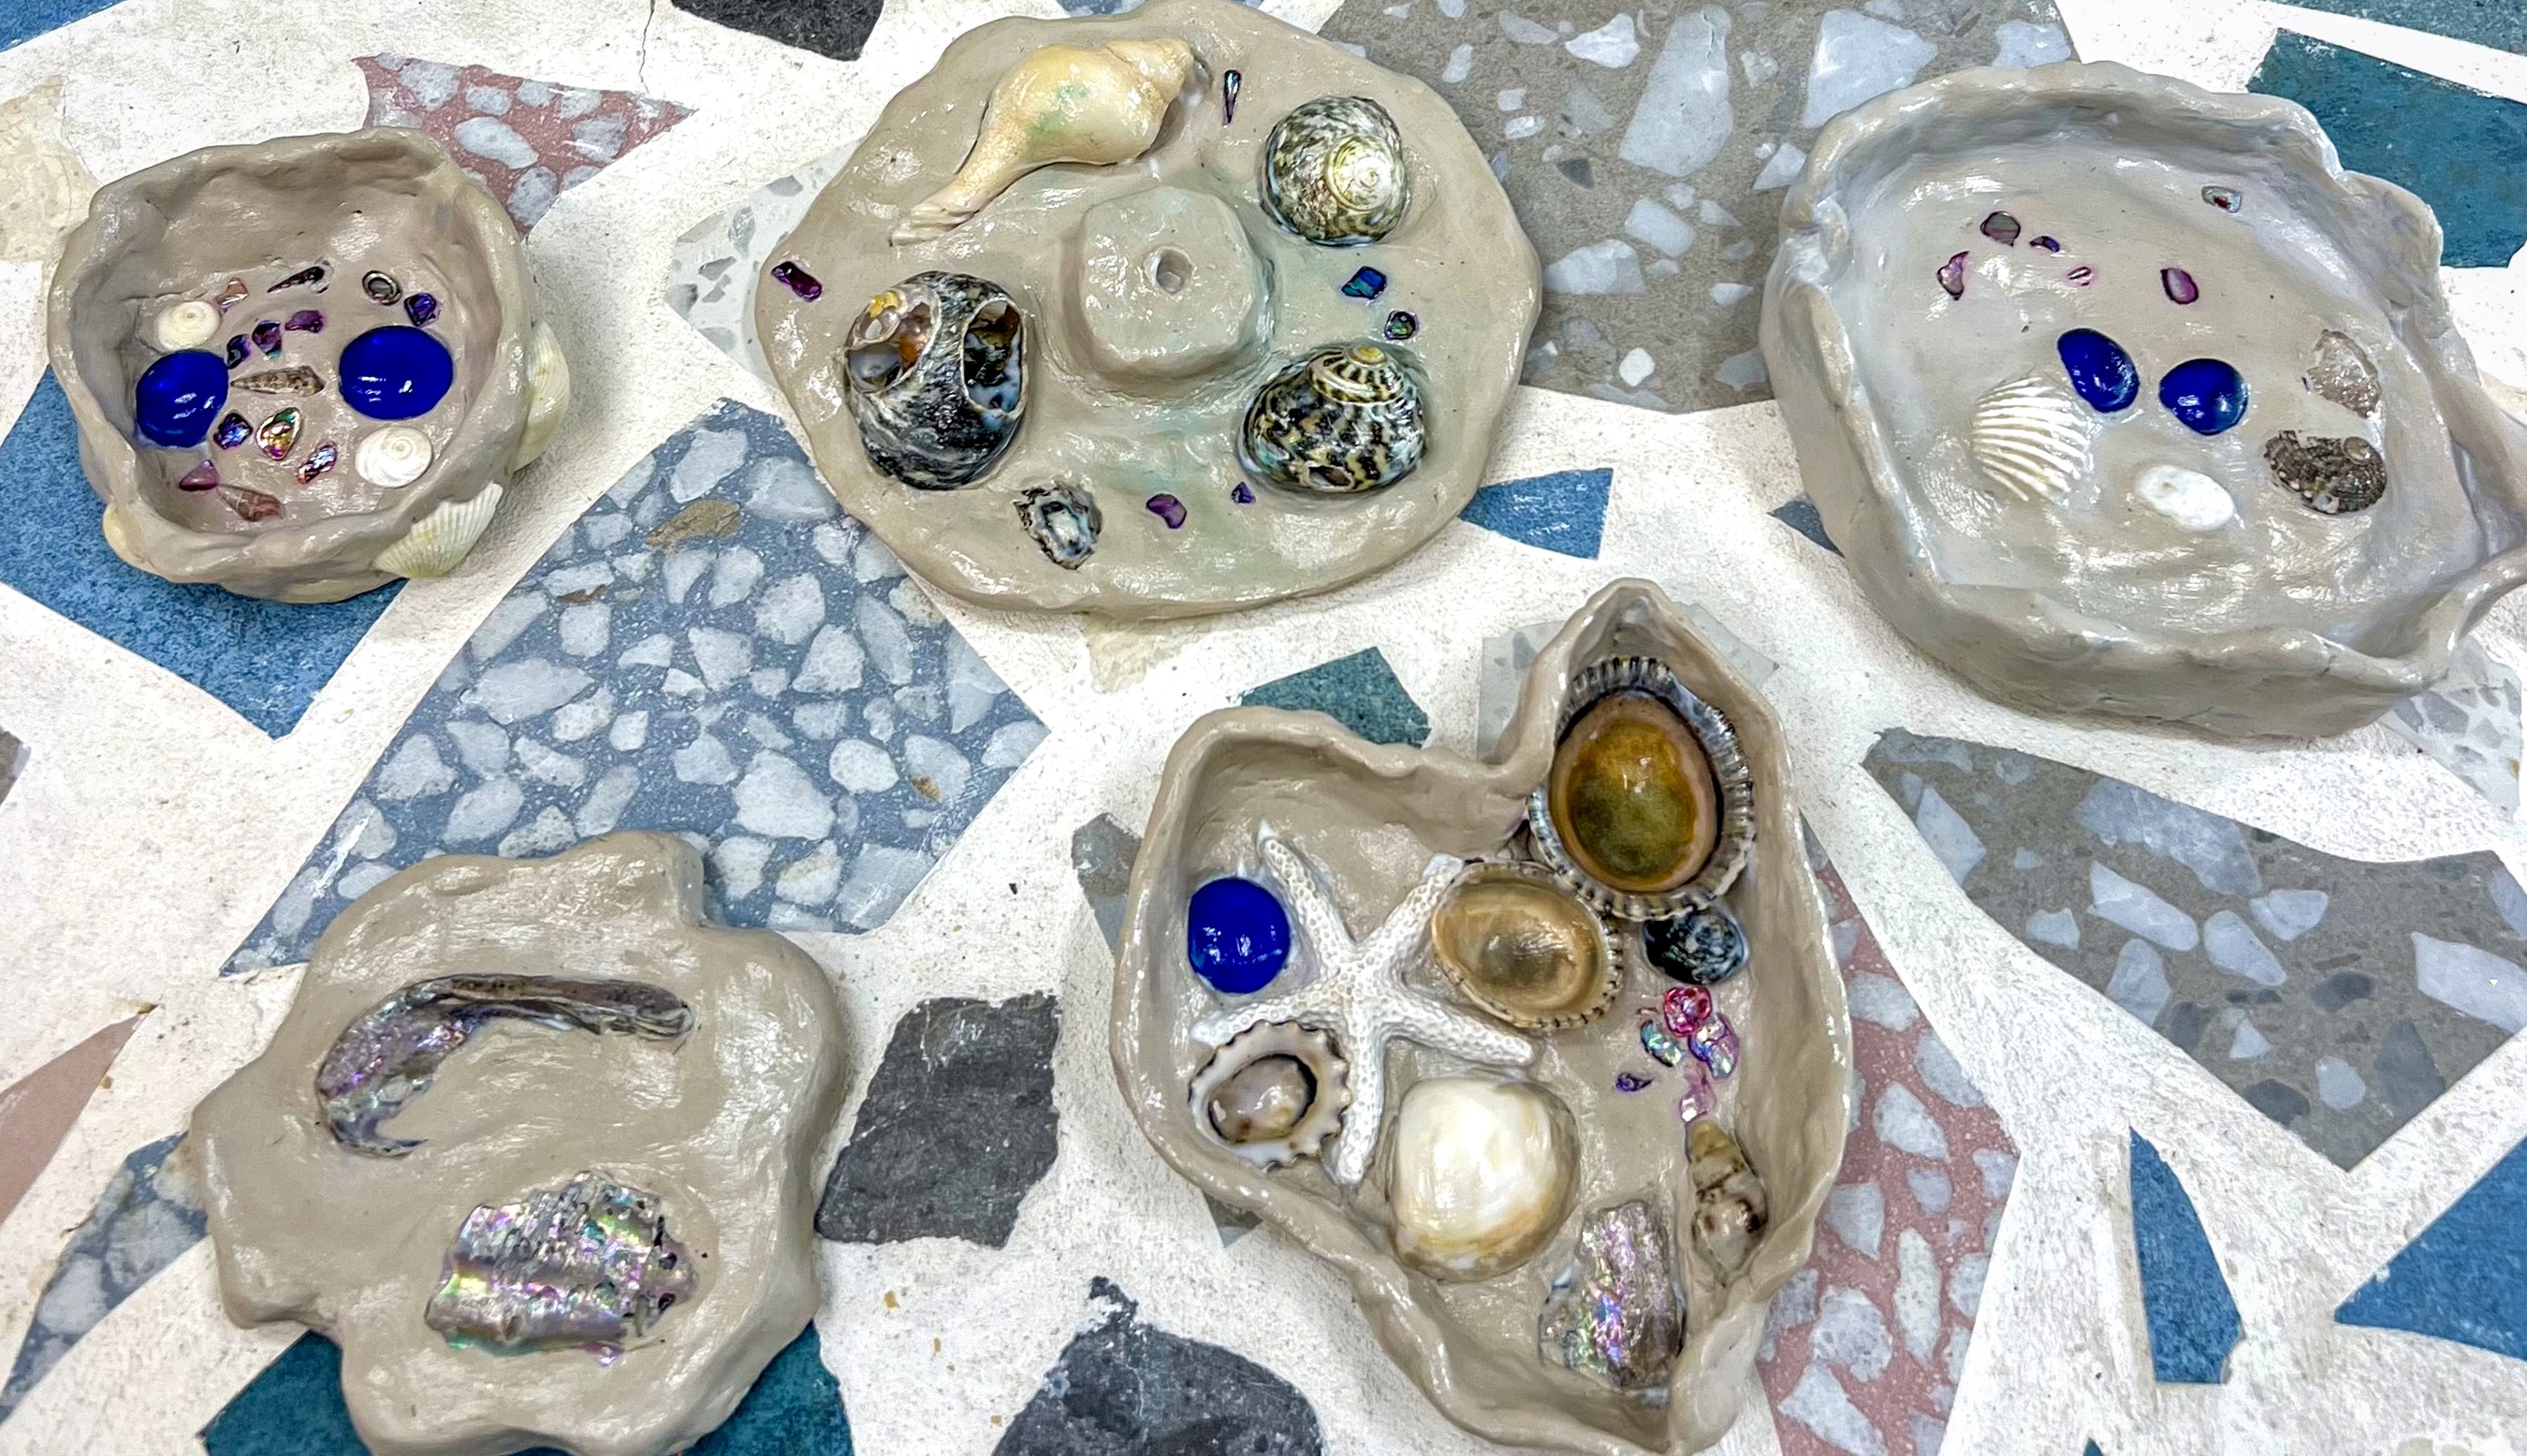
Begin by kneading or “throwing” the clay against the table to warm it up. This makes it easier to shape. Then build! We’ve seen coral reef trays, clam shells, bowls, and abstract ocean forms. The magic comes when kids press their chosen treasures into the clay, embedding them as permanent memories.
Clay definitely has its challenges, and it’s worth talking them through beforehand:
Cracking: if the clay is too thin, it can dry unevenly. Keep walls and bases around 1cm thick.
Pieces falling off: when adding handles, spikes, or extra layers, score both surfaces (cross-hatch with a tool) and dab with water before joining.
Flaking: a fingertip dipped in water smooths rough patches and stops edges from crumbling.
Once shaped, leave the work to dry slowly. Outdoors in the shade works well. I recommend avoiding harsh sun, which can cause warping. (Obviously freezing or wet weather won't work either!).
When dry, seal with Mod Podge or a clear varnish to add shine and secure the treasures.