Gelli Printing with Feathers
Press, print, and peel for the most satisfying surprises.

The Set Up
If you haven't tried gelli printing before, you are in for a treat. It sounds tricky, but it's honestly one of the most fun, experimental processes you can do... and it's something you can play with over and over. The moment you peel the paper off the plate and see what's underneath is a surprise every single time.
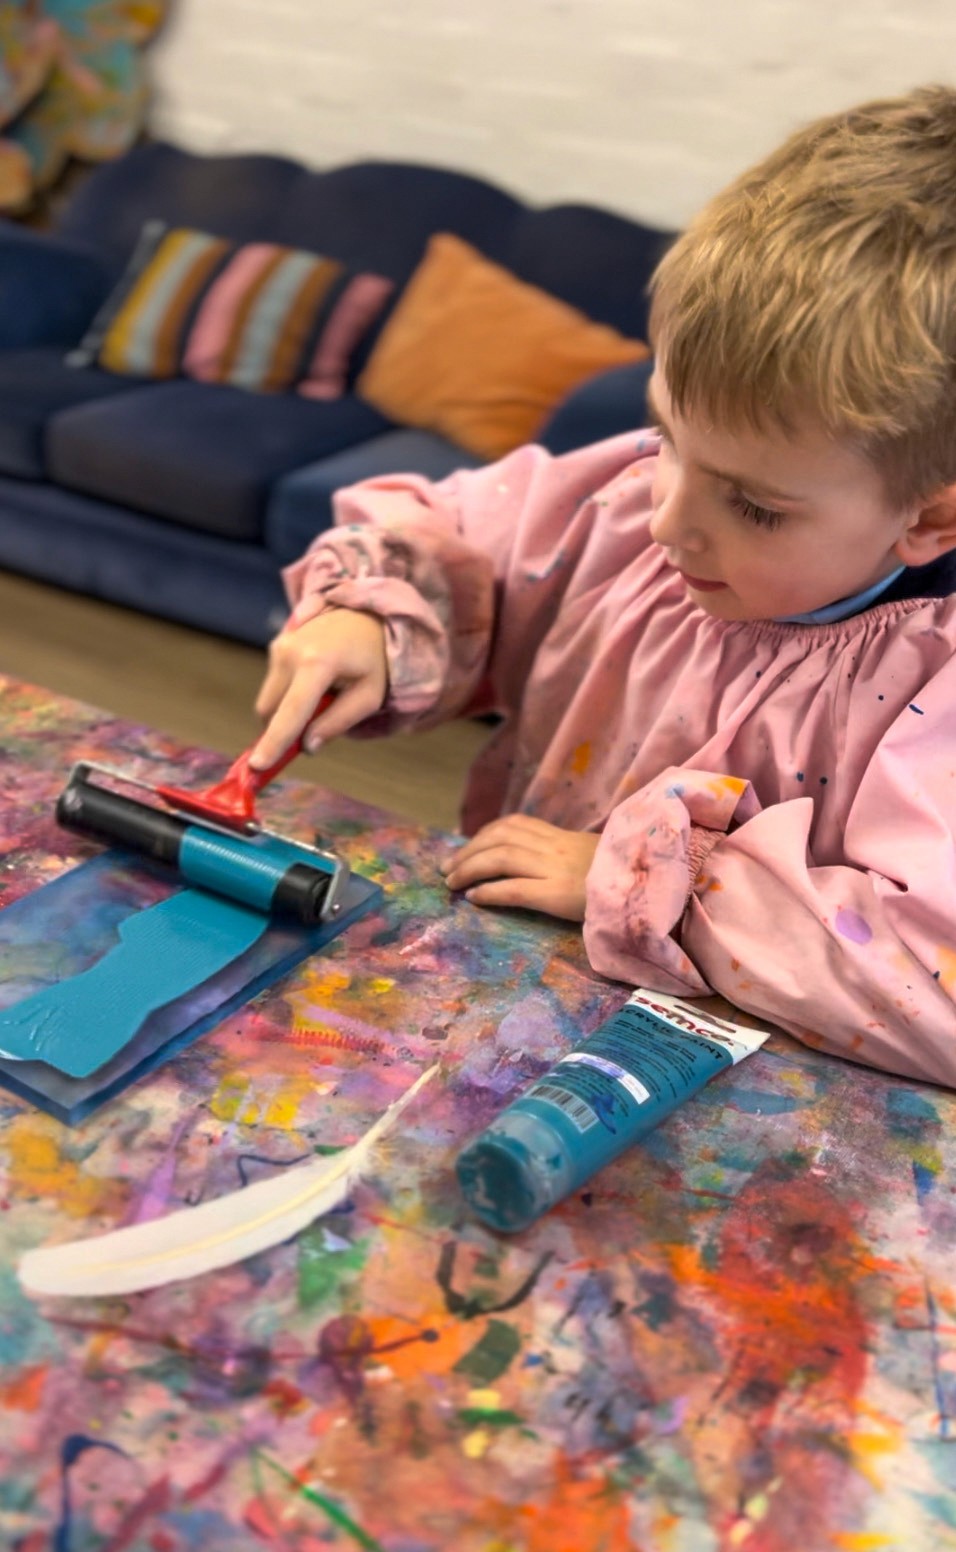
A gelli plate is a soft, flexible printing plate that you roll paint onto, press objects into, and pull prints from. No printing press needed! Set out gelli plates, acrylic paints, brayers (the small rollers for spreading paint), feathers, and thick cardstock.
The Making
The biggest tip with gelli printing: less paint is better. I know it's tempting to load it up, but three or four pea-sized blobs on the plate is plenty. Roll it out with your brayer until it's spread evenly in a thin, smooth layer. If the paint looks thick and gloopy, you've got too much on there.
Roll the brayer in one direction (sideways, then top to bottom) rather than back and forth. Rolling back and forth can lift the paint instead of spreading it, and that's usually what causes muddy results. You want to hear a lovely tacky sound as the brayer rolls... that's how you know the paint layer is just right.
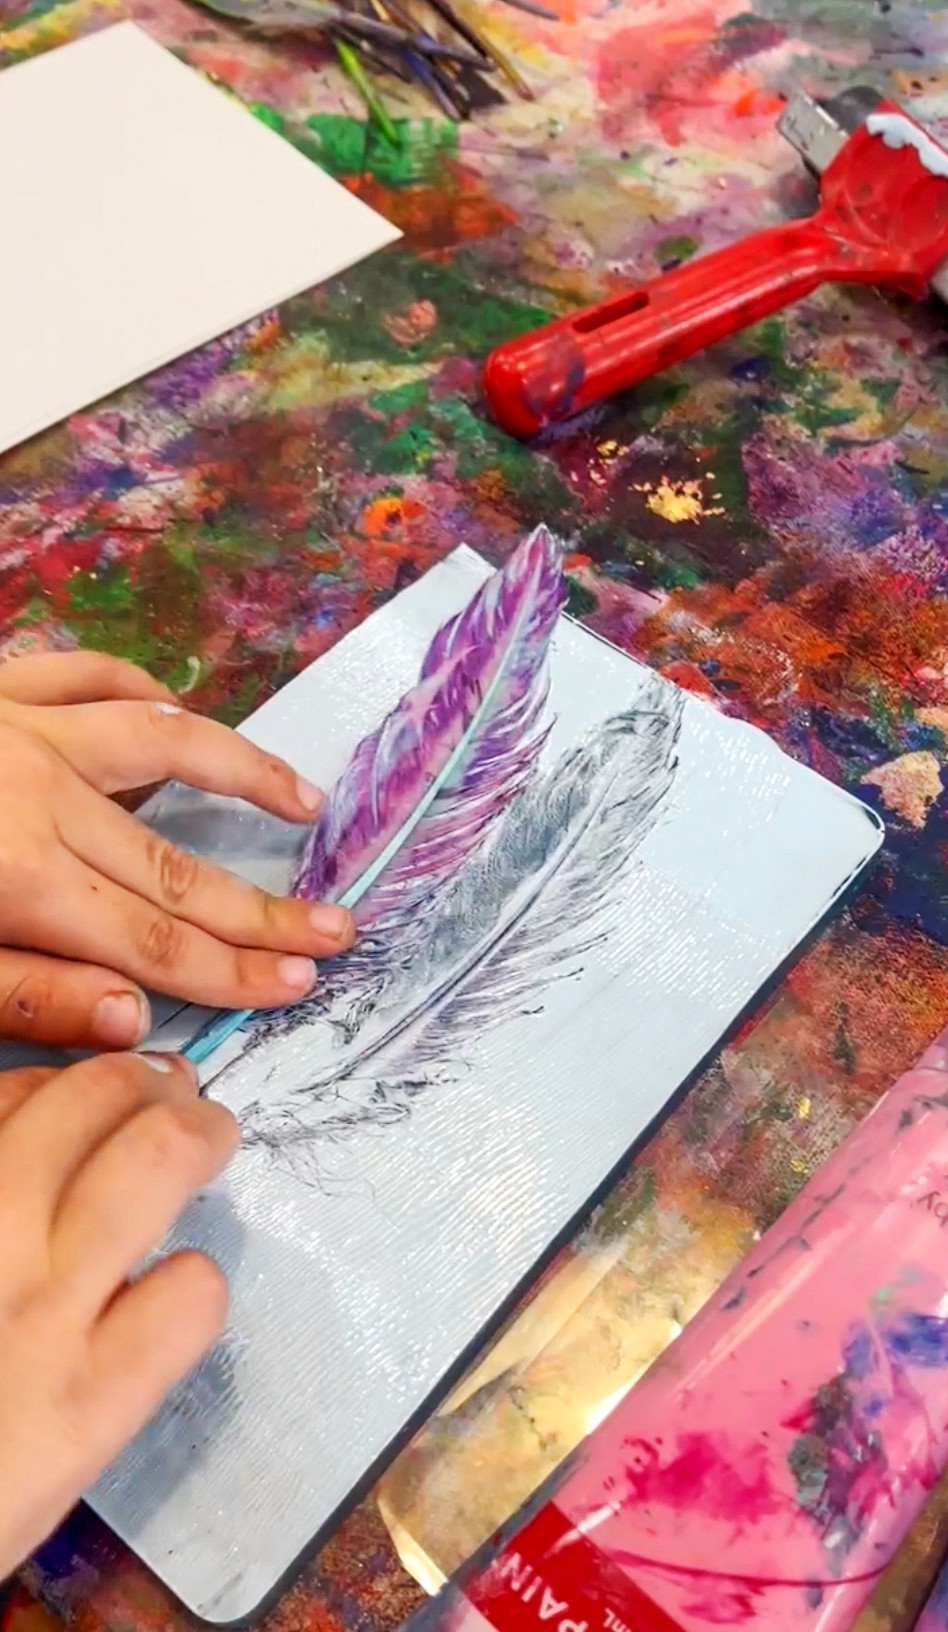
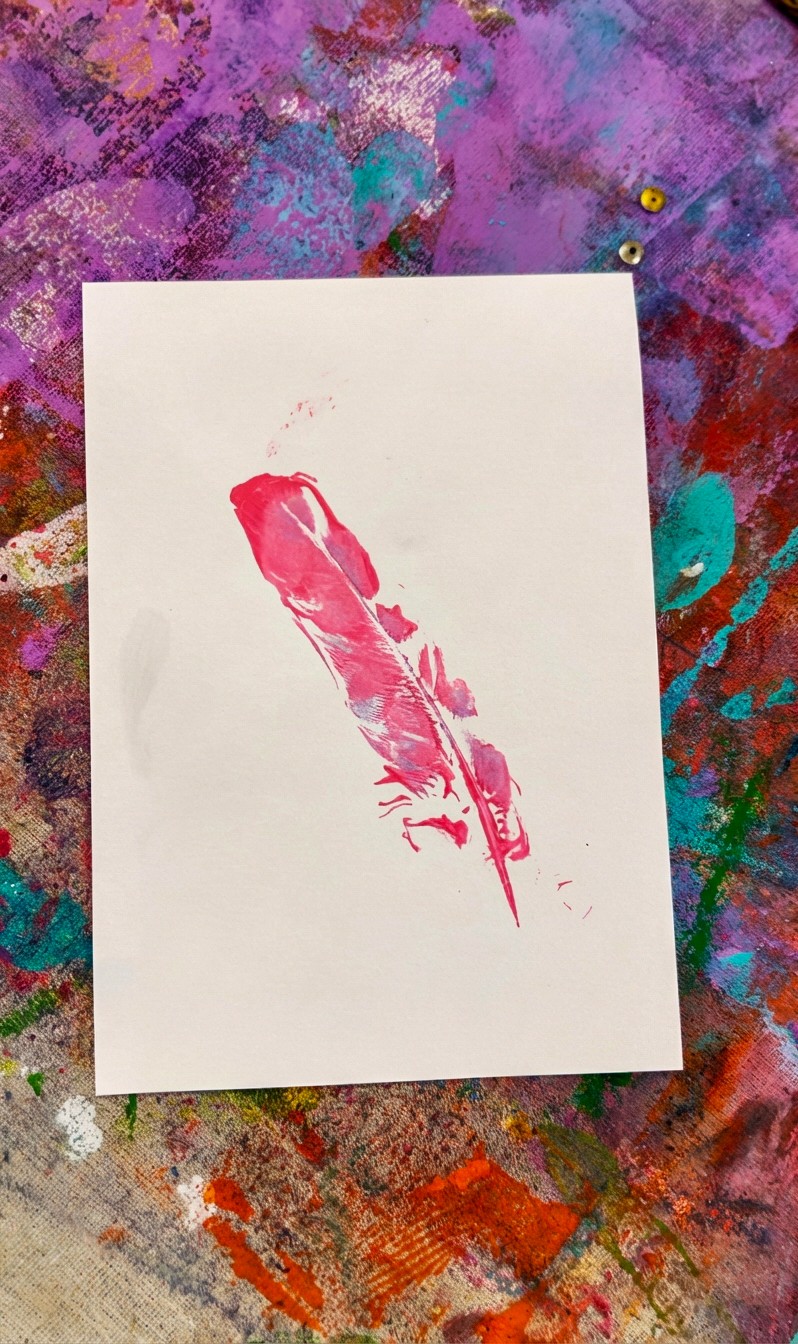
Now lay feathers onto the painted surface, gently press them down, and place your cardstock on top. Smooth it over with your hands, then peel. The feathers leave the most beautiful negative-space impressions, delicate, detailed, and completely unique every time!
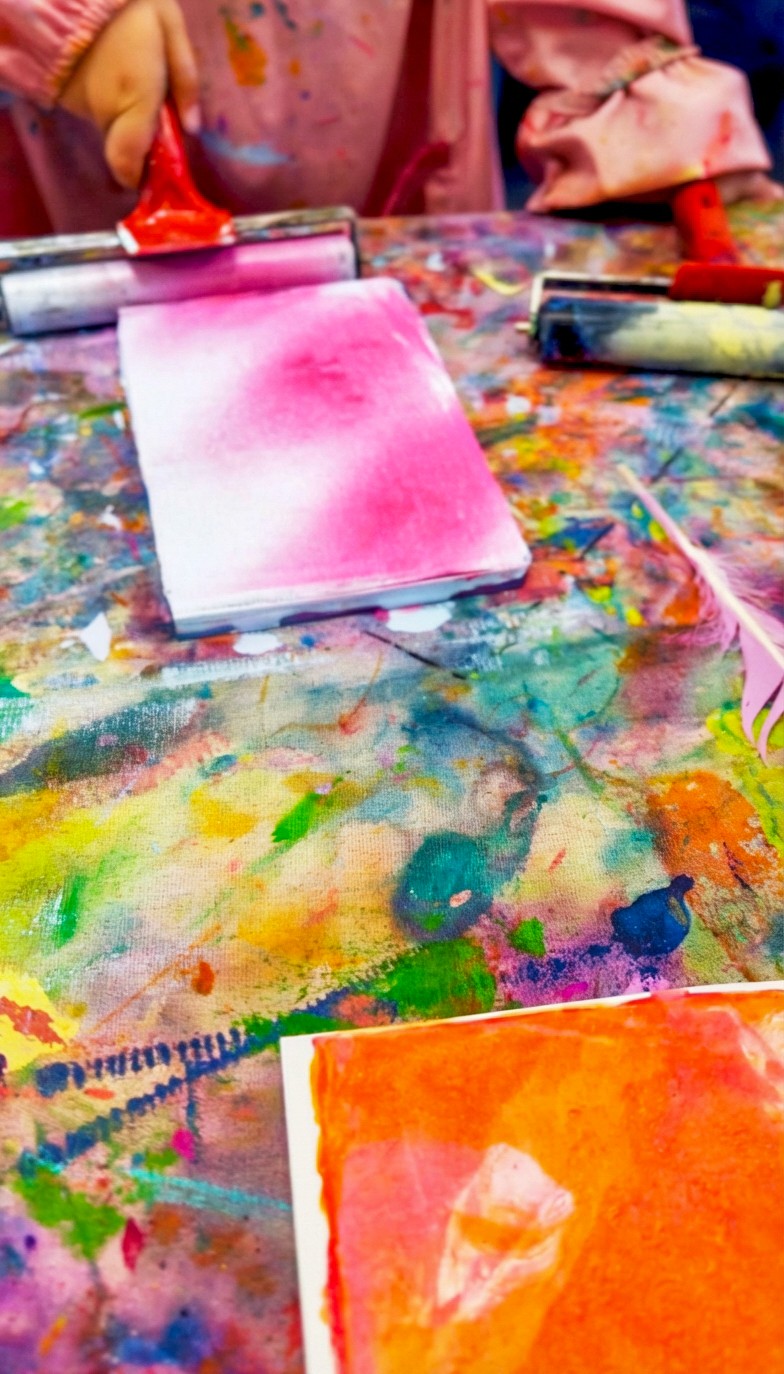
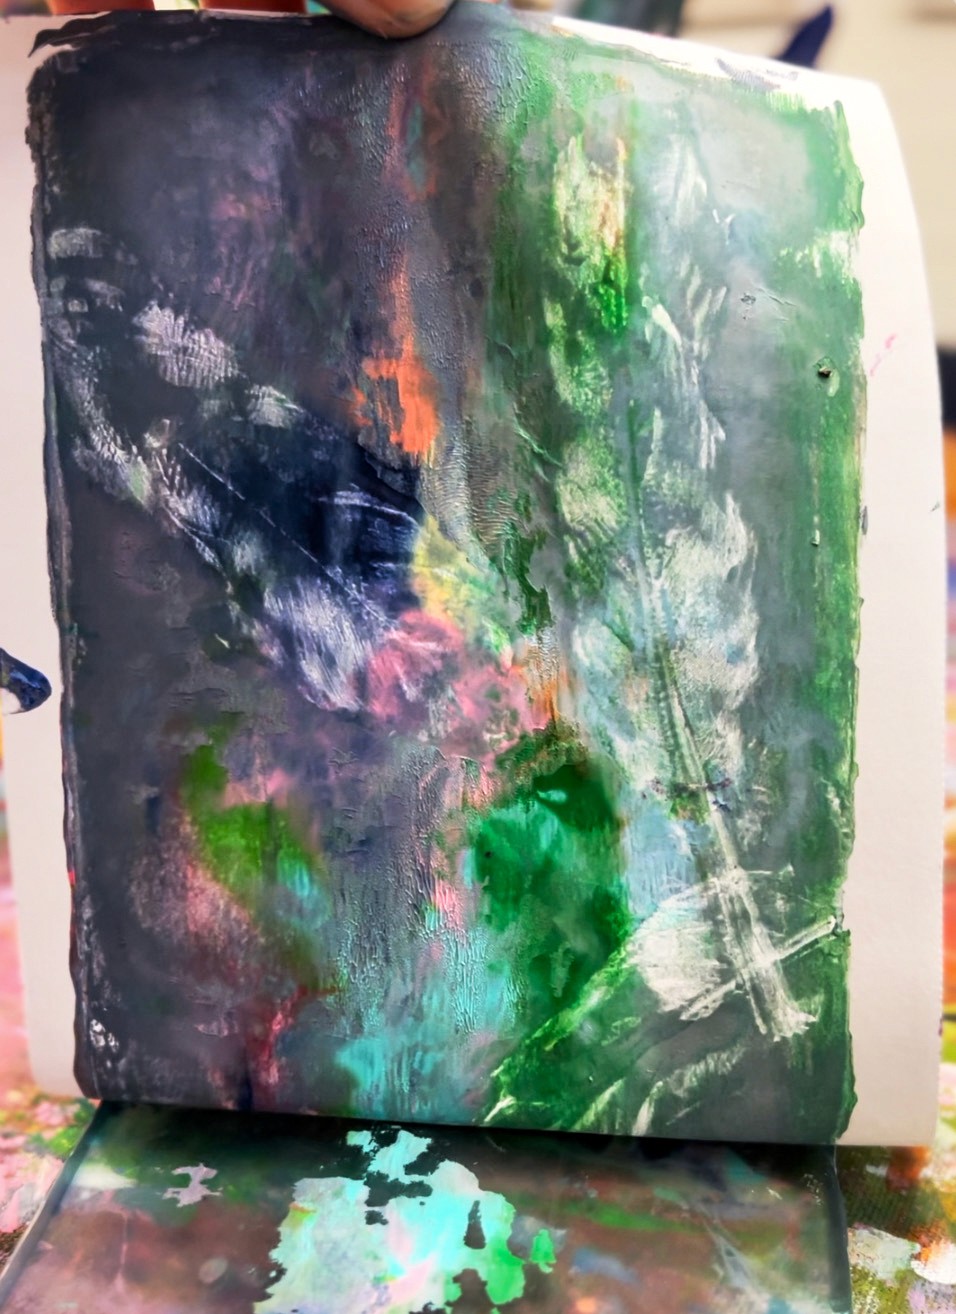
Don't forget about ghost prints! After you pull the first print, there's often enough paint left on the plate for a softer, more subtle second print. Just lay another piece of paper down without re-inking. Ghost prints are honestly some of our favourites.
Work quickly so the paint doesn't dry on the plate. If it does start to dry, a quick spritz of water can help, or just wipe the plate clean with a baby wipe and start fresh. That's the beauty of gelli printing... each print takes just a minute or two, so you can experiment endlessly.
Smudge Tip
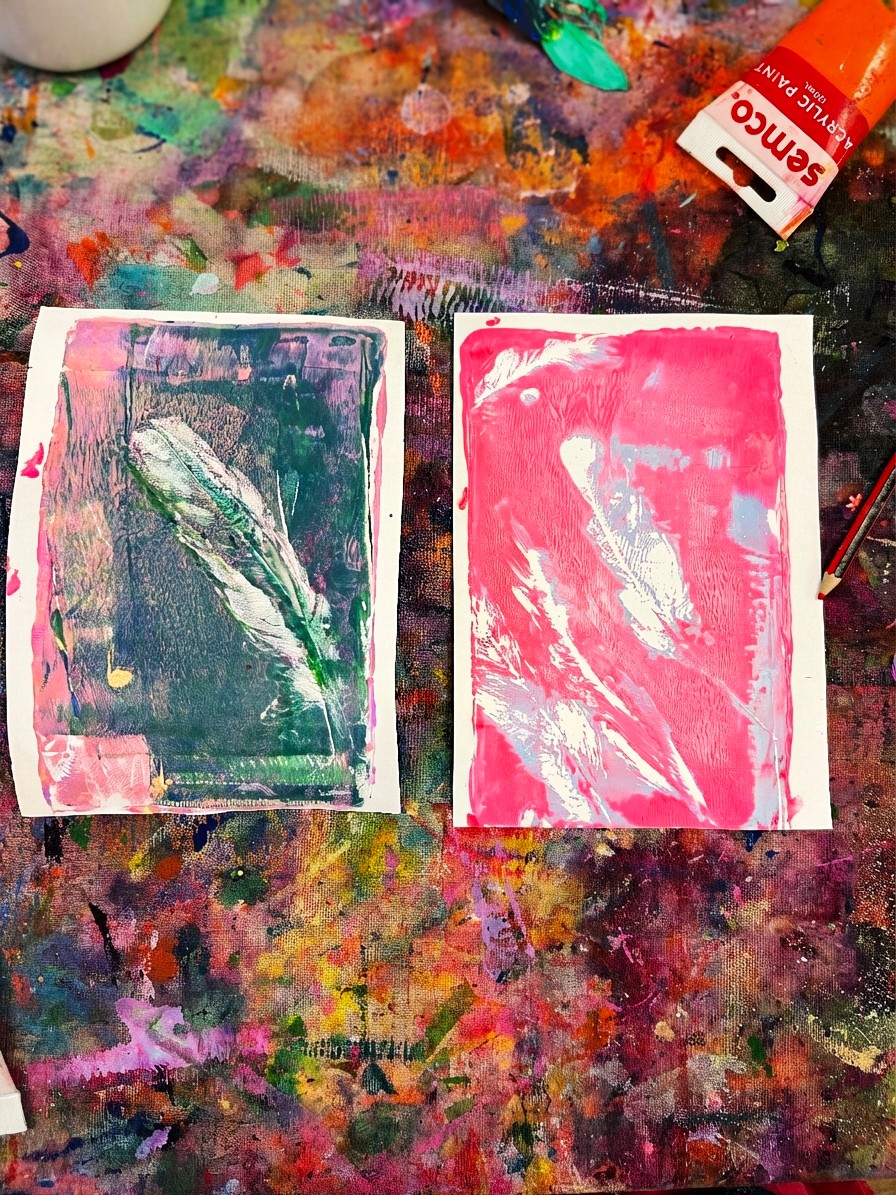
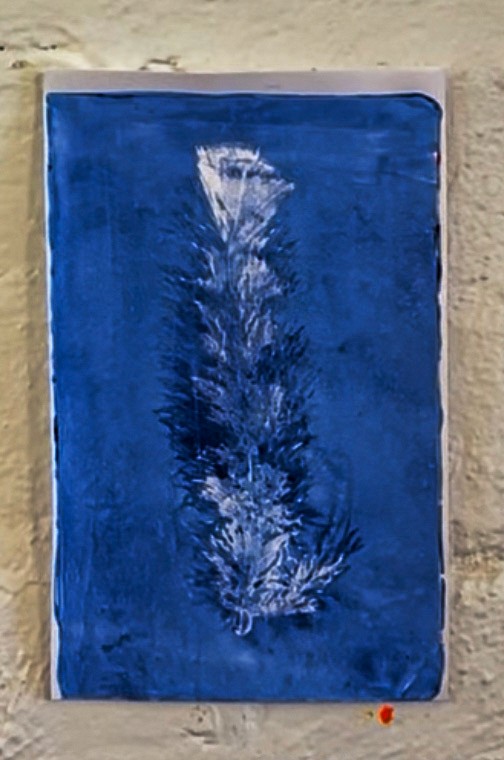
Try contrasting colours for the most striking results... a bright yellow feather print on a deep blue background is stunning. Or you can experiment with marbling colours together or paint mixing directly onto the plate itself.
Variations
Layer multiple prints on the same piece of paper for a rich, textured result. You can also try pressing leaves, lace, or bubble wrap alongside the feathers for different textures and patterns. For a first go, start with just one colour and feathers to keep it simple, then build up to more complex layers as confidence grows. Although as we know, kids have the most incredibly creative minds, so just letting them go for it in the beginning is my forever favourite!

Materials
• Gelli plates (5x7 inch or 8x10 inch are great sizes to start with)
• Acrylic paints, a curated colour palette works best
• Brayers / rollers
• Feathers, a range of sizes and shapes
• Thick cardstock (at least 200gsm)
• Paper towels or baby wipes for cleaning plates
• A spray bottle of water
• Drop cloth
Back to Top
Gelli Printing with Feathers
Press, print, and peel for the most satisfying surprises.
Bookmark
Print Making
The Set Up
If you haven't tried gelli printing before, you are in for a treat. It sounds tricky, but it's honestly one of the most fun, experimental processes you can do... and it's something you can play with over and over. The moment you peel the paper off the plate and see what's underneath is a surprise every single time.
A gelli plate is a soft, flexible printing plate that you roll paint onto, press objects into, and pull prints from. No printing press needed! Set out gelli plates, acrylic paints, brayers (the small rollers for spreading paint), feathers, and thick cardstock.
The Making
The biggest tip with gelli printing: less paint is better. I know it's tempting to load it up, but three or four pea-sized blobs on the plate is plenty. Roll it out with your brayer until it's spread evenly in a thin, smooth layer. If the paint looks thick and gloopy, you've got too much on there.
Roll the brayer in one direction (sideways, then top to bottom) rather than back and forth. Rolling back and forth can lift the paint instead of spreading it, and that's usually what causes muddy results. You want to hear a lovely tacky sound as the brayer rolls... that's how you know the paint layer is just right.
Now lay feathers onto the painted surface, gently press them down, and place your cardstock on top. Smooth it over with your hands, then peel. The feathers leave the most beautiful negative-space impressions, delicate, detailed, and completely unique every time!
Don't forget about ghost prints! After you pull the first print, there's often enough paint left on the plate for a softer, more subtle second print. Just lay another piece of paper down without re-inking. Ghost prints are honestly some of our favourites.
Work quickly so the paint doesn't dry on the plate. If it does start to dry, a quick spritz of water can help, or just wipe the plate clean with a baby wipe and start fresh. That's the beauty of gelli printing... each print takes just a minute or two, so you can experiment endlessly.
Smudge Tip
Try contrasting colours for the most striking results... a bright yellow feather print on a deep blue background is stunning. Or you can experiment with marbling colours together or paint mixing directly onto the plate itself.
Variations
Layer multiple prints on the same piece of paper for a rich, textured result. You can also try pressing leaves, lace, or bubble wrap alongside the feathers for different textures and patterns. For a first go, start with just one colour and feathers to keep it simple, then build up to more complex layers as confidence grows. Although as we know, kids have the most incredibly creative minds, so just letting them go for it in the beginning is my forever favourite!
Materials
• Gelli plates (5x7 inch or 8x10 inch are great sizes to start with)
• Acrylic paints, a curated colour palette works best
• Brayers / rollers
• Feathers, a range of sizes and shapes
• Thick cardstock (at least 200gsm)
• Paper towels or baby wipes for cleaning plates
• A spray bottle of water
• Drop cloth
Back to Top
Add this to your favourites
Add this to your favourites
Thoughts?
Would love to hear if youv'e tried this or have any ideas on how to make it even better!
