
ARTFUL EXPERIENCES
Deep Blue Sea
Dive in! (the ocean won’t paint itself)
Bookmark
Installations

The Set Up
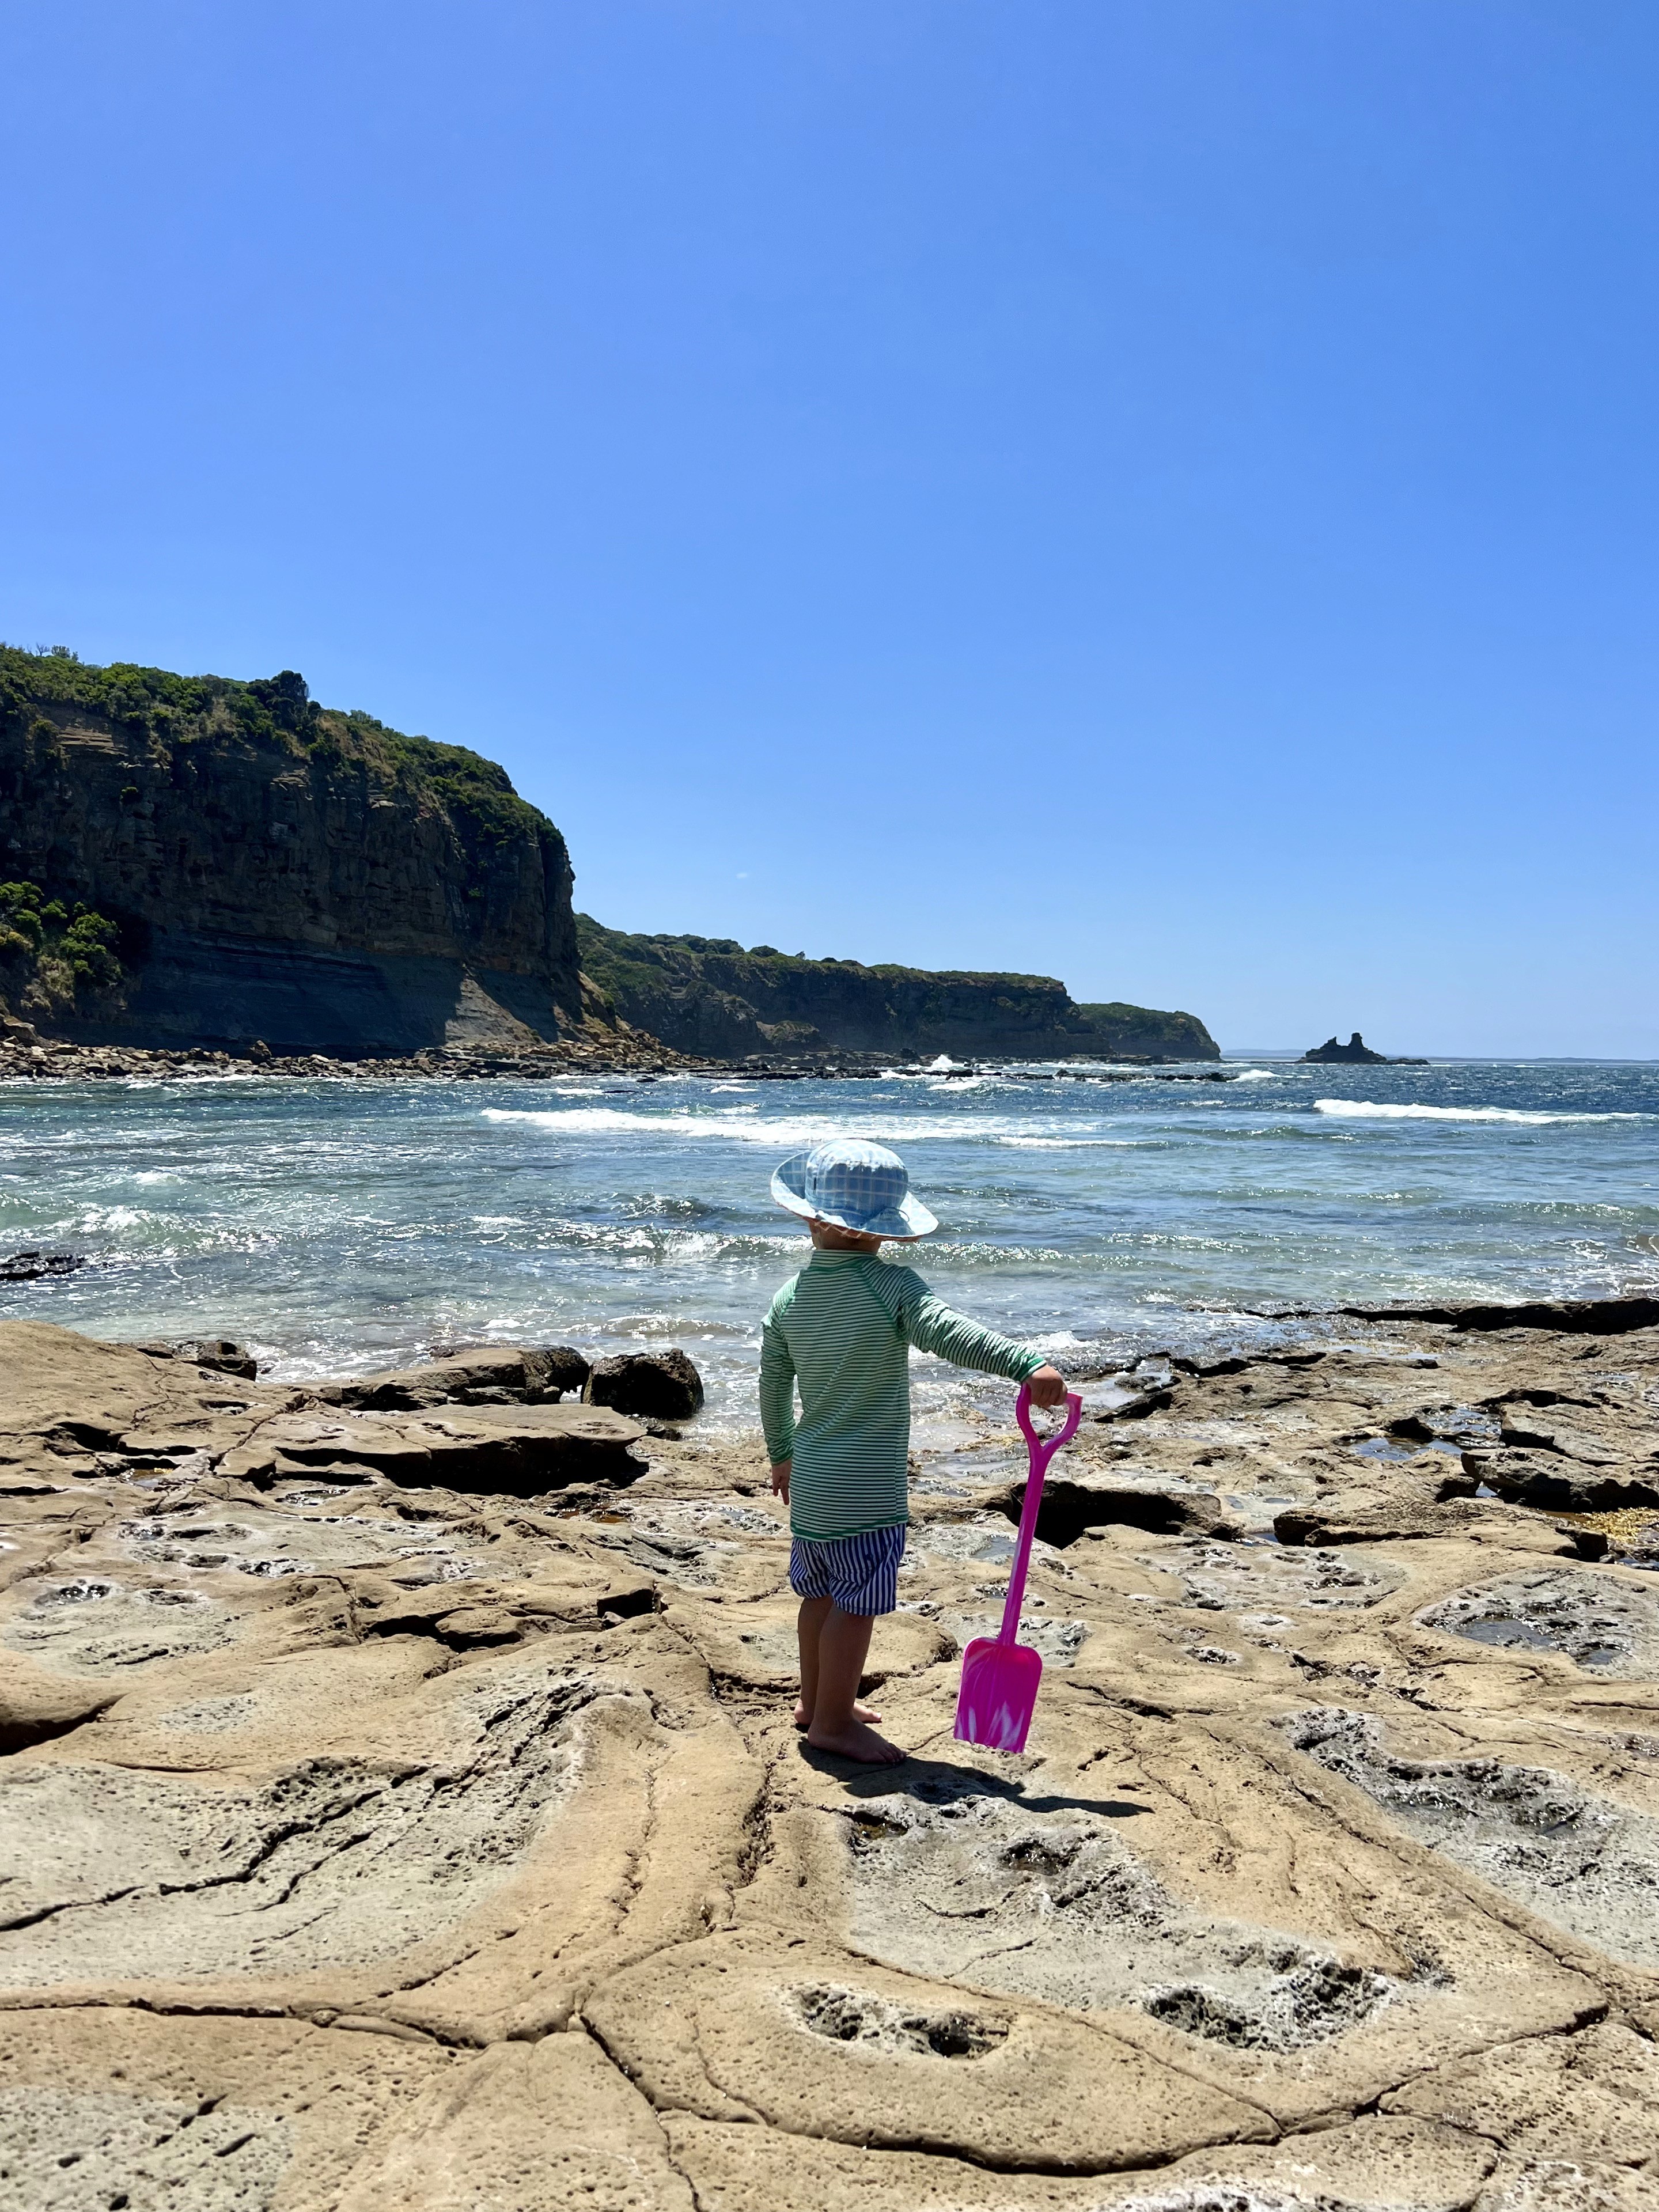
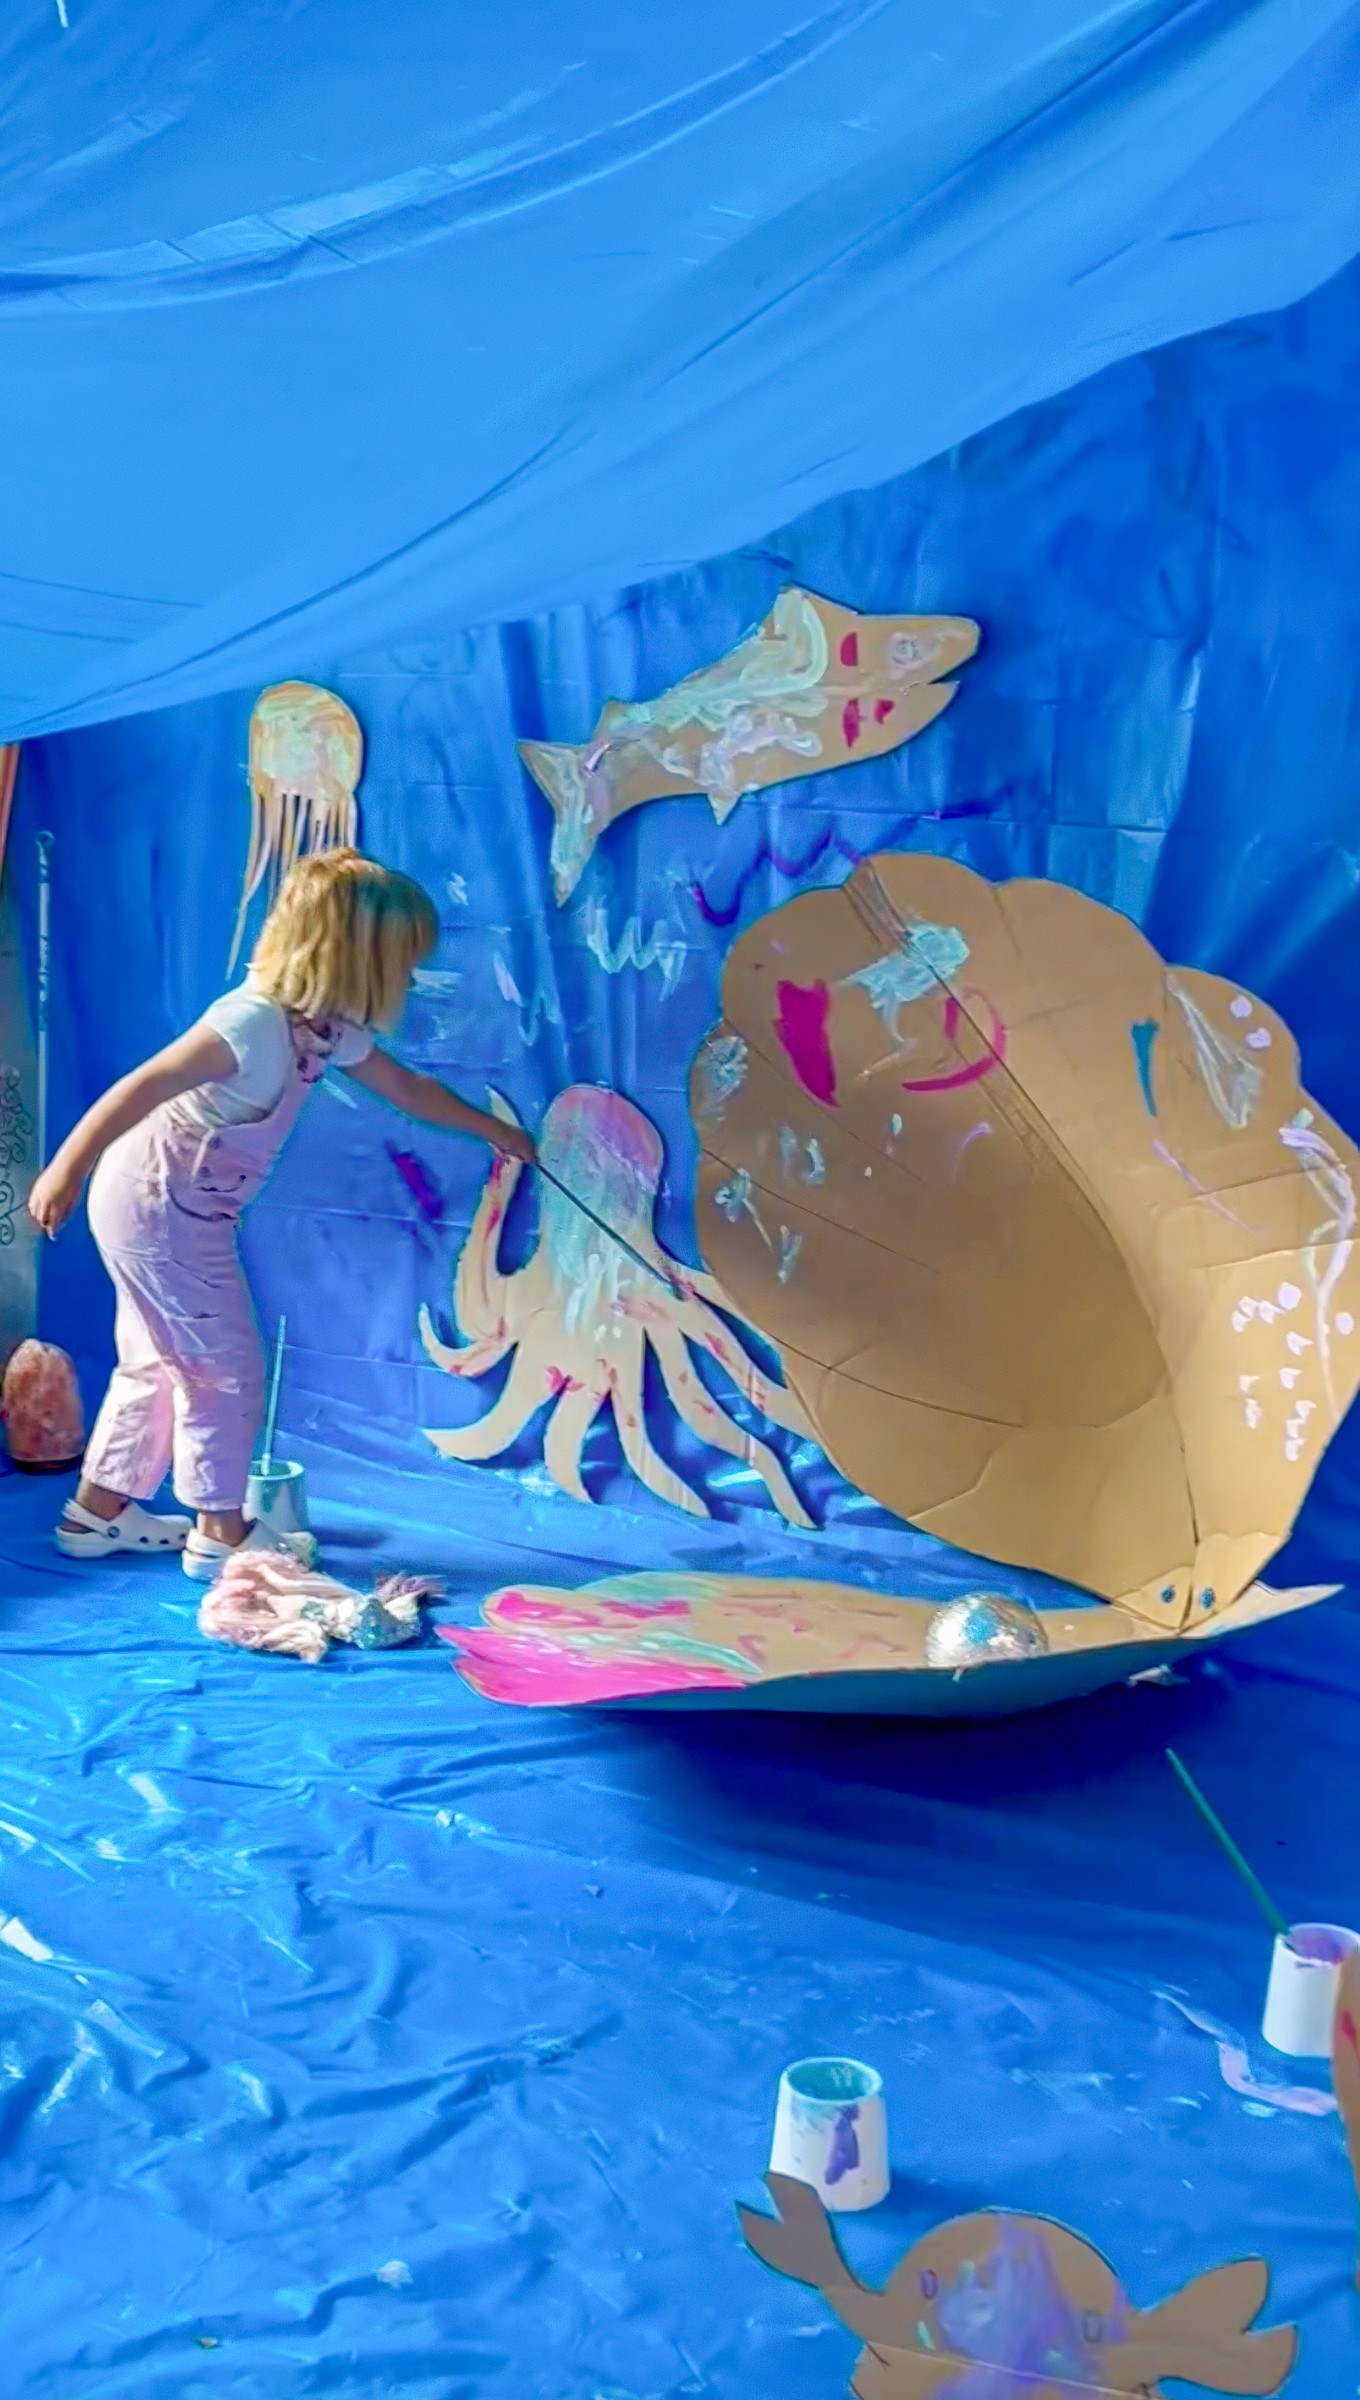
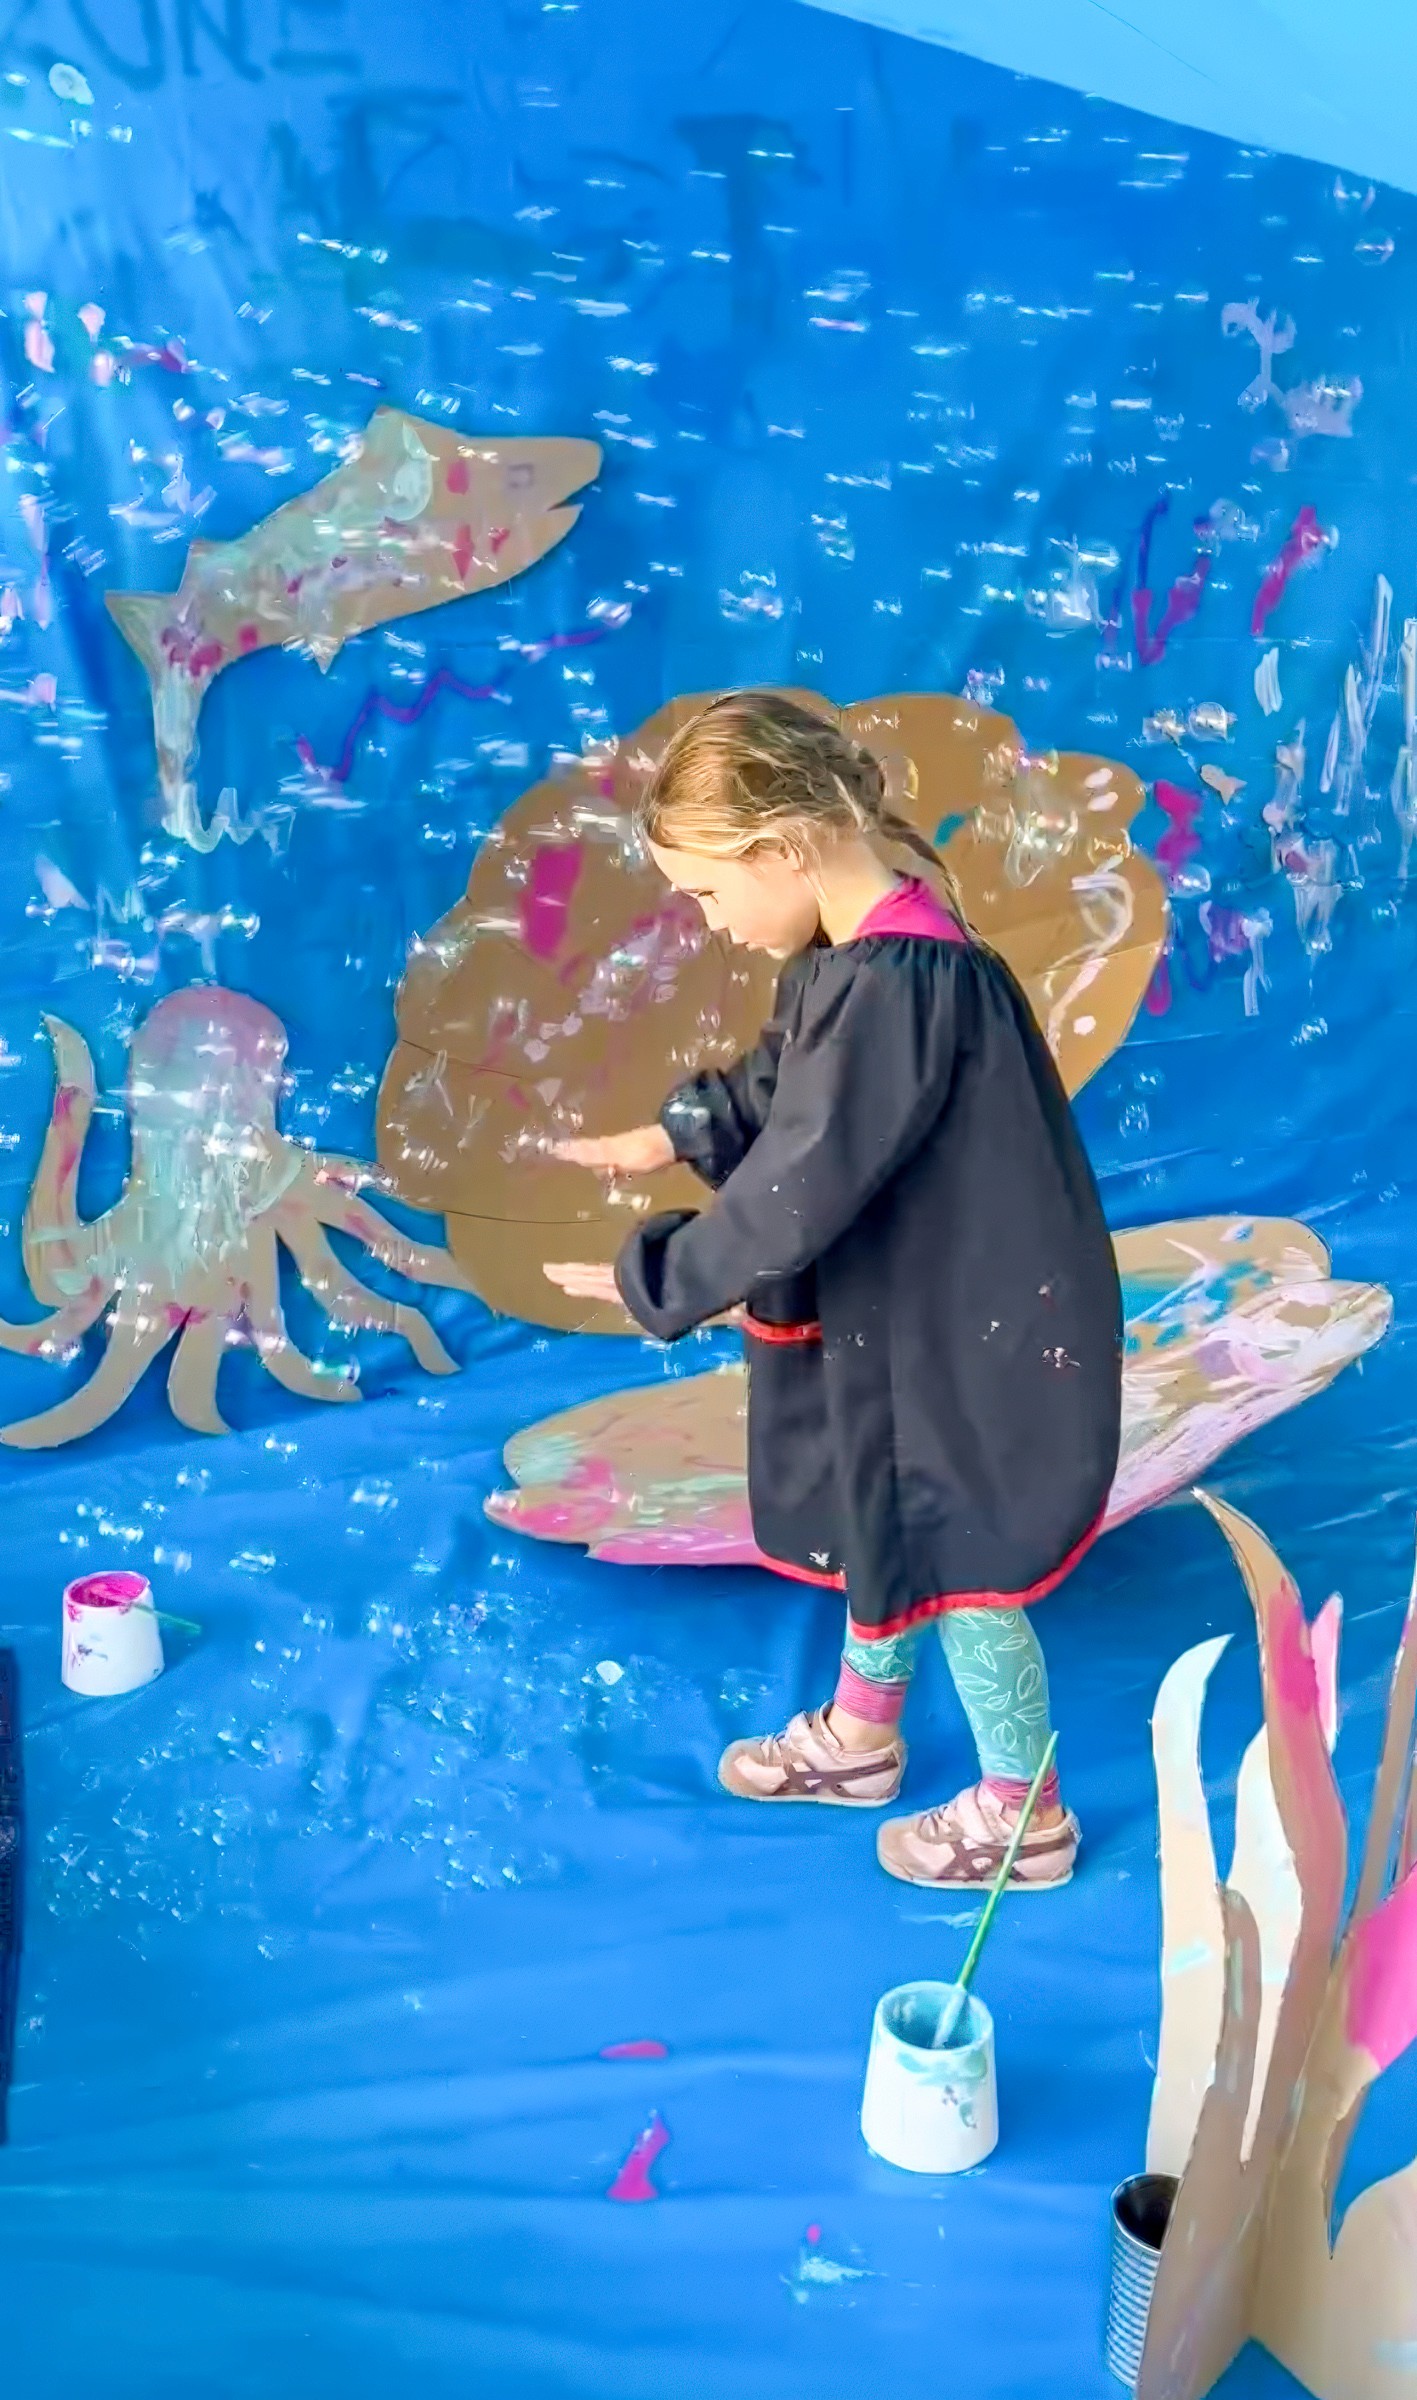
When kids walk in, the space already feels like the ocean. Blue runs across the walls and spills onto the floor. If you have the height, hang a few creatures from the ceiling so it feels like a dive beneath the waves.
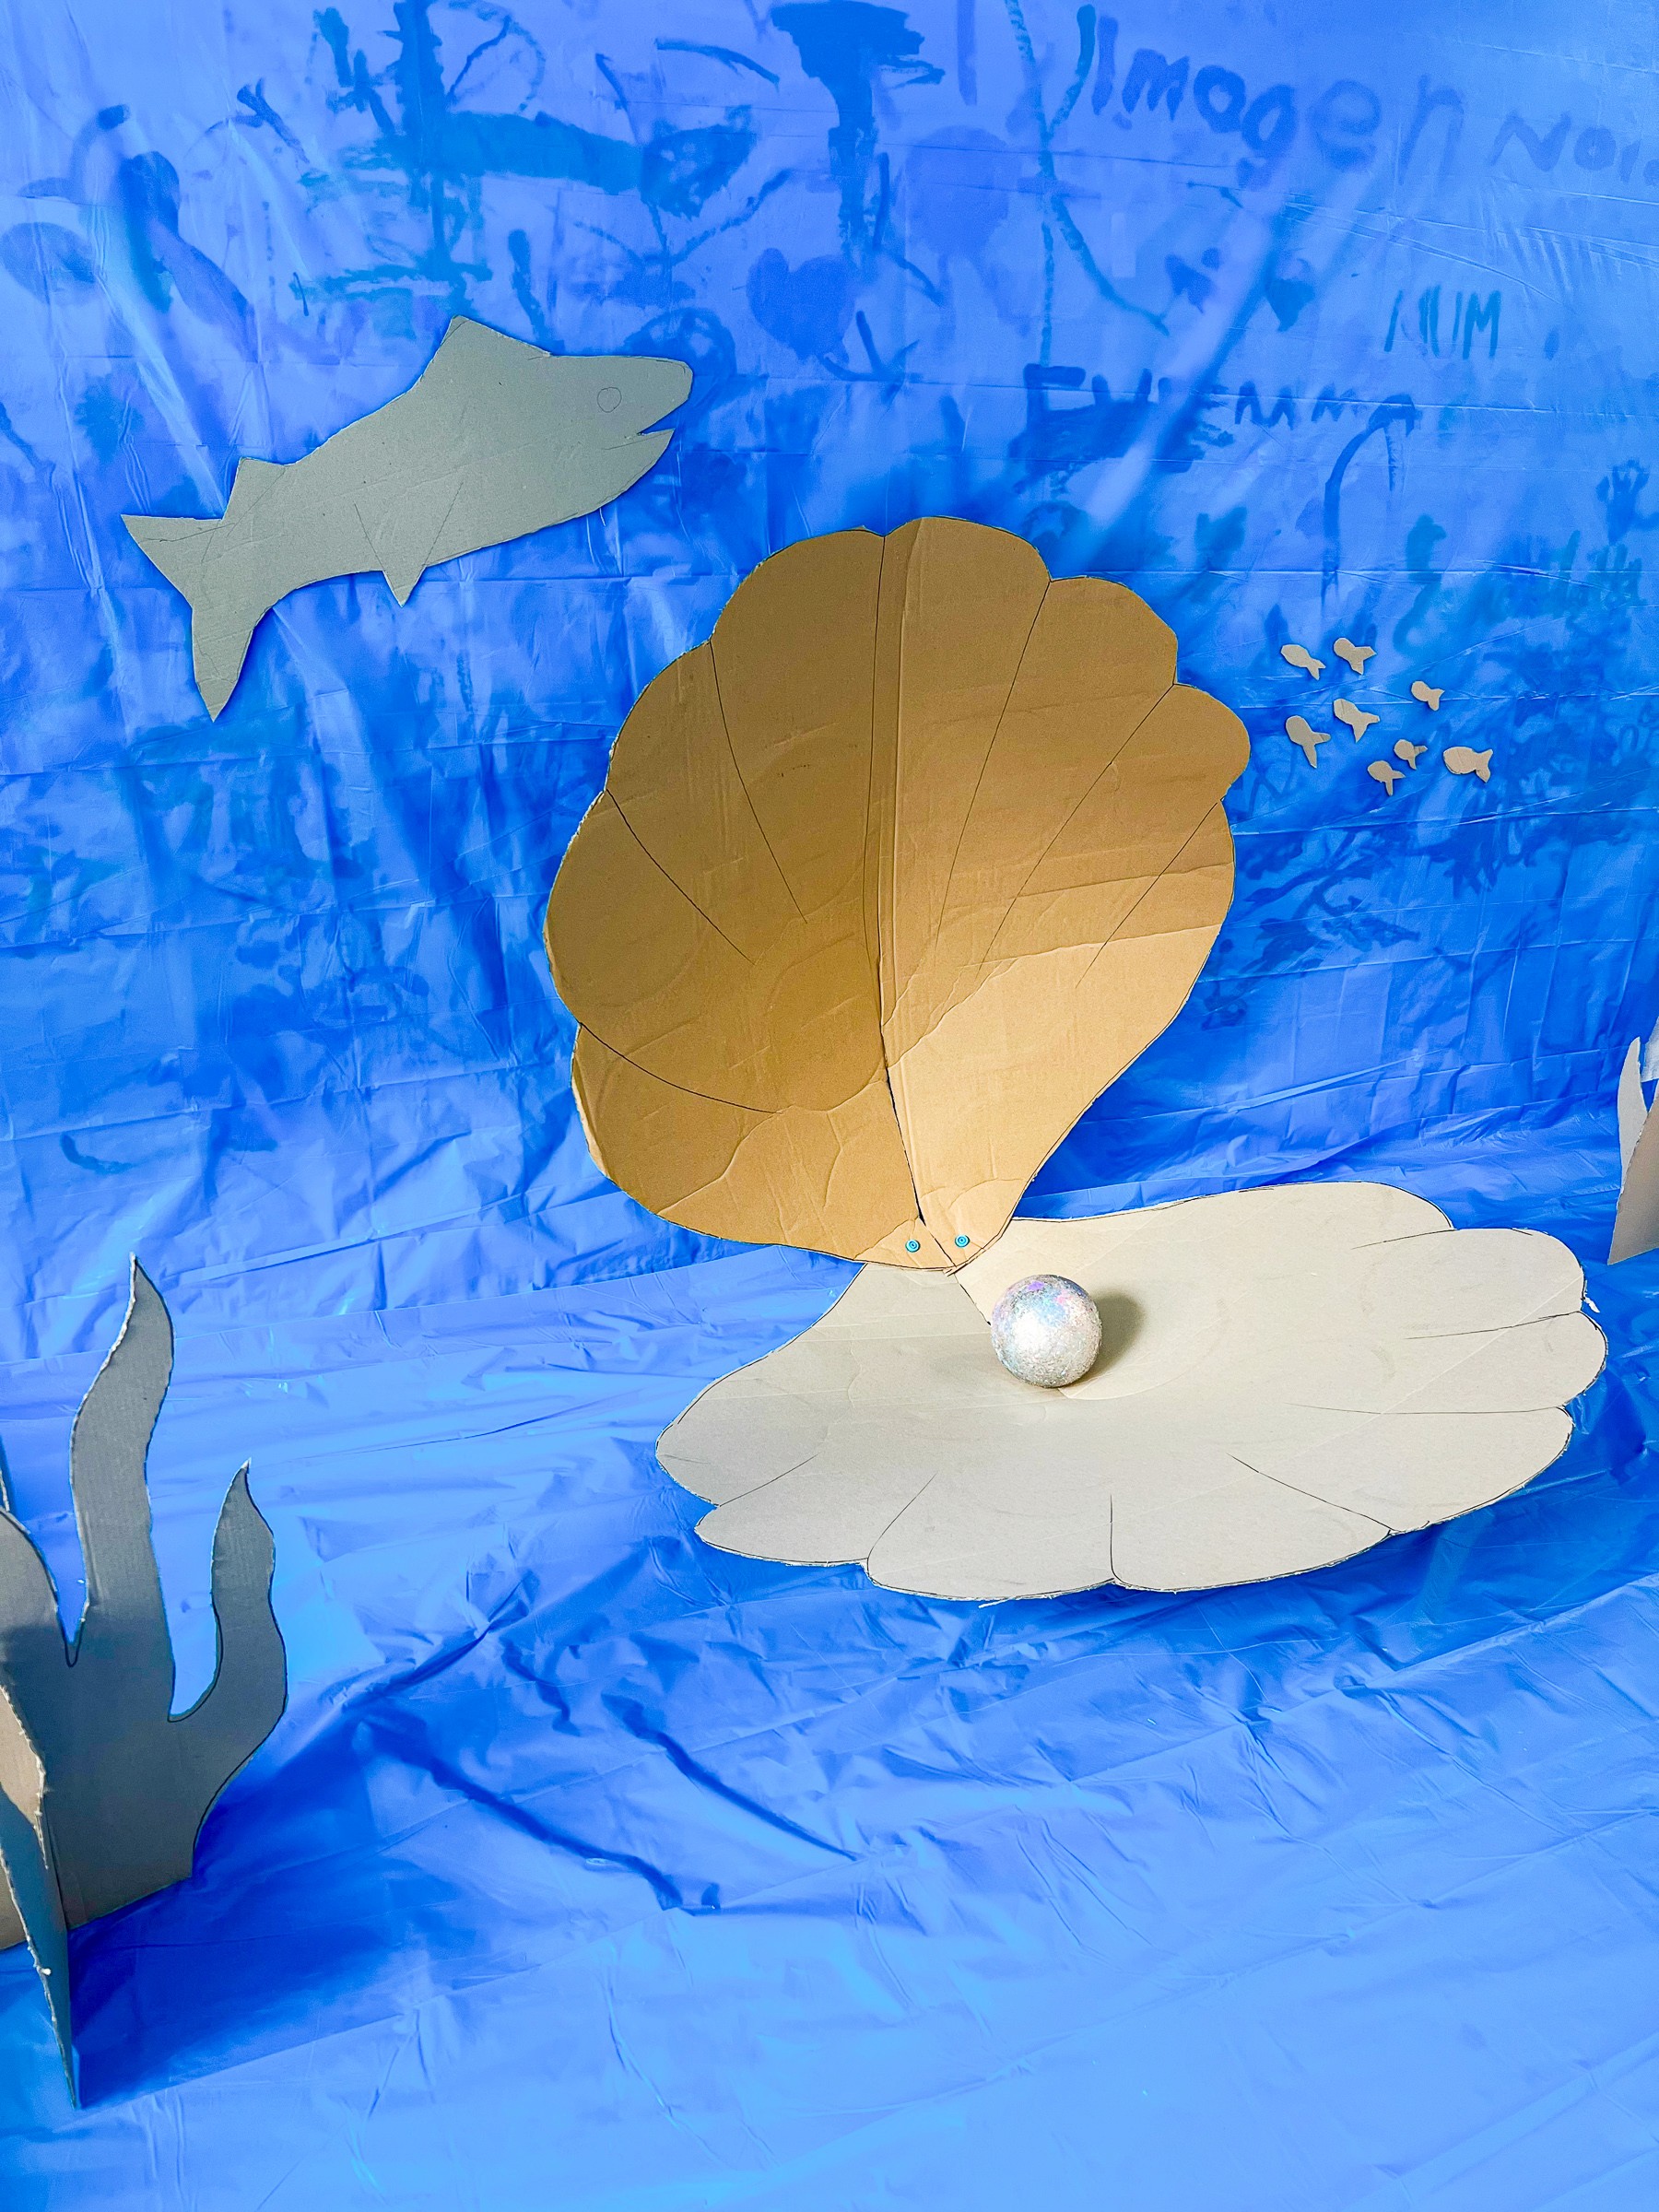
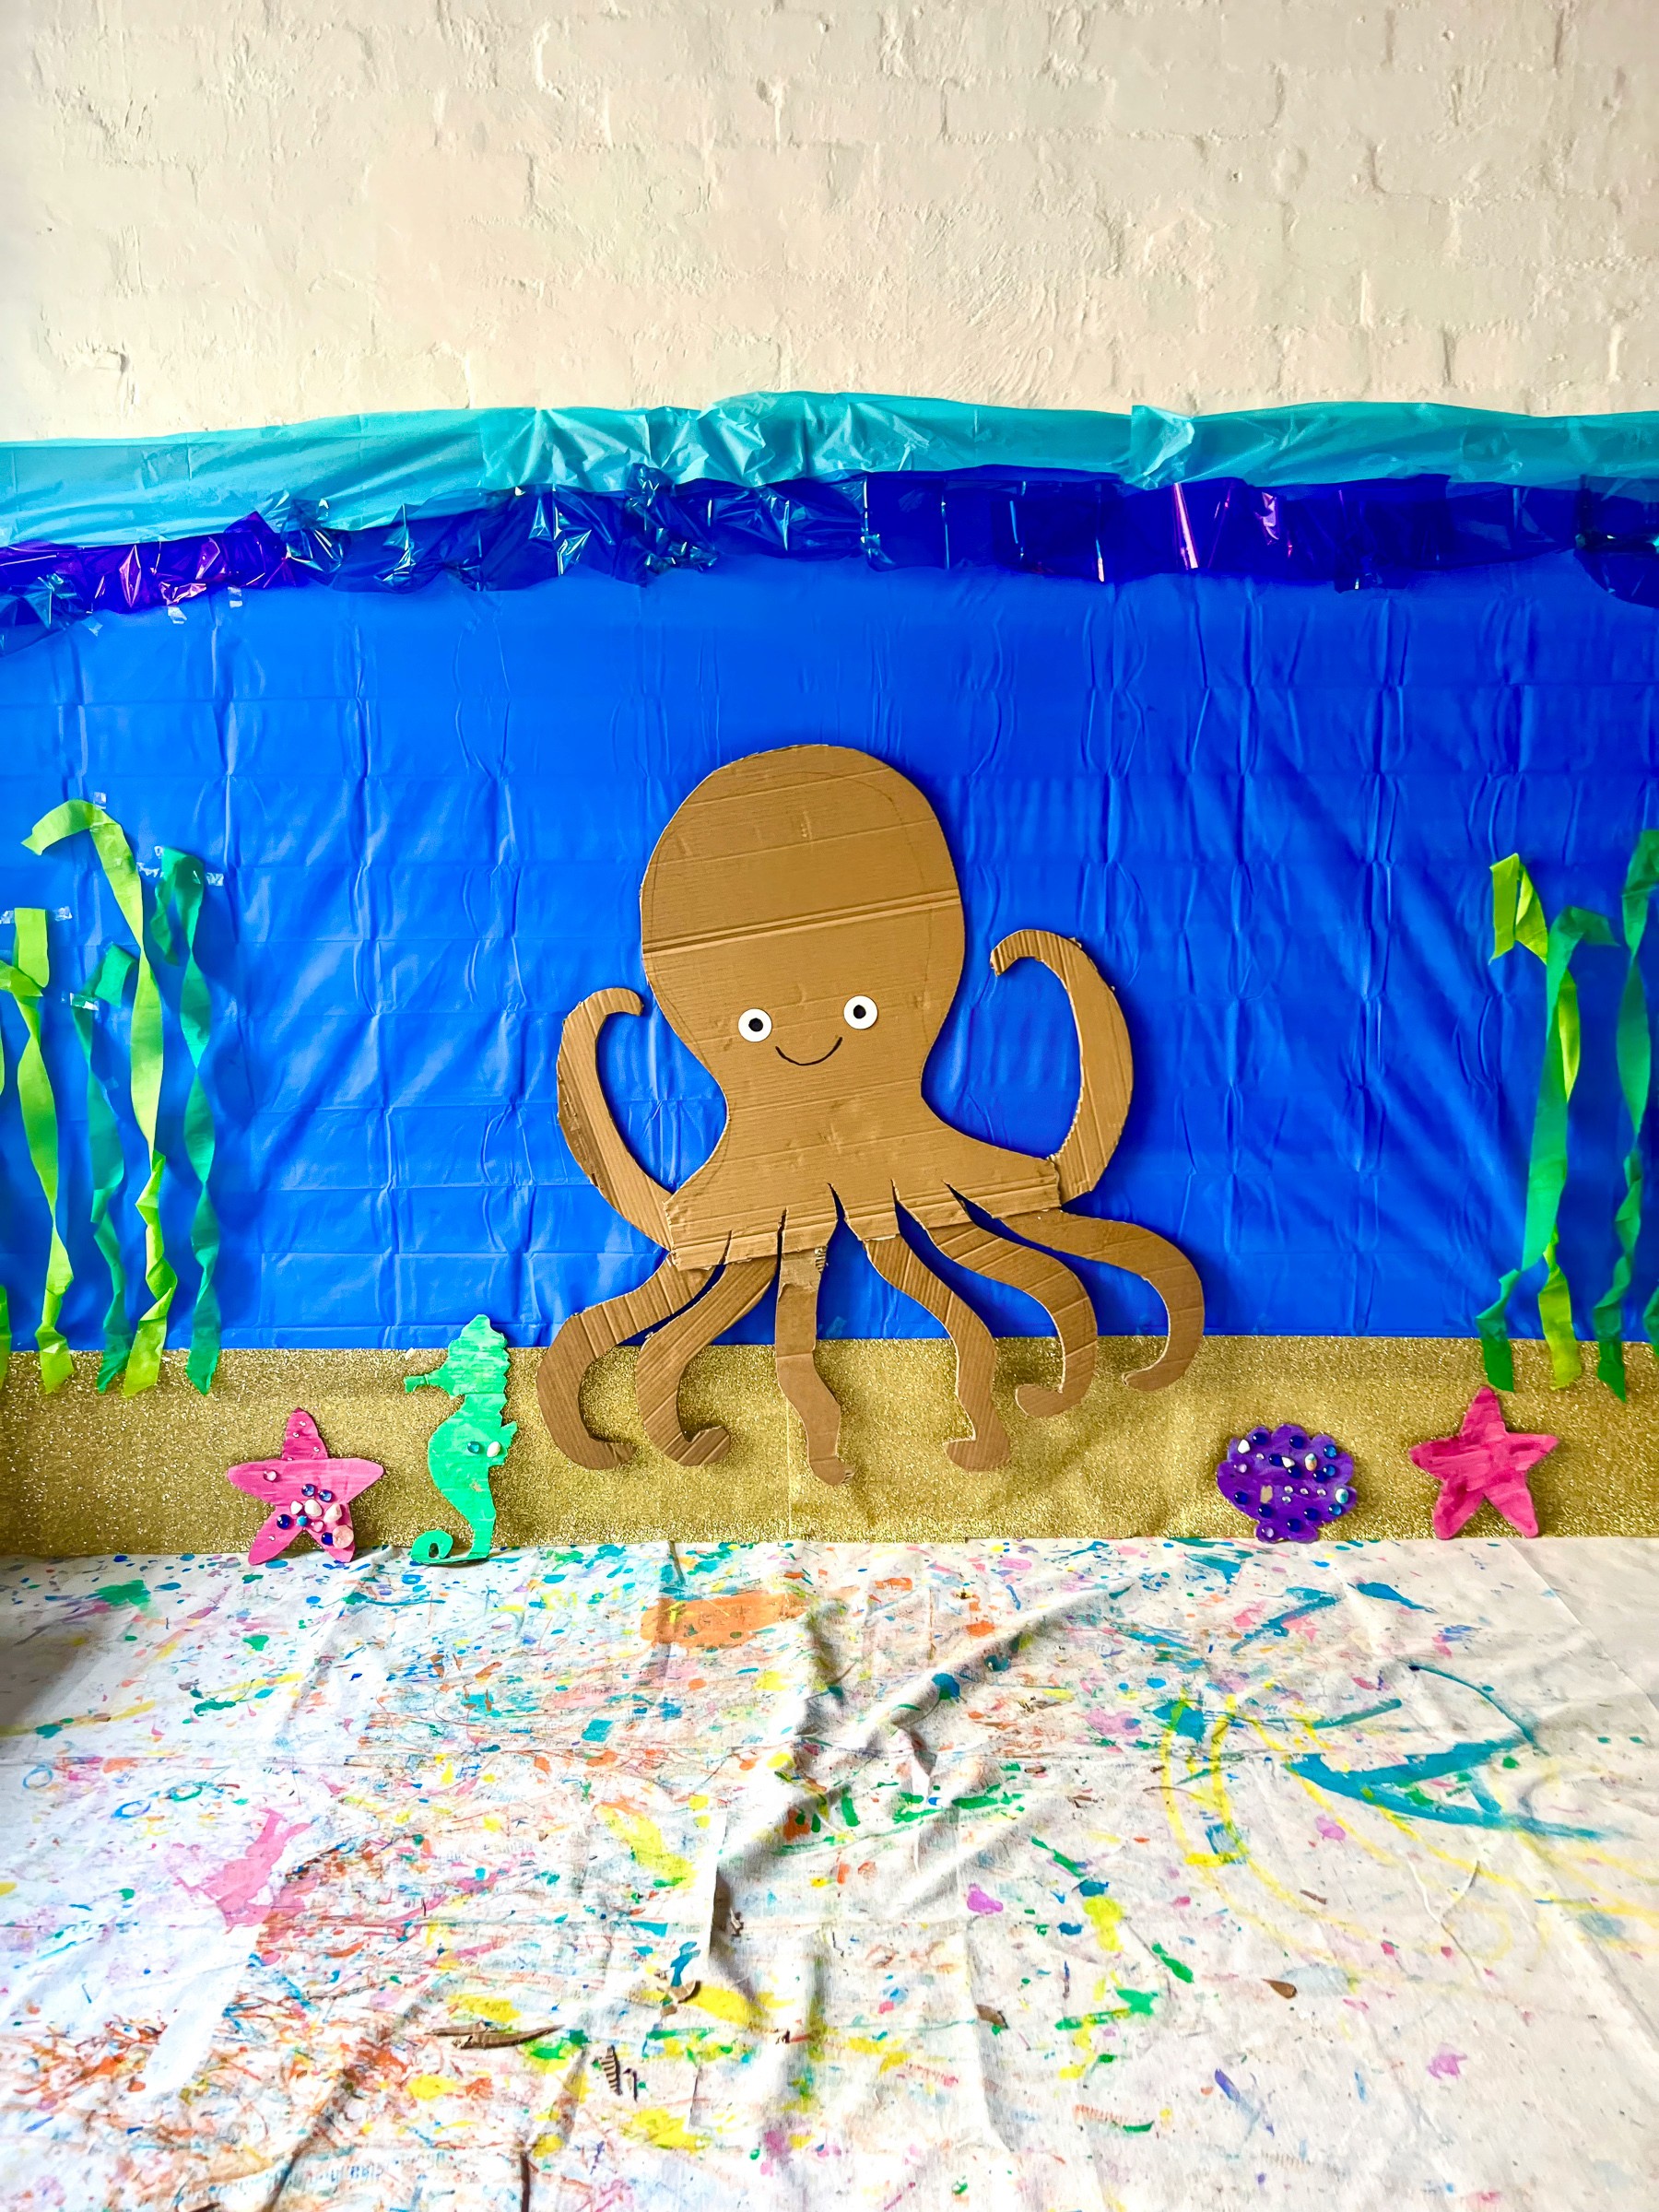
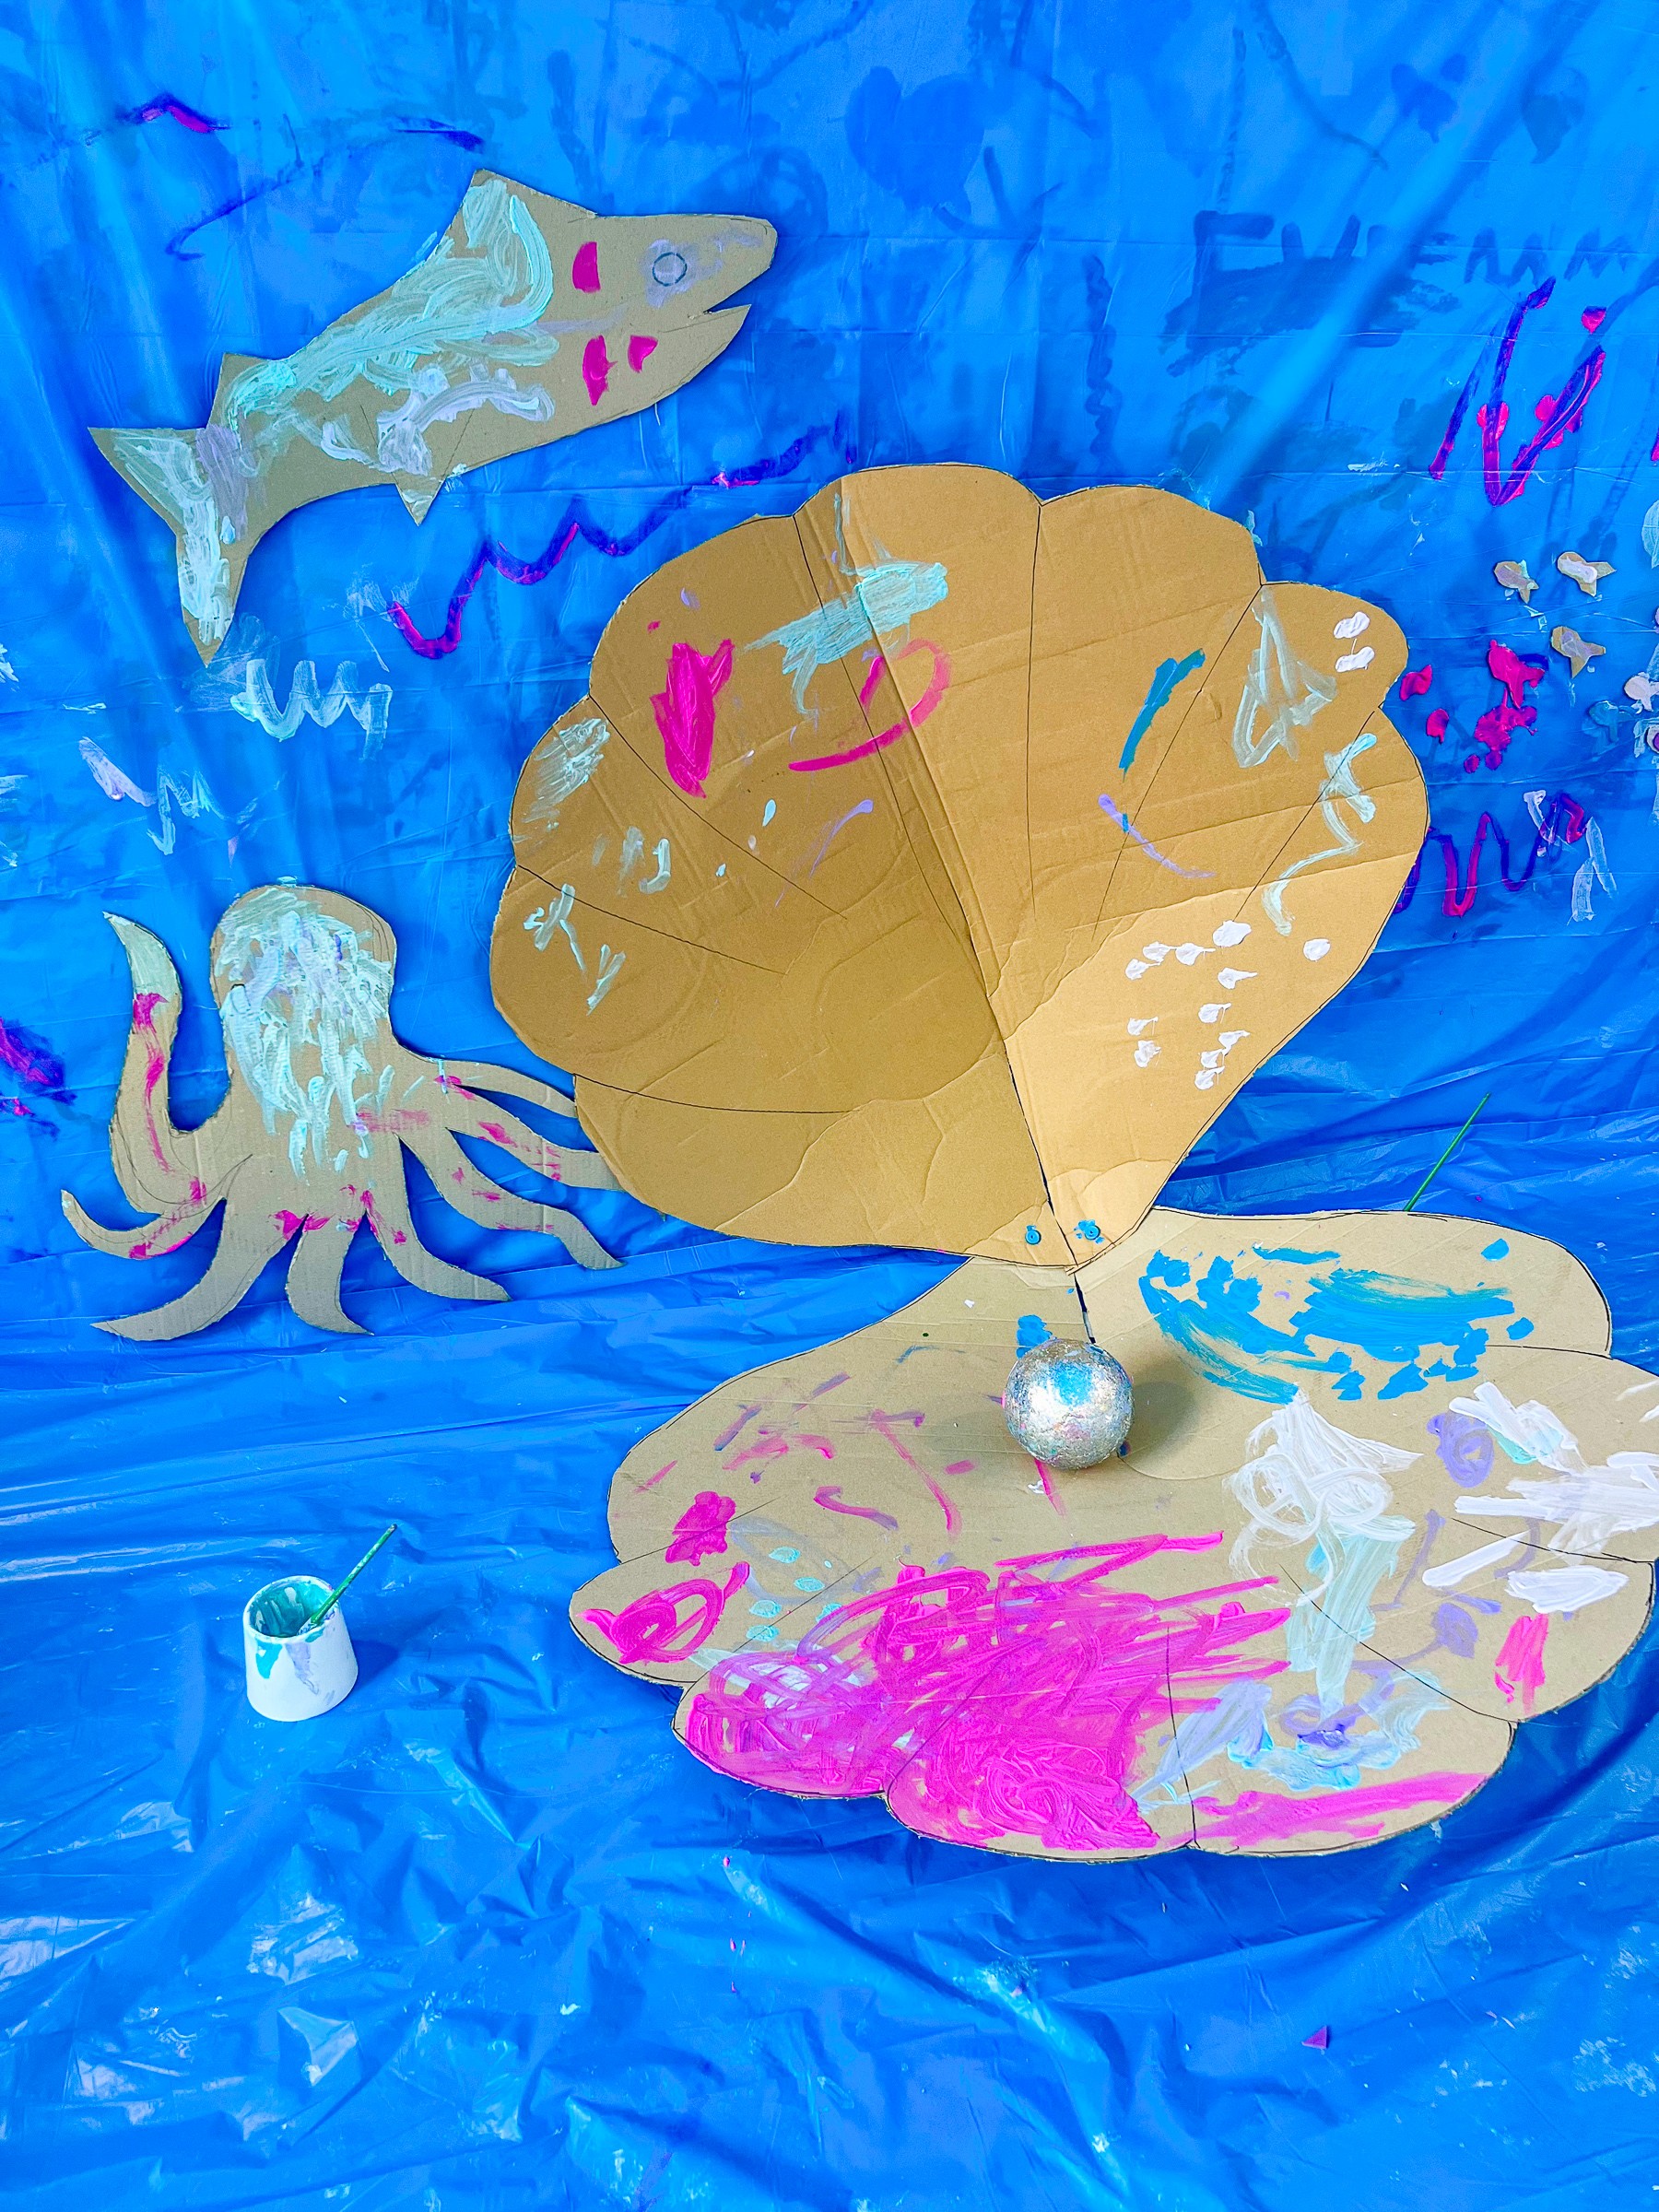
The big features are where the magic really happens. I still love our giant cardboard octopus with curling arms. And our clam shell big enough to climb inside (pearl optional, but a fun extra). We love using our Makedo Fold-Roller too because it bends cardboard into those beautiful scalloped curves so the plain boxes can become something sculptural.
But it doesn’t always have to be big and elaborate. A corner of blue fabric outdoors, a school of painted fish taped to the wall or a patch of bubble wrap “seaweed” to step on. Really anything that makes you feel like you’ve slipped under the surface works beautifully. The key is openness. Let the setup suggest the sea, and then let the kids take it wherever they want to go.
And of course… paint. Always tubs of washable poster or tempera, with a good squeeze of white mixed in to make the colours sing. All the ocean shades work here like seafoam green, turquoise shallows, deep indigo. It’s a brilliant chance to chat about how the sea changes with the light: bright and sparkling near the surface, dark and mysterious the deeper you go.
The Making
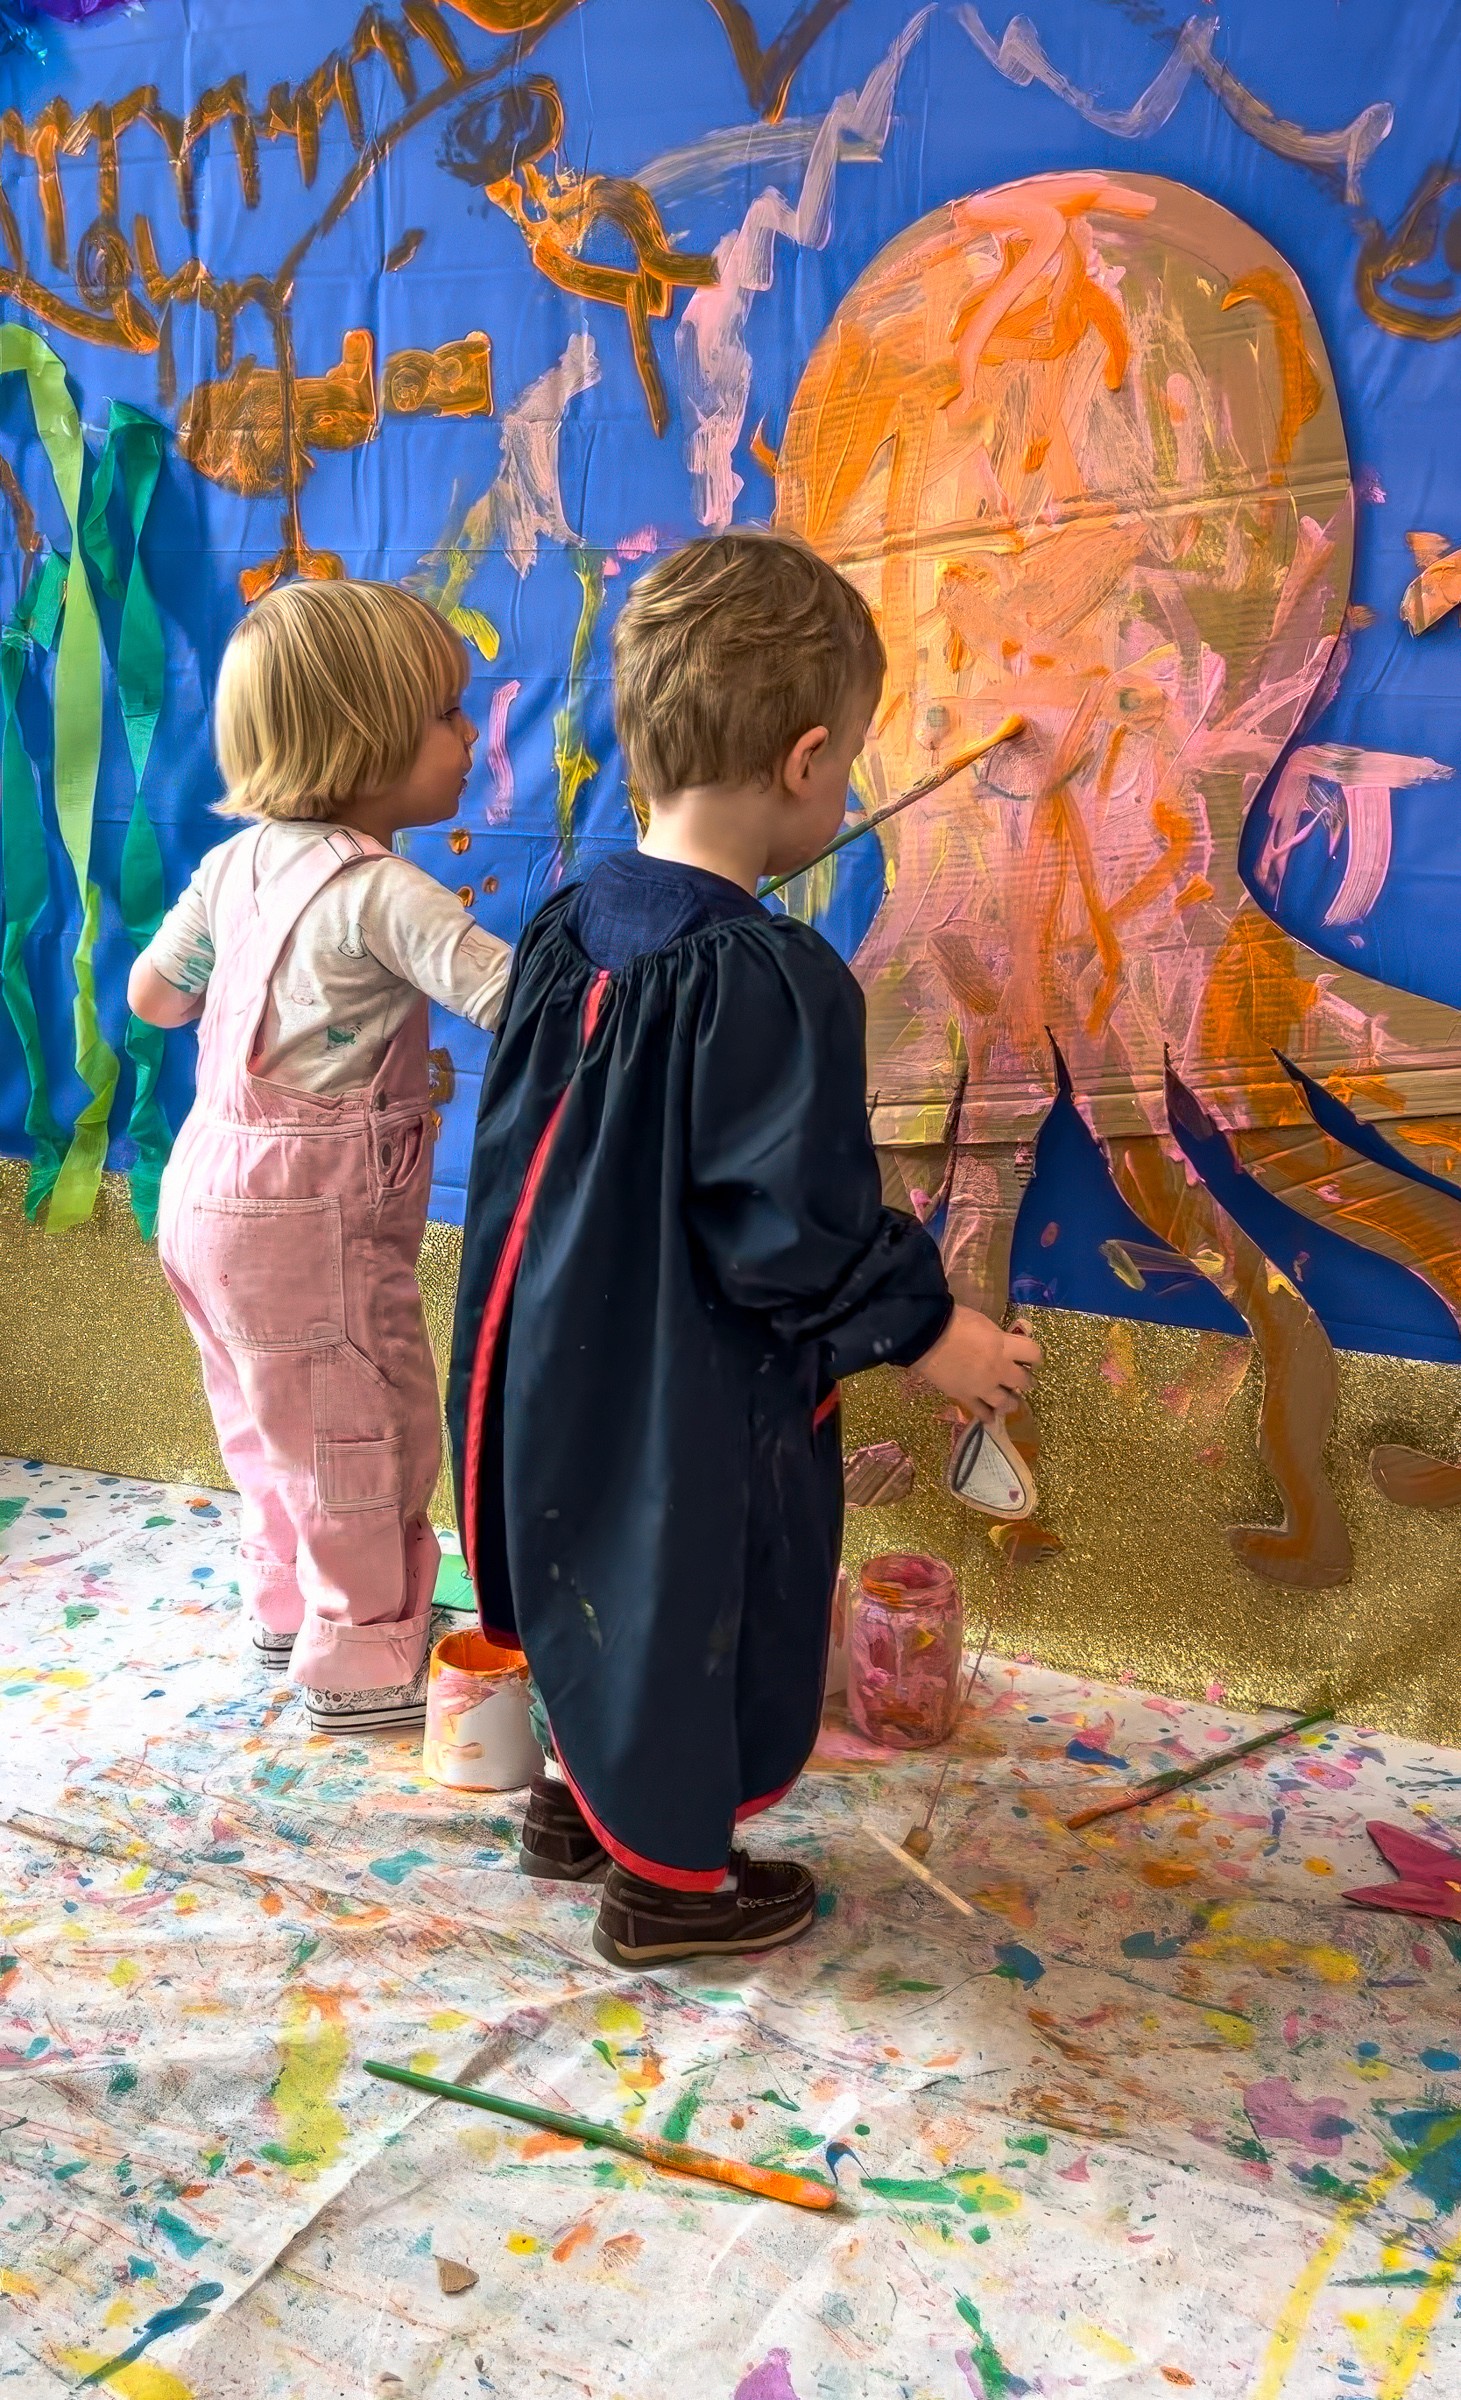
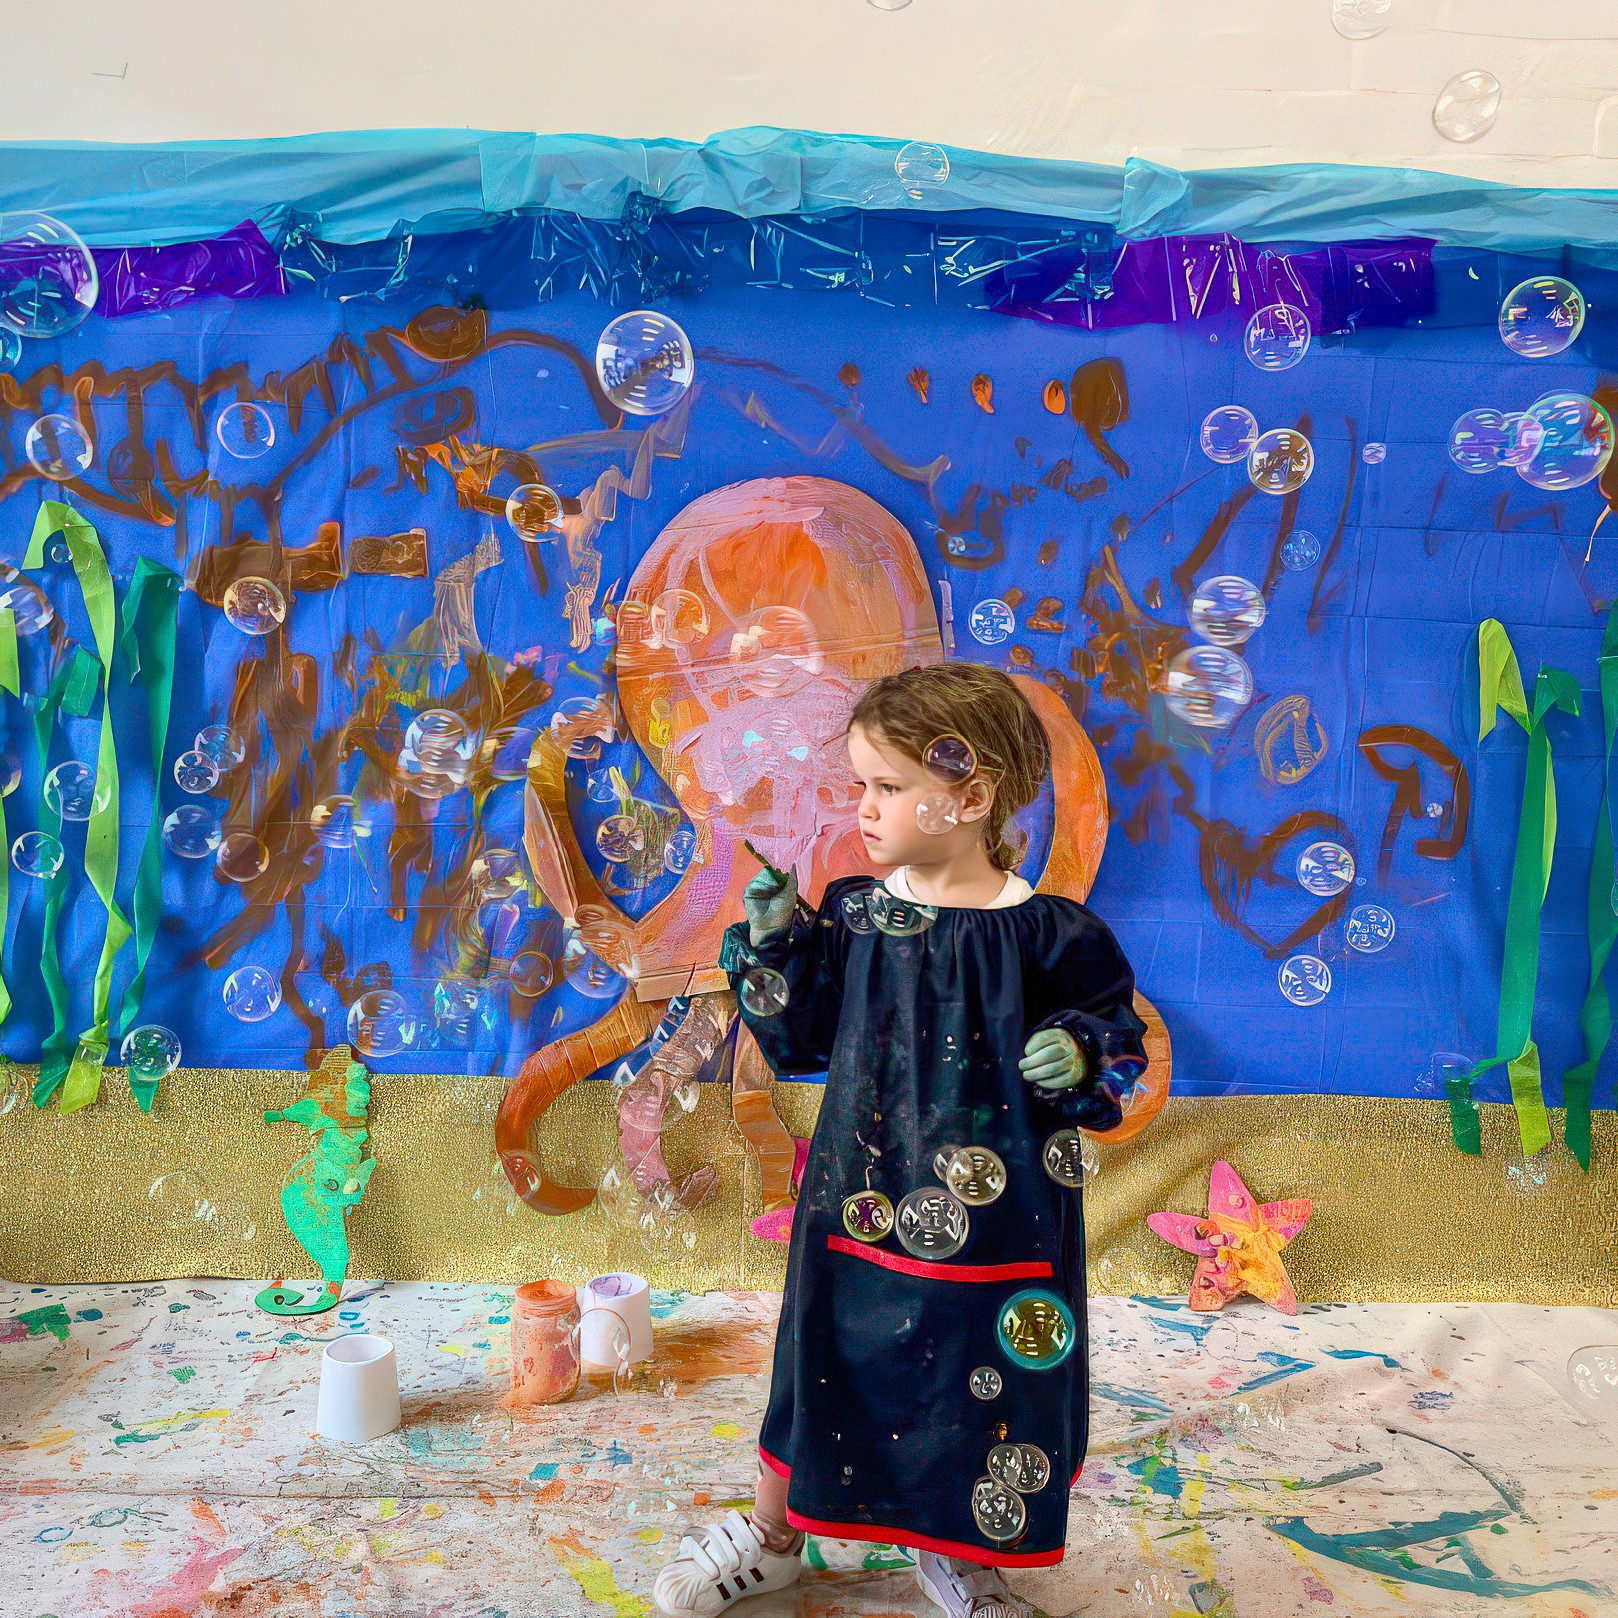
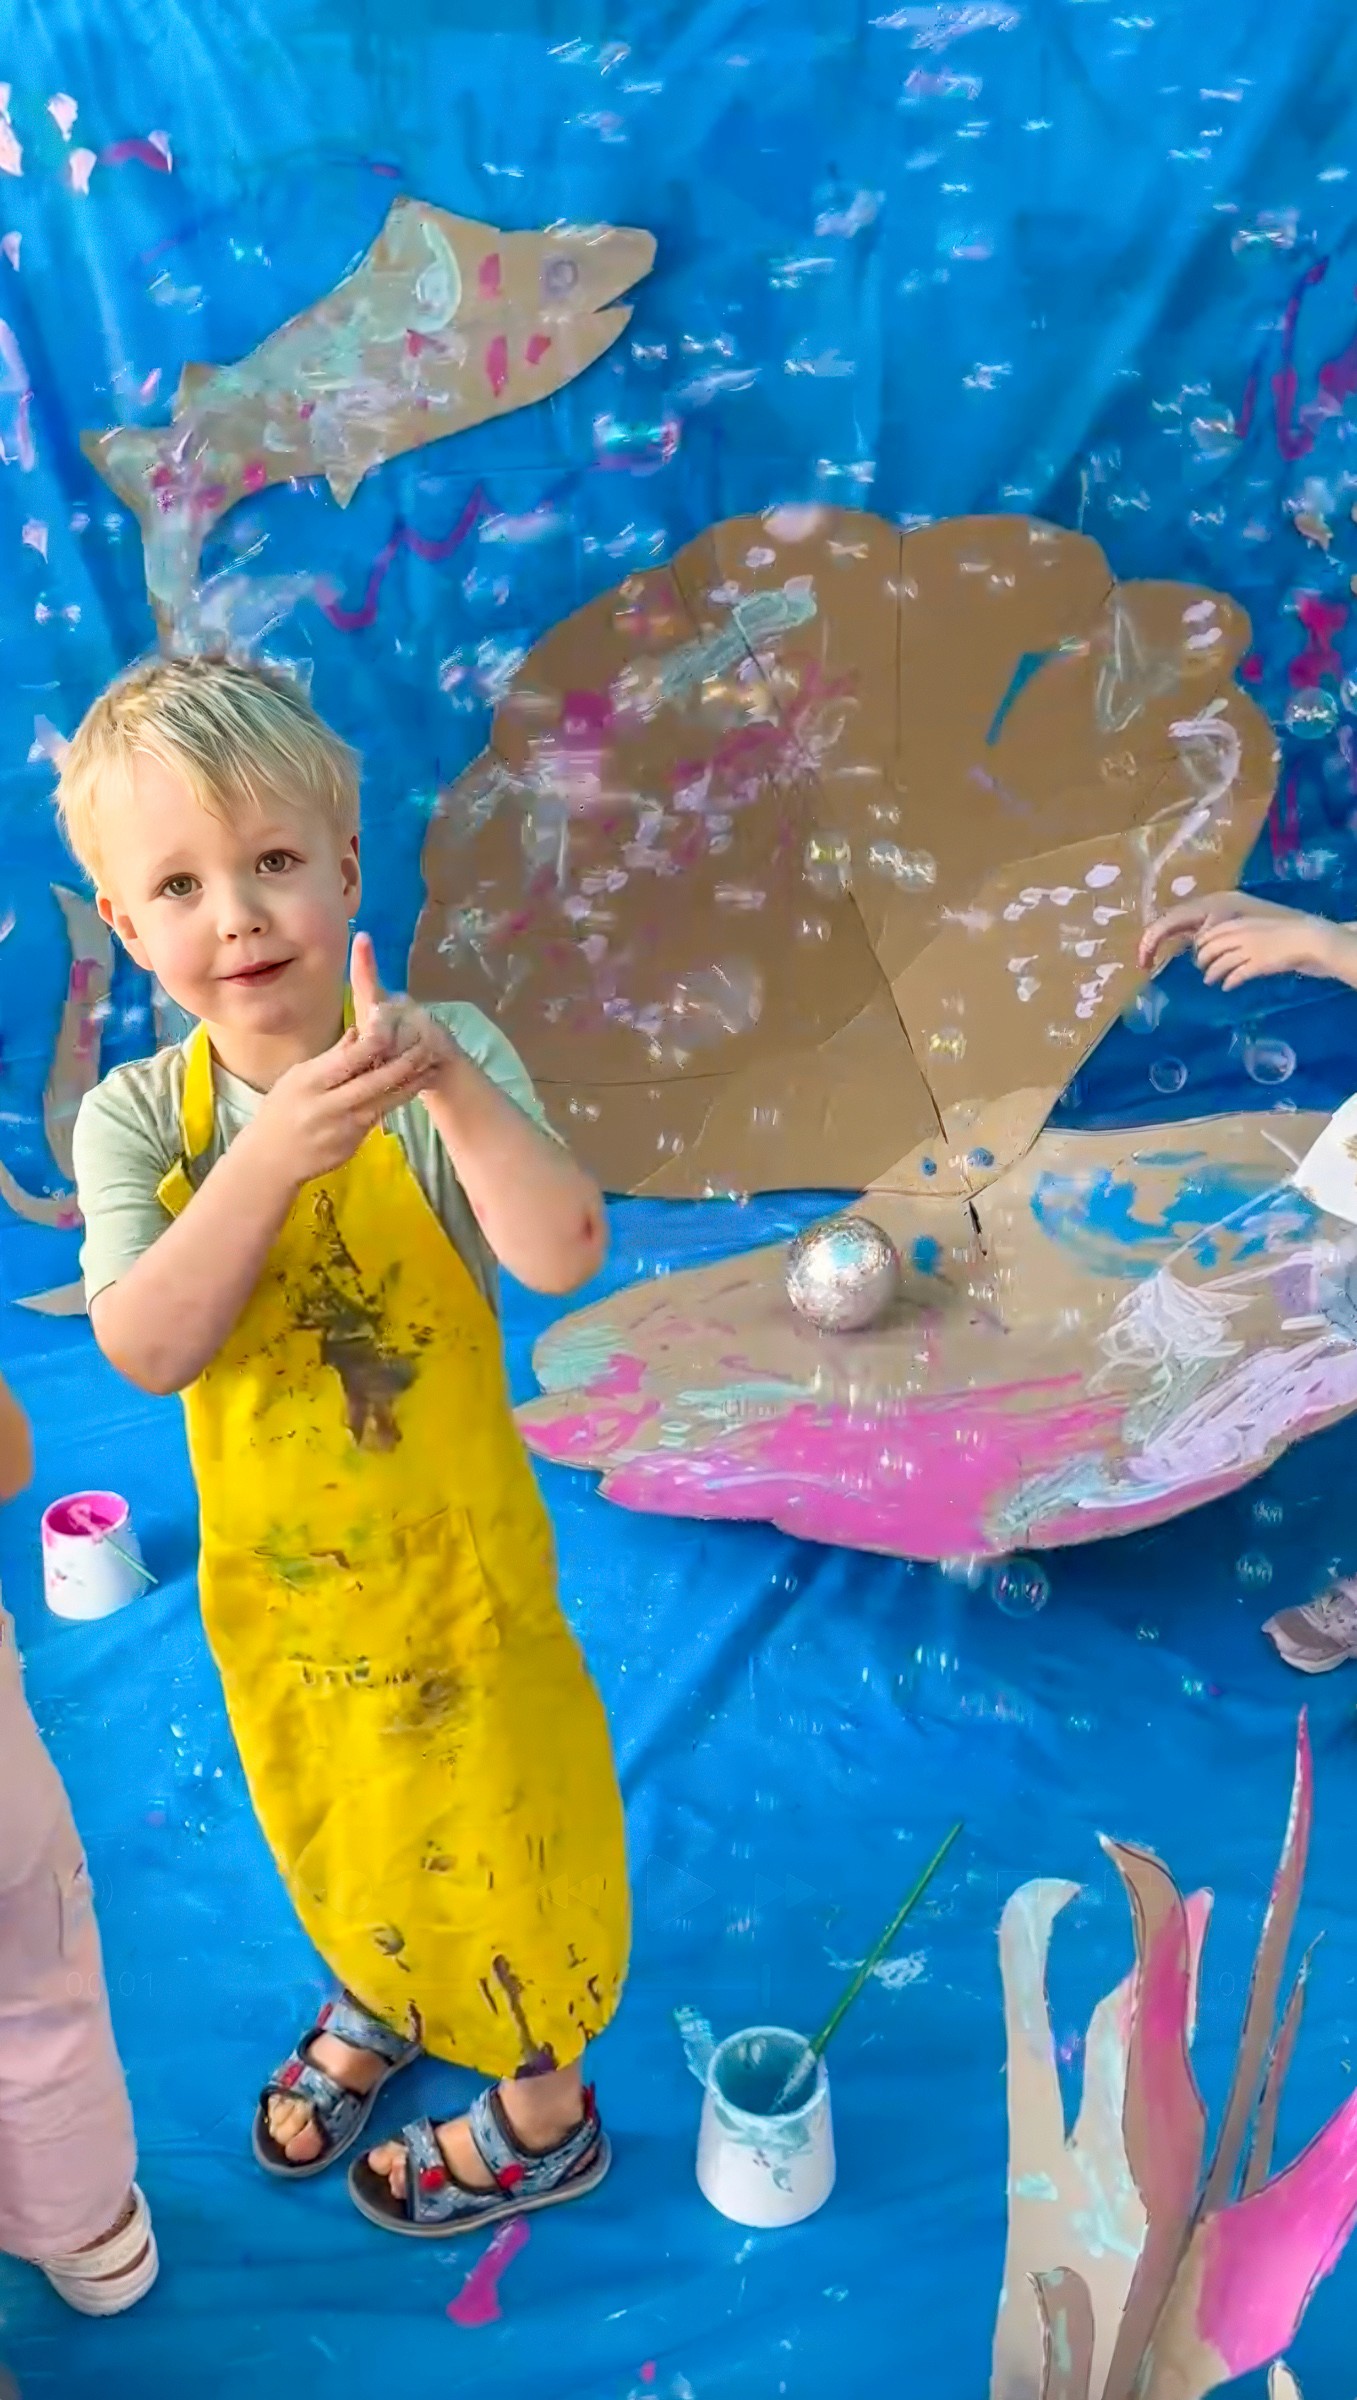
Once the paint is out, the ocean builds itself. Shapes and creatures appear quickly, and the cardboard disappears under layers of colour. Keep the energy loose and collaborative so the whole space grows together. And if you have a bubble machine handy, it is always a hit! Nothing feels more underwater than painting while bubbles float through the air.
Variations
Build the ocean slowly over a week and watch it shift and change every day.
Swap out paint for chalk or pastels on dark cardboard so it feels like deep night water.
Let the kids create their own sea creatures to add to the ocean.
Photograph the installation at each stage and flip through like a stop-motion dive.
Materials
Cardboard in every size: boxes, scraps, anything you can rescue from the recycling pile
Makedo tools (the Fold-Roller is a winner for shells and curves)
Washable poster paints in all the ocean shades: always with a hit of white so they cover well
A wild mix of tools: brushes and sponges and bubble wrap and loufas and whatever else leaves watery marks
Drop cloths, tarps, or old sheets
Optional extras: string for hanging jellyfish, fabric for waves, glitter if your sea needs sparkle
Back to Top
Deep Blue Sea
Dive in! (the ocean won’t paint itself)
Bookmark
Installations
The Set Up
When kids walk in, the space already feels like the ocean. Blue runs across the walls and spills onto the floor. If you have the height, hang a few creatures from the ceiling so it feels like a dive beneath the waves.
The big features are where the magic really happens. I still love our giant cardboard octopus with curling arms. And our clam shell big enough to climb inside (pearl optional, but a fun extra). We love using our Makedo Fold-Roller too because it bends cardboard into those beautiful scalloped curves so the plain boxes can become something sculptural.
But it doesn’t always have to be big and elaborate. A corner of blue fabric outdoors, a school of painted fish taped to the wall or a patch of bubble wrap “seaweed” to step on. Really anything that makes you feel like you’ve slipped under the surface works beautifully. The key is openness. Let the setup suggest the sea, and then let the kids take it wherever they want to go.
And of course… paint. Always tubs of washable poster or tempera, with a good squeeze of white mixed in to make the colours sing. All the ocean shades work here like seafoam green, turquoise shallows, deep indigo. It’s a brilliant chance to chat about how the sea changes with the light: bright and sparkling near the surface, dark and mysterious the deeper you go.
The Making
Once the paint is out, the ocean builds itself. Shapes and creatures appear quickly, and the cardboard disappears under layers of colour. Keep the energy loose and collaborative so the whole space grows together. And if you have a bubble machine handy, it is always a hit! Nothing feels more underwater than painting while bubbles float through the air.
Variations
Build the ocean slowly over a week and watch it shift and change every day.
Swap out paint for chalk or pastels on dark cardboard so it feels like deep night water.
Let the kids create their own sea creatures to add to the ocean.
Photograph the installation at each stage and flip through like a stop-motion dive.
Materials
Cardboard in every size: boxes, scraps, anything you can rescue from the recycling pile
Makedo tools (the Fold-Roller is a winner for shells and curves)
Washable poster paints in all the ocean shades: always with a hit of white so they cover well
A wild mix of tools: brushes and sponges and bubble wrap and loufas and whatever else leaves watery marks
Drop cloths, tarps, or old sheets
Optional extras: string for hanging jellyfish, fabric for waves, glitter if your sea needs sparkle
Back to Top
Smudge Pirate Ship
Ahoy! This ship runs on colour and chaos.
Bookmark
Installations
The Set Up
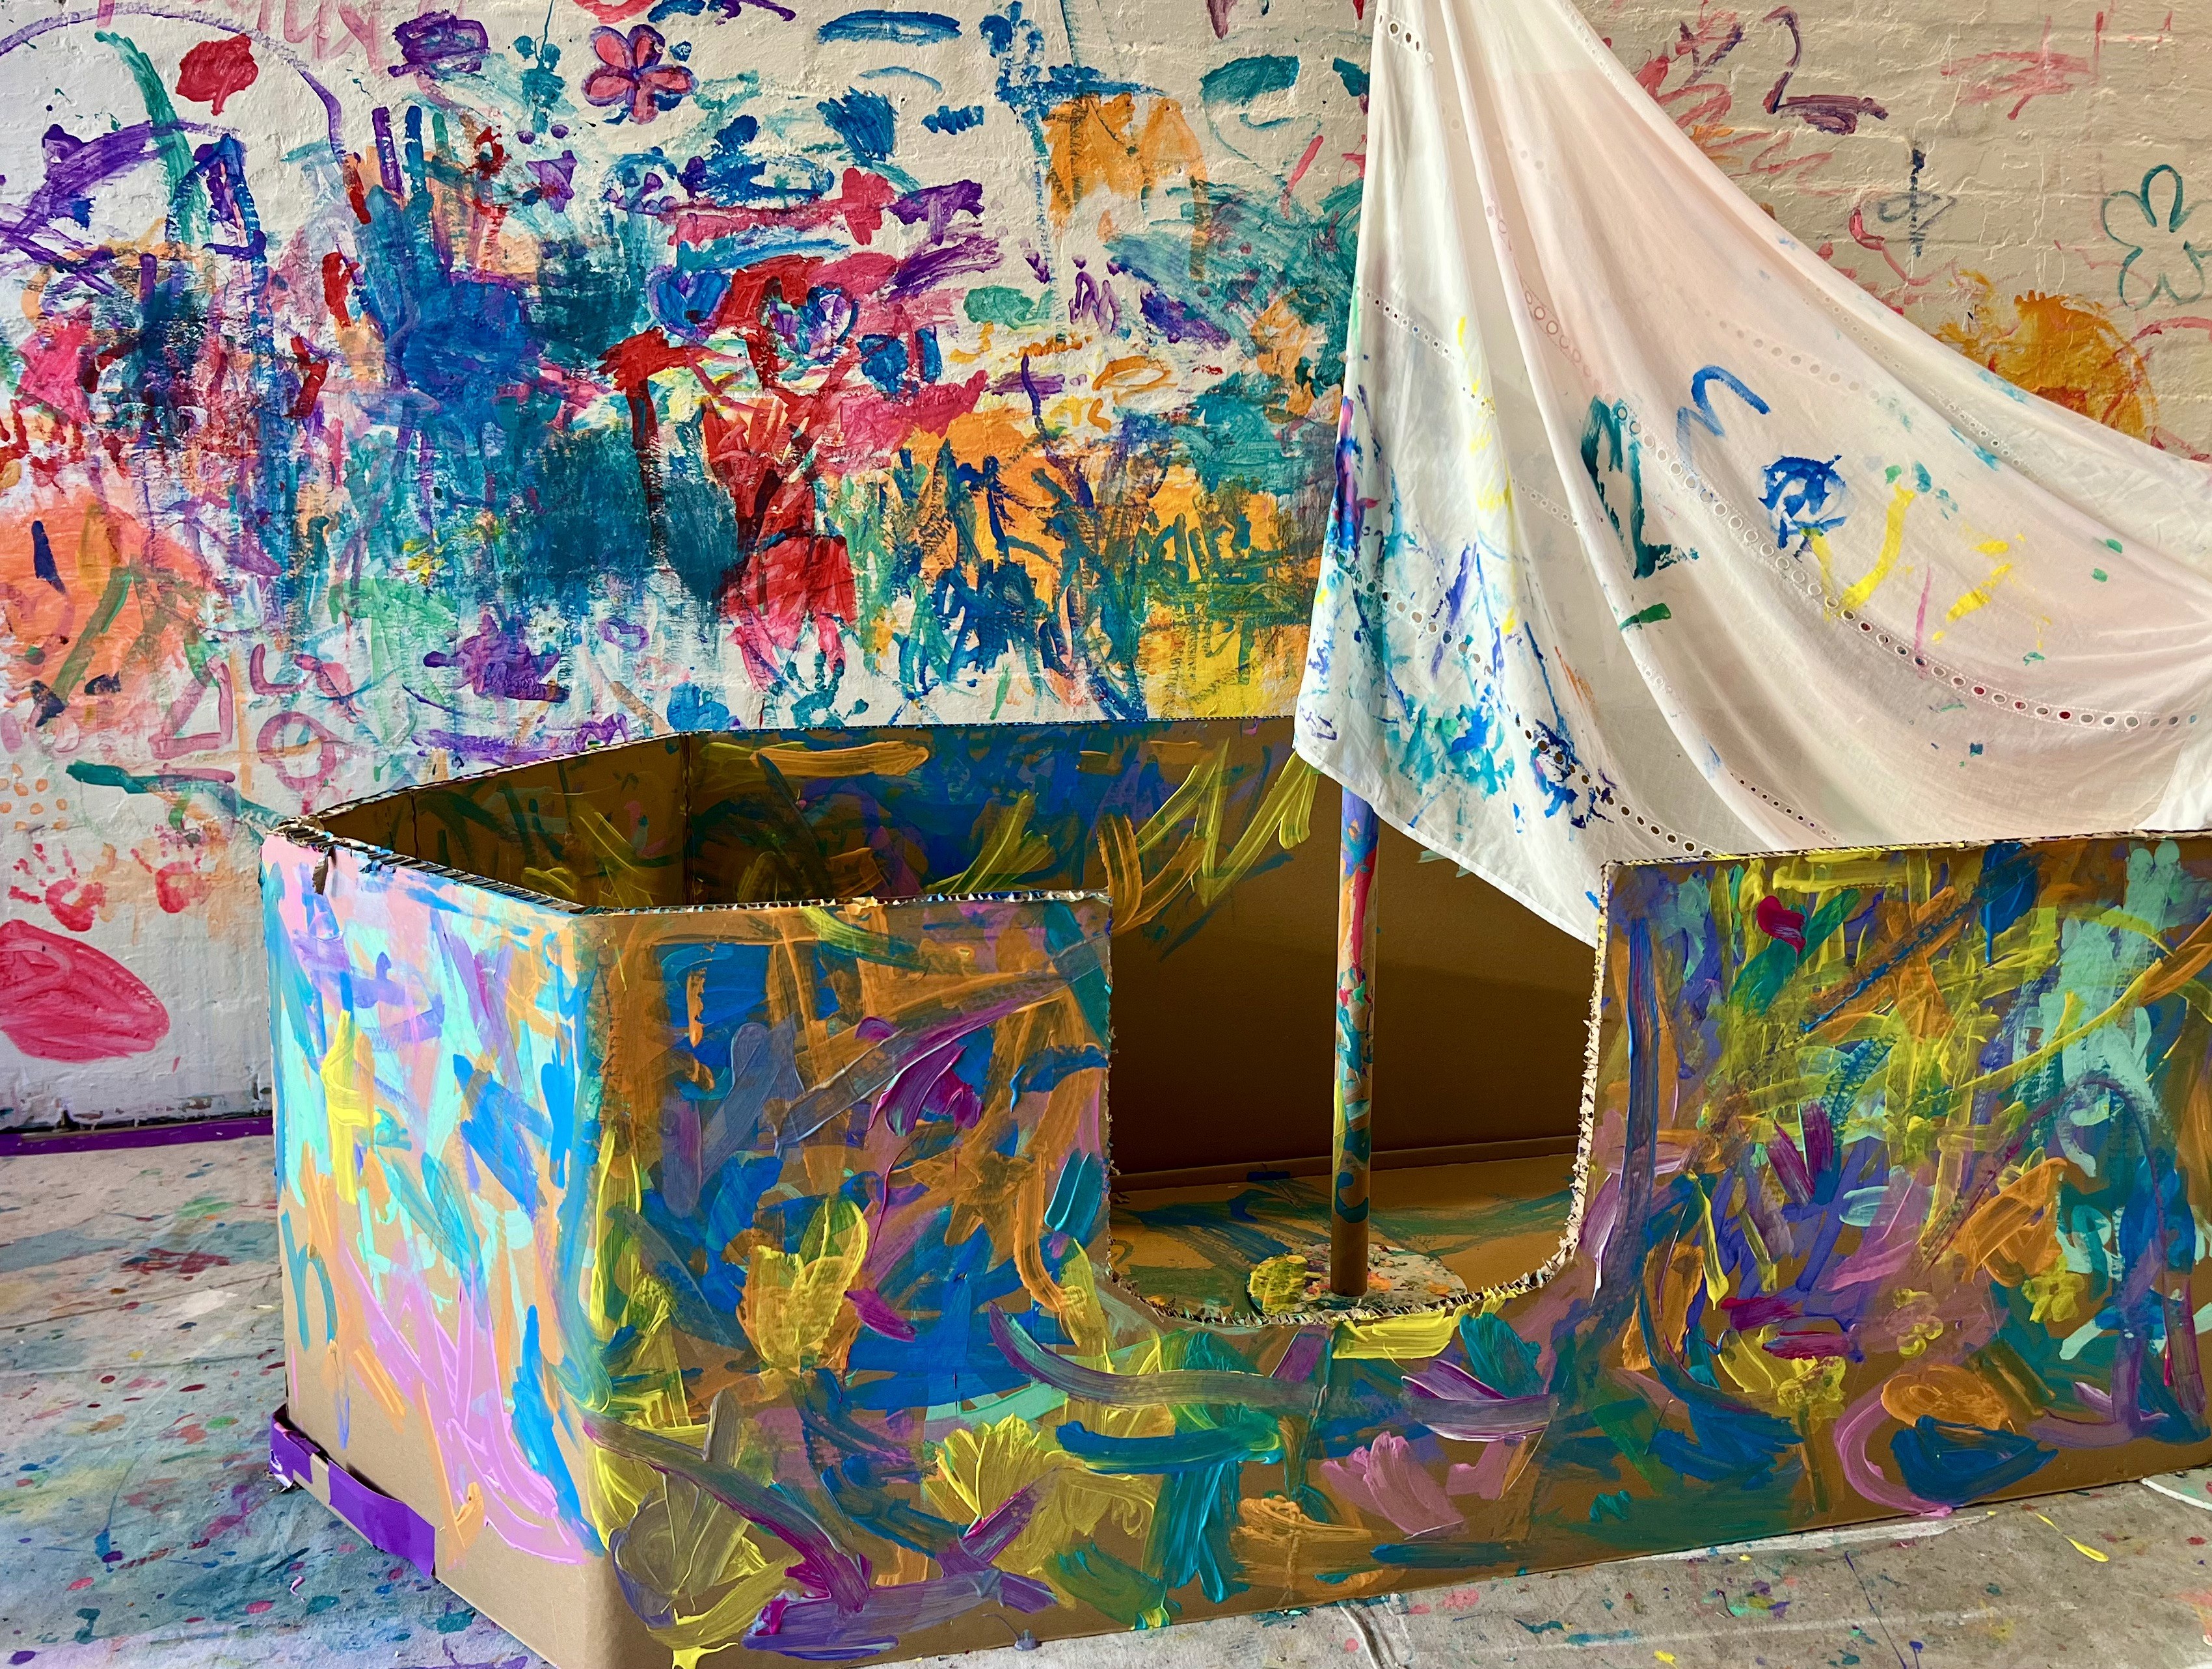
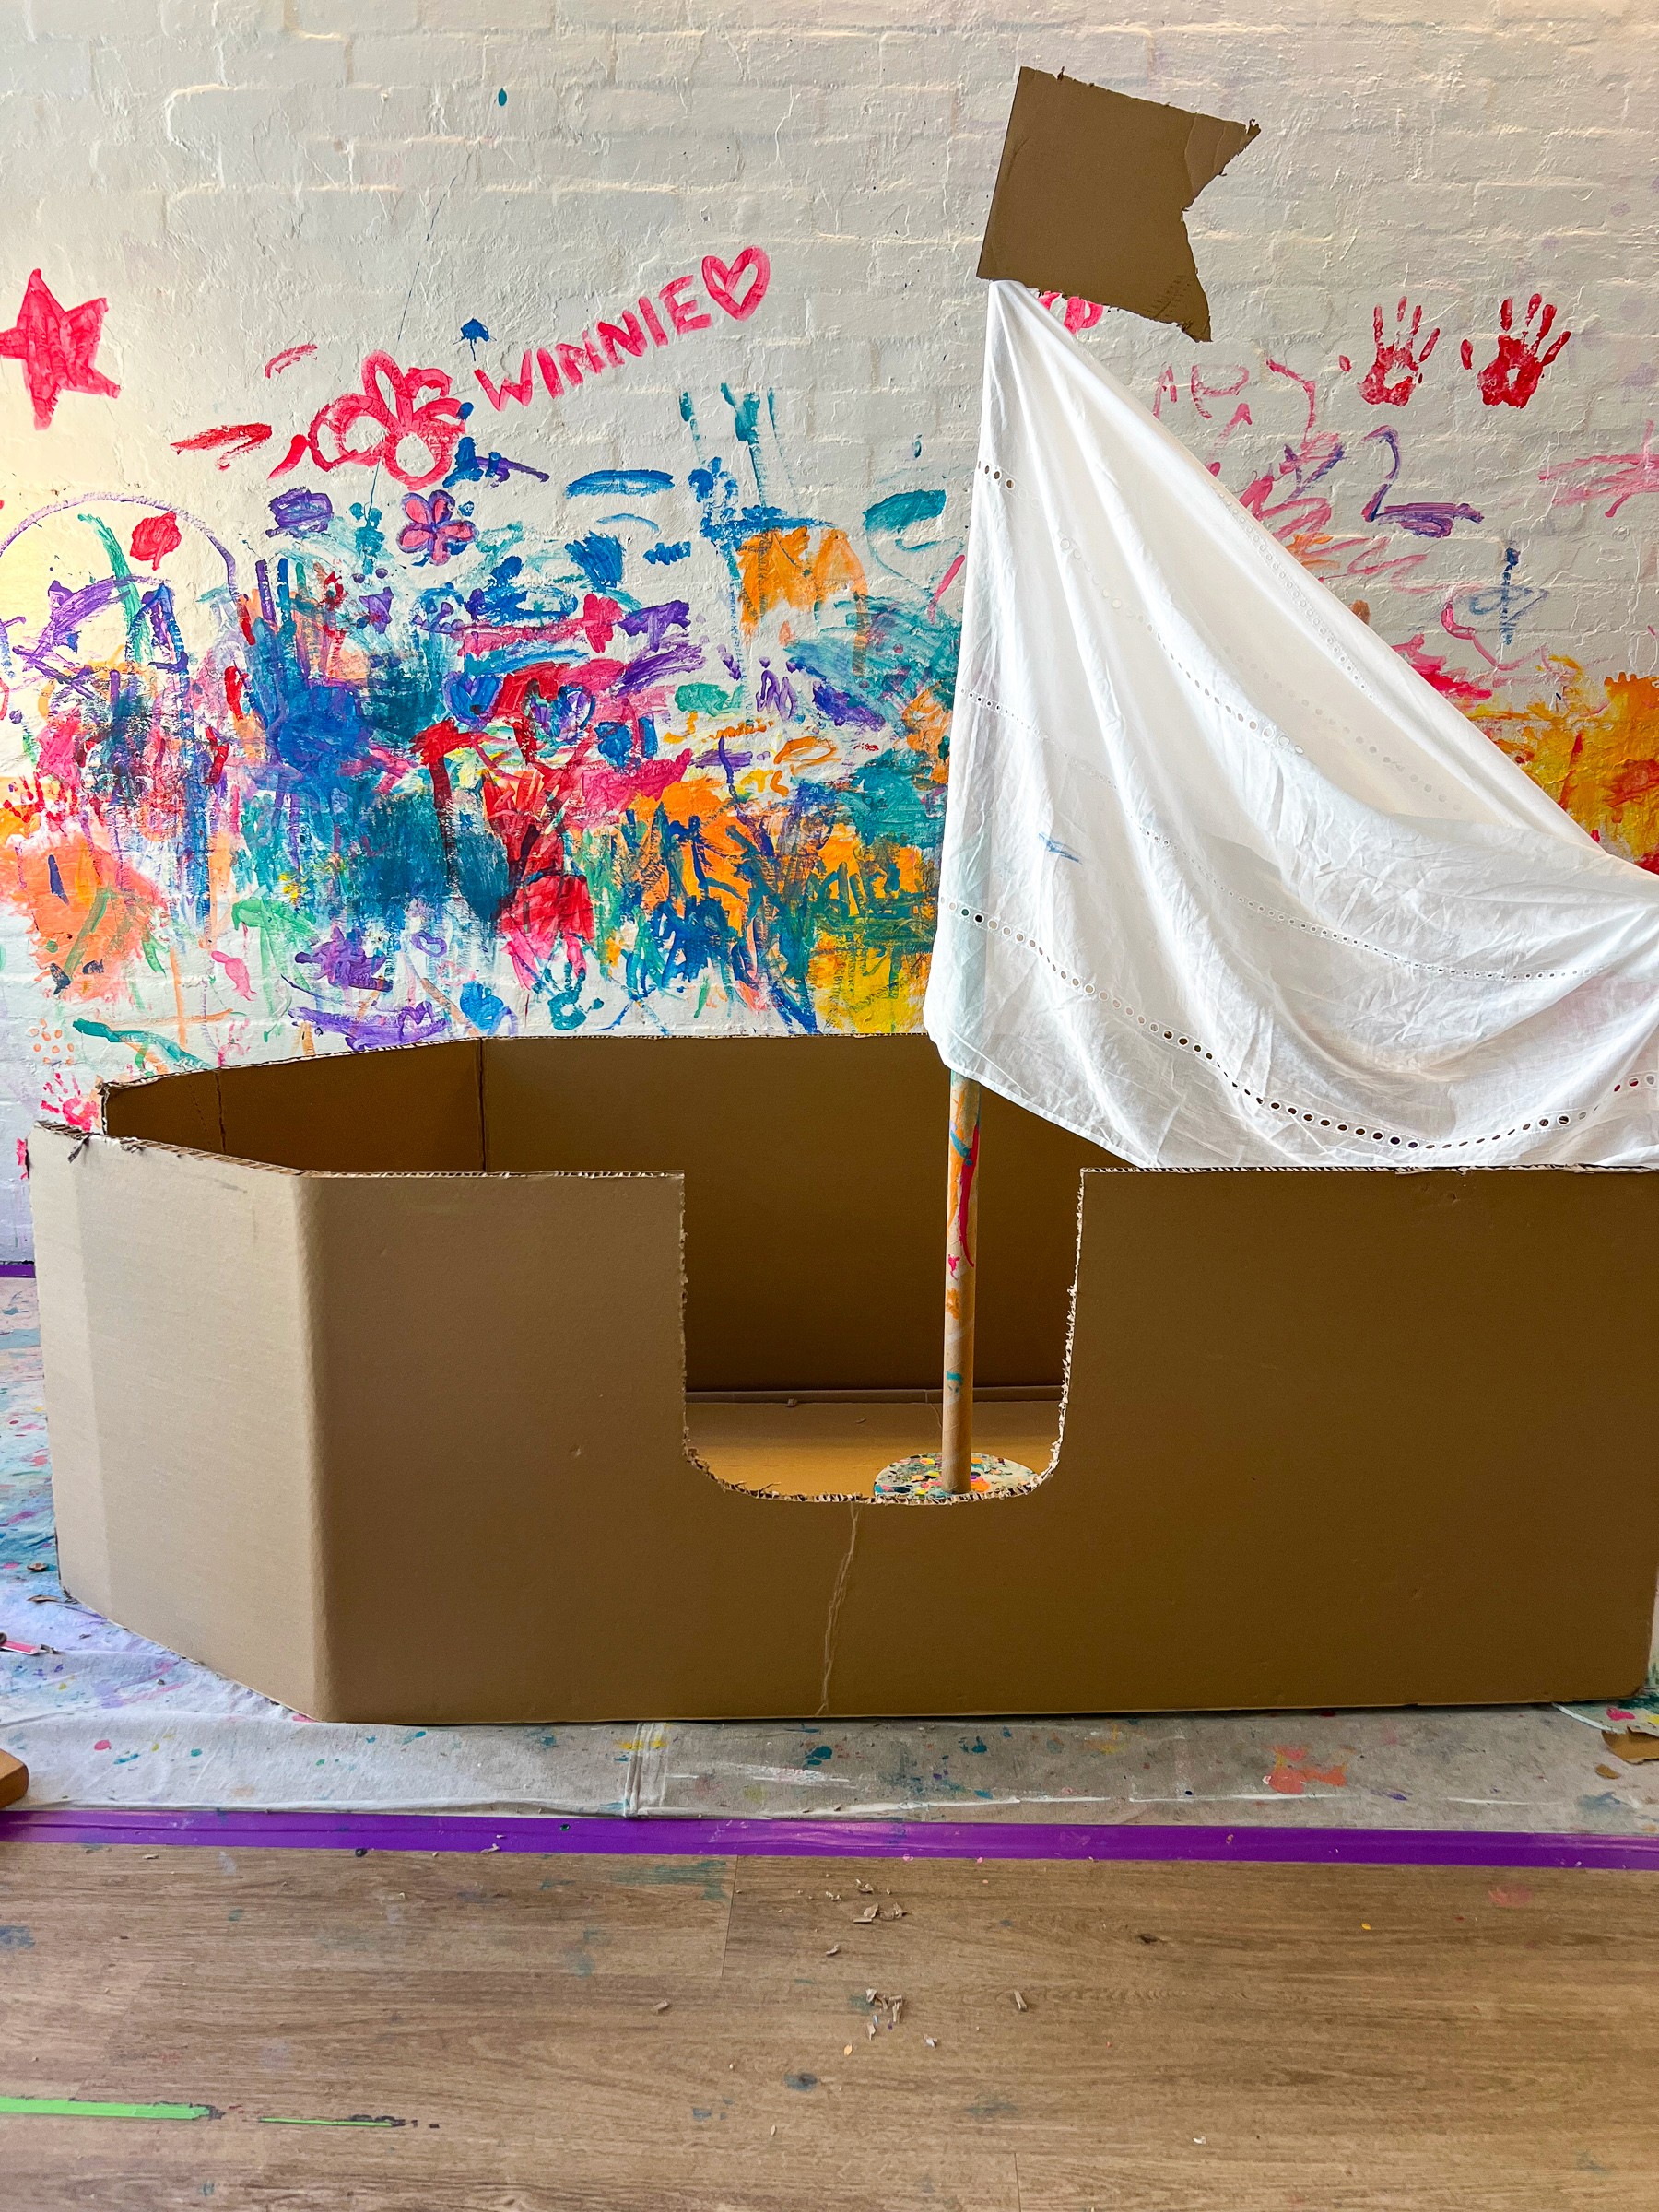
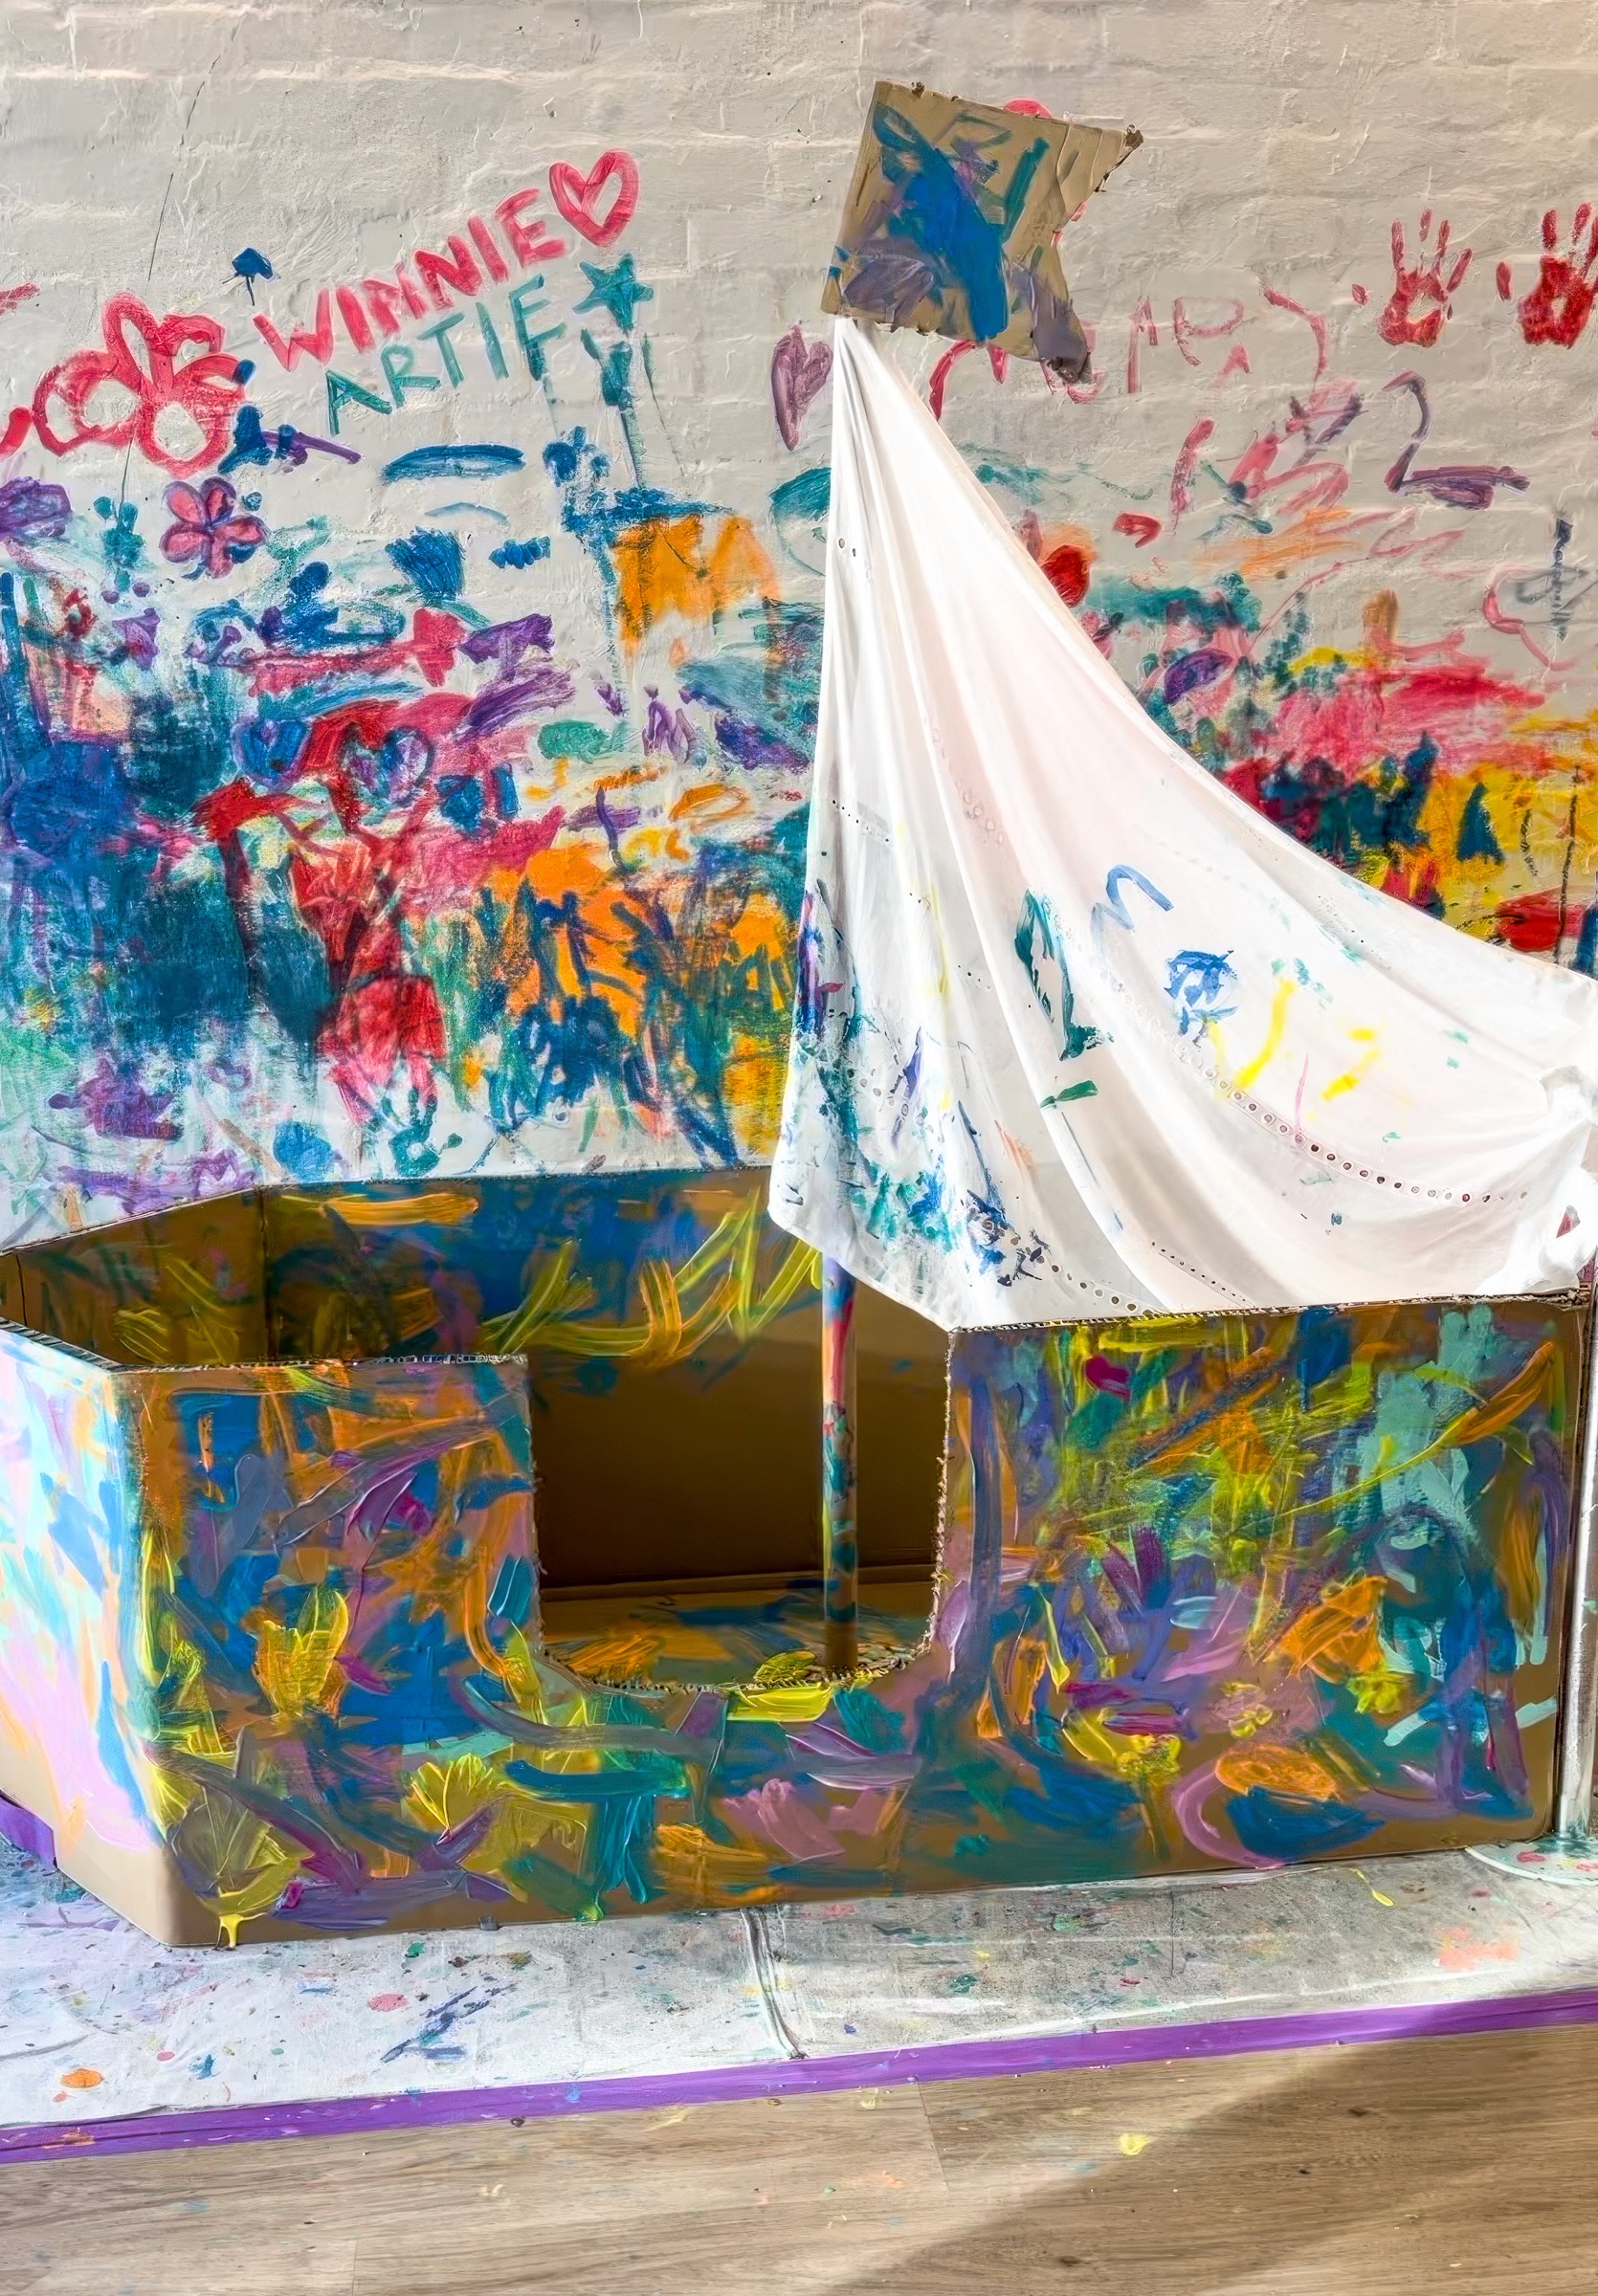
We’re lucky at Smudge to be surrounded by brilliant local businesses who share their boxes with us. The mechanic out the back is gold. Those huge car-part boxes became the base of our pirate ship (a little tricky to drag through the alley myself, but definitely worth it!).
A few joins with duct tape or Makedo tools and suddenly, ship shape.
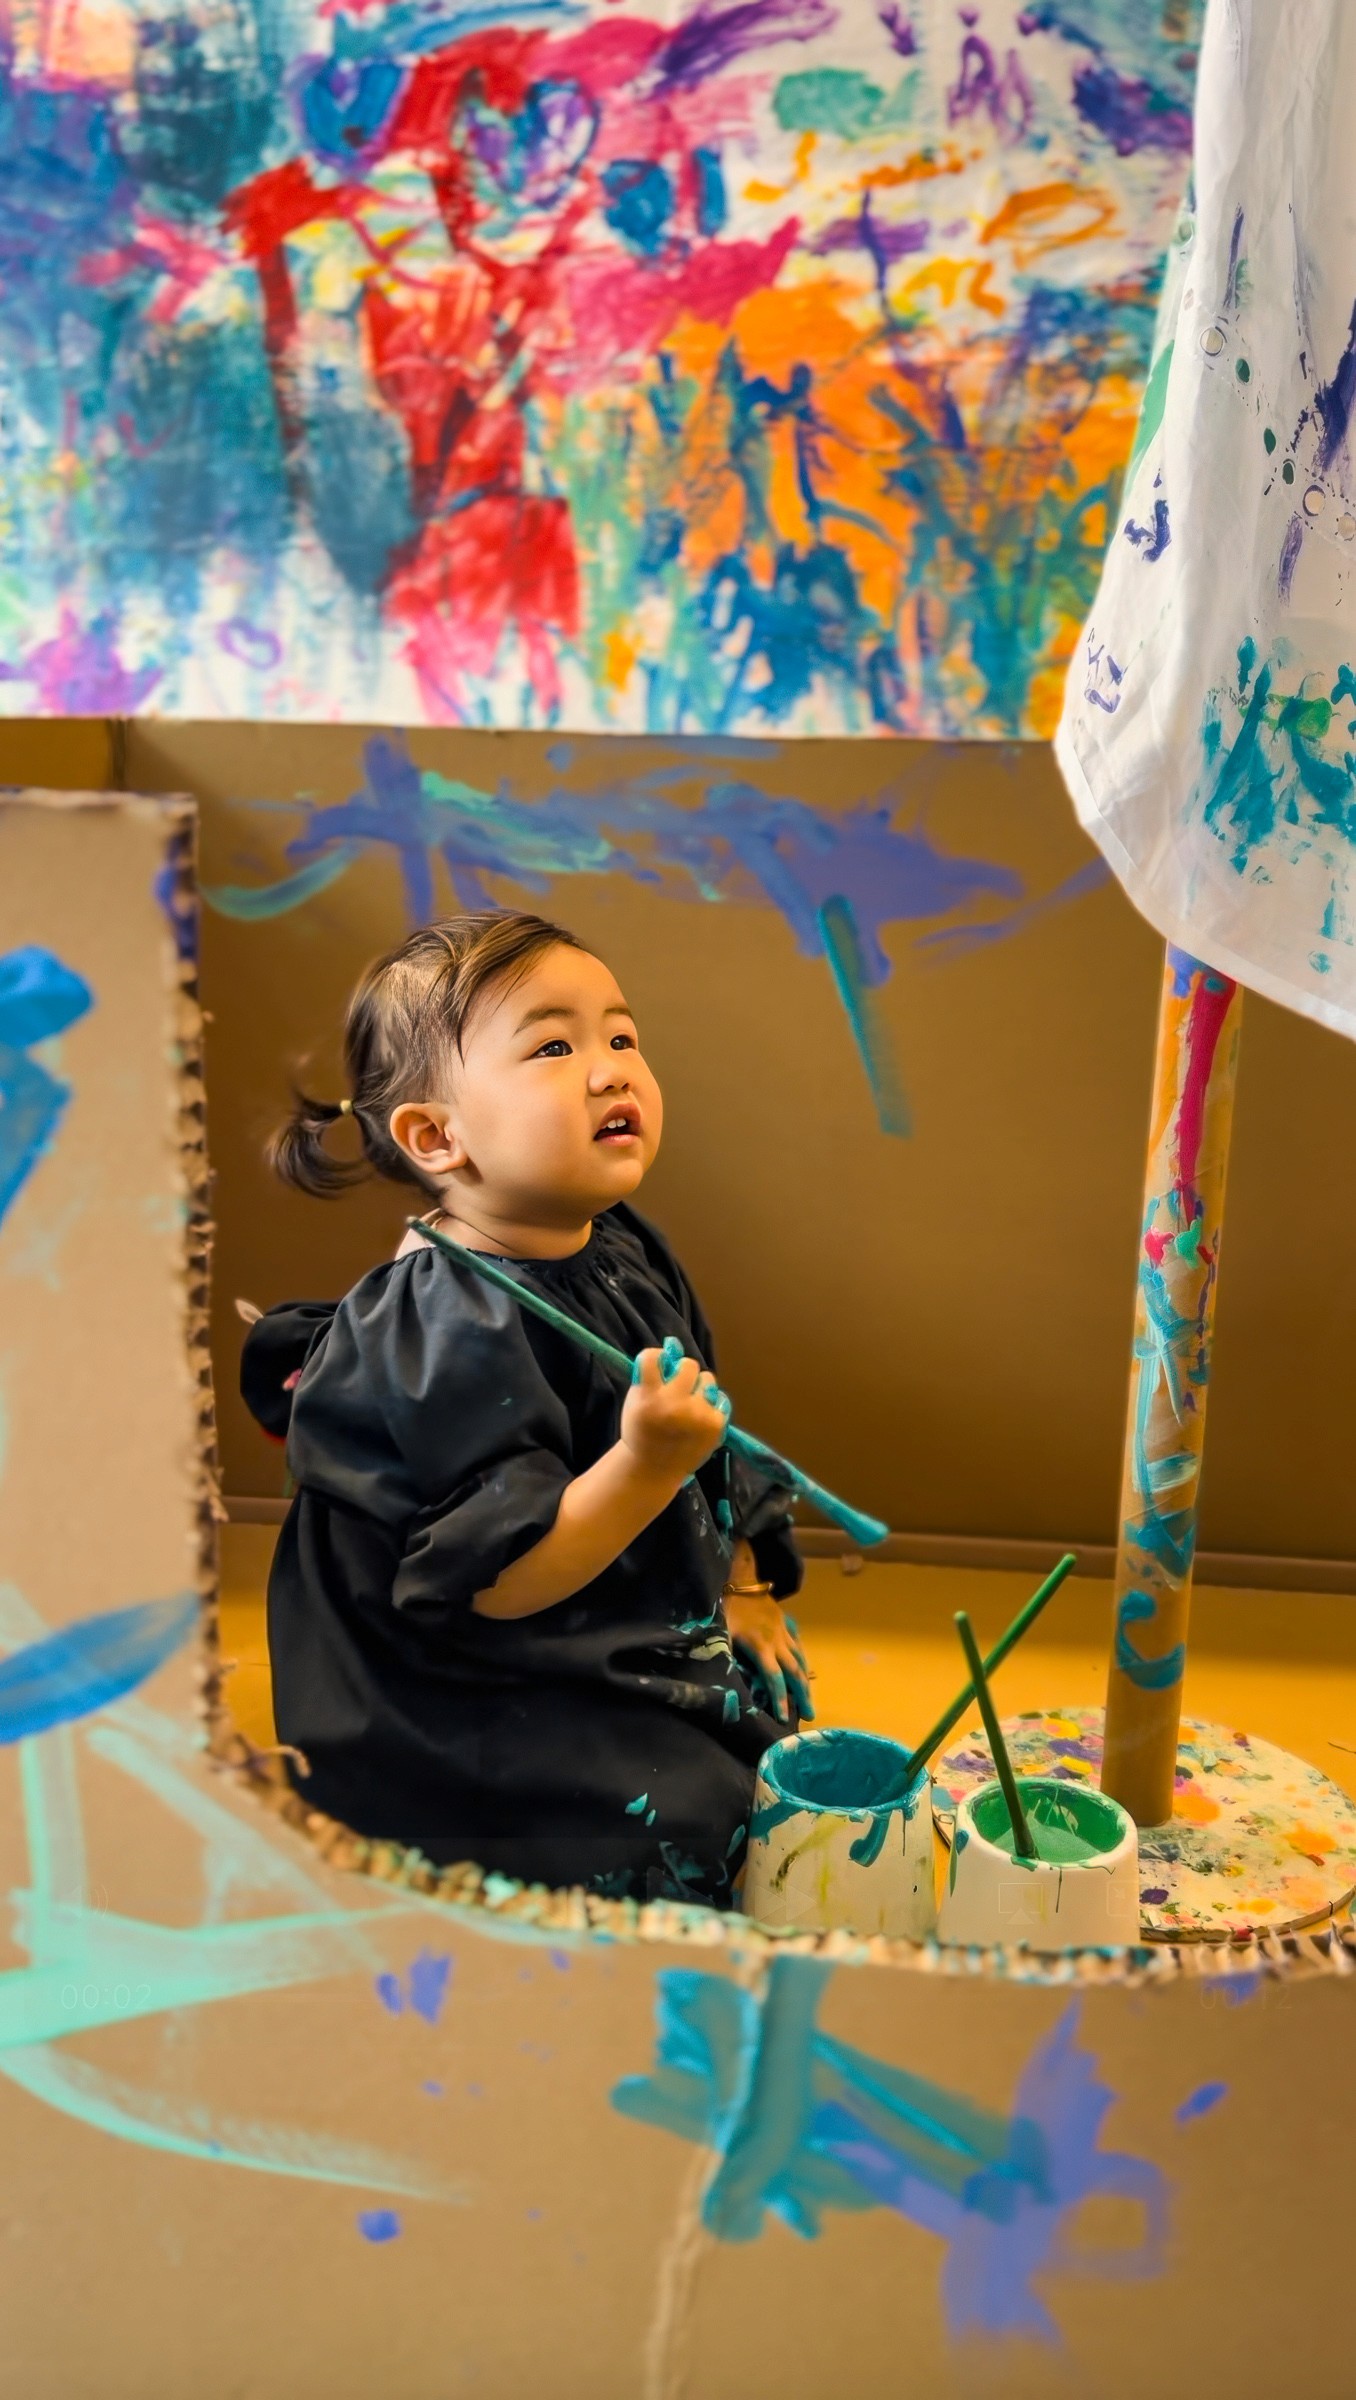
The rest is simple. A cardboard tube for a mast, an old curtain for a sail, maybe a flag or a plank if you have time. The beauty of a build like this is how little it takes for kids to believe in it. Once they climb in, the play does the rest.
Poster paint with a glug of white works beautifully, or use paint sticks for fast, bright coverage.

The Making
The ship only needs a hint of colour before it comes to life. Installation pieces like this invite children to work together, move through their creation and fill the space with their own stories. The making is less about the ship itself and more about giving them a space big enough for imagination to steer.
Variations
Roll up cardboard tubes into spyglasses and spot “land ahead!”
Add a treasure chest (shoebox + gold foil, sequins, or painted bottle tops) and let them fill it.
Swap pirates for explorers or mermaids or sea monsters so the story shifts instantly.
Hang a sail outside and let the wind do half the work.
Materials
Giant boxes (mechanic shops and appliance stores = pirate gold)
Cardboard tubes for masts and spyglasses
Old sheets or curtains for sails and flags
Duct tape or Makedo for strong joins
Poster paint or paint sticks (fast-dry is great for sails)
Brushes, rollers, sponges: big marks, fast coverage
Optional: ropes, planks, sequins, bottle tops for treasure
Back to Top
Smudge Pirate Ship
Ahoy! This ship runs on colour and chaos.
Bookmark
Installations
The Set Up
We’re lucky at Smudge to be surrounded by brilliant local businesses who share their boxes with us. The mechanic out the back is gold. Those huge car-part boxes became the base of our pirate ship (a little tricky to drag through the alley myself, but definitely worth it!).
A few joins with duct tape or Makedo tools and suddenly, ship shape.
The rest is simple. A cardboard tube for a mast, an old curtain for a sail, maybe a flag or a plank if you have time. The beauty of a build like this is how little it takes for kids to believe in it. Once they climb in, the play does the rest.
Poster paint with a glug of white works beautifully, or use paint sticks for fast, bright coverage.
The Making
The ship only needs a hint of colour before it comes to life. Installation pieces like this invite children to work together, move through their creation and fill the space with their own stories. The making is less about the ship itself and more about giving them a space big enough for imagination to steer.
Variations
Roll up cardboard tubes into spyglasses and spot “land ahead!”
Add a treasure chest (shoebox + gold foil, sequins, or painted bottle tops) and let them fill it.
Swap pirates for explorers or mermaids or sea monsters so the story shifts instantly.
Hang a sail outside and let the wind do half the work.
Materials
Giant boxes (mechanic shops and appliance stores = pirate gold)
Cardboard tubes for masts and spyglasses
Old sheets or curtains for sails and flags
Duct tape or Makedo for strong joins
Poster paint or paint sticks (fast-dry is great for sails)
Brushes, rollers, sponges: big marks, fast coverage
Optional: ropes, planks, sequins, bottle tops for treasure
Back to Top
Ken Done Inspired
Big colour, bold marks, and a reef that glows like Ken Done.
Bookmark
Painting & Drawing
The Set Up
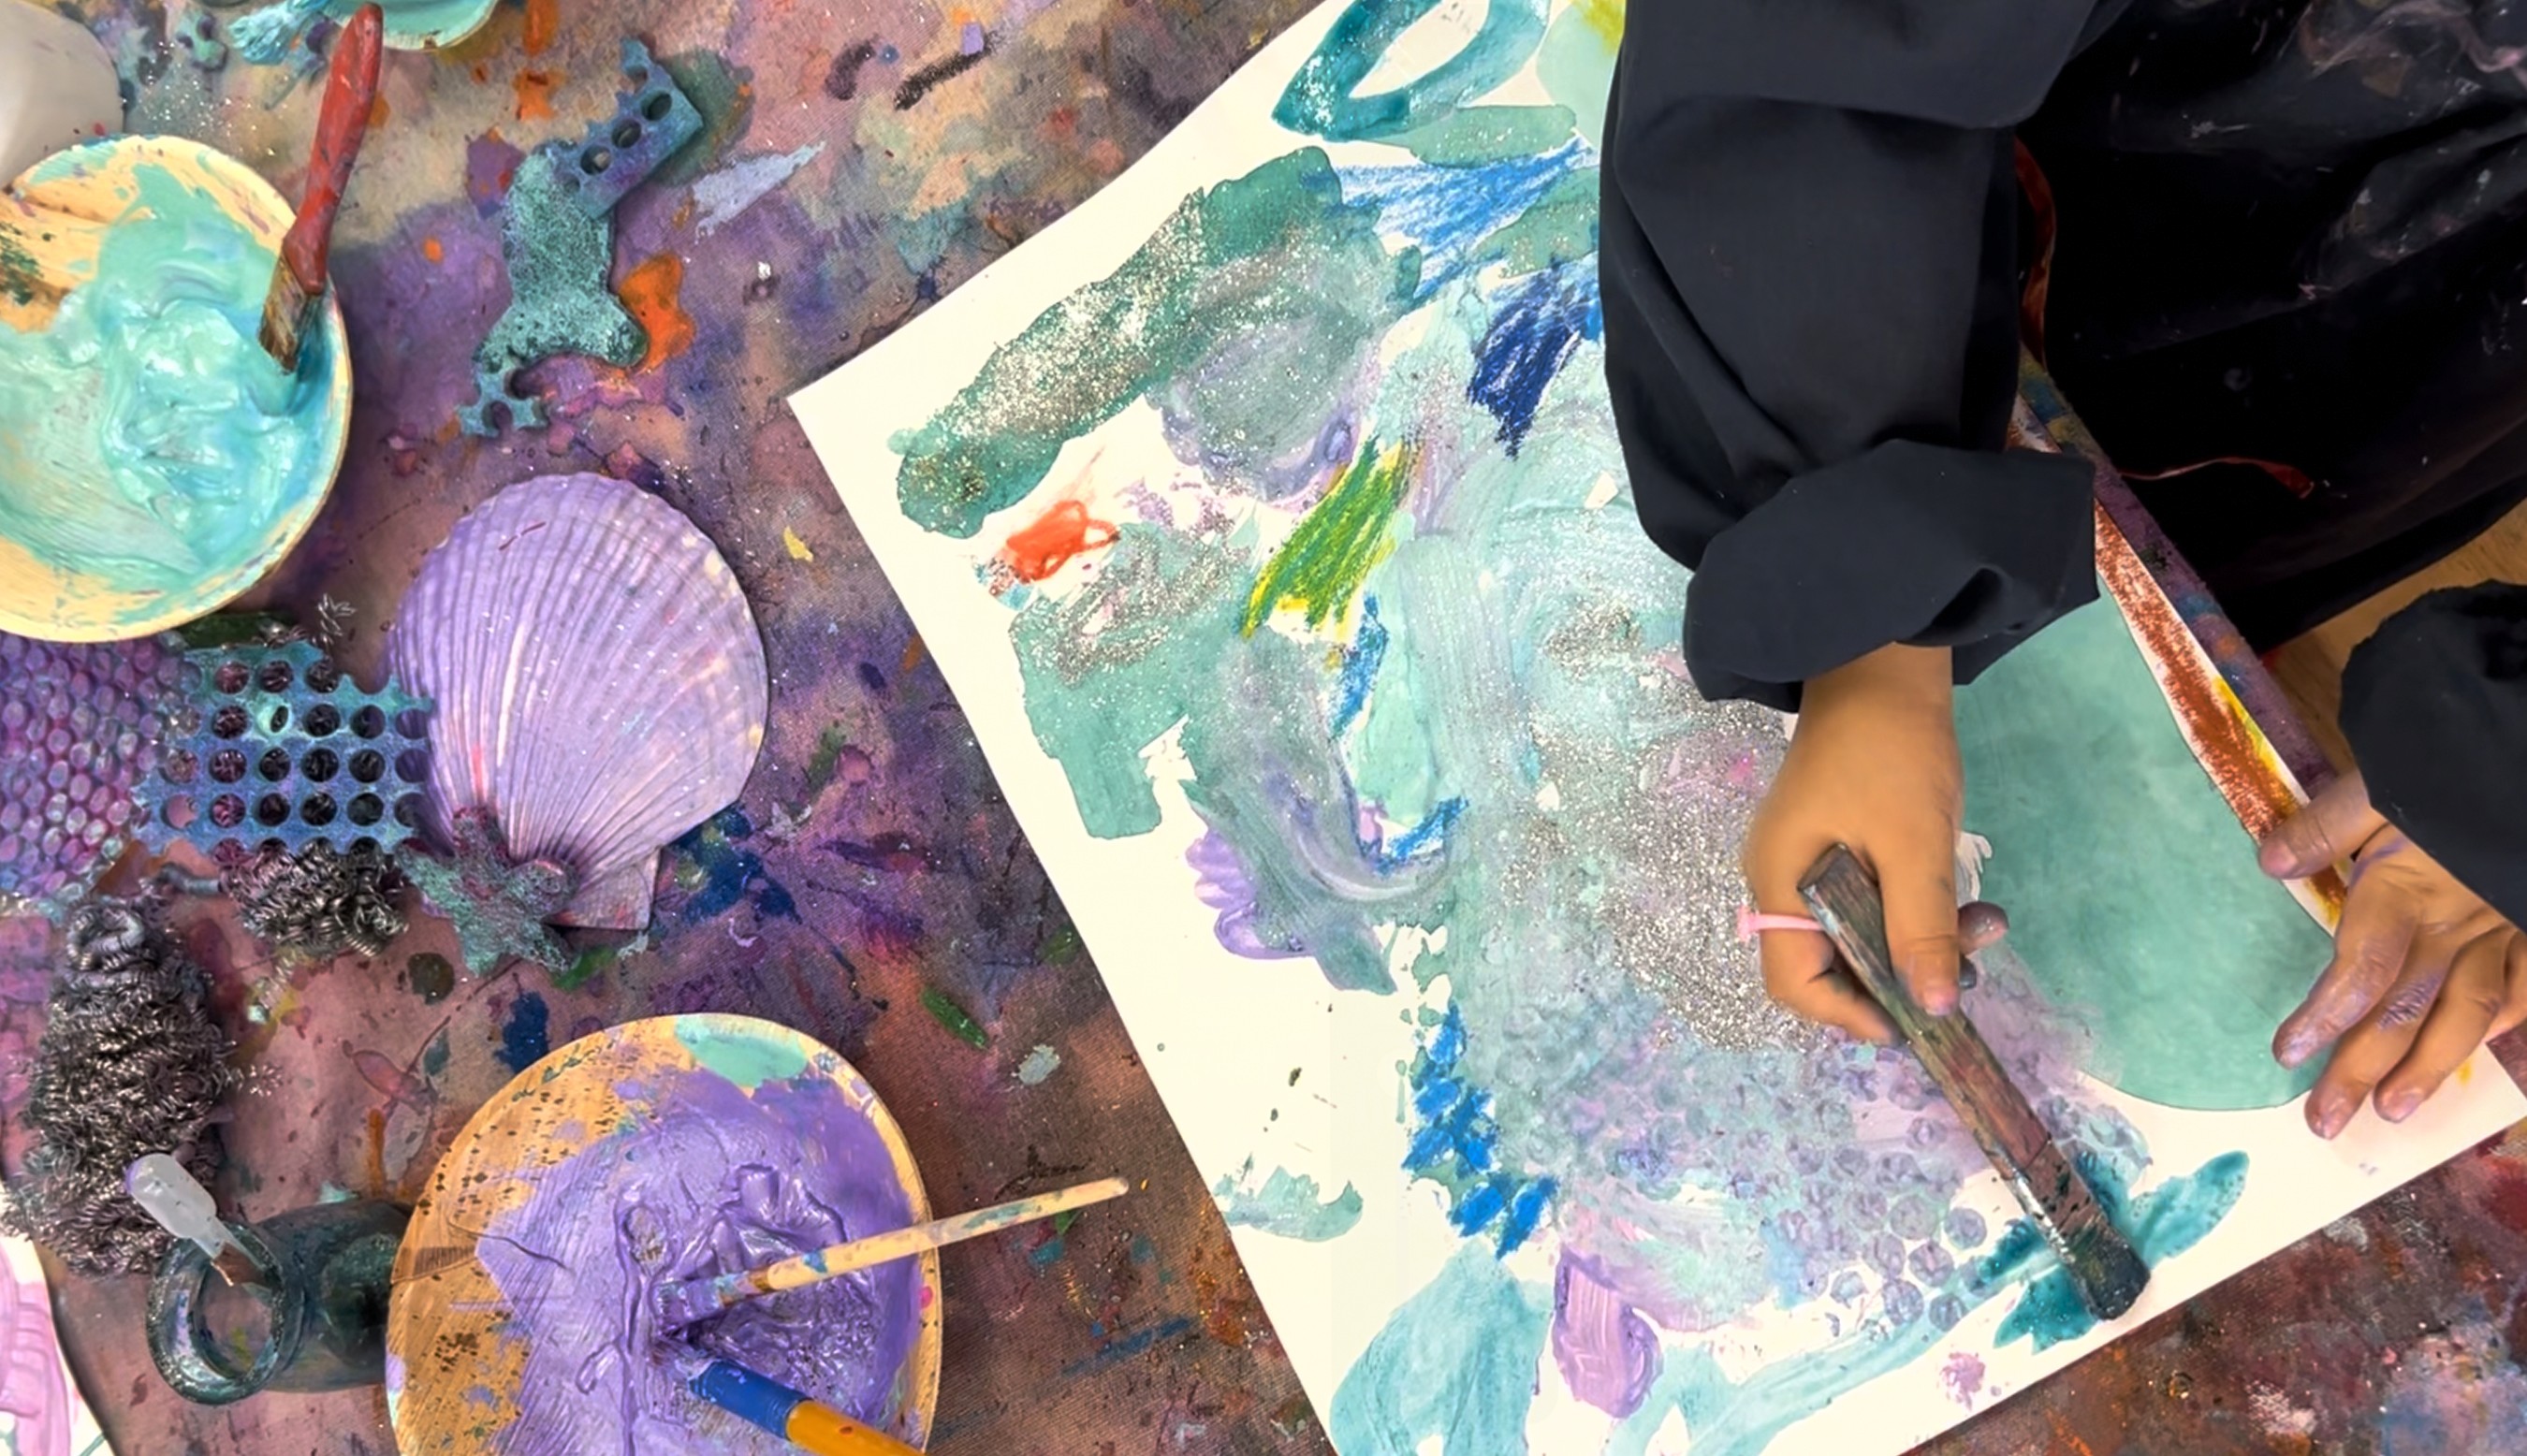
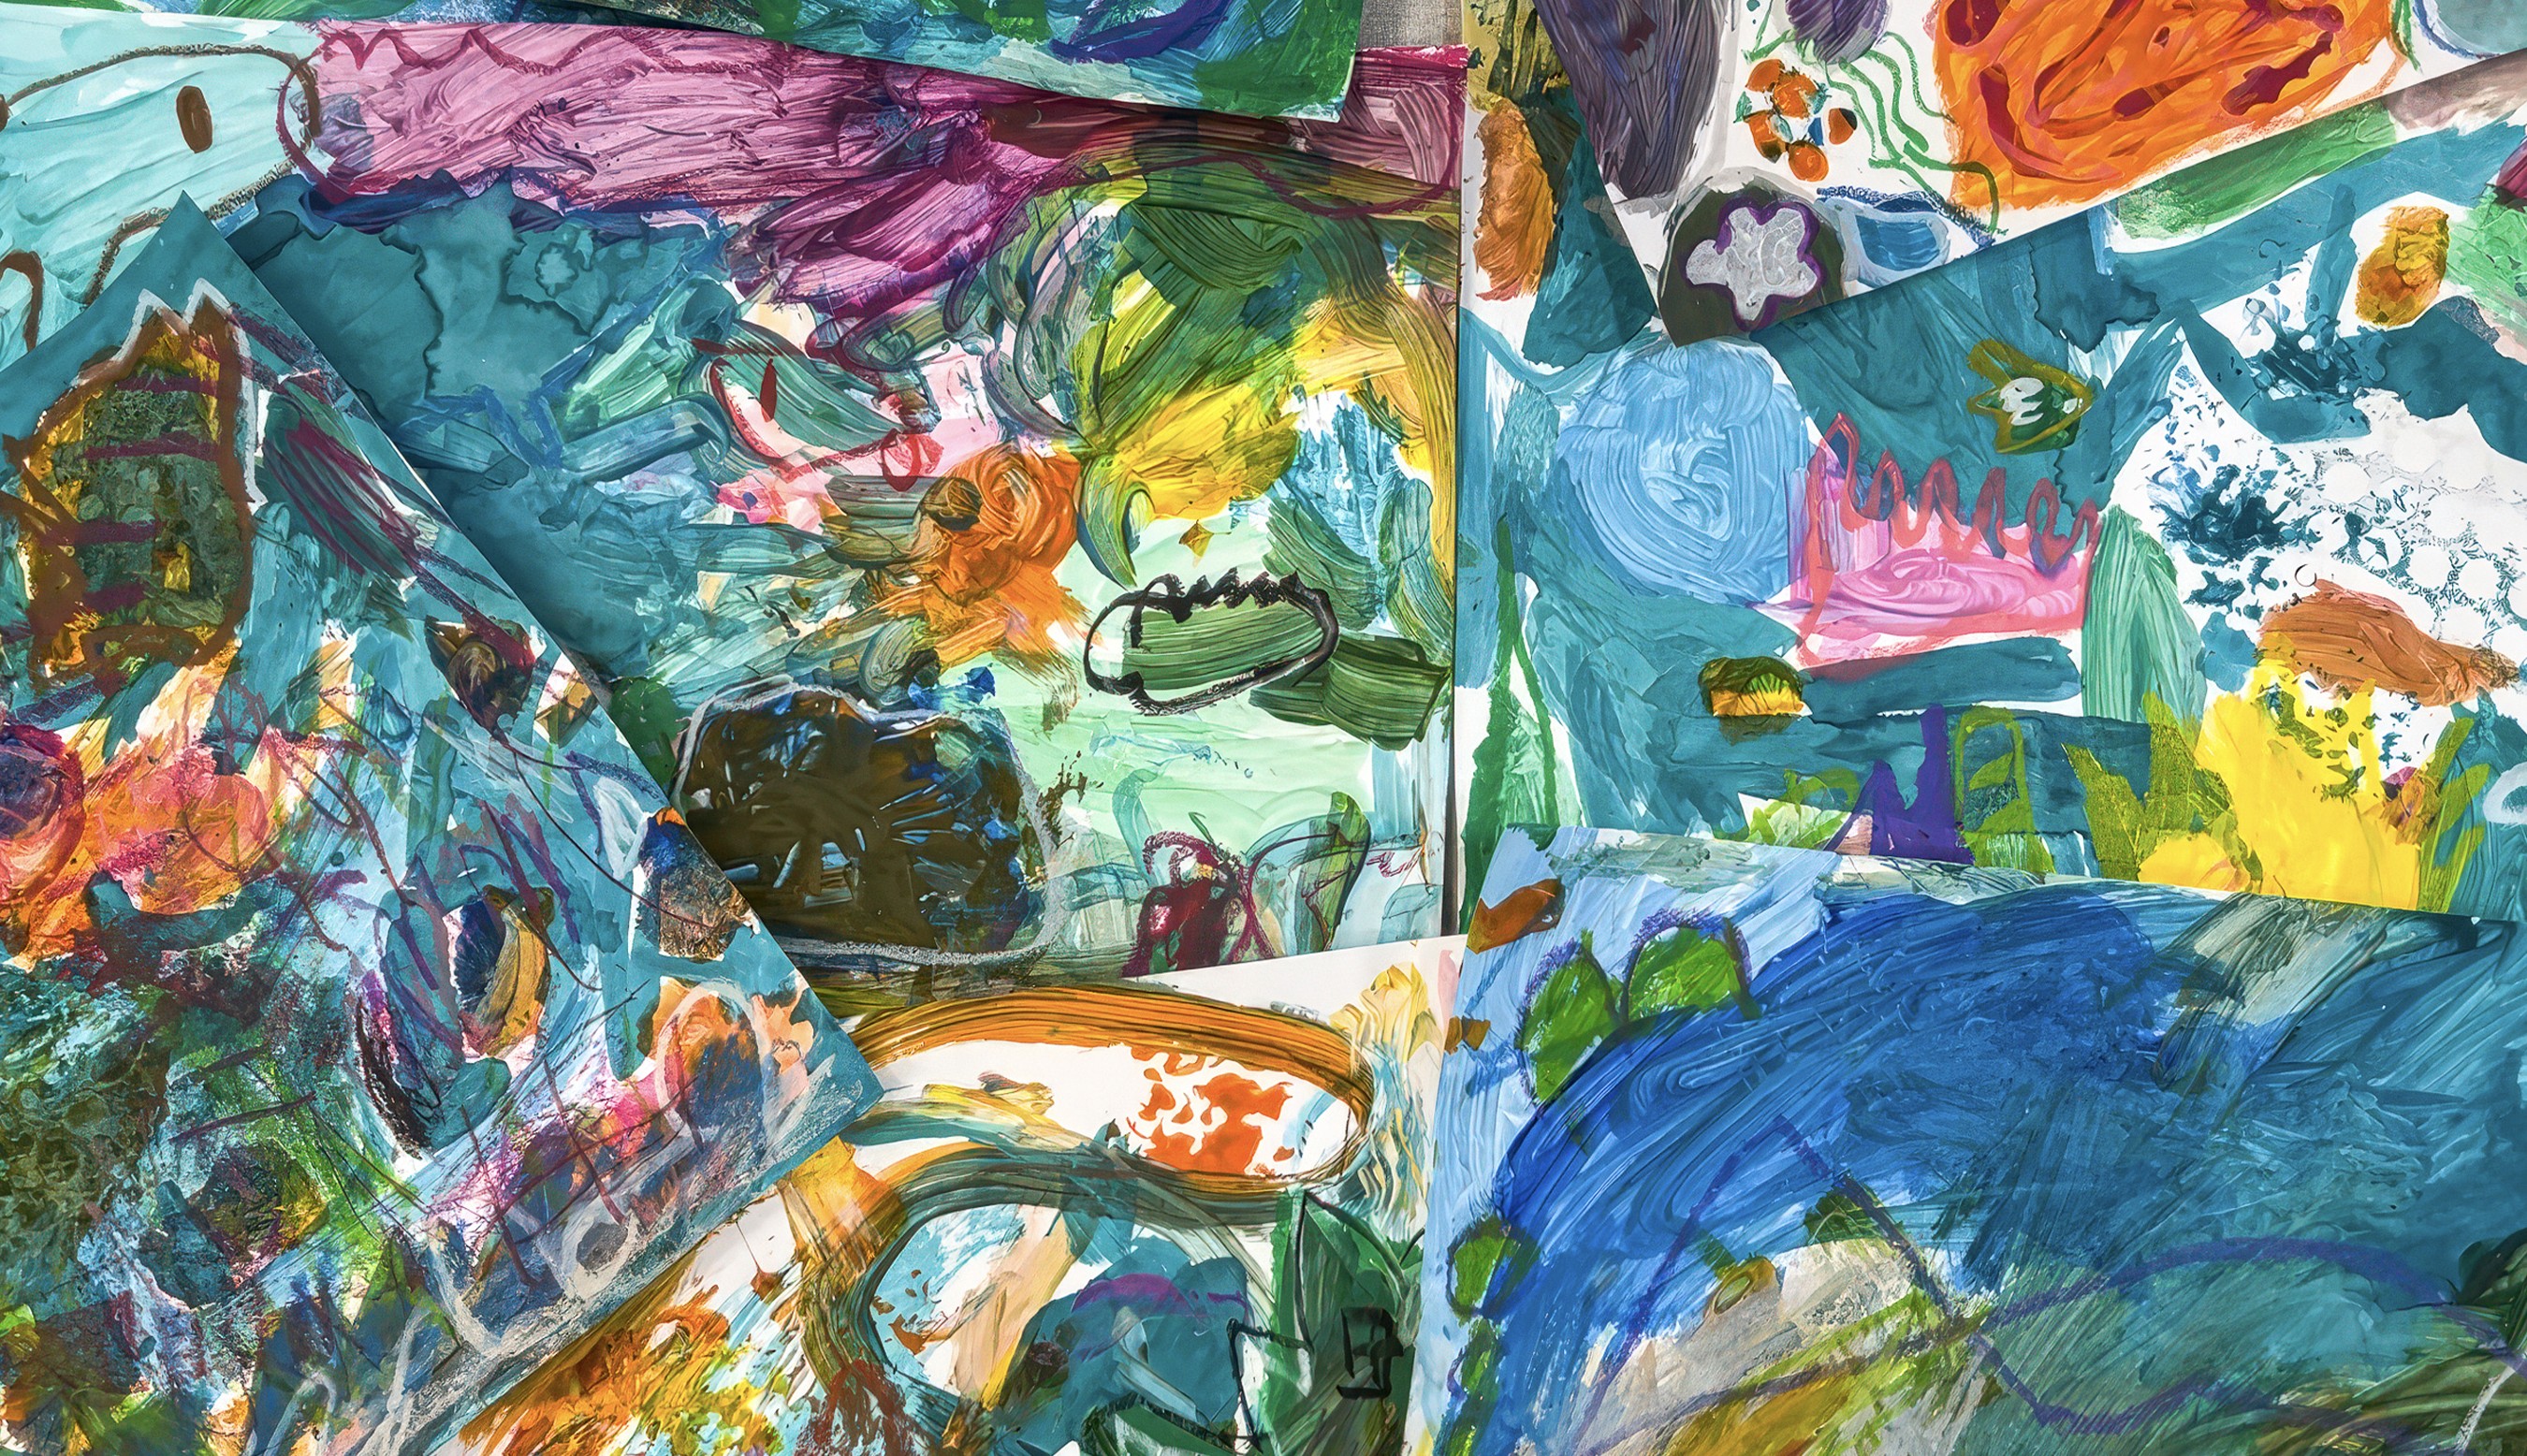
Ken Done is an Australian icon: artist, author, ocean-lover, and master of colour! His work absolutely bursts with energy. Beaches and reefs and harbours and coastlines that feel alive with texture and joy. That spirit is exactly what we’re channelling here.
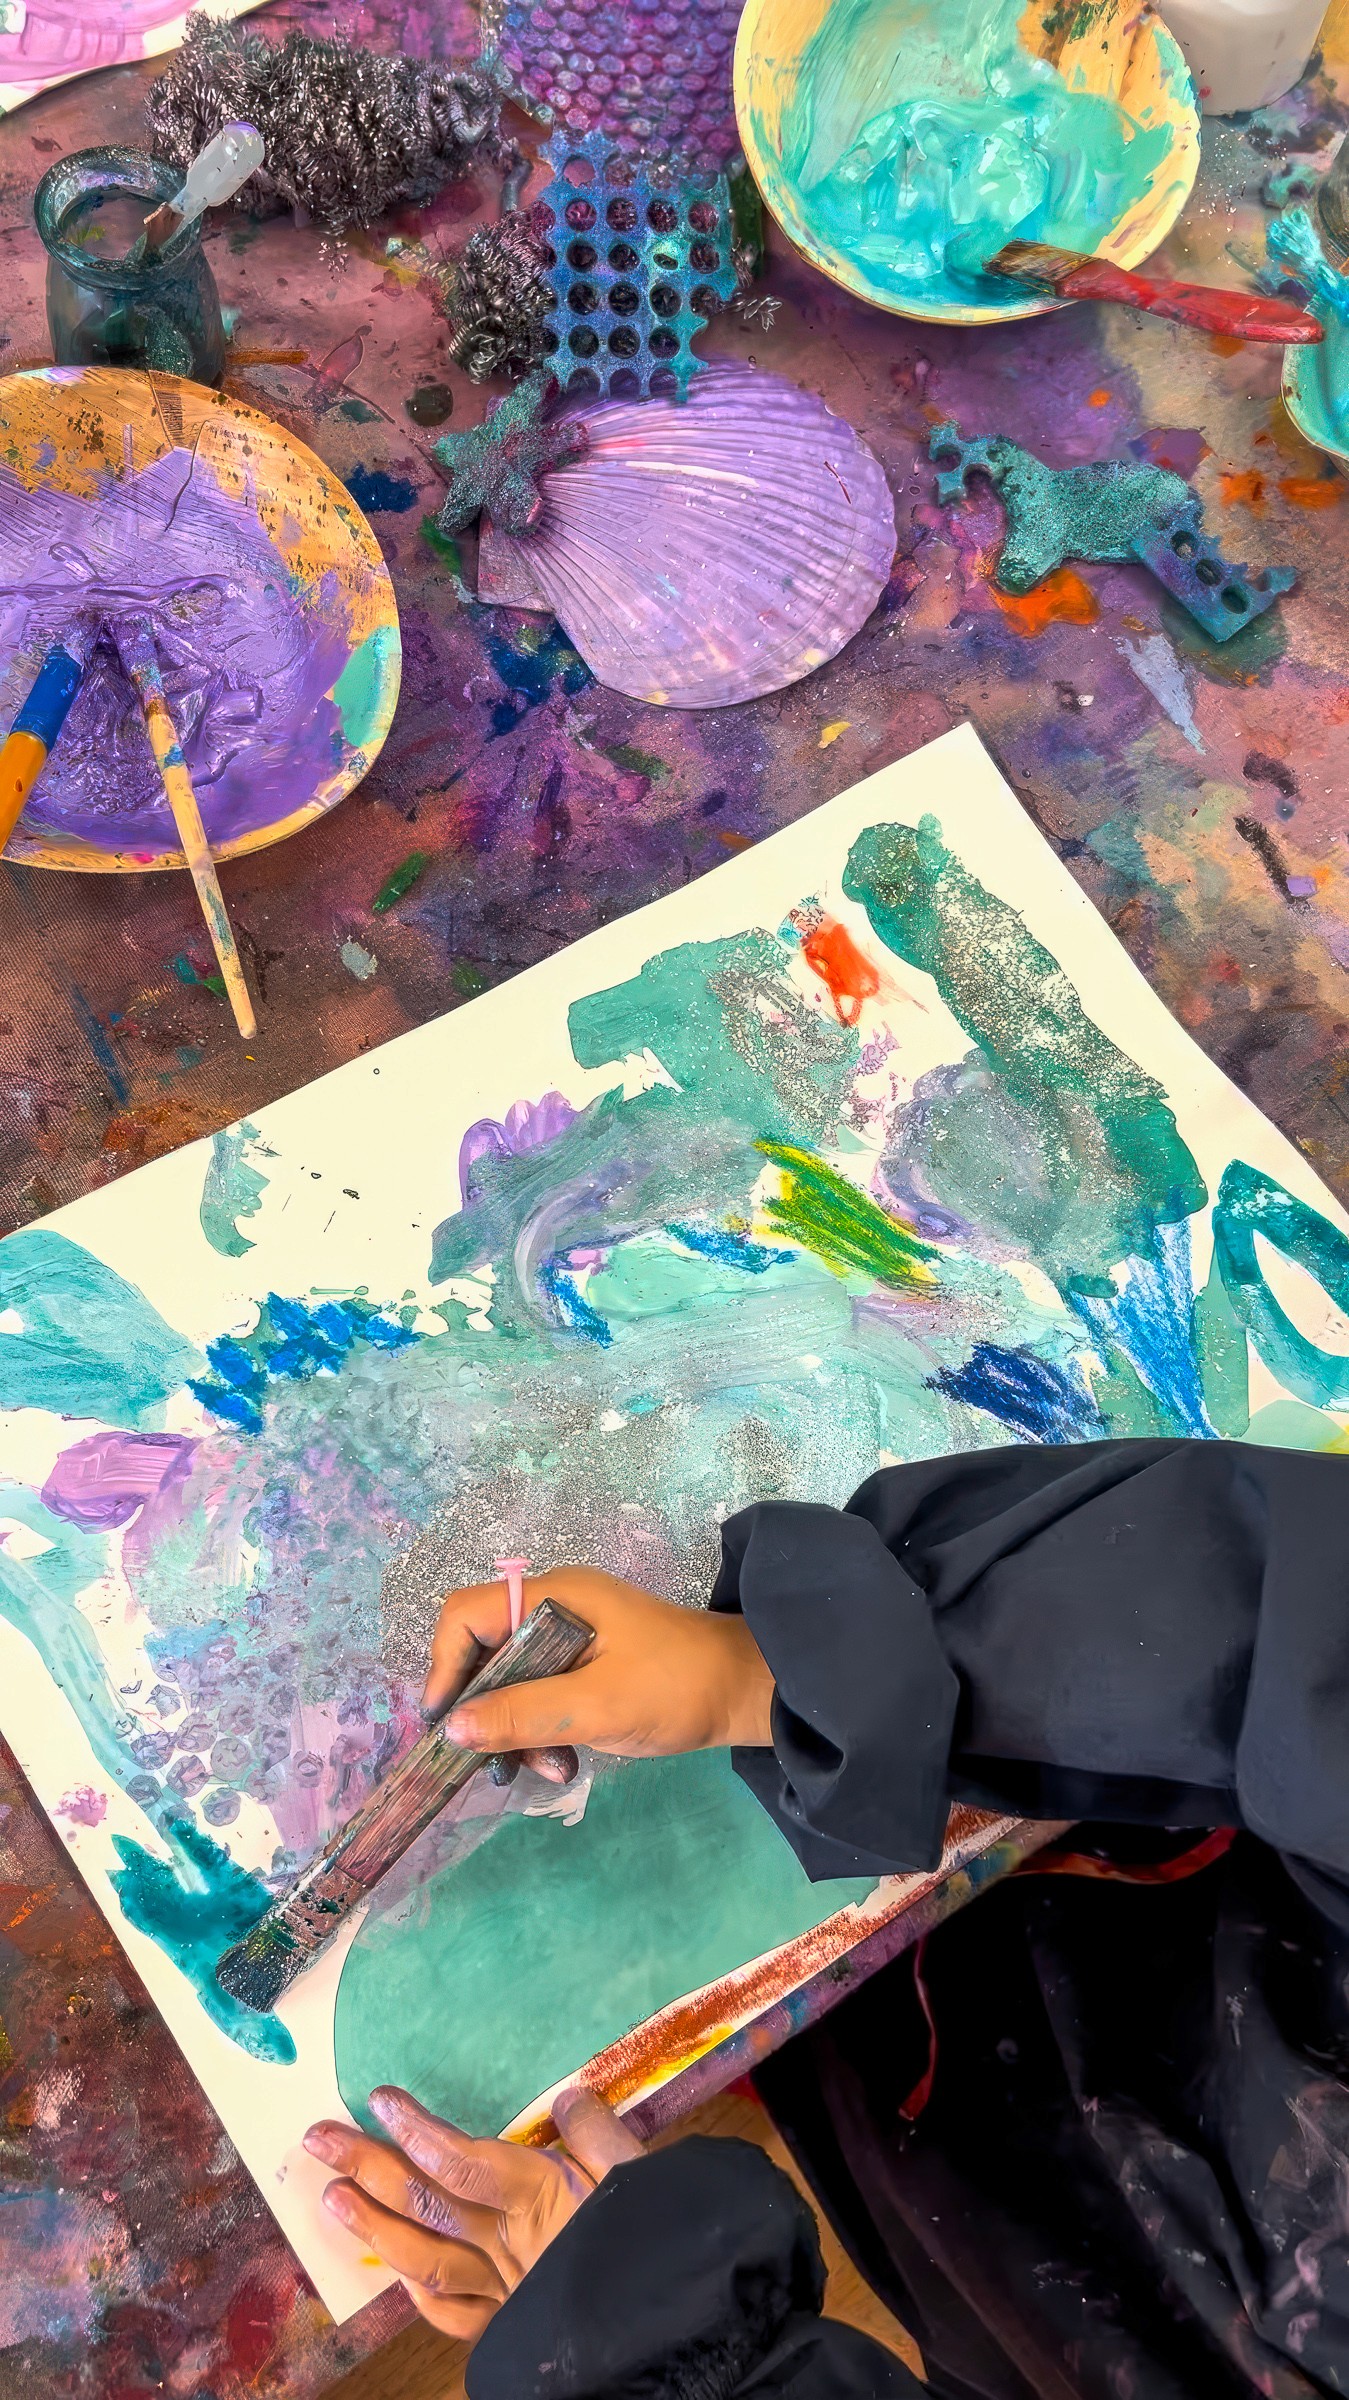
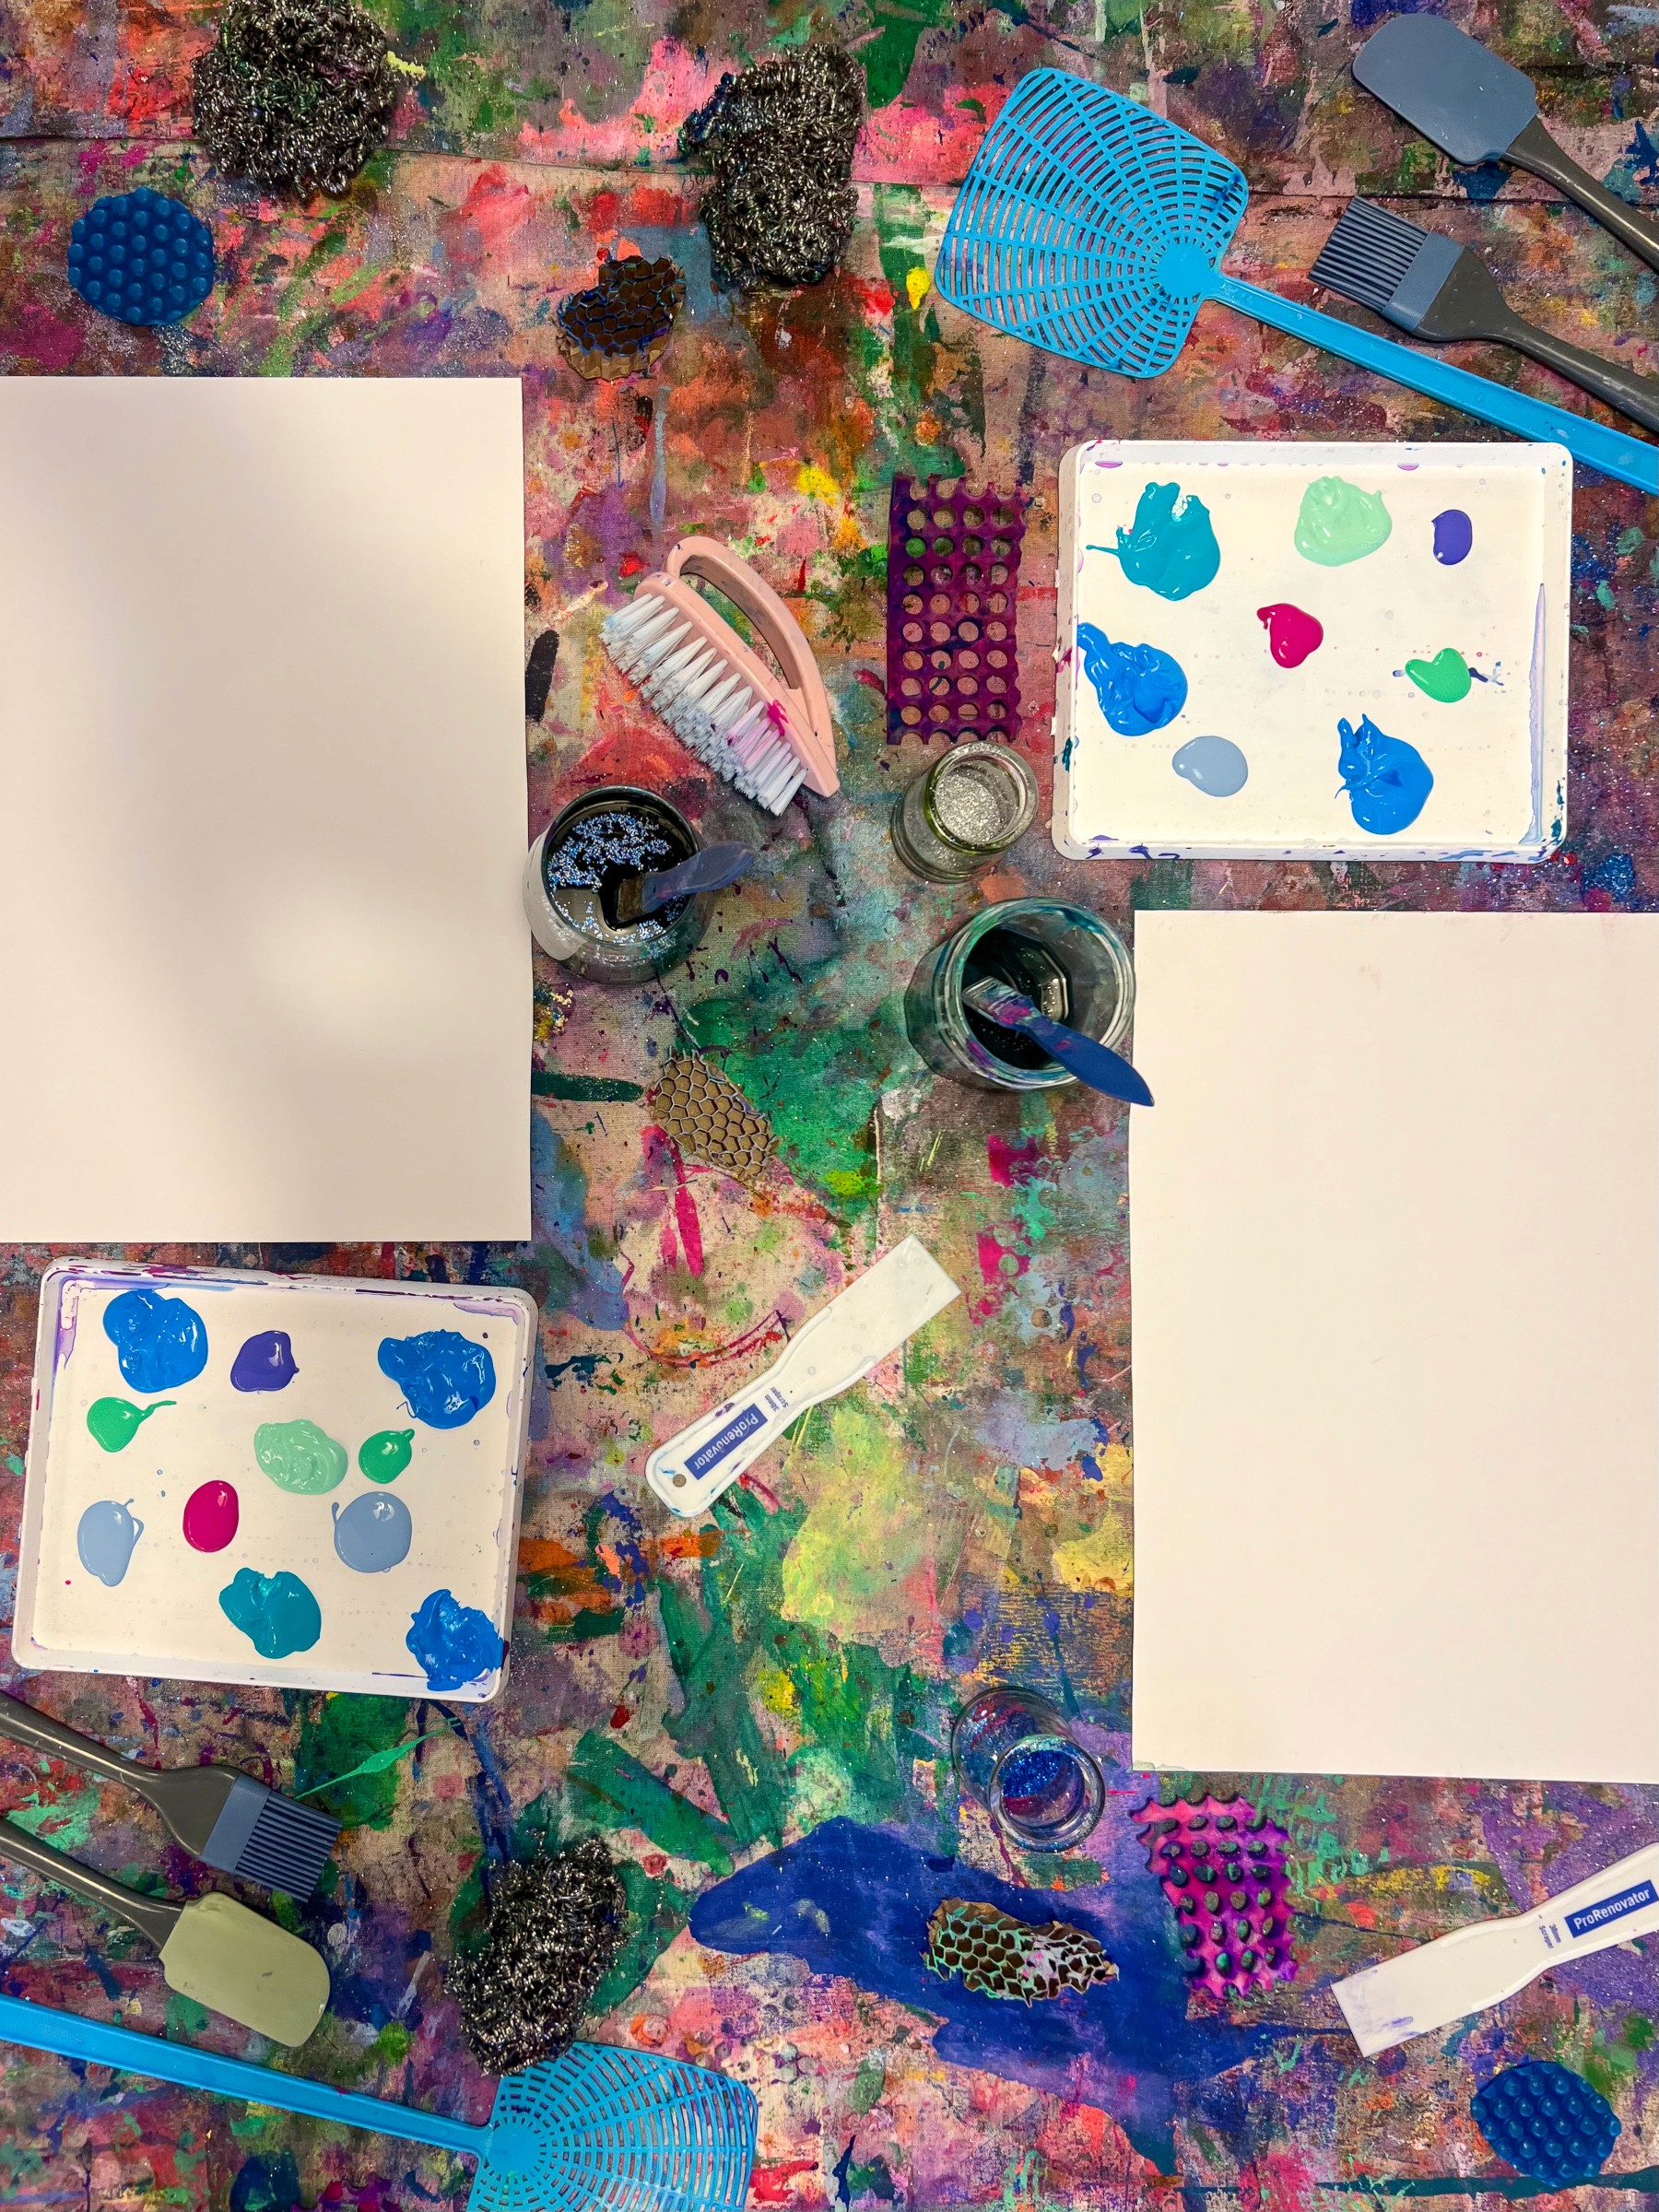
Set your table like a reef: a spread of materials that shimmer, splash, and surprise.
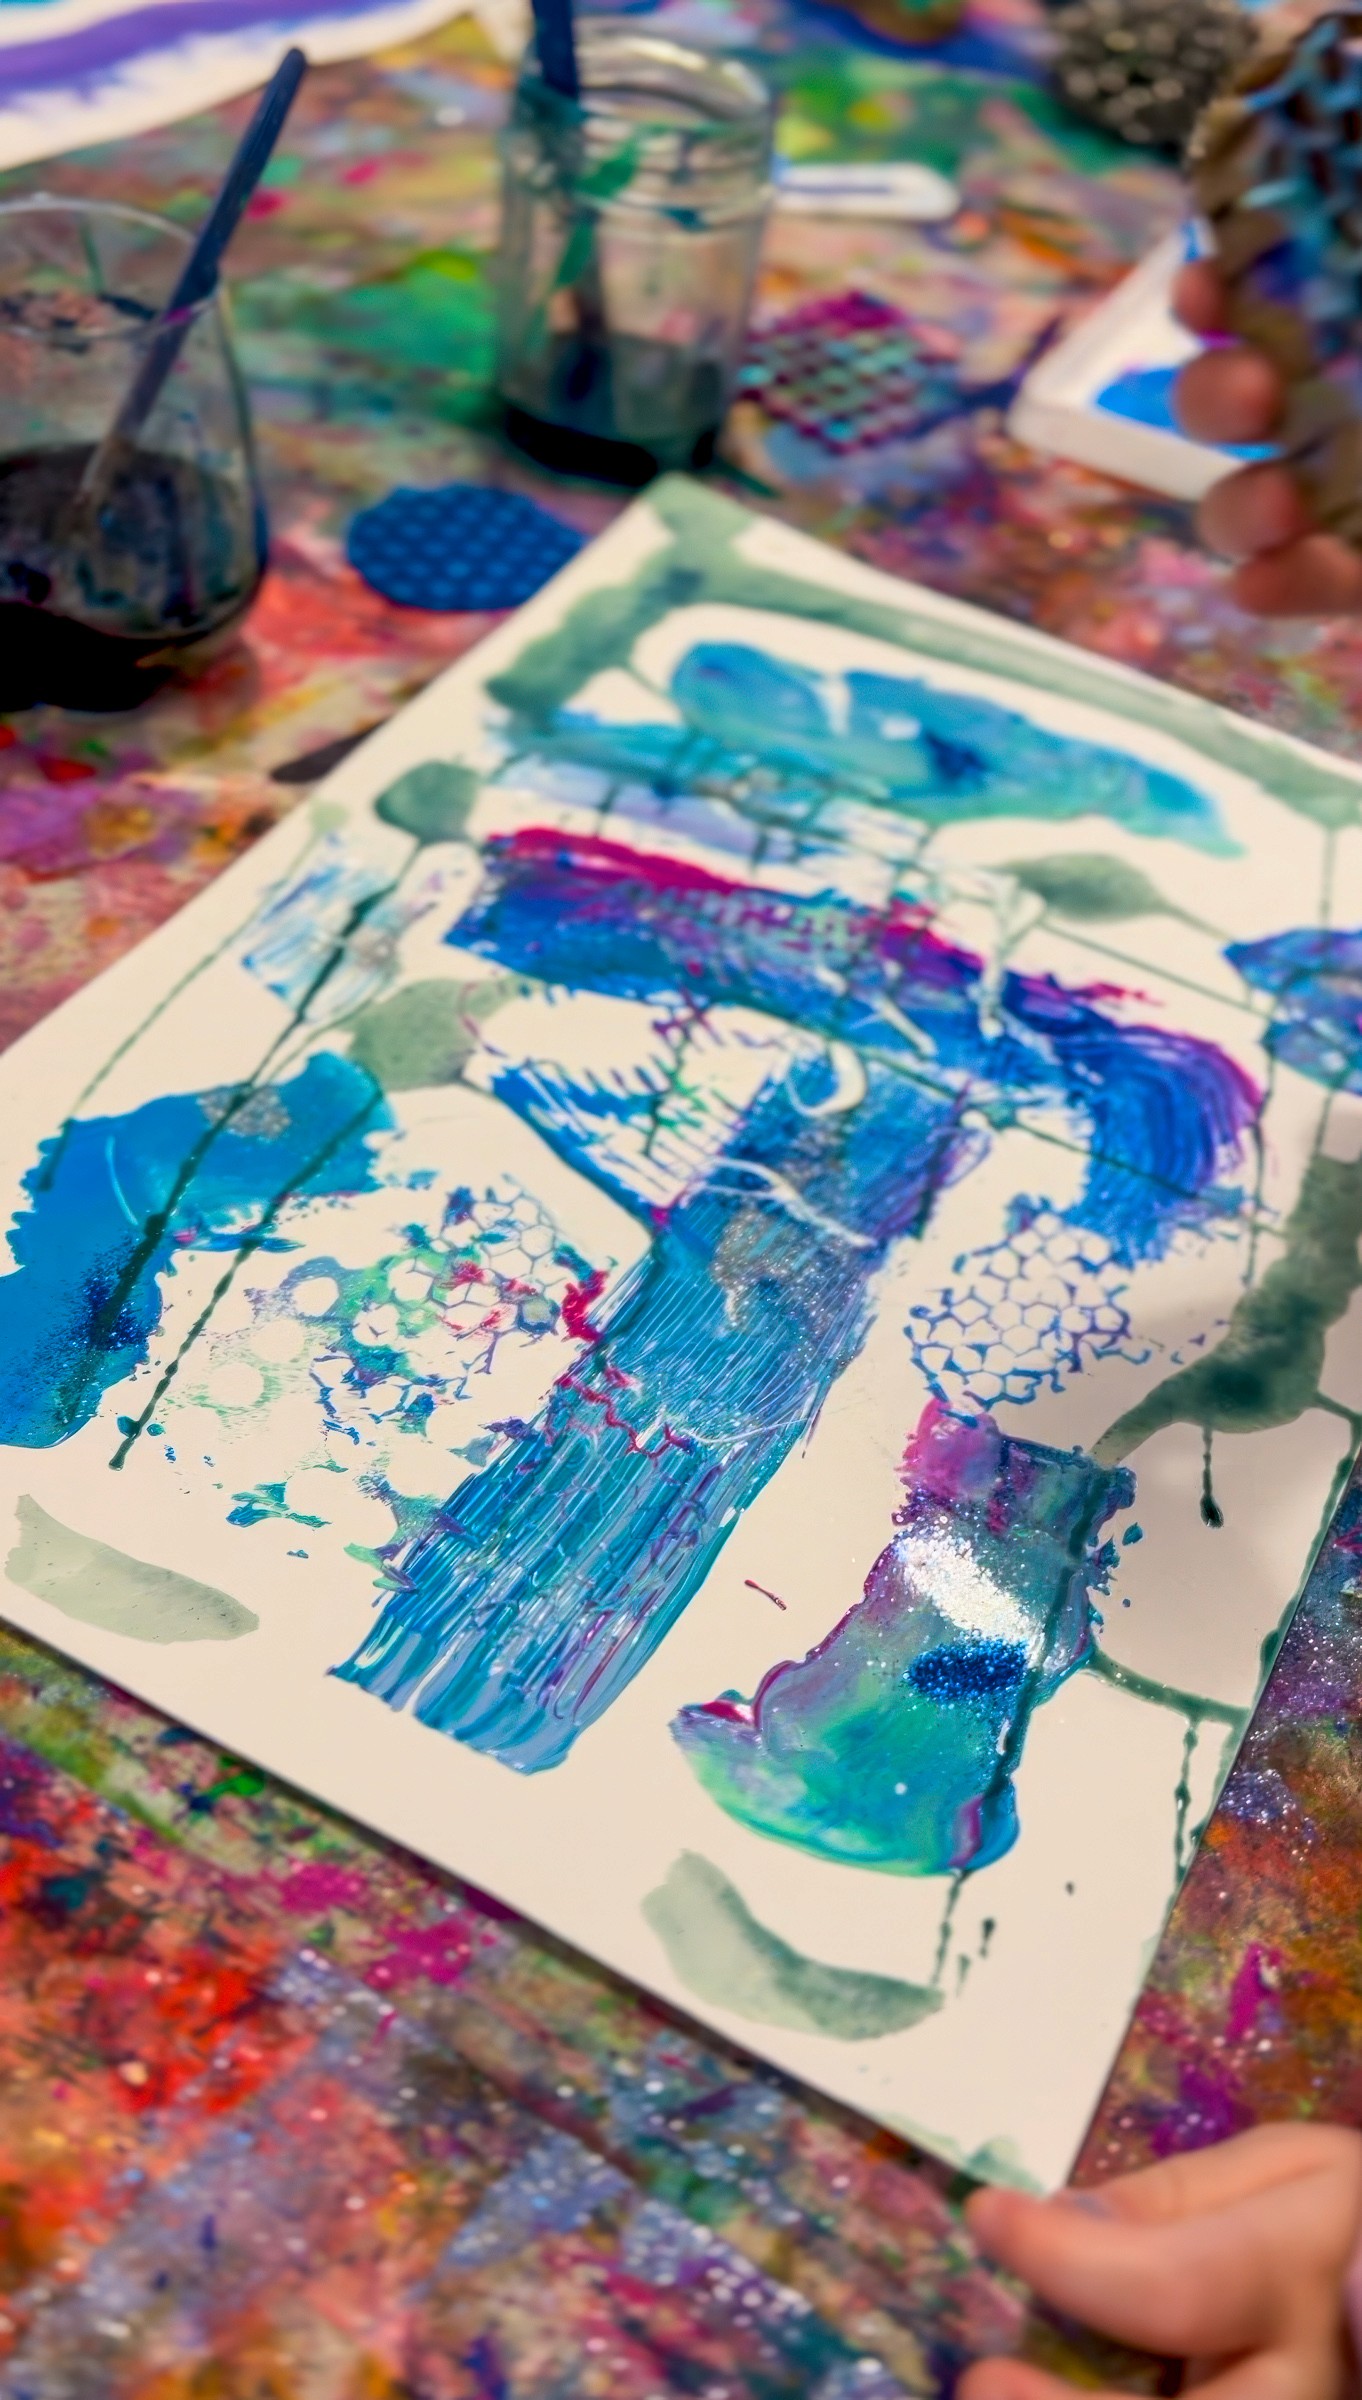
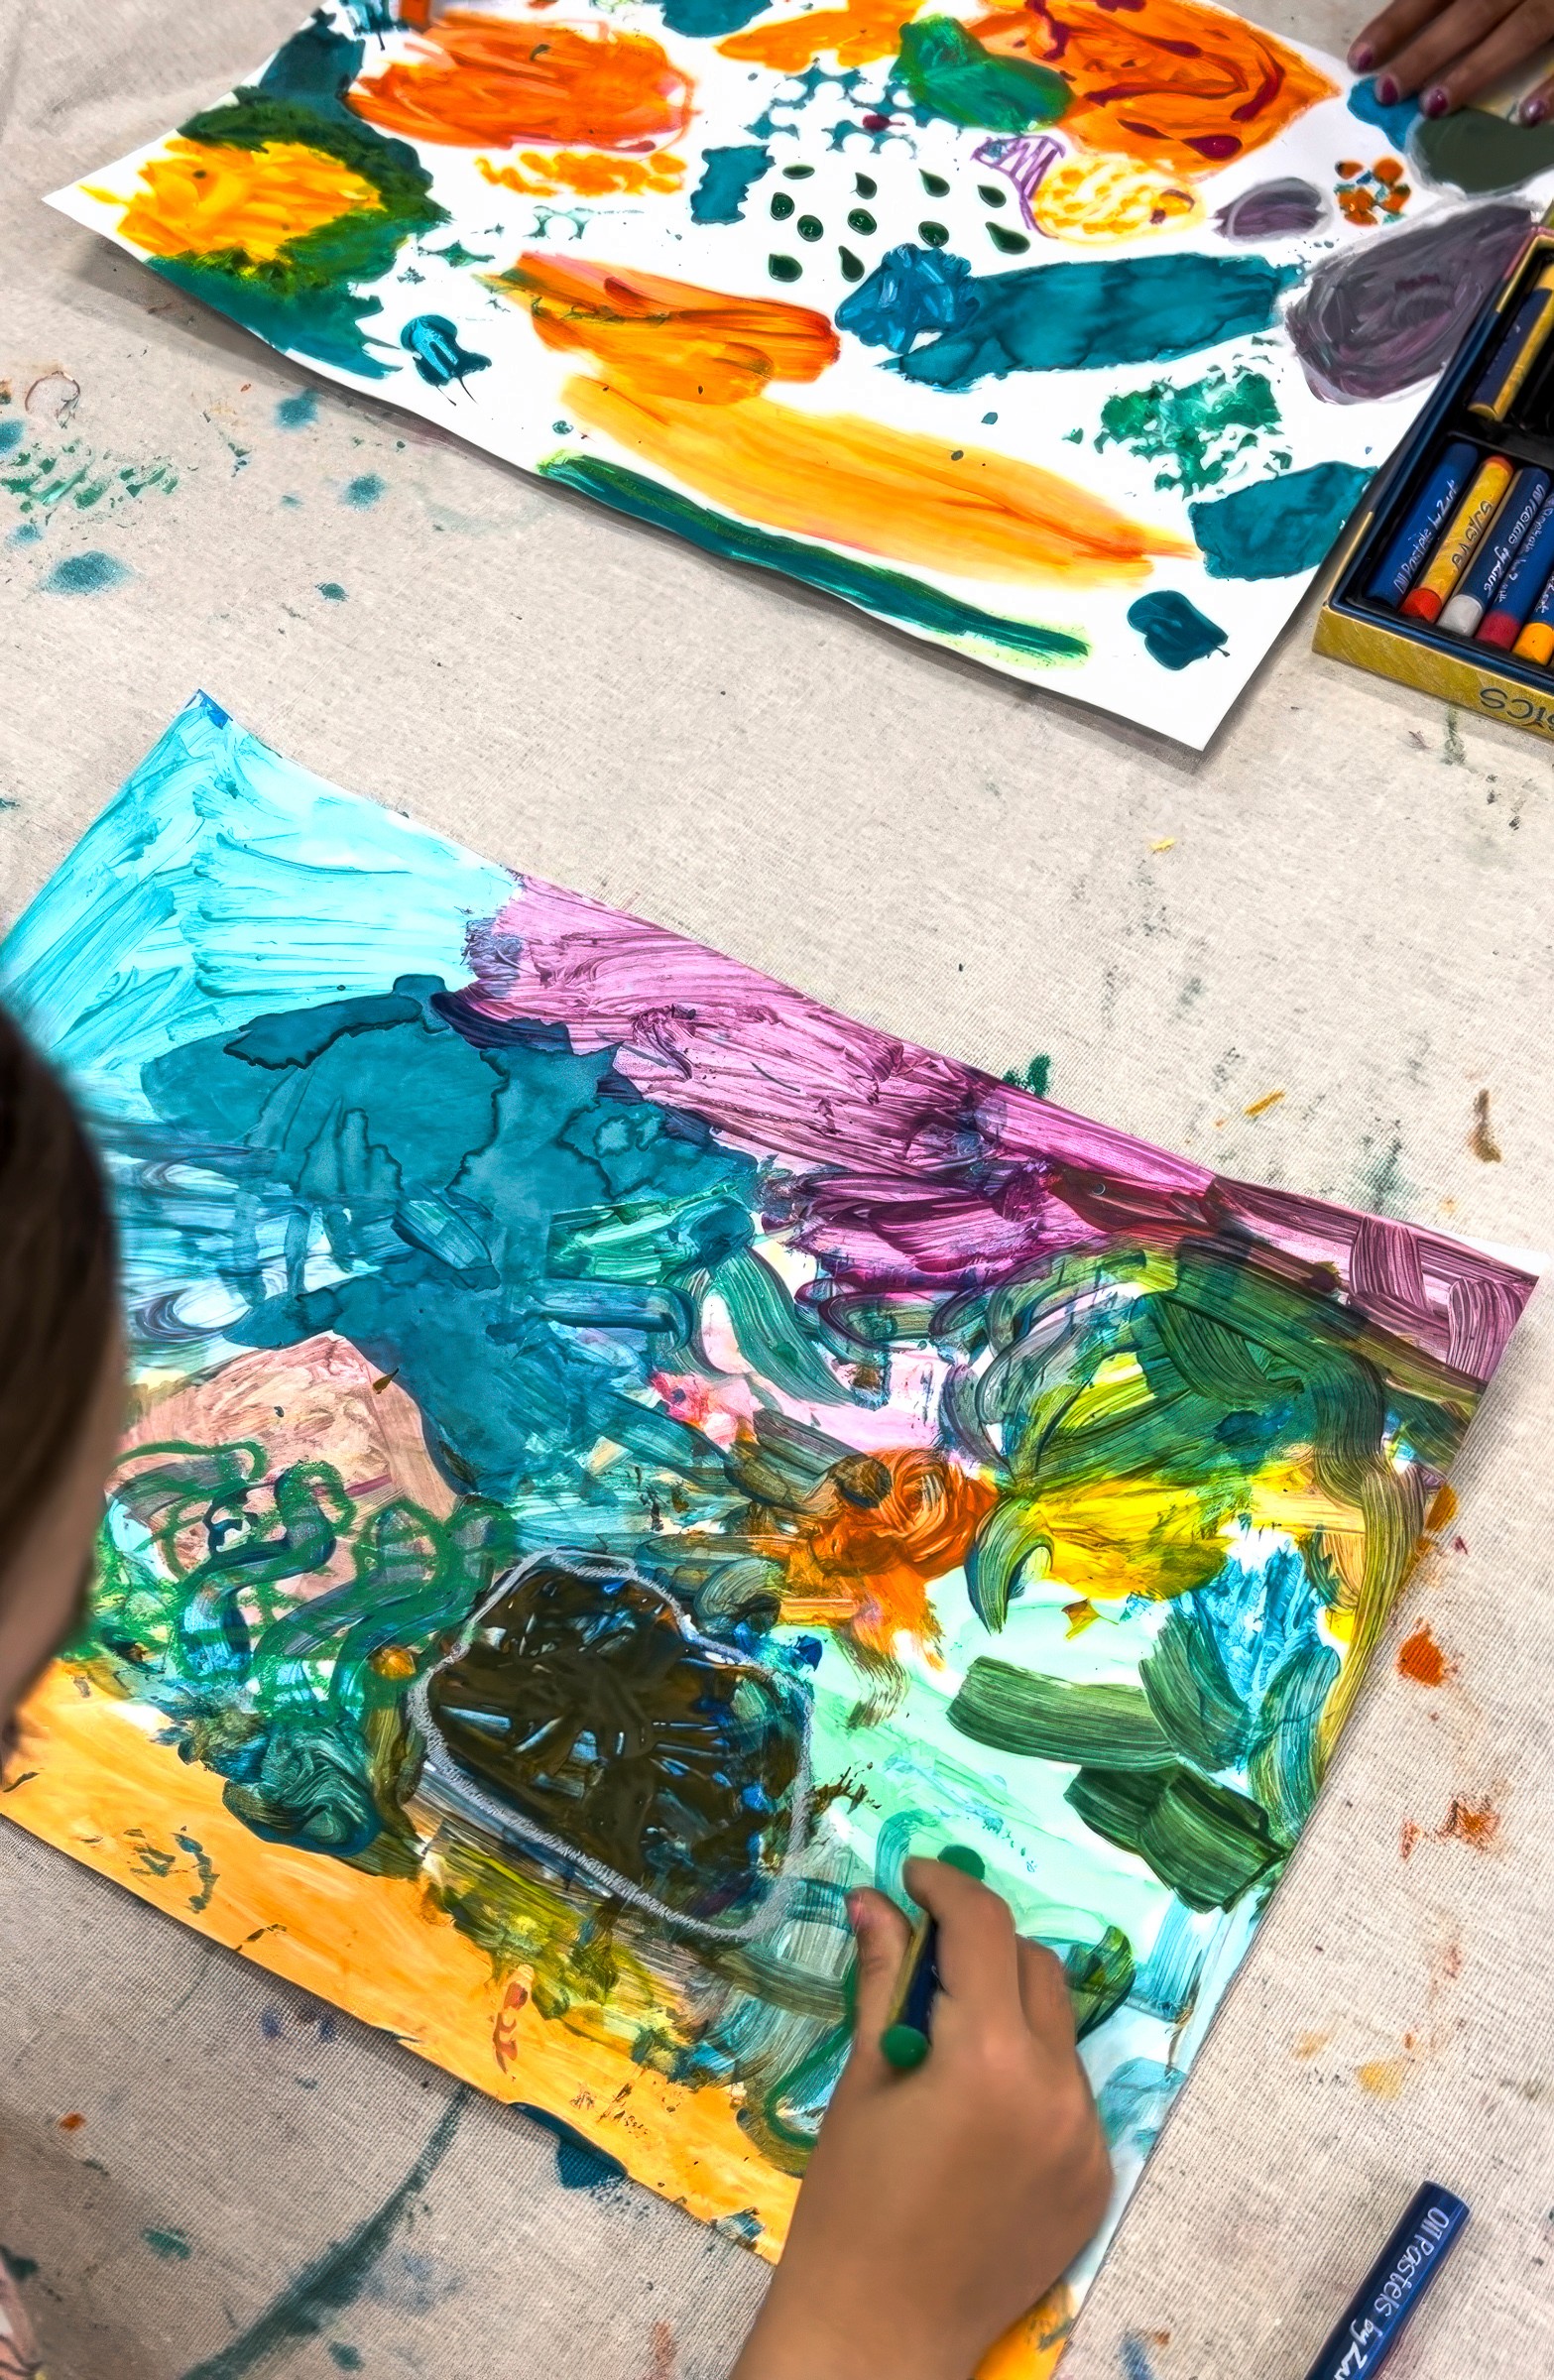
Poster paints (pearlescent ones are magic for the water), liquid watercolours, and oil pastels. Add glitter, markers, and all the tools for making unusual marks like bubble wrap, scourers, sponges (cut into fish shapes if you like), shells, packing foam, loufas, pipettes.
The more variety, the more chance for discovery!

The Making
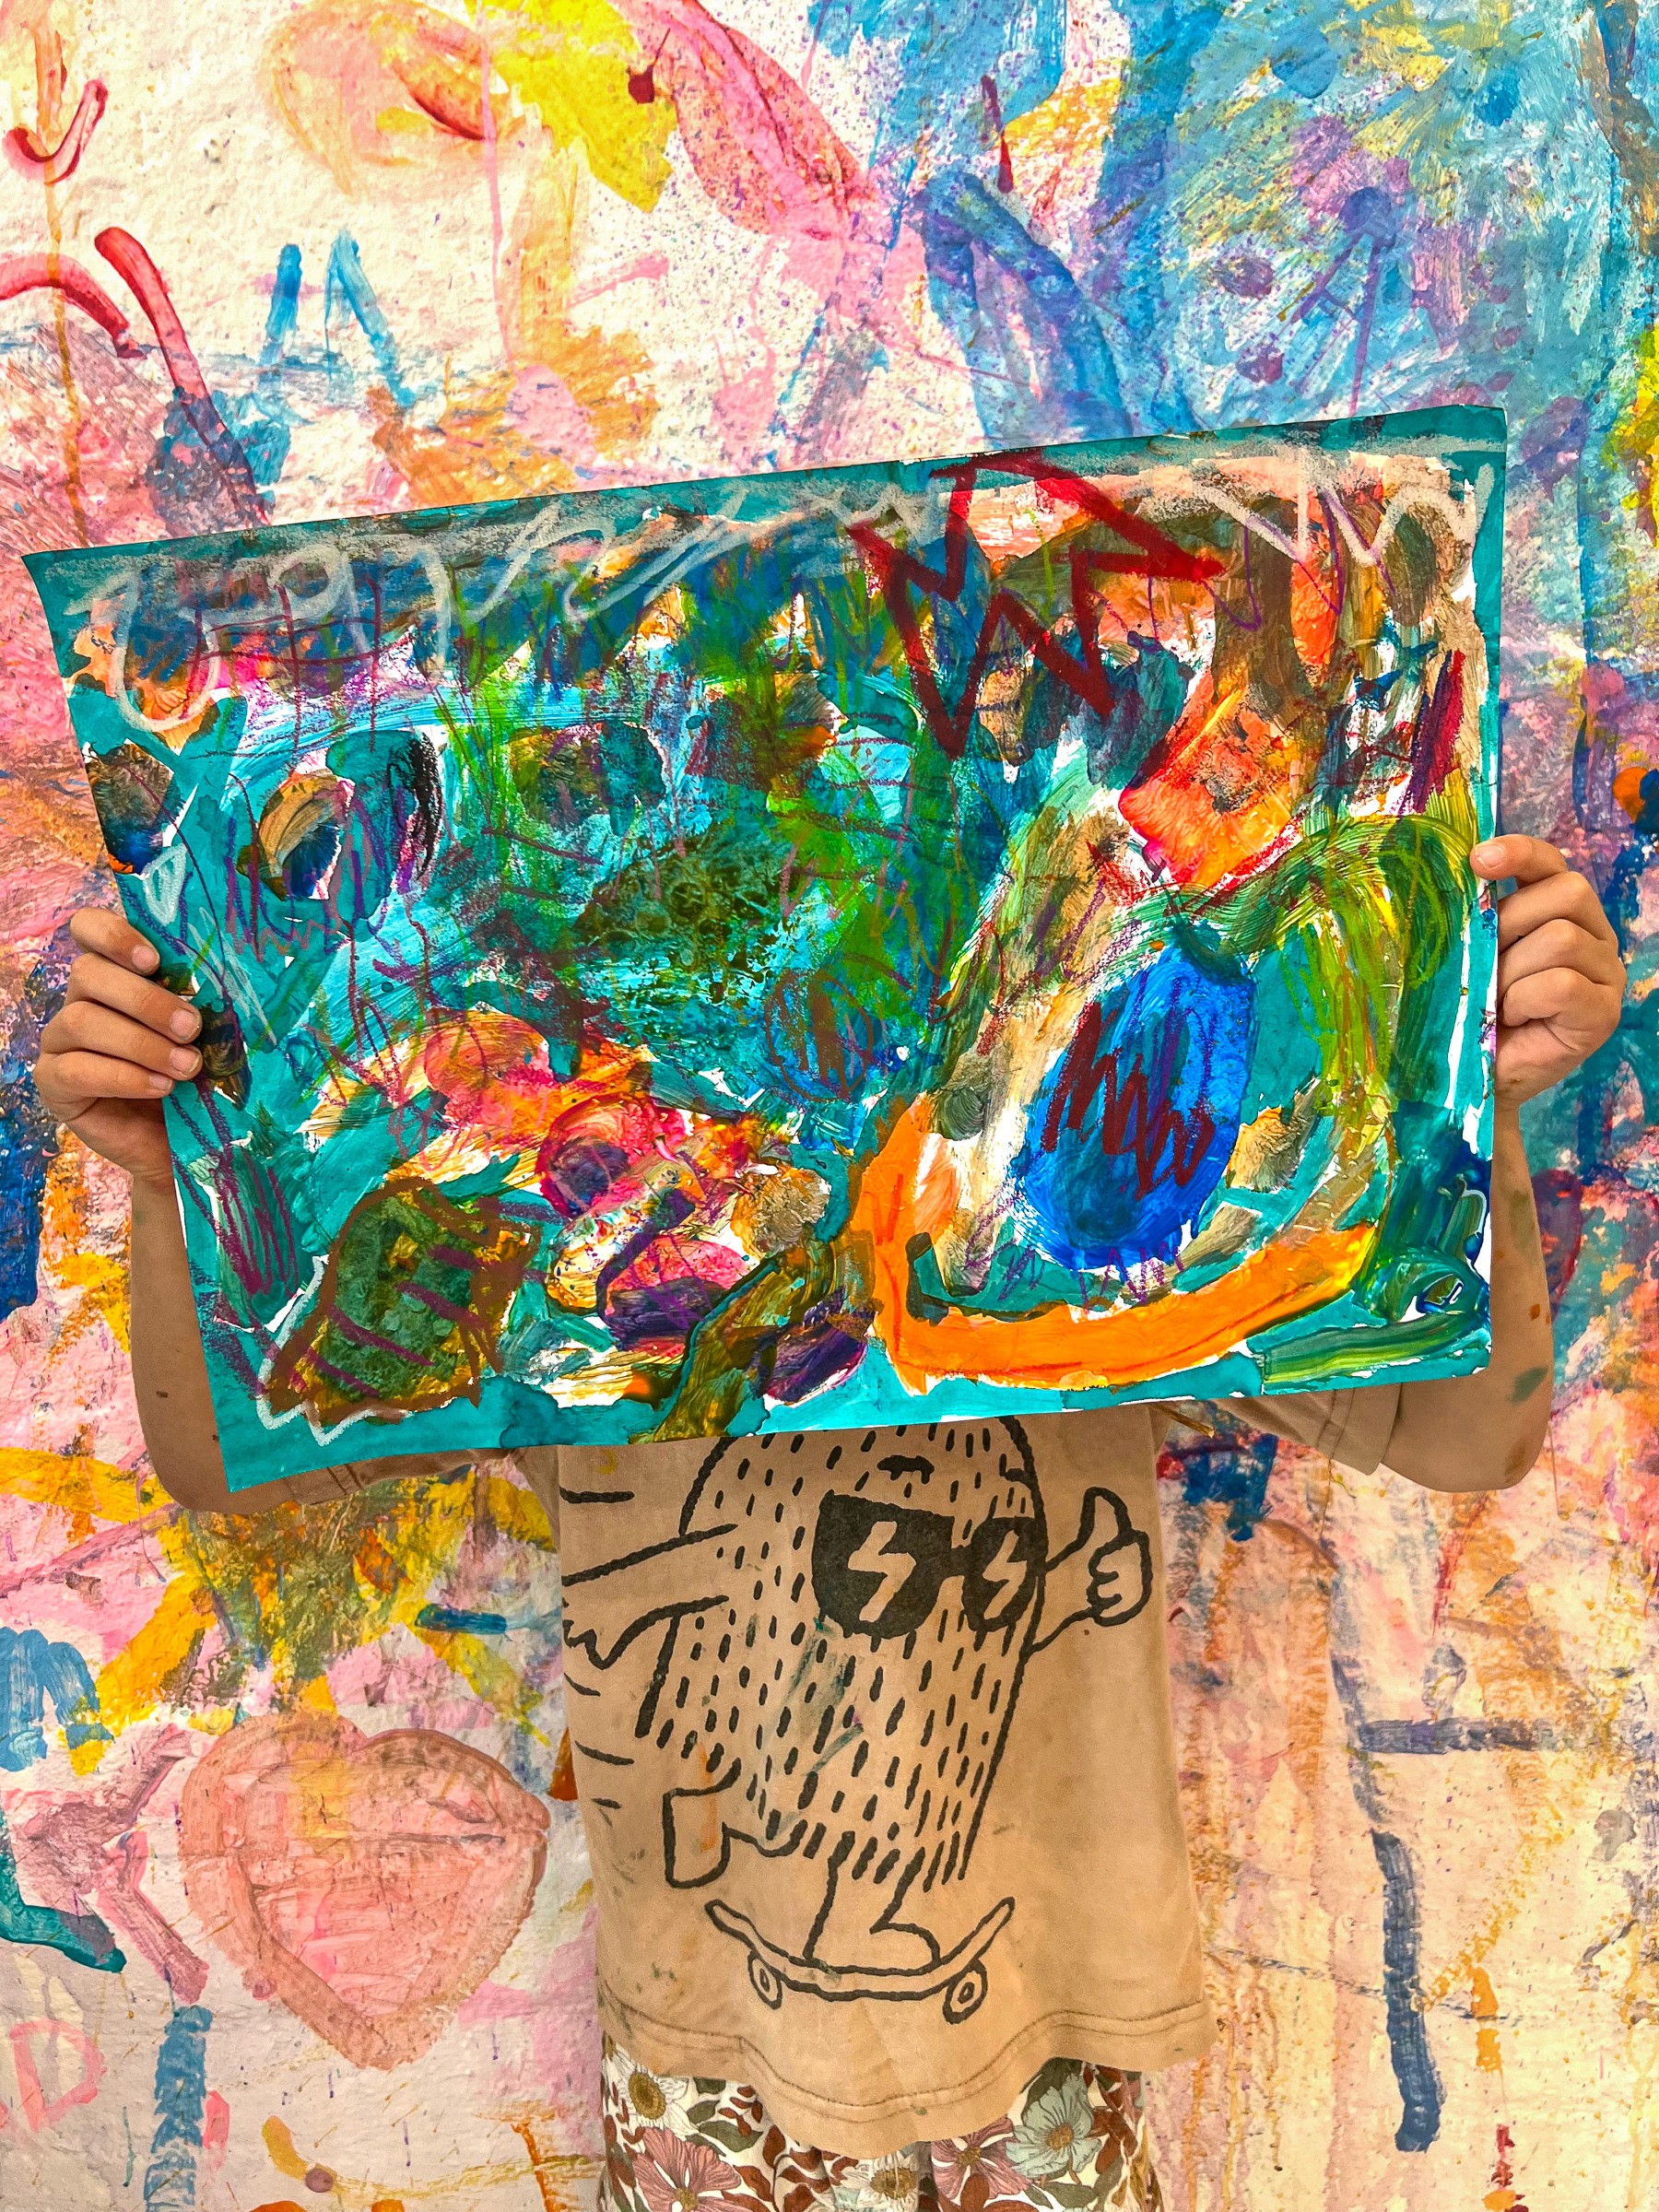
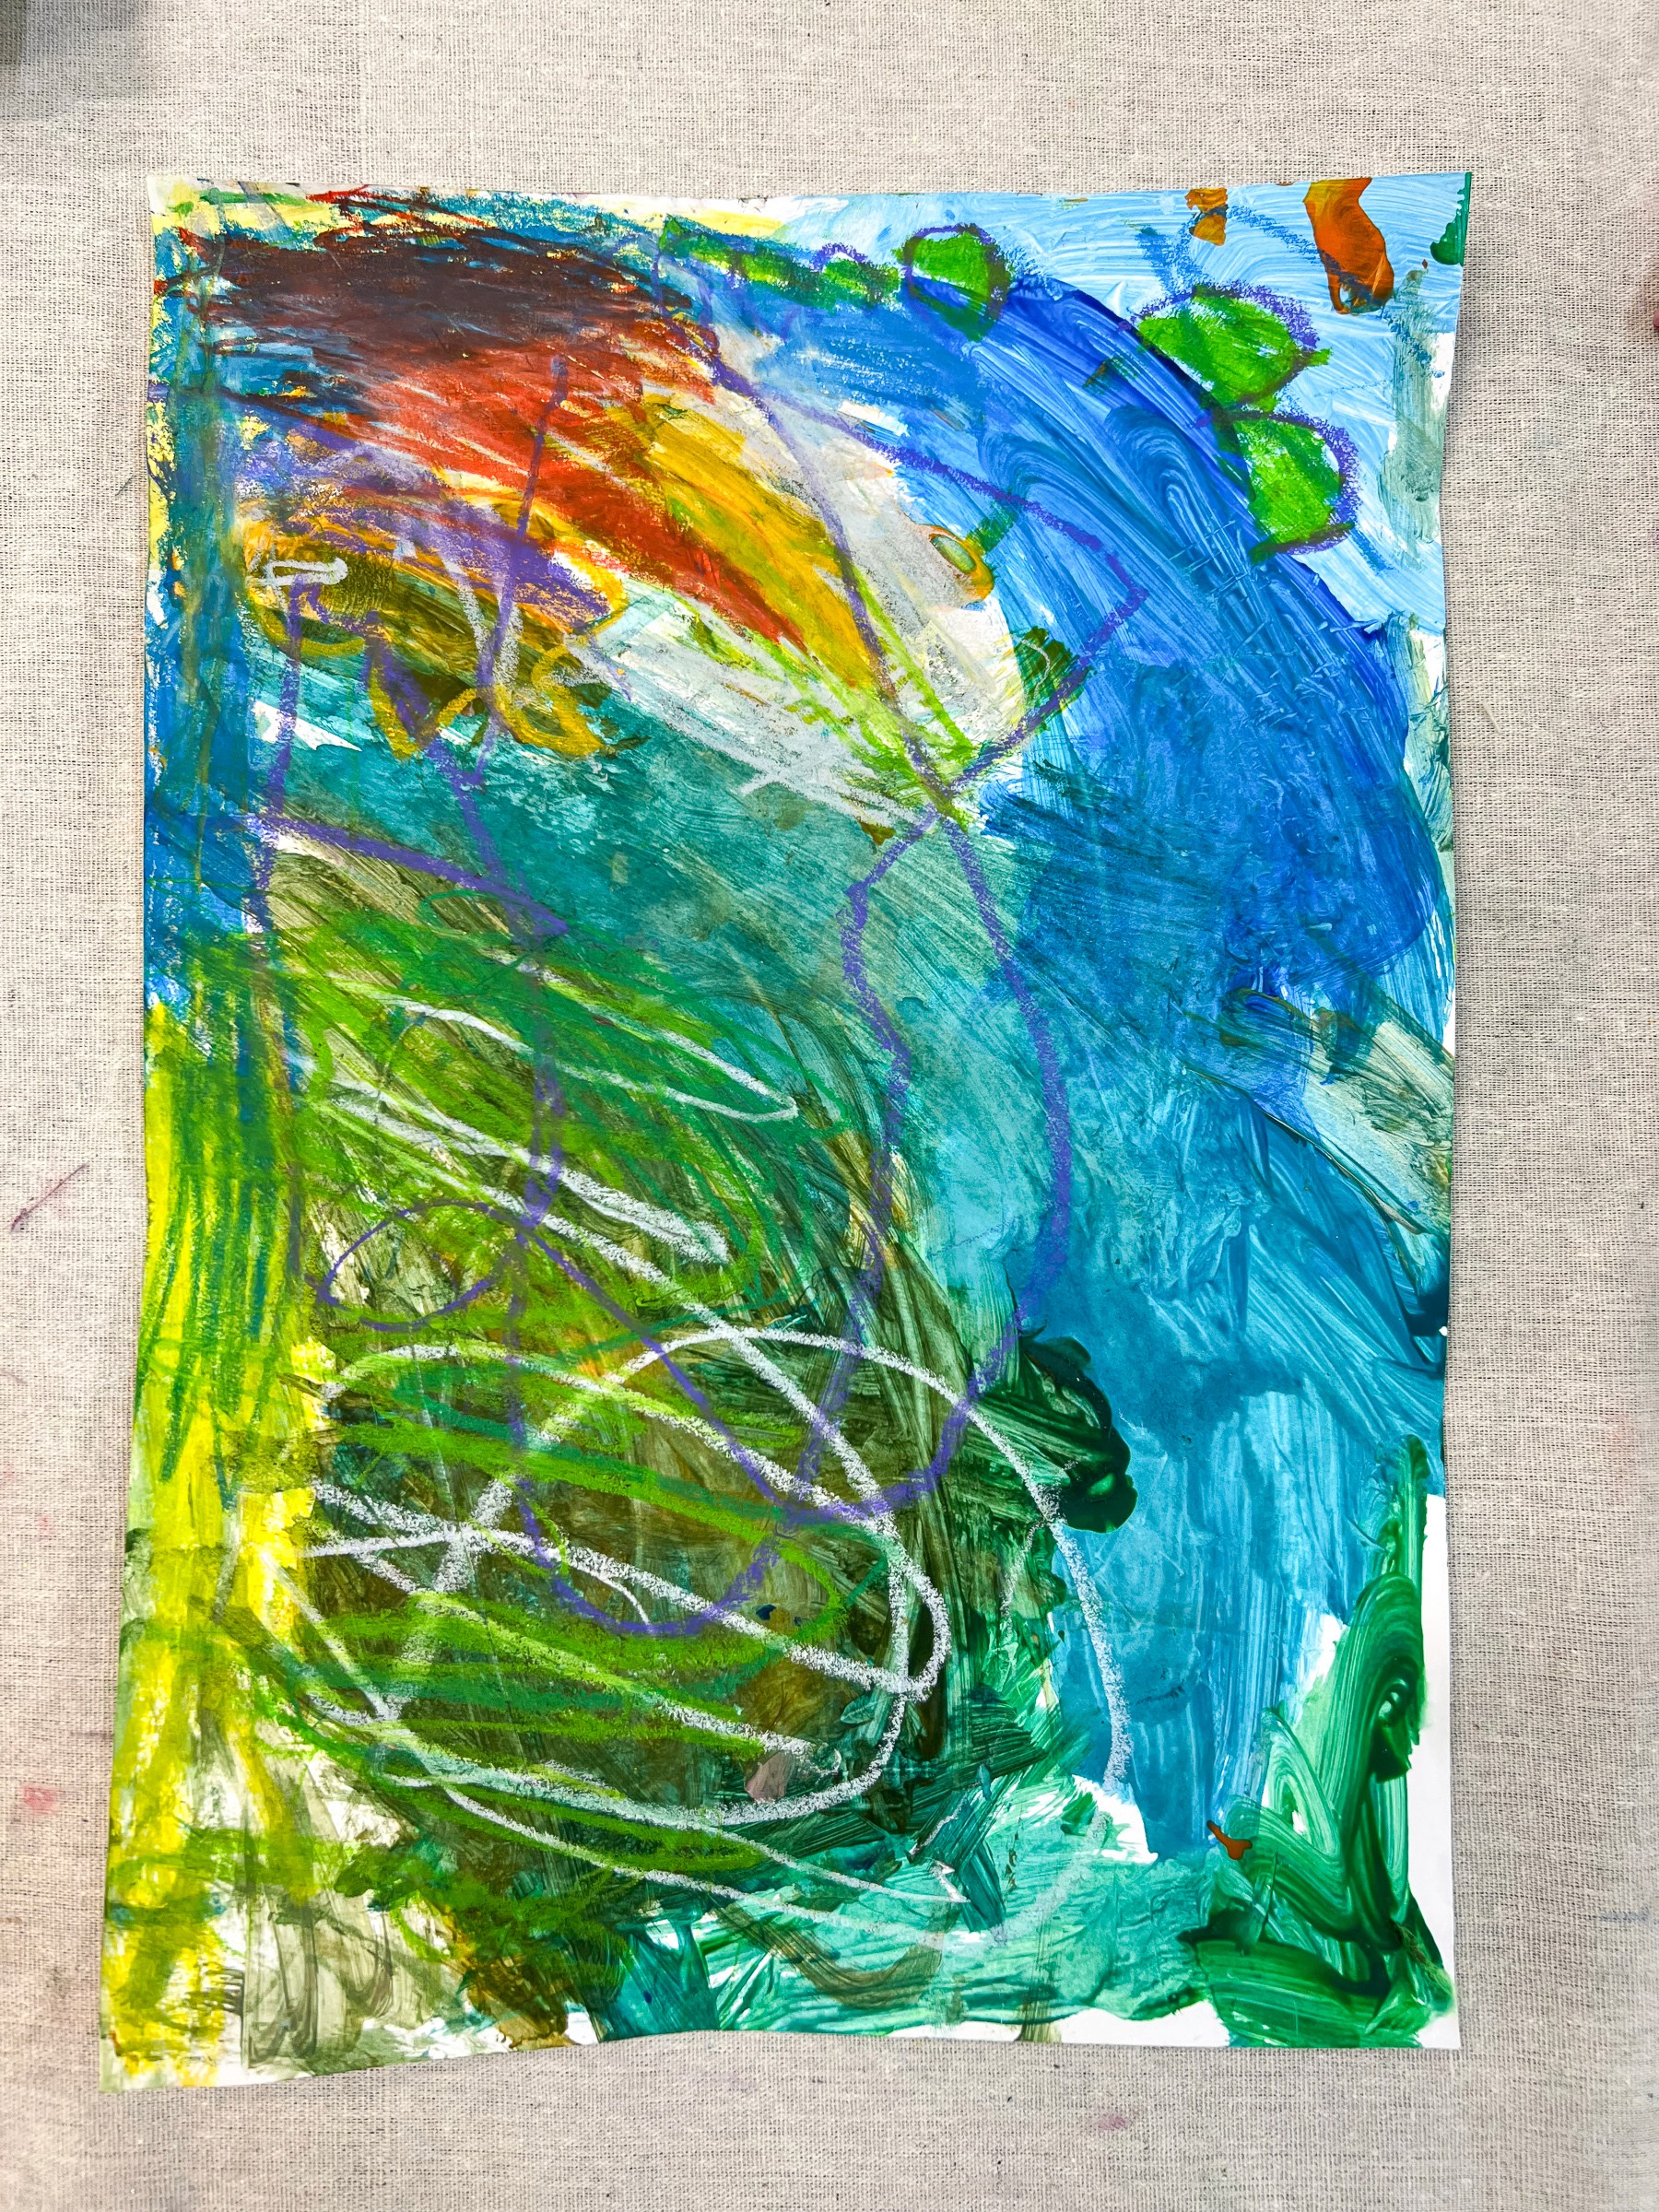
There’s no single way in. Some artists layer paint thick and fast, others print and stamp and dab until the page hums with texture. Encourage mixing, overlapping, letting colours collide.
The ocean comes alive not in neat outlines but in energy and gesture, just like Done himself.
Your role is simple: curate the buffet of materials, then step back and let the colour run wild!

Variations
Create a giant shared “reef wall” where everyone adds a piece
Limit the palette to just warm or cool tones and watch how the reef mood changes.
Photograph or scan the works and print them smaller to arrange into a whole underwater “gallery.”
Play with scale: tiny shells printed across the bottom, then huge brushstrokes sweeping over the top.
Materials
Poster paints (pearlescent if possible)
Liquid watercolours
Oil pastels, glitter, markers
Sponges, bubble wrap, scourers, shells, packing foam, loufas
Droppers, pipettes, brushes in all sizes
Large thick paper or card (120gsm or higher)
Gallery

Back to Top
Ken Done Inspired
Big colour, bold marks, and a reef that glows like Ken Done.
Bookmark
Painting & Drawing
The Set Up
Ken Done is an Australian icon: artist, author, ocean-lover, and master of colour! His work absolutely bursts with energy. Beaches and reefs and harbours and coastlines that feel alive with texture and joy. That spirit is exactly what we’re channelling here.
Set your table like a reef: a spread of materials that shimmer, splash, and surprise.
Poster paints (pearlescent ones are magic for the water), liquid watercolours, and oil pastels. Add glitter, markers, and all the tools for making unusual marks like bubble wrap, scourers, sponges (cut into fish shapes if you like), shells, packing foam, loufas, pipettes.
The more variety, the more chance for discovery!
The Making
There’s no single way in. Some artists layer paint thick and fast, others print and stamp and dab until the page hums with texture. Encourage mixing, overlapping, letting colours collide.
The ocean comes alive not in neat outlines but in energy and gesture, just like Done himself.
Your role is simple: curate the buffet of materials, then step back and let the colour run wild!
Variations
Create a giant shared “reef wall” where everyone adds a piece
Limit the palette to just warm or cool tones and watch how the reef mood changes.
Photograph or scan the works and print them smaller to arrange into a whole underwater “gallery.”
Play with scale: tiny shells printed across the bottom, then huge brushstrokes sweeping over the top.
Materials
Poster paints (pearlescent if possible)
Liquid watercolours
Oil pastels, glitter, markers
Sponges, bubble wrap, scourers, shells, packing foam, loufas
Droppers, pipettes, brushes in all sizes
Large thick paper or card (120gsm or higher)
Gallery
Back to Top
Buried Clay Treasures
Press the sea’s treasures into clay.
Bookmark
Sculpture
The Set Up
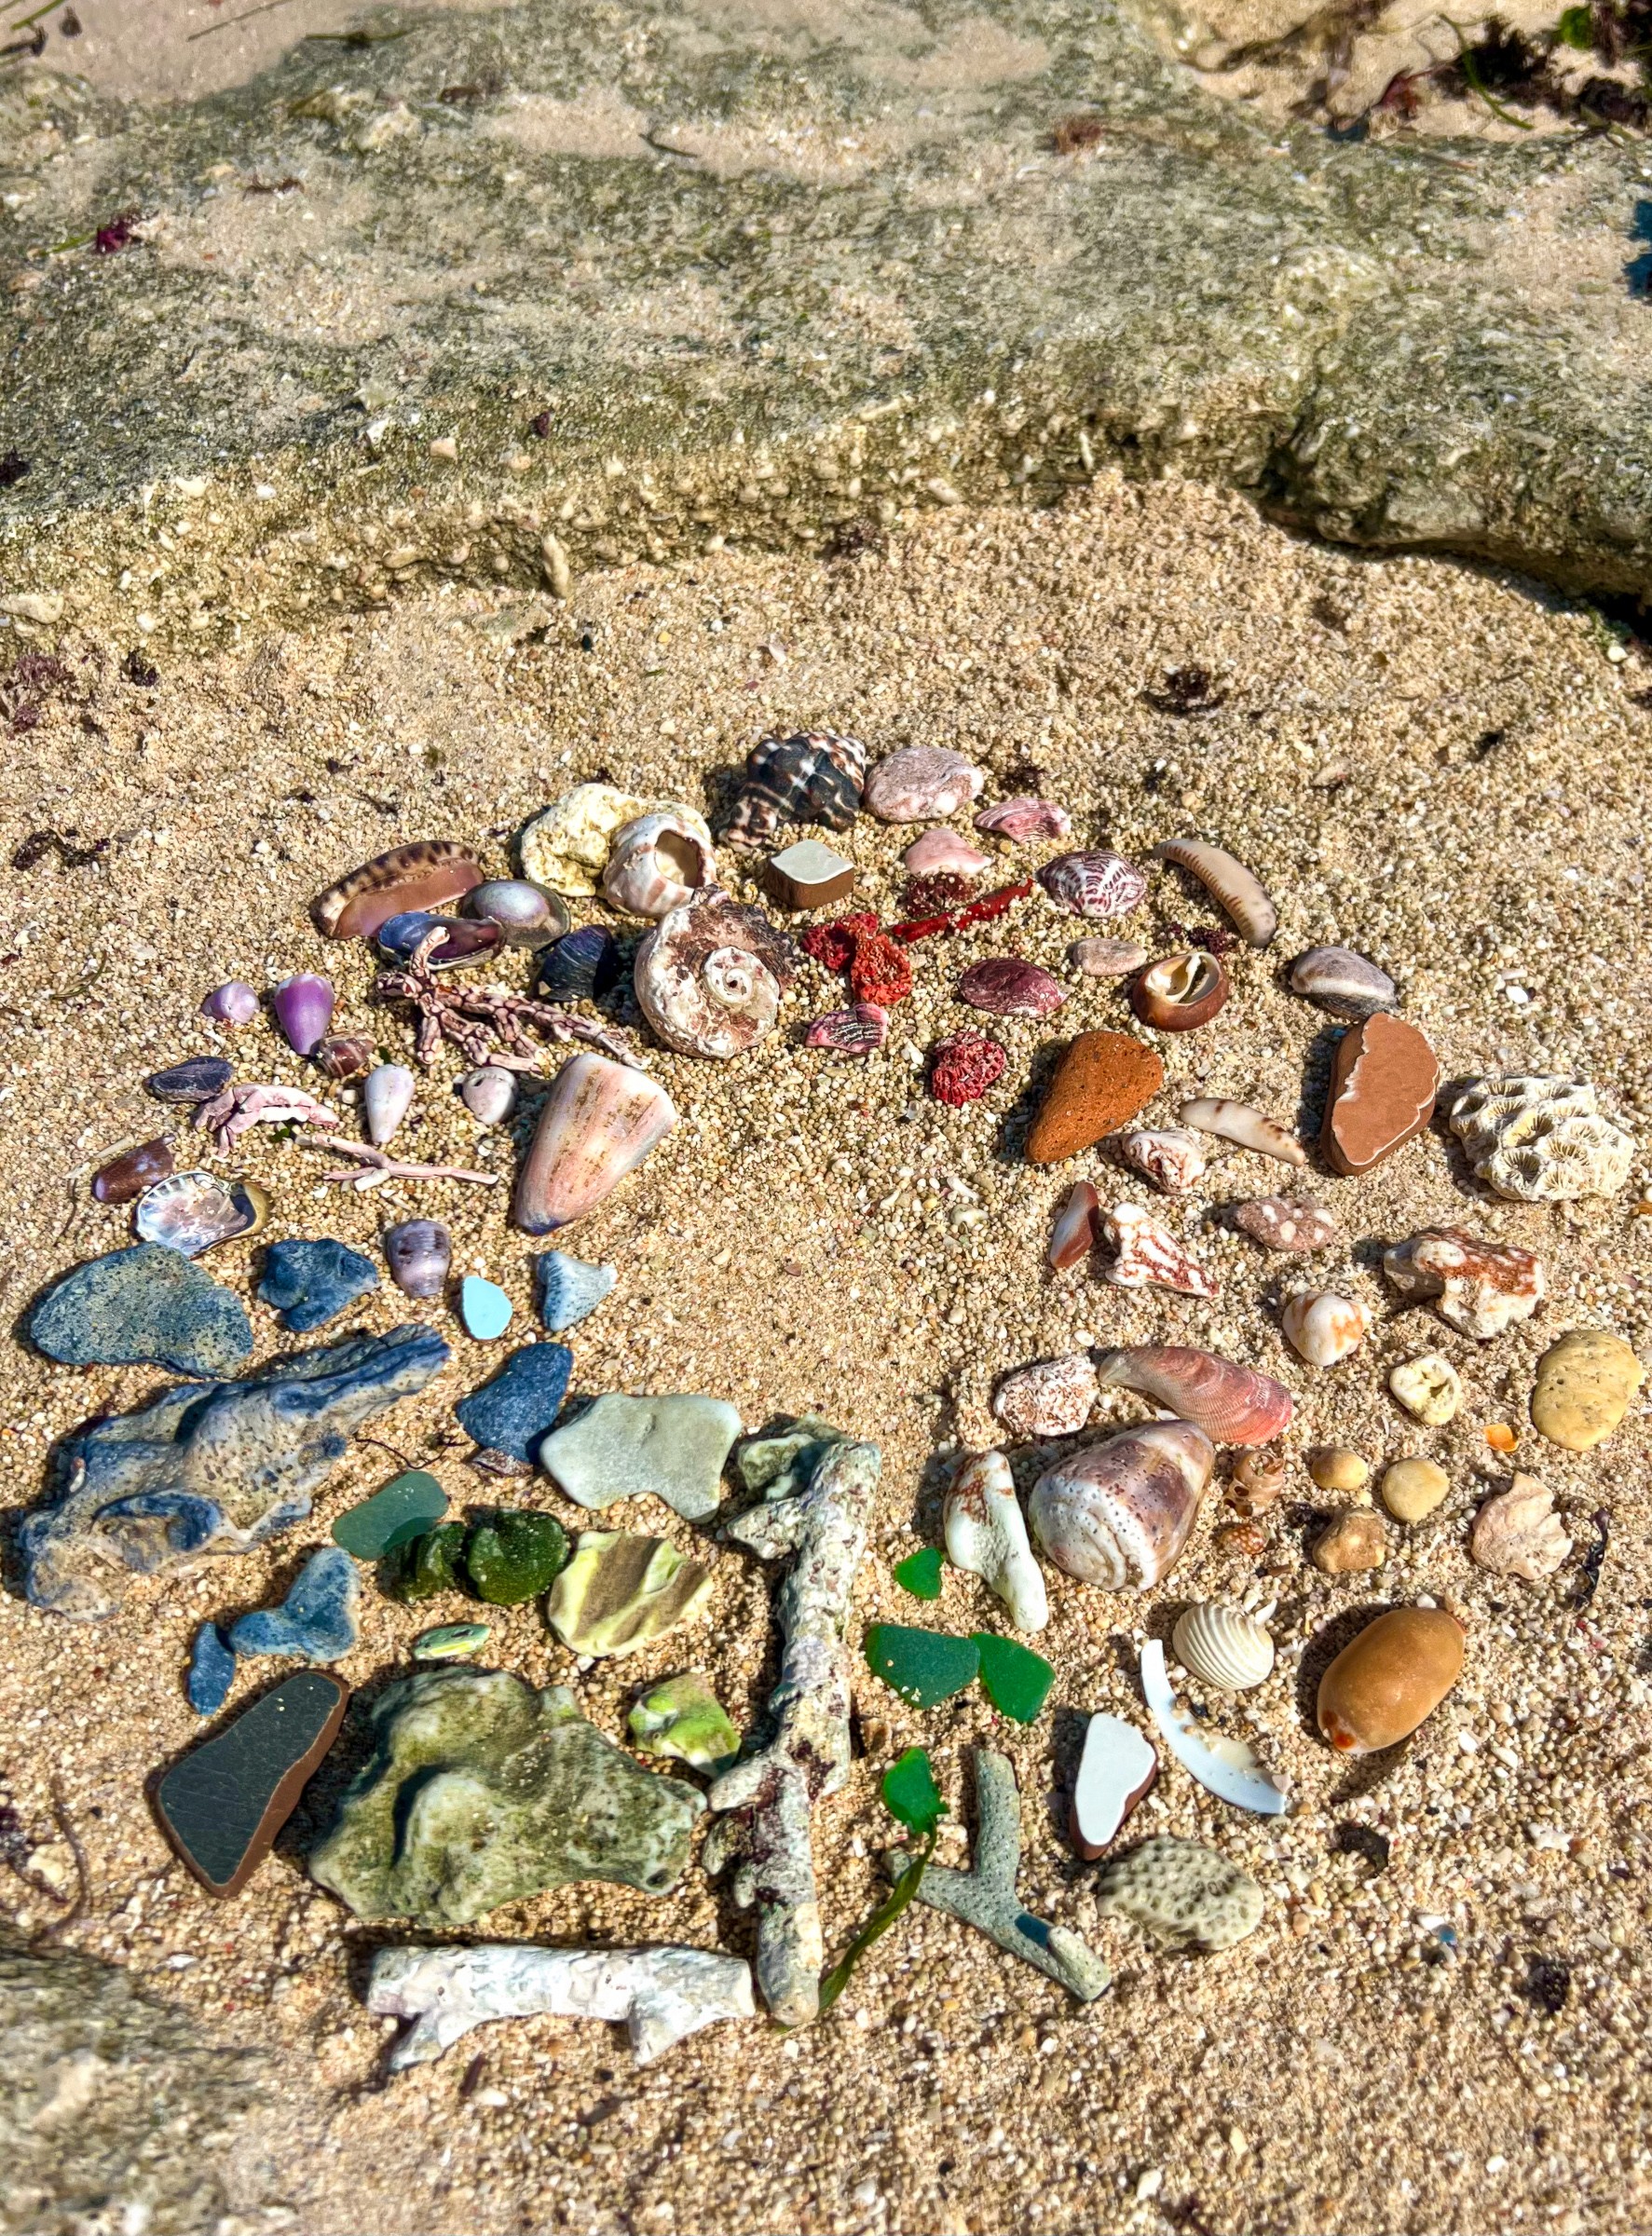
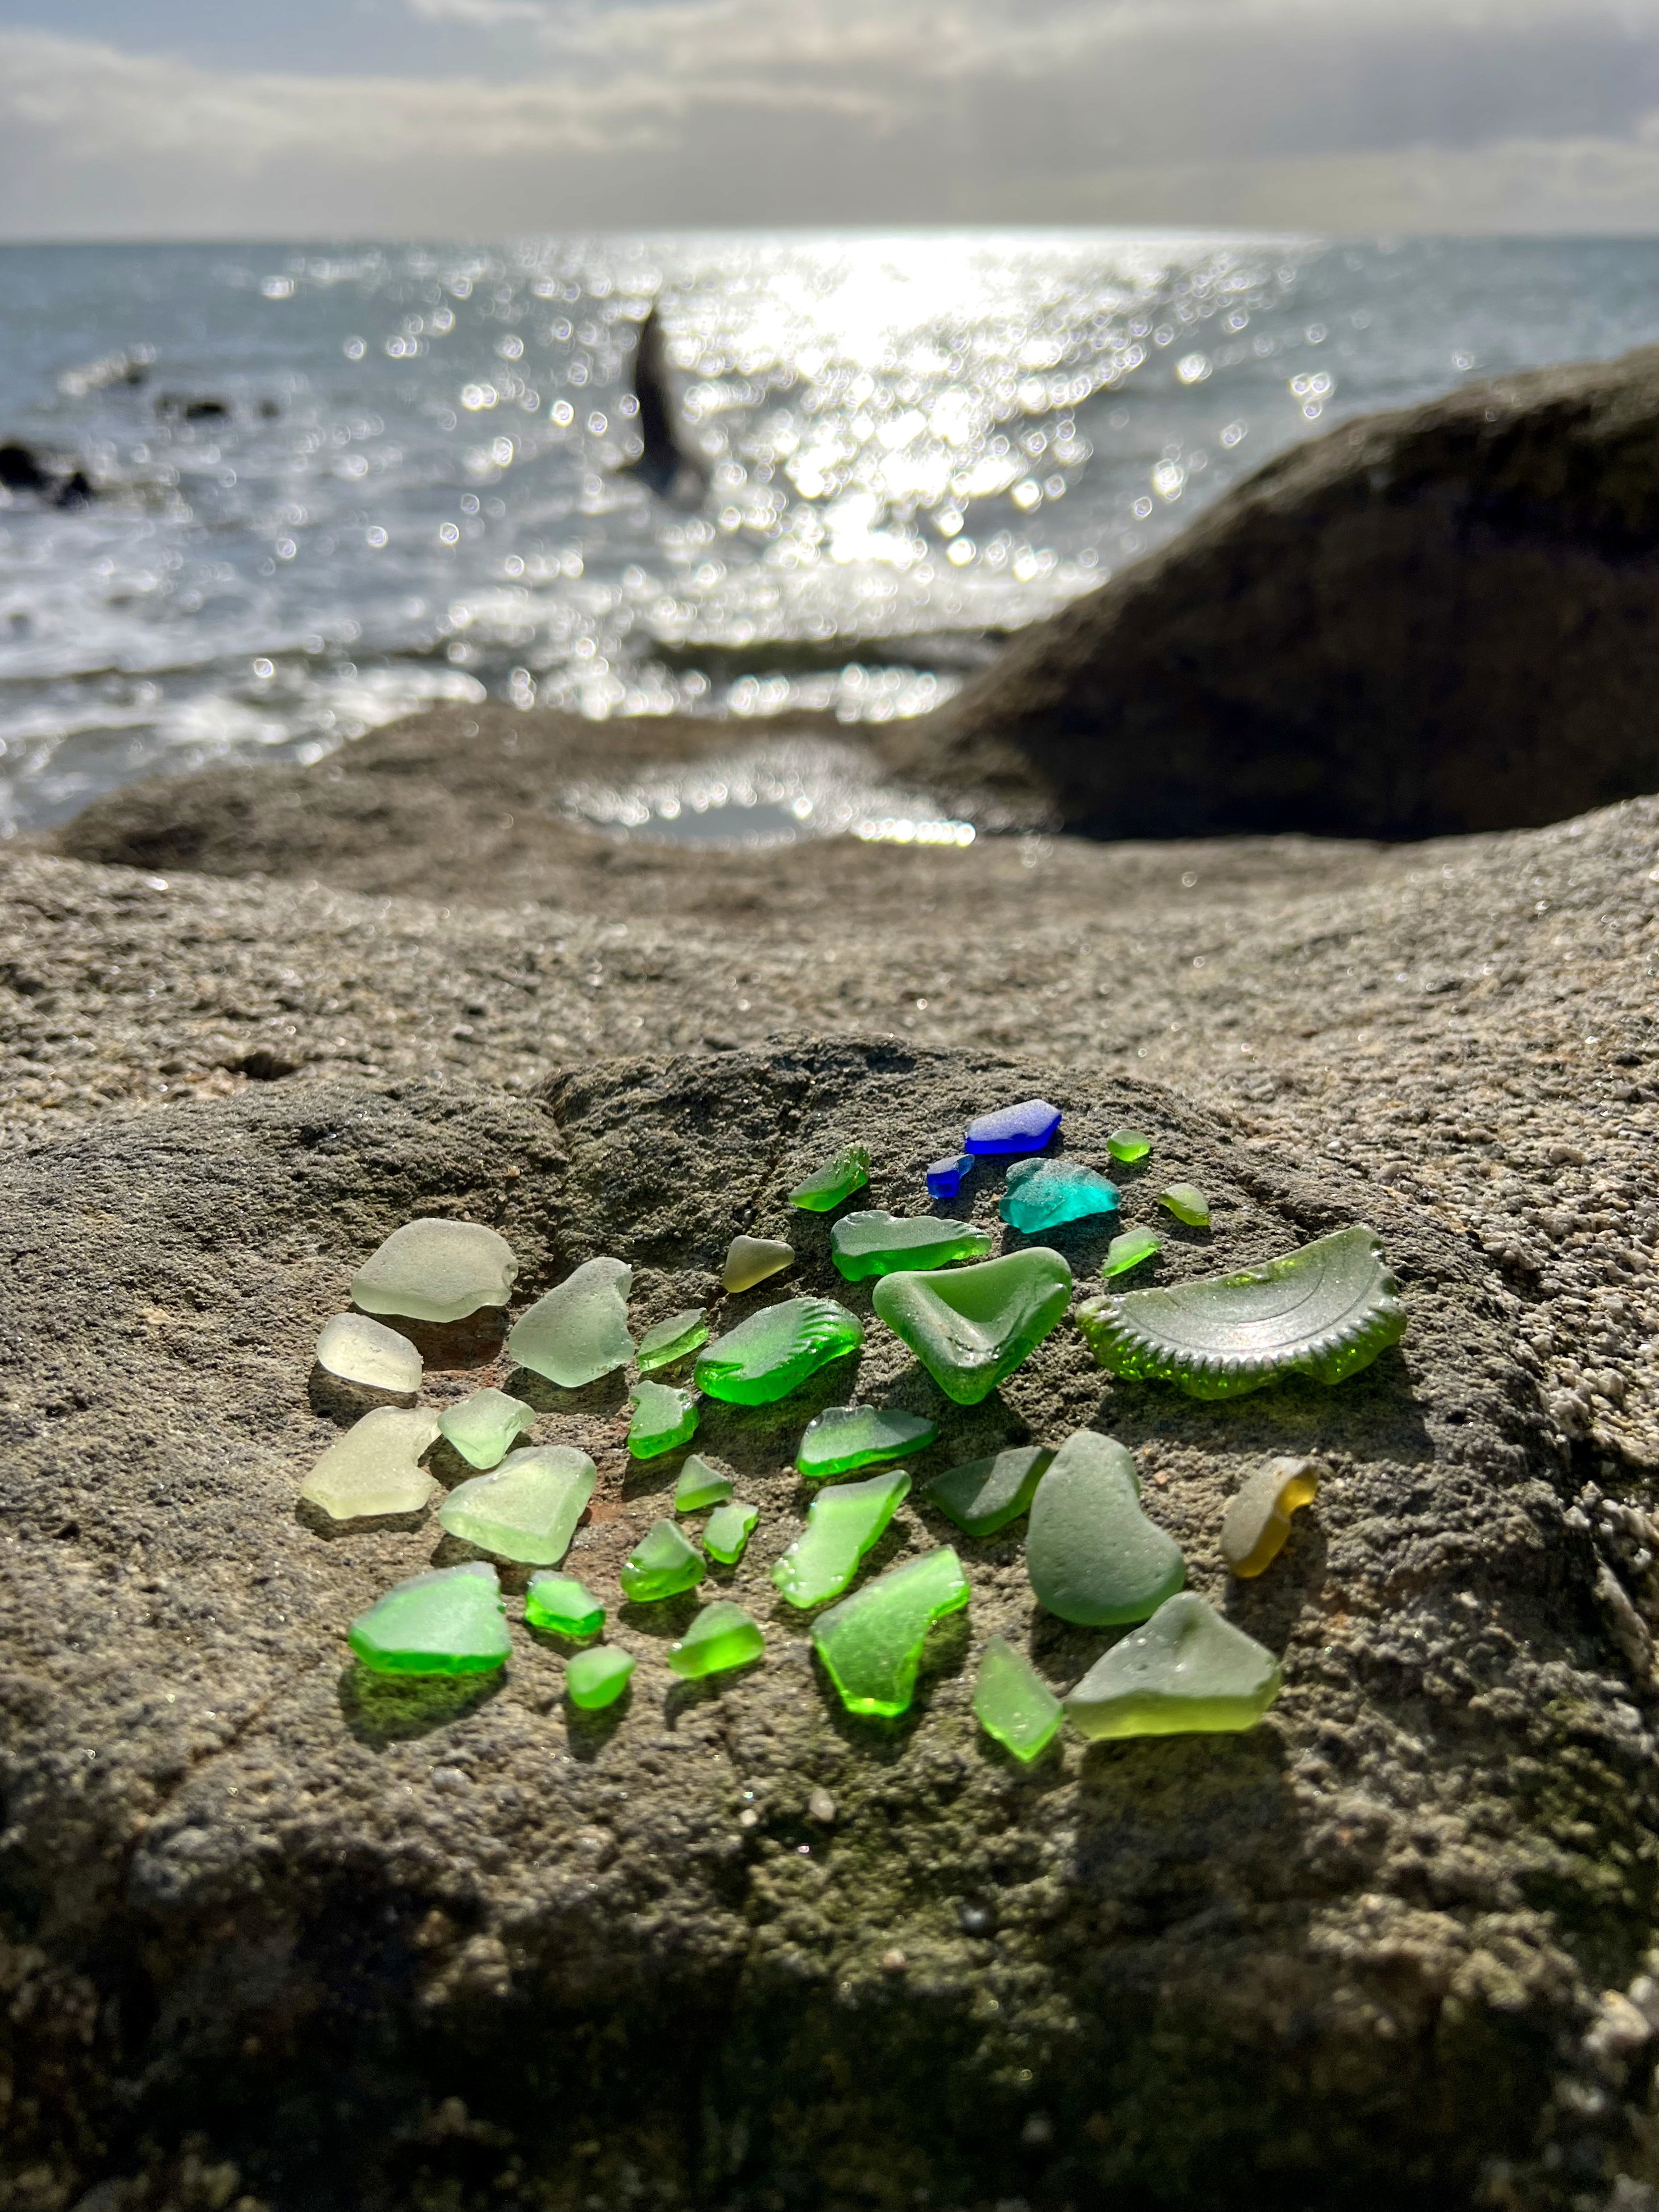
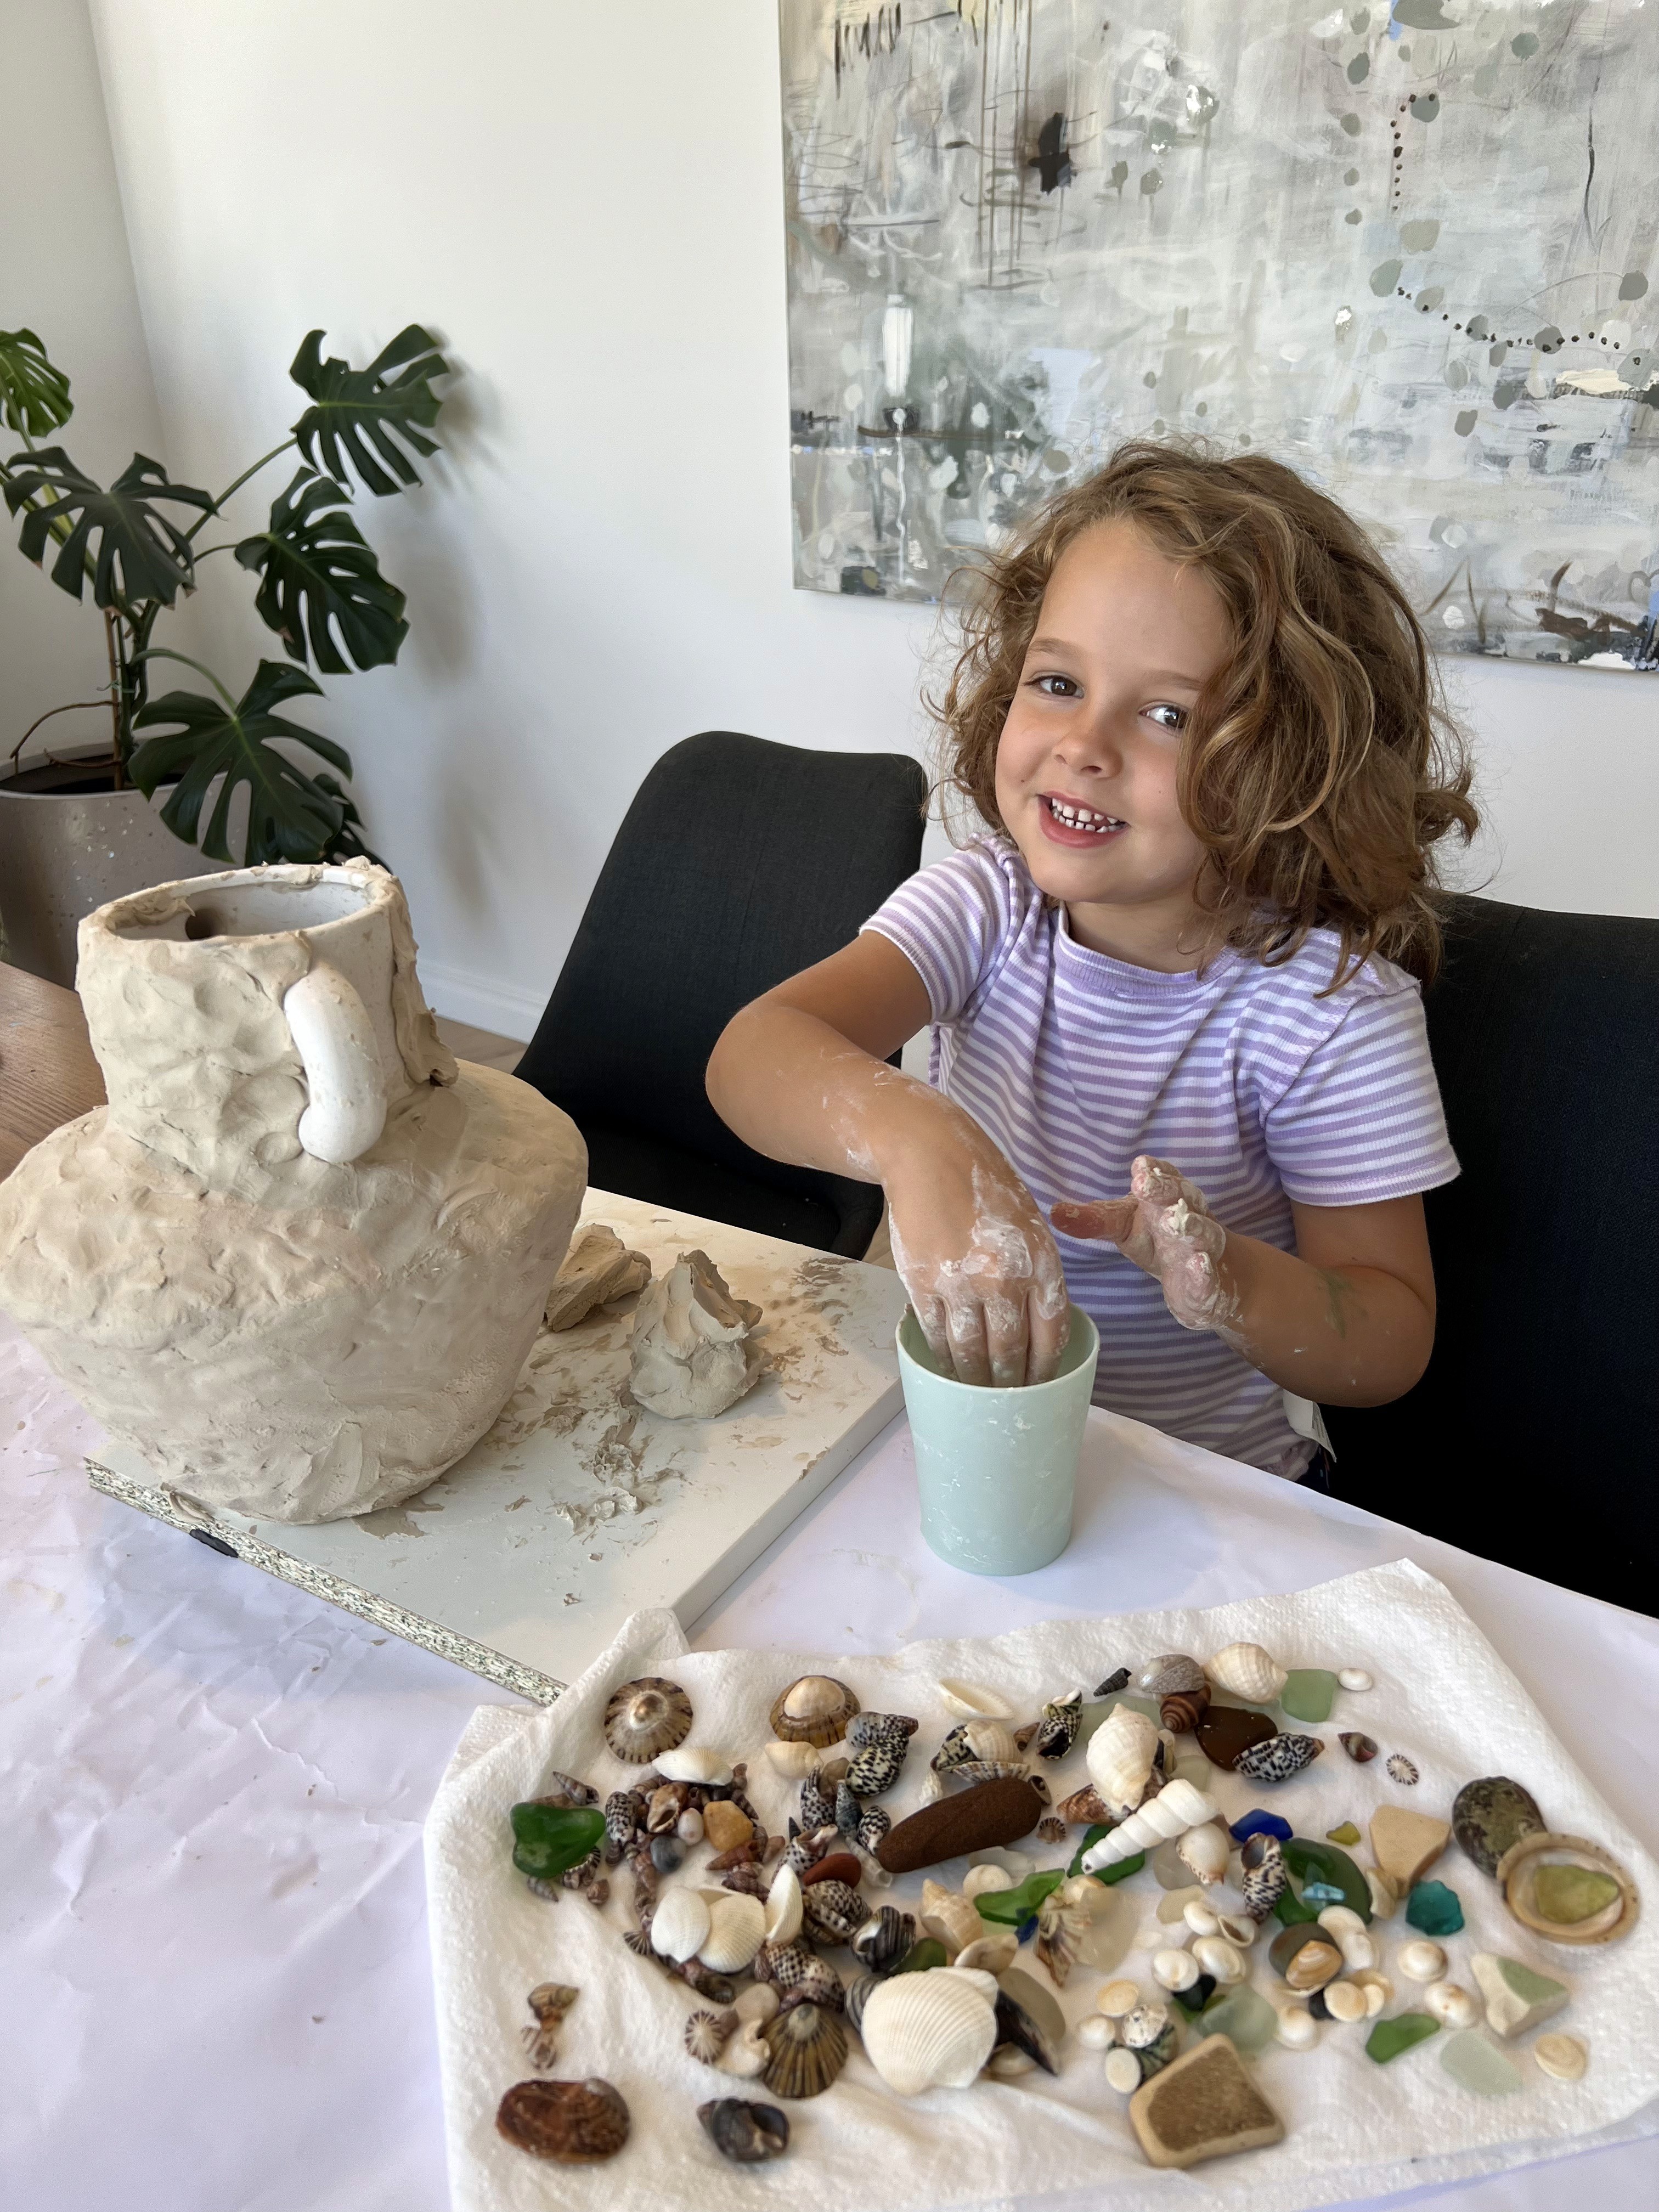
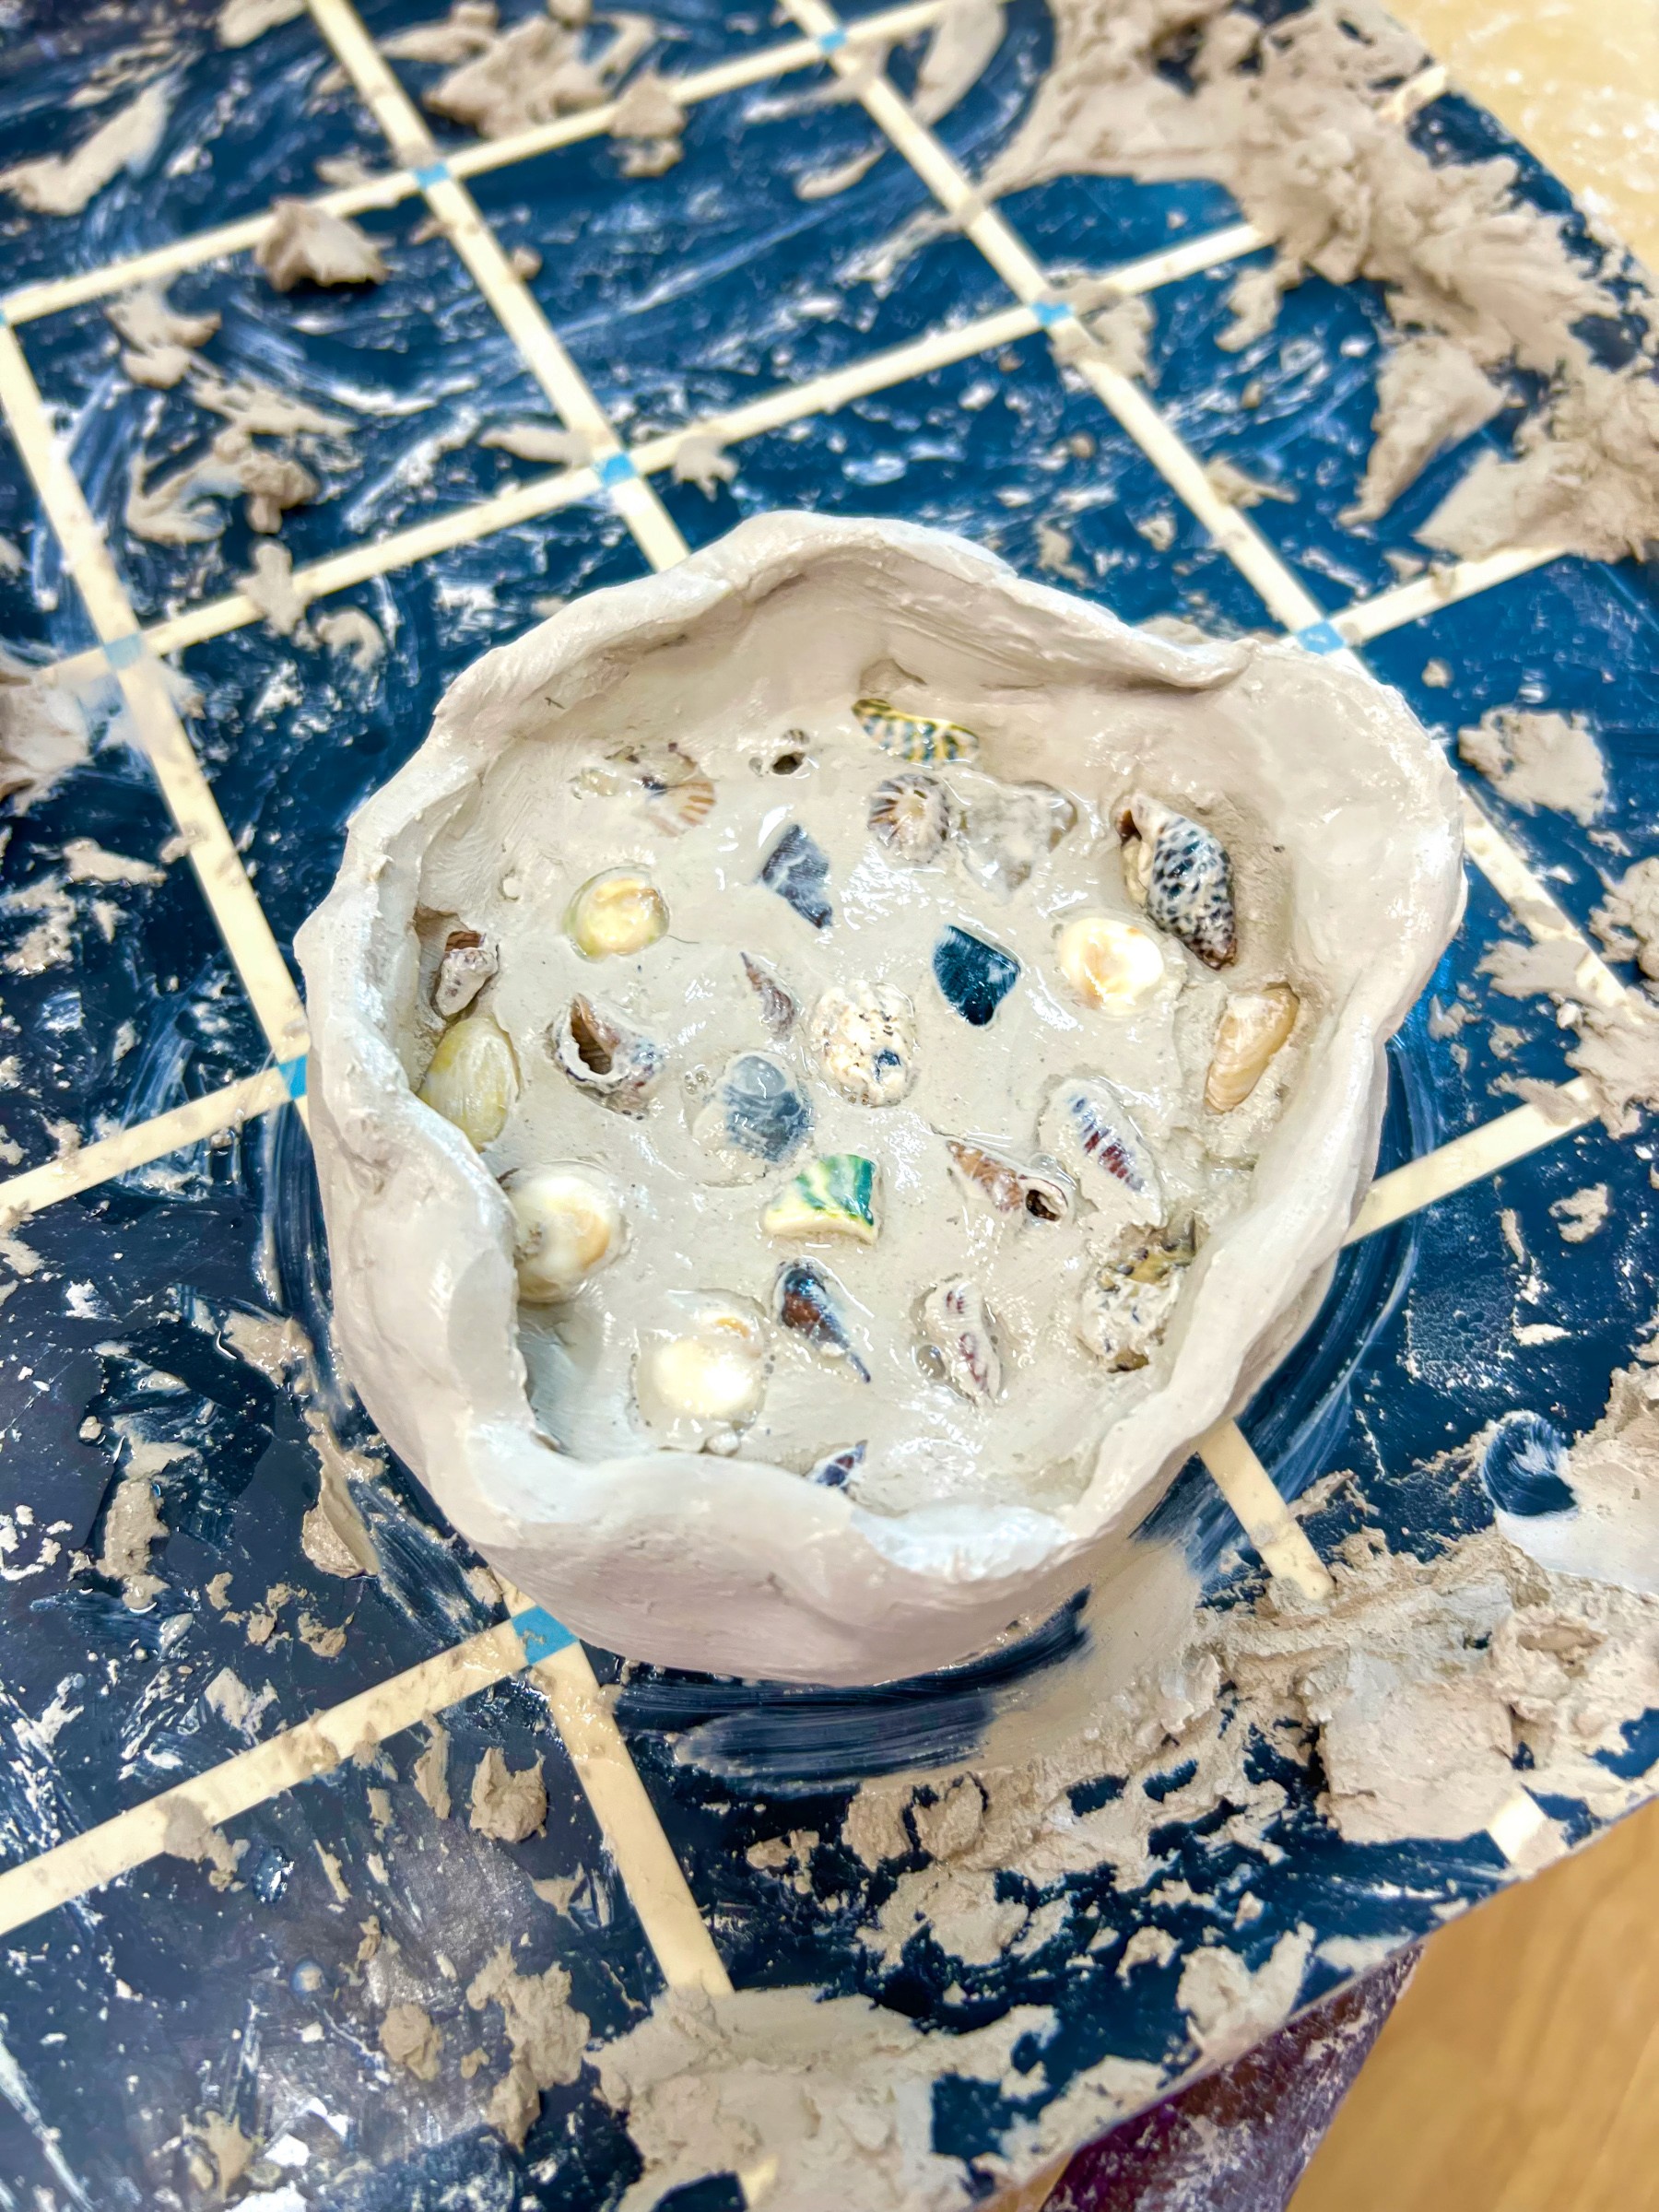
This idea was born from a beachcombing day with our daughter Olive. We came home with gorgeous frosted sea glass, and she sculpted a vase to hold it all, like a little treasure keeper for our Summer!
It was too beautiful not to share with the kids at Smudge, and as always, they took it further than I could have imagined.
We use air-dry clay from Northcote Pottery (our favourite in Melbourne: smooth, strong, no cracking clay).
Set up a “treasure bar” of sea glass, shells, and small beach finds so children can choose their own collection. Rolling pins, clay tools, plastic knives, and trays lined with baking paper all make it easier. A small bowl of water for smoothing is essential.
Before you head out collecting, check what’s allowed on your local beaches. Some spots (especially National Parks) have strict rules about removing natural materials. And always make sure every shell is empty and every creature stays safely at home in the sea!


The Making
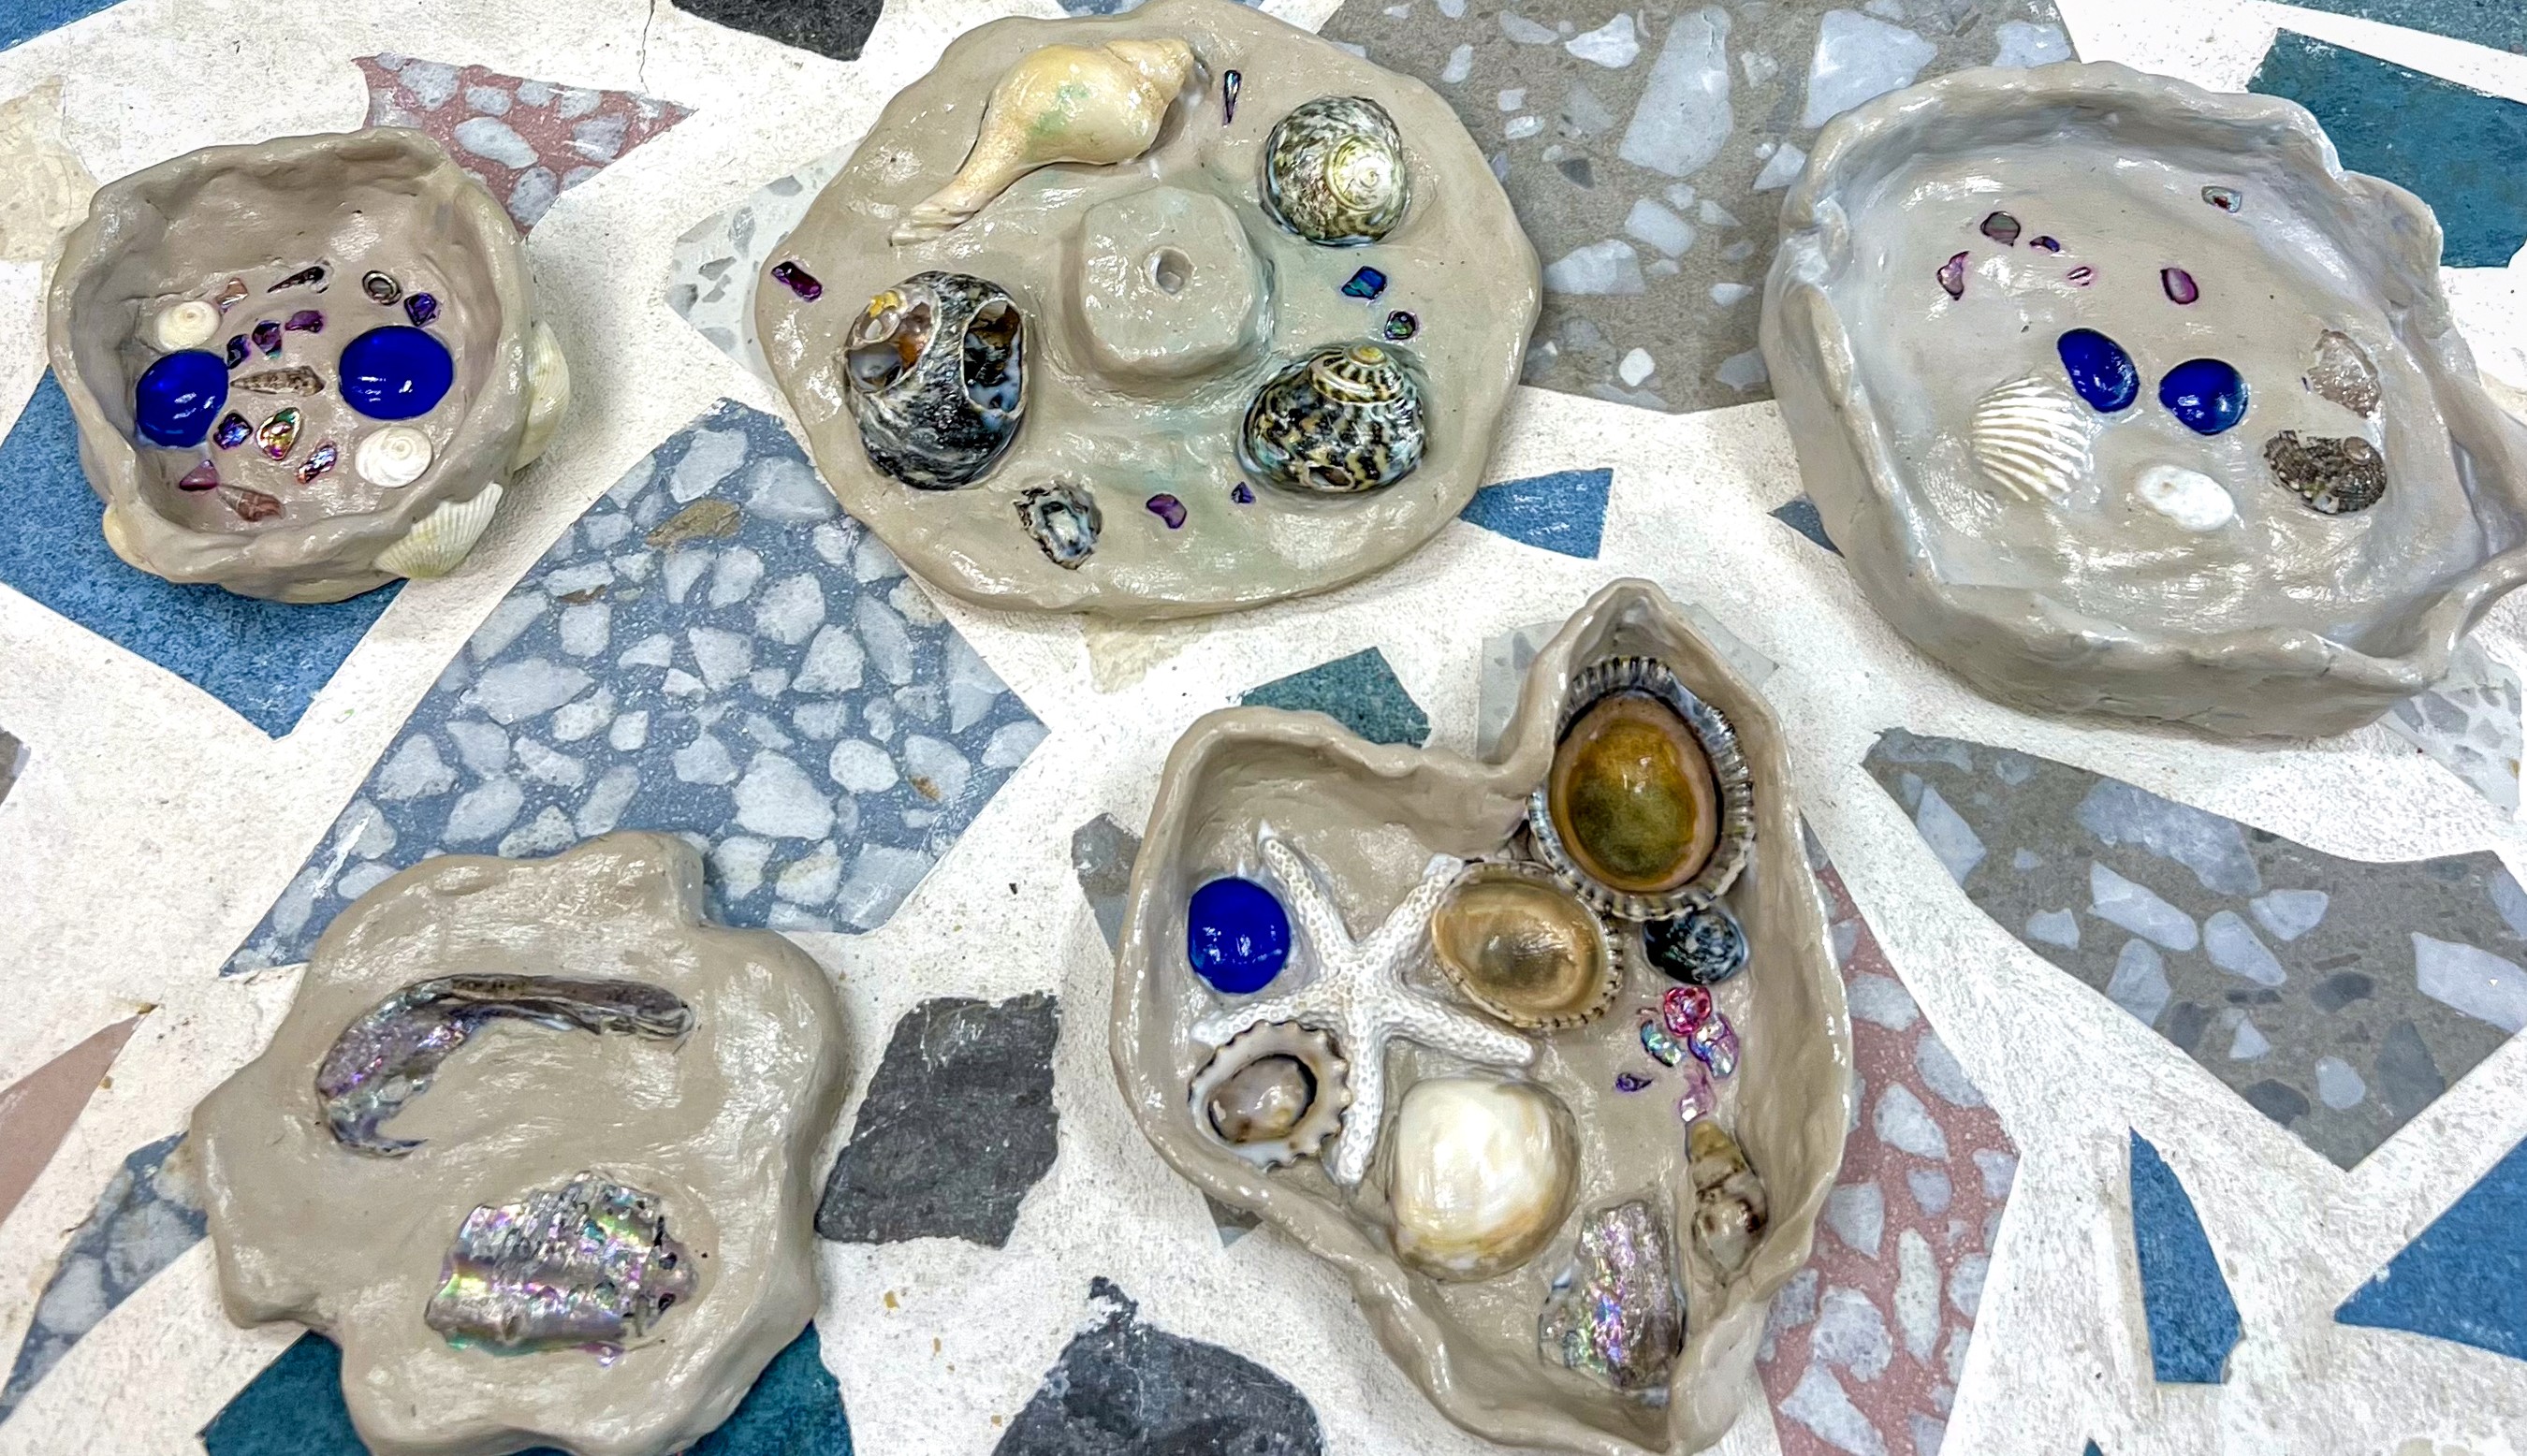
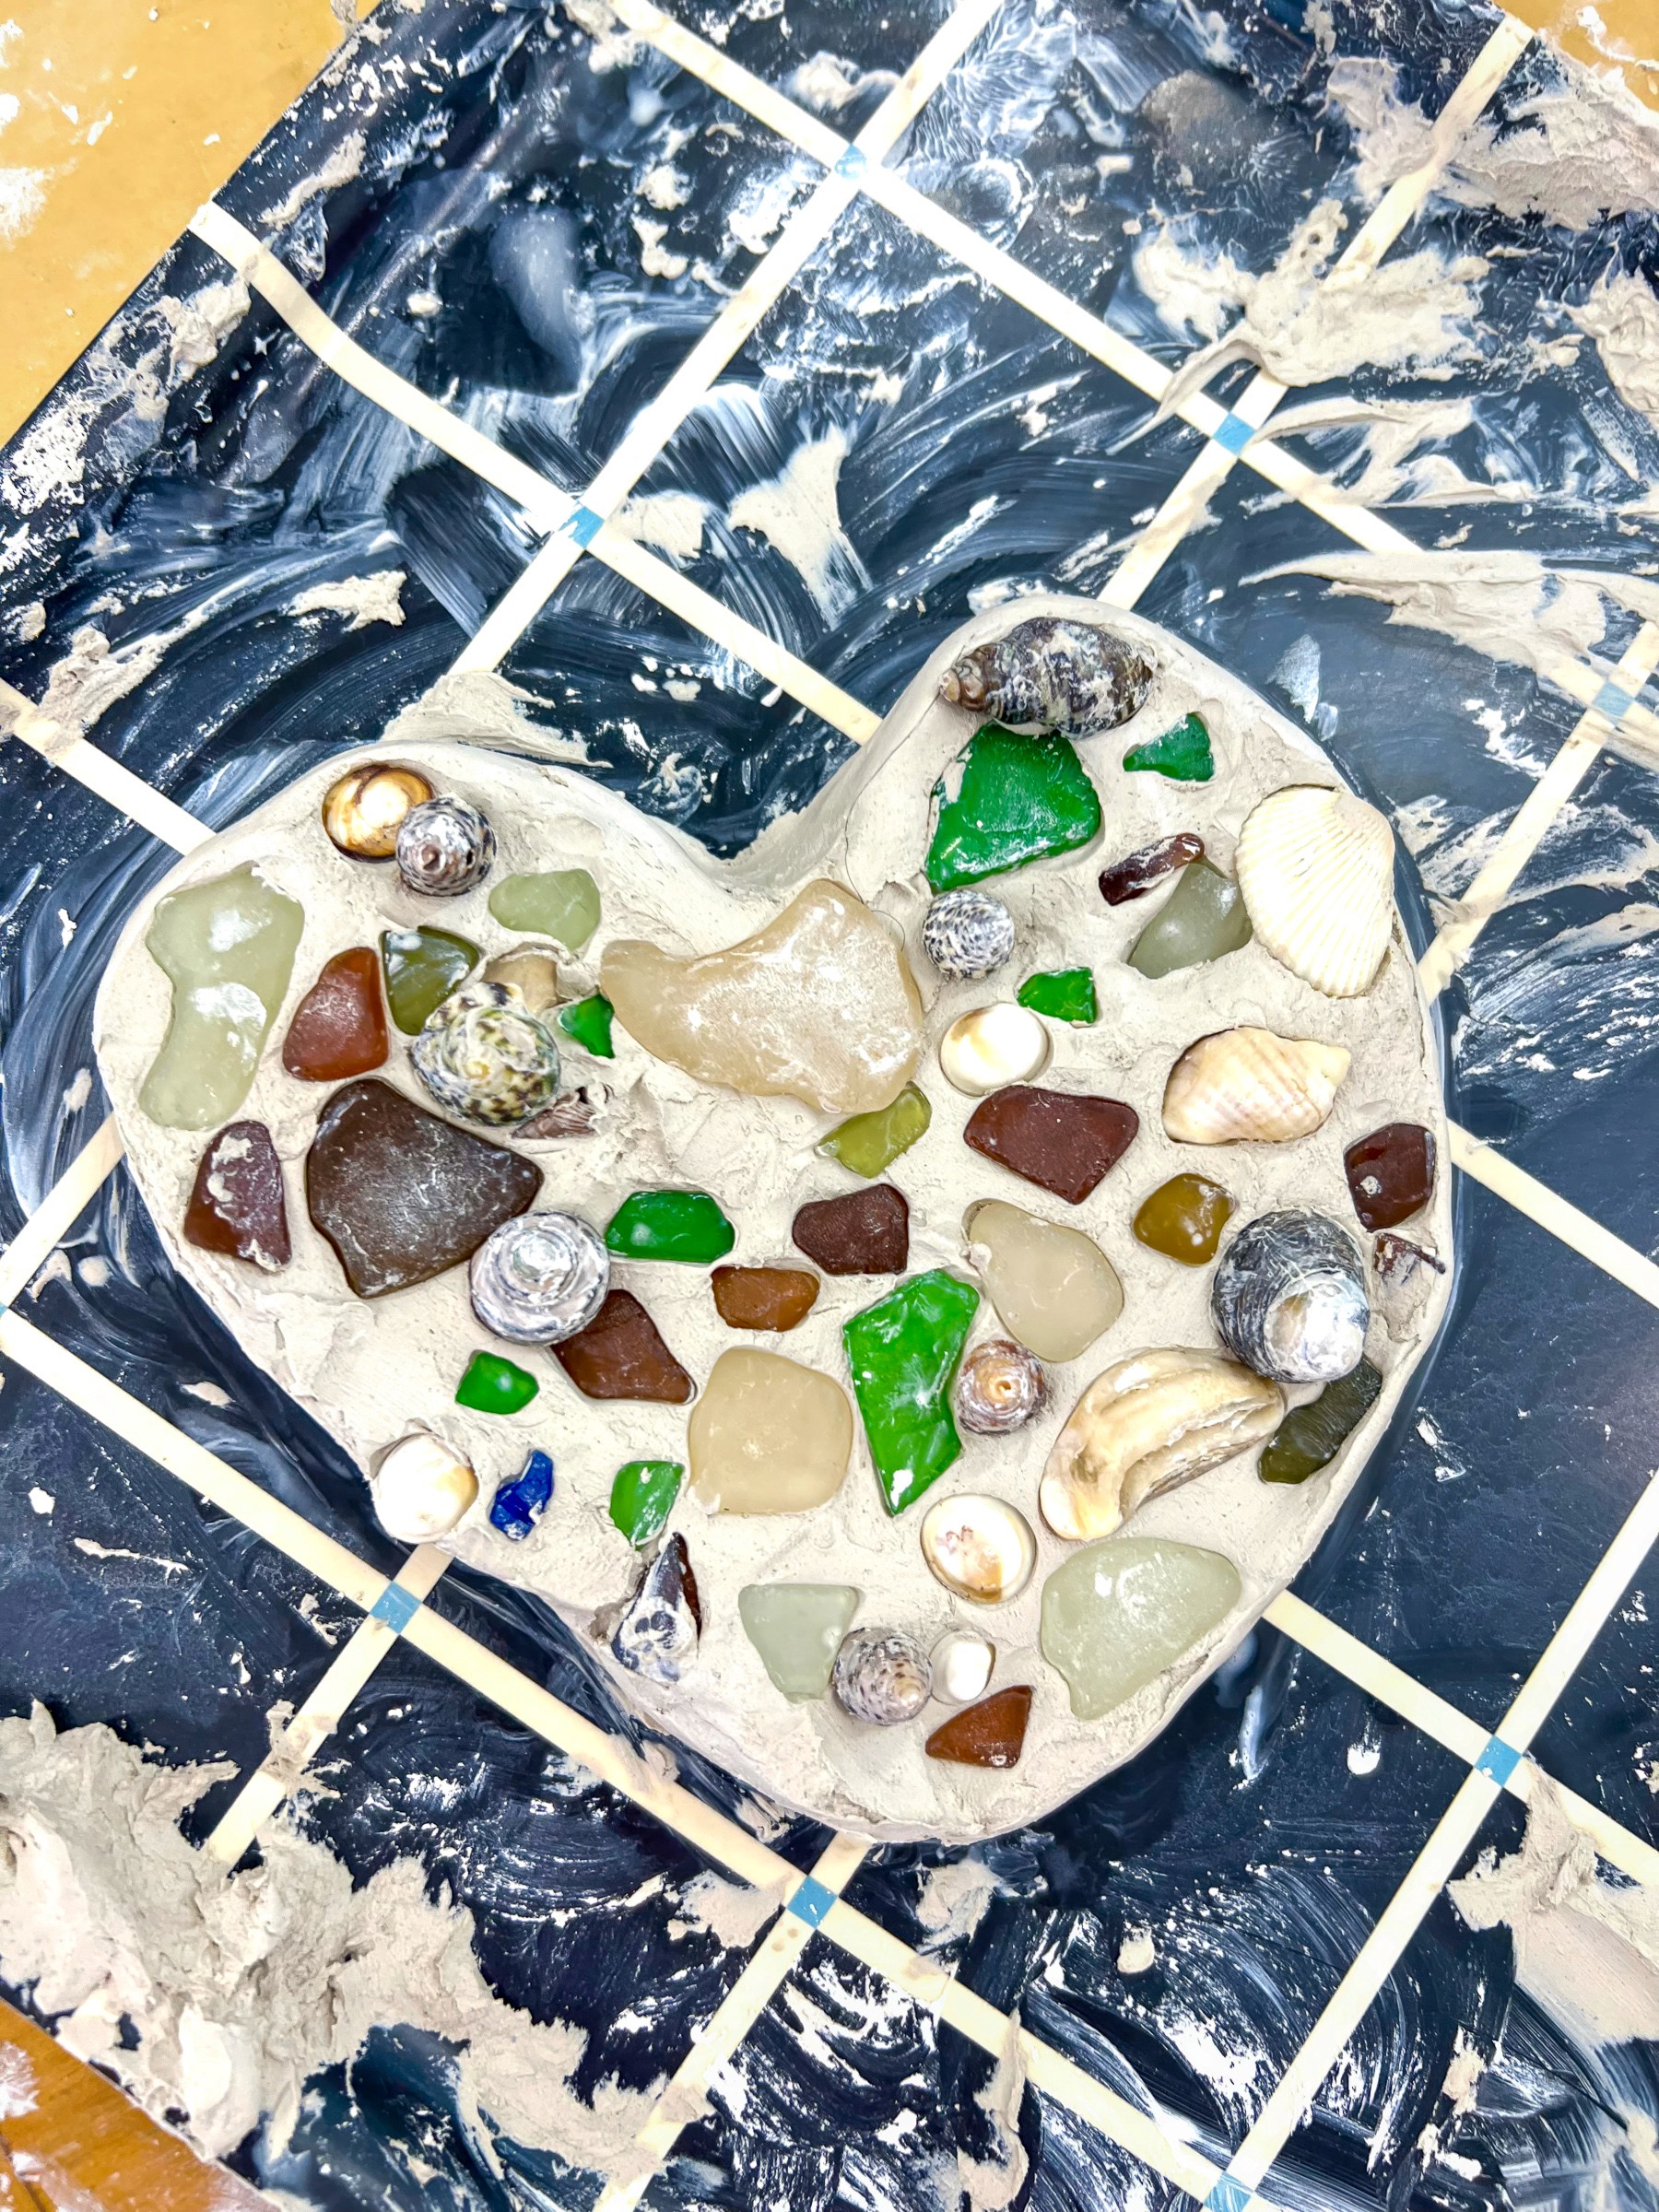
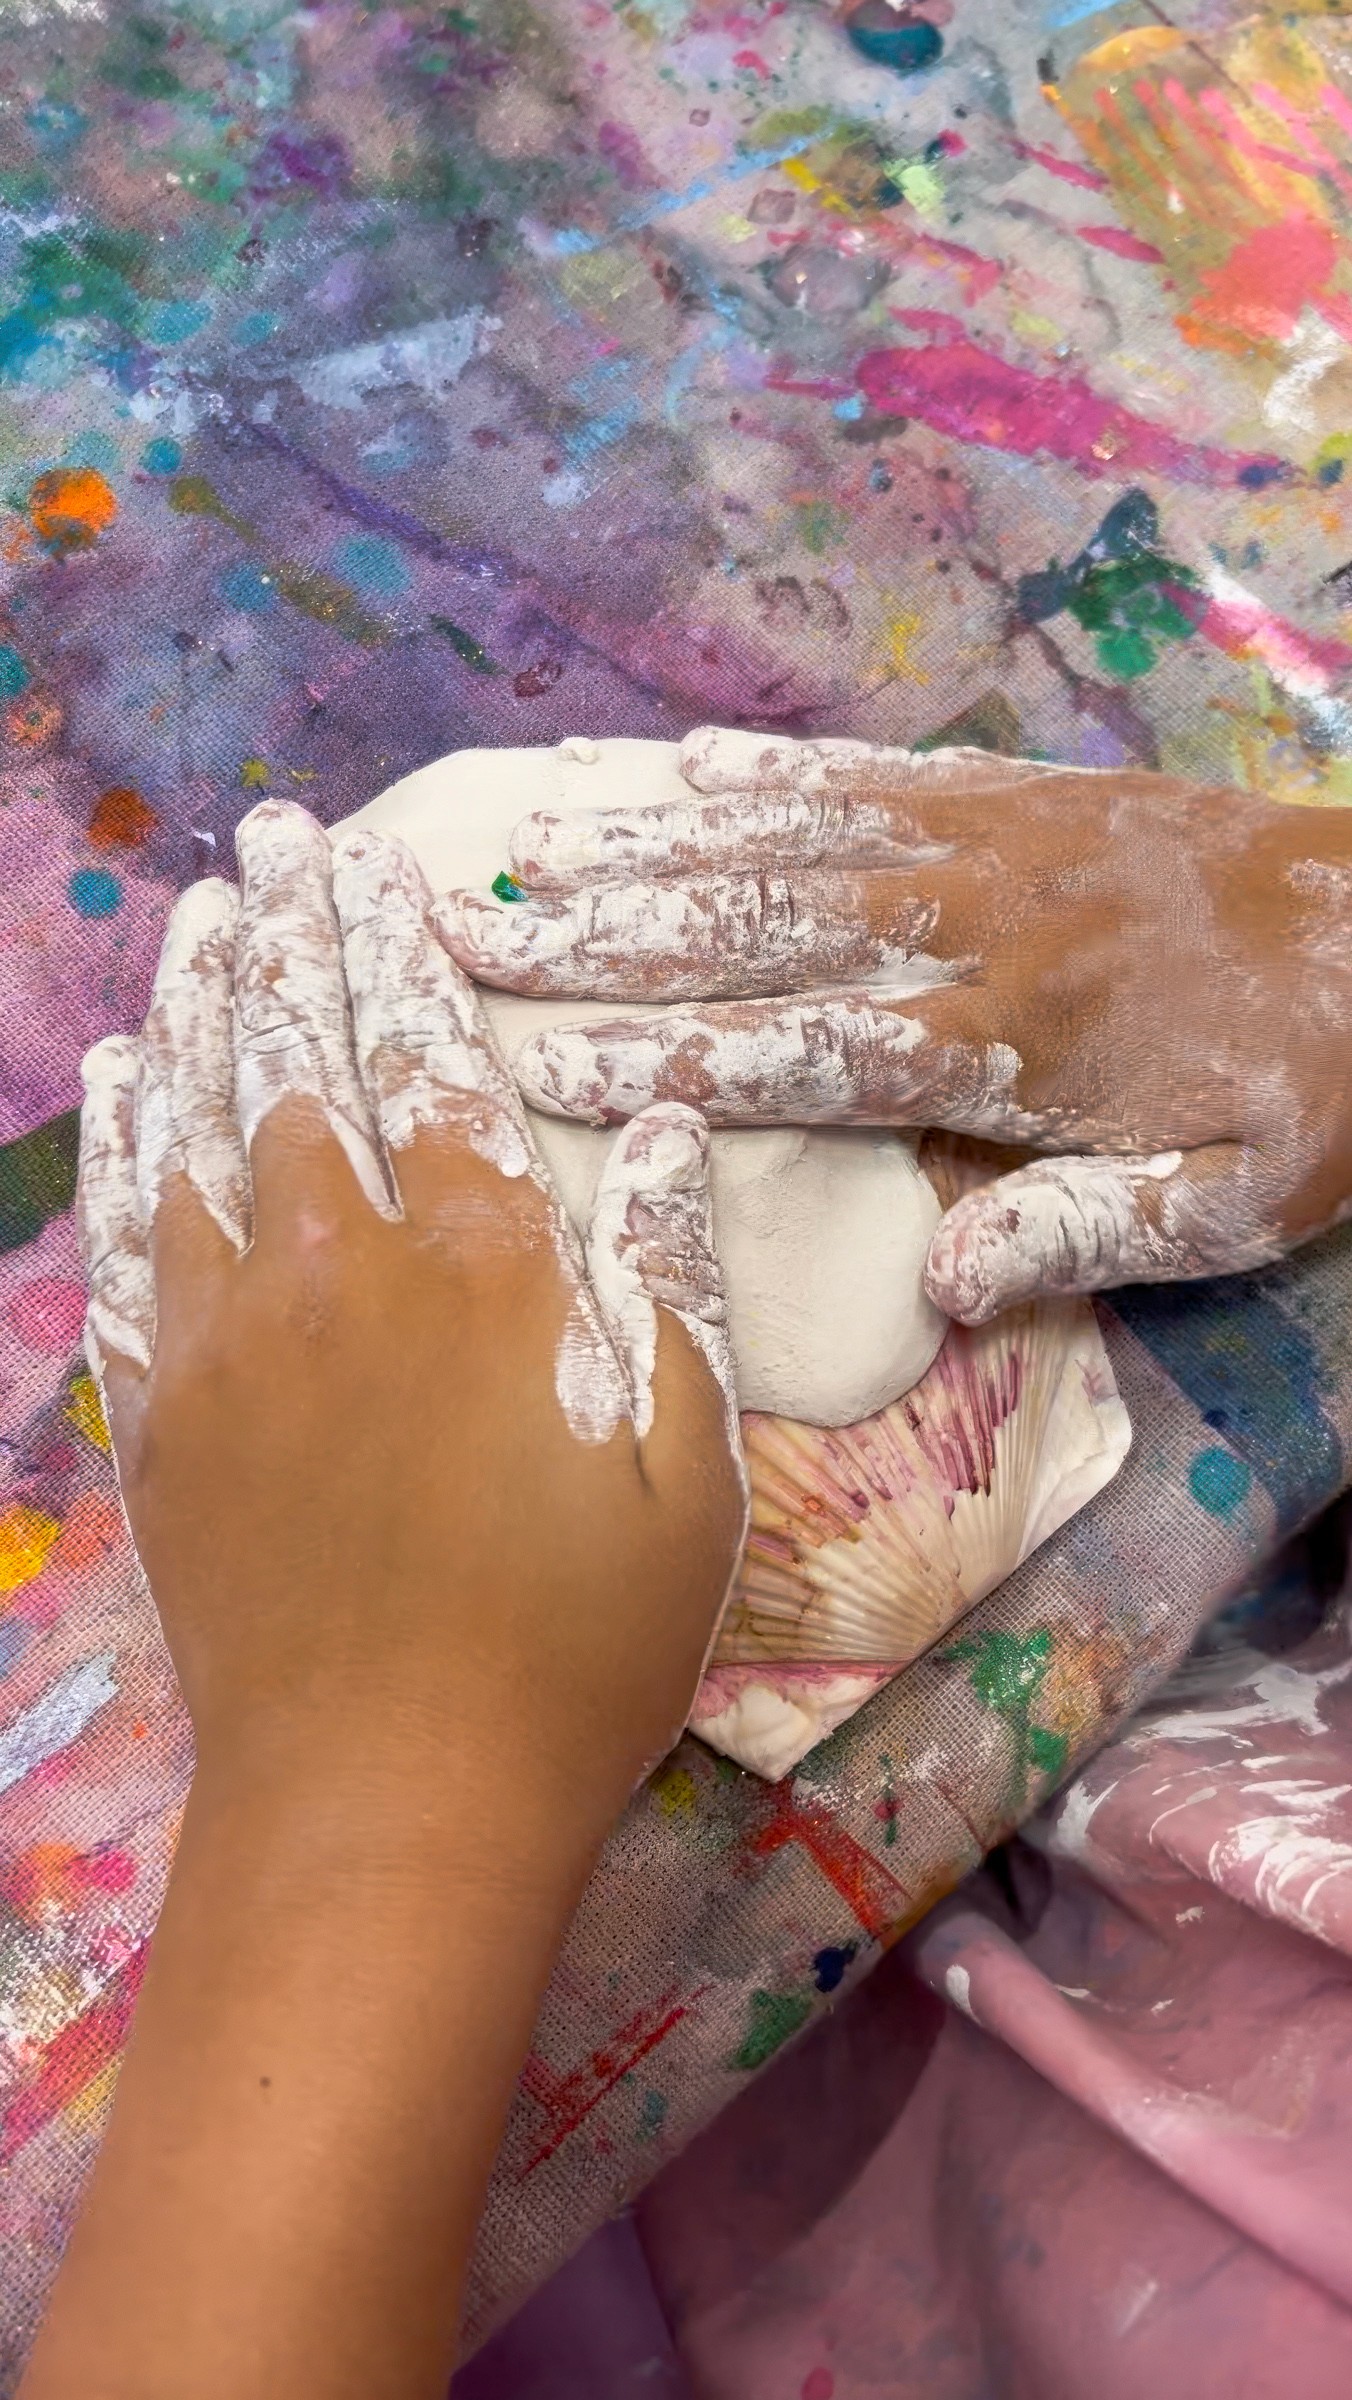
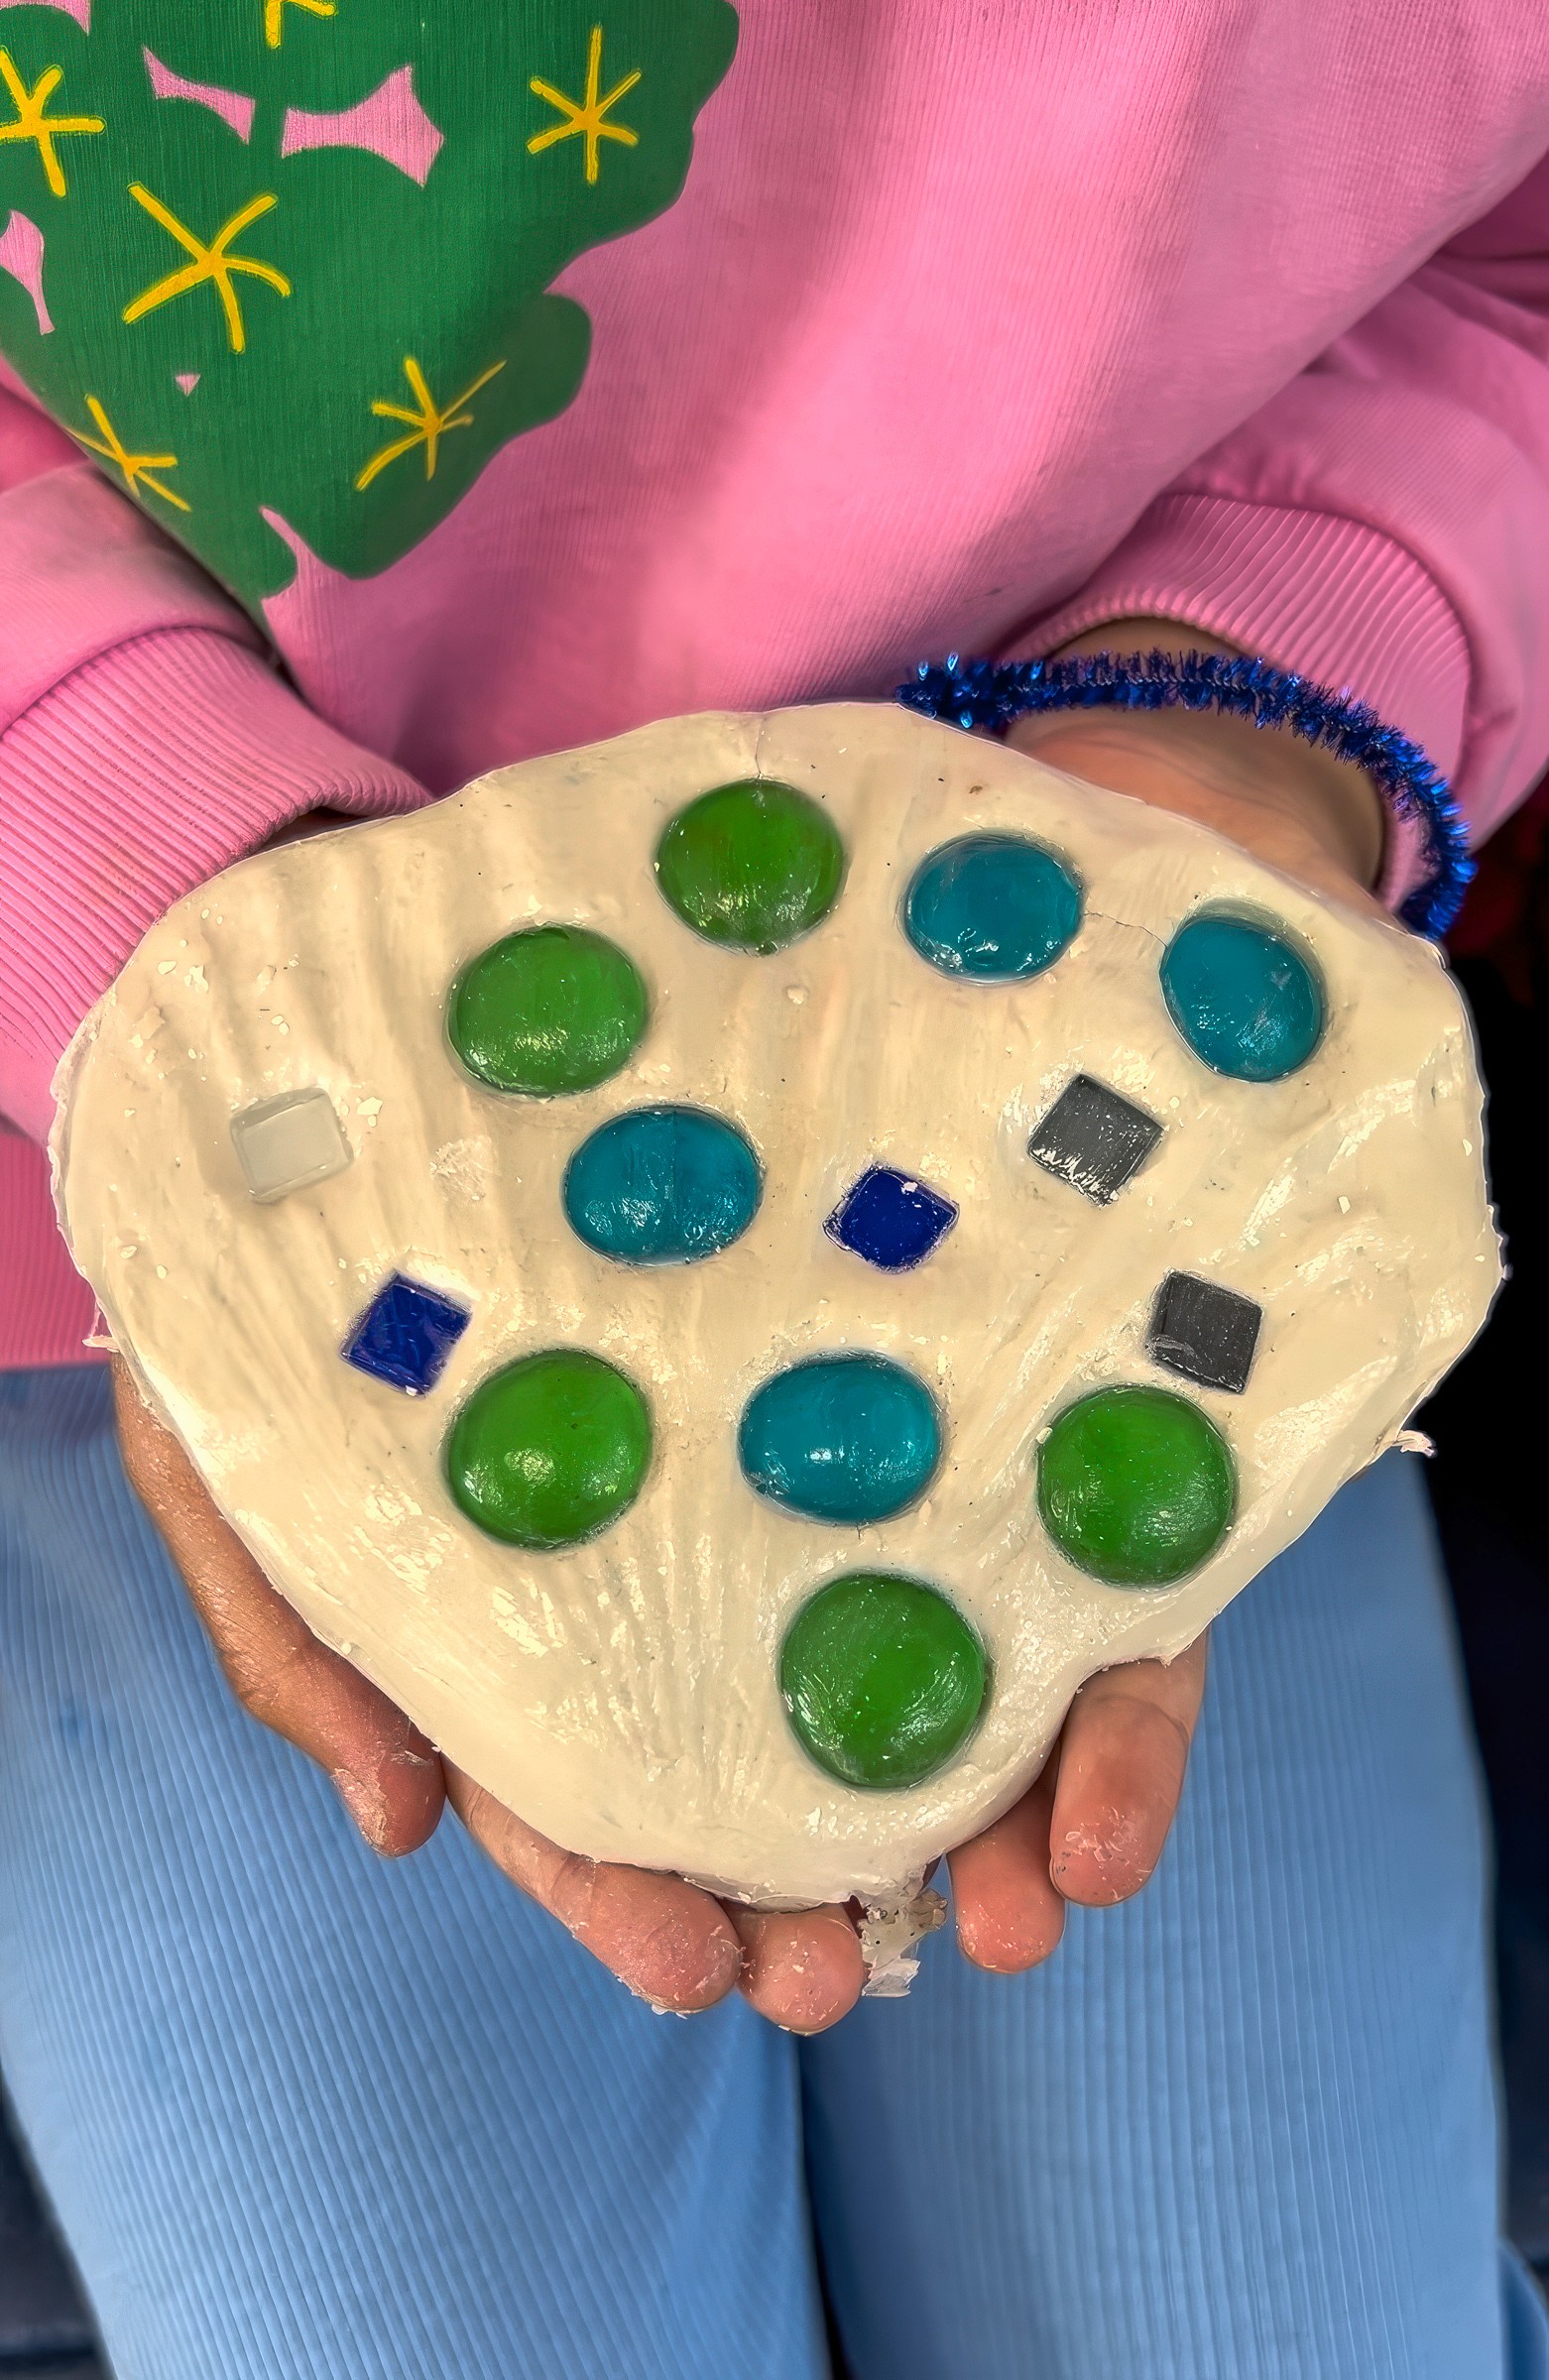
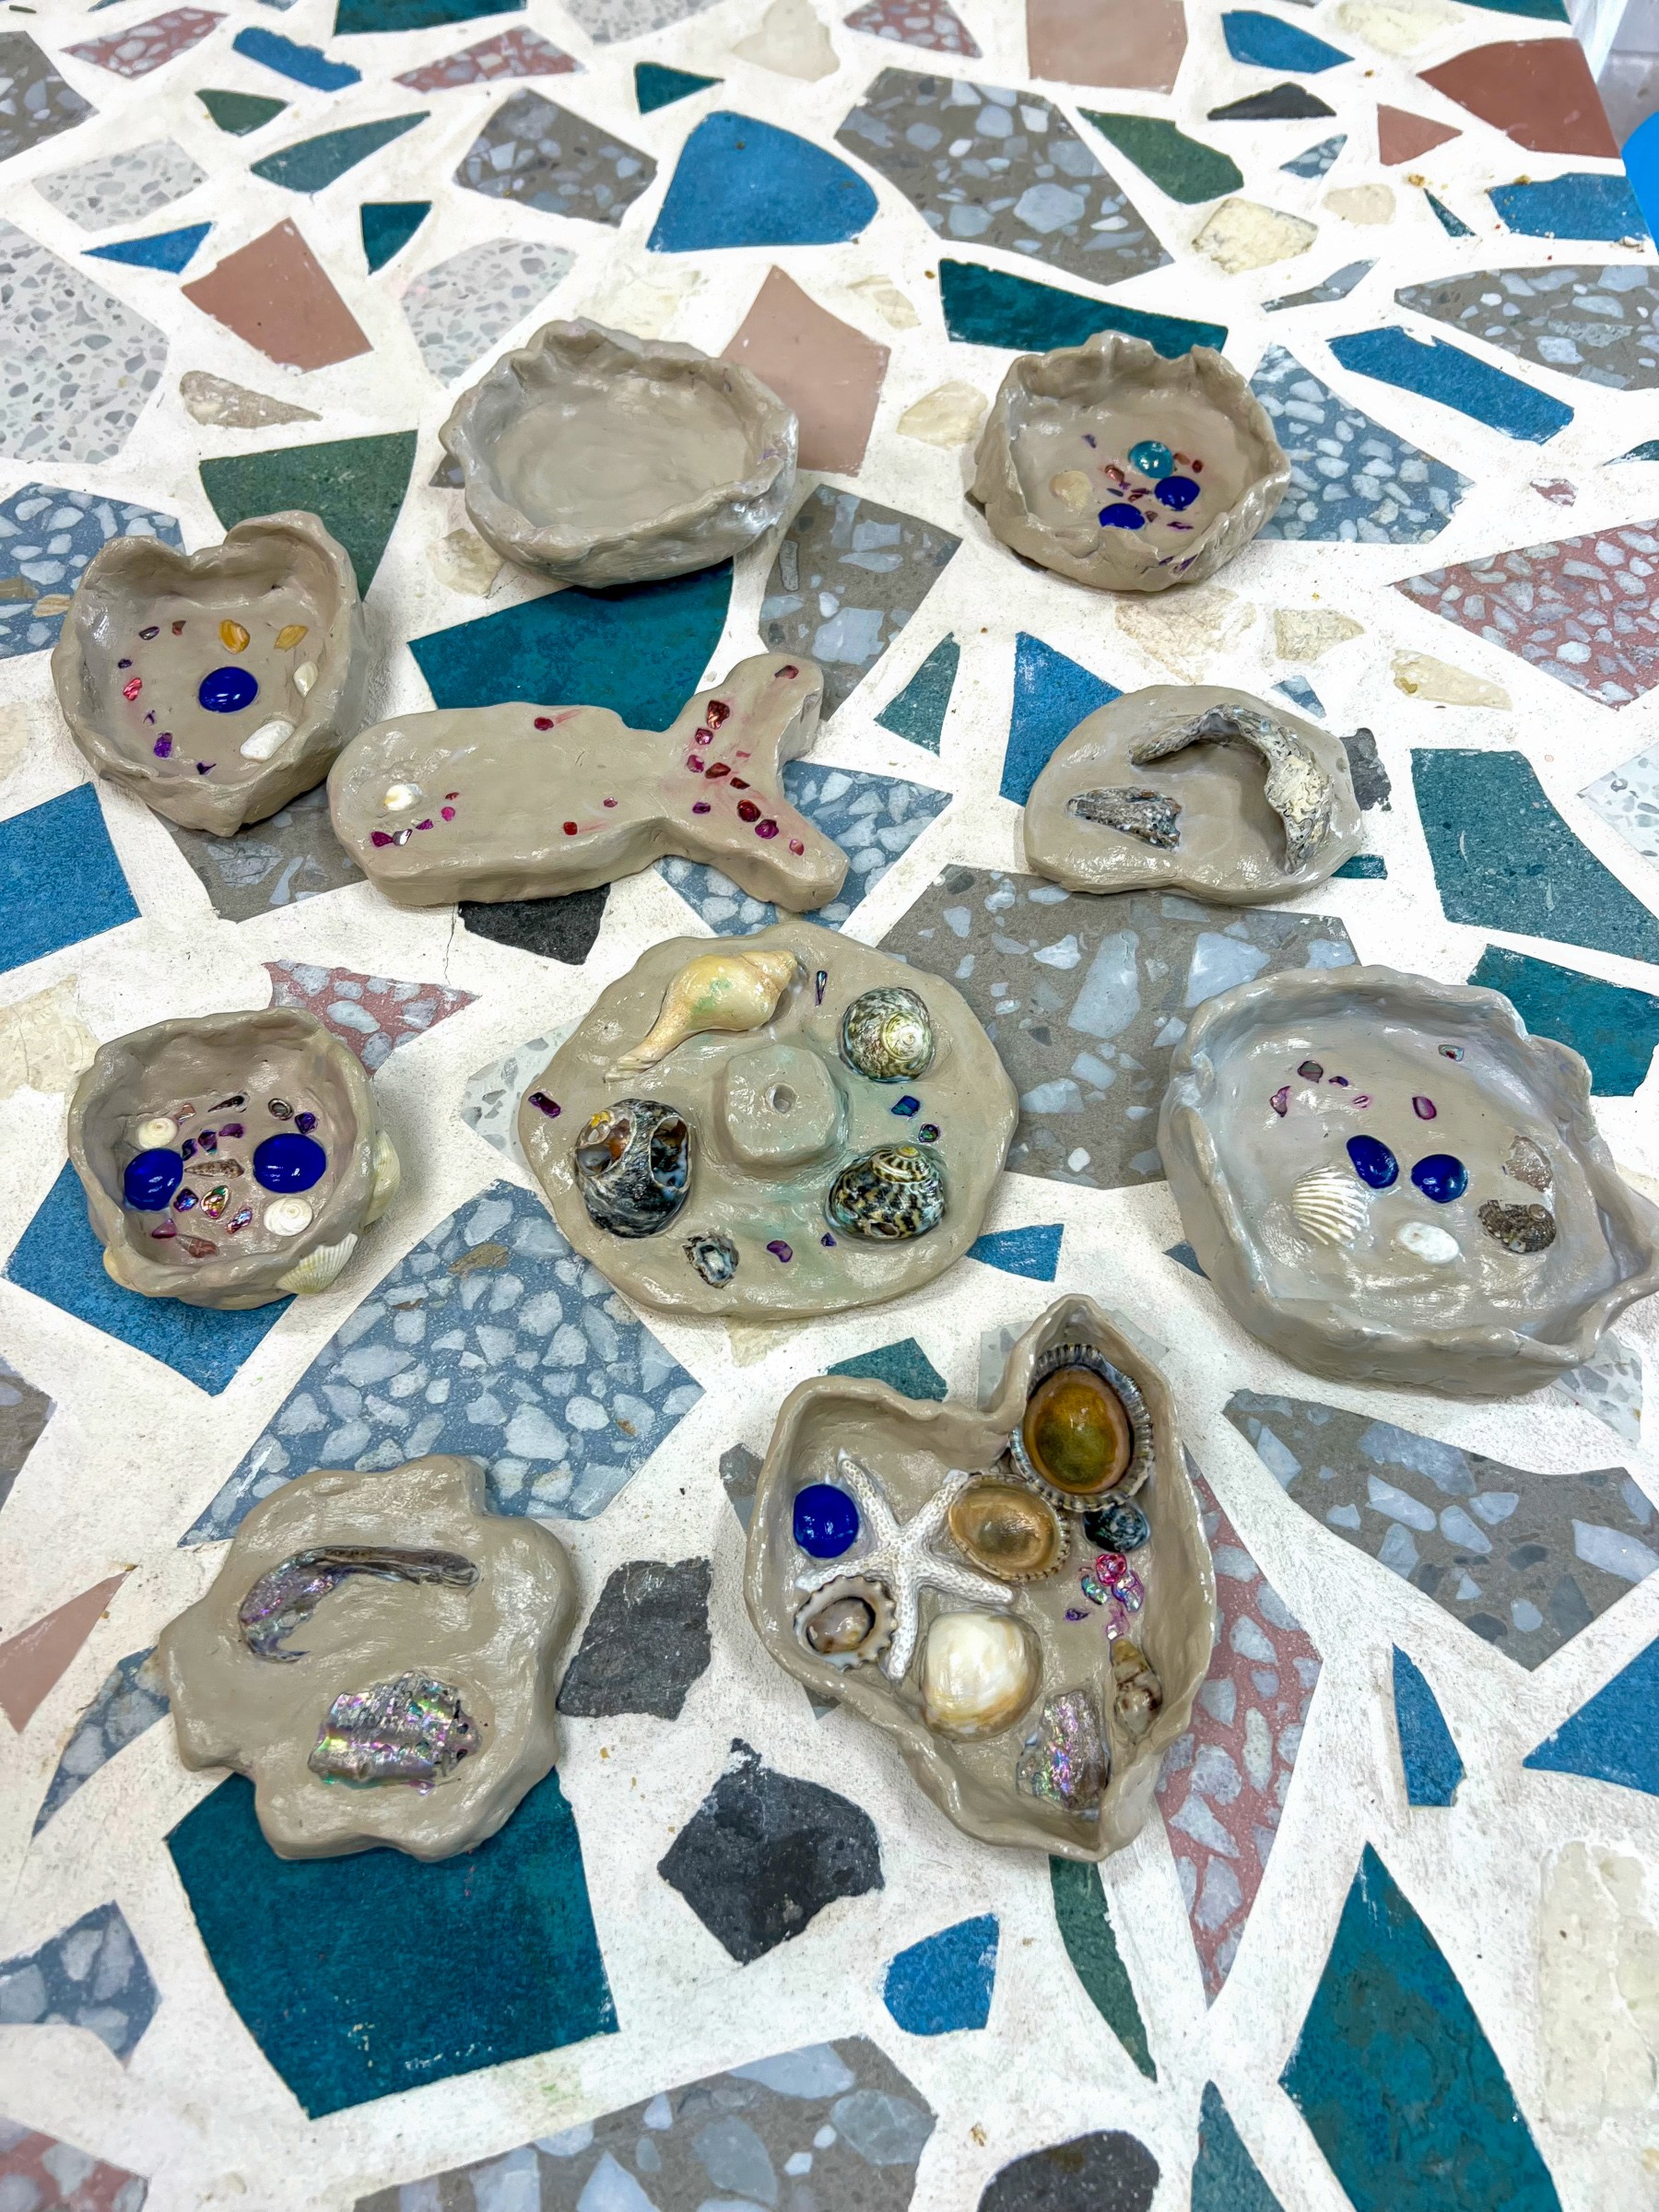
Begin by kneading or “throwing” the clay against the table to warm it up. This makes it easier to shape. Then build! We’ve seen coral reef trays, clam shells, bowls, and abstract ocean forms. The magic comes when kids press their chosen treasures into the clay, embedding them as permanent memories.
Clay definitely has its challenges, and it’s worth talking them through beforehand:
Cracking: if the clay is too thin, it can dry unevenly. Keep walls and bases around 1cm thick.
Pieces falling off: when adding handles, spikes, or extra layers, score both surfaces (cross-hatch with a tool) and dab with water before joining.
Flaking: a fingertip dipped in water smooths rough patches and stops edges from crumbling.
Once shaped, leave the work to dry slowly. Outdoors in the shade works well. I recommend avoiding harsh sun, which can cause warping. (Obviously freezing or wet weather won't work either!).
When dry, seal with Mod Podge or a clear varnish to add shine and secure the treasures.
Variations
Add a splash of colour once dry! You could paint the clay with tempera or watercolours before sealing.
Press textures into the clay before sculpting (netting, shells, fabric) so the surface feels ocean-worn.
Build collaborative “reef bowls” where everyone adds their treasures to one large piece.

Materials
Air-dry clay (Northcote Pottery recommended for anyone here in Melbourne!)
Rolling pins, clay tools, plastic knives
Baking paper or boards for working surfaces
Small bowls of water
Sea glass, shells, and other beach finds
Optional: Mod Podge, clear varnish, or paints for finishing
Back to Top
Buried Clay Treasures
Press the sea’s treasures into clay.
Bookmark
Sculpture
The Set Up
This idea was born from a beachcombing day with our daughter Olive. We came home with gorgeous frosted sea glass, and she sculpted a vase to hold it all, like a little treasure keeper for our Summer!
It was too beautiful not to share with the kids at Smudge, and as always, they took it further than I could have imagined.
We use air-dry clay from Northcote Pottery (our favourite in Melbourne: smooth, strong, no cracking clay).
Set up a “treasure bar” of sea glass, shells, and small beach finds so children can choose their own collection. Rolling pins, clay tools, plastic knives, and trays lined with baking paper all make it easier. A small bowl of water for smoothing is essential.
Before you head out collecting, check what’s allowed on your local beaches. Some spots (especially National Parks) have strict rules about removing natural materials. And always make sure every shell is empty and every creature stays safely at home in the sea!
The Making
Begin by kneading or “throwing” the clay against the table to warm it up. This makes it easier to shape. Then build! We’ve seen coral reef trays, clam shells, bowls, and abstract ocean forms. The magic comes when kids press their chosen treasures into the clay, embedding them as permanent memories.
Clay definitely has its challenges, and it’s worth talking them through beforehand:
Cracking: if the clay is too thin, it can dry unevenly. Keep walls and bases around 1cm thick.
Pieces falling off: when adding handles, spikes, or extra layers, score both surfaces (cross-hatch with a tool) and dab with water before joining.
Flaking: a fingertip dipped in water smooths rough patches and stops edges from crumbling.
Once shaped, leave the work to dry slowly. Outdoors in the shade works well. I recommend avoiding harsh sun, which can cause warping. (Obviously freezing or wet weather won't work either!).
When dry, seal with Mod Podge or a clear varnish to add shine and secure the treasures.
Variations
Add a splash of colour once dry! You could paint the clay with tempera or watercolours before sealing.
Press textures into the clay before sculpting (netting, shells, fabric) so the surface feels ocean-worn.
Build collaborative “reef bowls” where everyone adds their treasures to one large piece.
Materials
Air-dry clay (Northcote Pottery recommended for anyone here in Melbourne!)
Rolling pins, clay tools, plastic knives
Baking paper or boards for working surfaces
Small bowls of water
Sea glass, shells, and other beach finds
Optional: Mod Podge, clear varnish, or paints for finishing
Back to Top
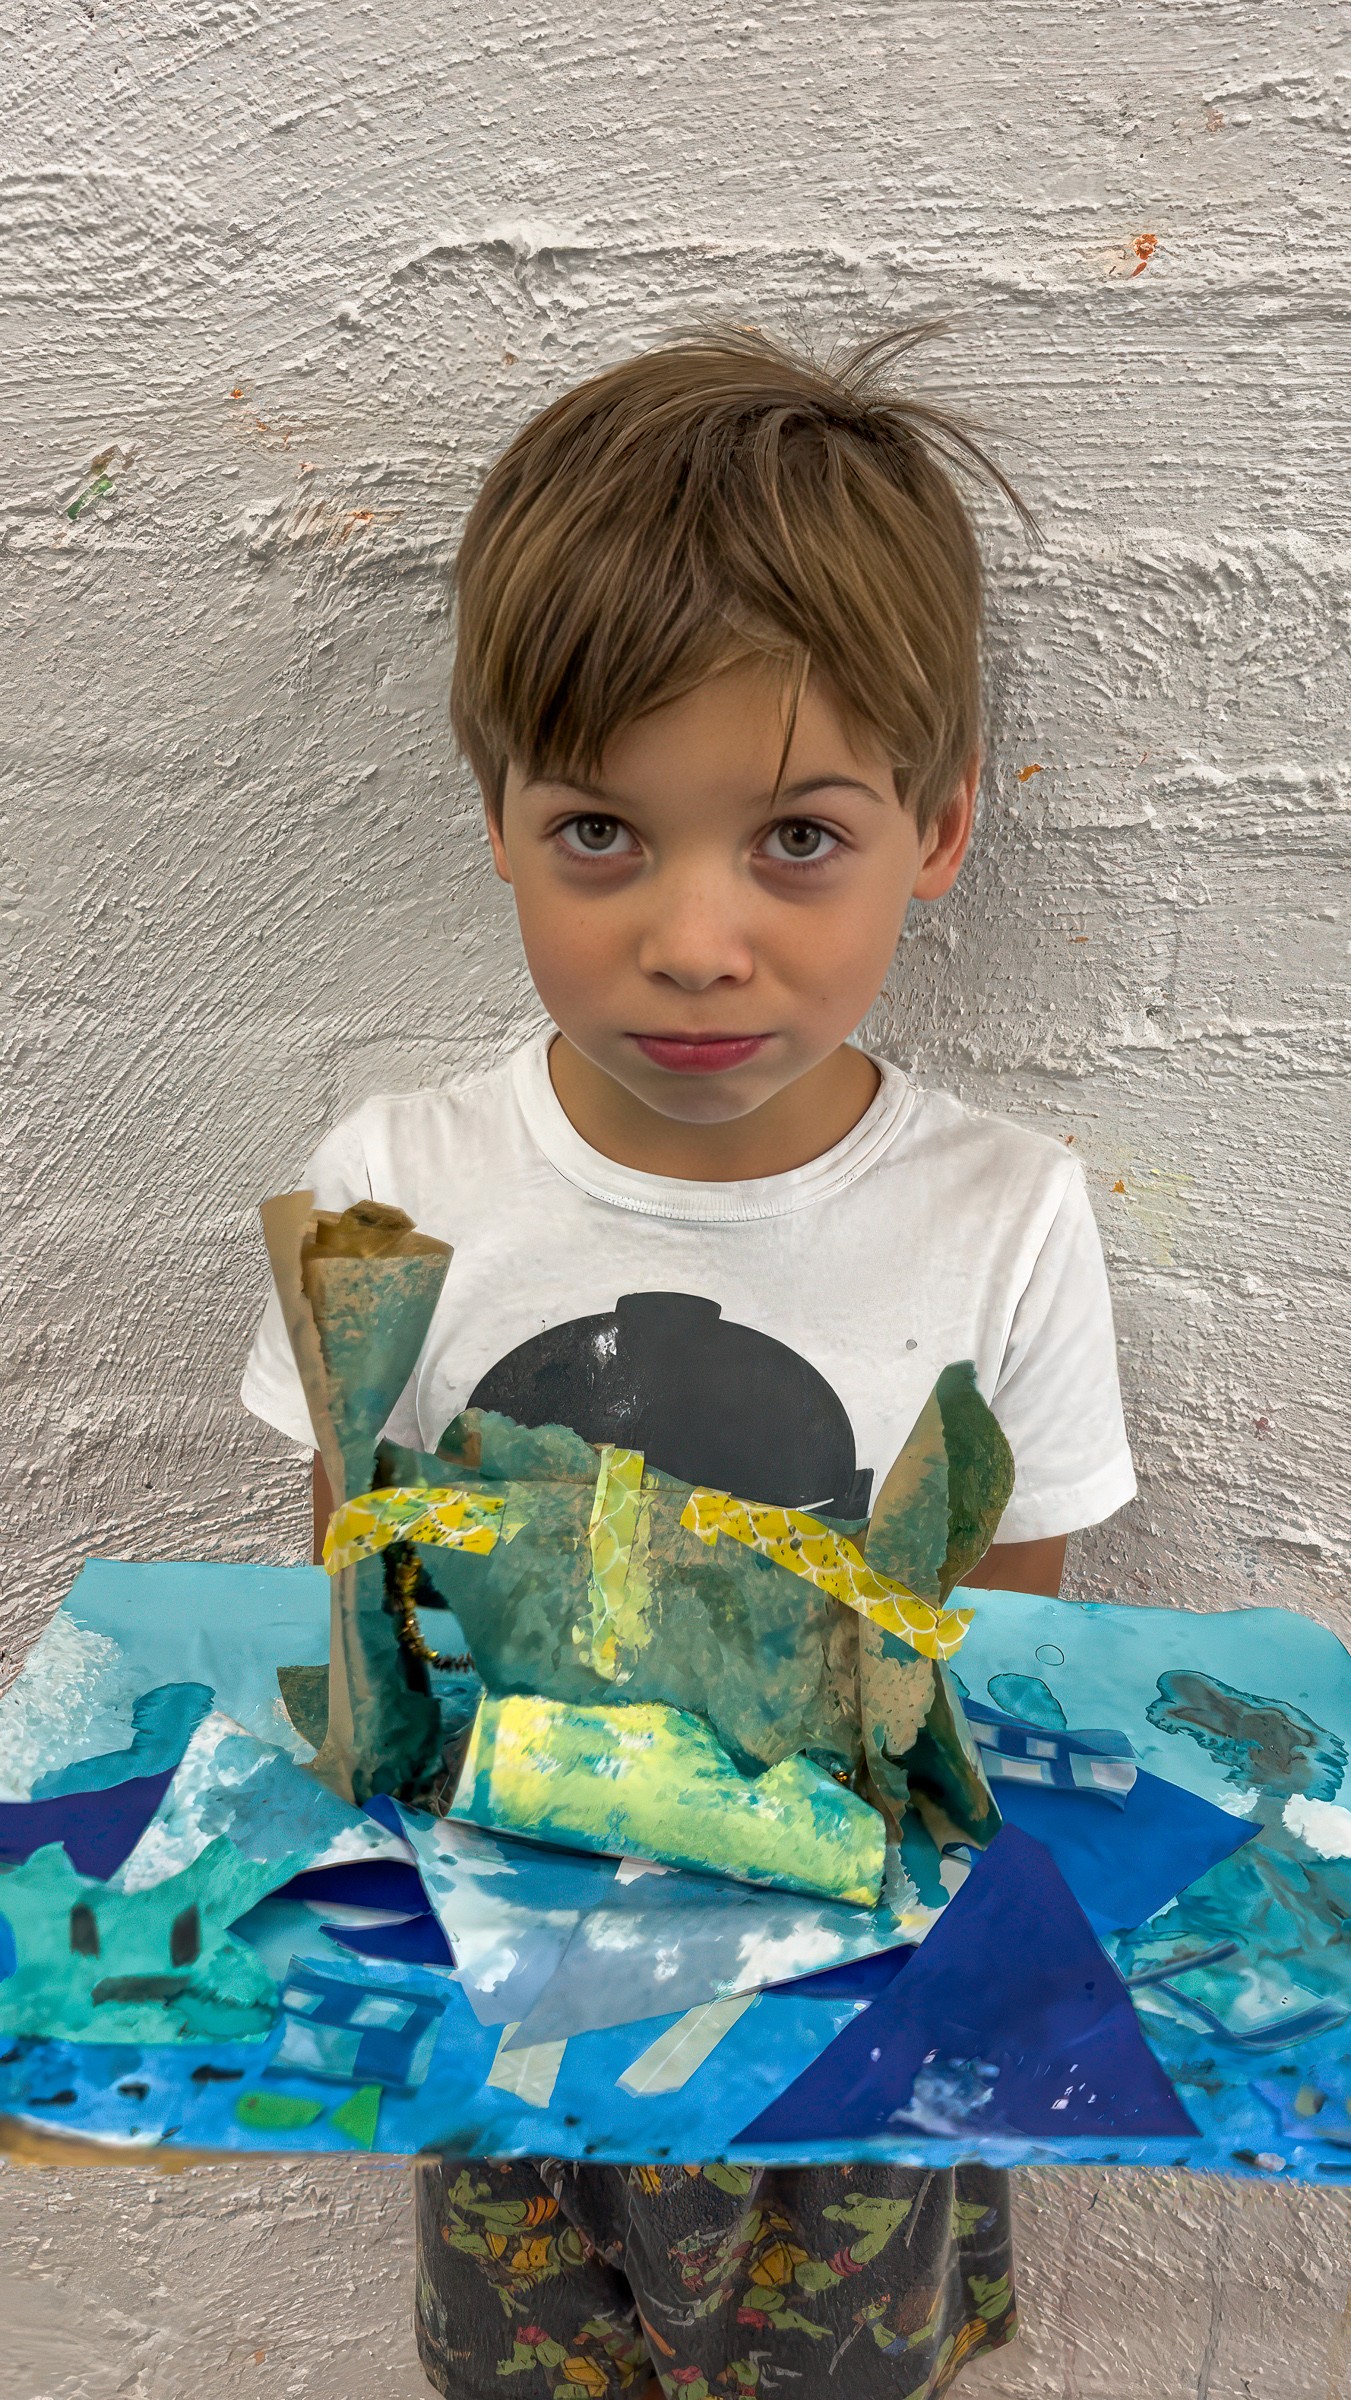
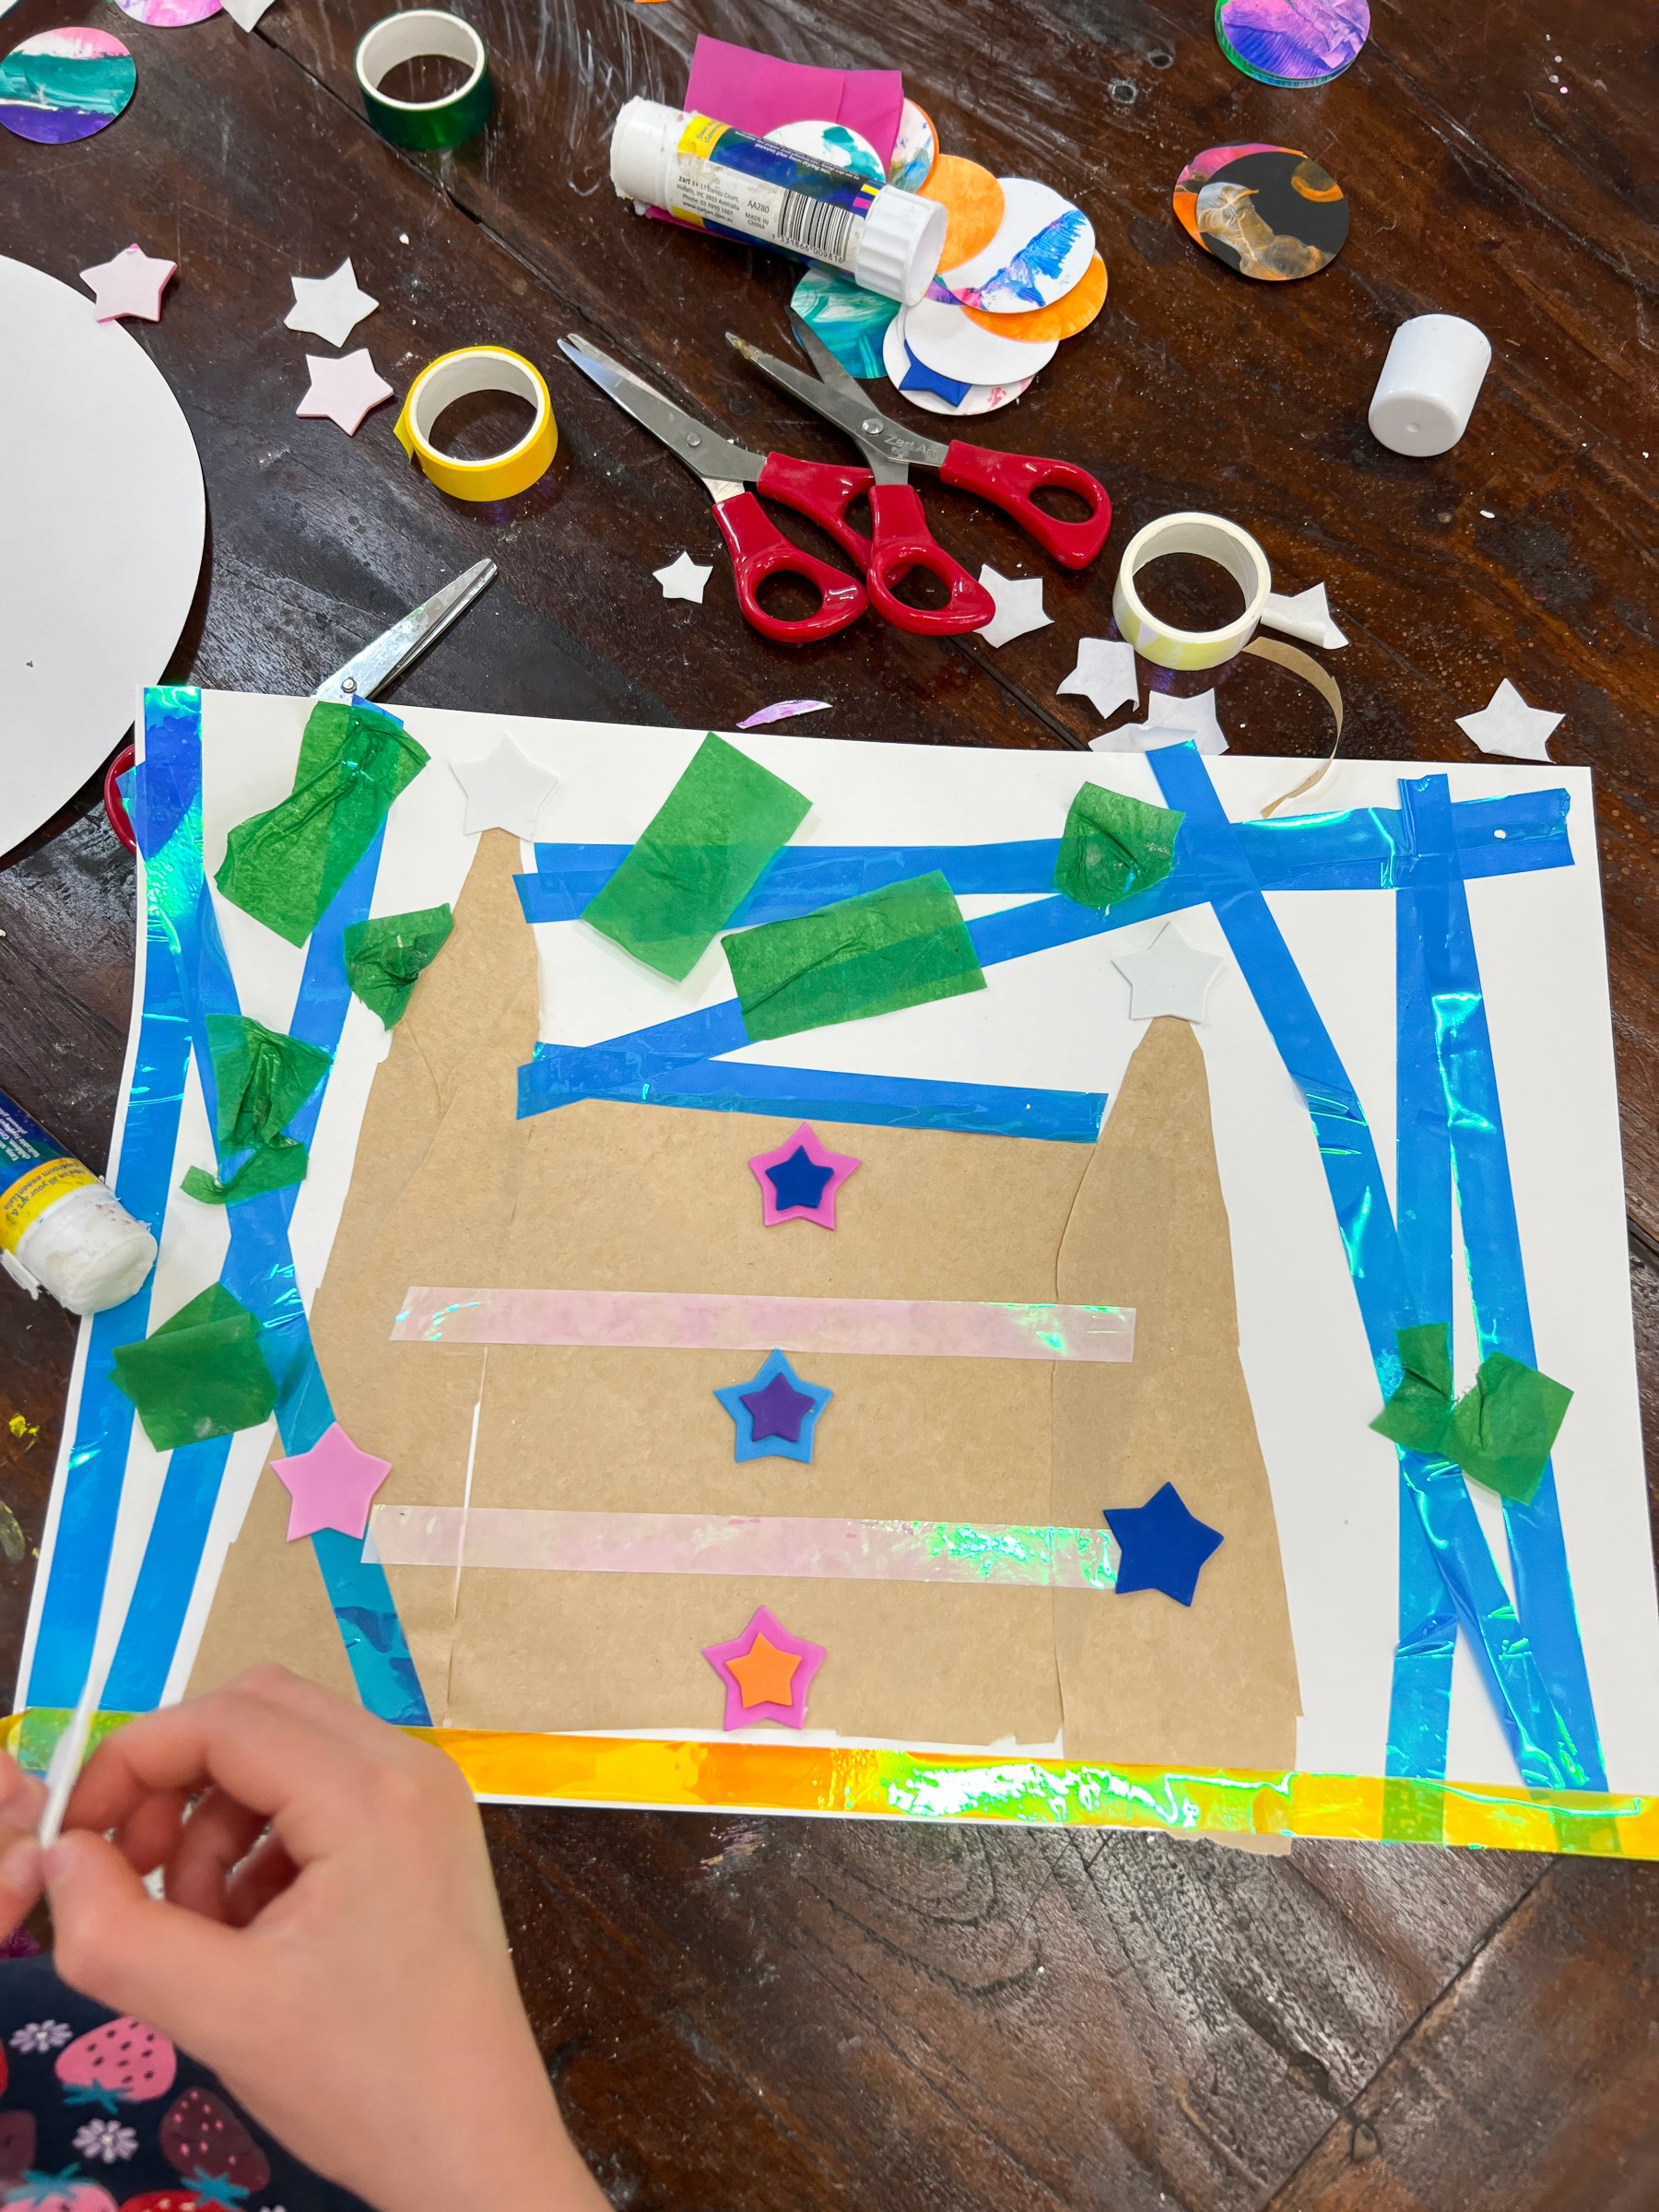
Paper Sandcastles
Sandcastle building without the sand in your toes
Bookmark
Collage
The Set Up
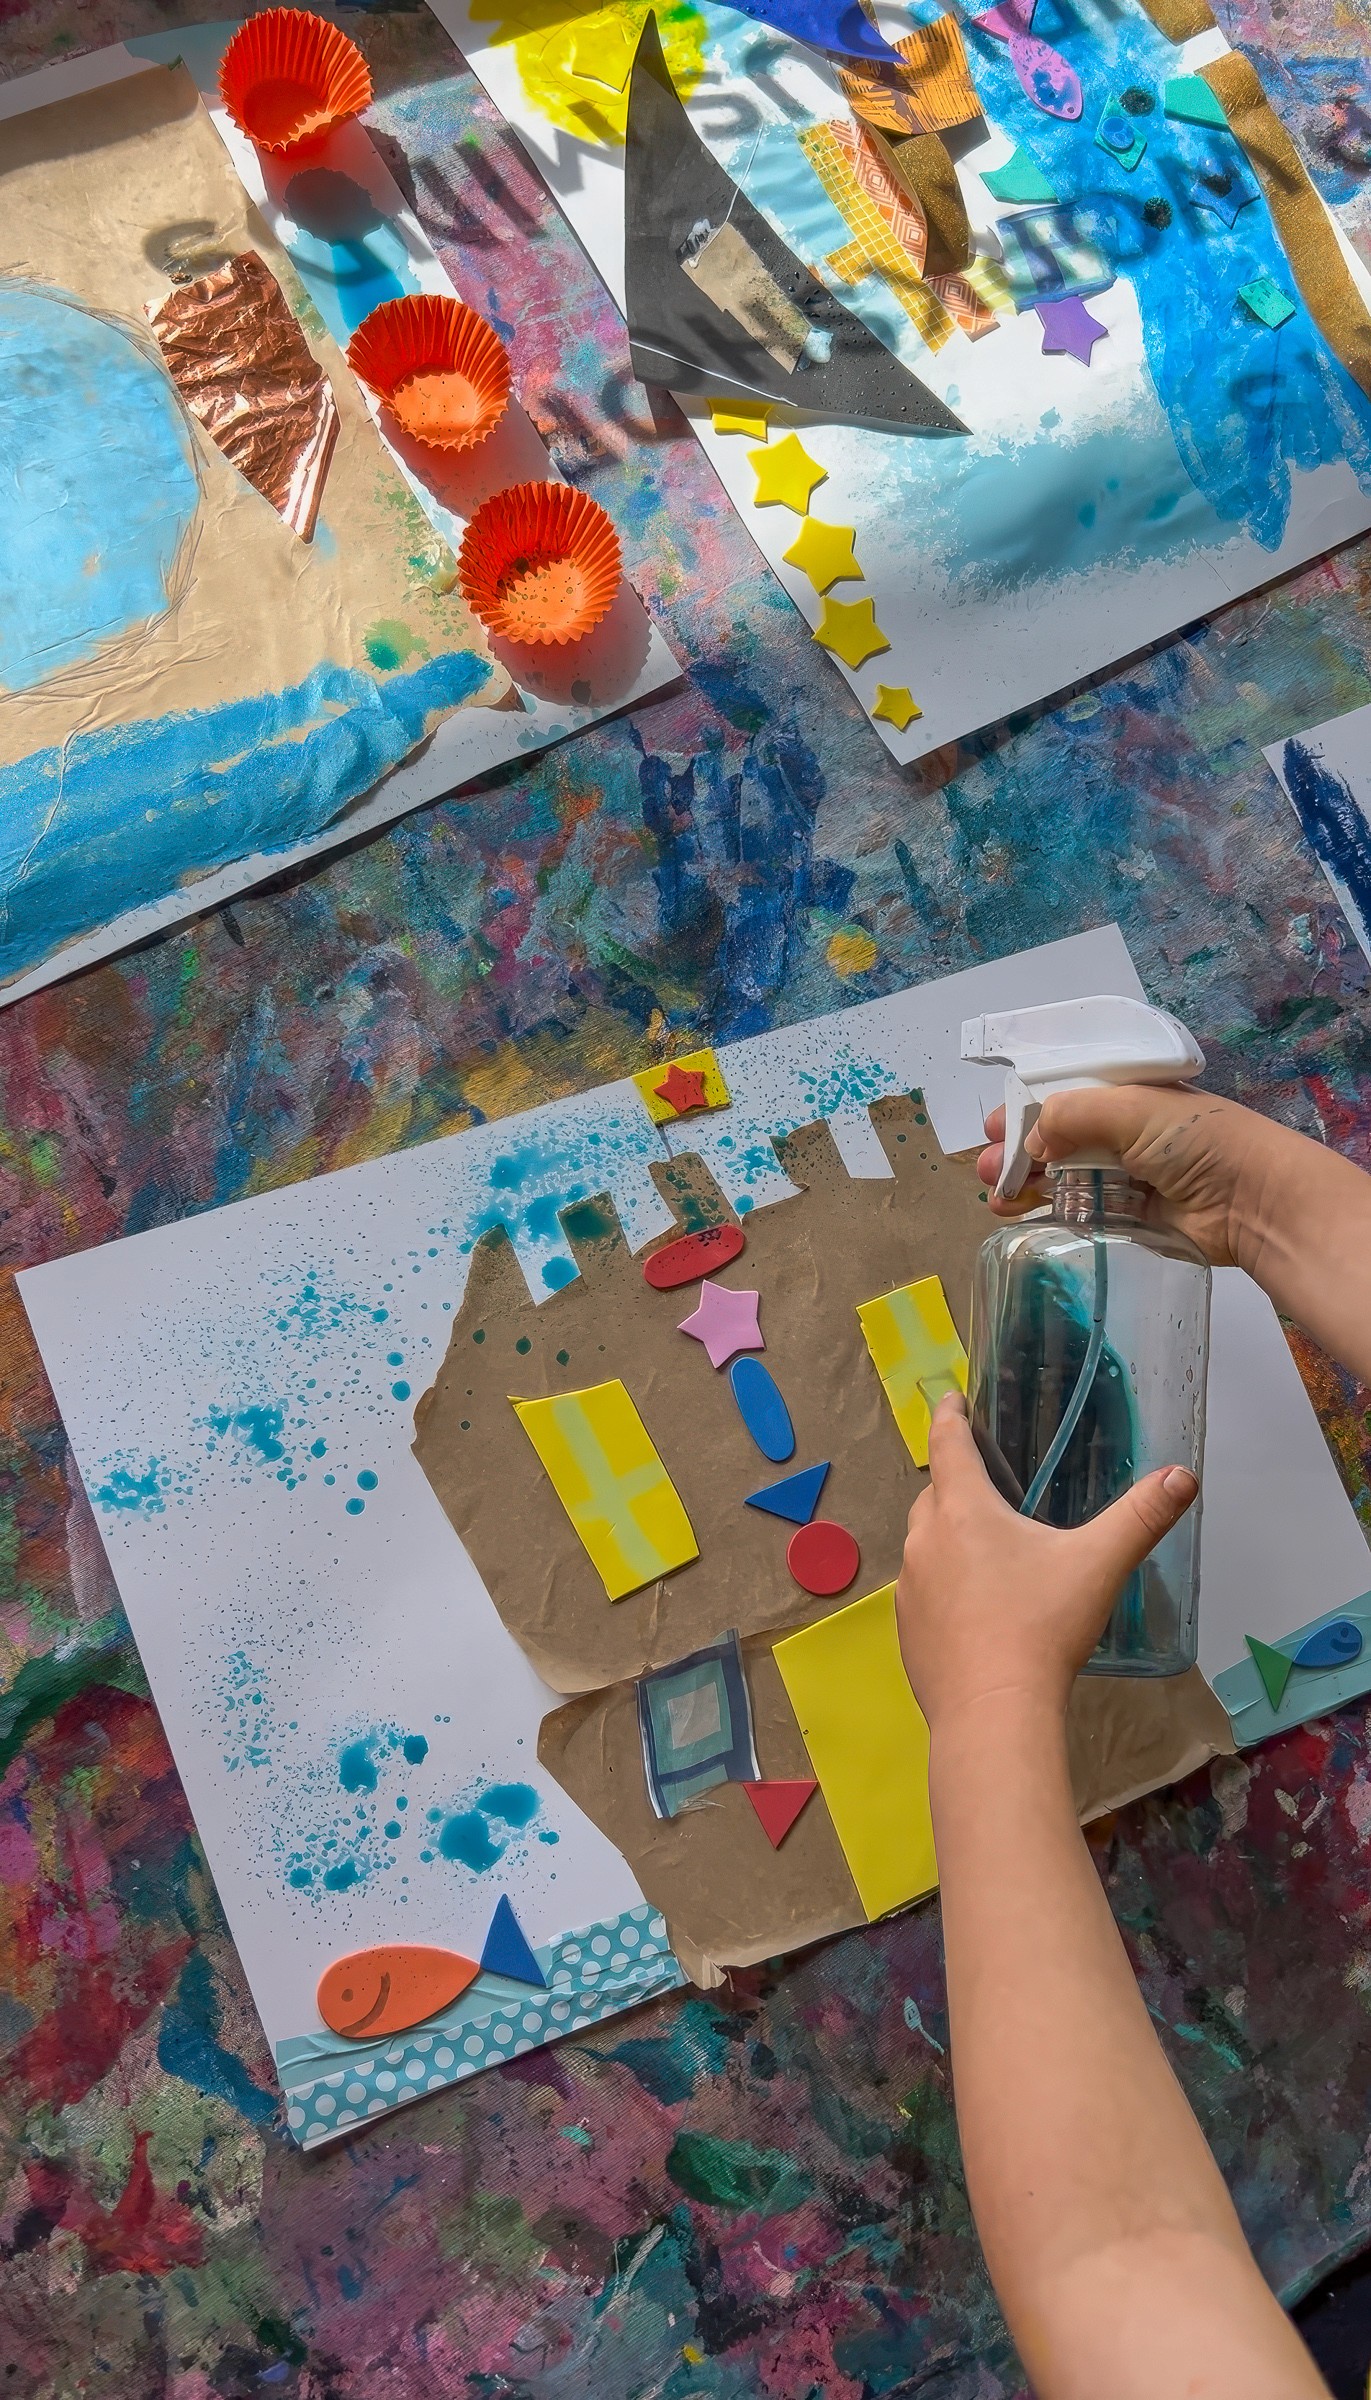
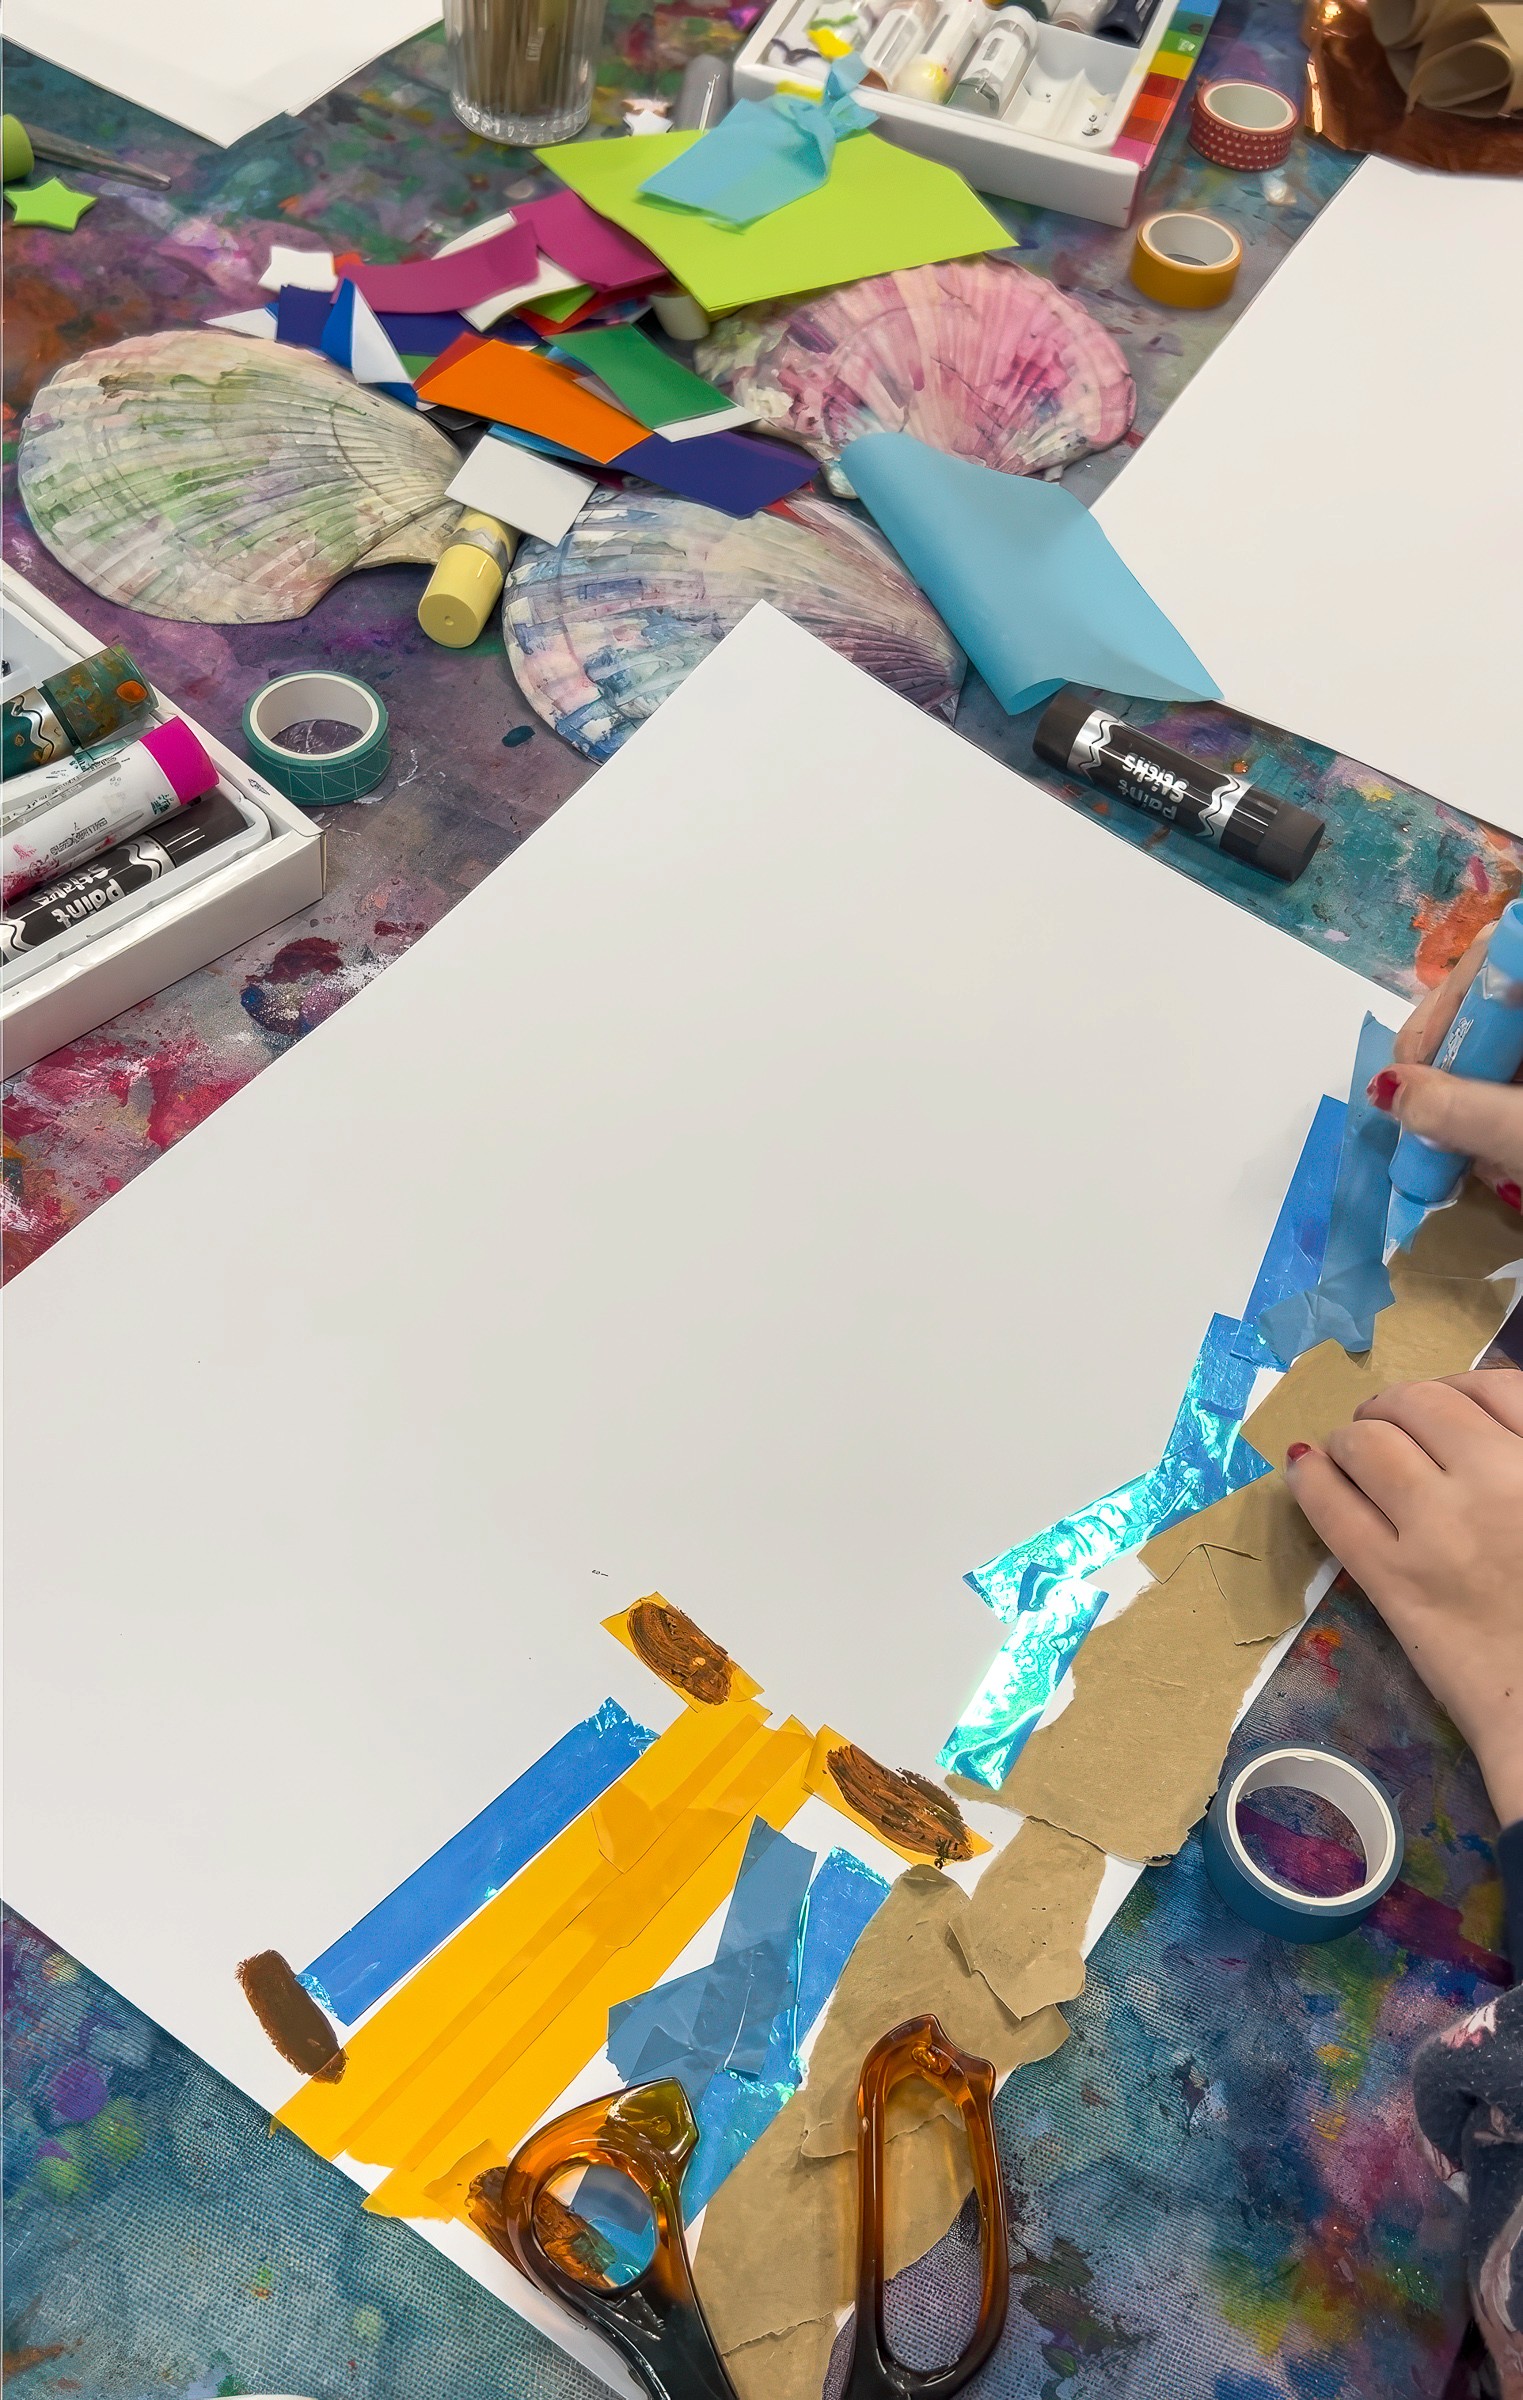
This is sandcastle building without the sand in your shoes. Gather a pile of textured, recycled and shiny bits that feel like the beach. Brown kraft wrap, honeycomb packing paper, repurposed painted scraps, blue cellophane for water, foil and shiny stickers for treasure. Add scissors, glue, washi tape and plenty of flat space to spread and layer.
You don’t need to steer this one too tightly. The joy is in the pile: a curated chaos of textures ready to be ripped, cut, stacked and transformed.
The Making
Before diving in, set the scene. Ask the children to close their eyes and imagine they’re at the beach, piling sand high, digging moats, adding towers and shells. Show photos of incredible sand sculptures or read from Alison Lester’s Magic Beach to stir ideas (a Smudge-forever favourite!). Rockpools, castles, whole underwater worlds, they are free to build whatever they can picture.
Then let it rip. Literally!
Your role here is to set the stage and then step back. Keep the table stocked, notice the choices children are making, and resist the urge to straighten edges or explain what a “real” sandcastle looks like. Every torn scrap or shiny piece is part of their story.
Children might stack scraps into towers, tuck treasures underneath layers, or sprawl their castles wide across the whole page. Others might build moats, rockpools, or tiny hidden rooms. The magic is in letting the collage take its own shape.
If you want to nudge the exploration, ask open questions instead of giving directions.
“What belongs at the very top of your castle?”
“Could you build something so tiny it almost disappears?”
“What would happen if the tide washed in and out again?”

Variations
Try building one giant castle together on butcher’s paper so every child adds their own tower, moat or treasure room.
Offer magazines such as National Geographic and let ocean creatures or landscapes creep into the castles.
Switch the base colour: ocean blue, sandy yellow, even black for a glowing night-time castle.
Take it three-dimensional by folding or rolling card so turrets lift off the page and feel like a construction more than a collage.
Materials
Brown kraft paper, honeycomb packing wrap, recycled packaging and painted paper scraps
Blue cellophane, foil, shiny stickers, washi tape and other sparkly or textured bits
Scissors, glue sticks, PVA
Cardboard rolls or folded card for three-dimensional castles (optional)
Magazines such as National Geographic for cut-out surprises
Back to Top
Paper Sandcastles
Sandcastle building without the sand in your toes
Bookmark
Collage
The Set Up
This is sandcastle building without the sand in your shoes. Gather a pile of textured, recycled and shiny bits that feel like the beach. Brown kraft wrap, honeycomb packing paper, repurposed painted scraps, blue cellophane for water, foil and shiny stickers for treasure. Add scissors, glue, washi tape and plenty of flat space to spread and layer.
You don’t need to steer this one too tightly. The joy is in the pile: a curated chaos of textures ready to be ripped, cut, stacked and transformed.
The Making
Before diving in, set the scene. Ask the children to close their eyes and imagine they’re at the beach, piling sand high, digging moats, adding towers and shells. Show photos of incredible sand sculptures or read from Alison Lester’s Magic Beach to stir ideas (a Smudge-forever favourite!). Rockpools, castles, whole underwater worlds, they are free to build whatever they can picture.
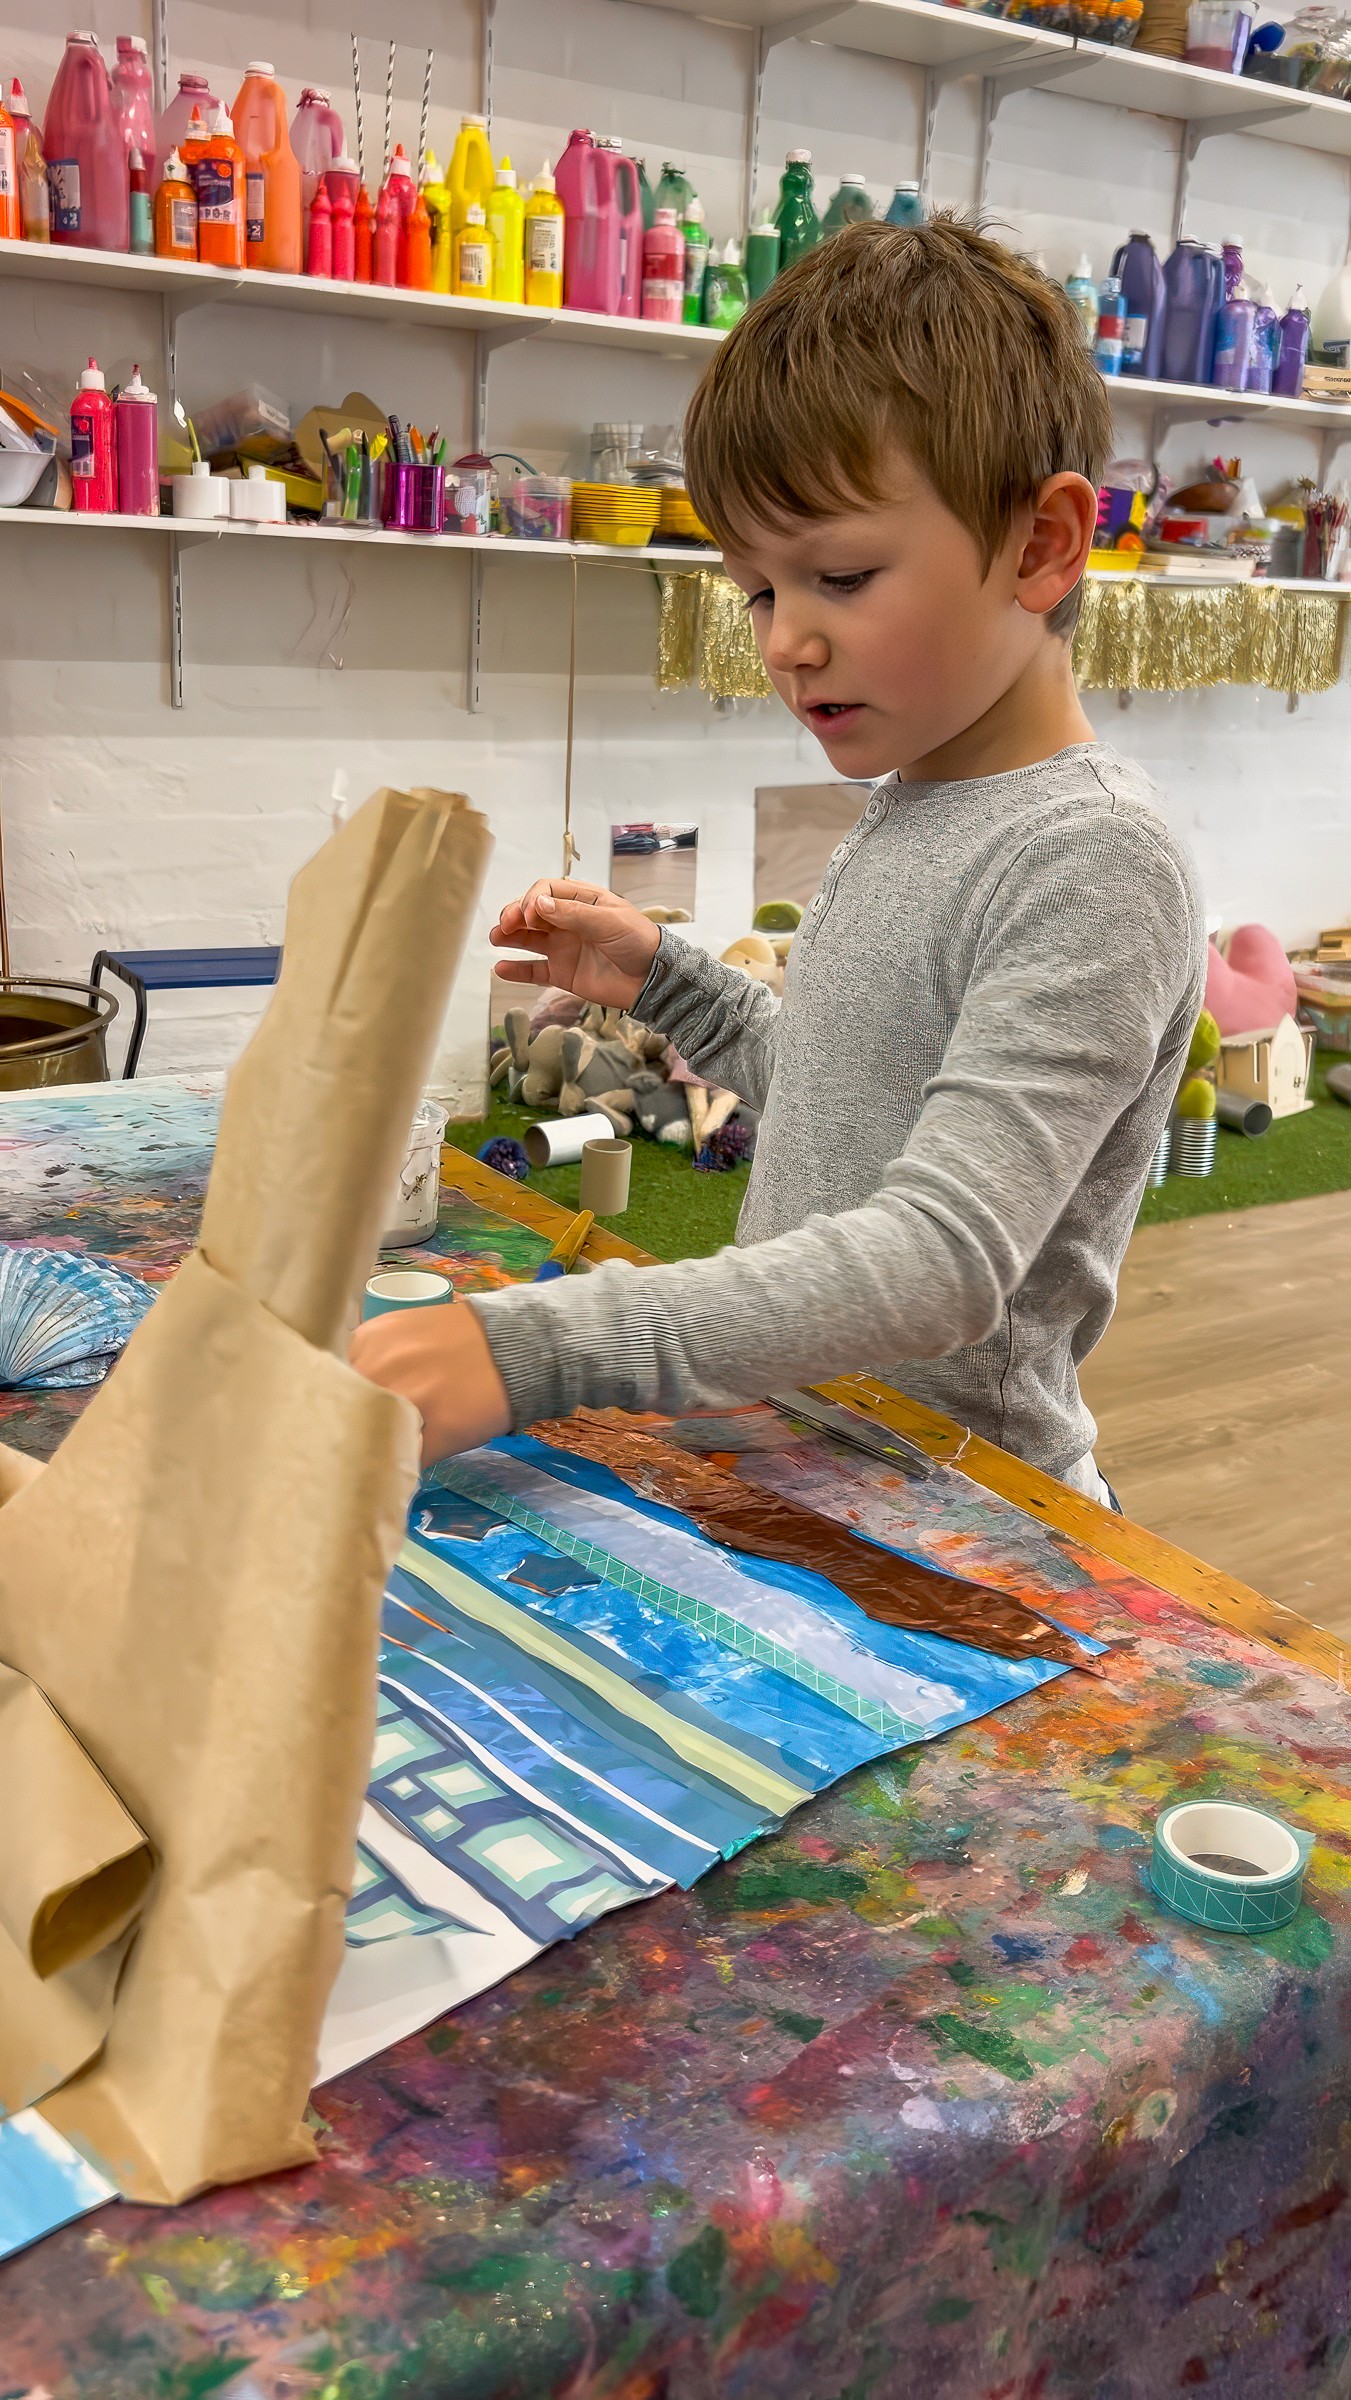
Then let it rip. Literally!
Your role here is to set the stage and then step back. Keep the table stocked, notice the choices children are making, and resist the urge to straighten edges or explain what a “real” sandcastle looks like. Every torn scrap or shiny piece is part of their story.
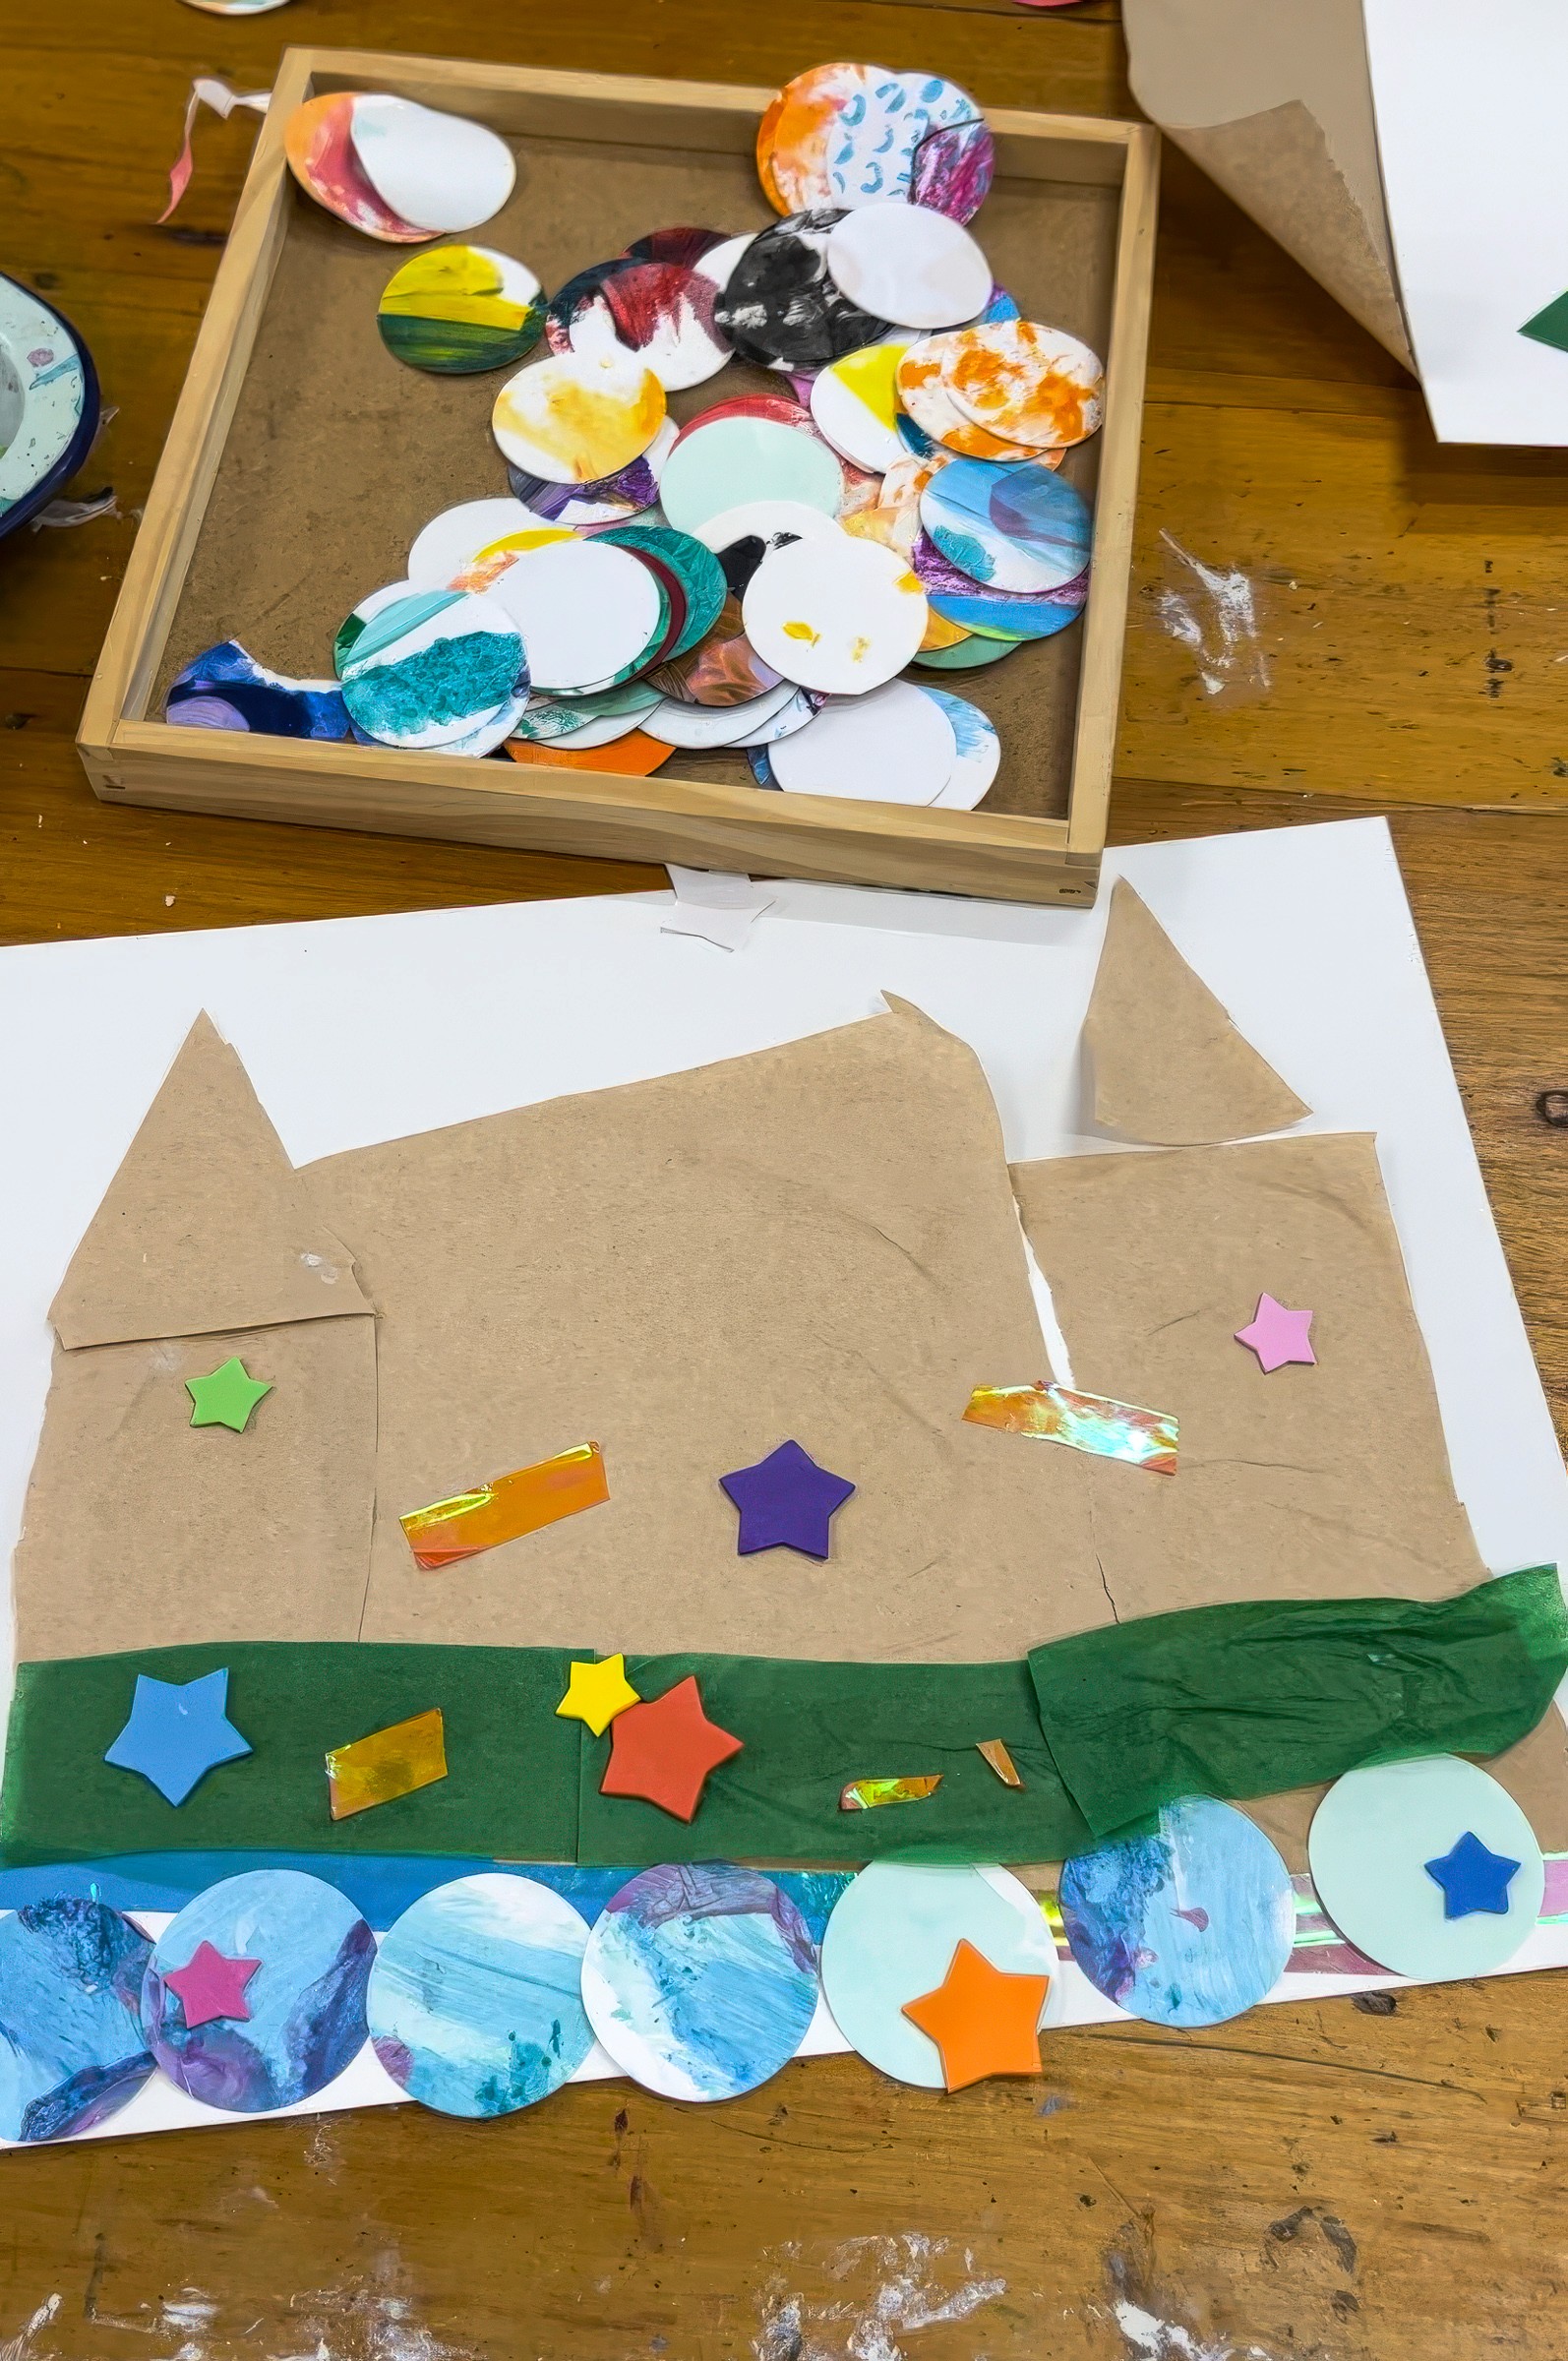
Children might stack scraps into towers, tuck treasures underneath layers, or sprawl their castles wide across the whole page. Others might build moats, rockpools, or tiny hidden rooms. The magic is in letting the collage take its own shape.
If you want to nudge the exploration, ask open questions instead of giving directions.
“What belongs at the very top of your castle?”
“Could you build something so tiny it almost disappears?”
“What would happen if the tide washed in and out again?”
Variations
Try building one giant castle together on butcher’s paper so every child adds their own tower, moat or treasure room.
Offer magazines such as National Geographic and let ocean creatures or landscapes creep into the castles.
Switch the base colour: ocean blue, sandy yellow, even black for a glowing night-time castle.
Take it three-dimensional by folding or rolling card so turrets lift off the page and feel like a construction more than a collage.
Materials
Brown kraft paper, honeycomb packing wrap, recycled packaging and painted paper scraps
Blue cellophane, foil, shiny stickers, washi tape and other sparkly or textured bits
Scissors, glue sticks, PVA
Cardboard rolls or folded card for three-dimensional castles (optional)
Magazines such as National Geographic for cut-out surprises
Back to Top
Paper Sandcastles
Sandcastle building without the sand in your toes
Bookmark
Collage
The Set Up
This is sandcastle building without the sand in your shoes. Gather a pile of textured, recycled and shiny bits that feel like the beach. Brown kraft wrap, honeycomb packing paper, repurposed painted scraps, blue cellophane for water, foil and shiny stickers for treasure. Add scissors, glue, washi tape and plenty of flat space to spread and layer.
You don’t need to steer this one too tightly. The joy is in the pile: a curated chaos of textures ready to be ripped, cut, stacked and transformed.
The Making
Before diving in, set the scene. Ask the children to close their eyes and imagine they’re at the beach, piling sand high, digging moats, adding towers and shells. Show photos of incredible sand sculptures or read from Alison Lester’s Magic Beach to stir ideas (a Smudge-forever favourite!). Rockpools, castles, whole underwater worlds, they are free to build whatever they can picture.
Then let it rip. Literally!
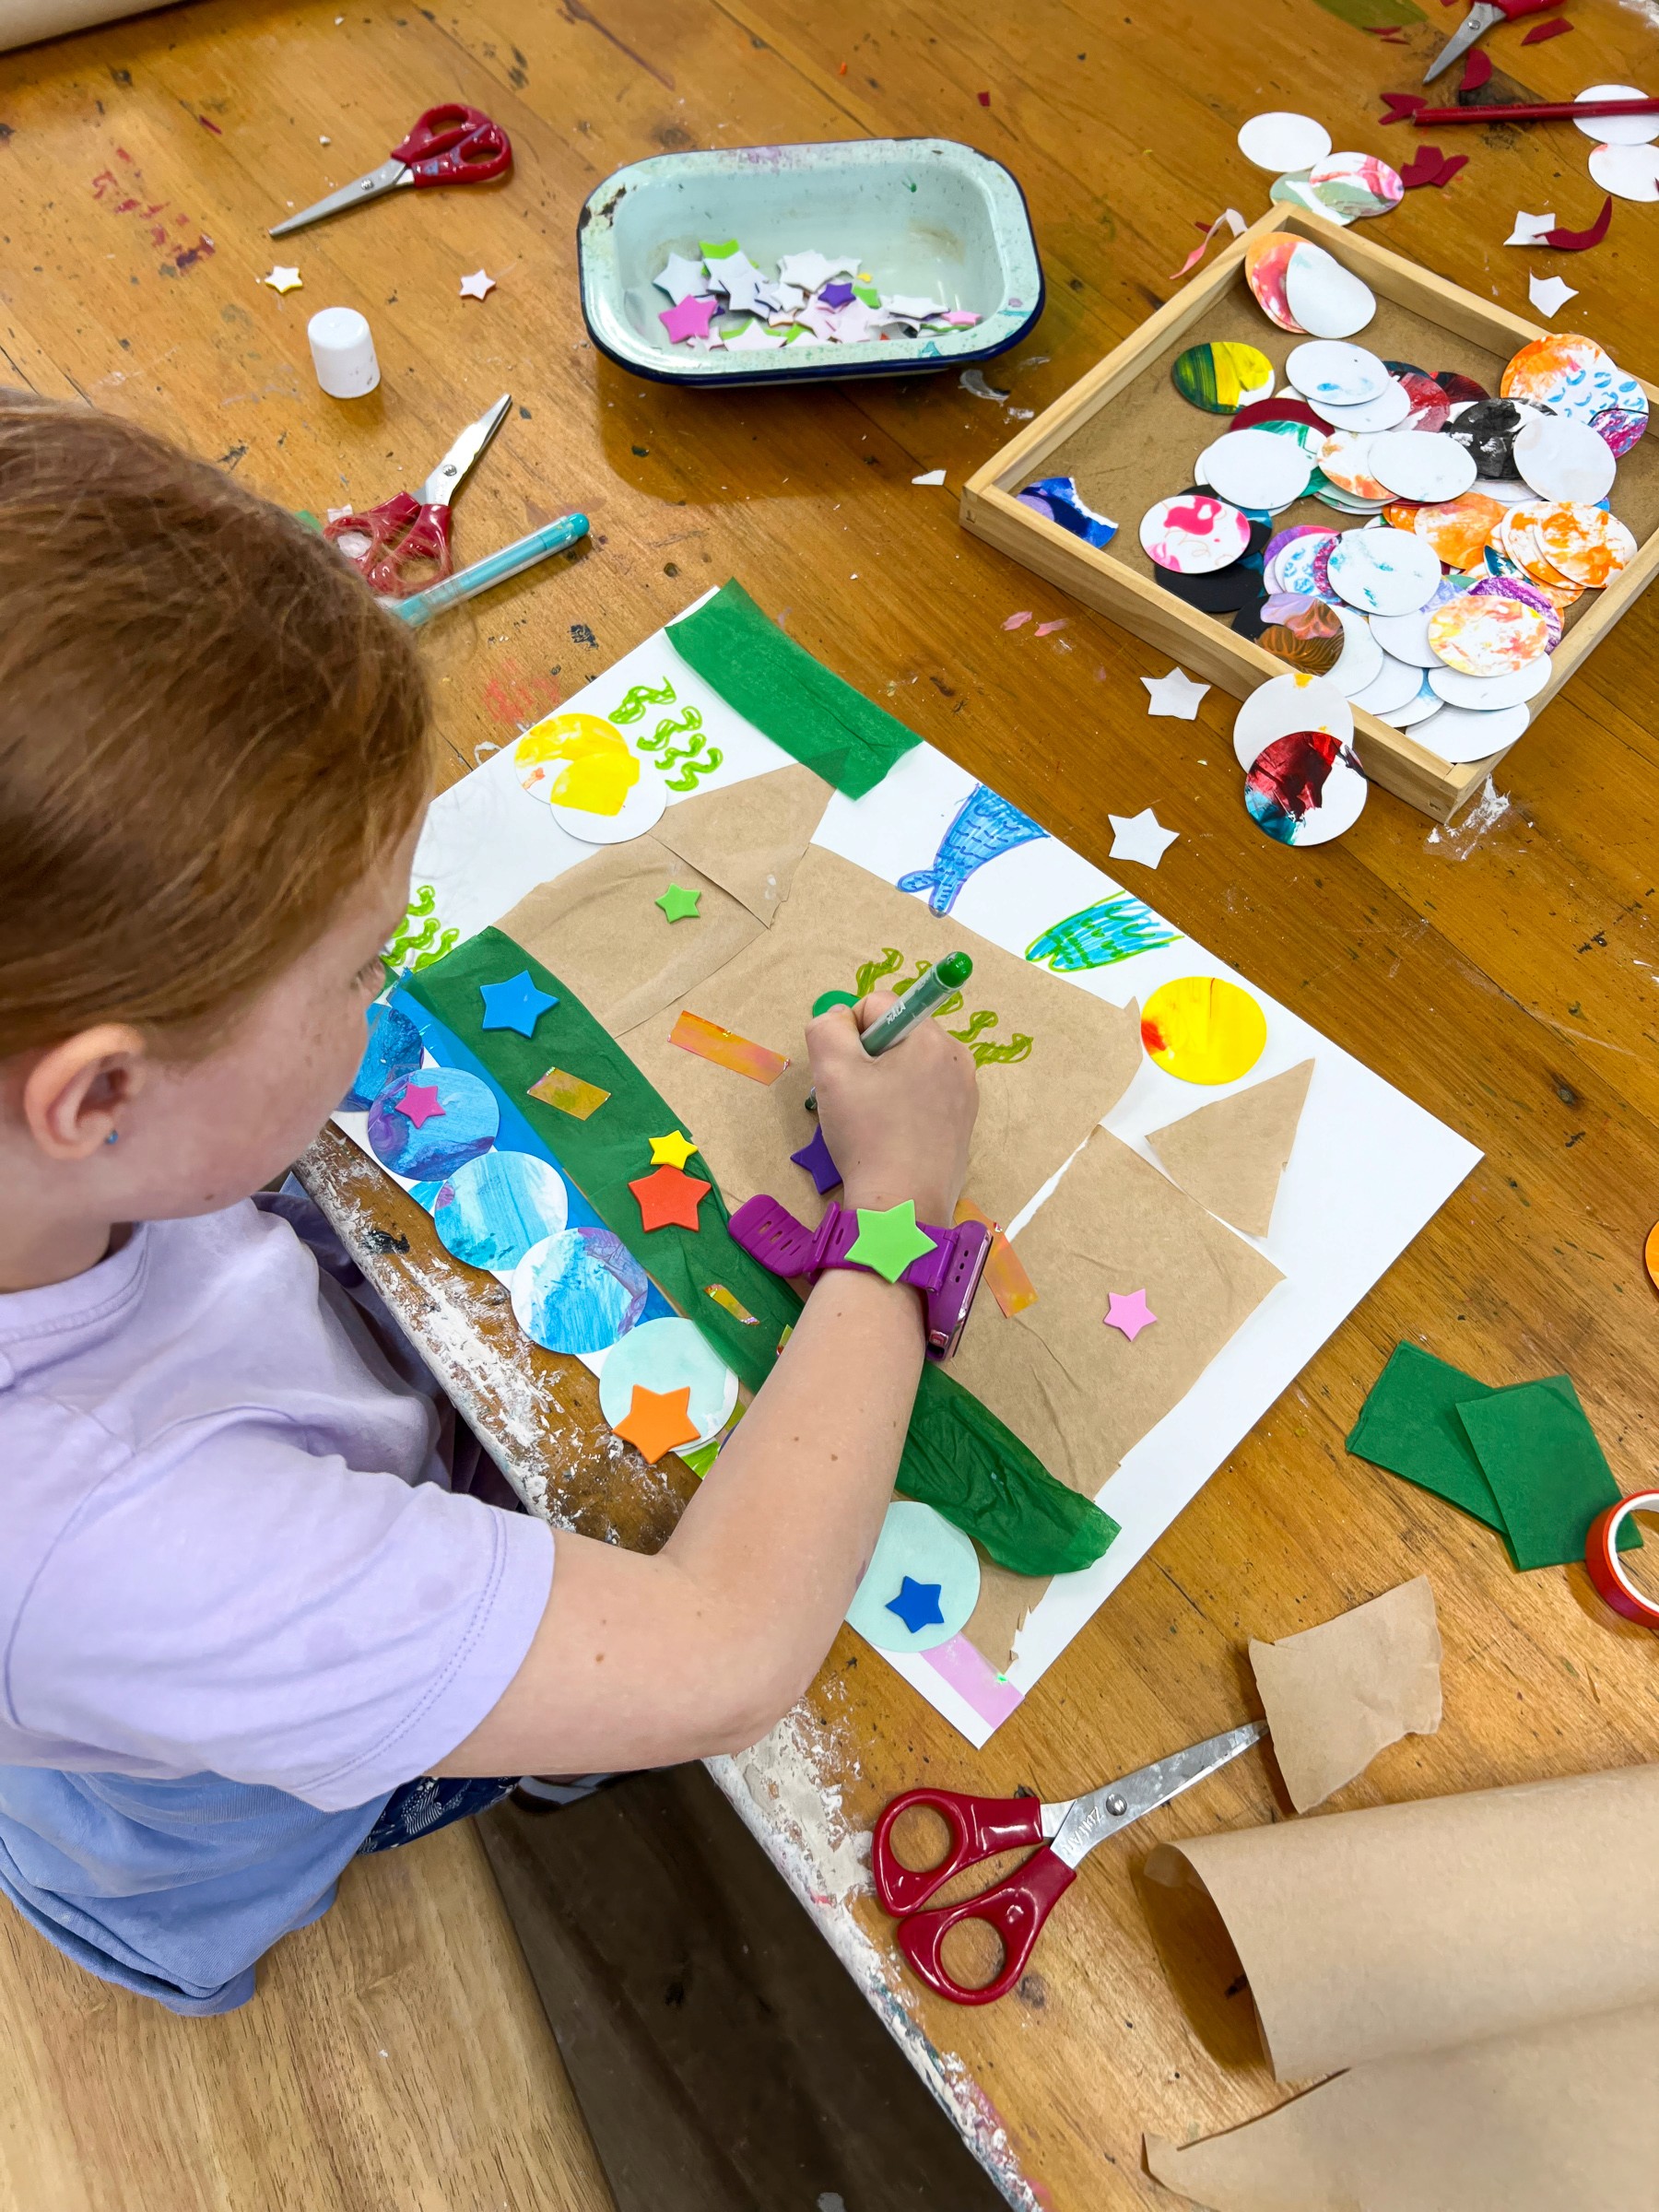
Your role here is to set the stage and then step back. Keep the table stocked, notice the choices children are making, and resist the urge to straighten edges or explain what a “real” sandcastle looks like. Every torn scrap or shiny piece is part of their story.
Children might stack scraps into towers, tuck treasures underneath layers, or sprawl their castles wide across the whole page. Others might build moats, rockpools, or tiny hidden rooms. The magic is in letting the collage take its own shape.
If you want to nudge the exploration, ask open questions instead of giving directions.
“What belongs at the very top of your castle?”
“Could you build something so tiny it almost disappears?”
“What would happen if the tide washed in and out again?”
Variations
Try building one giant castle together on butcher’s paper so every child adds their own tower, moat or treasure room.
Offer magazines such as National Geographic and let ocean creatures or landscapes creep into the castles.
Switch the base colour: ocean blue, sandy yellow, even black for a glowing night-time castle.
Take it three-dimensional by folding or rolling card so turrets lift off the page and feel like a construction more than a collage.
Materials
Brown kraft paper, honeycomb packing wrap, recycled packaging and painted paper scraps
Blue cellophane, foil, shiny stickers, washi tape and other sparkly or textured bits
Scissors, glue sticks, PVA
Cardboard rolls or folded card for three-dimensional castles (optional)
Magazines such as National Geographic for cut-out surprises
Back to Top
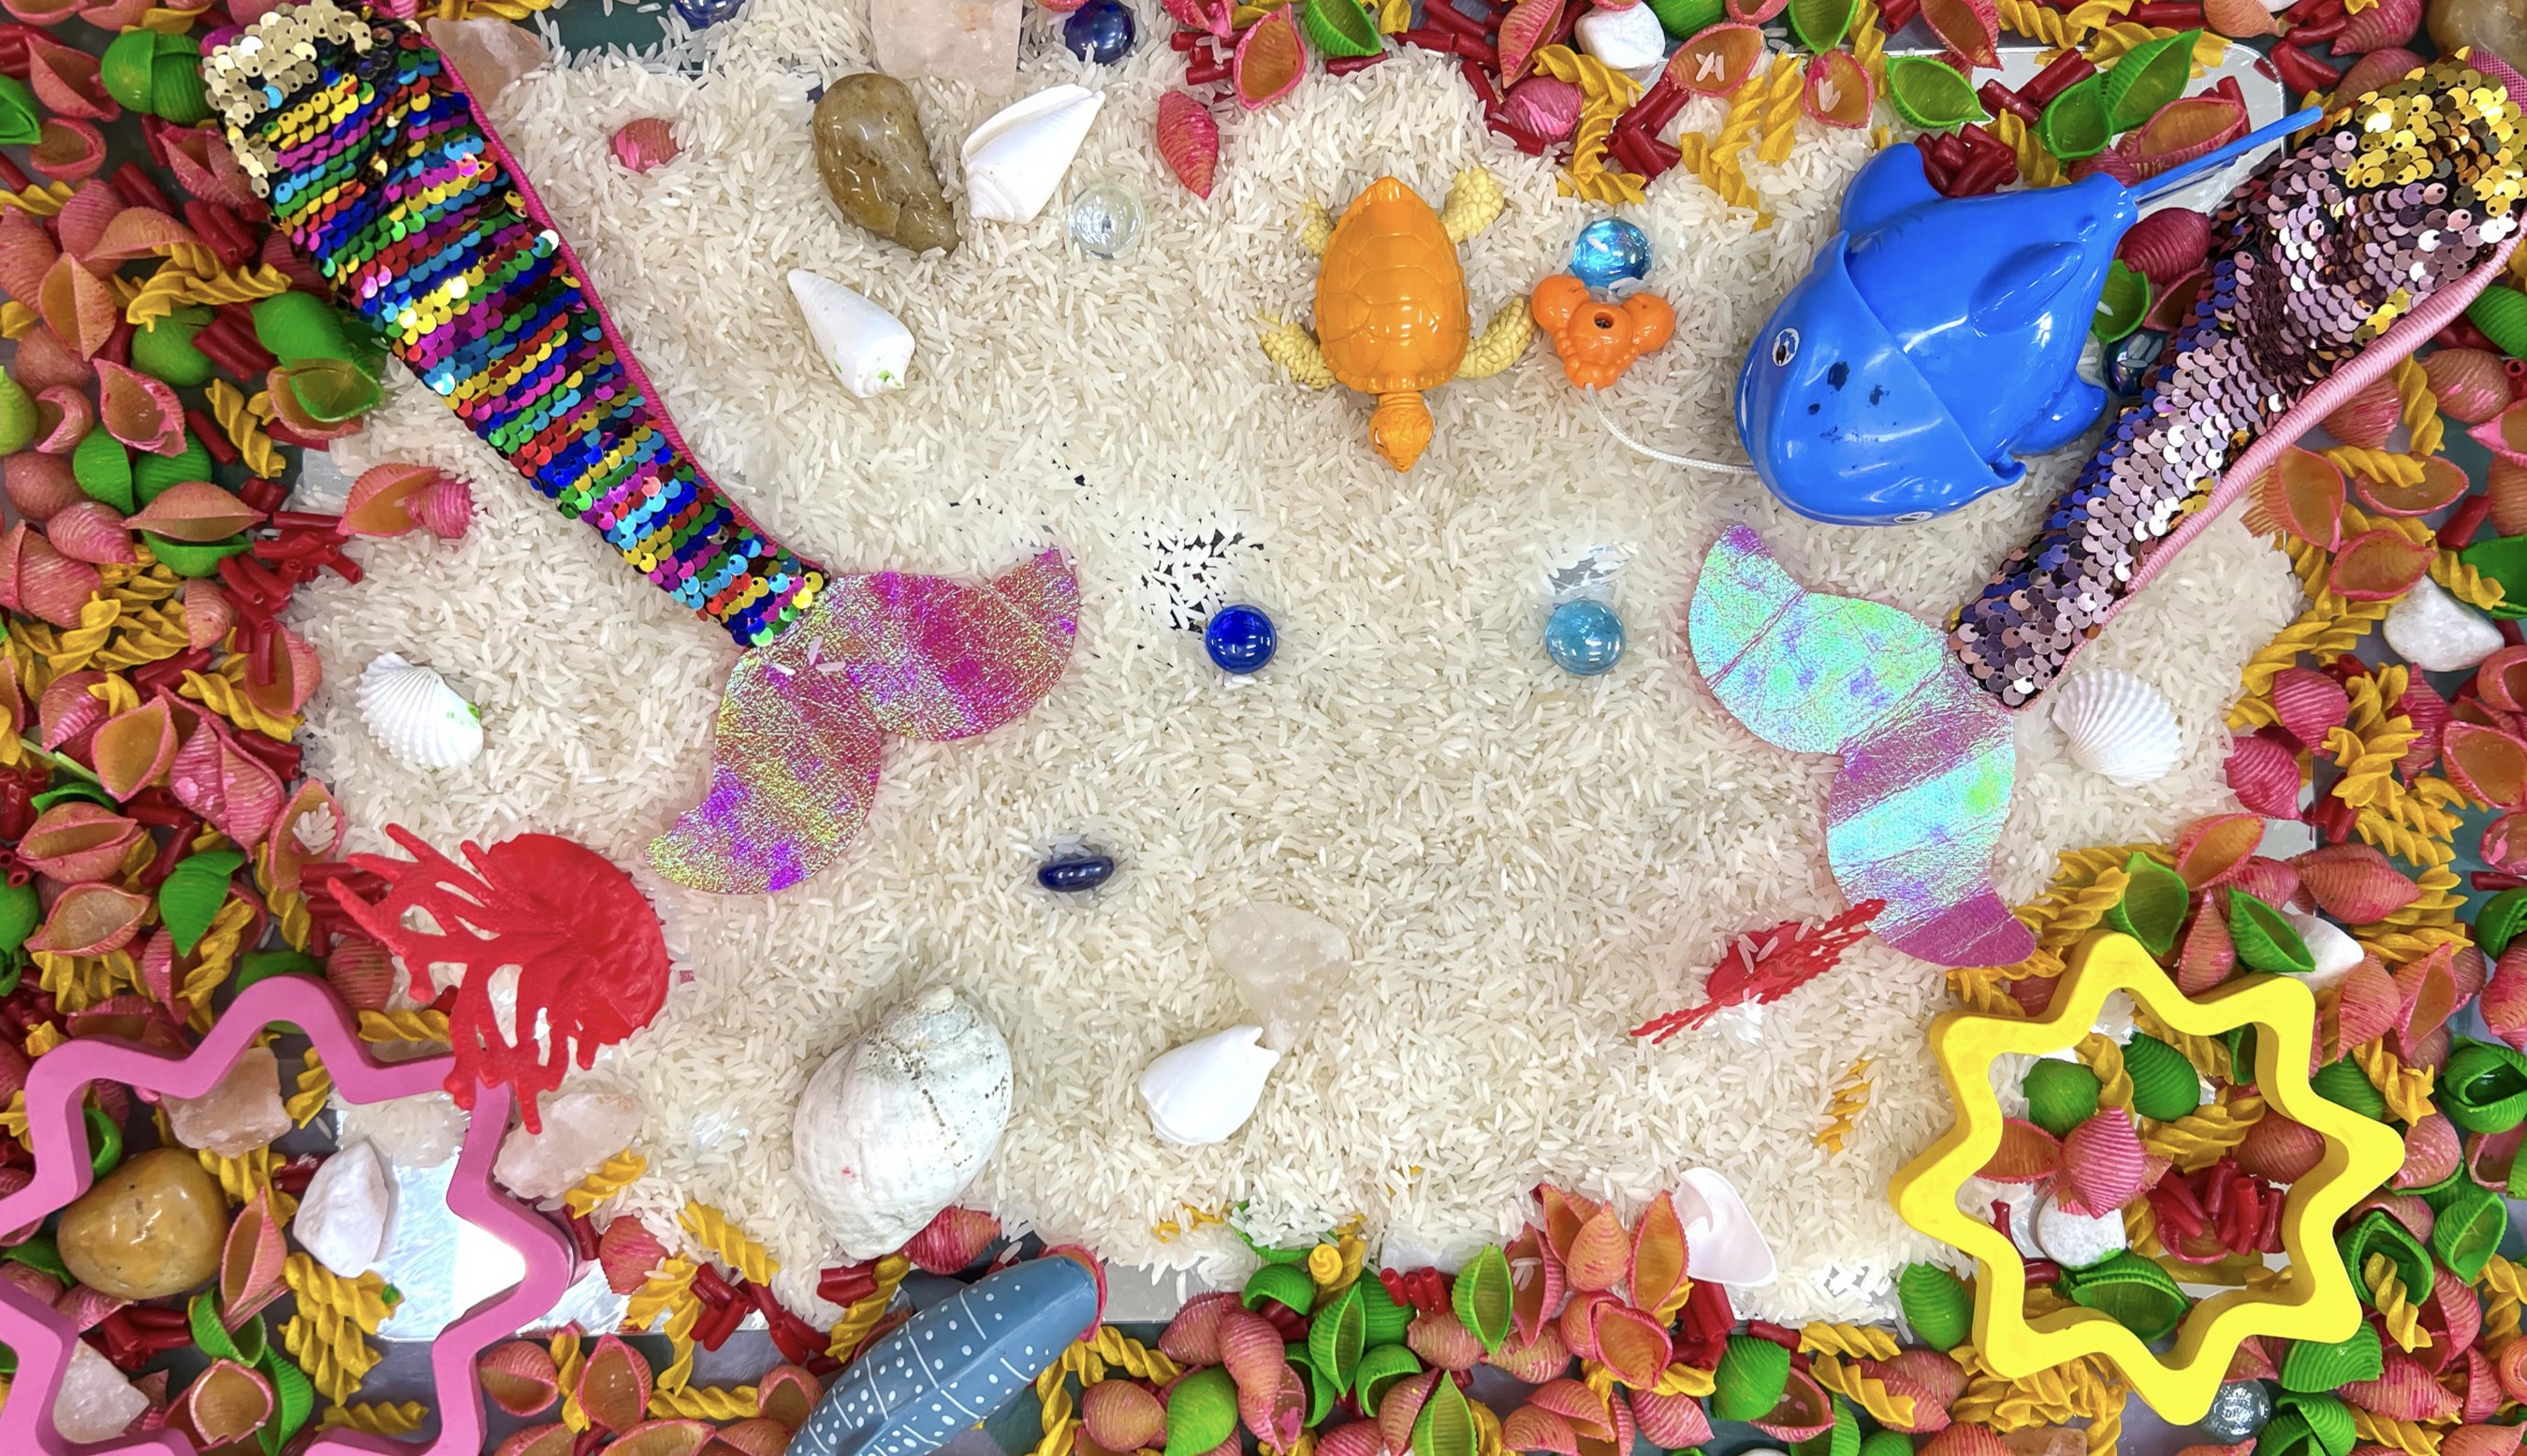
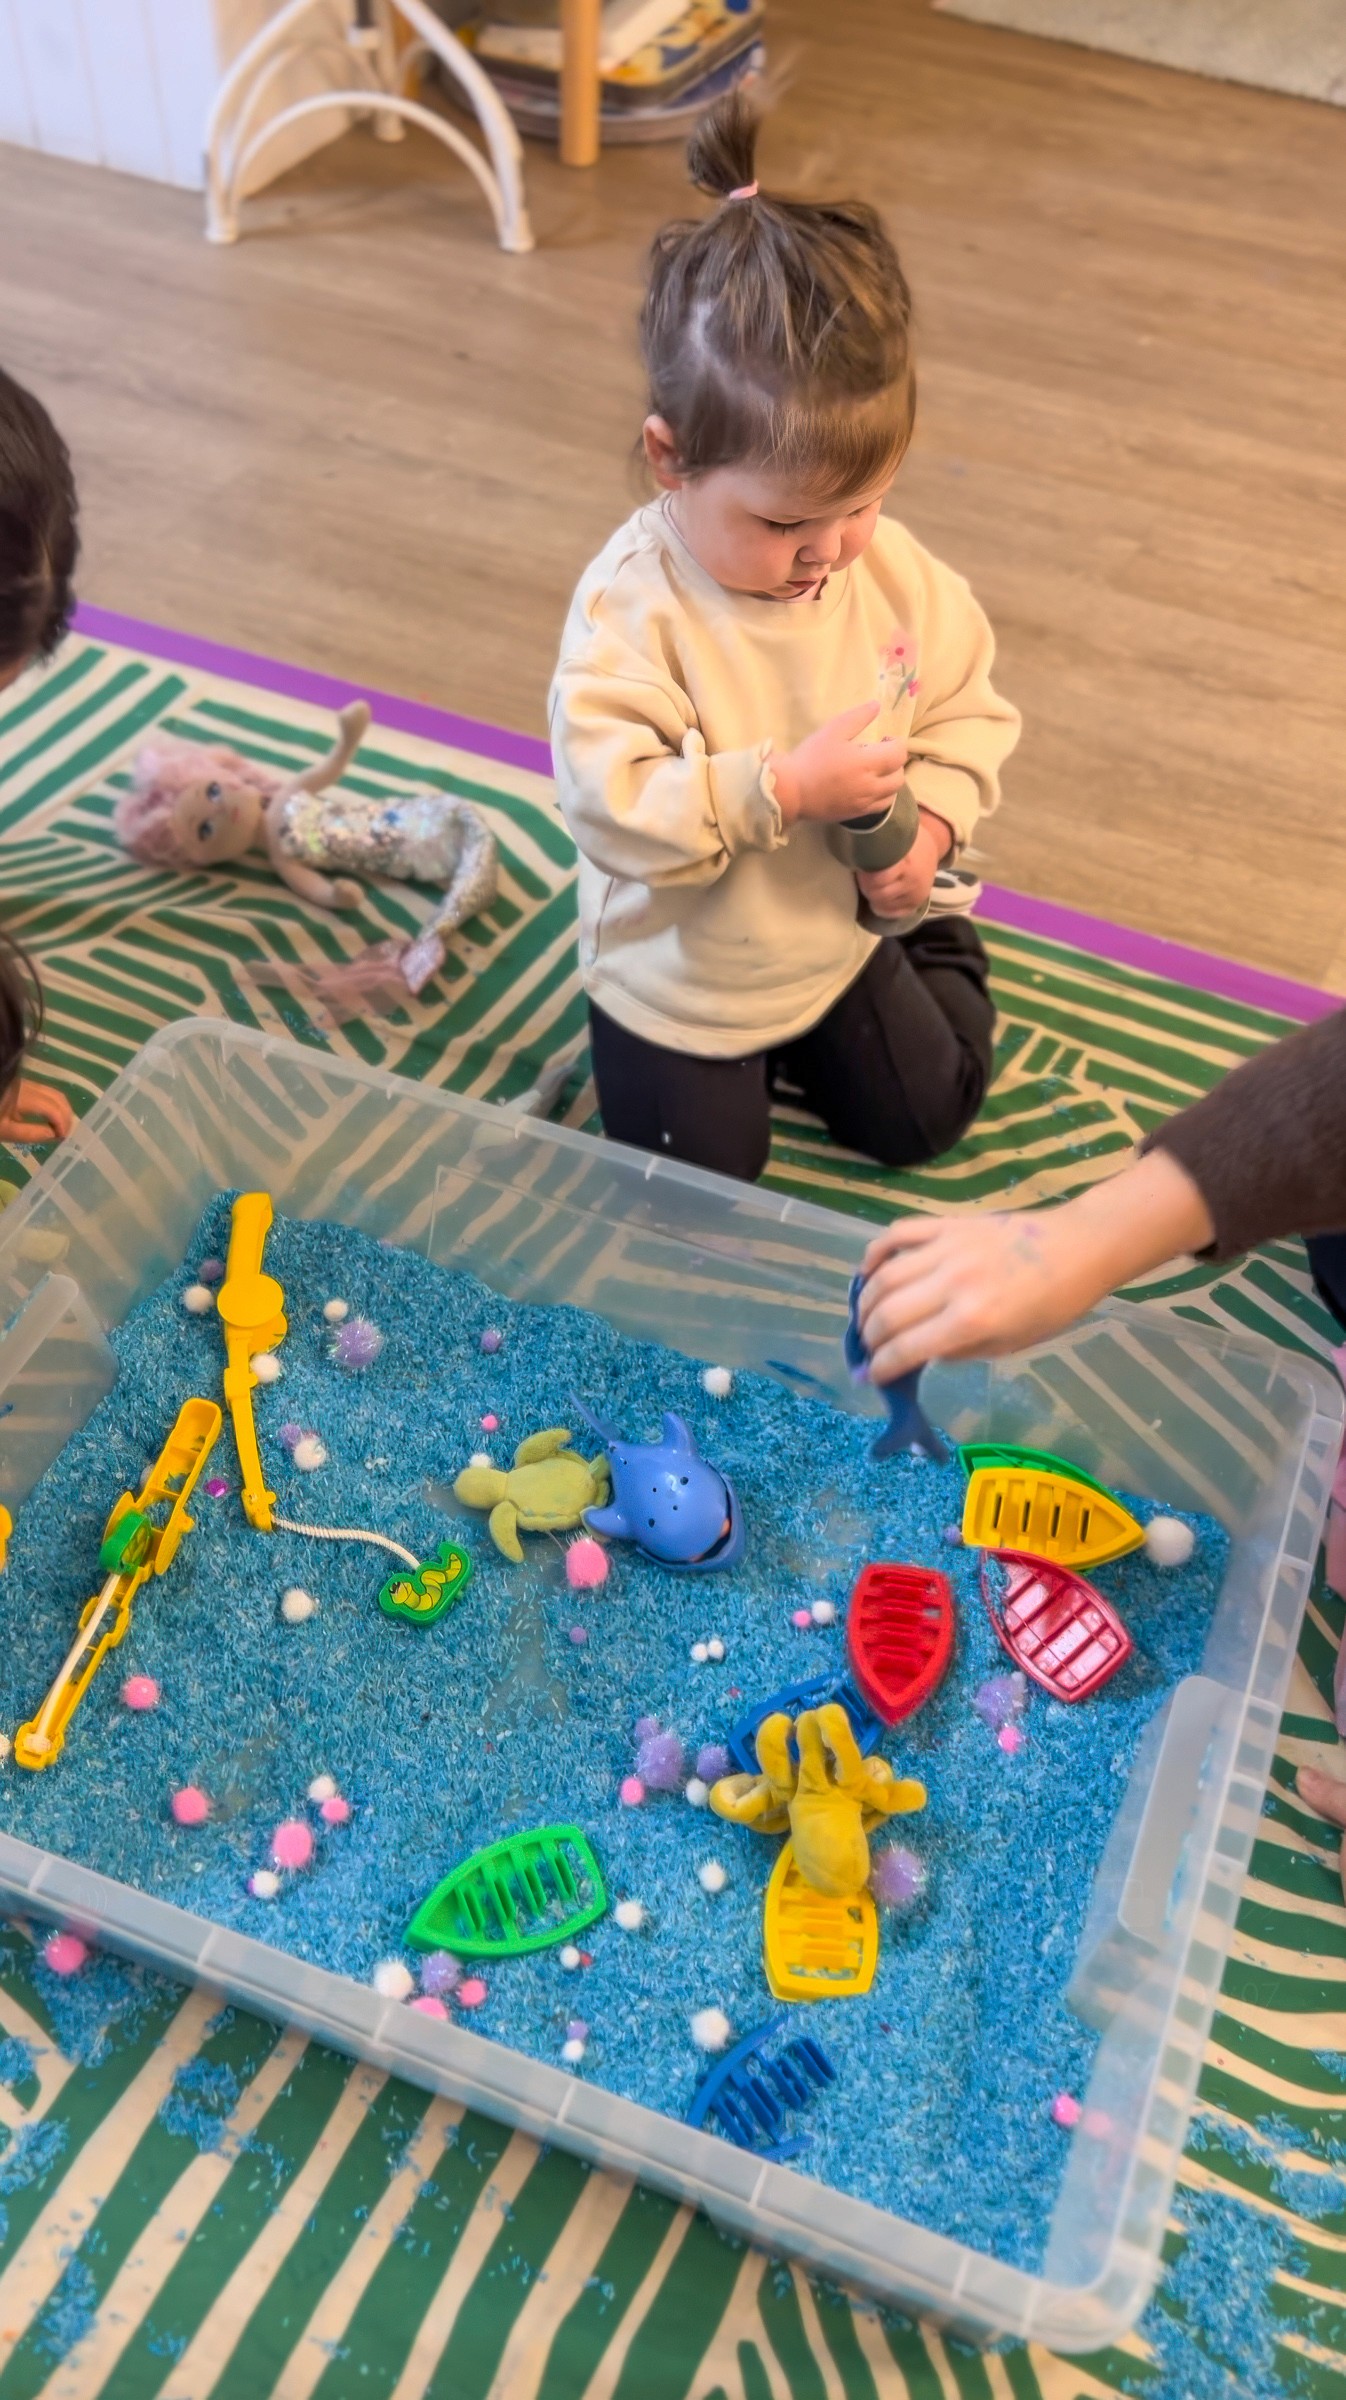
Rockpool Searching
Dig and scoop and discover
Bookmark
Sensory Play
The Set Up
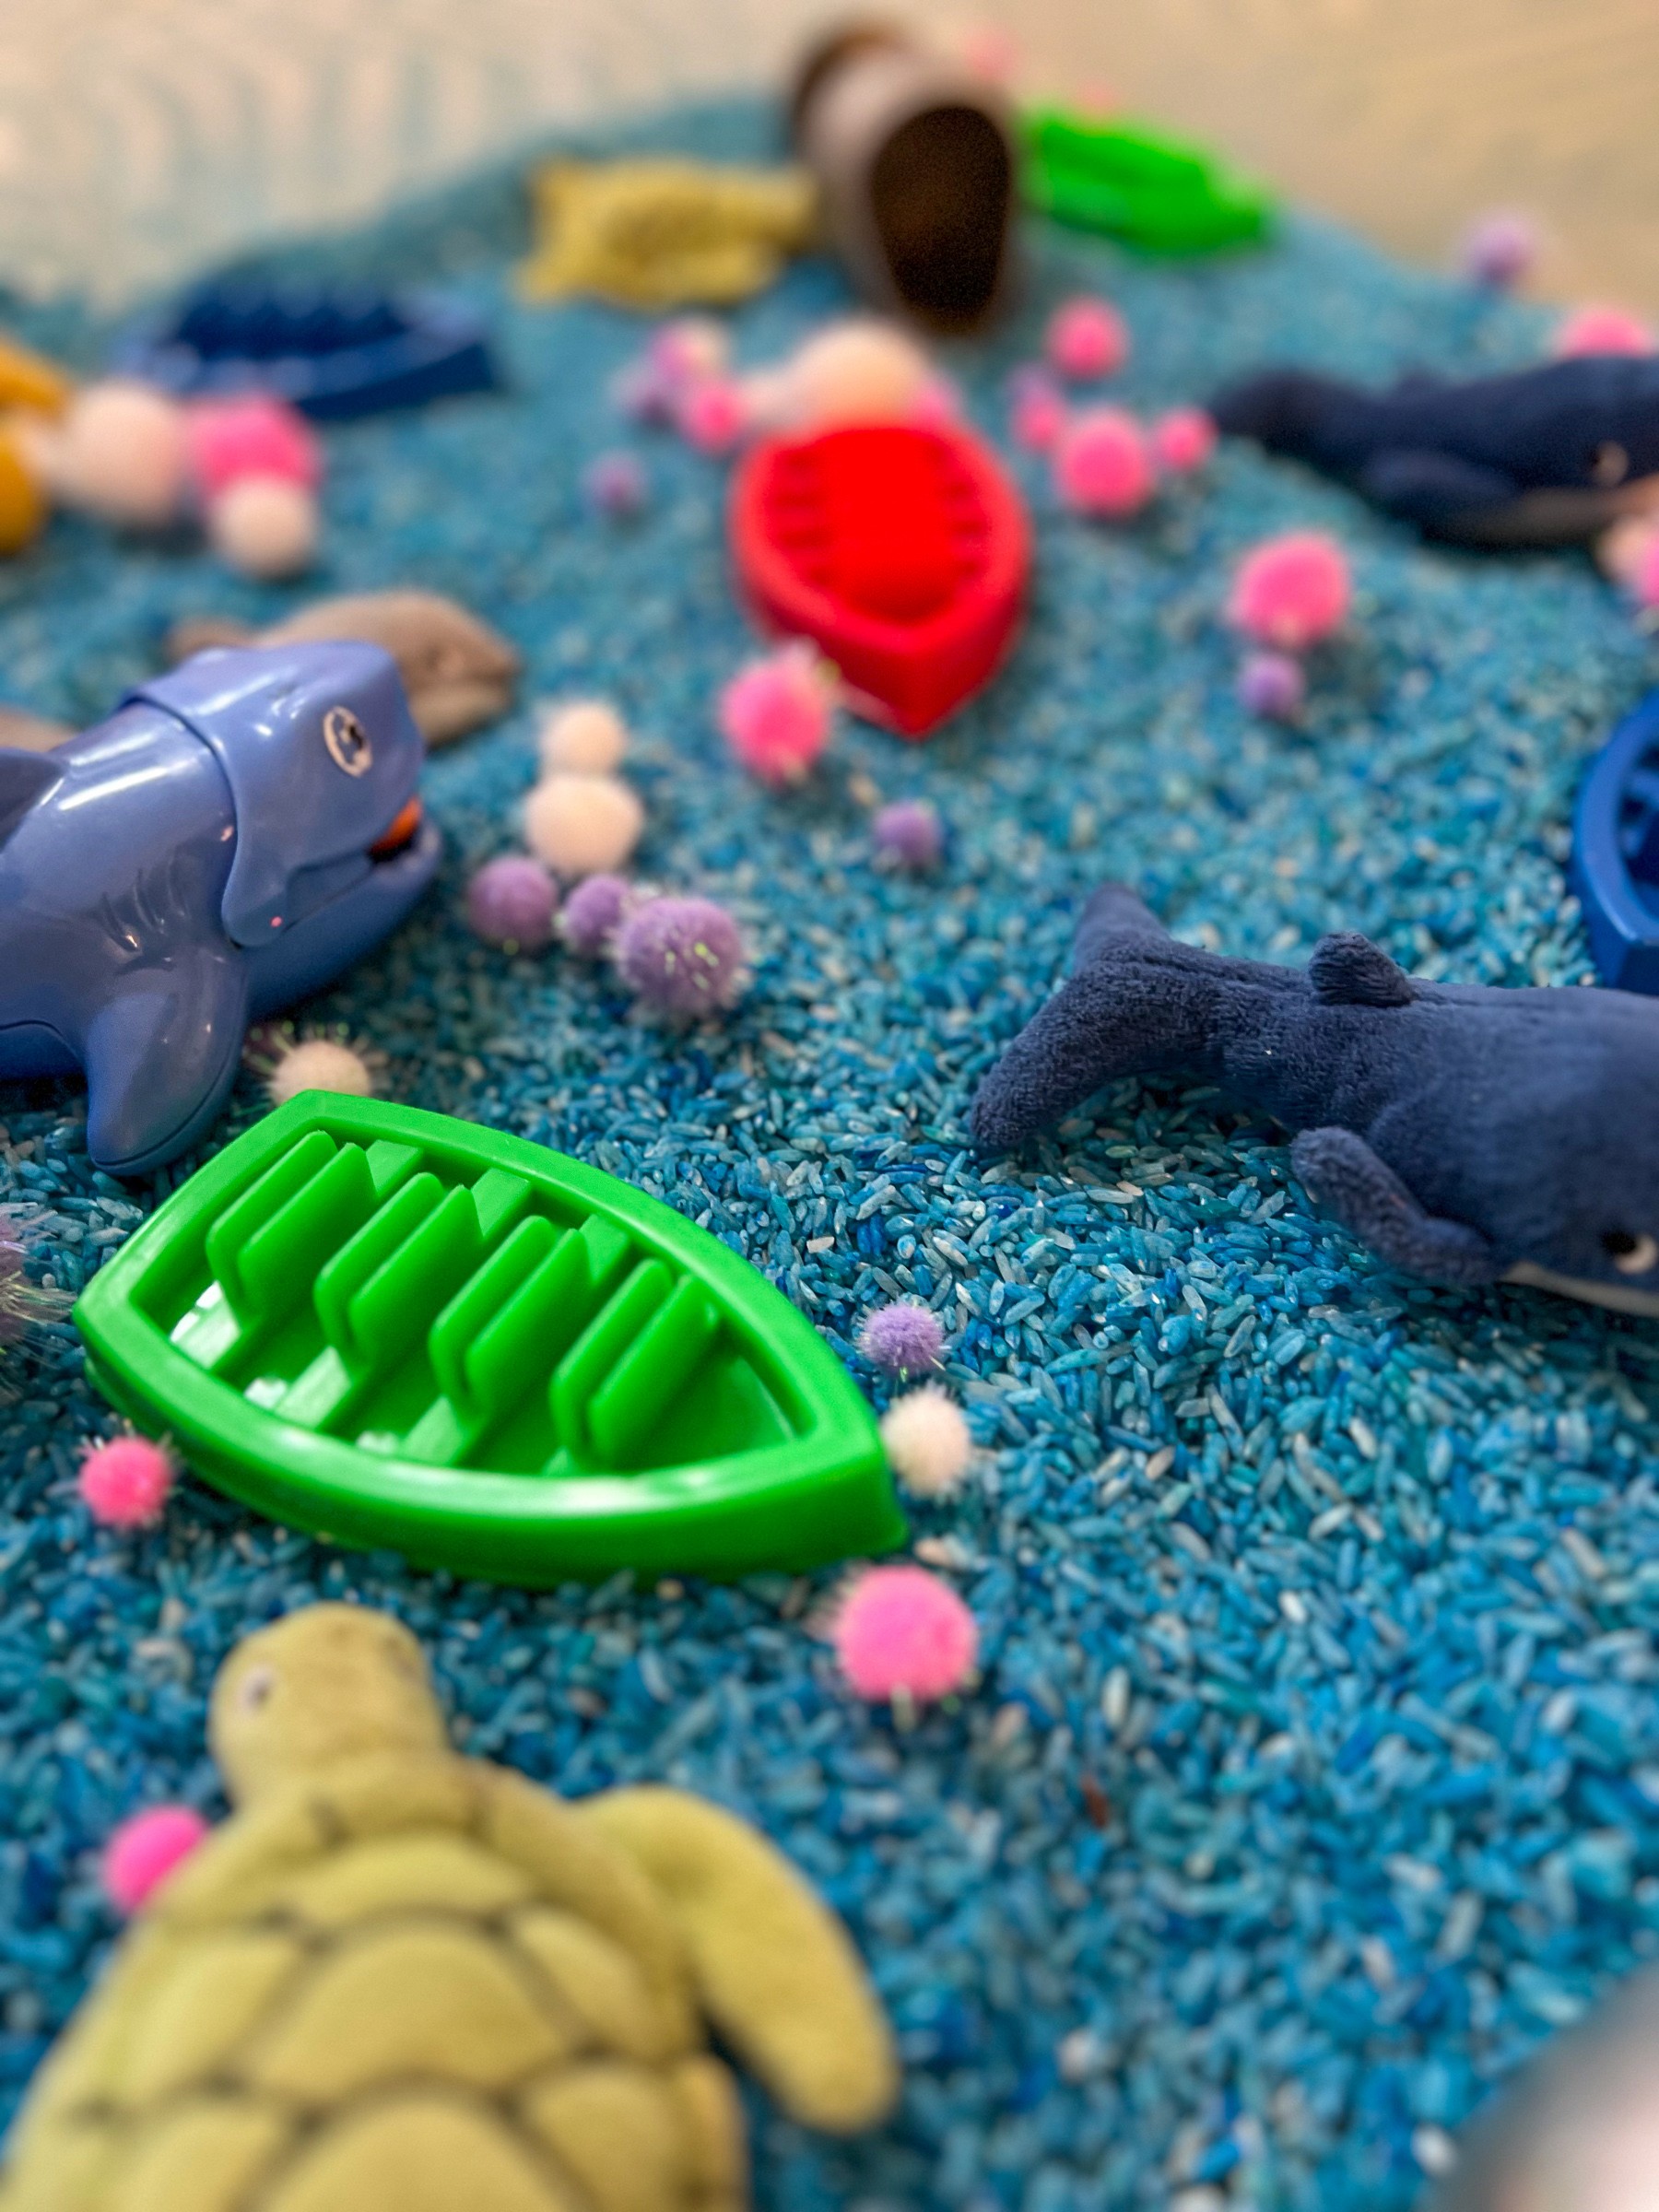
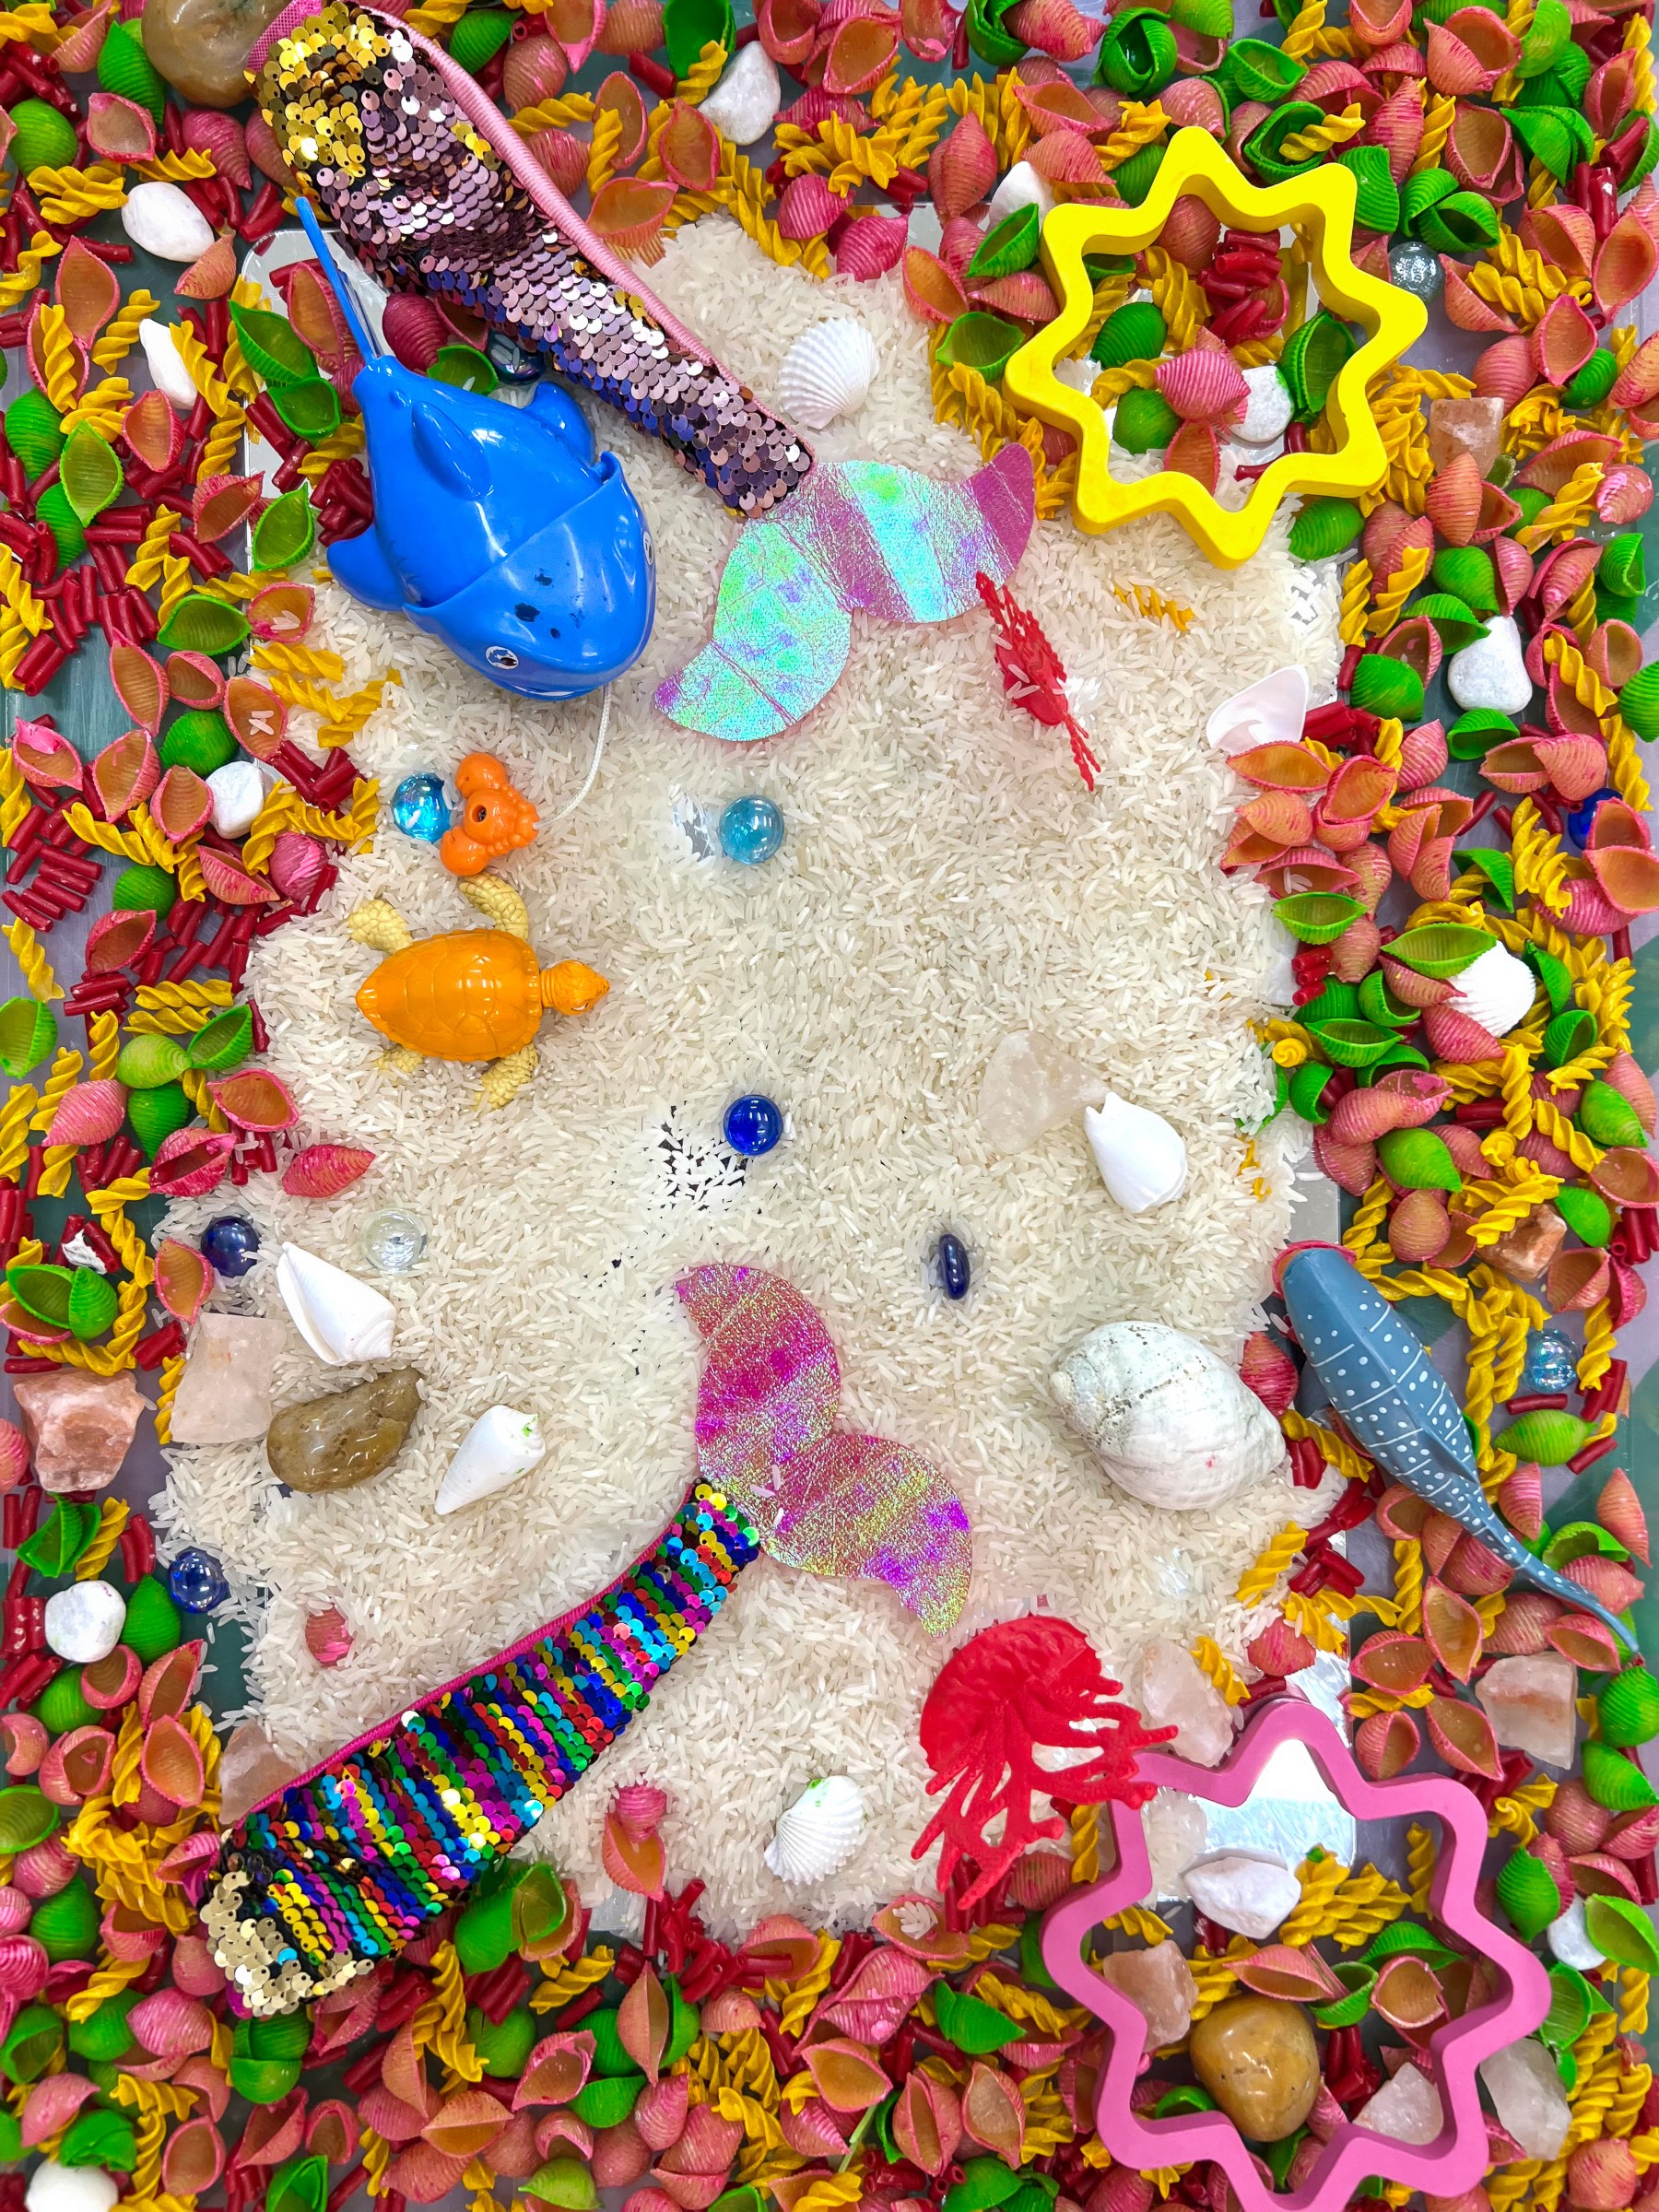
Create coral pasta with spirals and shells and tubes all painted in sea-bright colours. The trick? Ziplock bags, a good squeeze of poster paint (with that essential glug of white), and plenty of squishing until everything is coated. Spread the pasta out in the sun to dry properly. I learned the hard way that if you rush, little blobs of wet paint hide inside the shells!
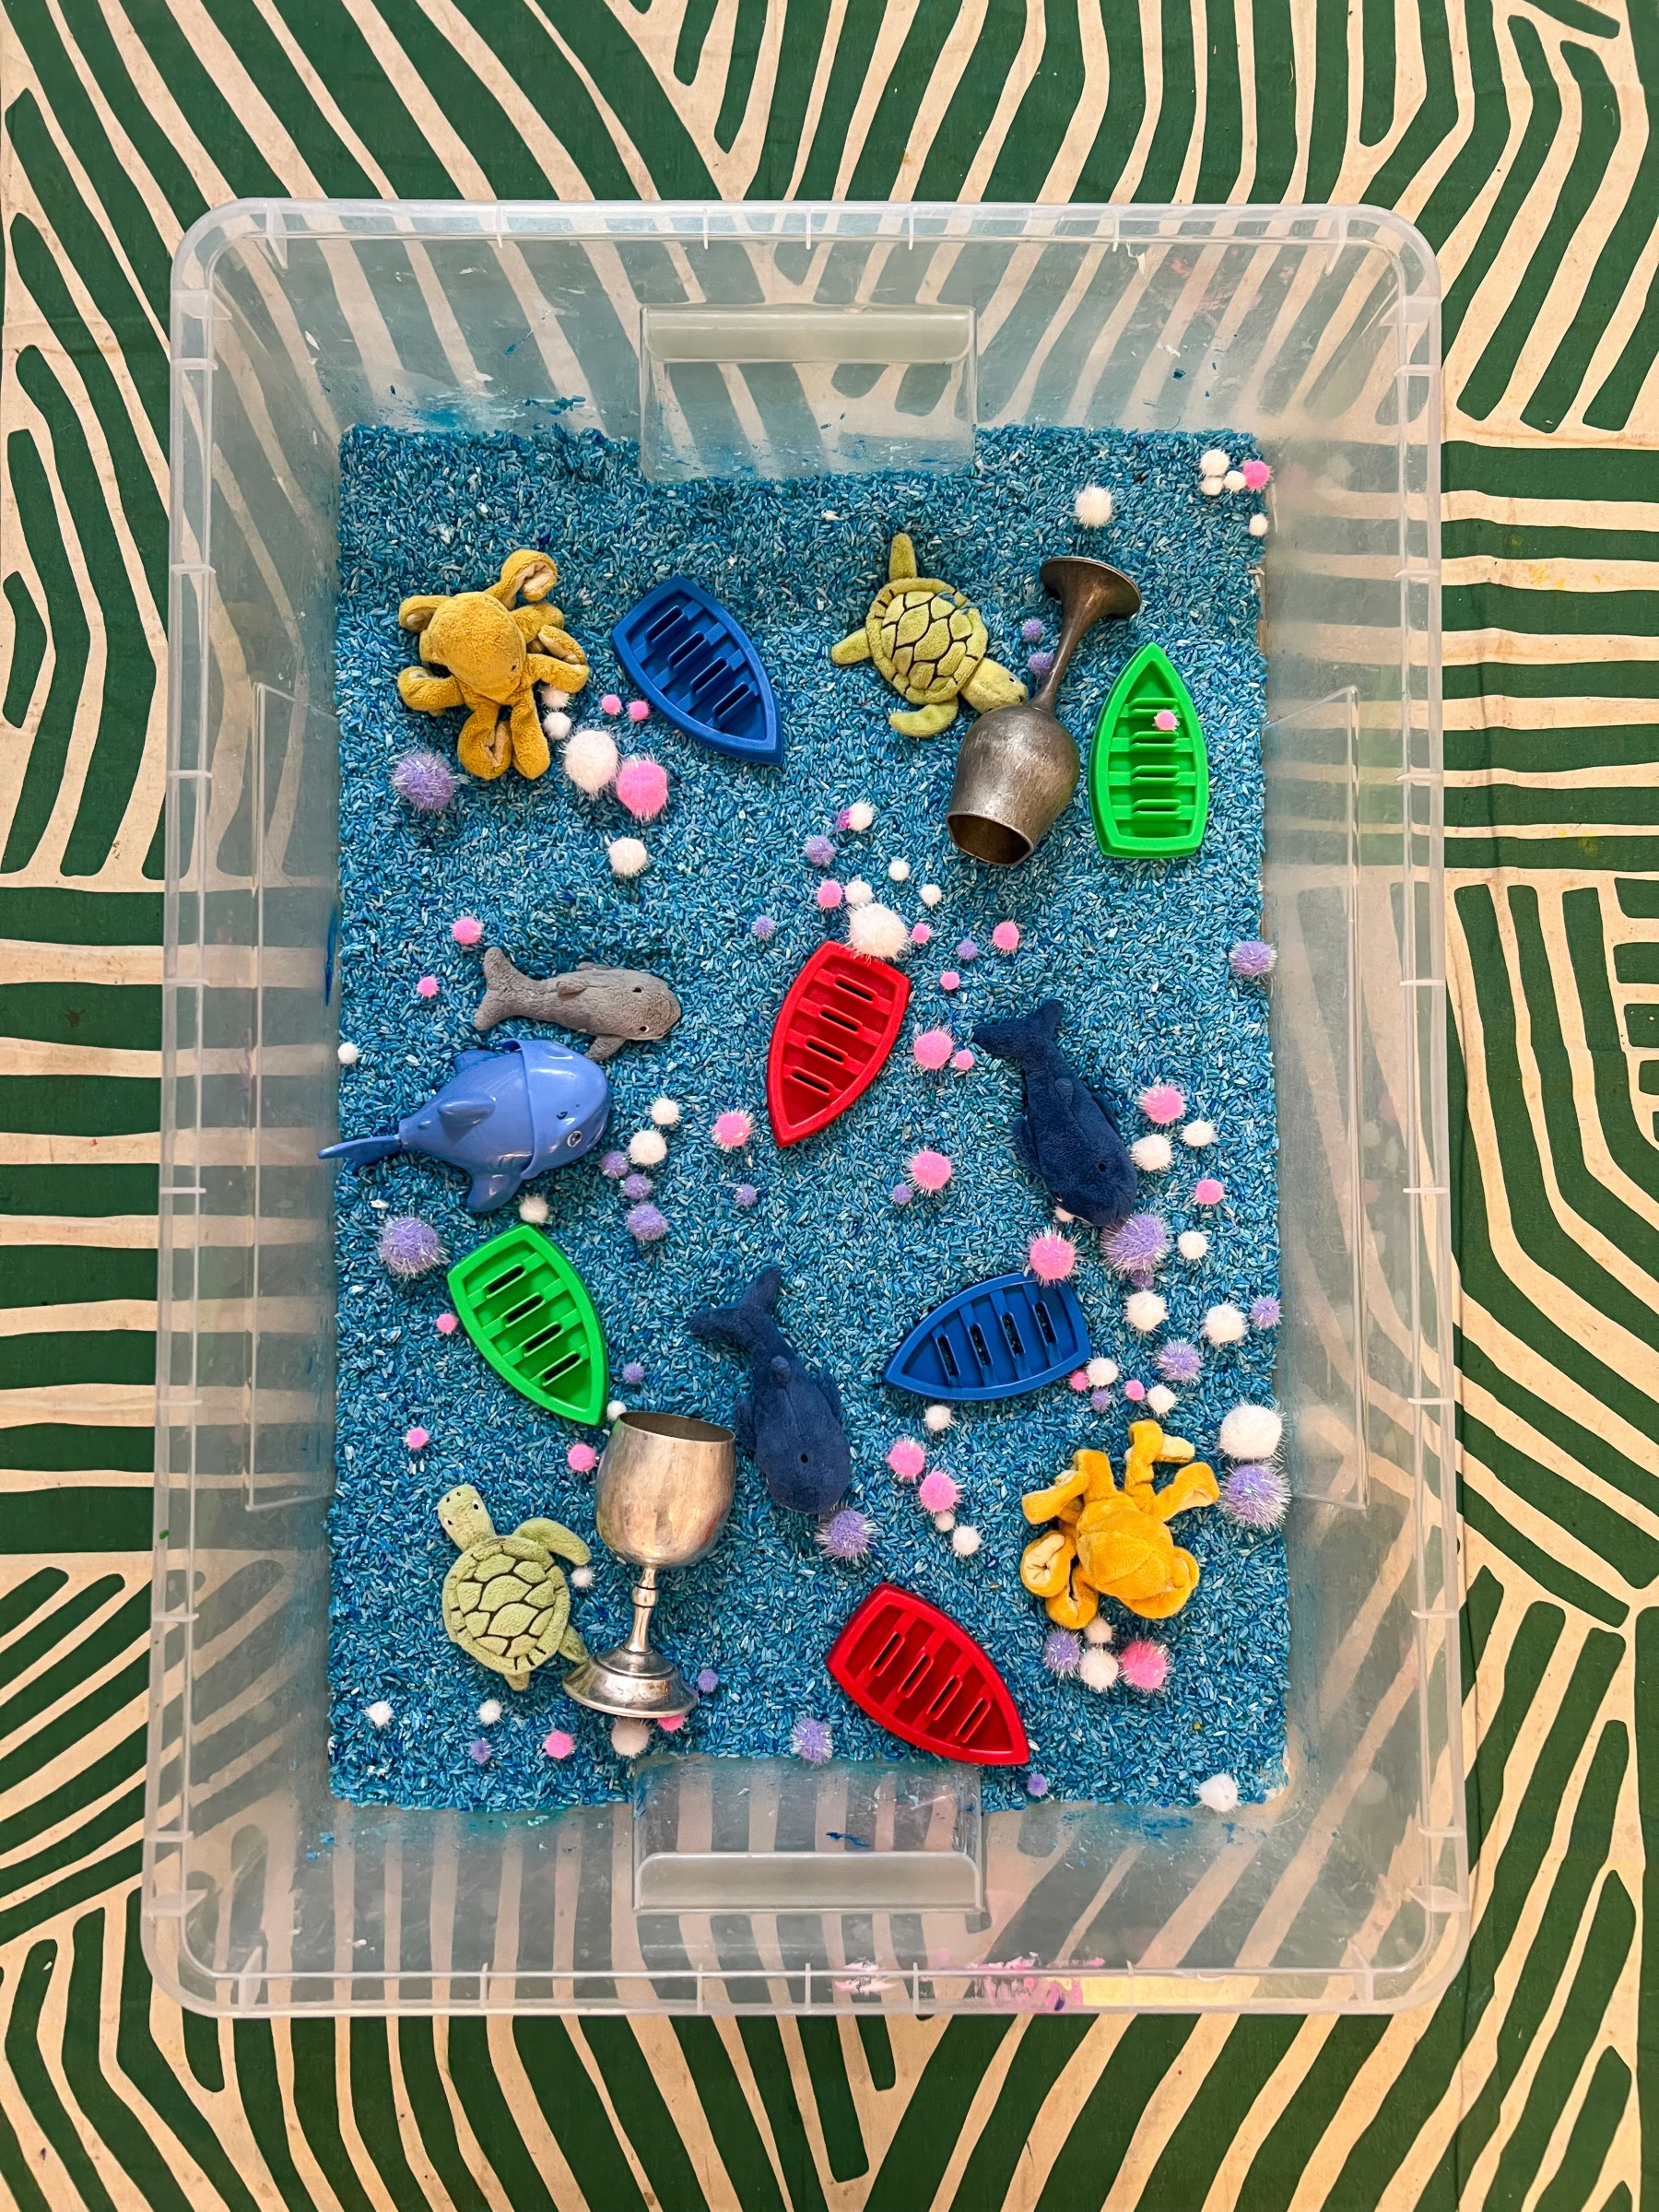
Once it’s dry, tip it into a deep tub. A base of plain white rice makes the colours pop, and mirrors at the bottom turn it into a tidal pool that shimmers. Add in whatever feels ocean-y; shells, sea creatures, mermaid tails (I borrowed Olive’s Barbie tail dress-ups for this and they were perfect). Bowls, cups, and scoops nearby invite endless pouring and filling.
Why It Matters
Sensory play gives children of all ages a space to regulate and reset.
For younger ones, it builds social and emotional skills as they share, swap, and create little stories together. For older kids, it offers a quieter rhythm and a way to explore textures, focus, and play without rules.
Plus the ocean connection makes it even richer: a reminder that nature is full of hidden worlds waiting to be uncovered.
Variations
Freeze coloured water in seashell moulds and drop them into the tub for a melting surprise.
Swap coral pasta to blue-dyed rice to shift the whole mood.
Hide tiny treasures (shiny beads, painted stones, little creatures) to “discover” while playing.
Add scoops and tubes for “pouring currents” that run like waves.
Materials
Pasta in mixed shapes (spirals, shells, tubes = perfect for “coral”)
Poster paint + a glug of white for vibrancy
Ziplock bags for mixing and coating
White rice or other sensory base
Mirrors for the bottom of the tub
Ocean-themed loose parts: shells, creatures, mermaid tails, beads, stones
Bowls, cups, spoons, scoops, funnels
Back to Top
Rockpool Searching
Dig and scoop and discover
Bookmark
Sensory Play
The Set Up
Create coral pasta with spirals and shells and tubes all painted in sea-bright colours. The trick? Ziplock bags, a good squeeze of poster paint (with that essential glug of white), and plenty of squishing until everything is coated. Spread the pasta out in the sun to dry properly. I learned the hard way that if you rush, little blobs of wet paint hide inside the shells!
Once it’s dry, tip it into a deep tub. A base of plain white rice makes the colours pop, and mirrors at the bottom turn it into a tidal pool that shimmers. Add in whatever feels ocean-y; shells, sea creatures, mermaid tails (I borrowed Olive’s Barbie tail dress-ups for this and they were perfect). Bowls, cups, and scoops nearby invite endless pouring and filling.
Why It Matters
Sensory play gives children of all ages a space to regulate and reset.
For younger ones, it builds social and emotional skills as they share, swap, and create little stories together. For older kids, it offers a quieter rhythm and a way to explore textures, focus, and play without rules.
Plus the ocean connection makes it even richer: a reminder that nature is full of hidden worlds waiting to be uncovered.
Variations
Freeze coloured water in seashell moulds and drop them into the tub for a melting surprise.
Swap coral pasta to blue-dyed rice to shift the whole mood.
Hide tiny treasures (shiny beads, painted stones, little creatures) to “discover” while playing.
Add scoops and tubes for “pouring currents” that run like waves.
Materials
Pasta in mixed shapes (spirals, shells, tubes = perfect for “coral”)
Poster paint + a glug of white for vibrancy
Ziplock bags for mixing and coating
White rice or other sensory base
Mirrors for the bottom of the tub
Ocean-themed loose parts: shells, creatures, mermaid tails, beads, stones
Bowls, cups, spoons, scoops, funnels
Back to Top
Ocean Printmaking
Print the sea again and again!
Bookmark
Print Making
The Set Up
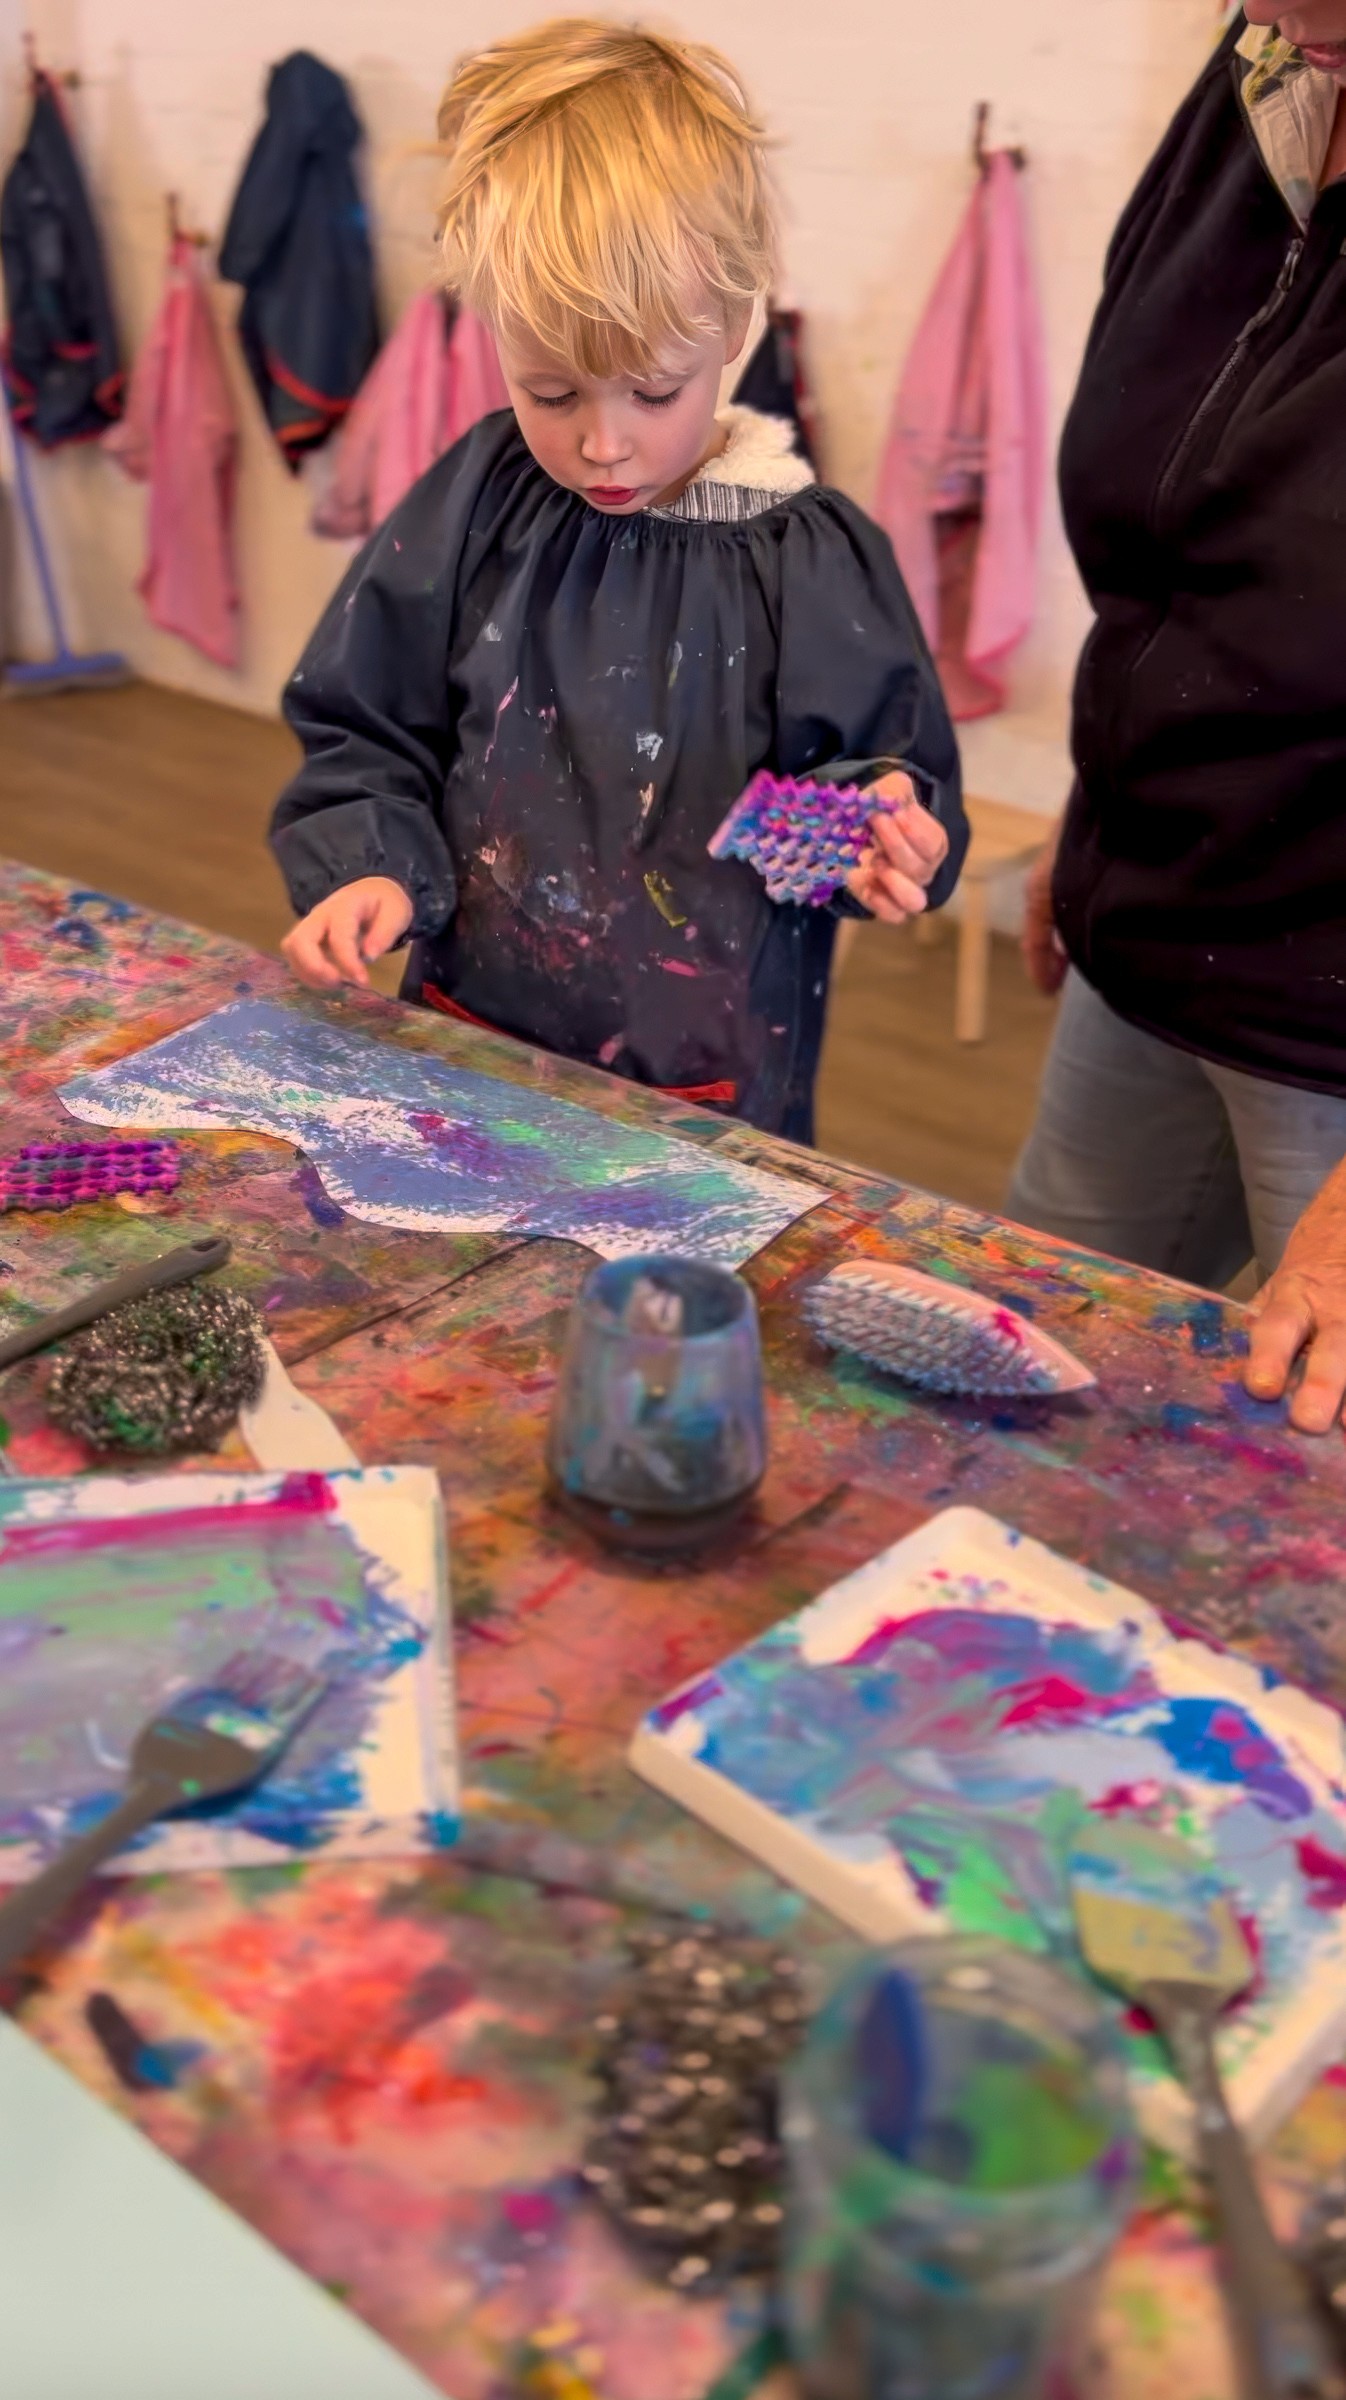
Foam sheets are the base for our stamps. We use sticky-backed ones so they can be mounted onto cardboard or wooden blocks, but plain foam works too. Lay out pencils or the ends of paintbrushes for drawing into the surface, plus trays with a little block printing ink and brayers for rolling.
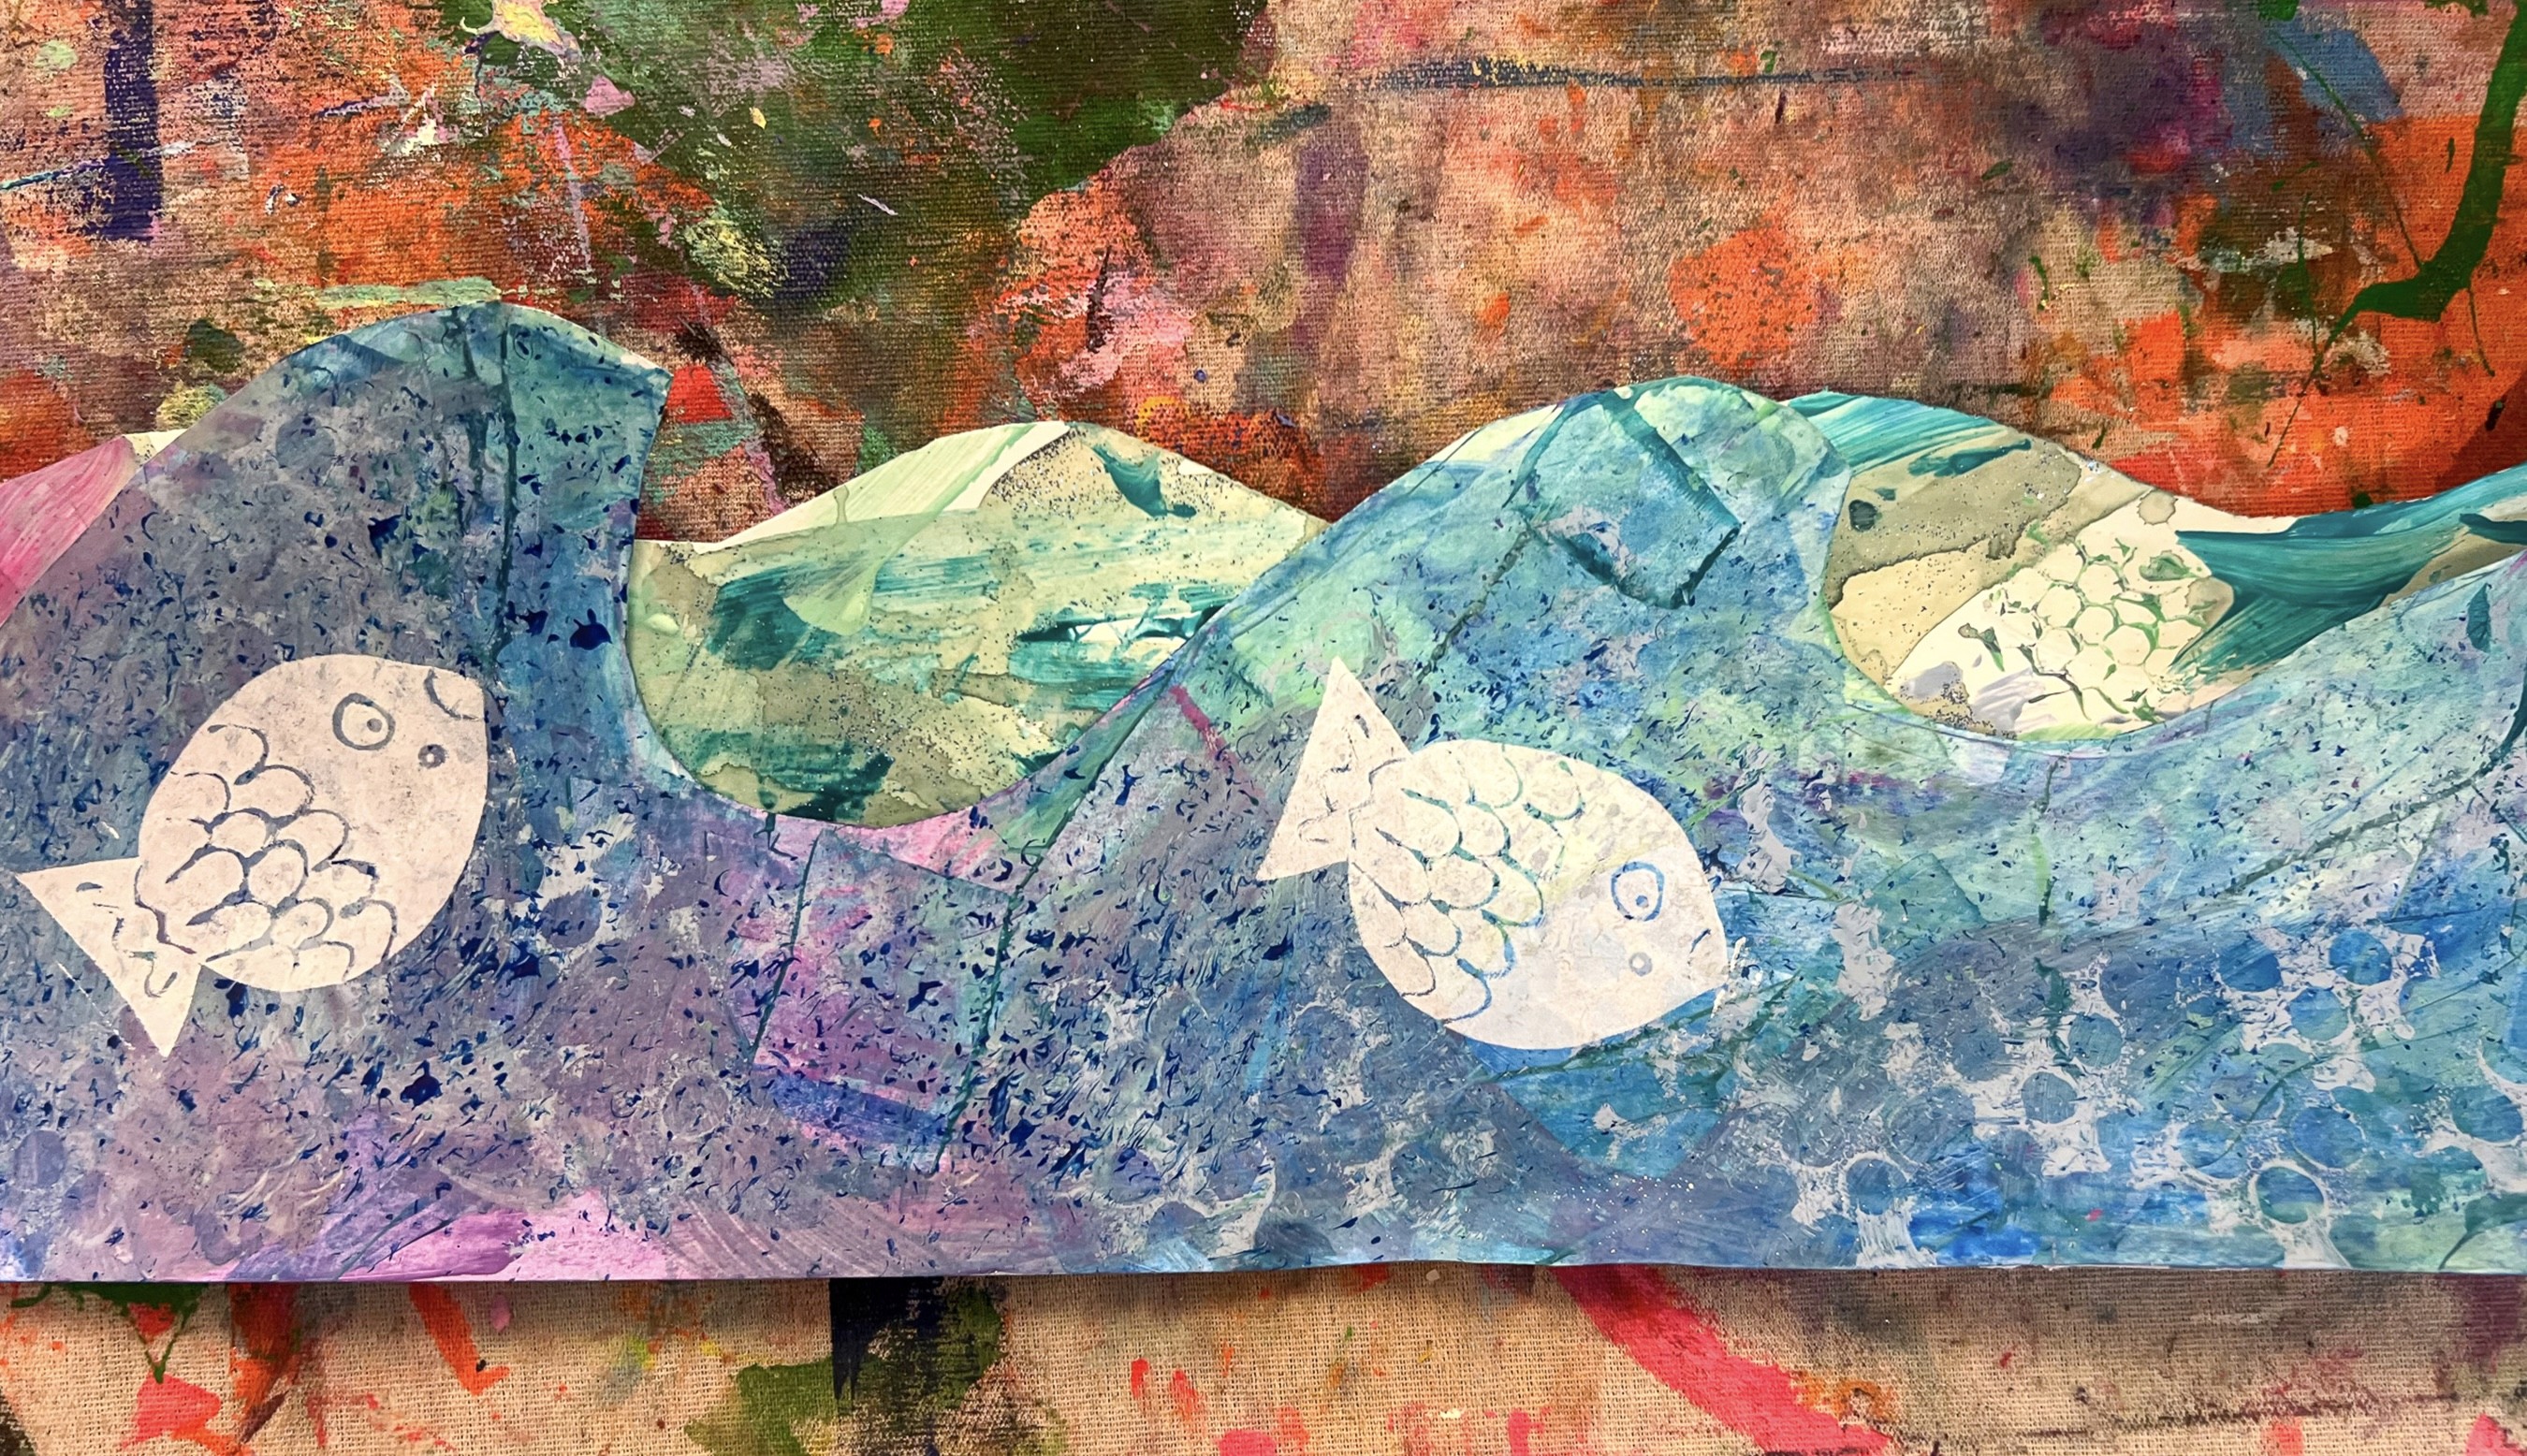
Blue and white inks look brilliant when printed onto textured “ocean paper” from earlier painting explorations!
The Making
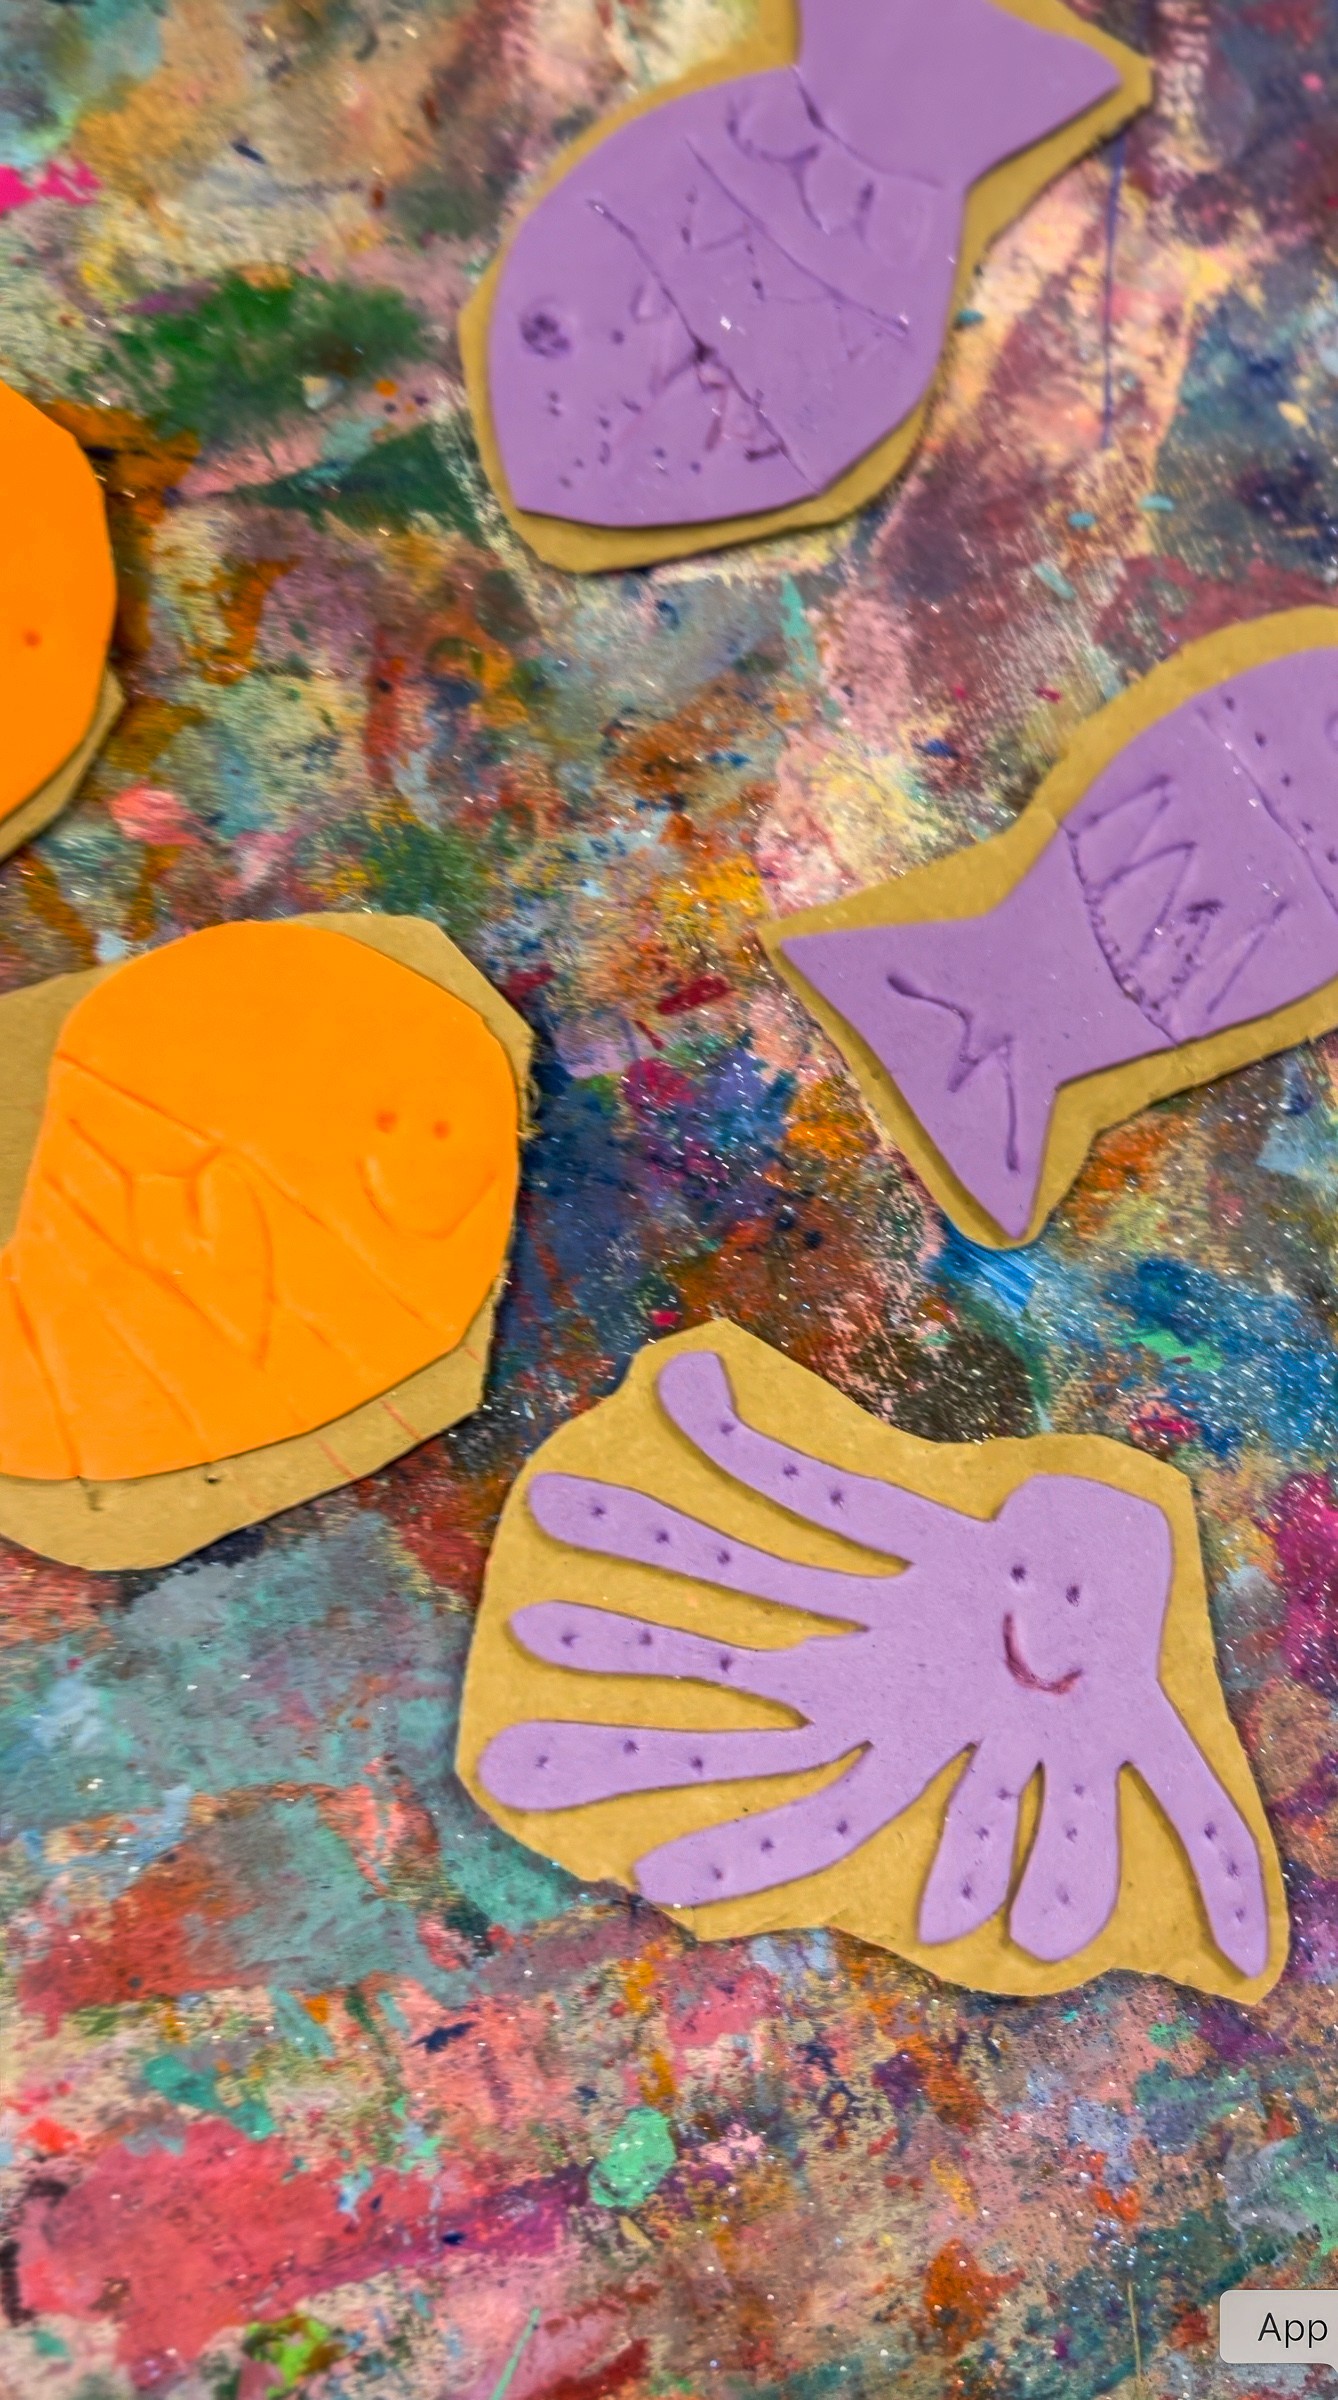
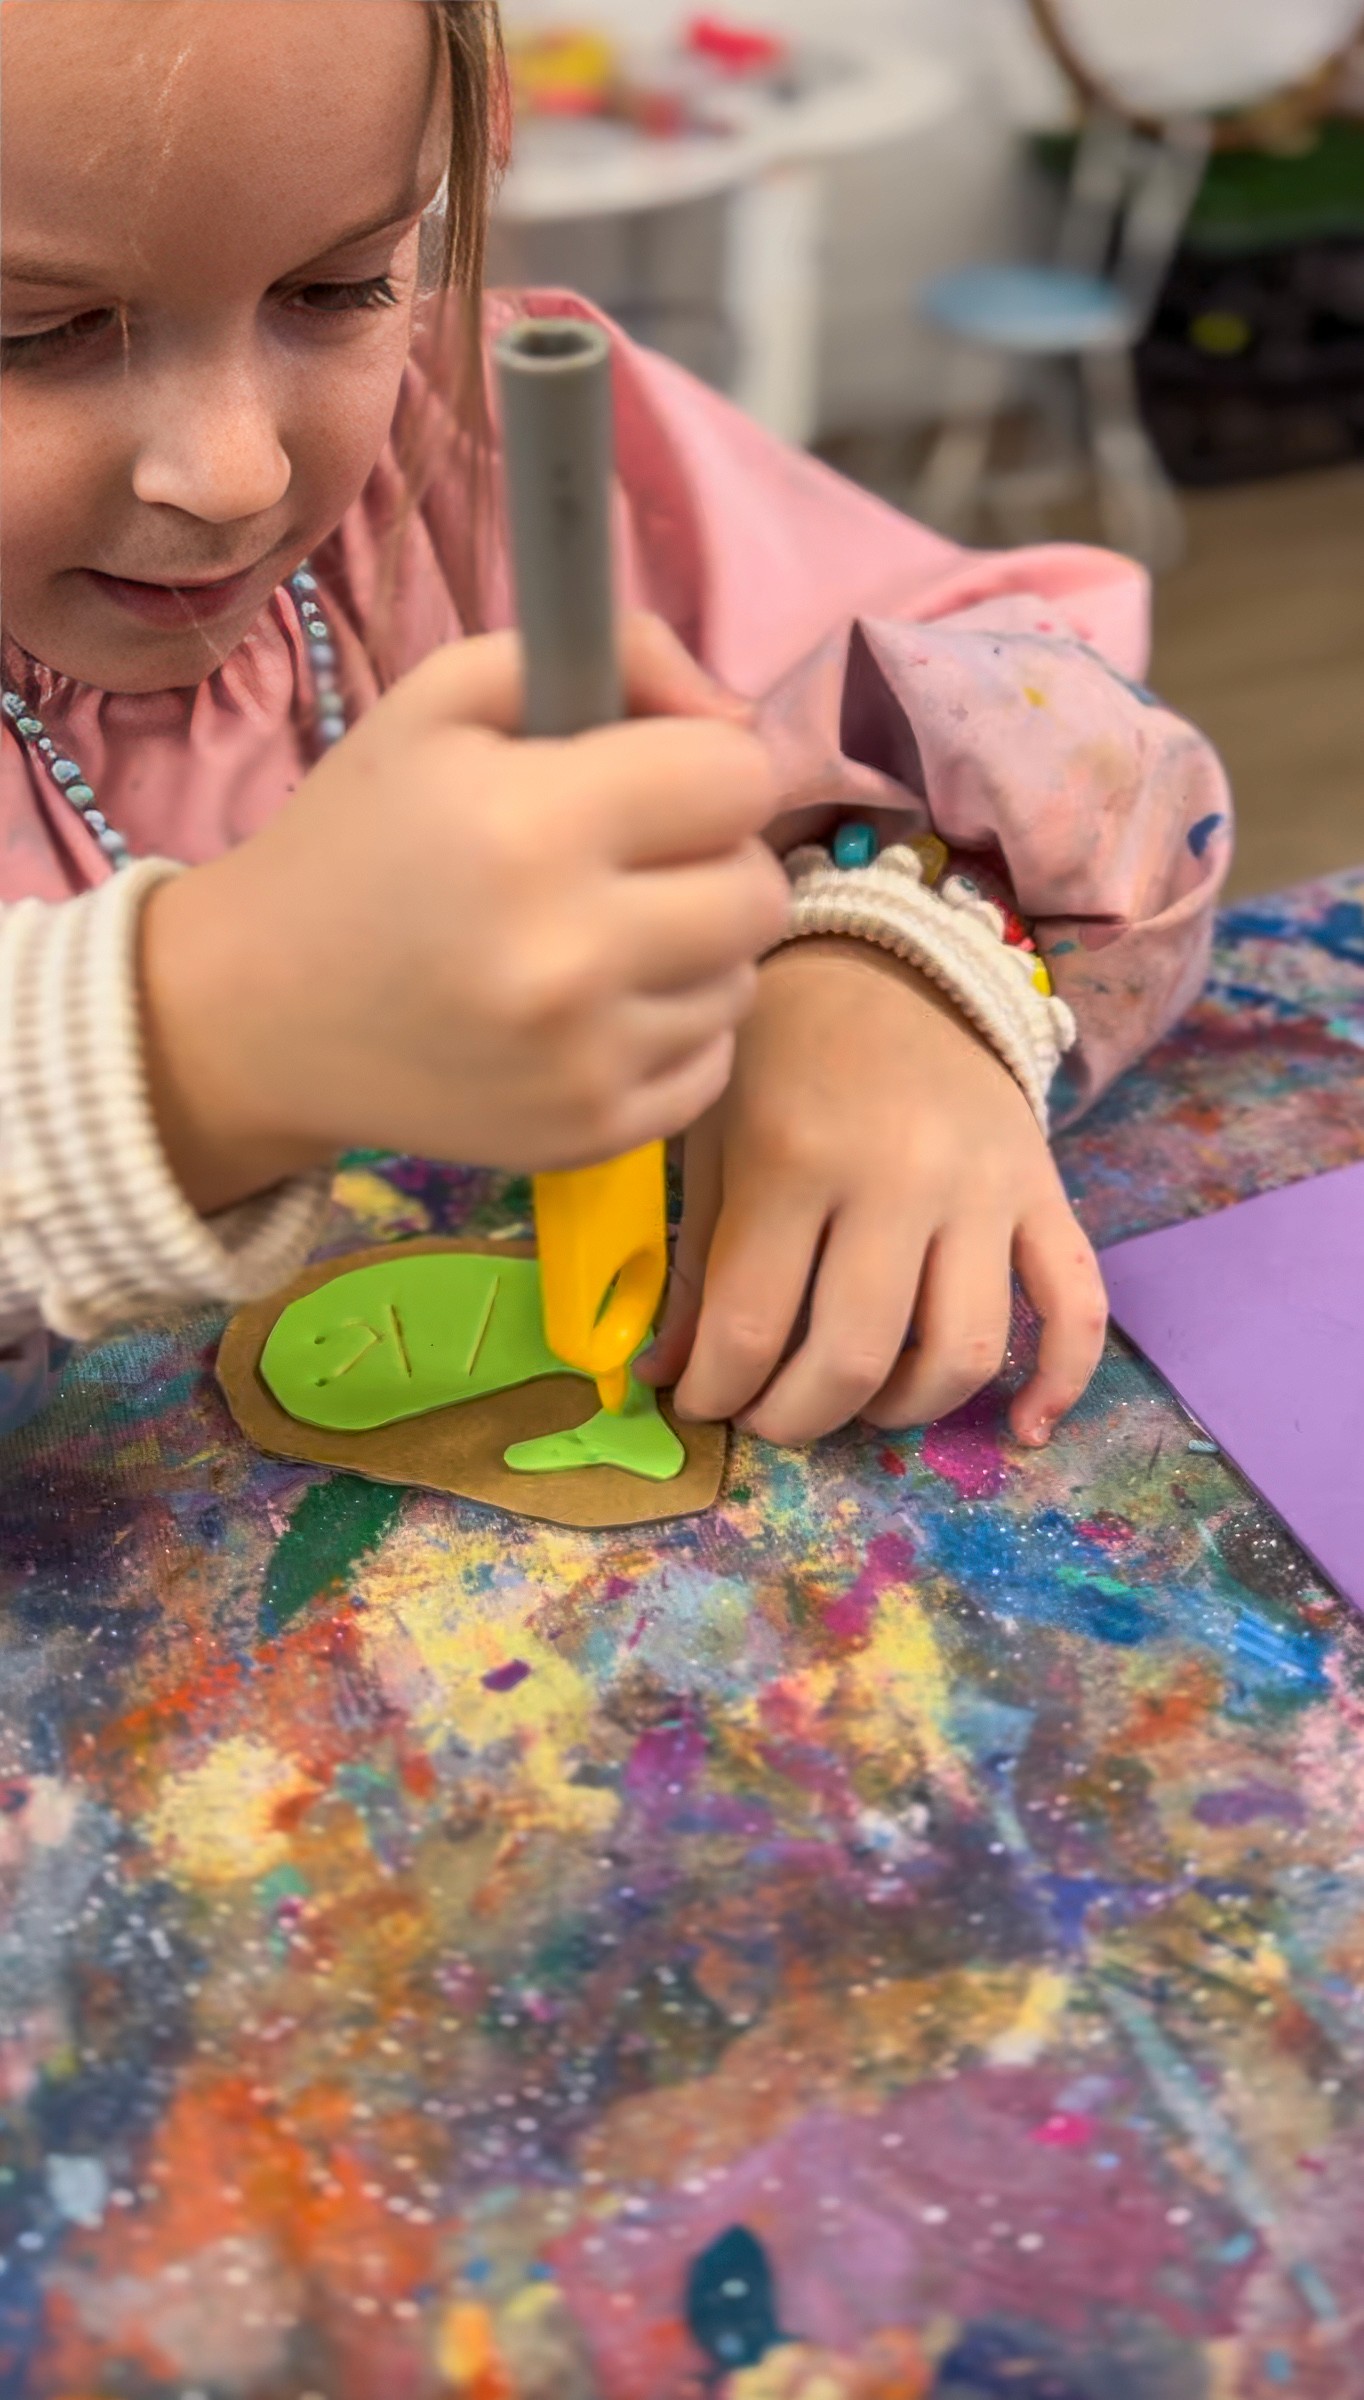
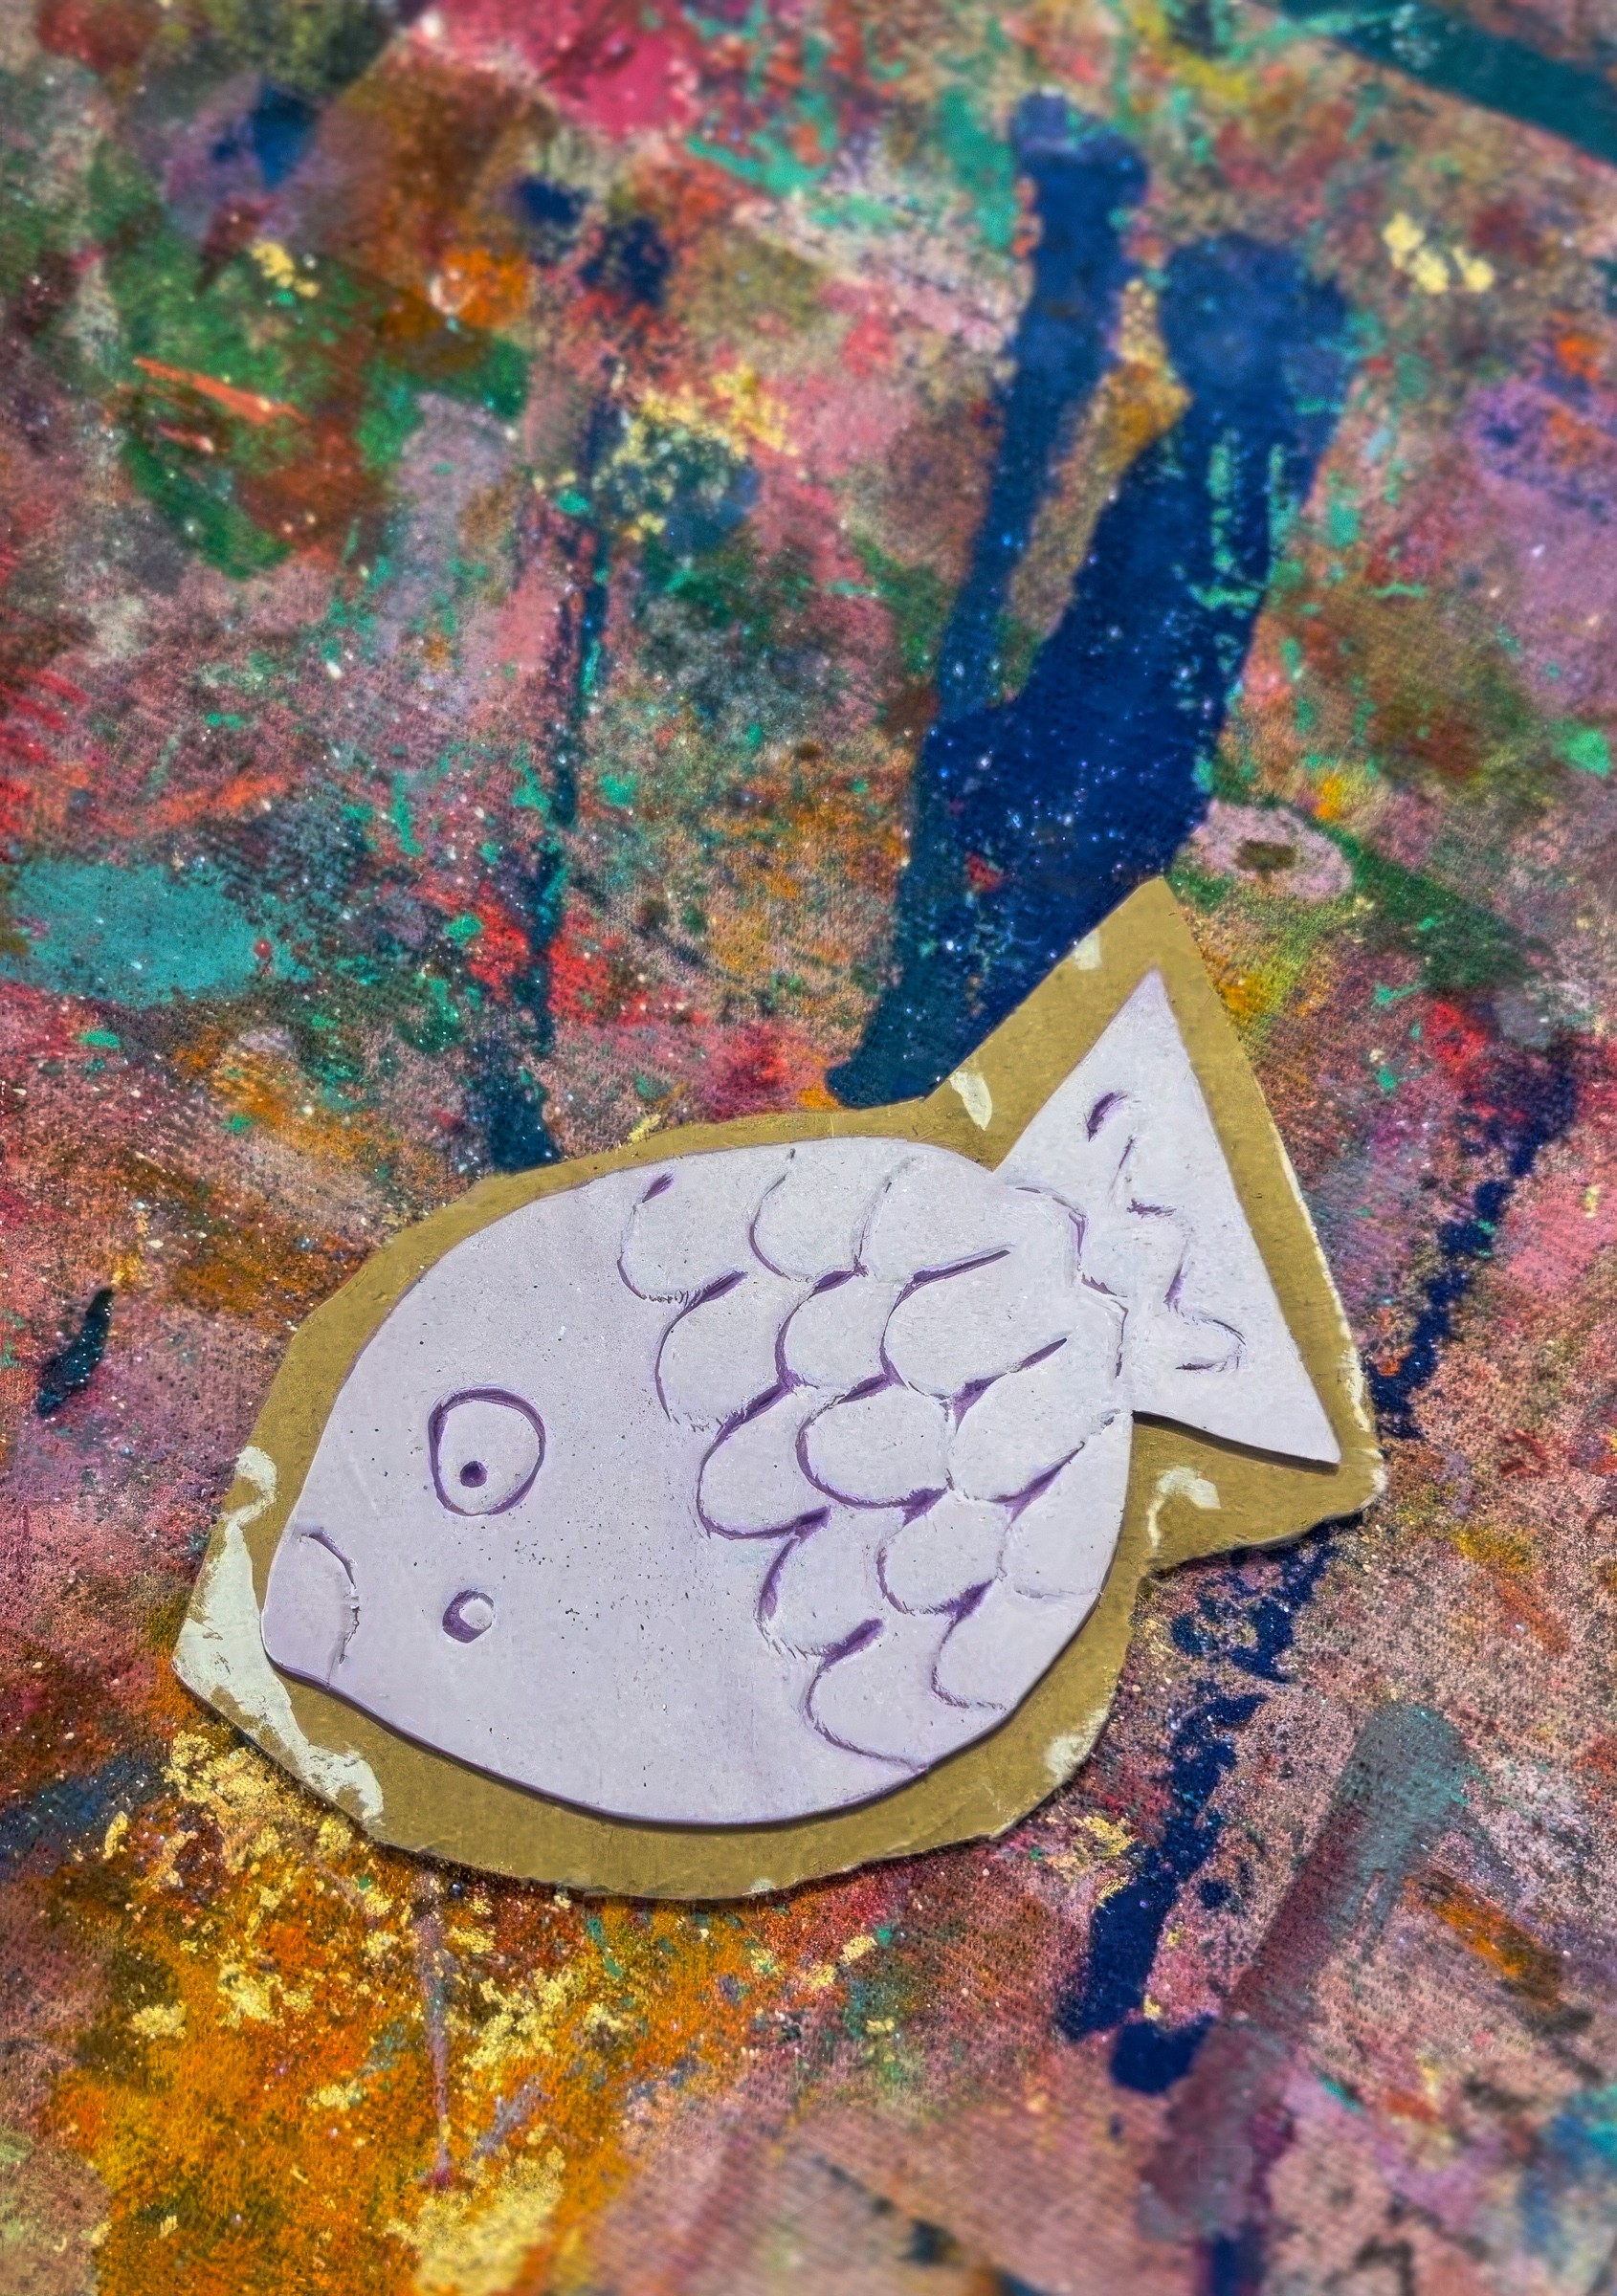
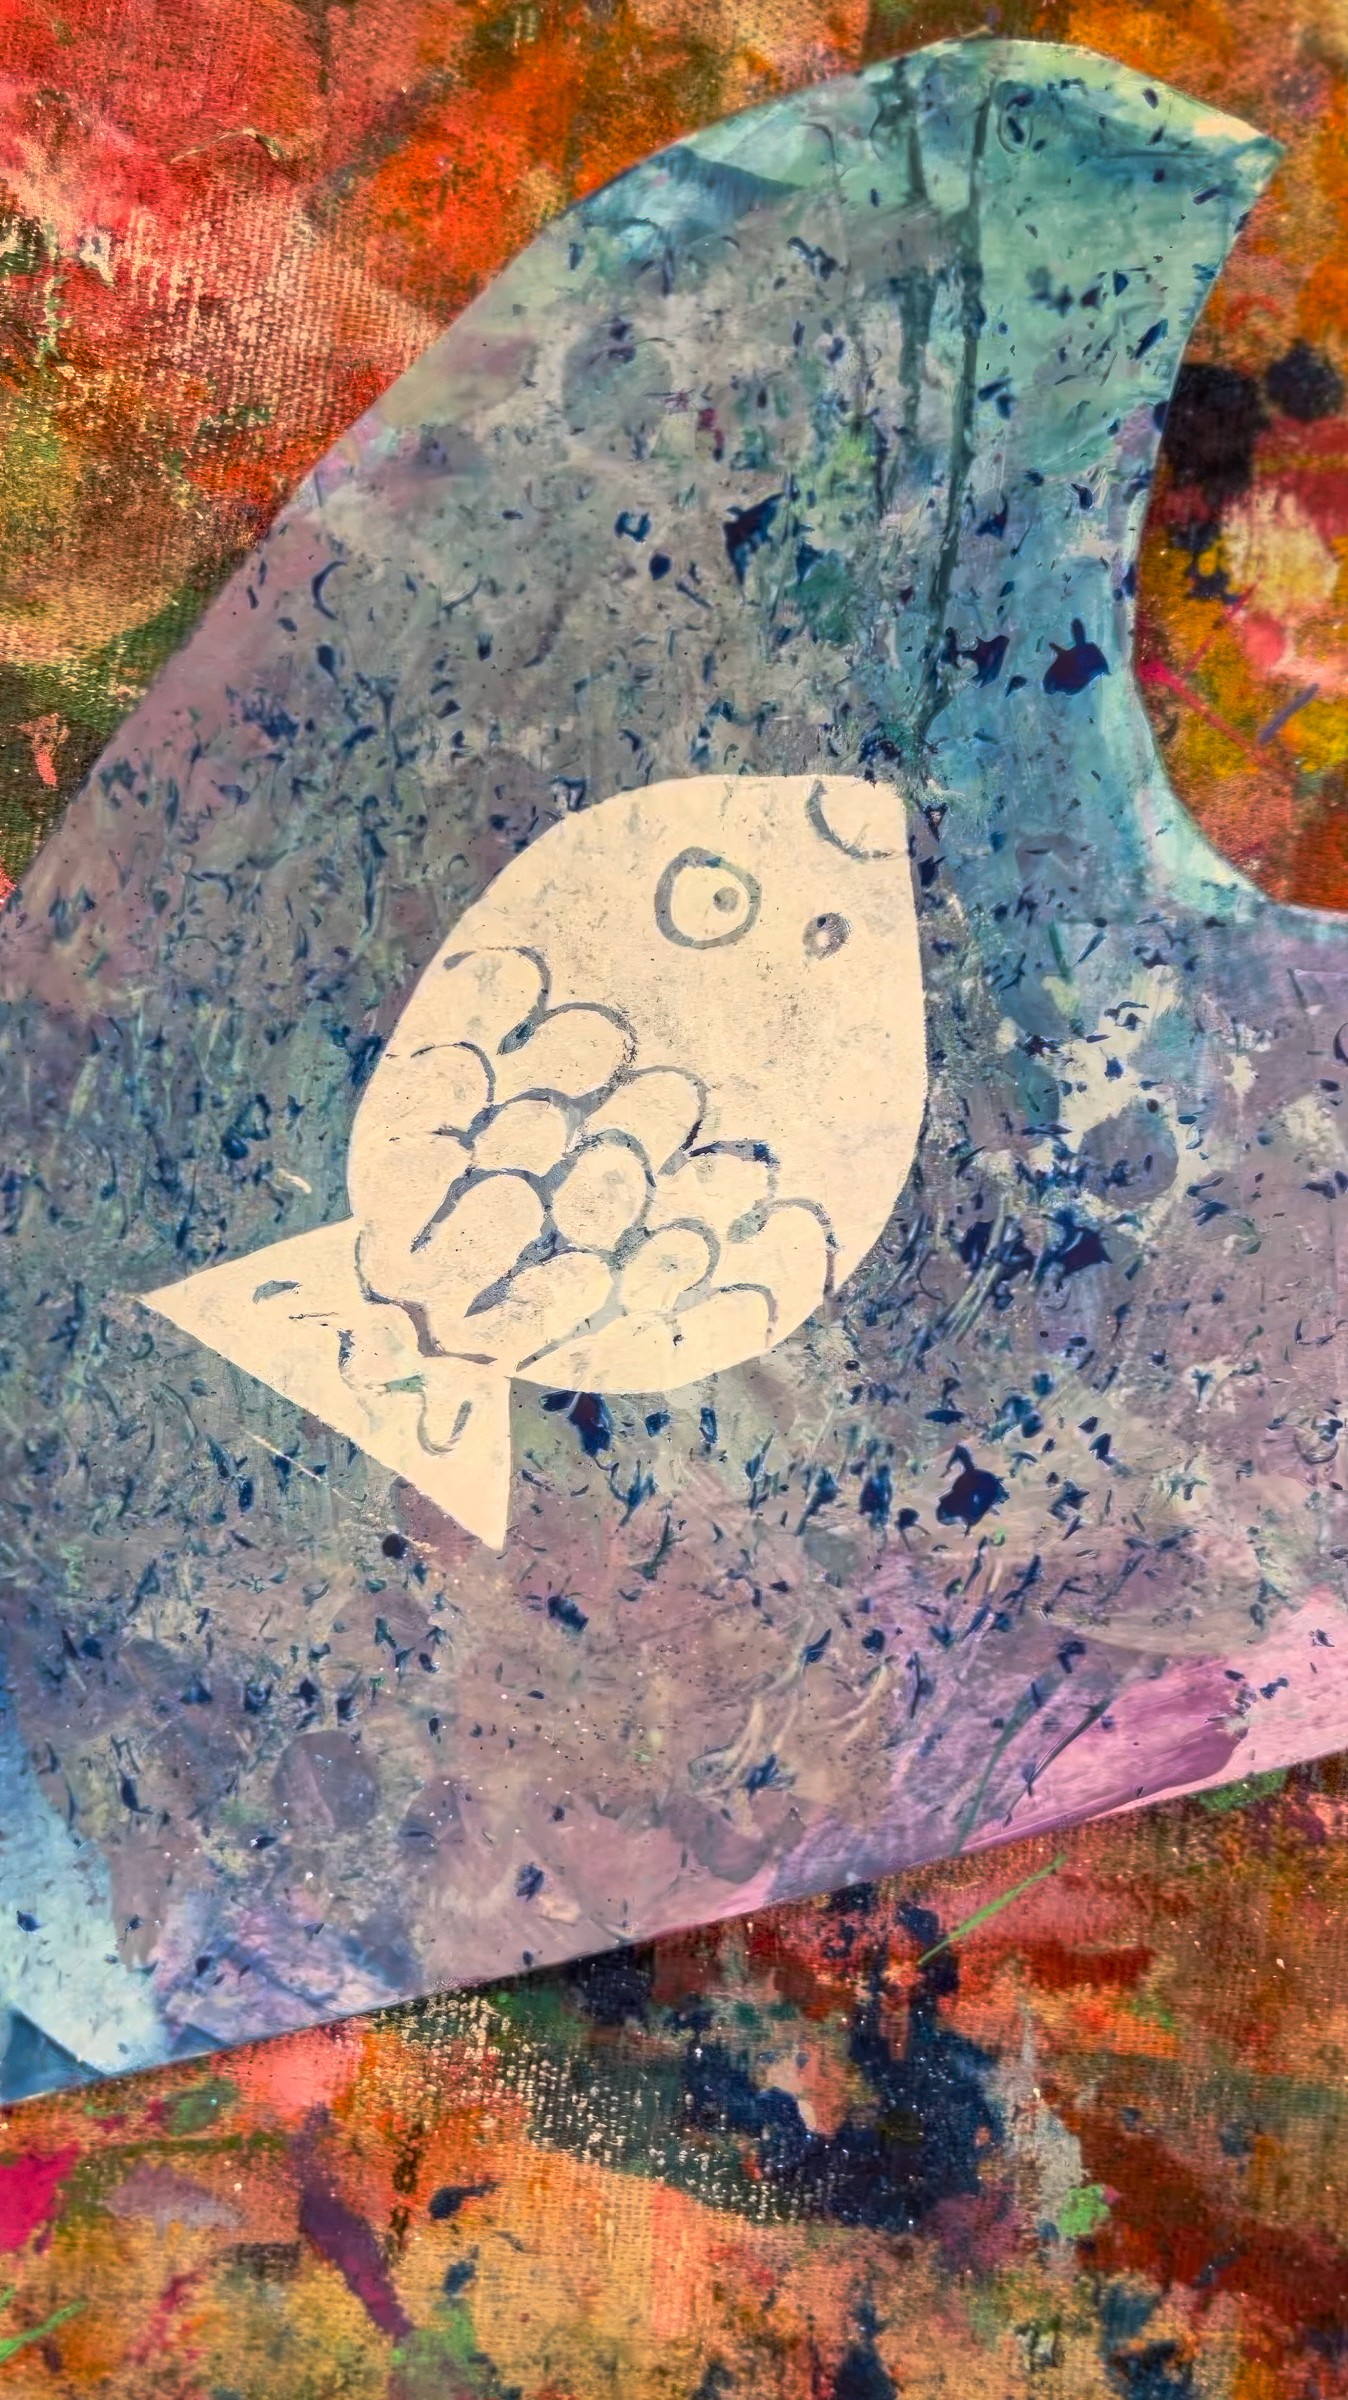
Start by drawing directly into the foam with a pencil or the end of a brush. Fish, shells, coral, waves — any design works. Press firmly enough so the grooves show clearly. If you are using sticky-backed foam, press it onto a block of wood or cardboard to make it easier to print and share.
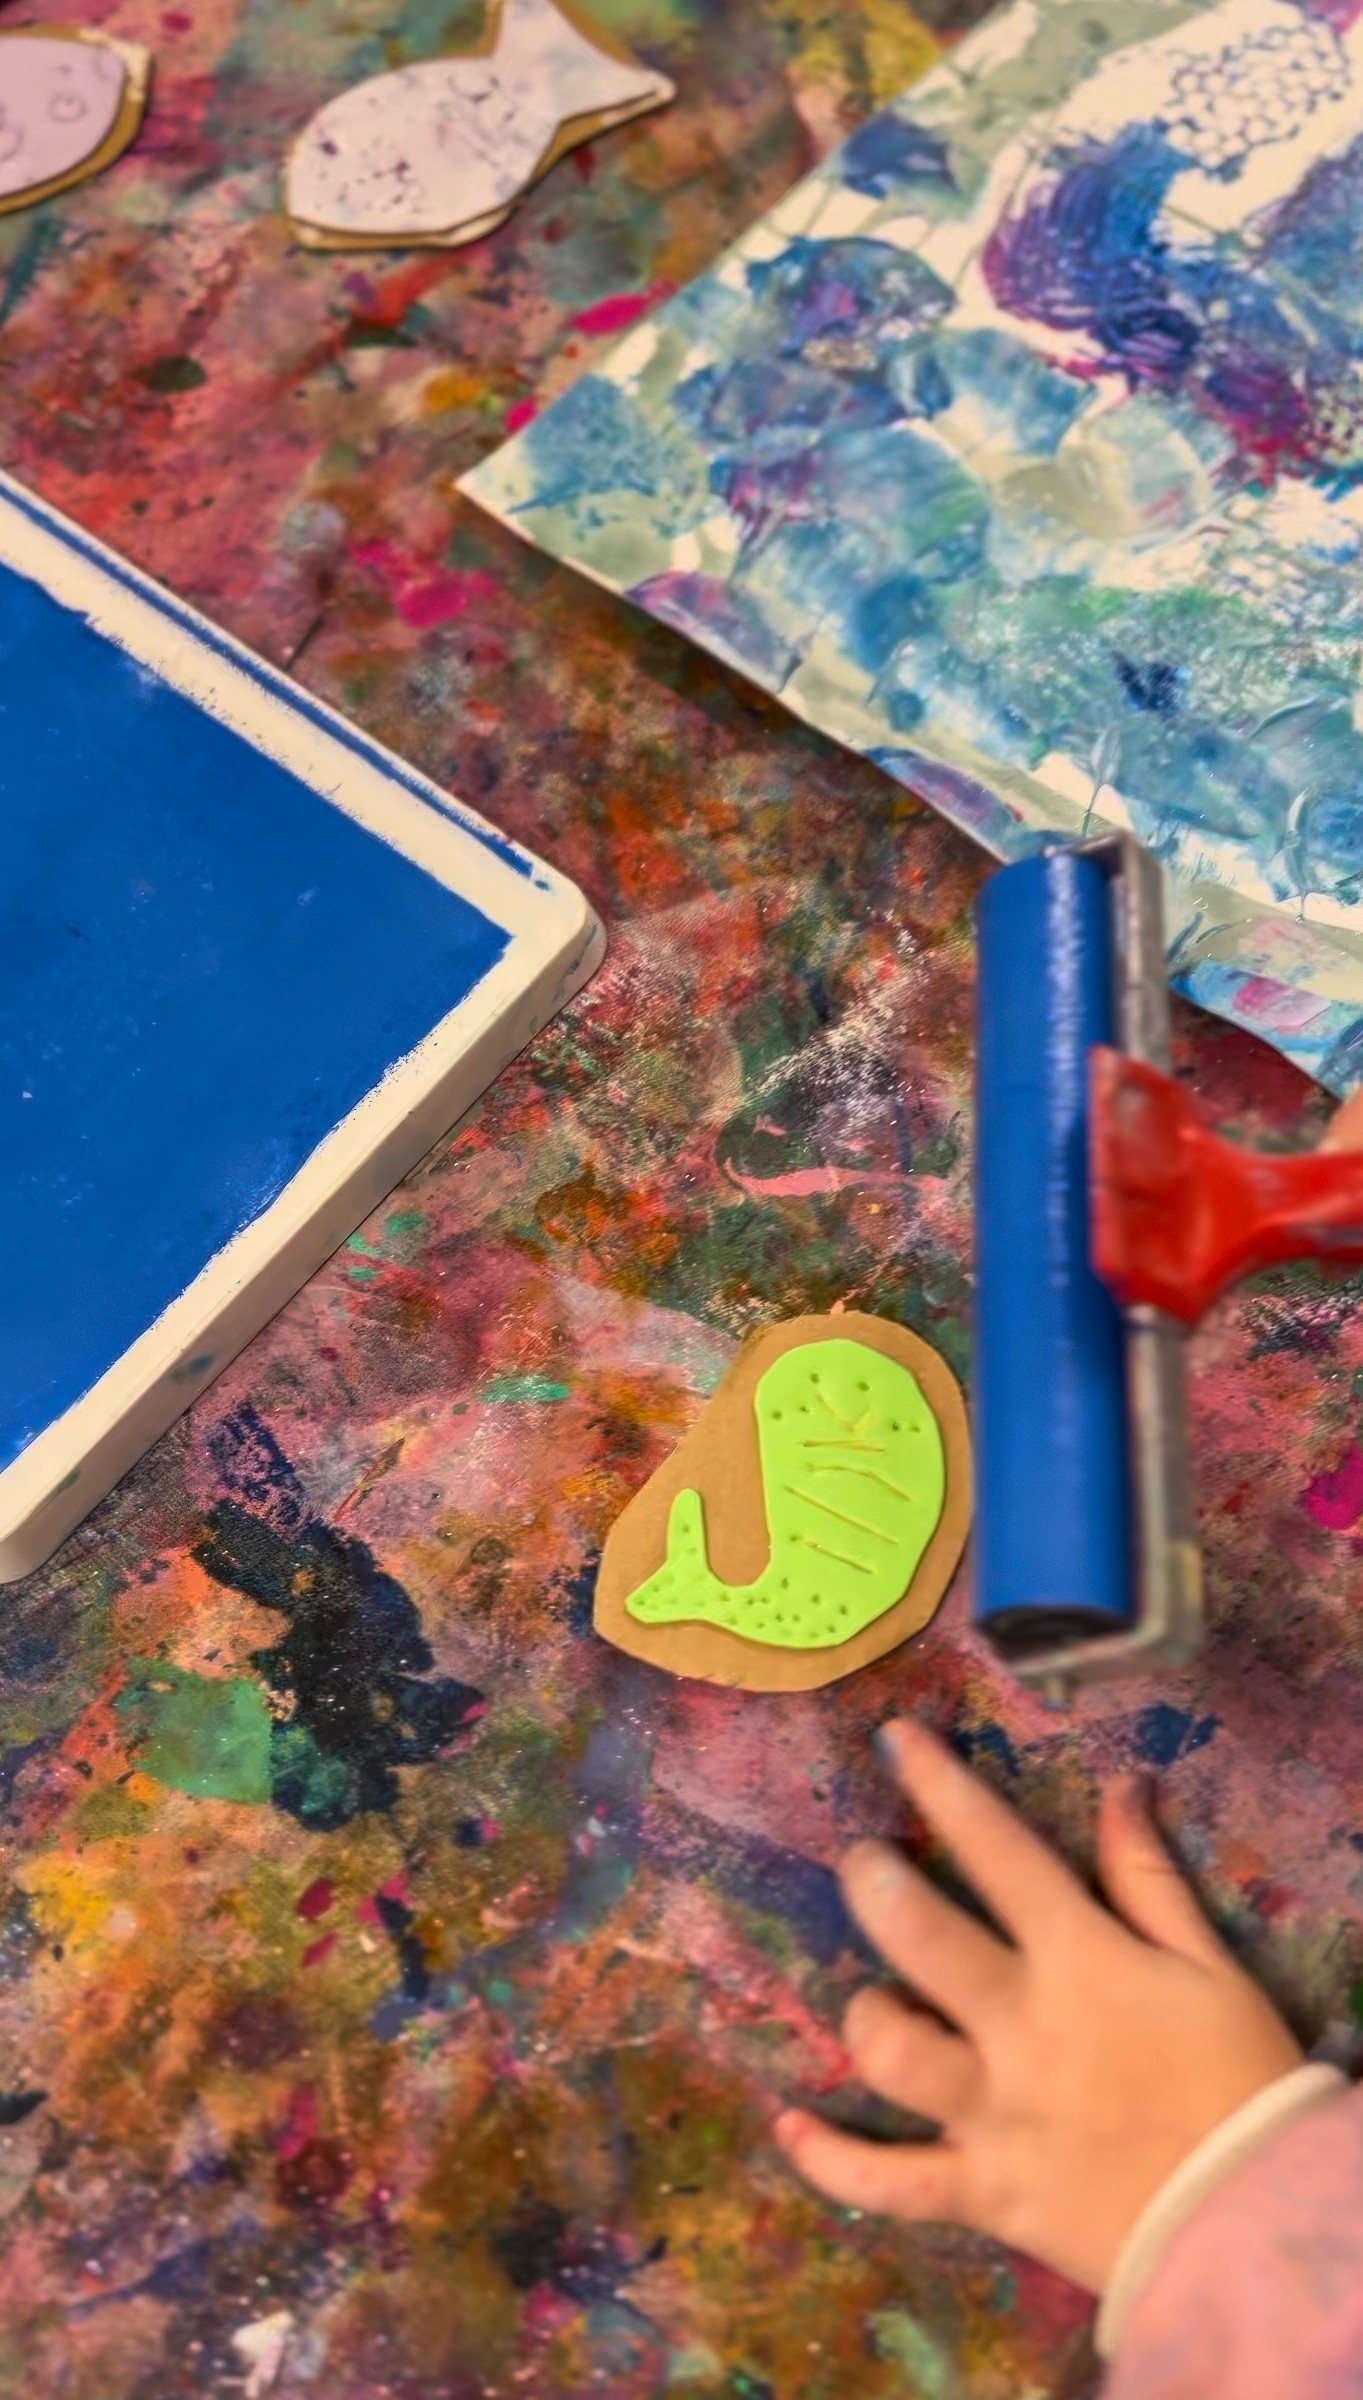
Block printing ink only needs a small amount. Drop a blob into the tray, spread it with a palette knife, and roll until the brayer feels smooth and even. Kids always notice the sticky squeak! It becomes part of the experience.
Roll ink across the foam stamp so the raised areas are covered and the scratched lines stay clear. Press onto paper, adding pressure with the palm of a hand or a clean roller. Lift carefully to reveal the print. Sometimes the image comes out crisp, sometimes smudged, and sometimes with unexpected textures. All of it belongs.
One stamp can be used again and again, layered over itself, and shared with friends to build an entire underwater world! Encourage children to experiment with colour, placement and overlapping until the page feels alive.
It can also be lovely to share that printmaking has been used for centuries to capture nature. Japanese artists like Hokusai carved waves and fish into woodblocks to tell stories of the sea, while Australian printmaker Margaret Preston often drew on natural forms for her bold designs. Showing even one or two of these images can open a conversation about how artists use simple tools to bring whole landscapes to life.
Variations
Print onto dark paper with white or metallic ink so the ocean turns into a night reef.
Play with scale by making both tiny stamps and oversized ones
Experiment with textures beyond foam, such as bubble wrap, netting or corrugated card, to see what new ocean marks appear.
Use the prints as building blocks. Collage them together into a giant group mural, or repeat a favourite stamp across the page to create patterned wrapping paper or borders.

Materials
Foam sheets (sticky-backed ones make mounting easy)
Cardboard or wooden blocks for backing the stamps
Pencils or the ends of paintbrushes for scratching designs
Block printing ink in ocean colours (blue, white, metallics work beautifully)
Palette knives or plastic spreaders for scooping ink
Brayers or rollers
Shallow trays or plates for rolling out ink
Large sheets of paper, including pre-painted “ocean paper” or darker card for contrast
Back to Top
Ocean Printmaking
Print the sea again and again!
Bookmark
Print Making
The Set Up
Foam sheets are the base for our stamps. We use sticky-backed ones so they can be mounted onto cardboard or wooden blocks, but plain foam works too. Lay out pencils or the ends of paintbrushes for drawing into the surface, plus trays with a little block printing ink and brayers for rolling.
Blue and white inks look brilliant when printed onto textured “ocean paper” from earlier painting explorations!
The Making
Start by drawing directly into the foam with a pencil or the end of a brush. Fish, shells, coral, waves — any design works. Press firmly enough so the grooves show clearly. If you are using sticky-backed foam, press it onto a block of wood or cardboard to make it easier to print and share.
Block printing ink only needs a small amount. Drop a blob into the tray, spread it with a palette knife, and roll until the brayer feels smooth and even. Kids always notice the sticky squeak! It becomes part of the experience.
Roll ink across the foam stamp so the raised areas are covered and the scratched lines stay clear. Press onto paper, adding pressure with the palm of a hand or a clean roller. Lift carefully to reveal the print. Sometimes the image comes out crisp, sometimes smudged, and sometimes with unexpected textures. All of it belongs.
One stamp can be used again and again, layered over itself, and shared with friends to build an entire underwater world! Encourage children to experiment with colour, placement and overlapping until the page feels alive.
It can also be lovely to share that printmaking has been used for centuries to capture nature. Japanese artists like Hokusai carved waves and fish into woodblocks to tell stories of the sea, while Australian printmaker Margaret Preston often drew on natural forms for her bold designs. Showing even one or two of these images can open a conversation about how artists use simple tools to bring whole landscapes to life.
Variations
Print onto dark paper with white or metallic ink so the ocean turns into a night reef.
Play with scale by making both tiny stamps and oversized ones
Experiment with textures beyond foam, such as bubble wrap, netting or corrugated card, to see what new ocean marks appear.
Use the prints as building blocks. Collage them together into a giant group mural, or repeat a favourite stamp across the page to create patterned wrapping paper or borders.
Materials
Foam sheets (sticky-backed ones make mounting easy)
Cardboard or wooden blocks for backing the stamps
Pencils or the ends of paintbrushes for scratching designs
Block printing ink in ocean colours (blue, white, metallics work beautifully)
Palette knives or plastic spreaders for scooping ink
Brayers or rollers
Shallow trays or plates for rolling out ink
Large sheets of paper, including pre-painted “ocean paper” or darker card for contrast
Back to Top
Watercolour Seashells
Turn everyday shells into shimmering treasures.
Bookmark
Creative Exploration
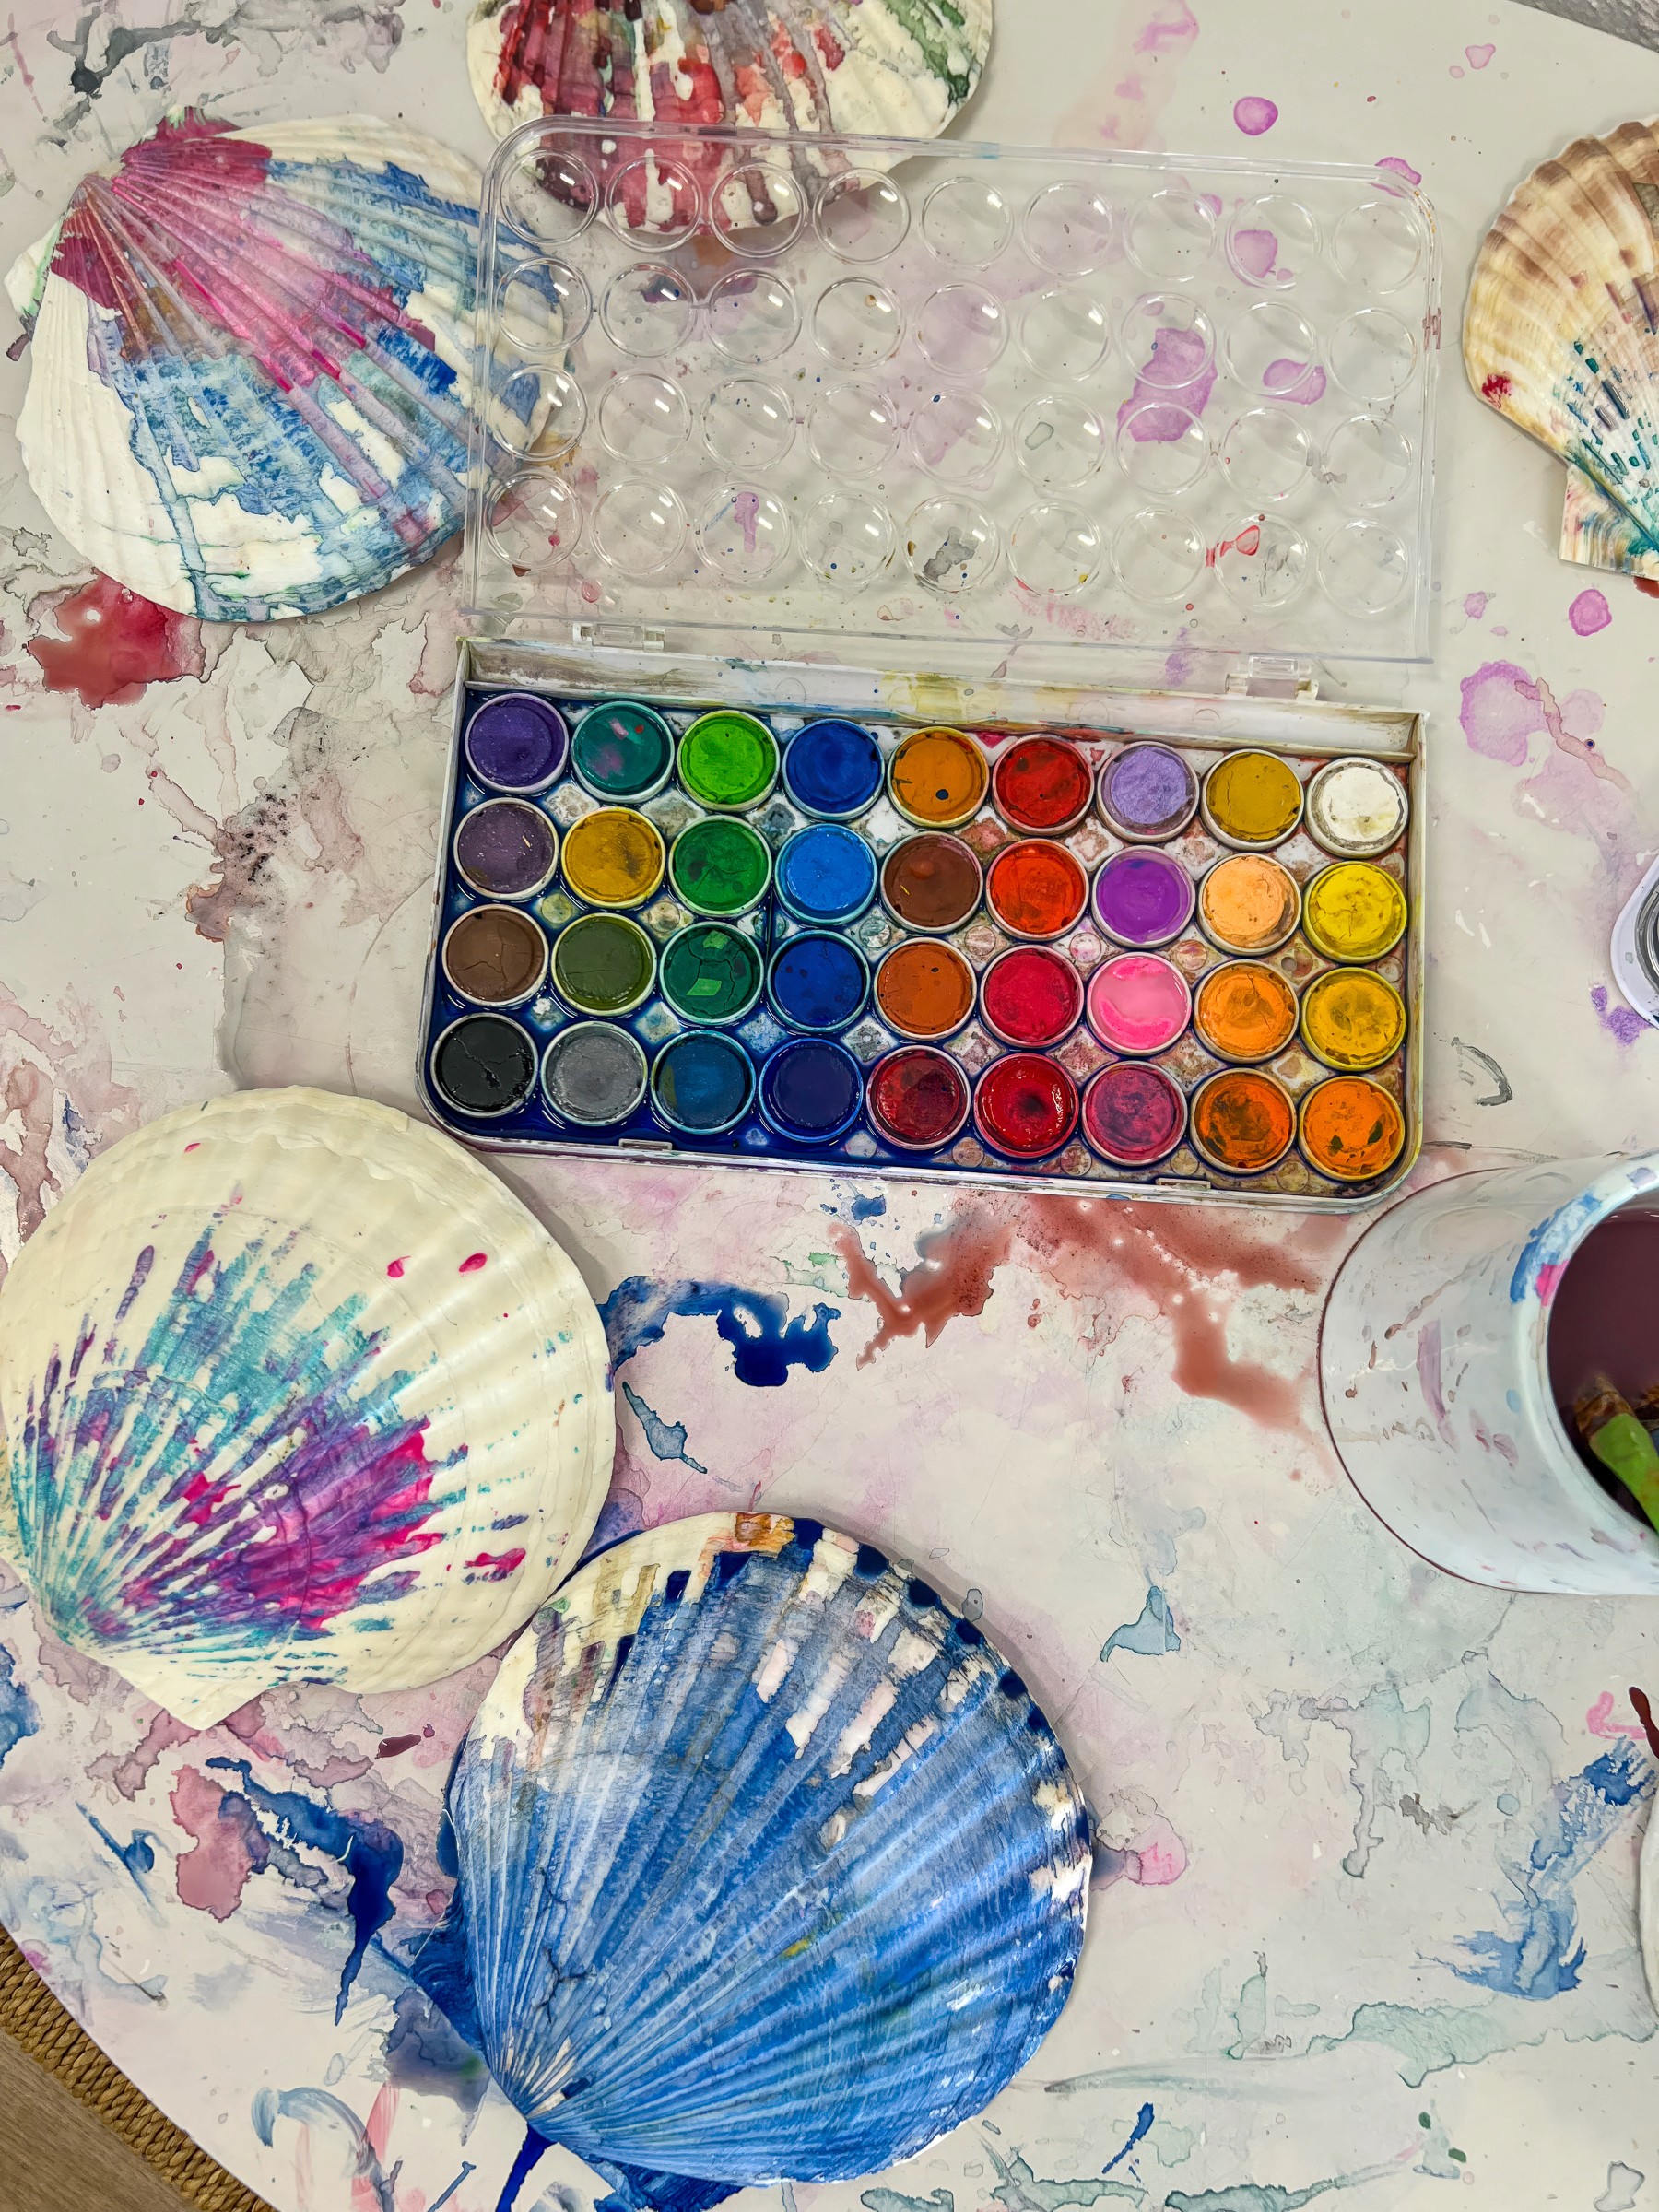
The Set Up
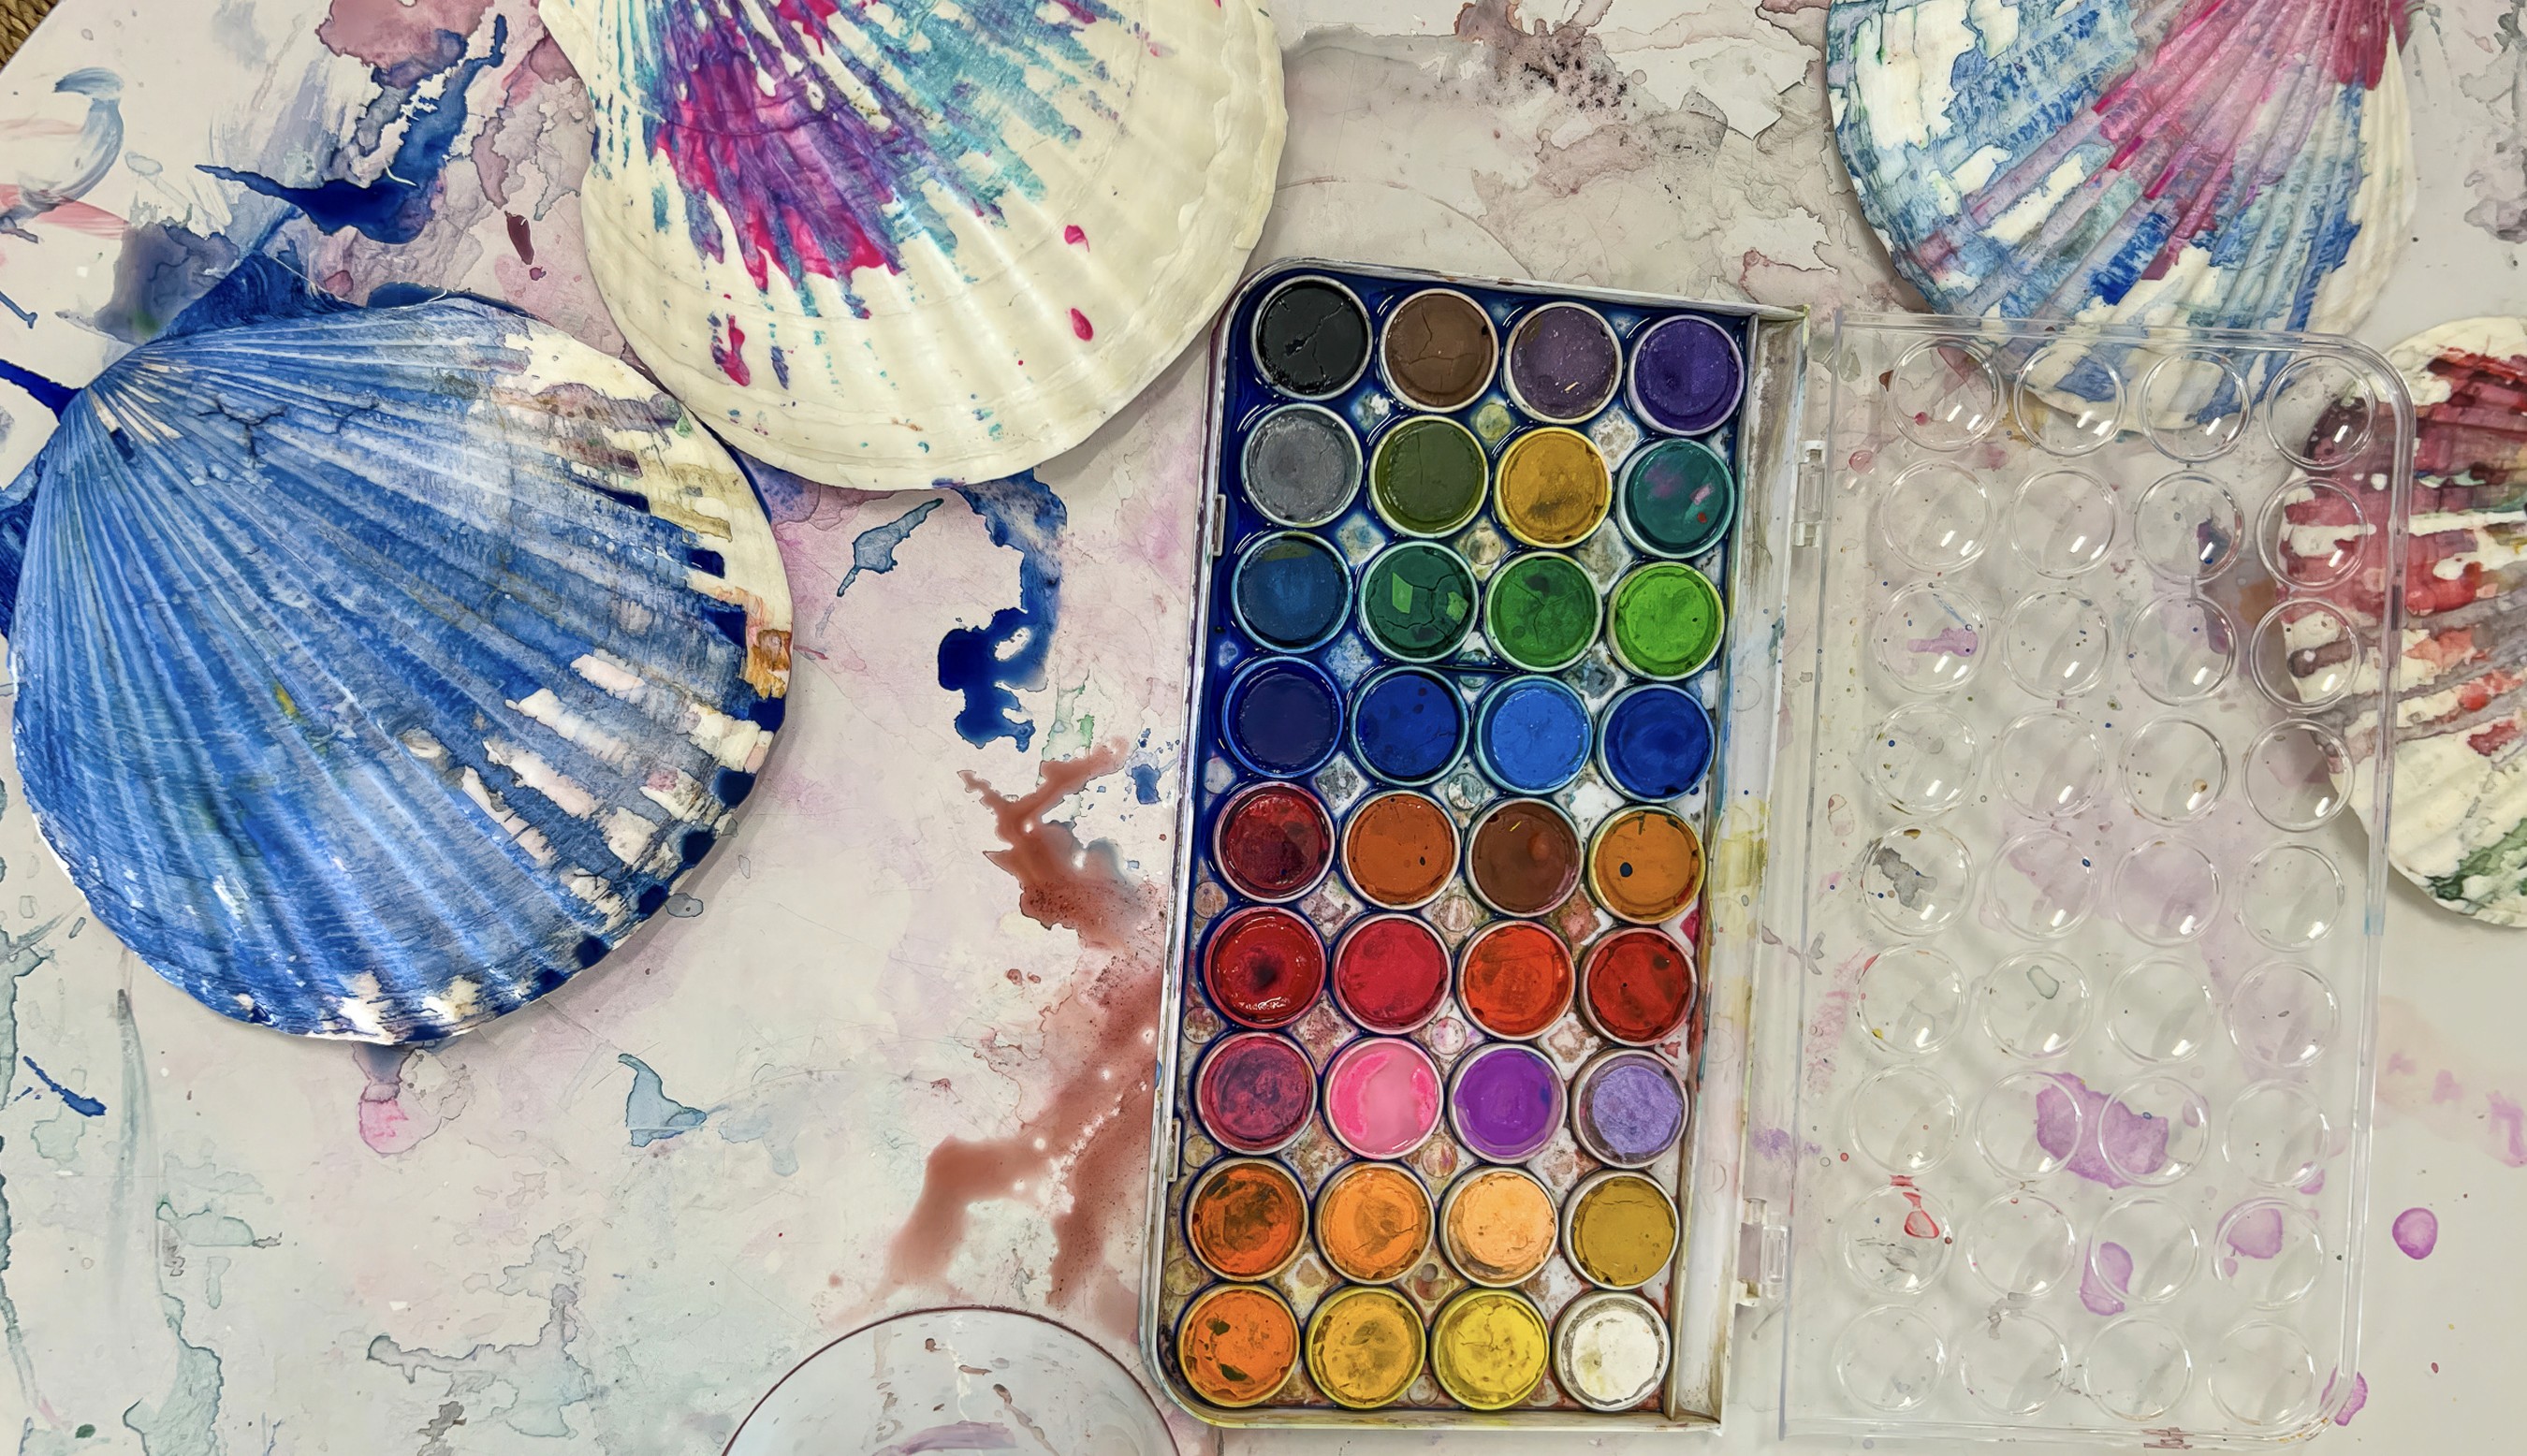
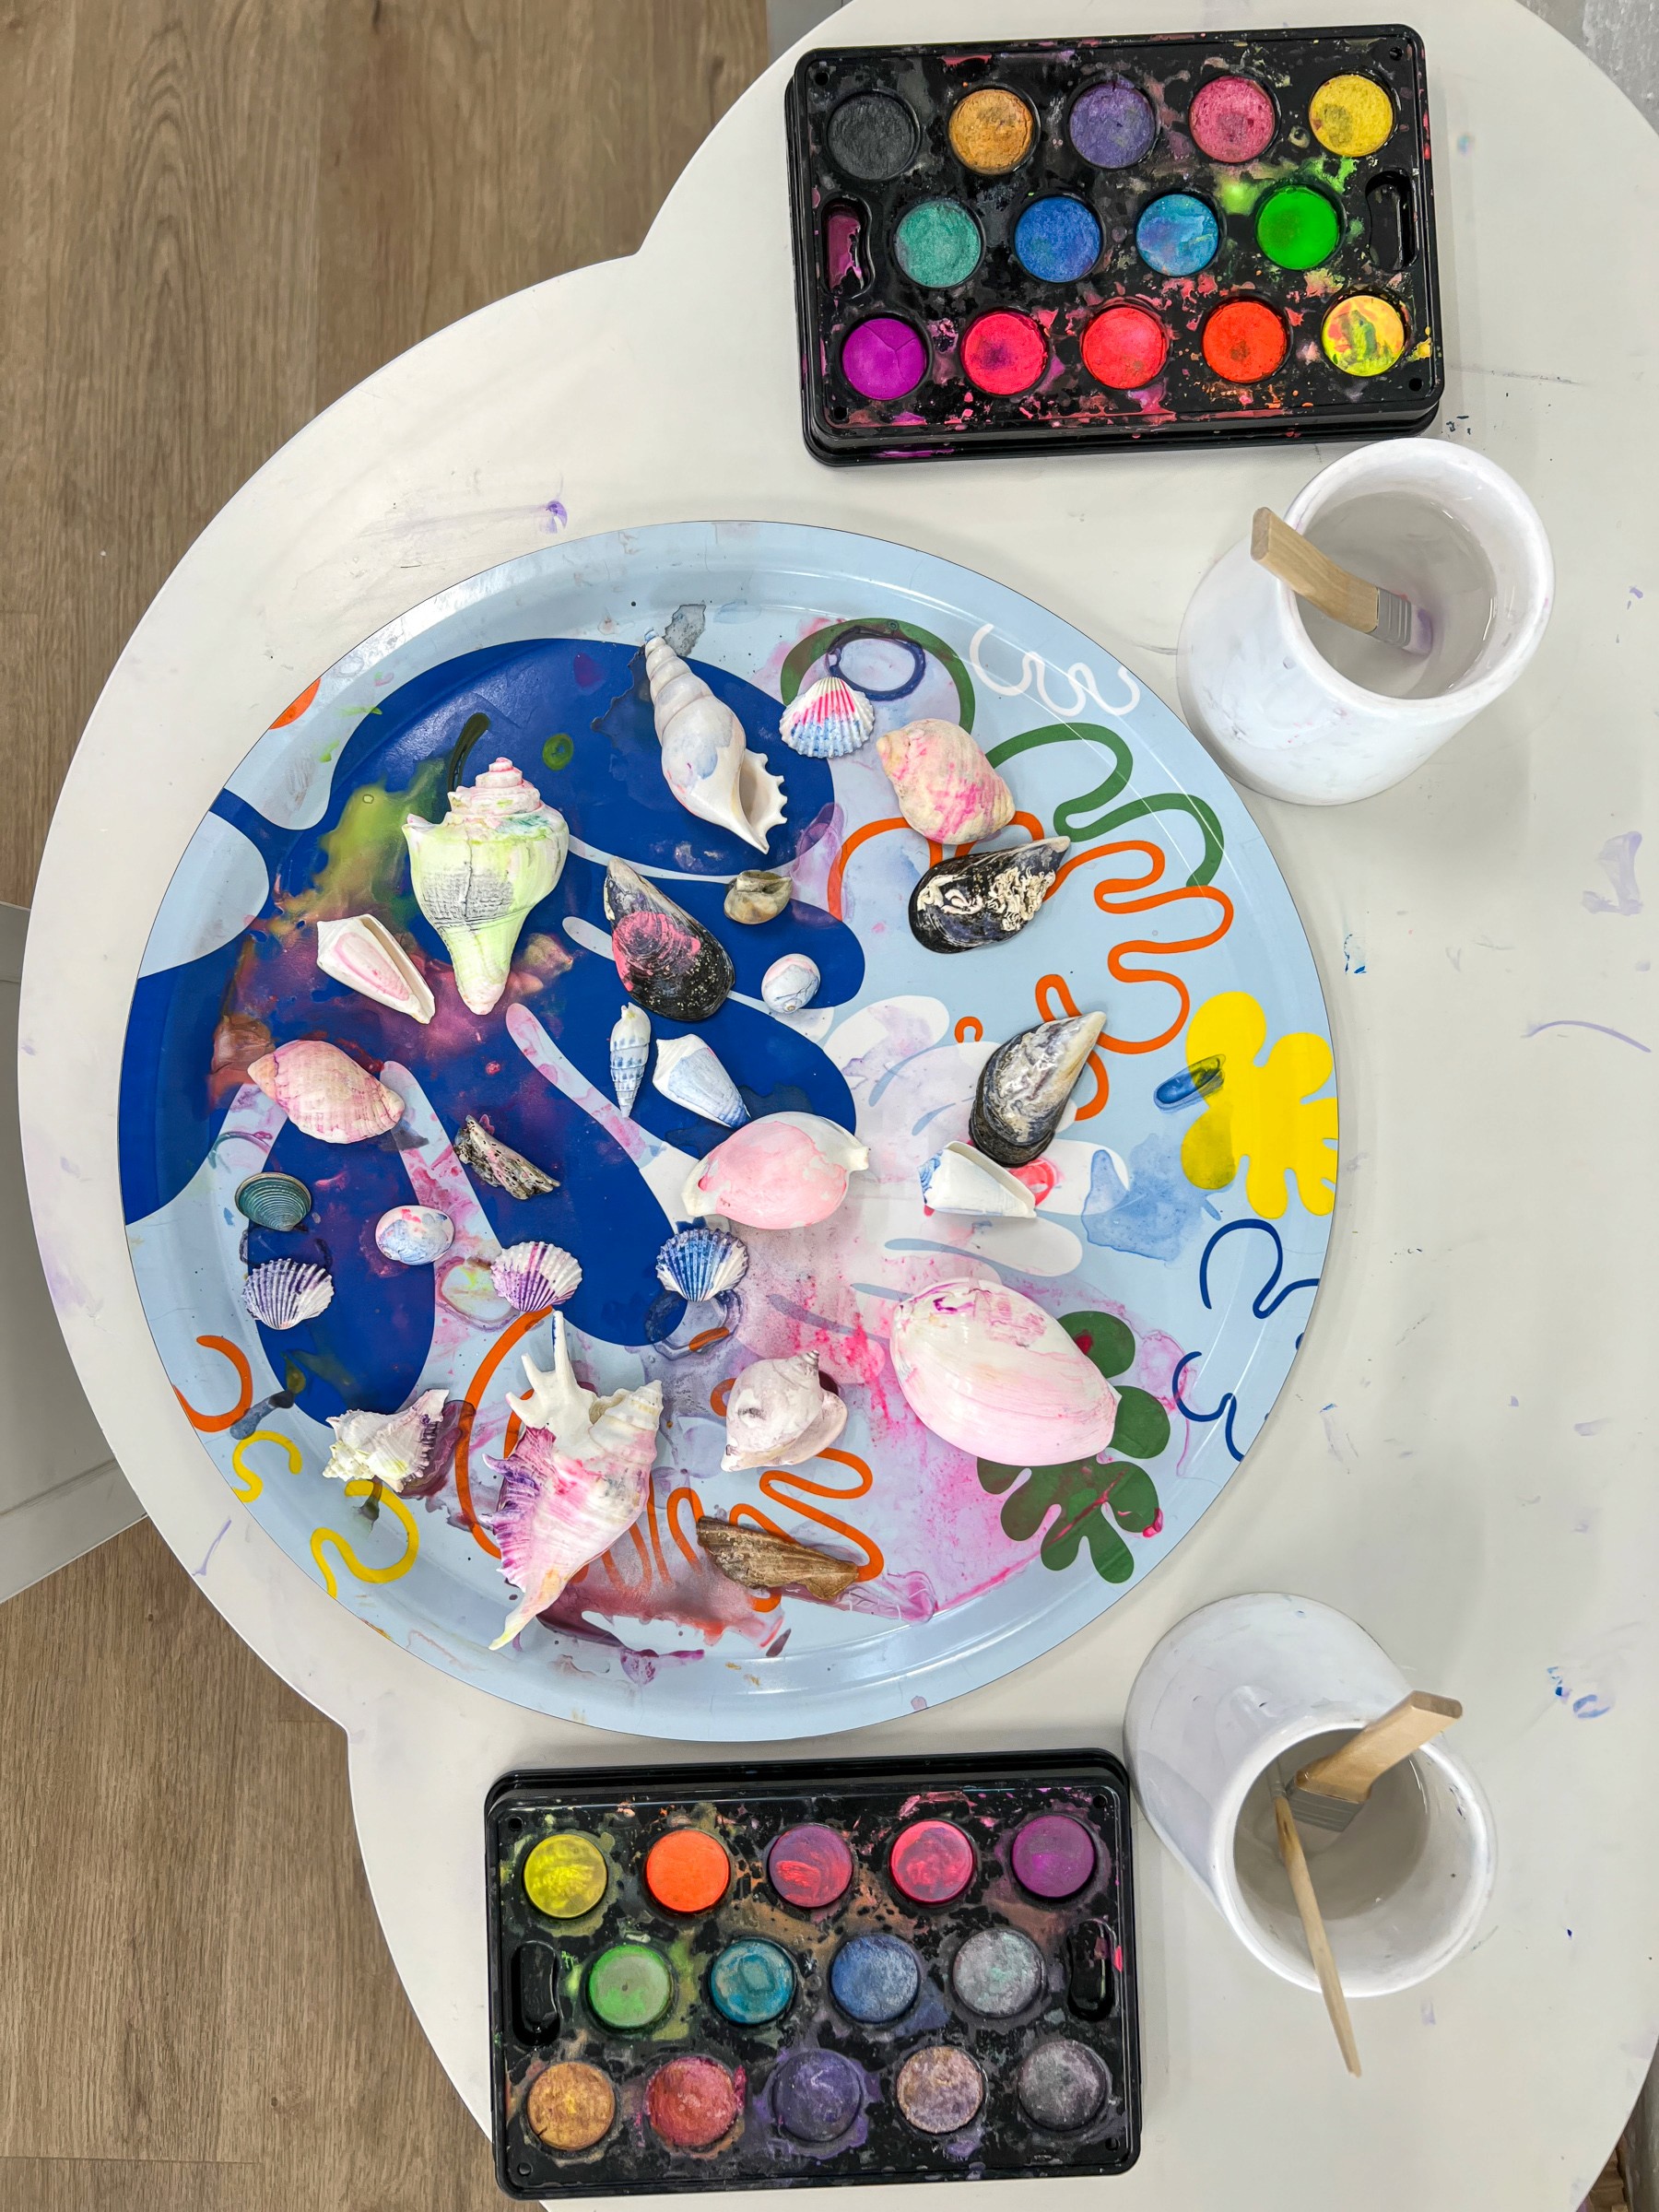
Lay out a collection of shells and beach finds in different shapes and sizes. Add watercolour palettes, brushes, jars of water and trays to catch the drips.
This is collaborative and open ended. There is no finished piece, only the joy of exploring colour on familiar forms!
There’s delight in painting something so familiar and seeing it differently. Little hands can layer colours across the top, fill grooves with patterns, or let watery washes flow. Holding and turning the shells feels really different from painting on paper.
If you want to spark ideas, ask the kids to notice the colours already hidden in the shell. Many shells carry faint pinks, soft purples or streaks of gold that only appear when you look closely.
Variations
Try liquid watercolours for stronger intensity.
Offer prompts for pattern making such as dots, stripes, spirals or cross hatching.
Mono-printing with the shells and rolling them across a page.
Mix in pebbles, driftwood or coral so the palette expands beyond shells.
Materials
A range of seashells or other beach treasures
Watercolour palettes or liquid watercolours
Brushes in different sizes
Jars of water
Trays or boards to hold the shells while painting
Back to Top
Watercolour Seashells
Turn everyday shells into shimmering treasures.
Bookmark
Creative Exploration
The Set Up
Lay out a collection of shells and beach finds in different shapes and sizes. Add watercolour palettes, brushes, jars of water and trays to catch the drips.
This is collaborative and open ended. There is no finished piece, only the joy of exploring colour on familiar forms!
There’s delight in painting something so familiar and seeing it differently. Little hands can layer colours across the top, fill grooves with patterns, or let watery washes flow. Holding and turning the shells feels really different from painting on paper.
If you want to spark ideas, ask the kids to notice the colours already hidden in the shell. Many shells carry faint pinks, soft purples or streaks of gold that only appear when you look closely.
Variations
Try liquid watercolours for stronger intensity.
Offer prompts for pattern making such as dots, stripes, spirals or cross hatching.
Mono-printing with the shells and rolling them across a page.
Mix in pebbles, driftwood or coral so the palette expands beyond shells.
Materials
A range of seashells or other beach treasures
Watercolour palettes or liquid watercolours
Brushes in different sizes
Jars of water
Trays or boards to hold the shells while painting
Back to Top
