


ARTFUL EXPERIENCES
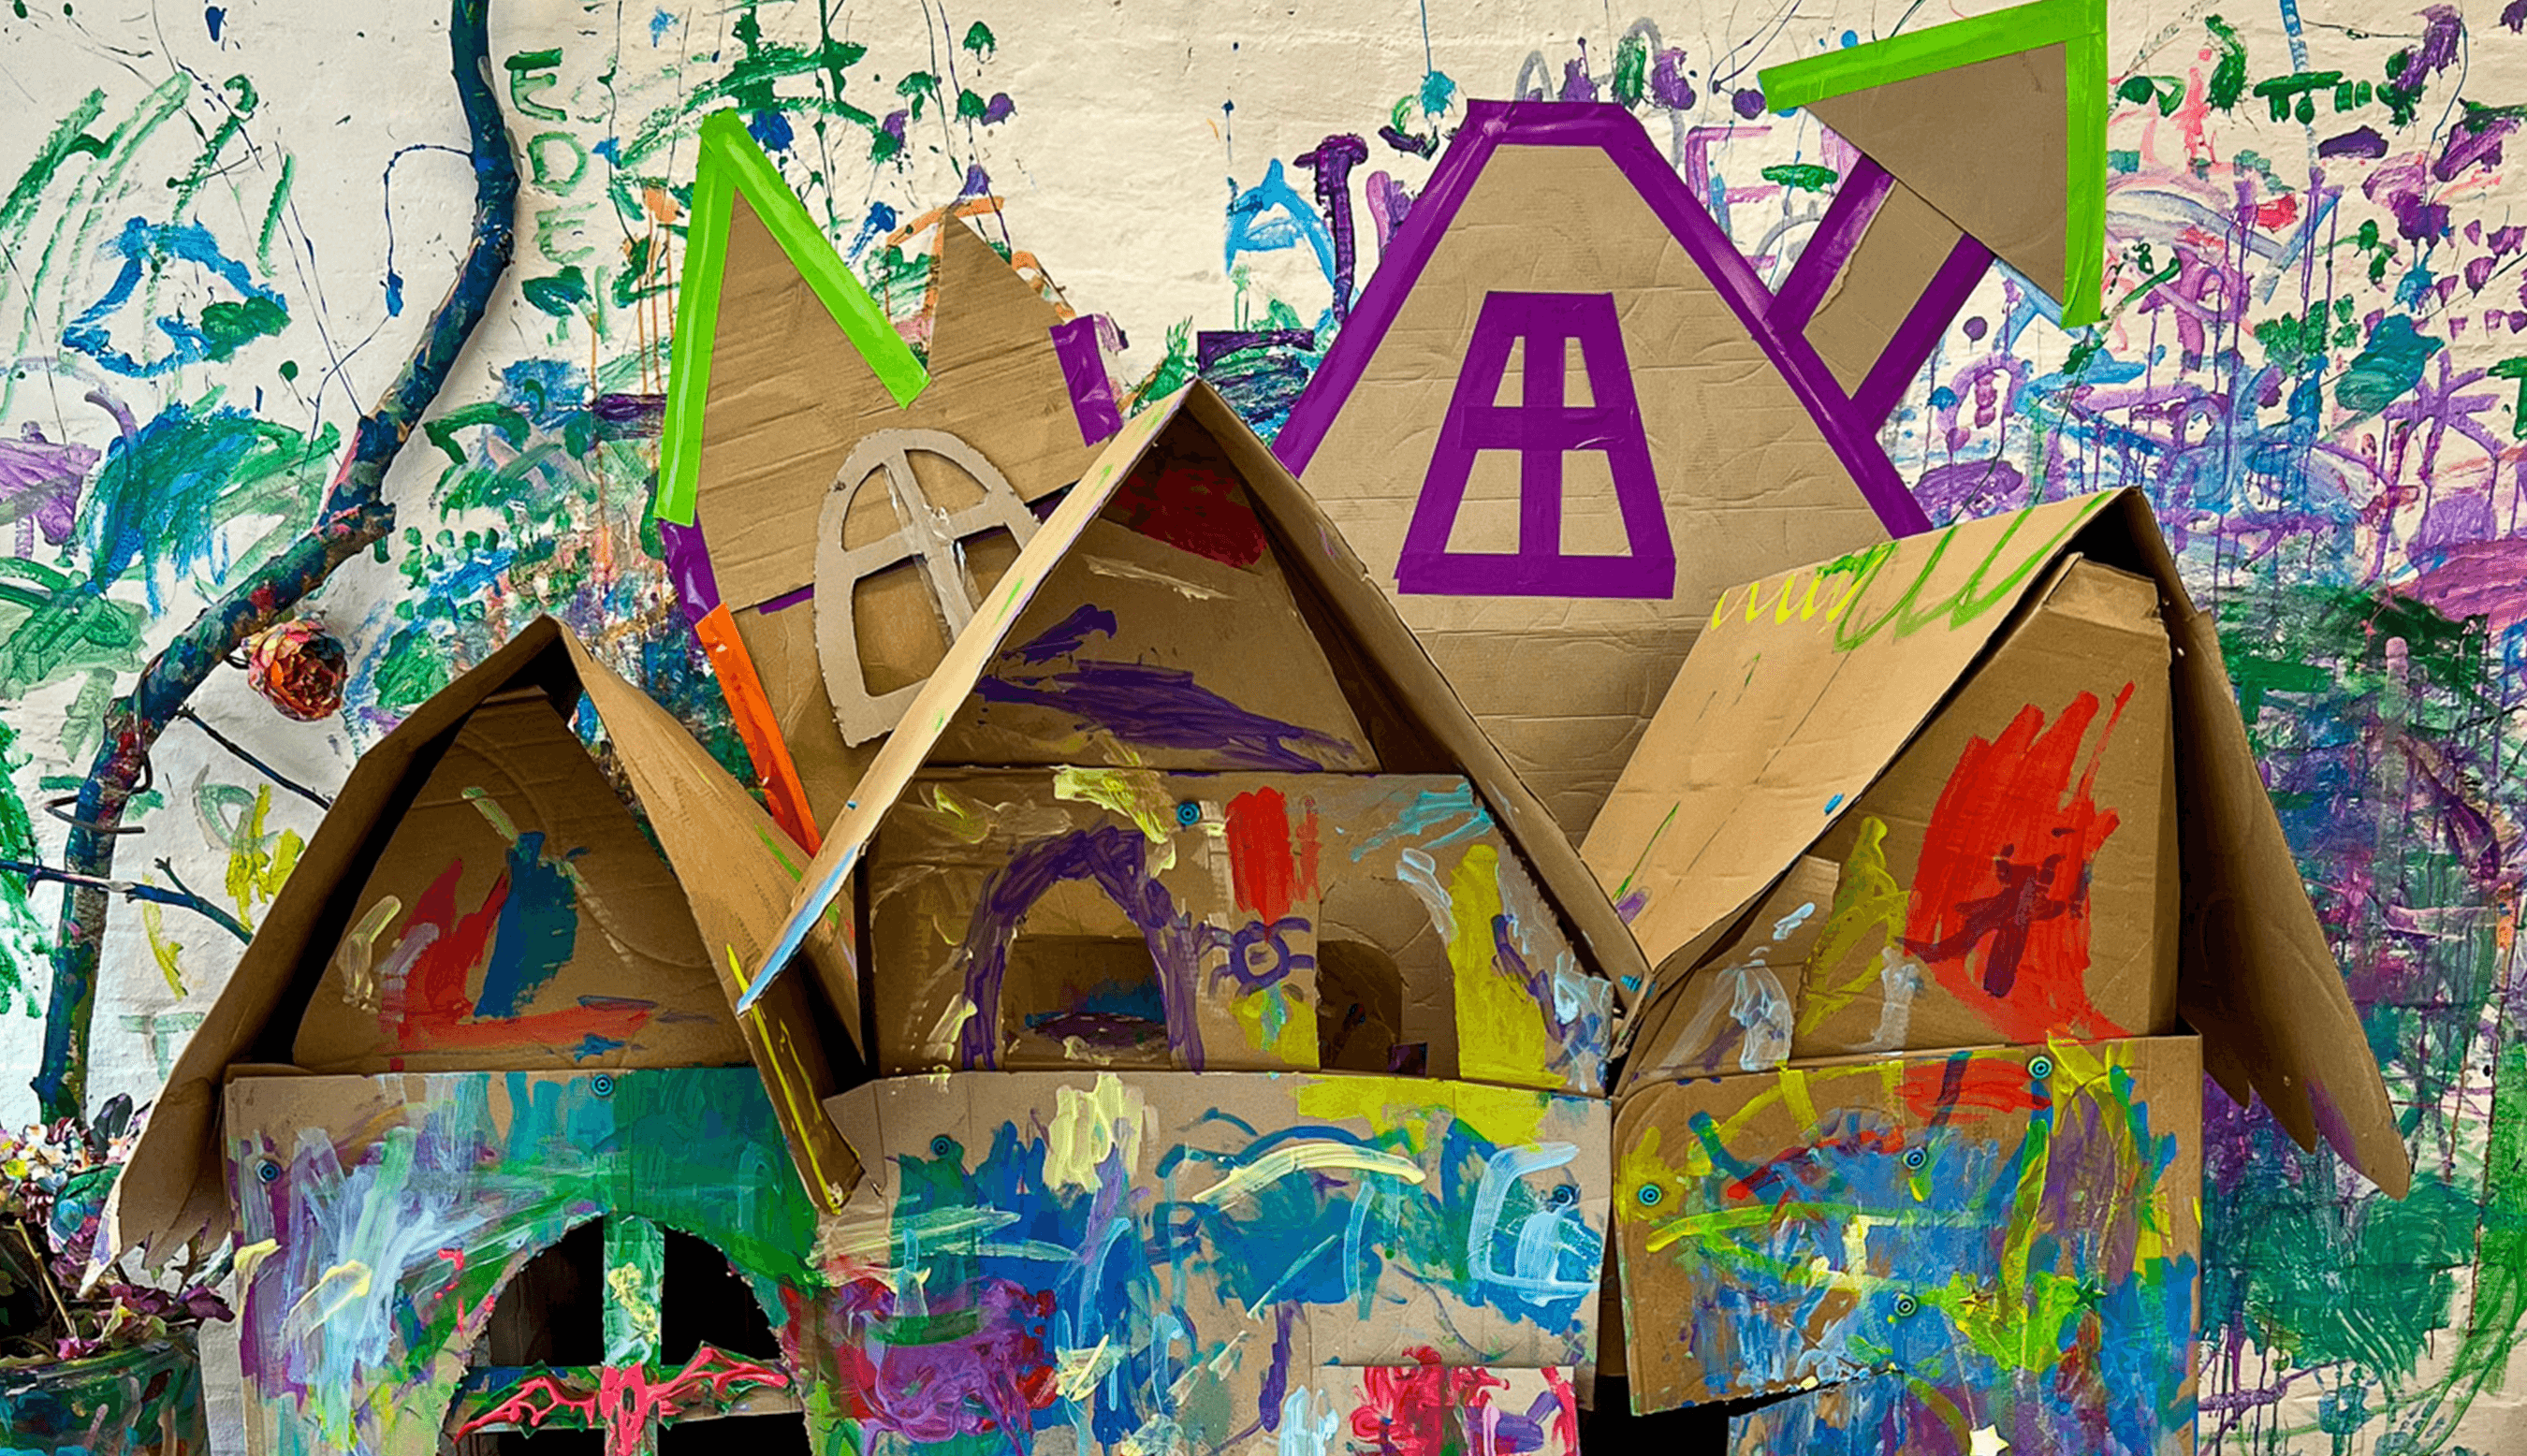
Haunted Cubby House
Build, paint, and play inside a recycled Halloween installation
All Ages
Bookmark
Installations
The Set Up
Cardboard invites big ideas. It is light, forgiving, and full of possibility. For Halloween it transforms a space into something a little spooky and very playful.
Gather large boxes or sheets from anywhere you can. We are lucky to have a mechanic behind Smudge who saves theirs for us. IKEA recycling stations, hardware stores, and paint shops often have stacks ready to go. Cut a mix of sizes so kids can decide where doors, windows, and secret passages belong.
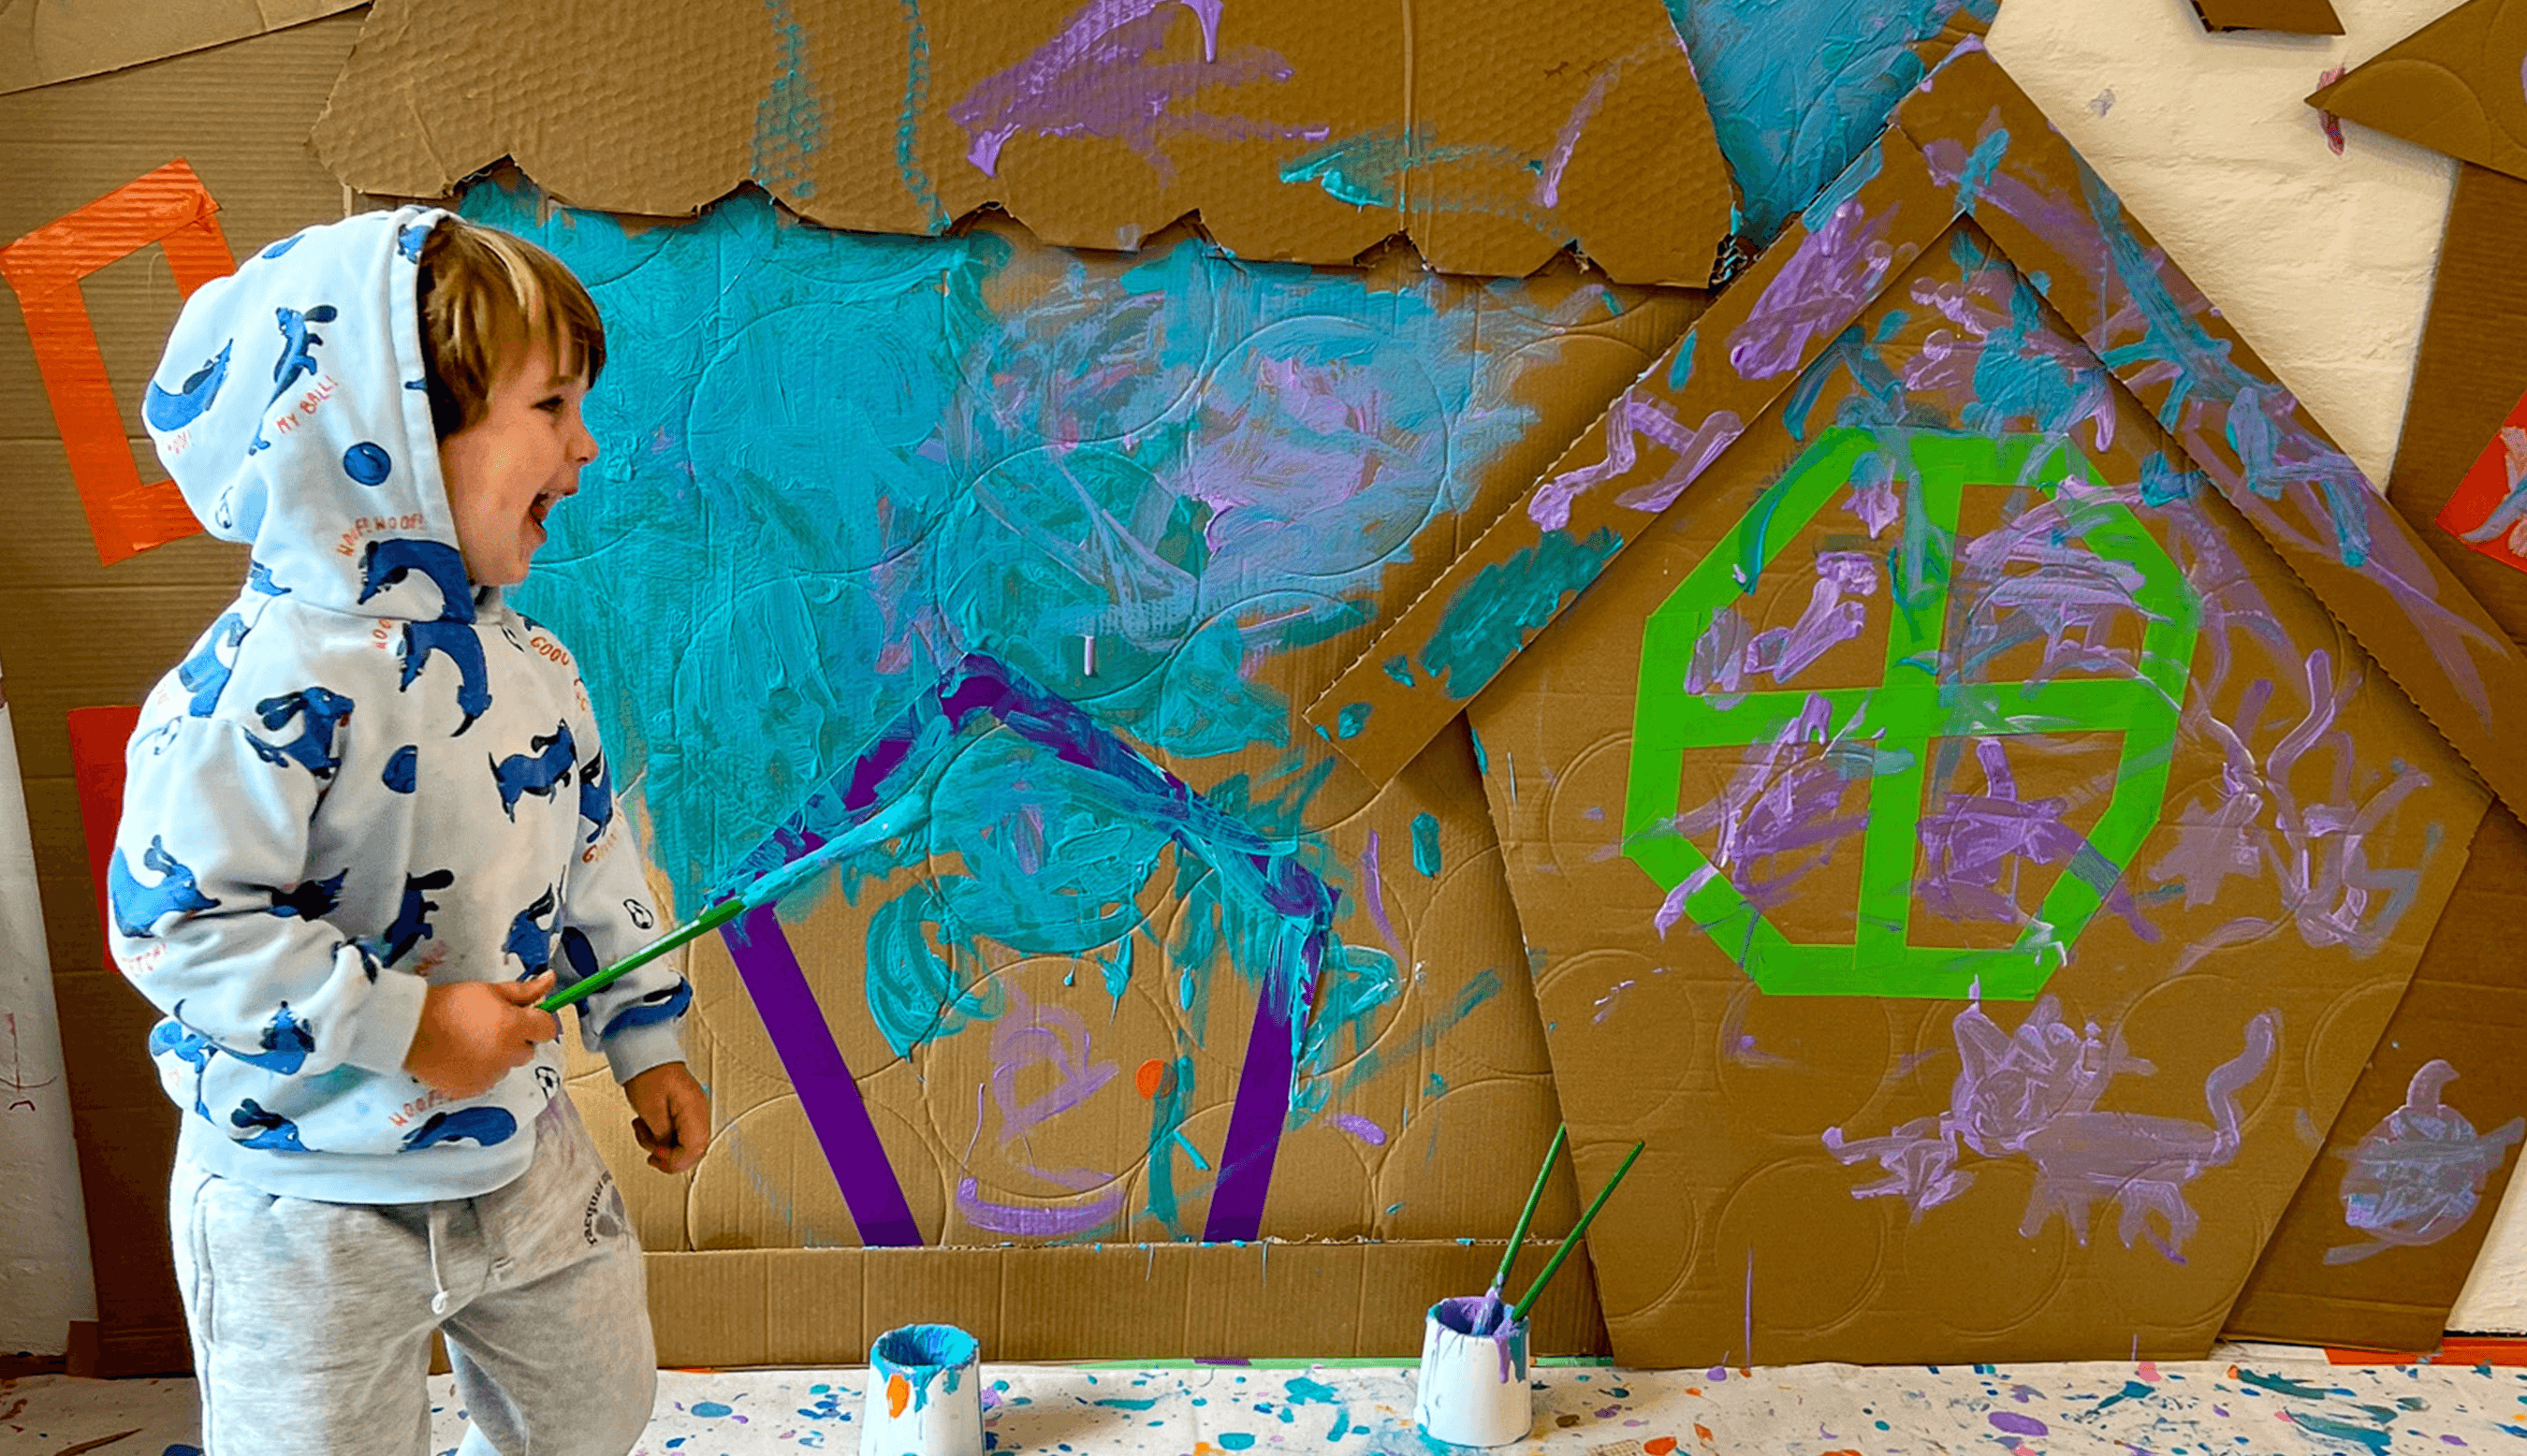
If space is tight, make a flat version on the wall. It still delivers that big visual moment. If you have room, build a cubby kids can step into. It is always worth it.
Makedo or ChompSaw tools keep construction safe and simple. Masking tape works for quick joins. Set out tempera or poster paint in whatever spooky colours take your fancy! Black, white, orange, and violet are often our go-to's. Mix a touch of white into every colour for extra brightness. Add rollers, sponges, and chunky brushes for loose, confident painting.


The Making
Ask who or what might live inside. A friendly ghost, a bat family, a witch with an insatiable glitter habit? Then step back a little and let the building and painting unfold. Walls might move, windows appear, chimneys lean.
Encourage movement and teamwork because learning sits inside all of those decisions. Let kids figure out how to join sections, balance heights, or create entryways. They’ll negotiate, problem-solve, and decorate all at once. The best moments come when storytelling and construction start to blur.
If you’re working with older groups, invite them to think beyond decoration. What kind of feeling does the space hold? Is it a hiding place, a memory, a dream? Those questions change the way they build.
Artist Study: Louise Bourgeois
Louise Bourgeois built sculptural spaces called Cells. They were small rooms made from wire, fabric, and found materials. Each one explored memory, fear, and the idea of home. Her giant spider sculptures, like Maman, weren’t about monsters or nightmares. They were symbols of strength, patience, and protection, all the qualities she saw in mothers weaving webs and repairing them again and again.
Show a few images of Maman or one of her Cells and talk about how she used structure to hold emotion. Ask: what could we build that feels strong or secret or safe? How can materials tell stories without words?
When kids build haunted houses, they’re doing what Bourgeois did; turning ordinary materials into spaces that hold feeling, memory, and a little bit of mystery.


Variations
Create a flat haunted mural instead of a 3D build
Add torches or fairy lights behind windows for glow
Use chalk pens or white paint pens for details once dry

Materials
• Large recycled cardboard sheets or boxes
• Makedo or ChompShop tools
• Masking tape or glue gun (for adult use, or supervised with kids)
• Tempera or poster paint
• Brushes, rollers, sponges
• Optional chalk pens, torches, string lights
Back to Top
Haunted Cubby House
Build, paint, and play inside a recycled Halloween installation
Bookmark
Installations
The Set Up
Cardboard invites big ideas. It is light, forgiving, and full of possibility. For Halloween it transforms a space into something a little spooky and very playful.
Gather large boxes or sheets from anywhere you can. We are lucky to have a mechanic behind Smudge who saves theirs for us. IKEA recycling stations, hardware stores, and paint shops often have stacks ready to go. Cut a mix of sizes so kids can decide where doors, windows, and secret passages belong.
If space is tight, make a flat version on the wall. It still delivers that big visual moment. If you have room, build a cubby kids can step into. It is always worth it.
Makedo or ChompSaw tools keep construction safe and simple. Masking tape works for quick joins. Set out tempera or poster paint in whatever spooky colours take your fancy! Black, white, orange, and violet are often our go-to's. Mix a touch of white into every colour for extra brightness. Add rollers, sponges, and chunky brushes for loose, confident painting.
The Making
Ask who or what might live inside. A friendly ghost, a bat family, a witch with an insatiable glitter habit? Then step back a little and let the building and painting unfold. Walls might move, windows appear, chimneys lean.
Encourage movement and teamwork because learning sits inside all of those decisions. Let kids figure out how to join sections, balance heights, or create entryways. They’ll negotiate, problem-solve, and decorate all at once. The best moments come when storytelling and construction start to blur.
If you’re working with older groups, invite them to think beyond decoration. What kind of feeling does the space hold? Is it a hiding place, a memory, a dream? Those questions change the way they build.
Artist Study: Louise Bourgeois
Louise Bourgeois built sculptural spaces called Cells. They were small rooms made from wire, fabric, and found materials. Each one explored memory, fear, and the idea of home. Her giant spider sculptures, like Maman, weren’t about monsters or nightmares. They were symbols of strength, patience, and protection, all the qualities she saw in mothers weaving webs and repairing them again and again.
Show a few images of Maman or one of her Cells and talk about how she used structure to hold emotion. Ask: what could we build that feels strong or secret or safe? How can materials tell stories without words?
When kids build haunted houses, they’re doing what Bourgeois did; turning ordinary materials into spaces that hold feeling, memory, and a little bit of mystery.
Variations
Create a flat haunted mural instead of a 3D build
Add torches or fairy lights behind windows for glow
Use chalk pens or white paint pens for details once dry
Materials
• Large recycled cardboard sheets or boxes
• Makedo or ChompShop tools
• Masking tape or glue gun (for adult use, or supervised with kids)
• Tempera or poster paint
• Brushes, rollers, sponges
• Optional chalk pens, torches, string lights
Back to Top
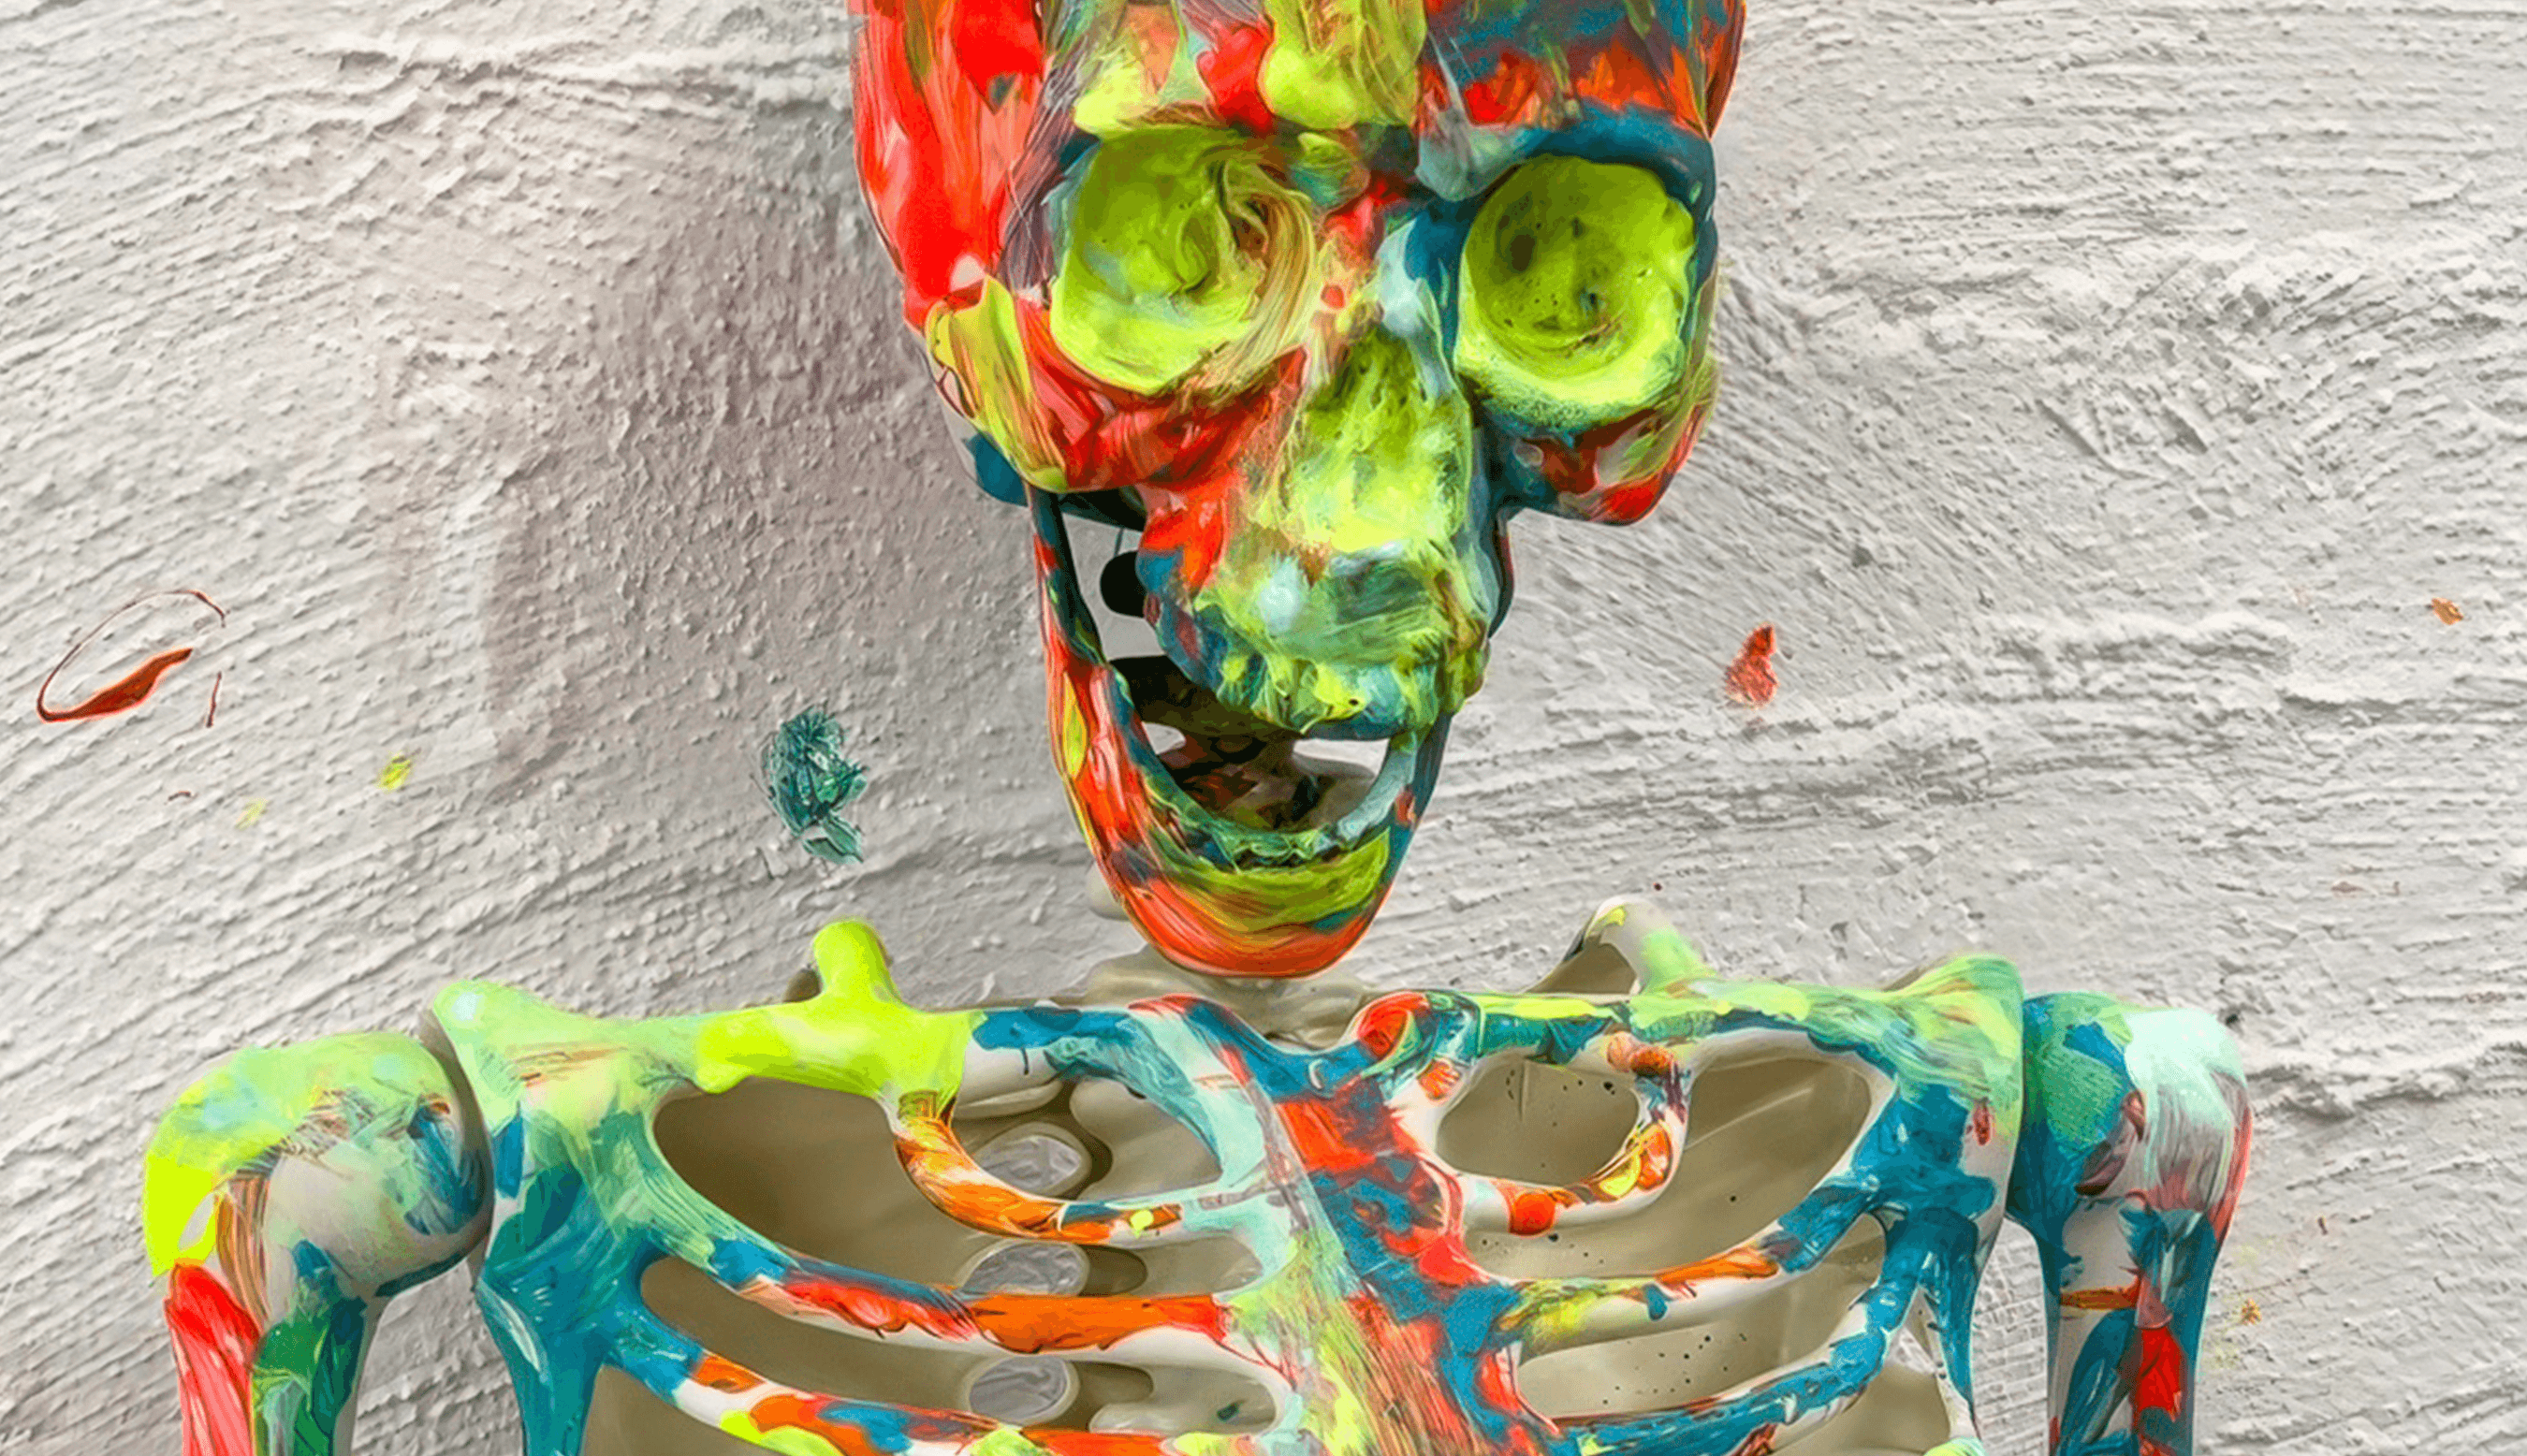
Painting A Skeleton
The leg bone's connected to the...
Bookmark
Creative Exploration
The Set Up
A life size skeleton is one of those studio props that earns its keep. It wipes clean, packs away easily, and brings instant curiosity every October. Lay it on a big sheet of paper or a canvas drop cloth. Floor work lets kids move around the form with their whole body.
Fill trays with washable poster paint. Add white to brighten every colour. Offer chunky brushes for sweeping lines and a few small brushes for pattern and detail. Sponges are great for quick blocks of colour.


The Making
Invite kids to pay attention to shape and line rather than accuracy. Trace a rib, paint a rhythm of dots along the spine, flood a bone with colour, then switch tools! It becomes a study of structure and movement wrapped inside play.
Conversations about how bodies bend and balance will appear on their own. Plus all those gorgeously rich questions about bones and skin and brains and bums.


Variations
Use the colourful skeleton as a still life drawing / painting model. Position it in different ways!
Tuck the finished skeleton into the haunted house installation
Materials
• Life size skeleton model, plastic or cardboard
• Washable poster or tempera paint
• White paint for mixing
• Large paper or canvas drop cloth
• Brushes, sponges, trays or palettes
Back to Top
Painting A Skeleton
The leg bone's connected to the...
Bookmark
Creative Exploration
The Set Up
A life size skeleton is one of those studio props that earns its keep. It wipes clean, packs away easily, and brings instant curiosity every October. Lay it on a big sheet of paper or a canvas drop cloth. Floor work lets kids move around the form with their whole body.
Fill trays with washable poster paint. Add white to brighten every colour. Offer chunky brushes for sweeping lines and a few small brushes for pattern and detail. Sponges are great for quick blocks of colour.
The Making
Invite kids to pay attention to shape and line rather than accuracy. Trace a rib, paint a rhythm of dots along the spine, flood a bone with colour, then switch tools! It becomes a study of structure and movement wrapped inside play.
Conversations about how bodies bend and balance will appear on their own. Plus all those gorgeously rich questions about bones and skin and brains and bums.
Variations
Use the colourful skeleton as a still life drawing / painting model. Position it in different ways!
Tuck the finished skeleton into the haunted house installation
Materials
• Life size skeleton model, plastic or cardboard
• Washable poster or tempera paint
• White paint for mixing
• Large paper or canvas drop cloth
• Brushes, sponges, trays or palettes
Back to Top
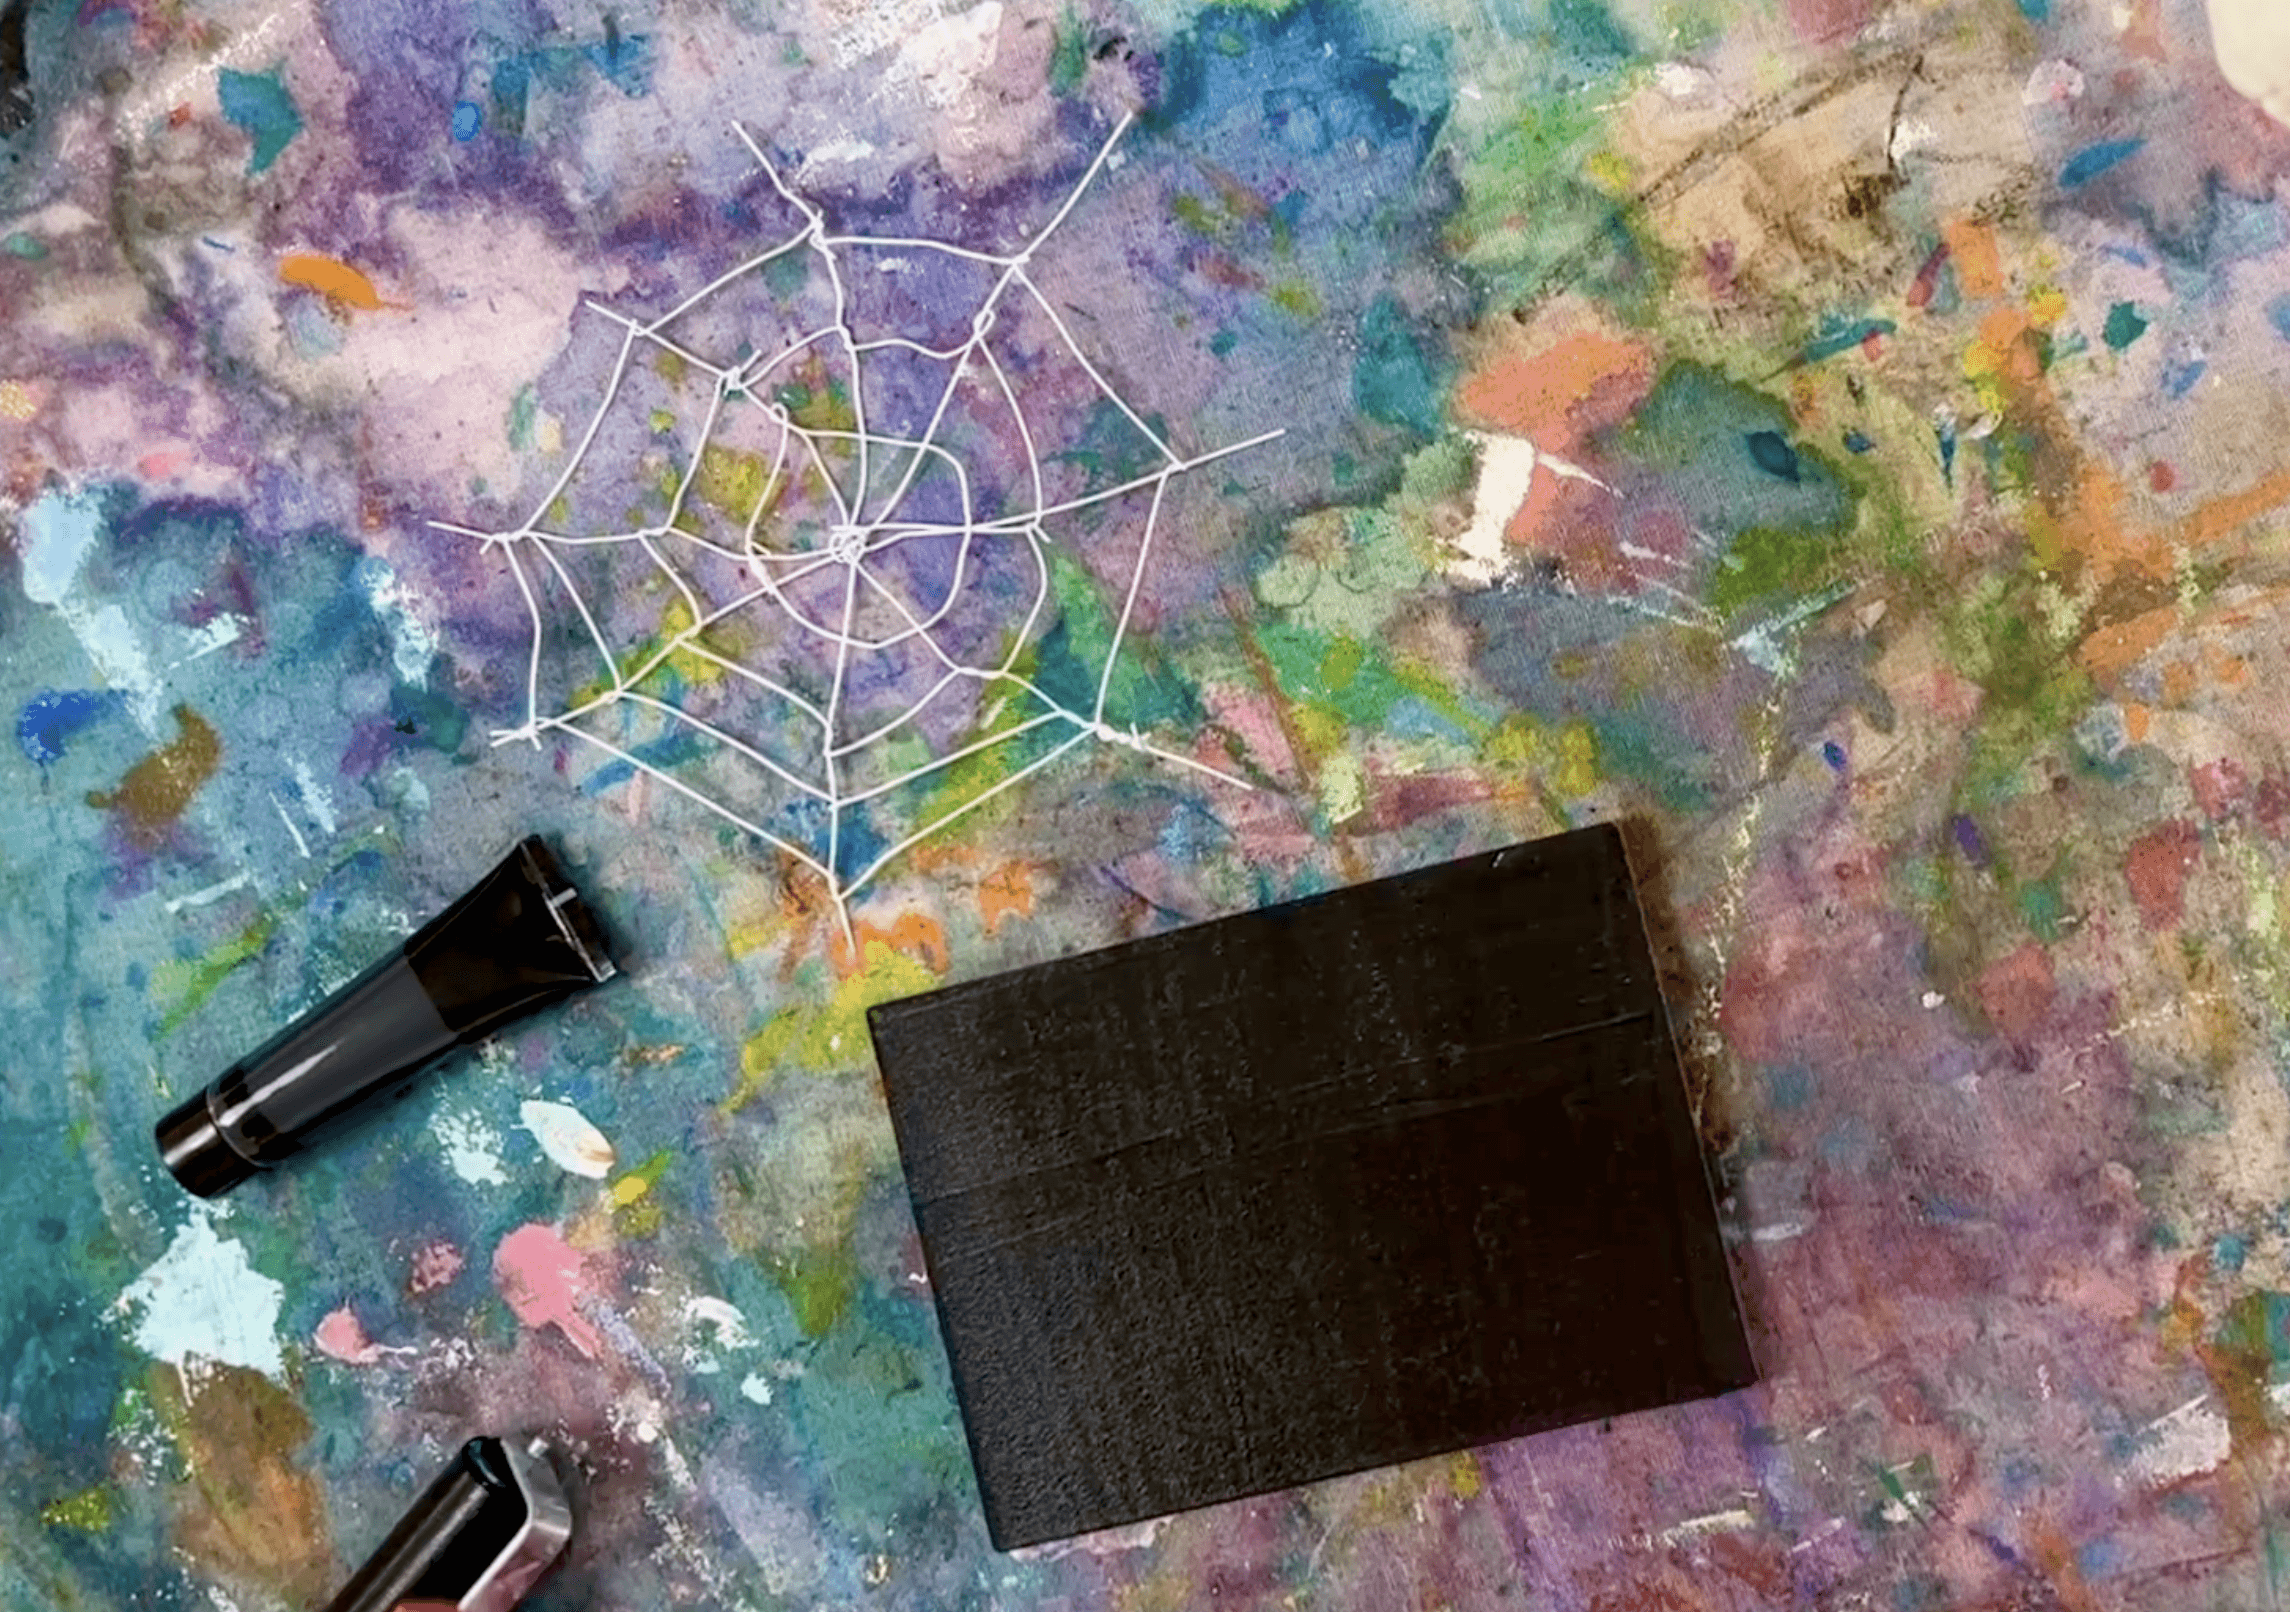
Gelli Spider Webs
Charlotte would be so proud!
Bookmark
Print Making
The Set Up
Gelli printing can look intimidating if you’ve never tried it before, but once you start, it quickly becomes one of those techniques that you and the kids can’t stop experimenting with. The joy is that every single print is different, and you can’t really get it wrong.
Set out gelli plates, a few tubes of acrylic paint, brayers, and paper. Use thicker paper for finished prints and regular copy paper for tests and ghost prints. Have cloths or wipes on hand and pop aprons on early because acrylics will stain.
Keep your materials simple for the first round: two or three colours and a small pile of texture tools beside each plate. Wool or string for spider webs, a piece of lace, mesh, or even foam shapes all work beautifully.
If your gelli plates are brand new, wash them first with a small amount of mild dish soap to remove the factory (oily) film. This helps paint spread evenly instead of beading up.


The Making
Squeeze a small blob of paint onto the plate and roll it out until it looks smooth and thin. Less paint gives cleaner prints. If it feels sticky or uneven, roll a little longer until you see a thin, glossy surface.
Press your wool or string into the paint to form web shapes. Add lace or mesh if you like more detail. These act as masks, which means the paint won’t transfer wherever they sit.
Lay a sheet of paper on top, smooth it gently with your hands, and then peel it away to reveal the first print.
Now lift off the textures and place a new sheet of paper on the plate without adding more paint. This second pull is called a ghost print because it picks up the leftover paint and texture marks. The result is lighter, more delicate, and completely on theme for Halloween.
Encourage layering. Once a print is dry, you can print over the top with new colours or textures. You can also let a thin layer of paint dry on the plate, roll a new colour over it, and then pull a single “pick-up” print that lifts both layers at once.
Smudge Gelli Printing Tips and Tricks
• Less is more. If your prints look muddy, you’ve probably used too much paint. Wipe the plate, roll a smaller amount, and go again.
• Watch for beading. If paint beads up, either it’s too watery or the plate needs another wash.
• Timing matters. If paint dries before you print, mist the surface with a little water or add a fresh tiny blob and roll again.
• Use your scraps. Offload excess paint onto copy paper while cleaning the brayer. Those sheets often become gorgeous collage material later. Or keep them for a later round of printmaking to see what you can layer again and again!
• Keep cleanup gentle. Wipe plates with soft cloths or baby wipes during a session. For dried paint, use a dab of baby oil or mineral oil, then wash with dish soap. Never scrape.
• Pair kids up. Sharing a plate encourages them to watch, plan, and respond to each other’s ideas rather than rushing through prints.


Variations
Shape wool or string into webs, spirals, or abstract lines.
Use lace, mesh, or leaves for organic textures.
Draw spiders or highlights with paint pens once prints are dry.
Combine ghost prints from different sessions into one large collaborative “web wall.”


Materials
• Gelli plates
• Acrylic paints
• Brayers or rollers
• Thick paper for printing and copy paper for tests
• Wool, string, lace, or foam shapes
• Spray bottle for light misting
• Cloths or baby wipes for cleaning
• Aprons / art smocks
Back to Top
Gelli Spider Webs
Charlotte would be so proud!
Bookmark
Print Making
The Set Up
Gelli printing can look intimidating if you’ve never tried it before, but once you start, it quickly becomes one of those techniques that you and the kids can’t stop experimenting with. The joy is that every single print is different, and you can’t really get it wrong.
Set out gelli plates, a few tubes of acrylic paint, brayers, and paper. Use thicker paper for finished prints and regular copy paper for tests and ghost prints. Have cloths or wipes on hand and pop aprons on early because acrylics will stain.
Keep your materials simple for the first round: two or three colours and a small pile of texture tools beside each plate. Wool or string for spider webs, a piece of lace, mesh, or even foam shapes all work beautifully.
If your gelli plates are brand new, wash them first with a small amount of mild dish soap to remove the factory (oily) film. This helps paint spread evenly instead of beading up.
The Making
Squeeze a small blob of paint onto the plate and roll it out until it looks smooth and thin. Less paint gives cleaner prints. If it feels sticky or uneven, roll a little longer until you see a thin, glossy surface.
Press your wool or string into the paint to form web shapes. Add lace or mesh if you like more detail. These act as masks, which means the paint won’t transfer wherever they sit.
Lay a sheet of paper on top, smooth it gently with your hands, and then peel it away to reveal the first print.
Now lift off the textures and place a new sheet of paper on the plate without adding more paint. This second pull is called a ghost print because it picks up the leftover paint and texture marks. The result is lighter, more delicate, and completely on theme for Halloween.
Encourage layering. Once a print is dry, you can print over the top with new colours or textures. You can also let a thin layer of paint dry on the plate, roll a new colour over it, and then pull a single “pick-up” print that lifts both layers at once.
Smudge Gelli Printing Tips and Tricks
• Less is more. If your prints look muddy, you’ve probably used too much paint. Wipe the plate, roll a smaller amount, and go again.
• Watch for beading. If paint beads up, either it’s too watery or the plate needs another wash.
• Timing matters. If paint dries before you print, mist the surface with a little water or add a fresh tiny blob and roll again.
• Use your scraps. Offload excess paint onto copy paper while cleaning the brayer. Those sheets often become gorgeous collage material later. Or keep them for a later round of printmaking to see what you can layer again and again!
• Keep cleanup gentle. Wipe plates with soft cloths or baby wipes during a session. For dried paint, use a dab of baby oil or mineral oil, then wash with dish soap. Never scrape.
• Pair kids up. Sharing a plate encourages them to watch, plan, and respond to each other’s ideas rather than rushing through prints.
Variations
Shape wool or string into webs, spirals, or abstract lines.
Use lace, mesh, or leaves for organic textures.
Draw spiders or highlights with paint pens once prints are dry.
Combine ghost prints from different sessions into one large collaborative “web wall.”
Materials
• Gelli plates
• Acrylic paints
• Brayers or rollers
• Thick paper for printing and copy paper for tests
• Wool, string, lace, or foam shapes
• Spray bottle for light misting
• Cloths or baby wipes for cleaning
• Aprons / art smocks
Back to Top
Magical Bubble Prints
Colour and air collide in a swirl of surprise.
Bookmark
Print Making

The Set Up
Bubble printing is joyful, messy, and a little bit scientific. You get colour, movement, and sound all in one process, which is probably why it’s such a favourite here at Smudge.
Set up shallow bowls, trays, or paper cups with a mix of bubble solution and liquid watercolour. The balance matters: too much colour and the bubbles won’t rise, too much soap and they’ll pop too quickly. You want a mixture that makes slow, glossy bubbles that hold their shape before bursting. A bit of experimenting at the start is half the fun.
Safety is important here! Before anything starts, make sure every kid can clearly blow out through a straw. For younger kids, or mixed-age sessions, adults can do the blowing while kids direct the bubbles with fans, straws, or even their hands. Fan-style bubble blowers or small handheld fans work brilliantly and turn it into kinetic art.
Paper cups are great for small setups. Add a little mixture and invite steady blowing until bubbles overflow. Then gently lower or guide the bubbles onto the paper to make prints. Keep white paper ready (it shows the colours best).
If you want to outline cauldrons or shapes, use a permanent marker such as a Posca or Sharpie so it won’t bleed into the liquid.


The Making
Adults often underestimate how much experimentation kids can handle here. Give them space to test different colours, speeds, and tools. They’ll find their own rhythm quickly, and that’s where the learning sits… in that gorgeous place between the art and the science.
The bubbles will rise and spill, creating overlapping prints as they pop. Each circle leaves fine veined edges that look like potion clouds or soft smoke. The density of the mixture, the force of the breath, and how long the bubbles sit before popping all change the effect. We can be thinking this as we step back and watch the magic unfold! Or choose to question lightly and openly to see what discussions come up.


Variations
Add glitter or sequins for sparkle.
If the artists haven't drawn a cauldron shape beforehand, these bubble prints could be gorgeous for a mixed-media collage! Cut and paste onto other witch-y, magical drawings or painting.
Materials
• Bubble solution or dish soap and water
• Liquid watercolours or food dye
• Paper cups, bowls, or trays
• Straws, bubble blowers, or small fans
• White paper
• Permanent markers (Posca or Sharpie)
• Optional glitter, sequins, scissors, glue
Back to Top
Magical Bubble Prints
Colour and air collide in a swirl of surprise.
Bookmark
Print Making
The Set Up
Bubble printing is joyful, messy, and a little bit scientific. You get colour, movement, and sound all in one process, which is probably why it’s such a favourite here at Smudge.
Set up shallow bowls, trays, or paper cups with a mix of bubble solution and liquid watercolour. The balance matters: too much colour and the bubbles won’t rise, too much soap and they’ll pop too quickly. You want a mixture that makes slow, glossy bubbles that hold their shape before bursting. A bit of experimenting at the start is half the fun.
Safety is important here! Before anything starts, make sure every kid can clearly blow out through a straw. For younger kids, or mixed-age sessions, adults can do the blowing while kids direct the bubbles with fans, straws, or even their hands. Fan-style bubble blowers or small handheld fans work brilliantly and turn it into kinetic art.
Paper cups are great for small setups. Add a little mixture and invite steady blowing until bubbles overflow. Then gently lower or guide the bubbles onto the paper to make prints. Keep white paper ready (it shows the colours best).
If you want to outline cauldrons or shapes, use a permanent marker such as a Posca or Sharpie so it won’t bleed into the liquid.
The Making
Adults often underestimate how much experimentation kids can handle here. Give them space to test different colours, speeds, and tools. They’ll find their own rhythm quickly, and that’s where the learning sits… in that gorgeous place between the art and the science.
The bubbles will rise and spill, creating overlapping prints as they pop. Each circle leaves fine veined edges that look like potion clouds or soft smoke. The density of the mixture, the force of the breath, and how long the bubbles sit before popping all change the effect. We can be thinking this as we step back and watch the magic unfold! Or choose to question lightly and openly to see what discussions come up.
Variations
Add glitter or sequins for sparkle.
If the artists haven't drawn a cauldron shape beforehand, these bubble prints could be gorgeous for a mixed-media collage! Cut and paste onto other witch-y, magical drawings or painting.
Materials
• Bubble solution or dish soap and water
• Liquid watercolours or food dye
• Paper cups, bowls, or trays
• Straws, bubble blowers, or small fans
• White paper
• Permanent markers (Posca or Sharpie)
• Optional glitter, sequins, scissors, glue
Back to Top
Halloween Sensory Lab
Keep it friendly (not frightful) with bright colour, soft textures, simple tools.
Bookmark
Sensory Play
The Set Up
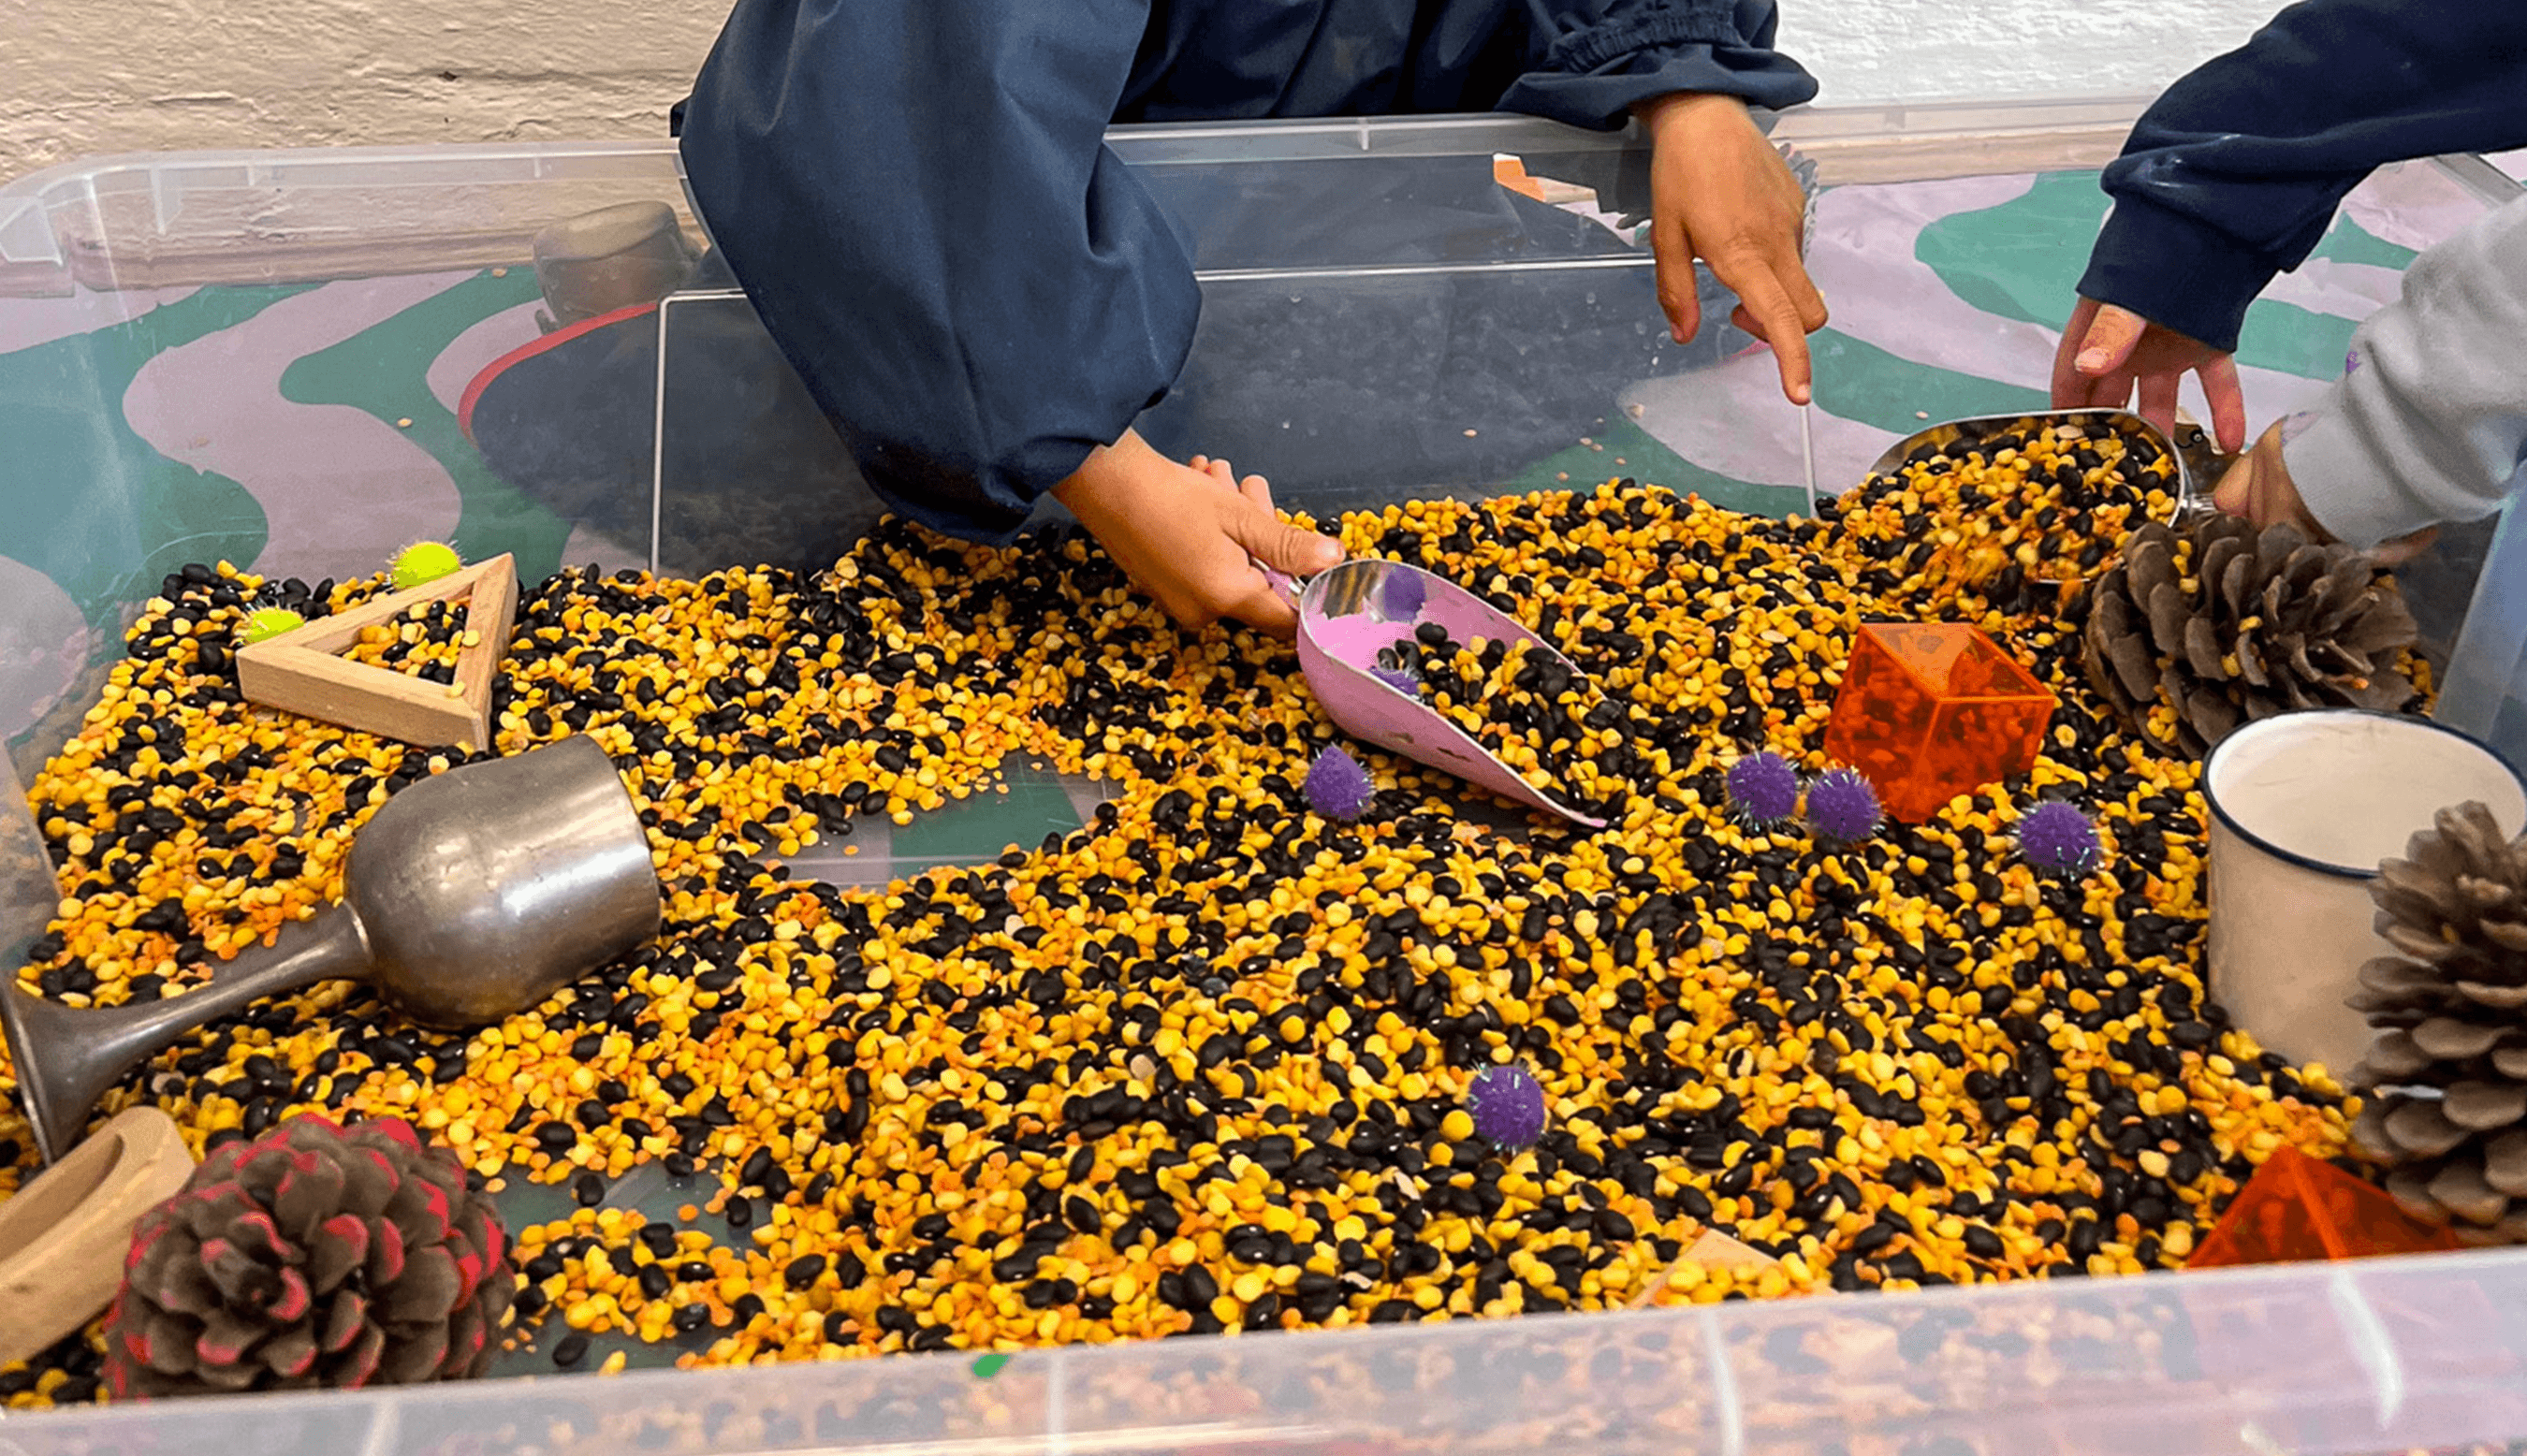
A sensory lab brings all the curiosity and calm of classic sensory play, but with a hint of Halloween mystery! It’s simple to set up and always draws kids in.
Fill a large tub or tray with a base of grains. Yellow split peas, black beans, and chickpeas look incredible together and sound beautiful as they pour.
Add a mix of Halloween-themed materials: plastic skeletons, toy bugs, googly eyes, and magnetic chips with wands. The mix of shiny, rough, and smooth textures invites touch and discovery.
For toddler sessions, replace small parts with dried citrus slices and larger natural materials. They smell amazing and create a safer, softer sensory experience that still feels magical and seasonal.
Set out scoops, spoons, jars, and funnels. These tools help kids slow down and focus while still encouraging open-ended exploration.


The Making
Watch the first choice they makes (like the sound they test, the scoop they choose, the object they search for). That single moment tells you what to lean into. Step back when you can and let them find their rhythm.
Create a small tray nearby for displaying what they uncover. Once treasures have a place, stories begin to form naturally. The lab becomes less about “doing” and more about noticing: the sound of pouring beans, the sparkle of movement, the quiet collaboration that builds between kids.
You might like to end with a simple ritual. Smooth the grains together, hide one or two new objects, and leave the setup ready for the next round.


Variations
Add dried herbs or spices like cinnamon, rosemary, or clove for scent
Freeze small toys in ice cubes for a “frozen bones” twist
Add pinecones, bark, or sticks for natural texture
Place a mirror or metallic tray at the base for reflection
Use the lab as a story prompt: “What’s hiding in the witch’s cauldron today”
Materials
• Large sensory tub or tray
• Base mix of grains (yellow split peas, black beans, chickpeas)
• Halloween-themed items (plastic skeletons, toy bugs, googly eyes, magnetic chips)
• Dried citrus slices for toddler-friendly play
• Scoops, spoons, jars, funnels
• Optional extras such as dried herbs, pinecones, bark, mirrors
Back to Top
Halloween Sensory Lab
Keep it friendly (not frightful) with bright colour, soft textures, simple tools.
Bookmark
Sensory Play
The Set Up
A sensory lab brings all the curiosity and calm of classic sensory play, but with a hint of Halloween mystery! It’s simple to set up and always draws kids in.
Fill a large tub or tray with a base of grains. Yellow split peas, black beans, and chickpeas look incredible together and sound beautiful as they pour.
Add a mix of Halloween-themed materials: plastic skeletons, toy bugs, googly eyes, and magnetic chips with wands. The mix of shiny, rough, and smooth textures invites touch and discovery.
For toddler sessions, replace small parts with dried citrus slices and larger natural materials. They smell amazing and create a safer, softer sensory experience that still feels magical and seasonal.
Set out scoops, spoons, jars, and funnels. These tools help kids slow down and focus while still encouraging open-ended exploration.
The Making
Watch the first choice they makes (like the sound they test, the scoop they choose, the object they search for). That single moment tells you what to lean into. Step back when you can and let them find their rhythm.
Create a small tray nearby for displaying what they uncover. Once treasures have a place, stories begin to form naturally. The lab becomes less about “doing” and more about noticing: the sound of pouring beans, the sparkle of movement, the quiet collaboration that builds between kids.
You might like to end with a simple ritual. Smooth the grains together, hide one or two new objects, and leave the setup ready for the next round.
Variations
Add dried herbs or spices like cinnamon, rosemary, or clove for scent
Freeze small toys in ice cubes for a “frozen bones” twist
Add pinecones, bark, or sticks for natural texture
Place a mirror or metallic tray at the base for reflection
Use the lab as a story prompt: “What’s hiding in the witch’s cauldron today”
Materials
• Large sensory tub or tray
• Base mix of grains (yellow split peas, black beans, chickpeas)
• Halloween-themed items (plastic skeletons, toy bugs, googly eyes, magnetic chips)
• Dried citrus slices for toddler-friendly play
• Scoops, spoons, jars, funnels
• Optional extras such as dried herbs, pinecones, bark, mirrors
Back to Top
Spooky Bugs
A simple process that turns paint into pattern and whole new species.
Bookmark
Painting & Drawing
The Set Up
Fold a stack of A3 paper in half before you start. Choose something sturdy, around 180 gsm or heavier, so it can hold wet paint.
Set out squeezy bottles of poster or tempera paint in Halloween colours such as orange, magenta, lime, and violet, and always add a pot of white to brighten and mix. The IKEA MÅLA bottles work beautifully because the paint moves slowly and gives kids control.
It helps to have a few close-up photos of beetles, butterflies, or moths nearby. Pattern and structure are clearer when you look at the real thing. You could also show a few images by Christopher Marley, who arranges real insects into bold symmetrical mosaics. His work celebrates colour, balance, and repetition, the same qualities that make this activity so satisfying.


The Making
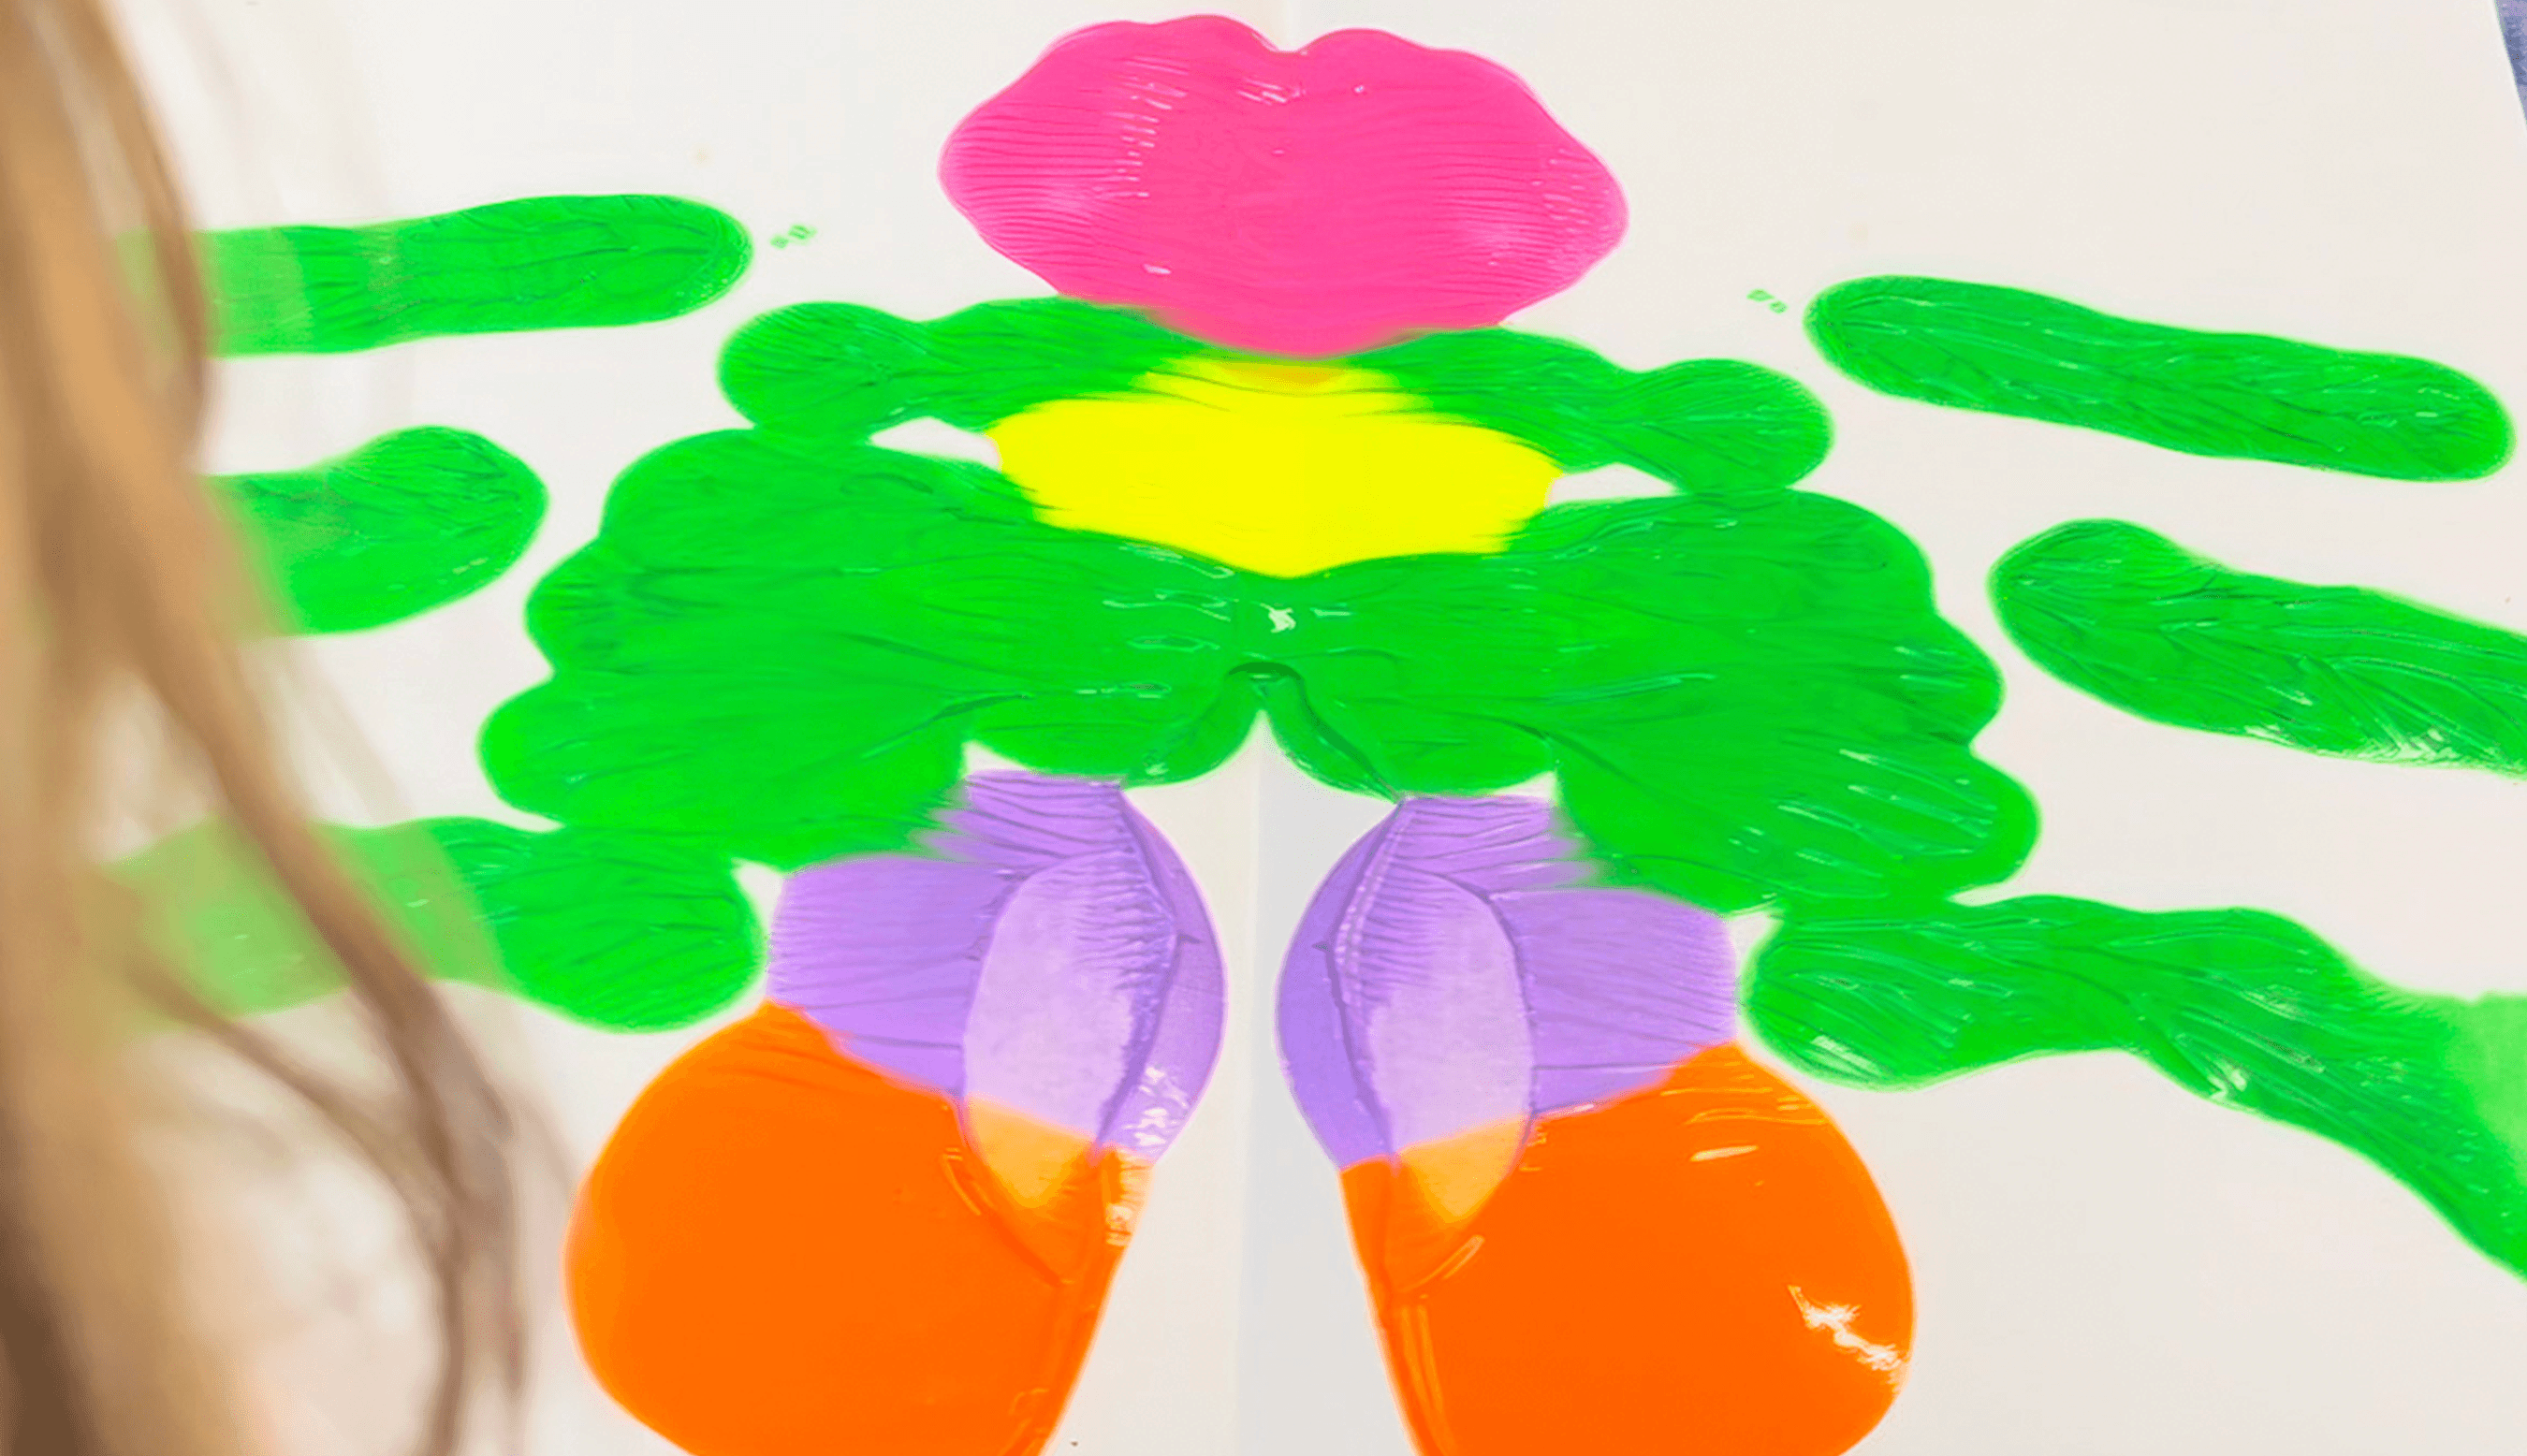
Invite kids to squeeze small blobs of paint on one side of the folded paper. A few drops are plenty. The fold line becomes the body, so they can think about wings, shells, or new imagined species.
Fold the page closed and press gently with flat hands. Feel the paint move under the surface, then open it up to reveal the mirrored print. The reveal moment always lands with a quiet gasp.
Once dry, add legs, eyes, and patterns with oil pastels or markers. Encourage confidence in mark-making rather than accuracy. The aim is not a perfect bug but to notice rhythm, pattern, and symmetry.
Artist Study: Christopher Marley
Christopher Marley collects and arranges insects, shells, and minerals into dazzling geometric patterns. He focuses on balance, repetition, and colour harmony rather than the individual bug itself. His work helps us see that symmetry and pattern are everywhere in nature, even in things we might normally overlook.
When kids fold and print their bugs, they are exploring the same ideas as Marley, turning small details into big design, chaos into order, and colour into pattern.


Variations
Use fluorescent or metallic paint for glow.
Add collage elements like foil, sequins, or gelli print scraps once dry.
Try the same process on fabric for texture.
Label each species with a made-up name and create a classroom Bug Museum.


Materials
• A3 paper, 180 gsm or heavier
• Poster or tempera paint in bright and Halloween colours
• White paint for mixing
• Brushes, palettes, or trays
• Oil pastels or markers
• Optional: collage extras, fabric and images of Christopher Marley's work
Back to Top
Spooky Bugs
A simple process that turns paint into pattern and whole new species.
Bookmark
Painting & Drawing
The Set Up
Fold a stack of A3 paper in half before you start. Choose something sturdy, around 180 gsm or heavier, so it can hold wet paint.
Set out squeezy bottles of poster or tempera paint in Halloween colours such as orange, magenta, lime, and violet, and always add a pot of white to brighten and mix. The IKEA MÅLA bottles work beautifully because the paint moves slowly and gives kids control.
It helps to have a few close-up photos of beetles, butterflies, or moths nearby. Pattern and structure are clearer when you look at the real thing. You could also show a few images by Christopher Marley, who arranges real insects into bold symmetrical mosaics. His work celebrates colour, balance, and repetition, the same qualities that make this activity so satisfying.
The Making
Invite kids to squeeze small blobs of paint on one side of the folded paper. A few drops are plenty. The fold line becomes the body, so they can think about wings, shells, or new imagined species.
Fold the page closed and press gently with flat hands. Feel the paint move under the surface, then open it up to reveal the mirrored print. The reveal moment always lands with a quiet gasp.
Once dry, add legs, eyes, and patterns with oil pastels or markers. Encourage confidence in mark-making rather than accuracy. The aim is not a perfect bug but to notice rhythm, pattern, and symmetry.
Artist Study: Christopher Marley
Christopher Marley collects and arranges insects, shells, and minerals into dazzling geometric patterns. He focuses on balance, repetition, and colour harmony rather than the individual bug itself. His work helps us see that symmetry and pattern are everywhere in nature, even in things we might normally overlook.
When kids fold and print their bugs, they are exploring the same ideas as Marley, turning small details into big design, chaos into order, and colour into pattern.
Variations
Use fluorescent or metallic paint for glow.
Add collage elements like foil, sequins, or gelli print scraps once dry.
Try the same process on fabric for texture.
Label each species with a made-up name and create a classroom Bug Museum.
Materials
• A3 paper, 180 gsm or heavier
• Poster or tempera paint in bright and Halloween colours
• White paint for mixing
• Brushes, palettes, or trays
• Oil pastels or markers
• Optional: collage extras, fabric and images of Christopher Marley's work
Back to Top
Collage Cauldrons
A playful mix of texture and sparkle
Bookmark
Collage
The Set Up
Thick recycled cardboard is perfect for this project. Cut large cauldron shapes before the session or let kids draw and cut their own. The bigger the surface, the better. Punch two small holes at the top and thread wire for handles if you want to hang them later.
If you have more time or want a 3D version, cut two matching cauldrons (more on this later).
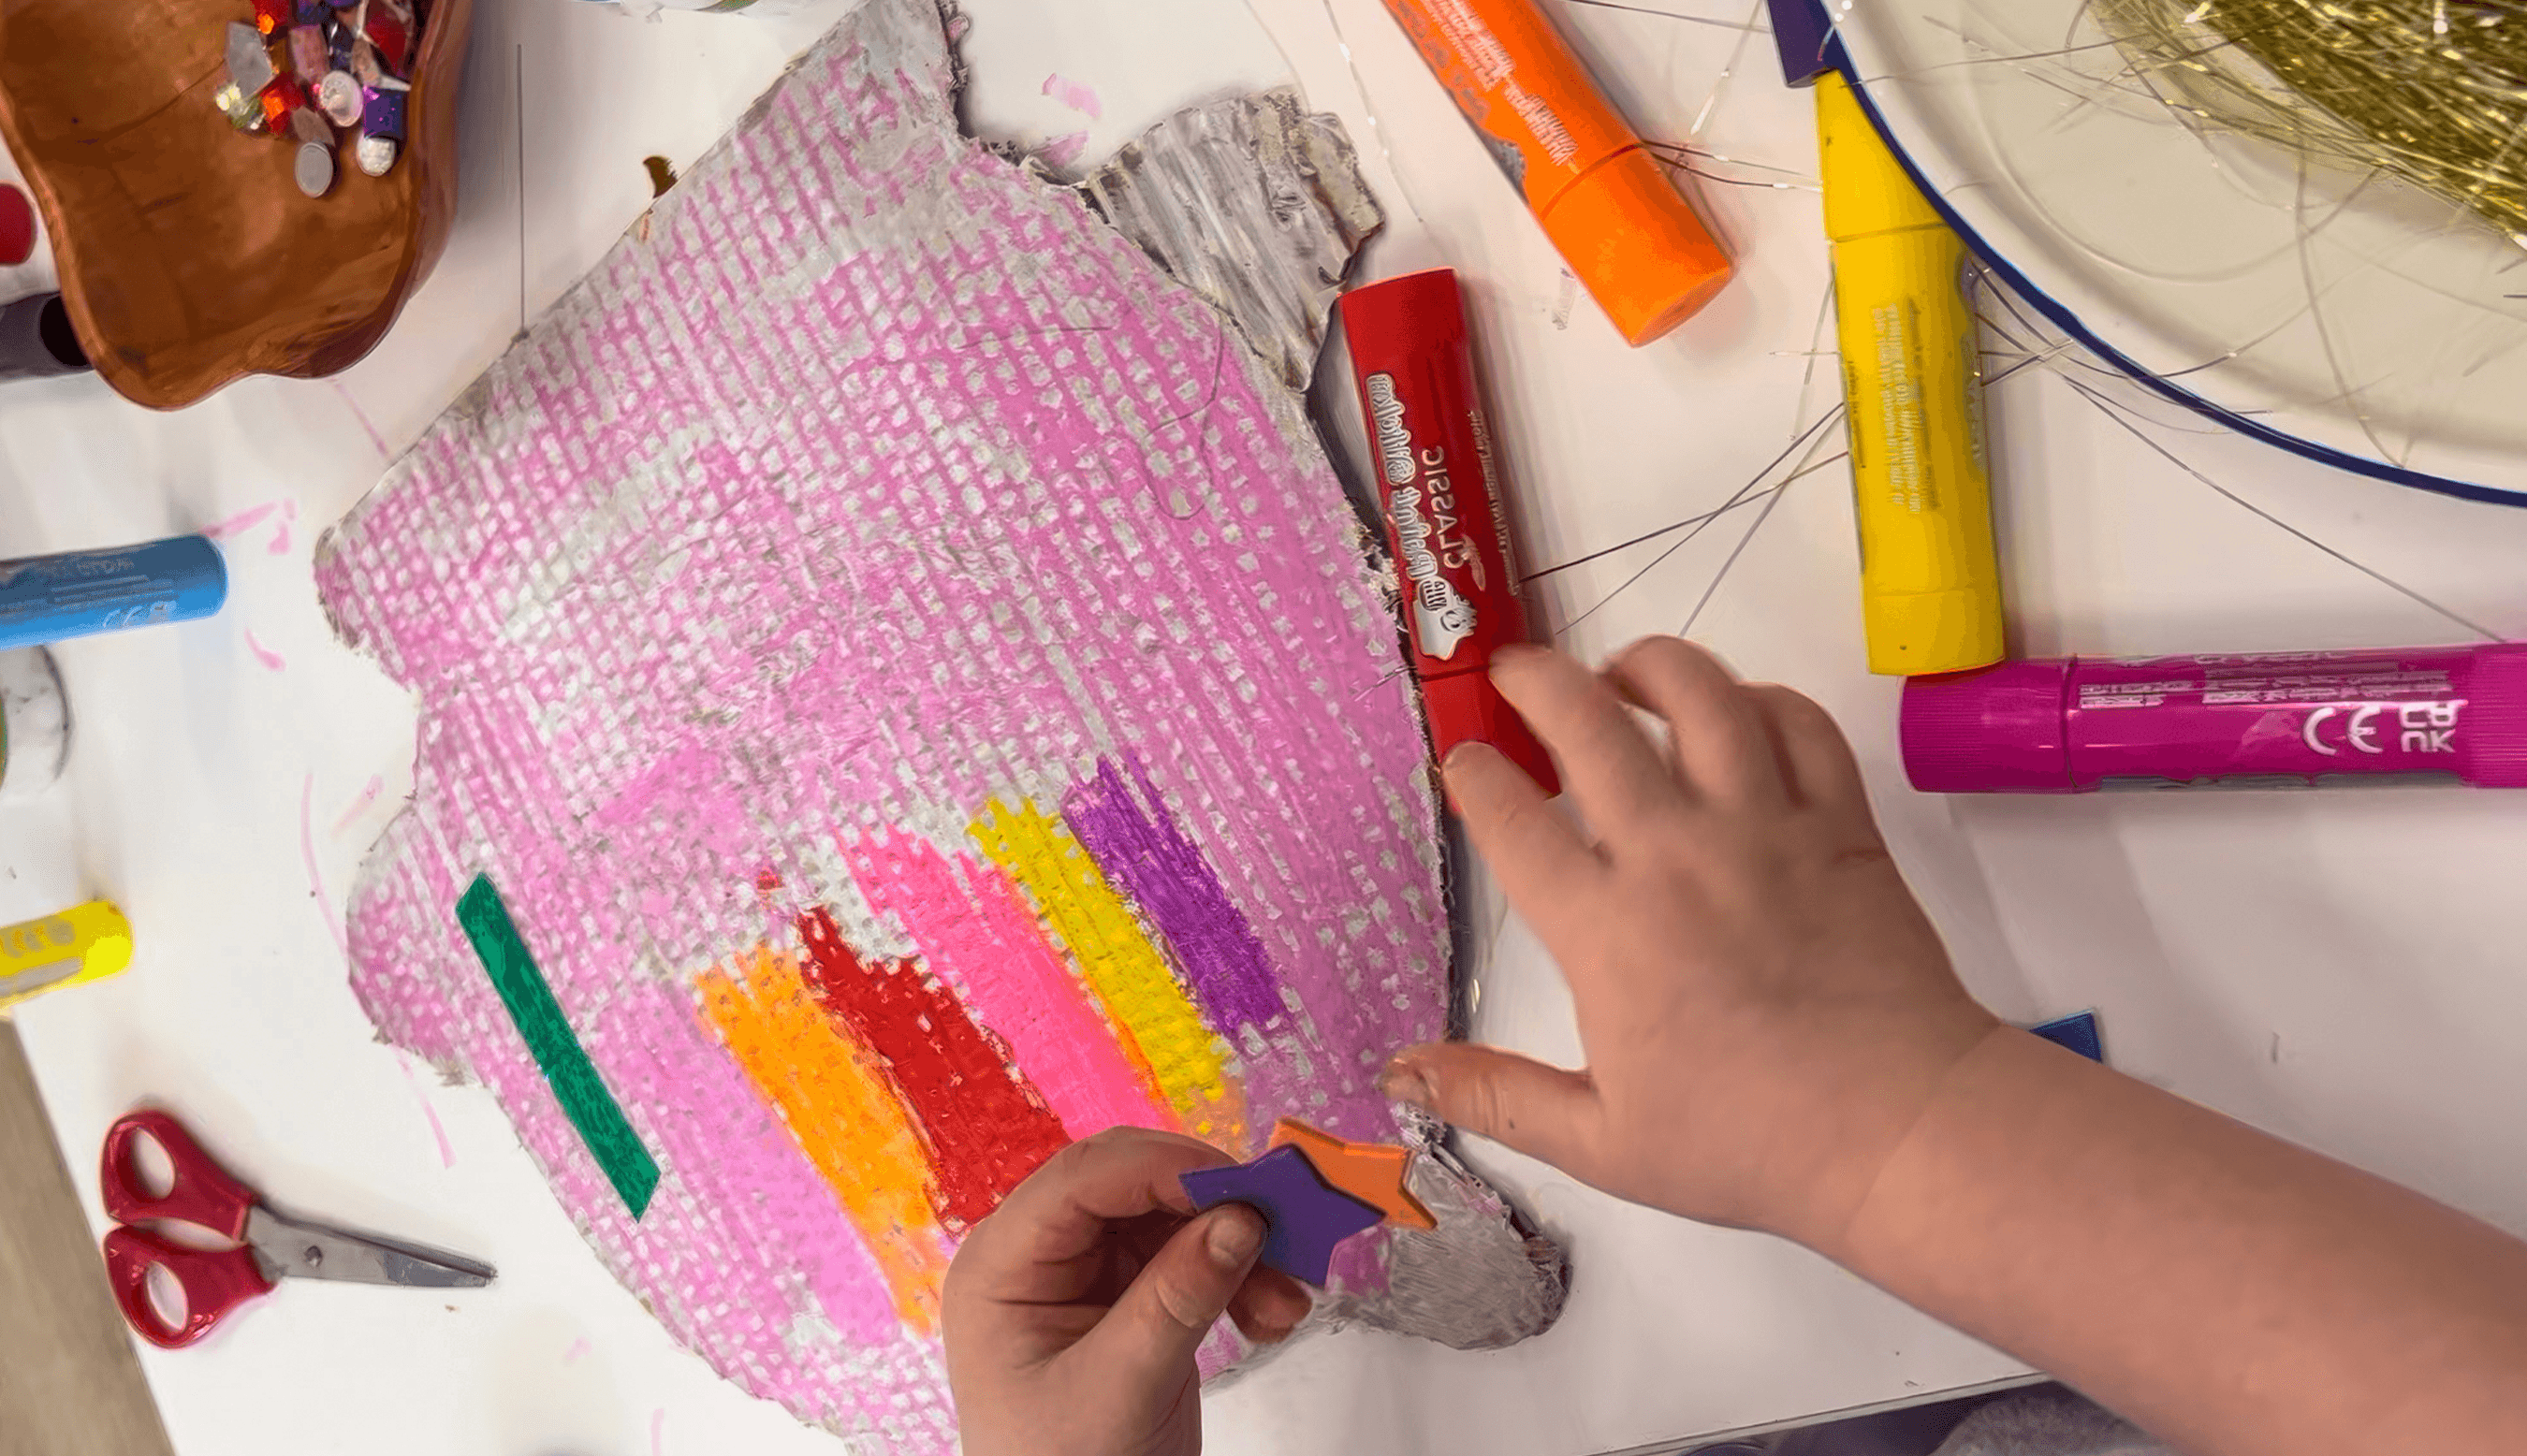
Set up paint sticks and oil pastels for base coats.
Add trays of mixed materials: foil, tissue paper, fabric scraps, ribbons, sequins, washi tape, stickers and glue sticks. Keep it open and full of choice!


The Making
Kids don’t need instructions for this one. Once materials are out, they’ll dive straight into building, layering, sticking, and storytelling. The process is rich on its own (resist the urge to direct!).
Spend your time noticing what’s happening. Comment on textures, colour choices, and shapes.
Ask gentle questions: “What’s bubbling inside your cauldron?” or “Where did that idea come from?” These small acts of noticing invite conversation and connection, and kids begin to learn from one another without needing formal steps.
That’s the real work of process art.
3D Extension: Trick or Treat Baskets
Once both sides are decorated and dry, bring the pieces together to create a basket. Use a strip of cardboard about 8 to 10 cm wide (and however long your shapes are).
Run the Makedo Fold Roller tool along the strip horizontally to score it evenly, which helps it bend without cracking.
Curve the strip into a semi-circle between the two cauldrons and line up the bottom edges.
Secure it using Makedo scrus or a glue gun (adult use), or strong tape along the inside.
Add a wire or string handle through the top holes and twist the ends to secure.
Each basket will be different in shape and character, which is exactly the point!


Materials
• Thick recycled cardboard
• Paint or paint sticks for base coats
• Collage materials such as foil, tissue paper, ribbon, sequins, and washi tape
• Glue sticks or PVA
• Oil pastels or markers for detailing
• Hole punch and wire for handles
• Optional: hot glue and Makedo fold roller tool for 3D versions
Back to Top
Collage Cauldrons
A playful mix of texture and sparkle
Bookmark
Collage
The Set Up
Thick recycled cardboard is perfect for this project. Cut large cauldron shapes before the session or let kids draw and cut their own. The bigger the surface, the better. Punch two small holes at the top and thread wire for handles if you want to hang them later.
If you have more time or want a 3D version, cut two matching cauldrons (more on this later).
Set up paint sticks and oil pastels for base coats.
Add trays of mixed materials: foil, tissue paper, fabric scraps, ribbons, sequins, washi tape, stickers and glue sticks. Keep it open and full of choice!
The Making
Kids don’t need instructions for this one. Once materials are out, they’ll dive straight into building, layering, sticking, and storytelling. The process is rich on its own (resist the urge to direct!).
Spend your time noticing what’s happening. Comment on textures, colour choices, and shapes.
Ask gentle questions: “What’s bubbling inside your cauldron?” or “Where did that idea come from?” These small acts of noticing invite conversation and connection, and kids begin to learn from one another without needing formal steps.
That’s the real work of process art.
3D Extension: Trick or Treat Baskets
Once both sides are decorated and dry, bring the pieces together to create a basket. Use a strip of cardboard about 8 to 10 cm wide (and however long your shapes are).
Run the Makedo Fold Roller tool along the strip horizontally to score it evenly, which helps it bend without cracking.
Curve the strip into a semi-circle between the two cauldrons and line up the bottom edges.
Secure it using Makedo scrus or a glue gun (adult use), or strong tape along the inside.
Add a wire or string handle through the top holes and twist the ends to secure.
Each basket will be different in shape and character, which is exactly the point!
Materials
• Thick recycled cardboard
• Paint or paint sticks for base coats
• Collage materials such as foil, tissue paper, ribbon, sequins, and washi tape
• Glue sticks or PVA
• Oil pastels or markers for detailing
• Hole punch and wire for handles
• Optional: hot glue and Makedo fold roller tool for 3D versions
Back to Top
Pumpkin Painting
Real or not, pumpkins are the perfect canvas!
Bookmark
Creative Exploration
The Set Up
Pumpkins are such a simple way to bring instant colour and texture into your space. Real pumpkins are beautiful, but plastic or foam ones work just as well and can be reused year after year. If you want the paint to stay, prime them first with a plastic primer spray, then seal once dry. At Smudge, we usually use washable paints so kids can paint, rinse, and paint again.
Set out trays of bright colour and always include white for mixing. Brushes and sponges work equally well, and squeezy bottles are great for bold marks and drips. The IKEA MÅLA paints are perfect because they flow slowly, giving kids control.
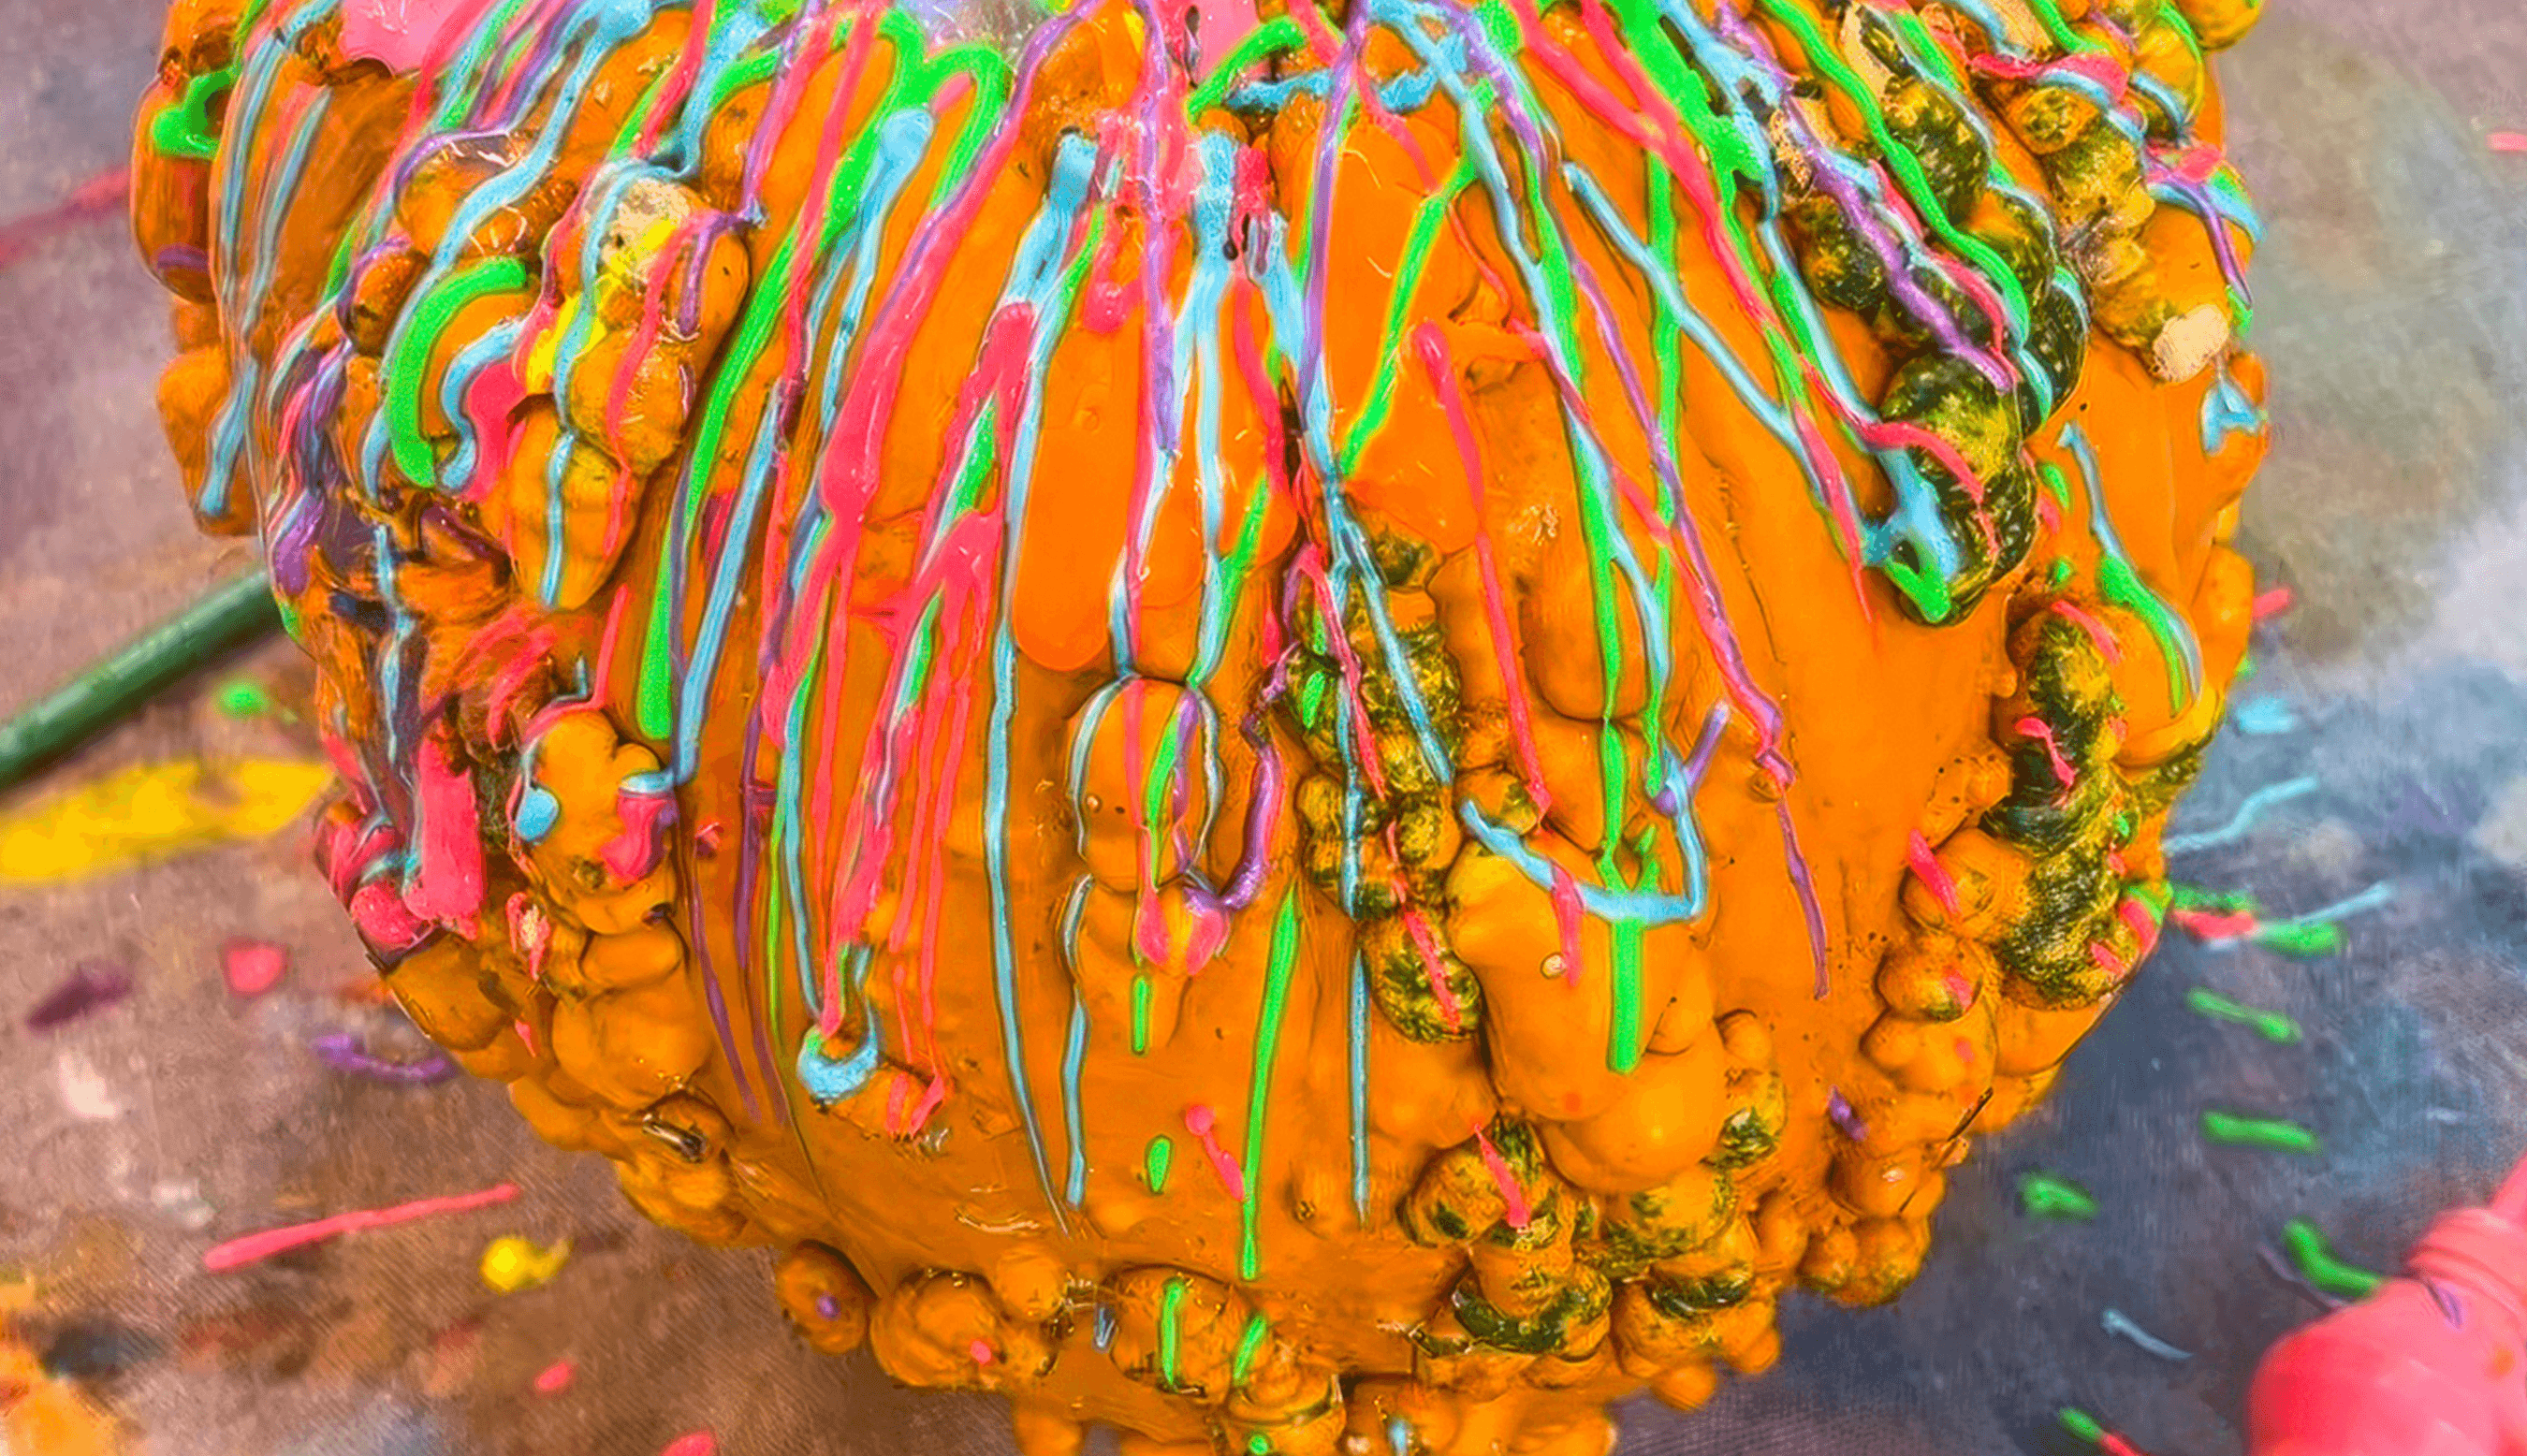
If you can, find interesting gourds or misshapen Goblin warty pumpkins! The bumps, ridges, and folds give a tactile surface that changes how the paint behaves.


The Making
Encourage kids to explore movement and colour rather than decoration. Thick stripes, dots, and flowing drips all look incredible as they wrap around the surface.
If you are using foam or plastic pumpkins, let kids experiment with layering and blending. Real pumpkins are better for short-term play and sensory exploration, while foam ones become lasting art pieces.
Having a tray underneath is great to catch all the excess paint to re-use in another gorgeous (spooky) artwork later.


Variations
Try finger painting or sponge stamping for sensory exploration.
Paint a collection of pumpkins together as a collaborative display.
Use black paper or cardboard backdrops to make colours pop.
Look to Yayoi Kusama for pumpkin inspiration!


Materials
• Real, plastic, or foam pumpkins and gourds
• Washable poster or tempera paint
• White paint for mixing
• Brushes, sponges, and paint trays
• Optional primer spray and clear sealer
Back to Top
Pumpkin Painting
Real or not, pumpkins are the perfect canvas!
Bookmark
Creative Exploration
The Set Up
Pumpkins are such a simple way to bring instant colour and texture into your space. Real pumpkins are beautiful, but plastic or foam ones work just as well and can be reused year after year. If you want the paint to stay, prime them first with a plastic primer spray, then seal once dry. At Smudge, we usually use washable paints so kids can paint, rinse, and paint again.
Set out trays of bright colour and always include white for mixing. Brushes and sponges work equally well, and squeezy bottles are great for bold marks and drips. The IKEA MÅLA paints are perfect because they flow slowly, giving kids control.
If you can, find interesting gourds or misshapen Goblin warty pumpkins! The bumps, ridges, and folds give a tactile surface that changes how the paint behaves.
The Making
Encourage kids to explore movement and colour rather than decoration. Thick stripes, dots, and flowing drips all look incredible as they wrap around the surface.
If you are using foam or plastic pumpkins, let kids experiment with layering and blending. Real pumpkins are better for short-term play and sensory exploration, while foam ones become lasting art pieces.
Having a tray underneath is great to catch all the excess paint to re-use in another gorgeous (spooky) artwork later.
Variations
Try finger painting or sponge stamping for sensory exploration.
Paint a collection of pumpkins together as a collaborative display.
Use black paper or cardboard backdrops to make colours pop.
Look to Yayoi Kusama for pumpkin inspiration!
Materials
• Real, plastic, or foam pumpkins and gourds
• Washable poster or tempera paint
• White paint for mixing
• Brushes, sponges, and paint trays
• Optional primer spray and clear sealer
Back to Top
Pretend Poisonous Potions
Such a classic!
Bookmark
Sensory Play
The Set Up
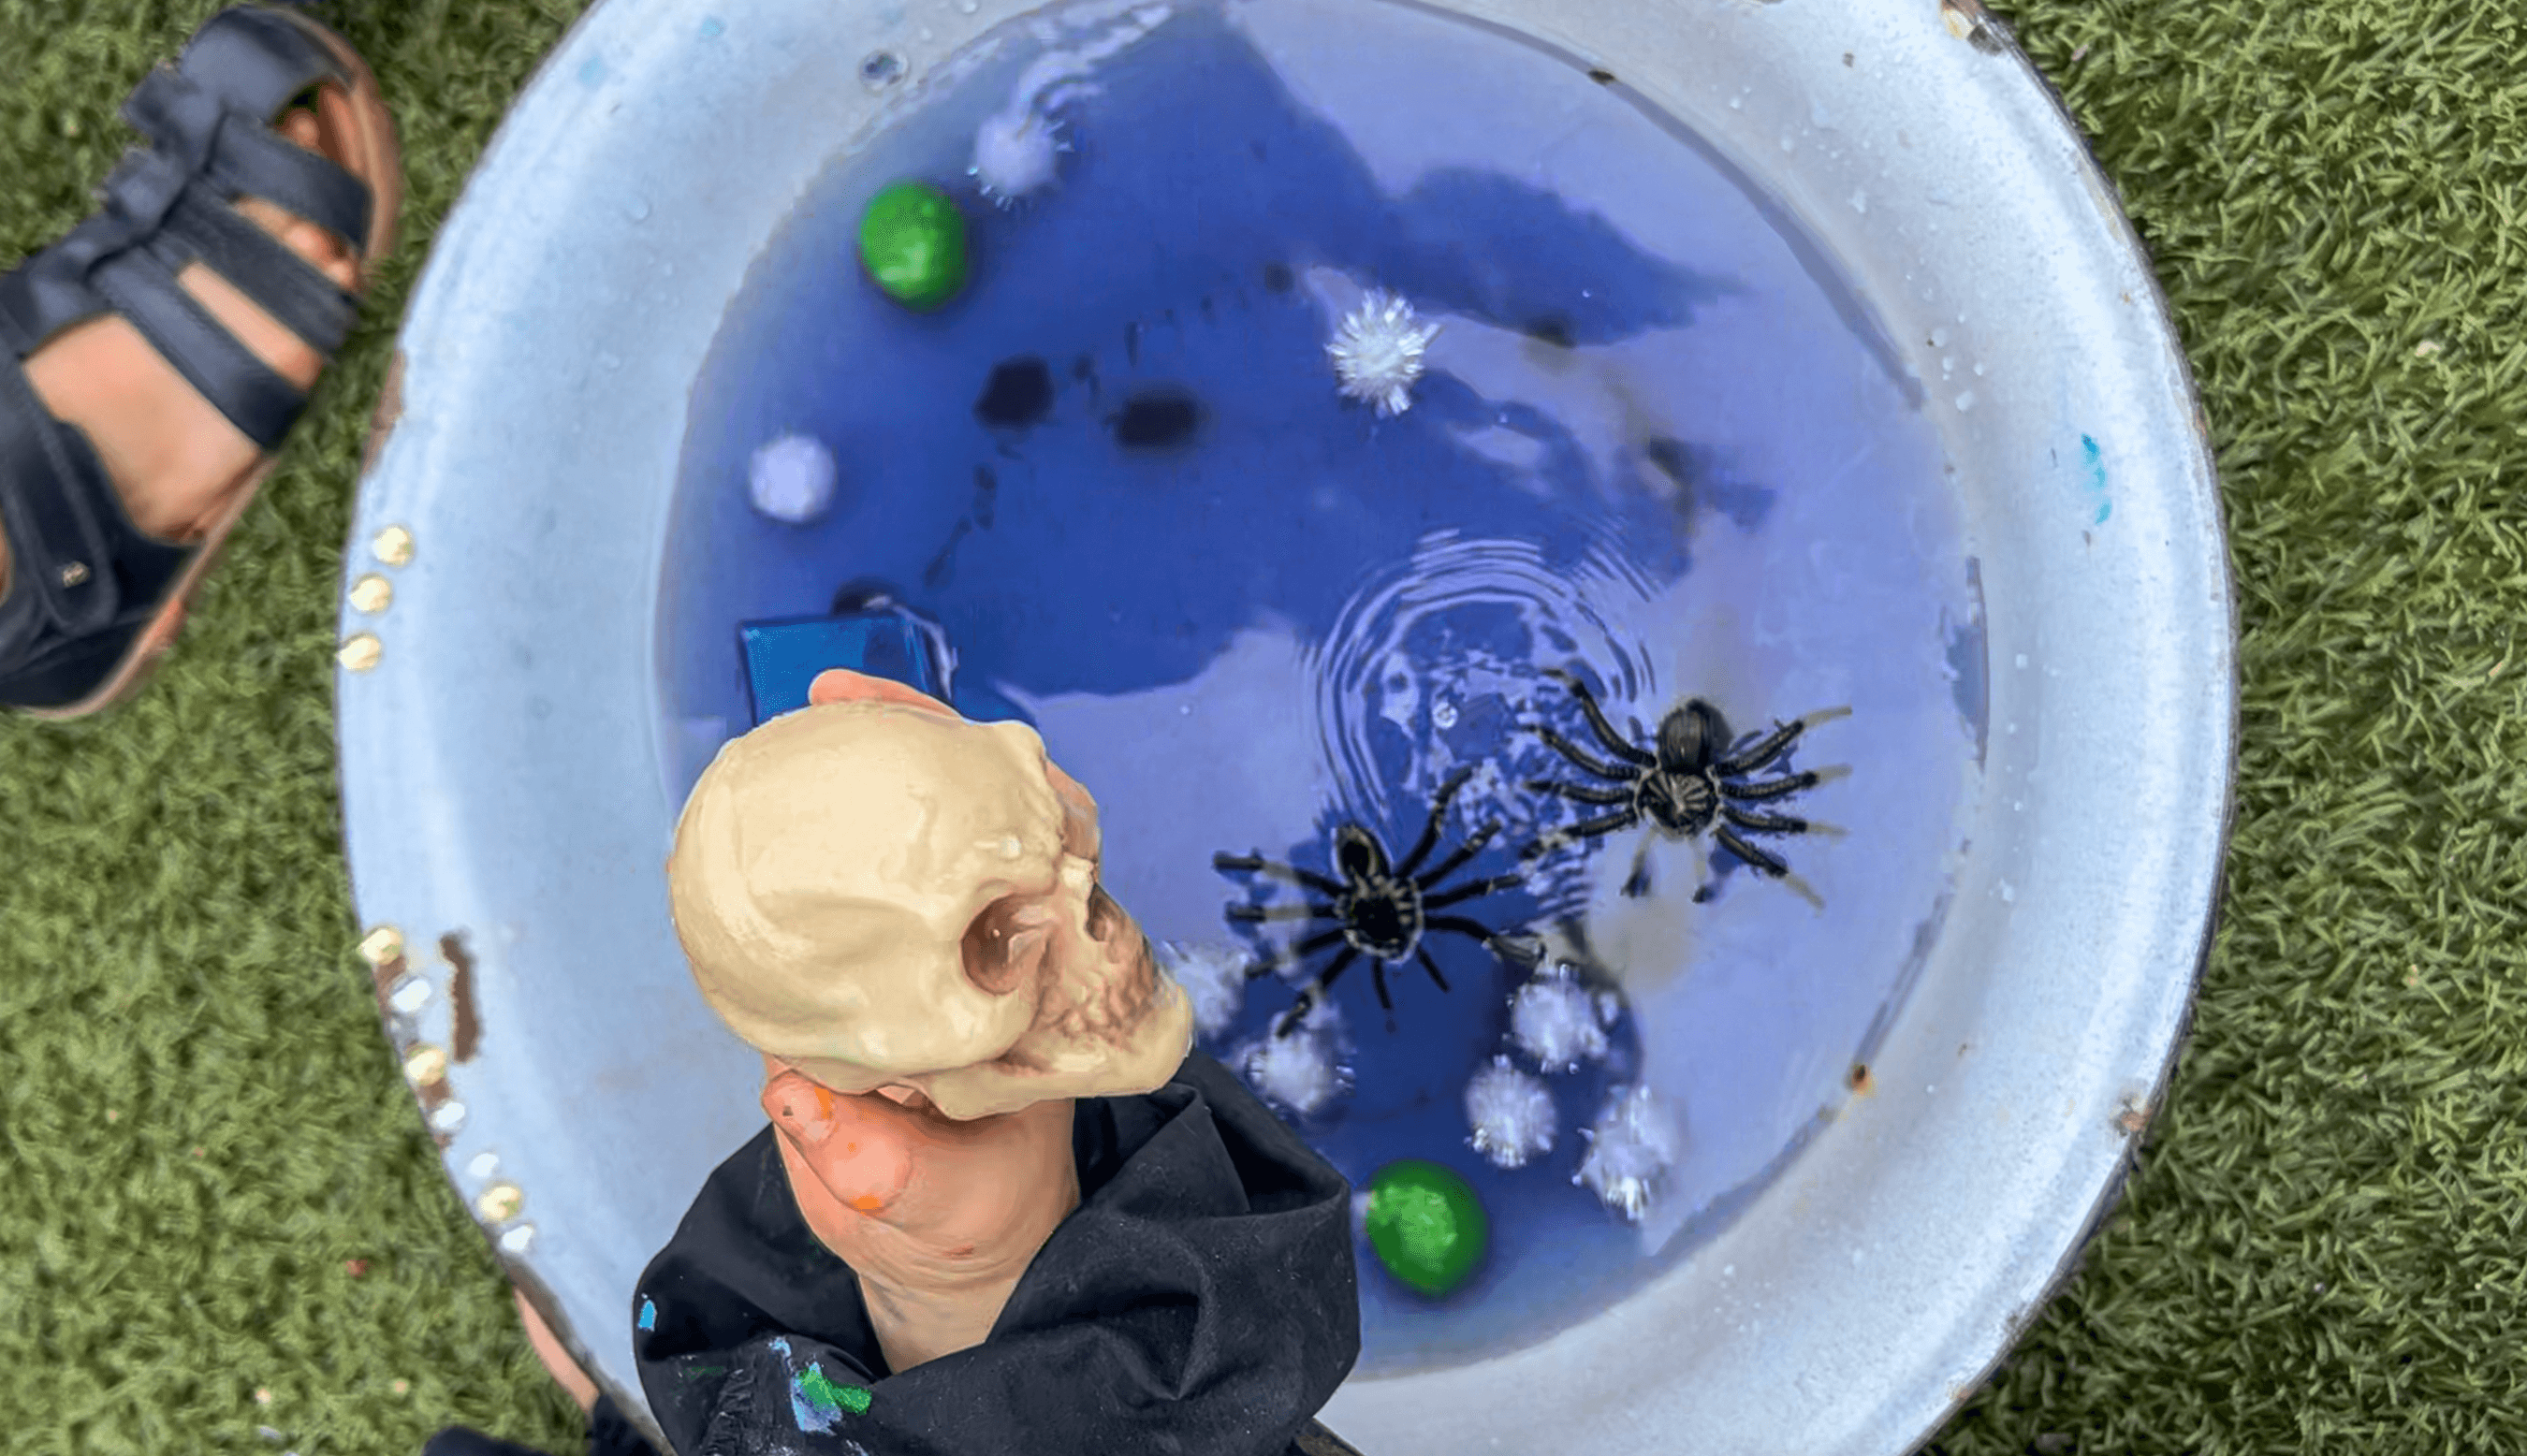
Turn your sensory area into a potion lab. Gather shallow tubs or bowls and fill them with water tinted by liquid watercolours in rich Halloween shades. Deep green, purple, orange, or even a cloudy grey all look brilliant.
Add scoops, spoons, sticks, funnels, jugs, droppers, fake bugs and plastic skulls. Include a few sparkly extras like sequins, petals, or bio glitter. Each tub can have a different colour or ingredient theme, or you can mix everything together into one bubbling cauldron. For extra fizz, add small containers of bicarb and vinegar, or a few crushed bath bombs for scent and soft foam.
If you’re setting this up indoors, put trays or towels underneath to catch spills.
The Making
Listen for the language that emerges: the recipes, the ingredients, the bubbling sound effects, the spells. Those moments of imagination and connection are the real learning!


Variations
Use ice cubes coloured with food dye for a melting transformation.
Turn this into an outdoor water play station for larger groups.


Materials
• Shallow tubs or bowls
• Water tinted with liquid watercolours
• Cups, jugs, spoons, funnels, and droppers
• Sequins, petals, bio glitter
• Fake bugs and plastic skulls
• Optional bicarb soda and vinegar
• Crushed bath bombs for fizz
• Towels or trays
Back to Top
Pretend Poisonous Potions
Such a classic!
Bookmark
Sensory Play
The Set Up
Turn your sensory area into a potion lab. Gather shallow tubs or bowls and fill them with water tinted by liquid watercolours in rich Halloween shades. Deep green, purple, orange, or even a cloudy grey all look brilliant.
Add scoops, spoons, sticks, funnels, jugs, droppers, fake bugs and plastic skulls. Include a few sparkly extras like sequins, petals, or bio glitter. Each tub can have a different colour or ingredient theme, or you can mix everything together into one bubbling cauldron. For extra fizz, add small containers of bicarb and vinegar, or a few crushed bath bombs for scent and soft foam.
If you’re setting this up indoors, put trays or towels underneath to catch spills.
The Making
Listen for the language that emerges: the recipes, the ingredients, the bubbling sound effects, the spells. Those moments of imagination and connection are the real learning!
Variations
Use ice cubes coloured with food dye for a melting transformation.
Turn this into an outdoor water play station for larger groups.
Materials
• Shallow tubs or bowls
• Water tinted with liquid watercolours
• Cups, jugs, spoons, funnels, and droppers
• Sequins, petals, bio glitter
• Fake bugs and plastic skulls
• Optional bicarb soda and vinegar
• Crushed bath bombs for fizz
• Towels or trays
Back to Top
