
ARTFUL EXPERIENCES
The Giant Treasure Map
Claim the islands, mark the X, build the world together
All Ages
Bookmark
Installations
The Set Up
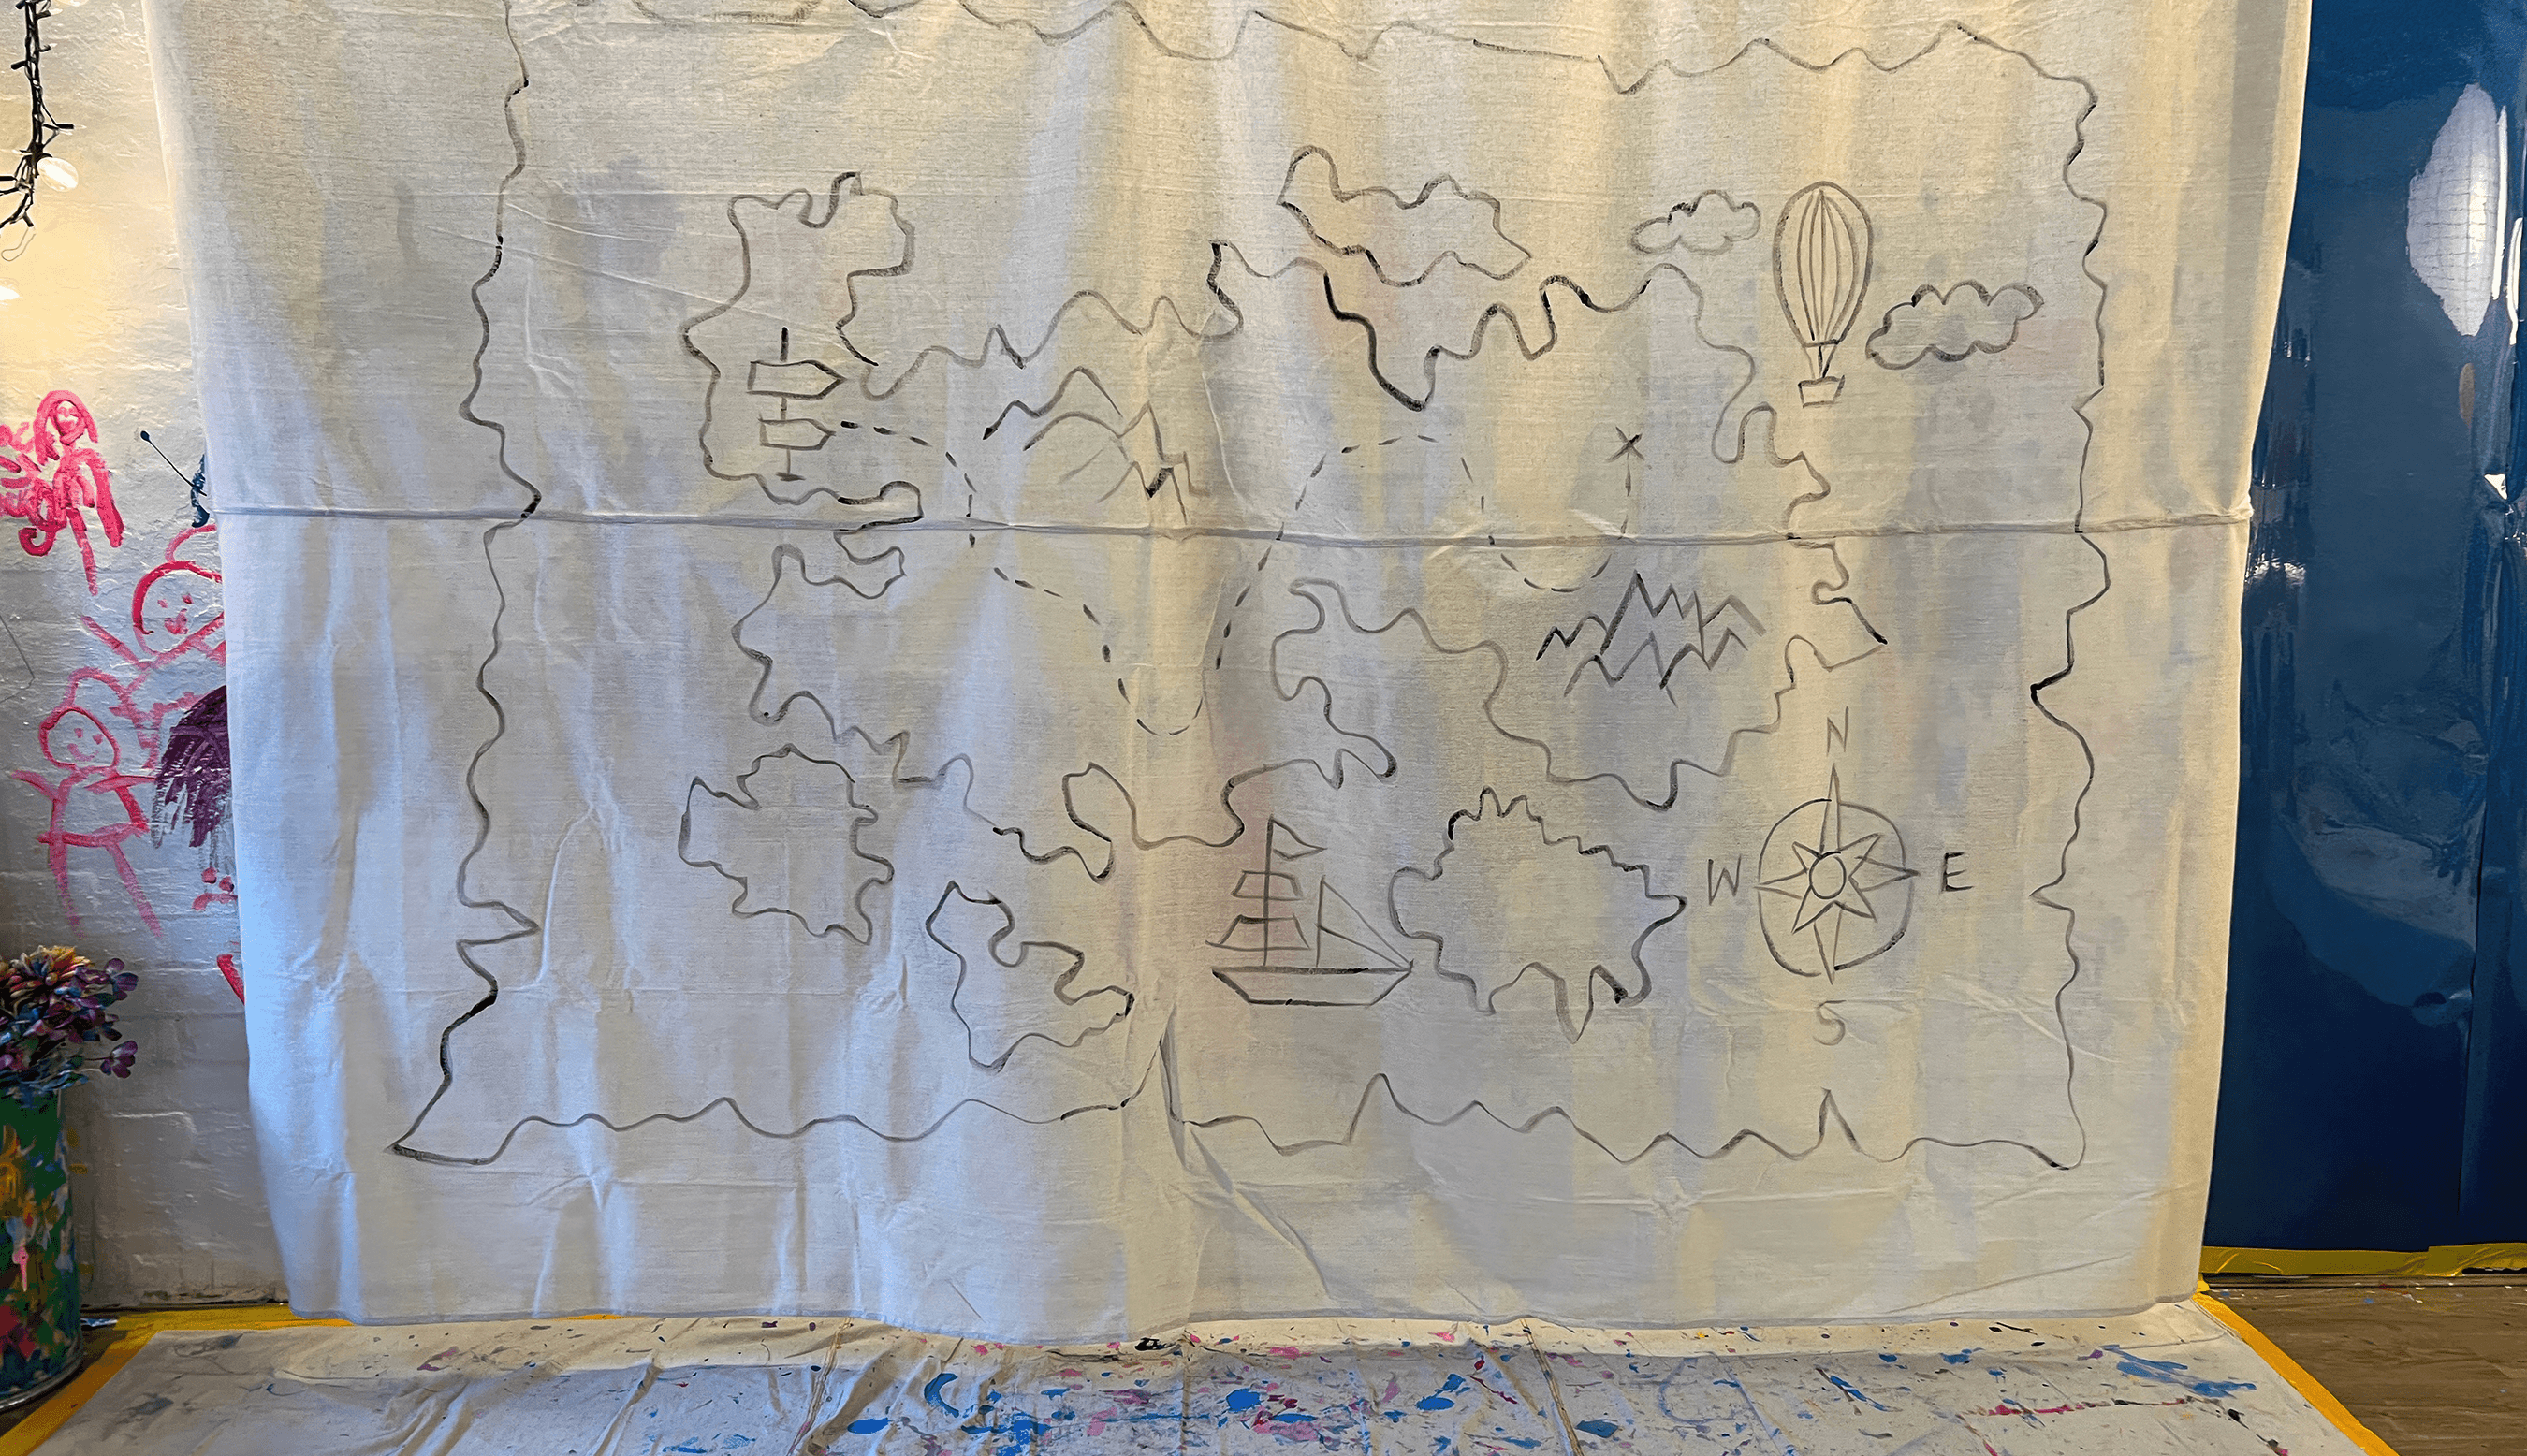
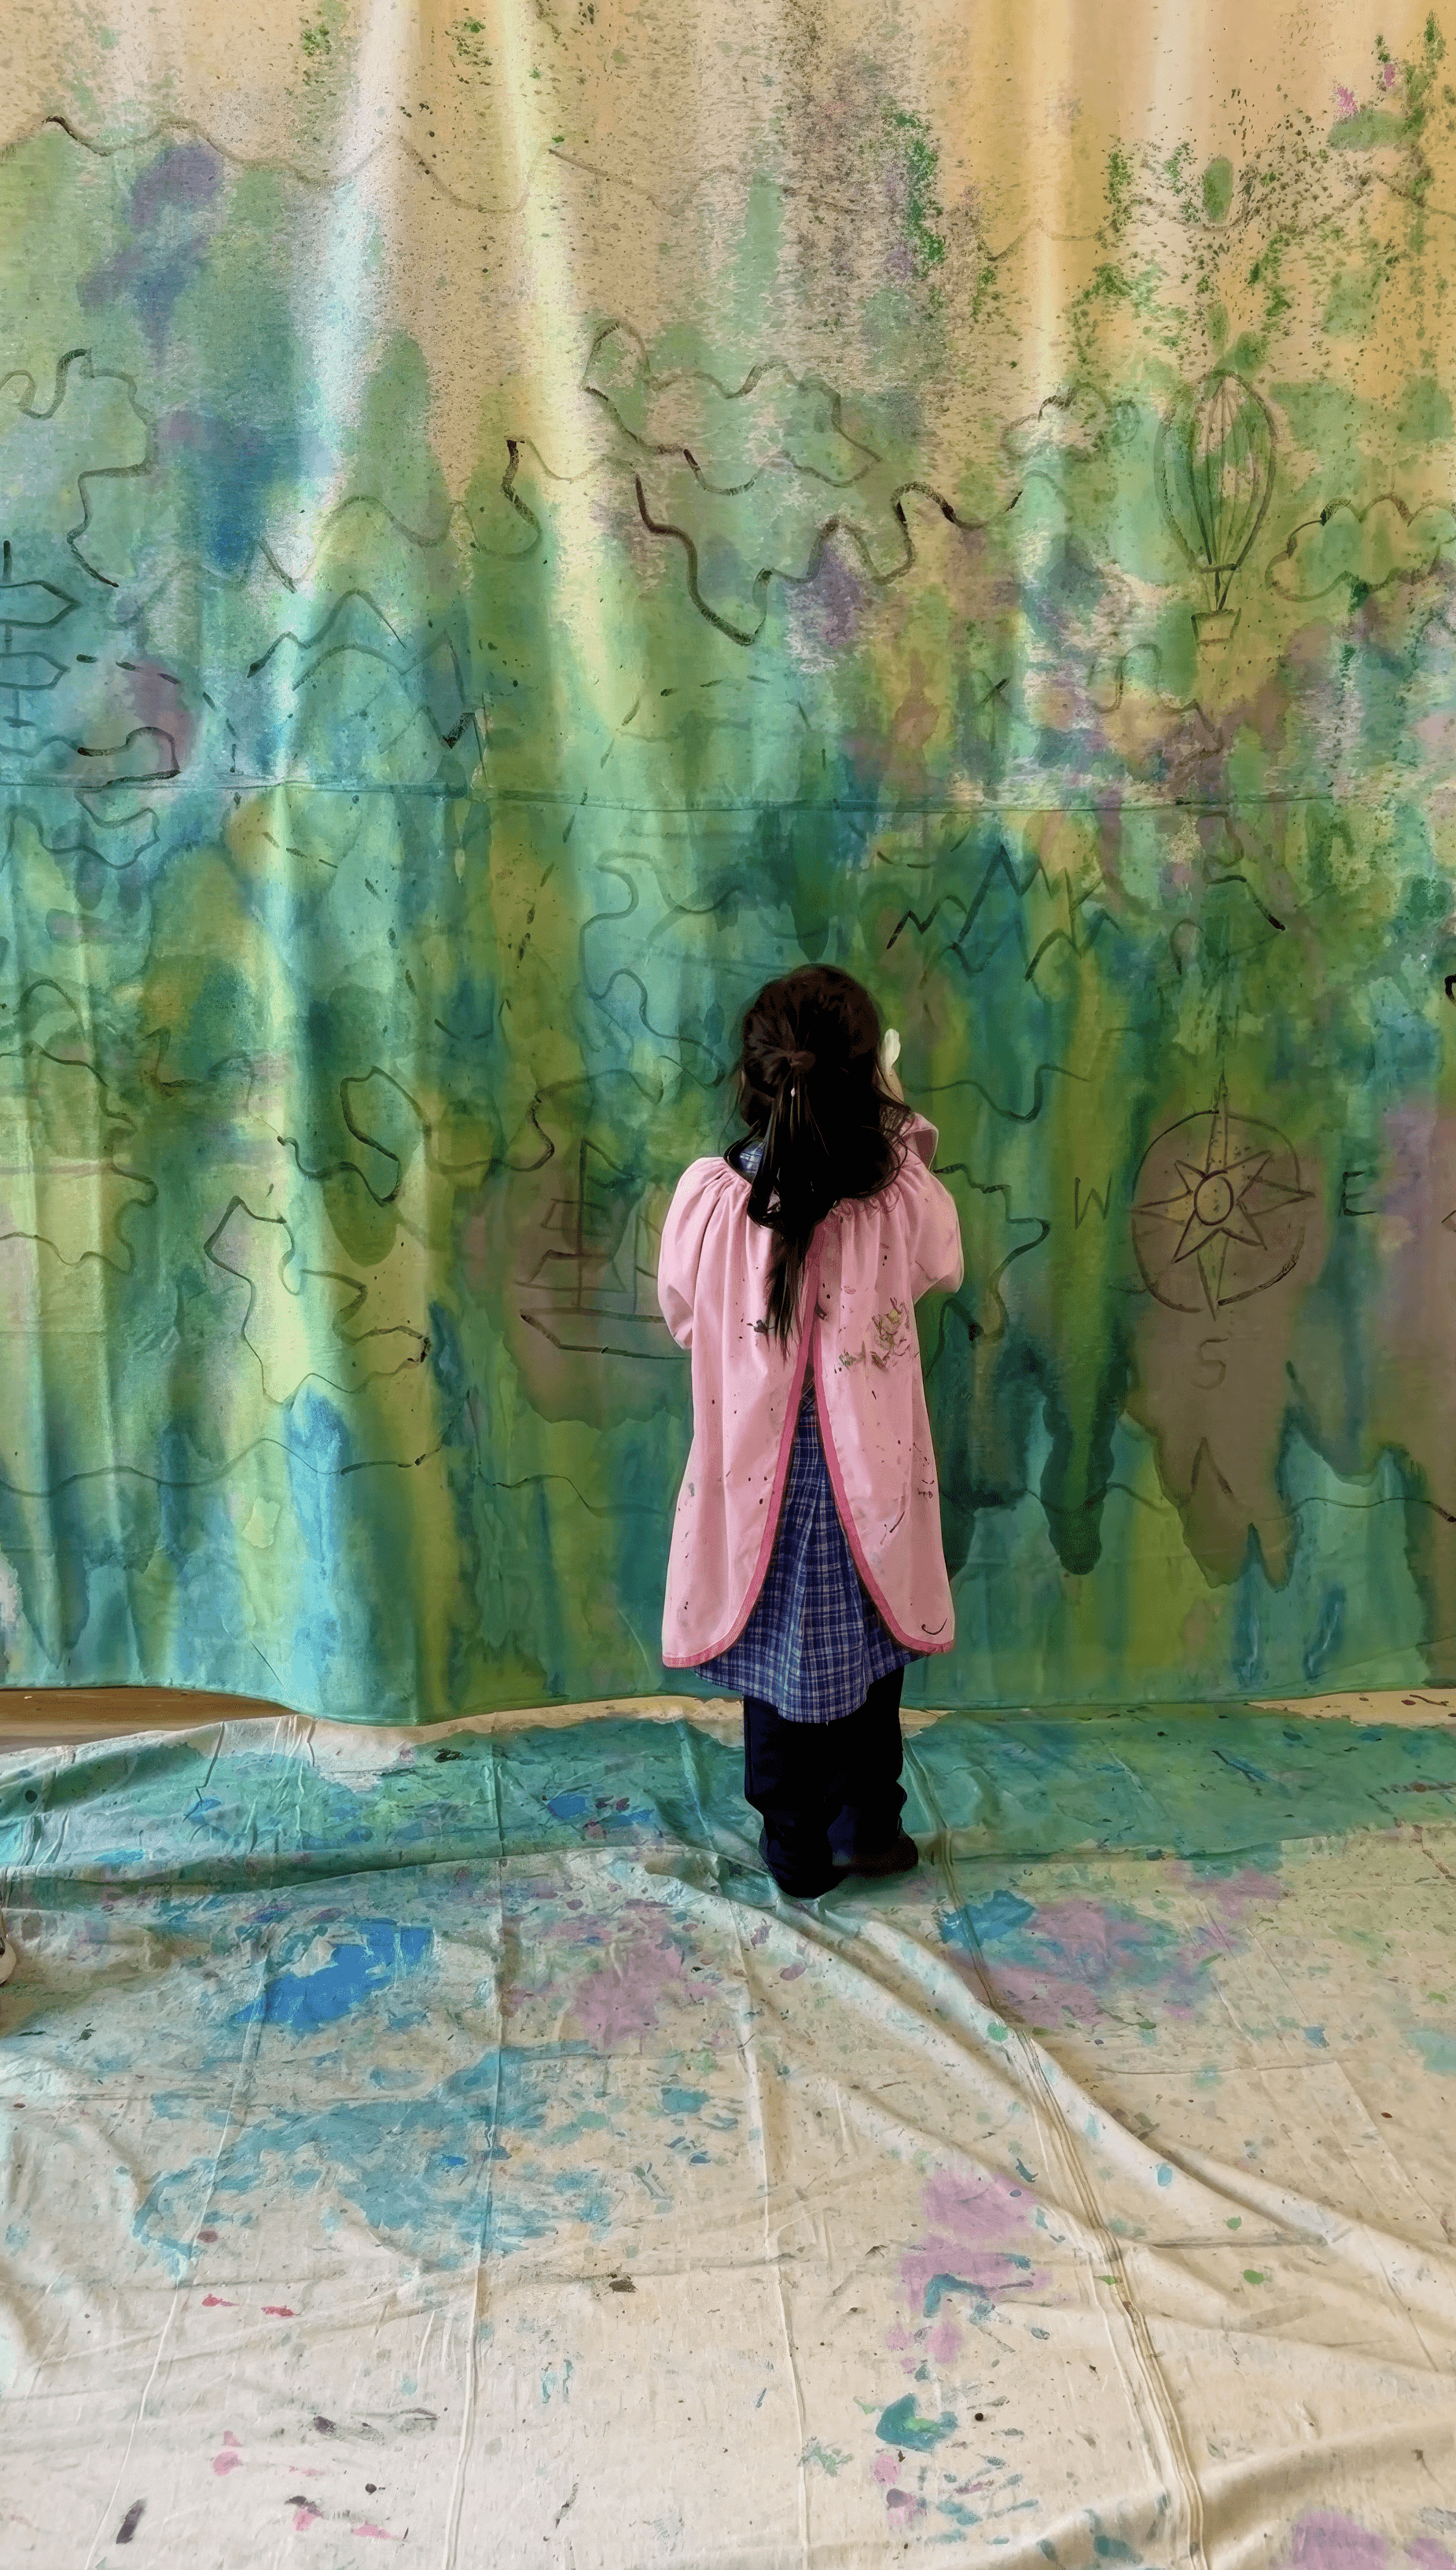
Go big if you can! The scale matters here because the map becomes a shared place, not just a drawing. At Smudge we use a giant canvas drop sheet around three metres by two metres. I hot glue along one long edge, fold that edge over by roughly ten centimetres to make a sleeve, then slide a curtain rod through so it can hang easily. You can also paint straight onto a wall if that’s friendlier for your space. We have done both (and loved both!). The wall version feels immediate and immersive. The hanging fabric map means you can move it, fold it, and keep adding day after day.
To sketch the first outline I like using an overhead projector. I draw my rough map on a sheet of clear perspex with a whiteboard marker. Island shapes. A coastline or two. A compass. A tiny boat. Waves. Mountains. An X that marks the spot. Maybe one treasure chest (or two?). Then I project that drawing onto the hanging drop sheet or directly onto the wall, and trace the outlines in black. For fabric I use black acrylic paint so it doesn't get washed away with the watercolours. For the direct-to-wall approach, I switch to a washable black paint so I can wipe back later. If you don't have a projector, freehand drawing works just as well! A plastic backed drop cloth on the ground will save your floor.
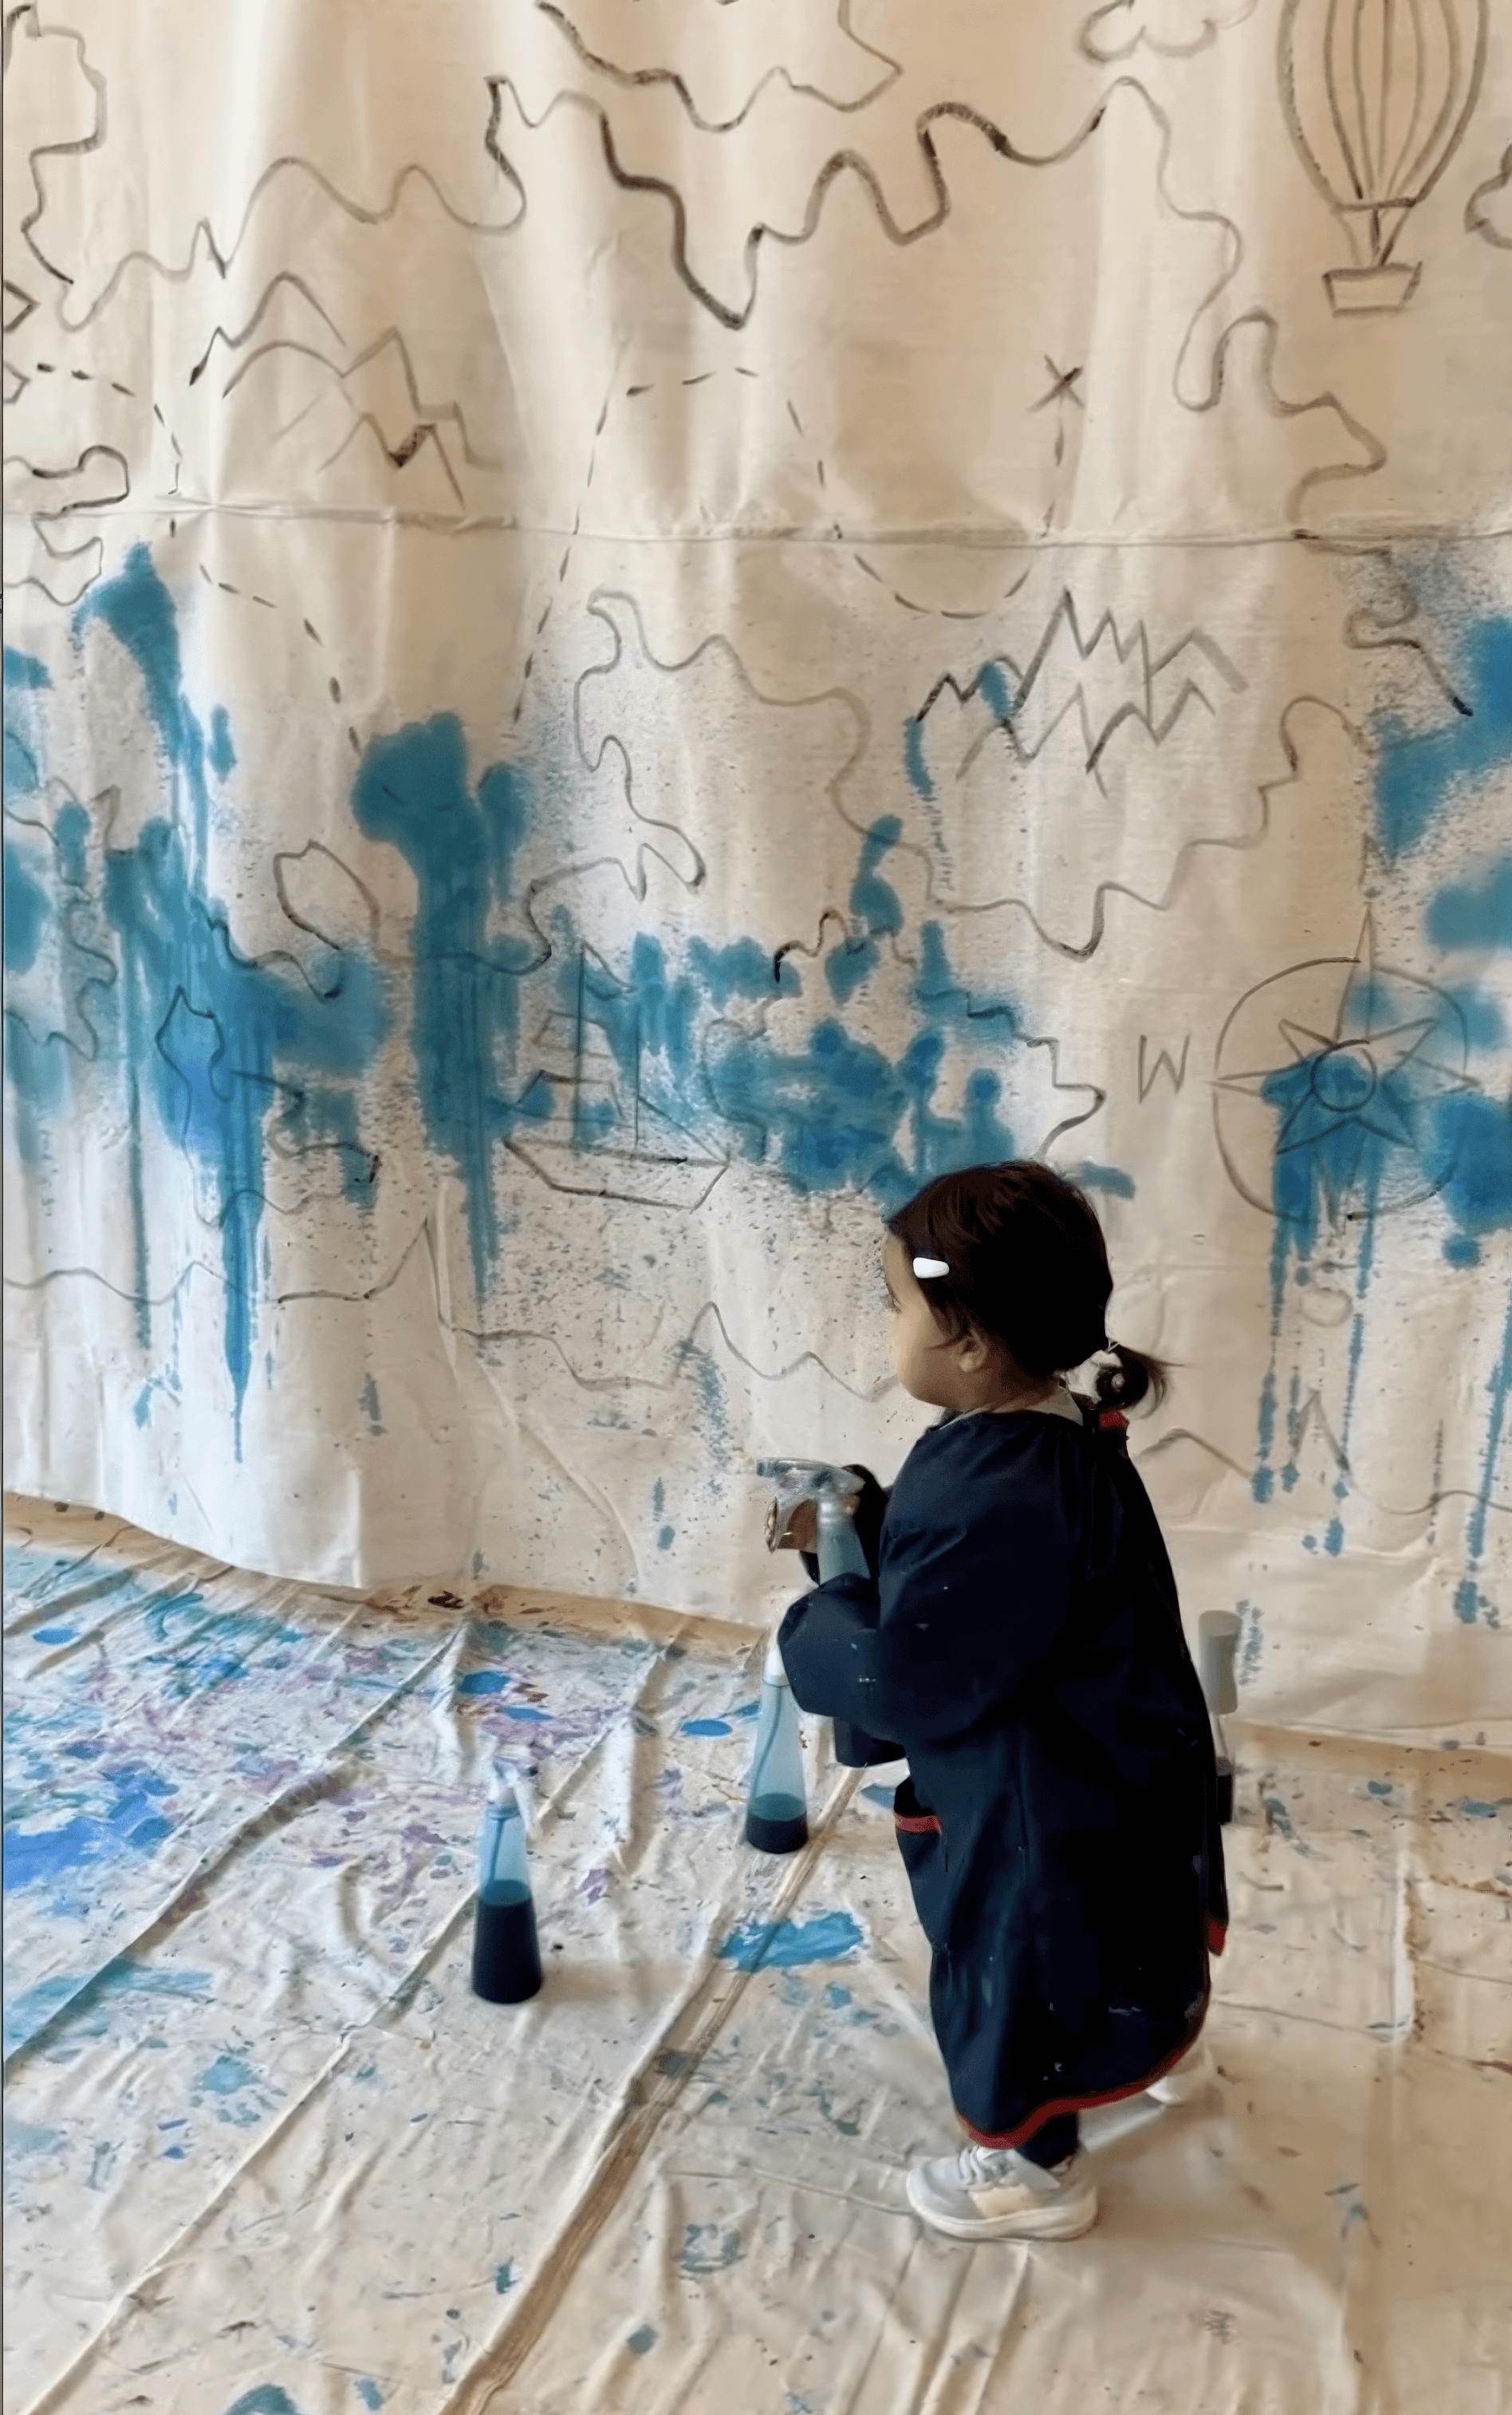
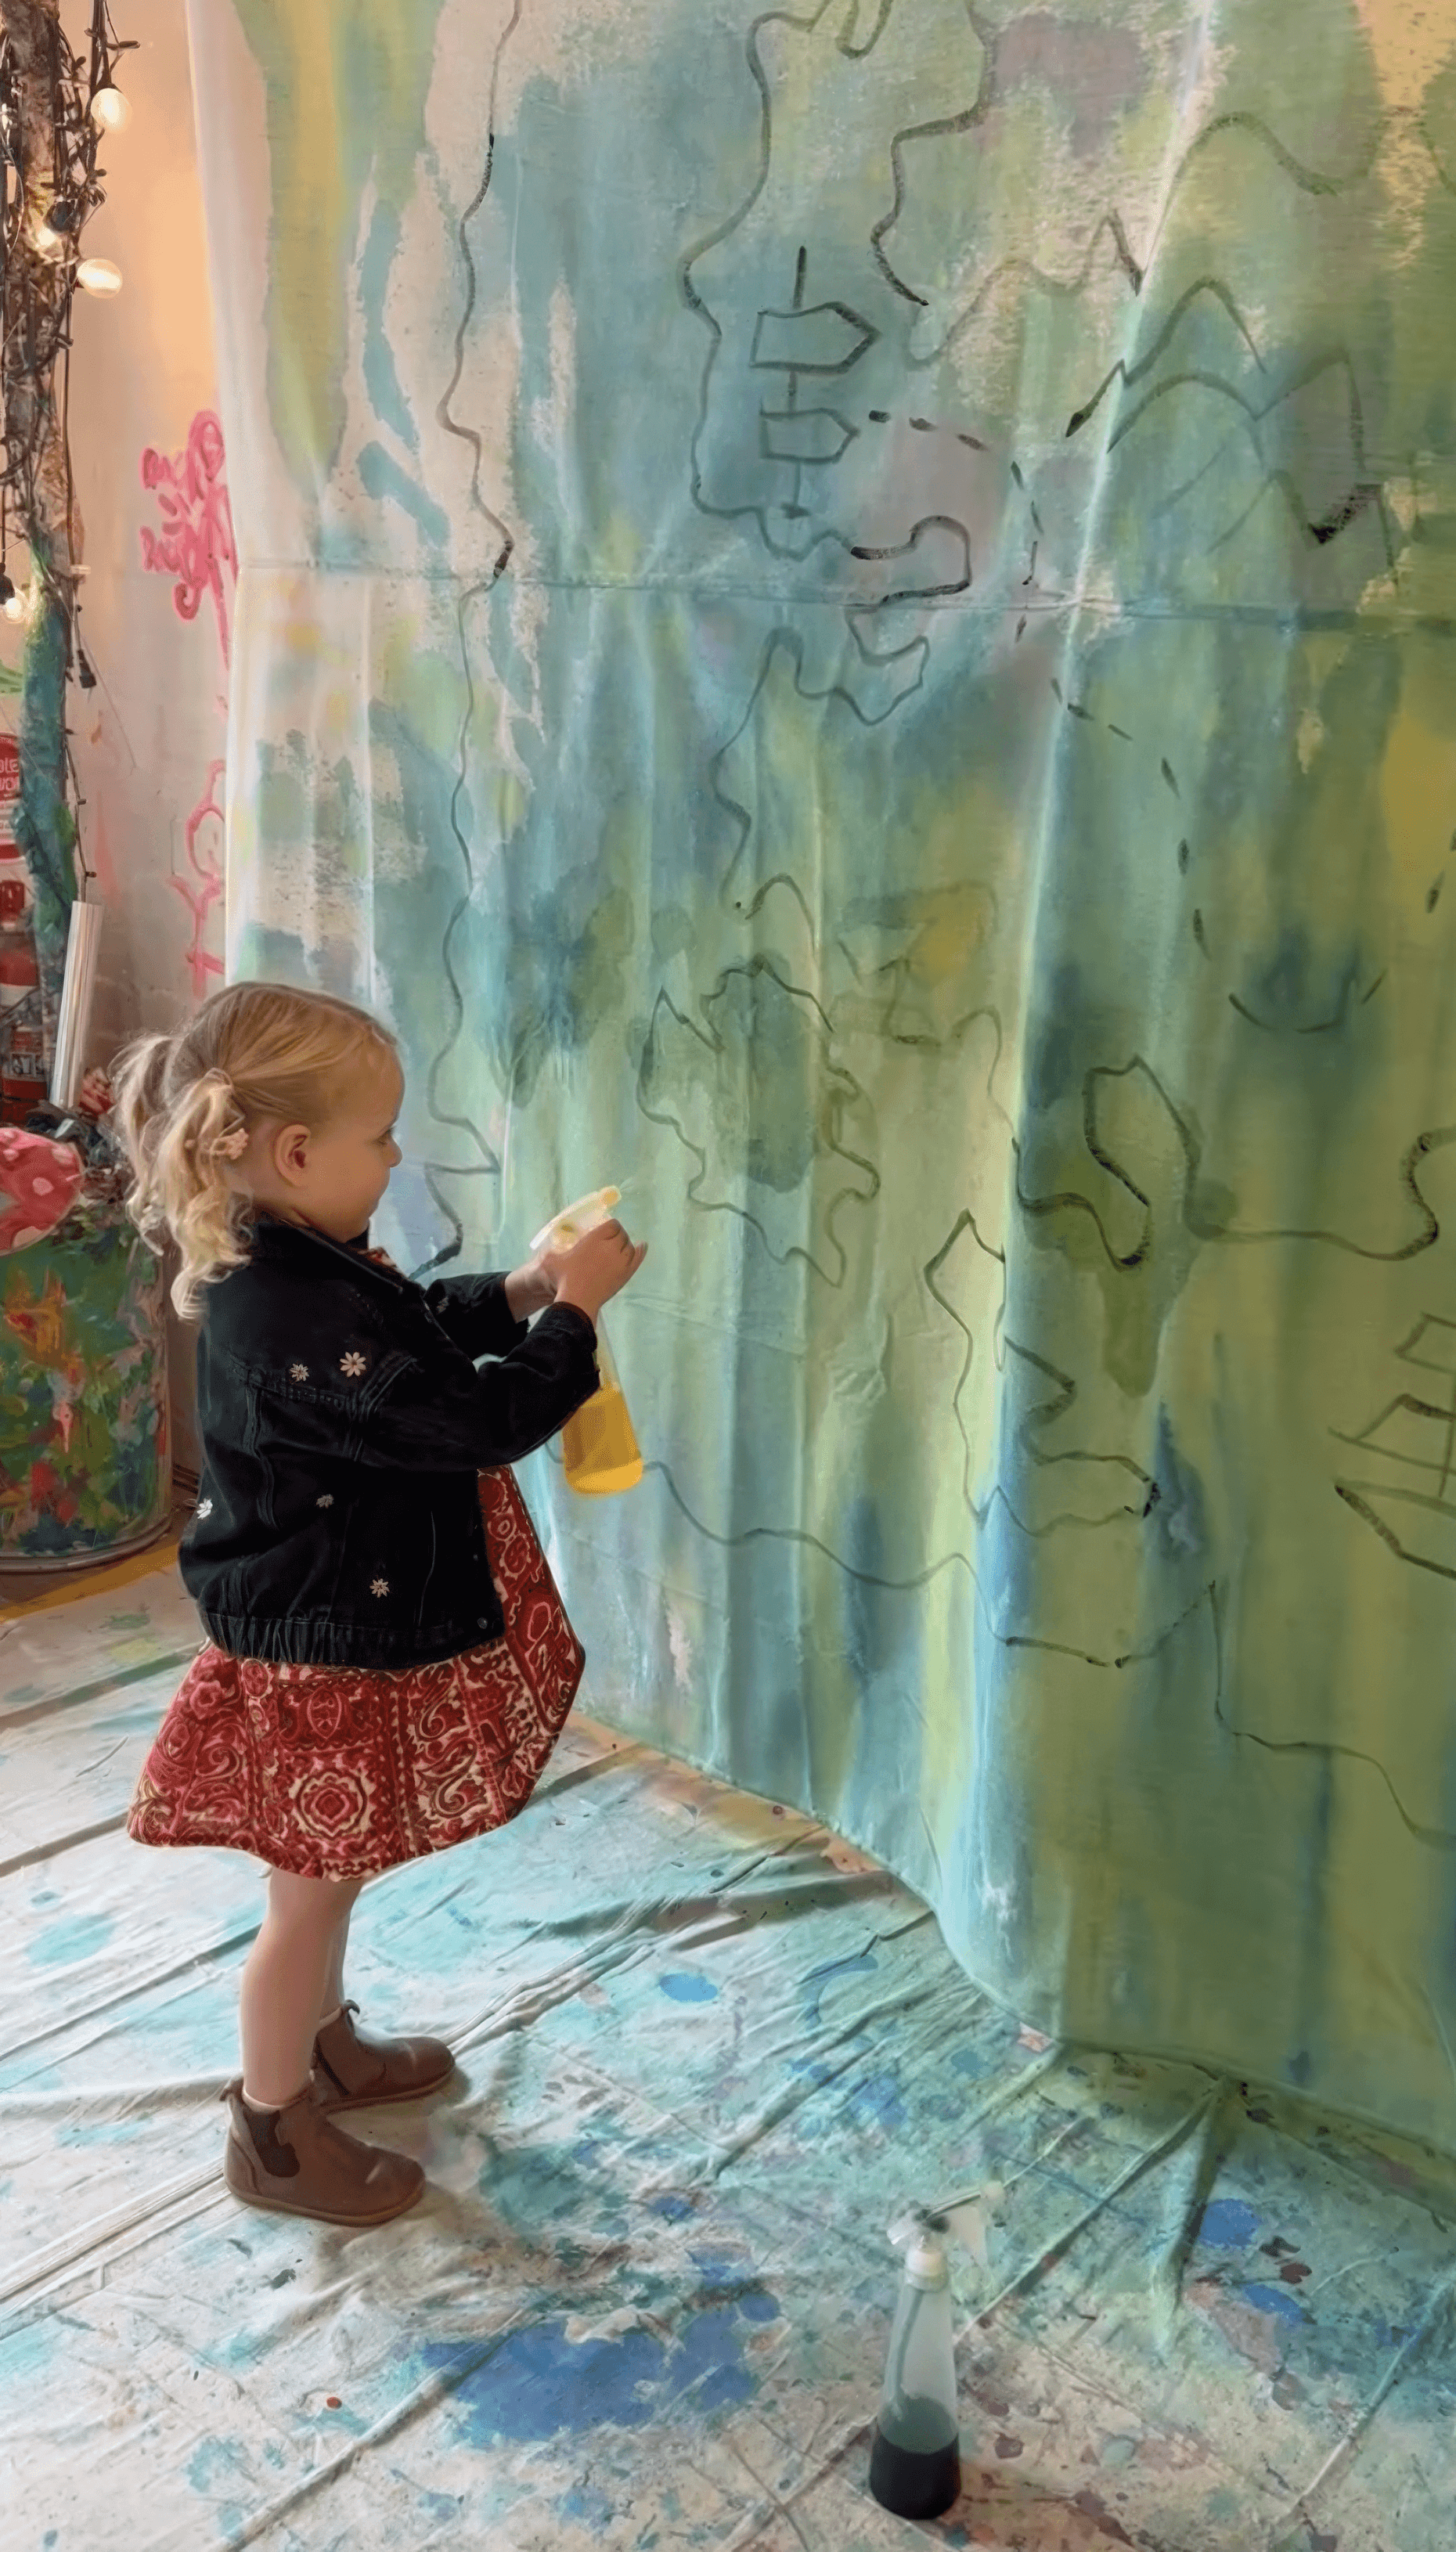
Set out trays and bottles for colour. Spray bottles with liquid watercolours. Or open paint pots with washable poster paint. Brushes for anyone who wants to work more slowly around edges. I like to mix a touch of white into each colour to keep them bright and opaque at scale. Keep extra cloths nearby because you'll soon find out that this one gets energetic, fast!

The Making
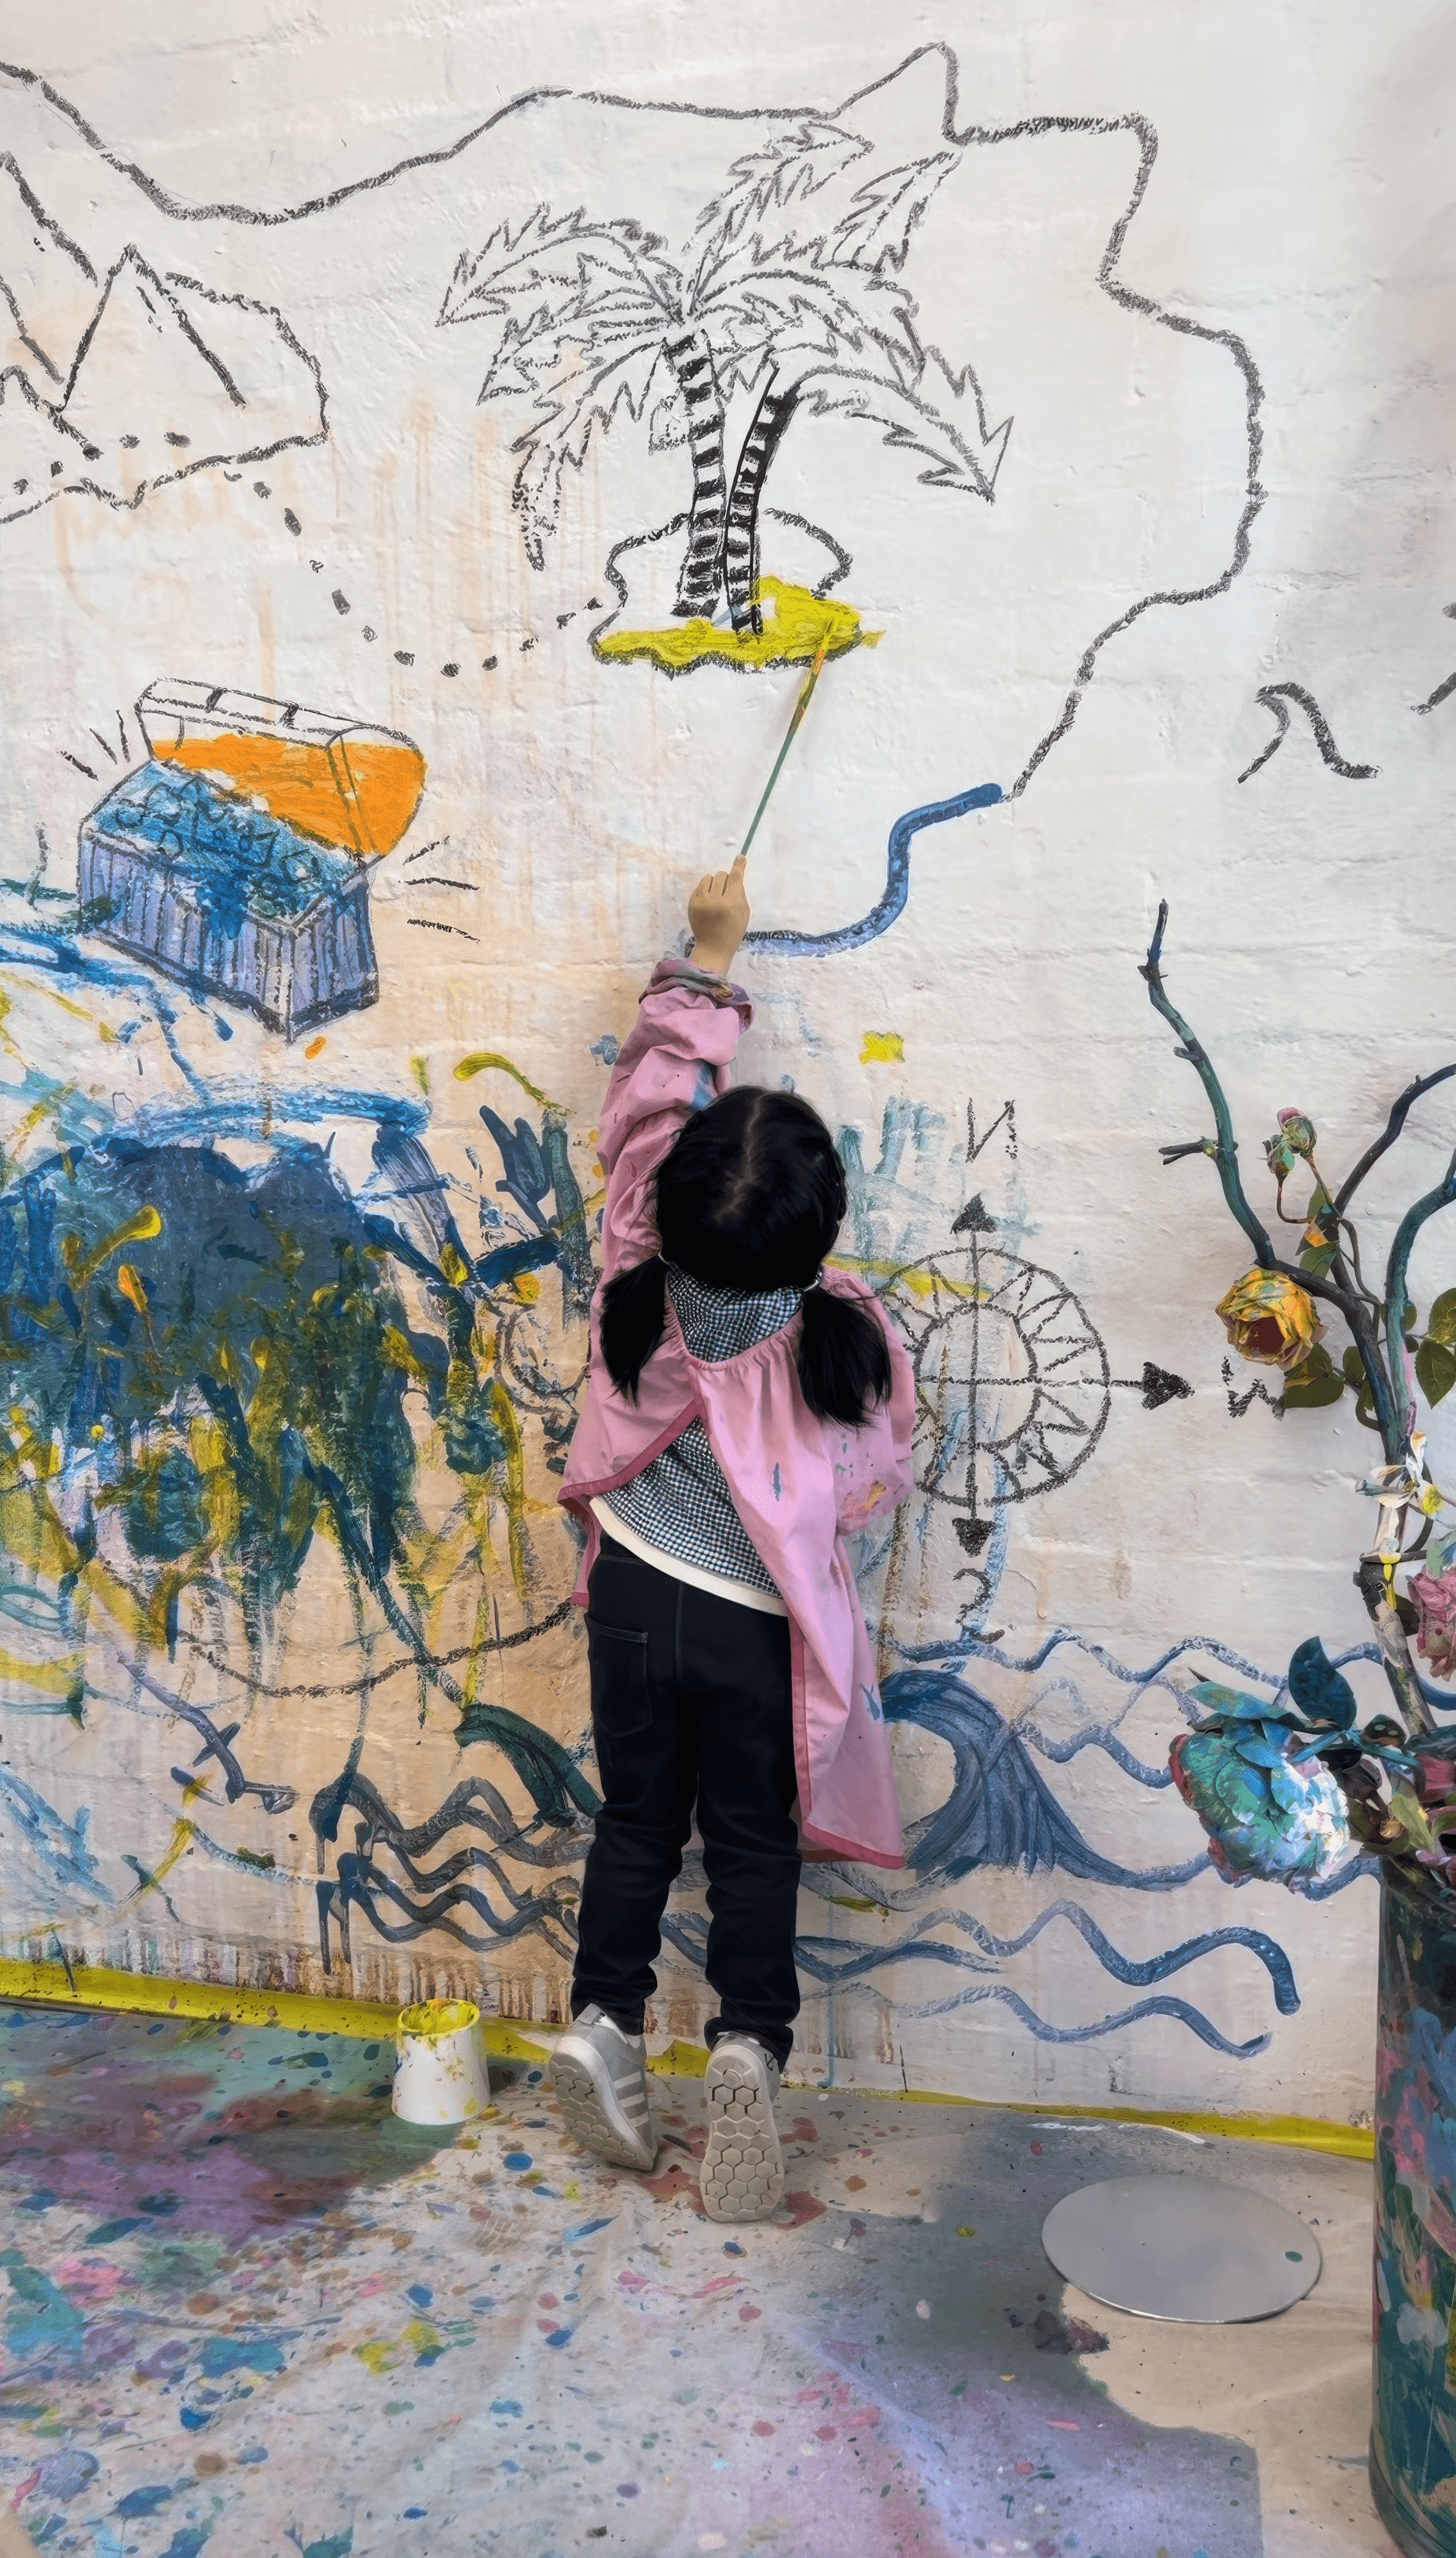
Invite the group into naming the world. Ask where the ocean starts and who guards the treasure and what lives in the place marked with the X.
Then, the most important part… step back and let them claim territory with colour!
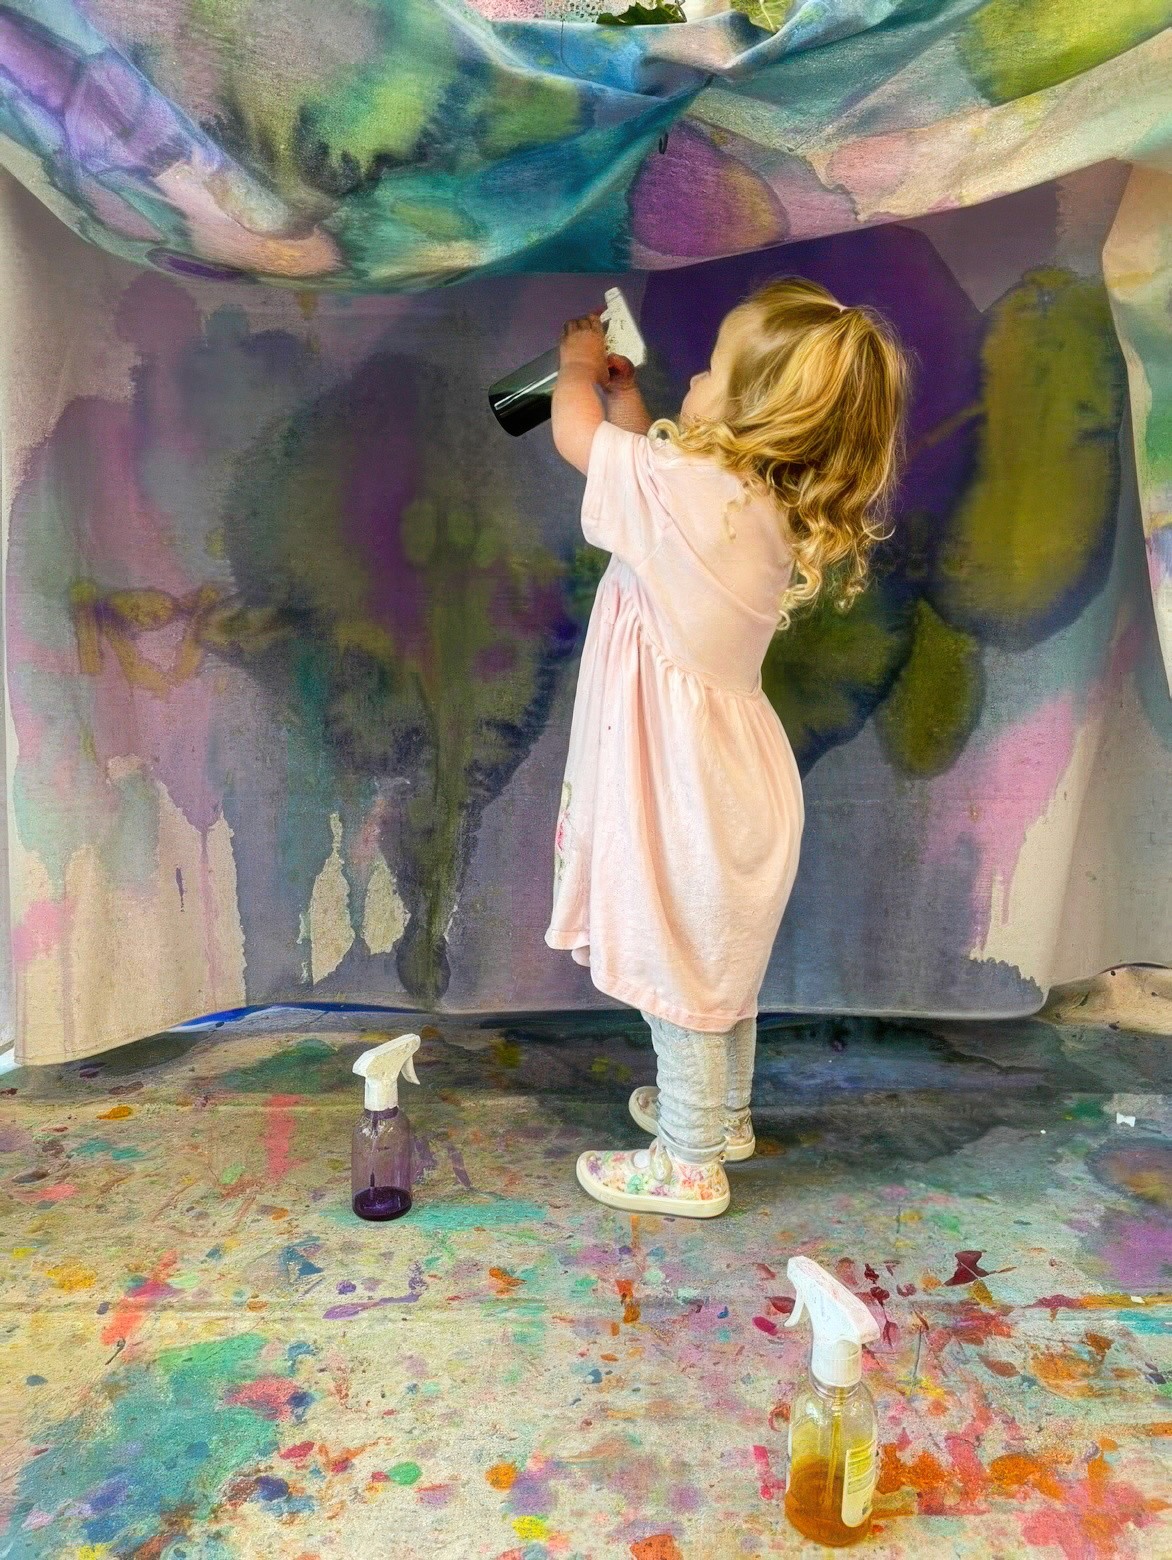
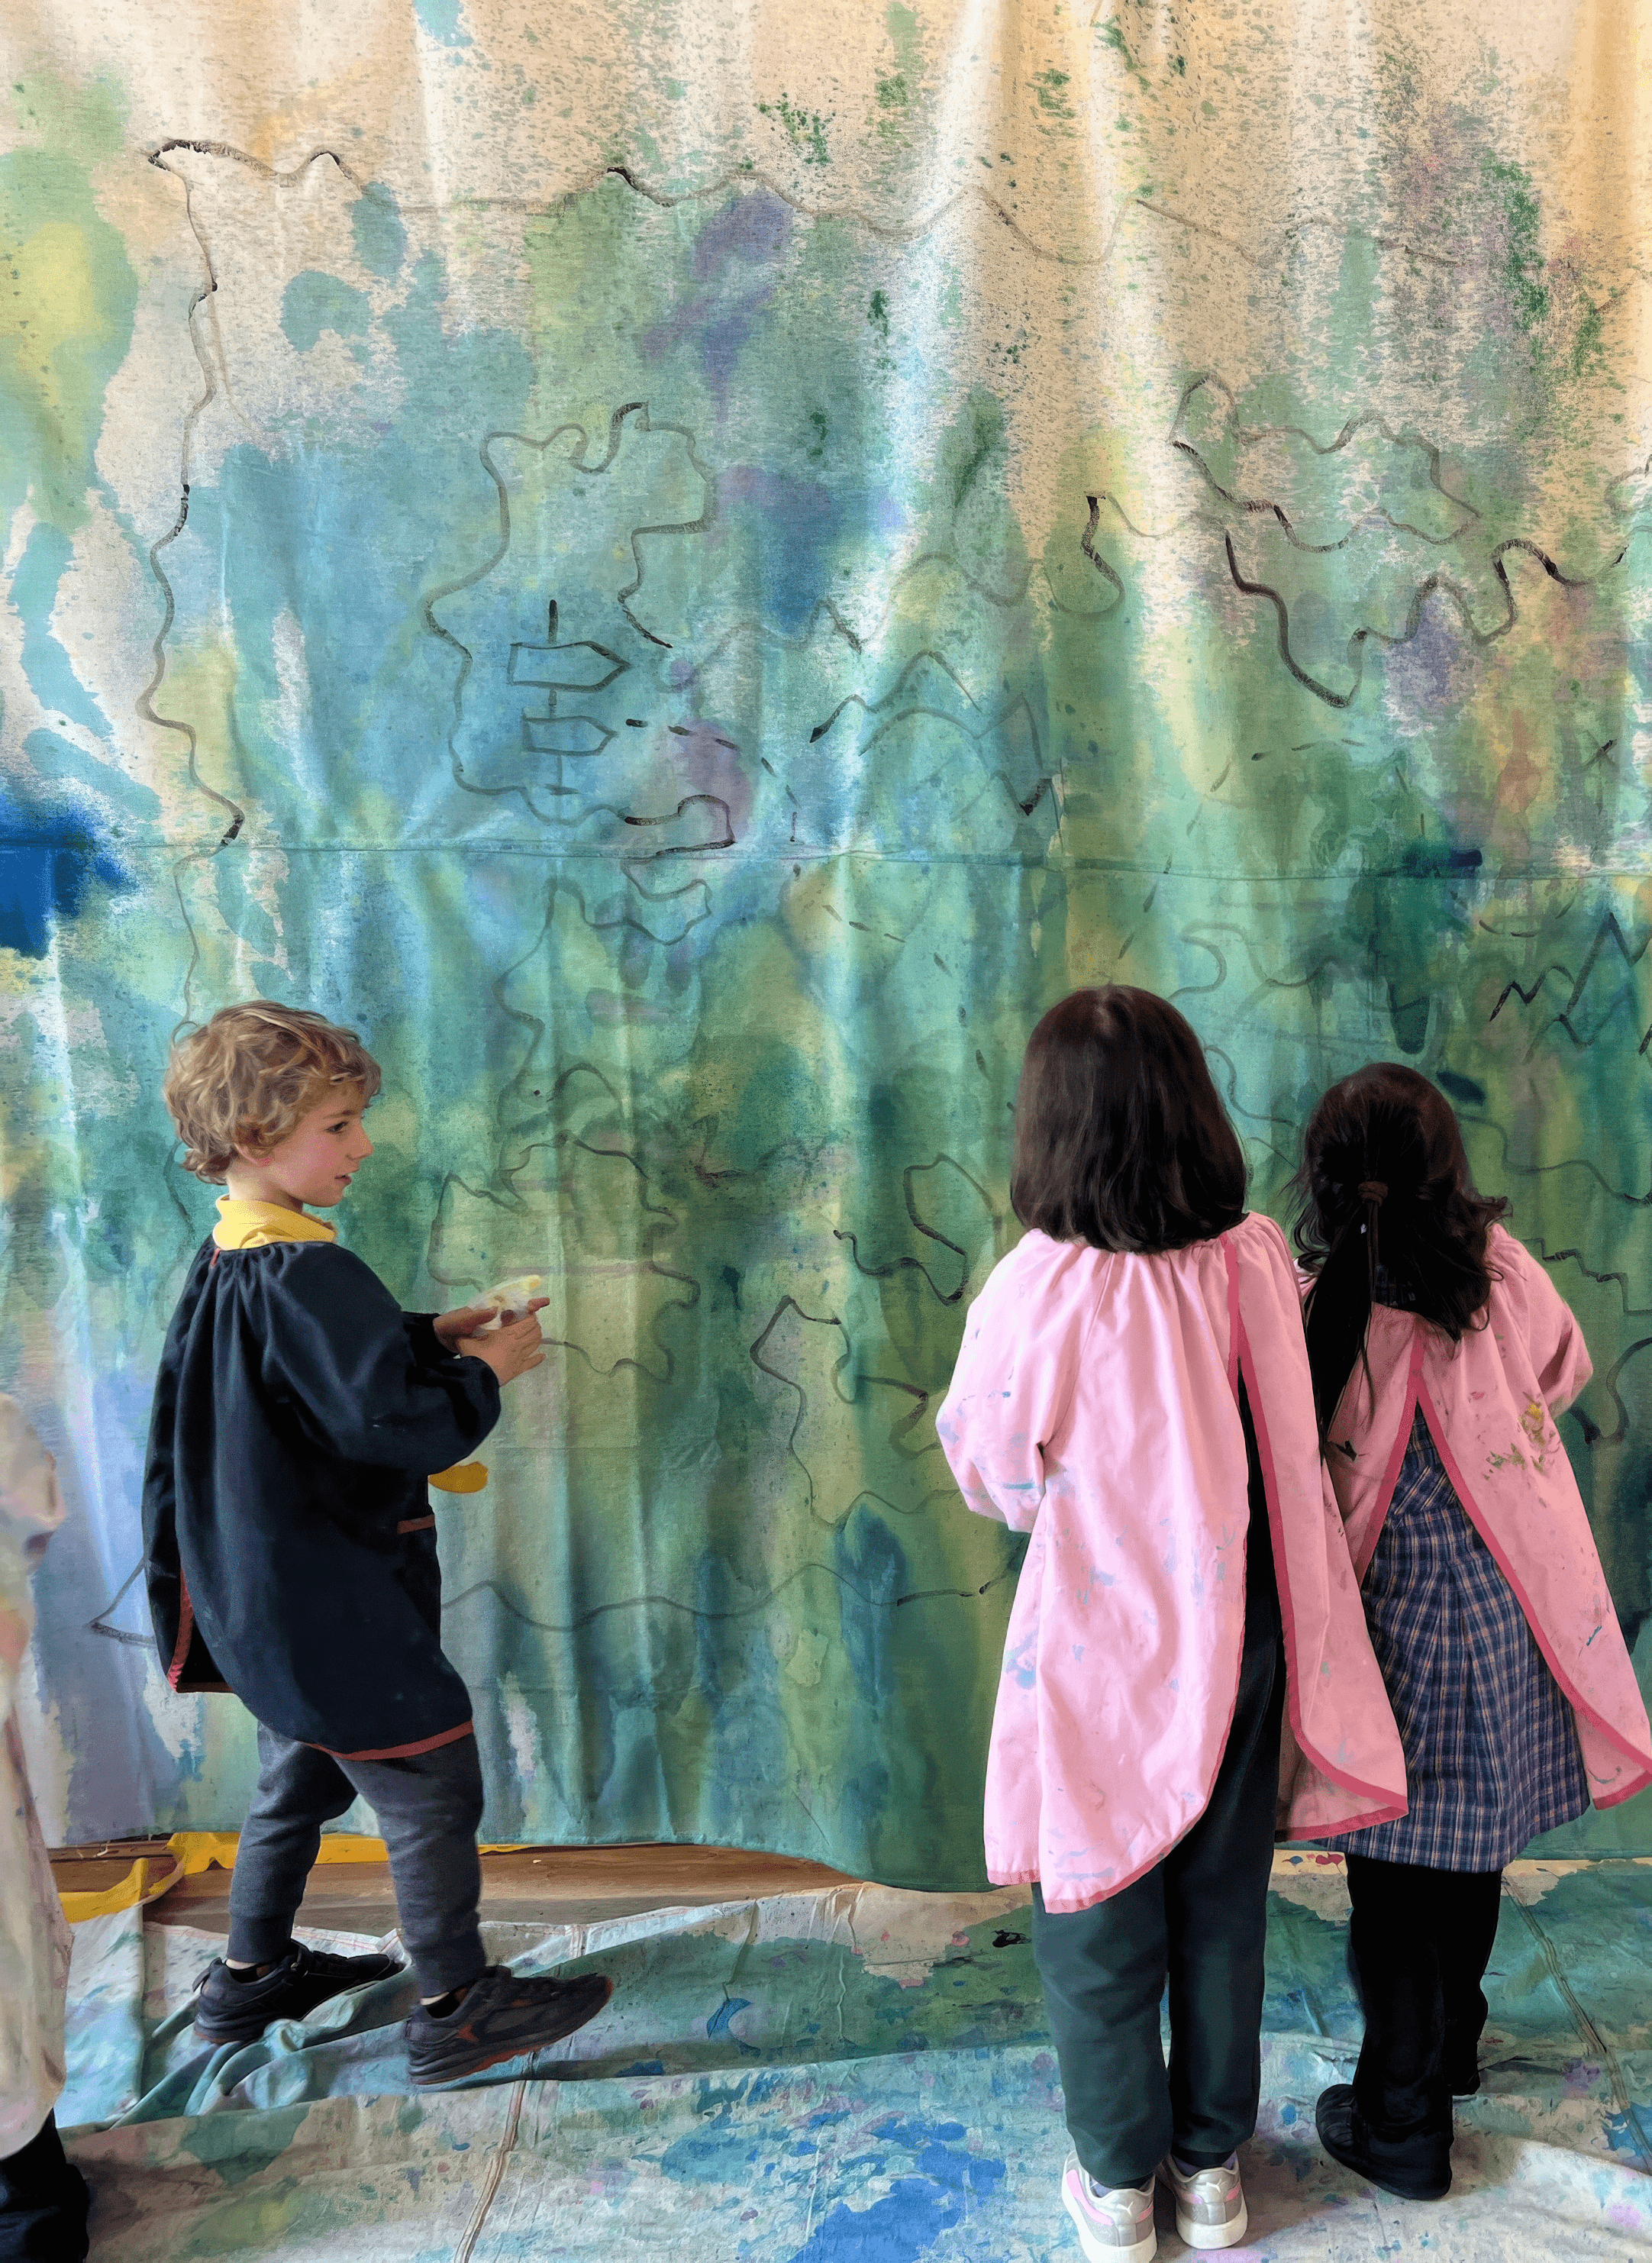
Some kids move in long sweeping sprays, walking the shoreline with a bottle in each hand. Others crouch and patiently fill one small island. Both approaches are just right (plus everything in between!). You will see collaboration start to happen on its own because large work demands it.
Notes from our Artspace:
We have found that spray bottles feel freeing on fabric because colour can travel and mist and drip. On a wall we usually lean on brushes and pots of washable paint so clean up is kind. If you are working directly on a painted wall and you want it gone later, keep the palette simple and stay with washable paint only so it wipes back with a damp cloth.


Variations
Use chalk pens or paint pens to add tiny map icons once the big colour is dry
Leave a blank corner marked Unknown Land and let new explorers add to it across the week
Photograph sections of the map and turn them into printed postcards for storytelling later

Materials
Large canvas drop sheet or fabric backed plastic drop cloth
Option to hang with a glued fold and a curtain rod or to paint directly on a wall
Black acrylic paint for fabric or washable black paint for walls
Liquid watercolours in spray bottles
Washable poster or tempera paint with a touch of white mixed in
Brushes, trays, cloths
Optional projector and clear perspex sheet for tracing
Optional chalk pens or paint pens for detail
Back to Top
The Giant Treasure Map
Claim the islands, mark the X, build the world together
Bookmark
Installations
The Set Up
Go big if you can! The scale matters here because the map becomes a shared place, not just a drawing. At Smudge we use a giant canvas drop sheet around three metres by two metres. I hot glue along one long edge, fold that edge over by roughly ten centimetres to make a sleeve, then slide a curtain rod through so it can hang easily. You can also paint straight onto a wall if that’s friendlier for your space. We have done both (and loved both!). The wall version feels immediate and immersive. The hanging fabric map means you can move it, fold it, and keep adding day after day.
To sketch the first outline I like using an overhead projector. I draw my rough map on a sheet of clear perspex with a whiteboard marker. Island shapes. A coastline or two. A compass. A tiny boat. Waves. Mountains. An X that marks the spot. Maybe one treasure chest (or two?). Then I project that drawing onto the hanging drop sheet or directly onto the wall, and trace the outlines in black. For fabric I use black acrylic paint so it doesn't get washed away with the watercolours. For the direct-to-wall approach, I switch to a washable black paint so I can wipe back later. If you don't have a projector, freehand drawing works just as well! A plastic backed drop cloth on the ground will save your floor.
Set out trays and bottles for colour. Spray bottles with liquid watercolours. Or open paint pots with washable poster paint. Brushes for anyone who wants to work more slowly around edges. I like to mix a touch of white into each colour to keep them bright and opaque at scale. Keep extra cloths nearby because you'll soon find out that this one gets energetic, fast!
The Making
Invite the group into naming the world. Ask where the ocean starts and who guards the treasure and what lives in the place marked with the X.
Then, the most important part… step back and let them claim territory with colour!
Some kids move in long sweeping sprays, walking the shoreline with a bottle in each hand. Others crouch and patiently fill one small island. Both approaches are just right (plus everything in between!). You will see collaboration start to happen on its own because large work demands it.
Notes from our Artspace:
We have found that spray bottles feel freeing on fabric because colour can travel and mist and drip. On a wall we usually lean on brushes and pots of washable paint so clean up is kind. If you are working directly on a painted wall and you want it gone later, keep the palette simple and stay with washable paint only so it wipes back with a damp cloth.
Variations
Use chalk pens or paint pens to add tiny map icons once the big colour is dry
Leave a blank corner marked Unknown Land and let new explorers add to it across the week
Photograph sections of the map and turn them into printed postcards for storytelling later
Materials
Large canvas drop sheet or fabric backed plastic drop cloth
Option to hang with a glued fold and a curtain rod or to paint directly on a wall
Black acrylic paint for fabric or washable black paint for walls
Liquid watercolours in spray bottles
Washable poster or tempera paint with a touch of white mixed in
Brushes, trays, cloths
Optional projector and clear perspex sheet for tracing
Optional chalk pens or paint pens for detail
Back to Top
Explorer Binoculars
Make it, wear it, start exploring!
Bookmark
Sculpture
The Set Up
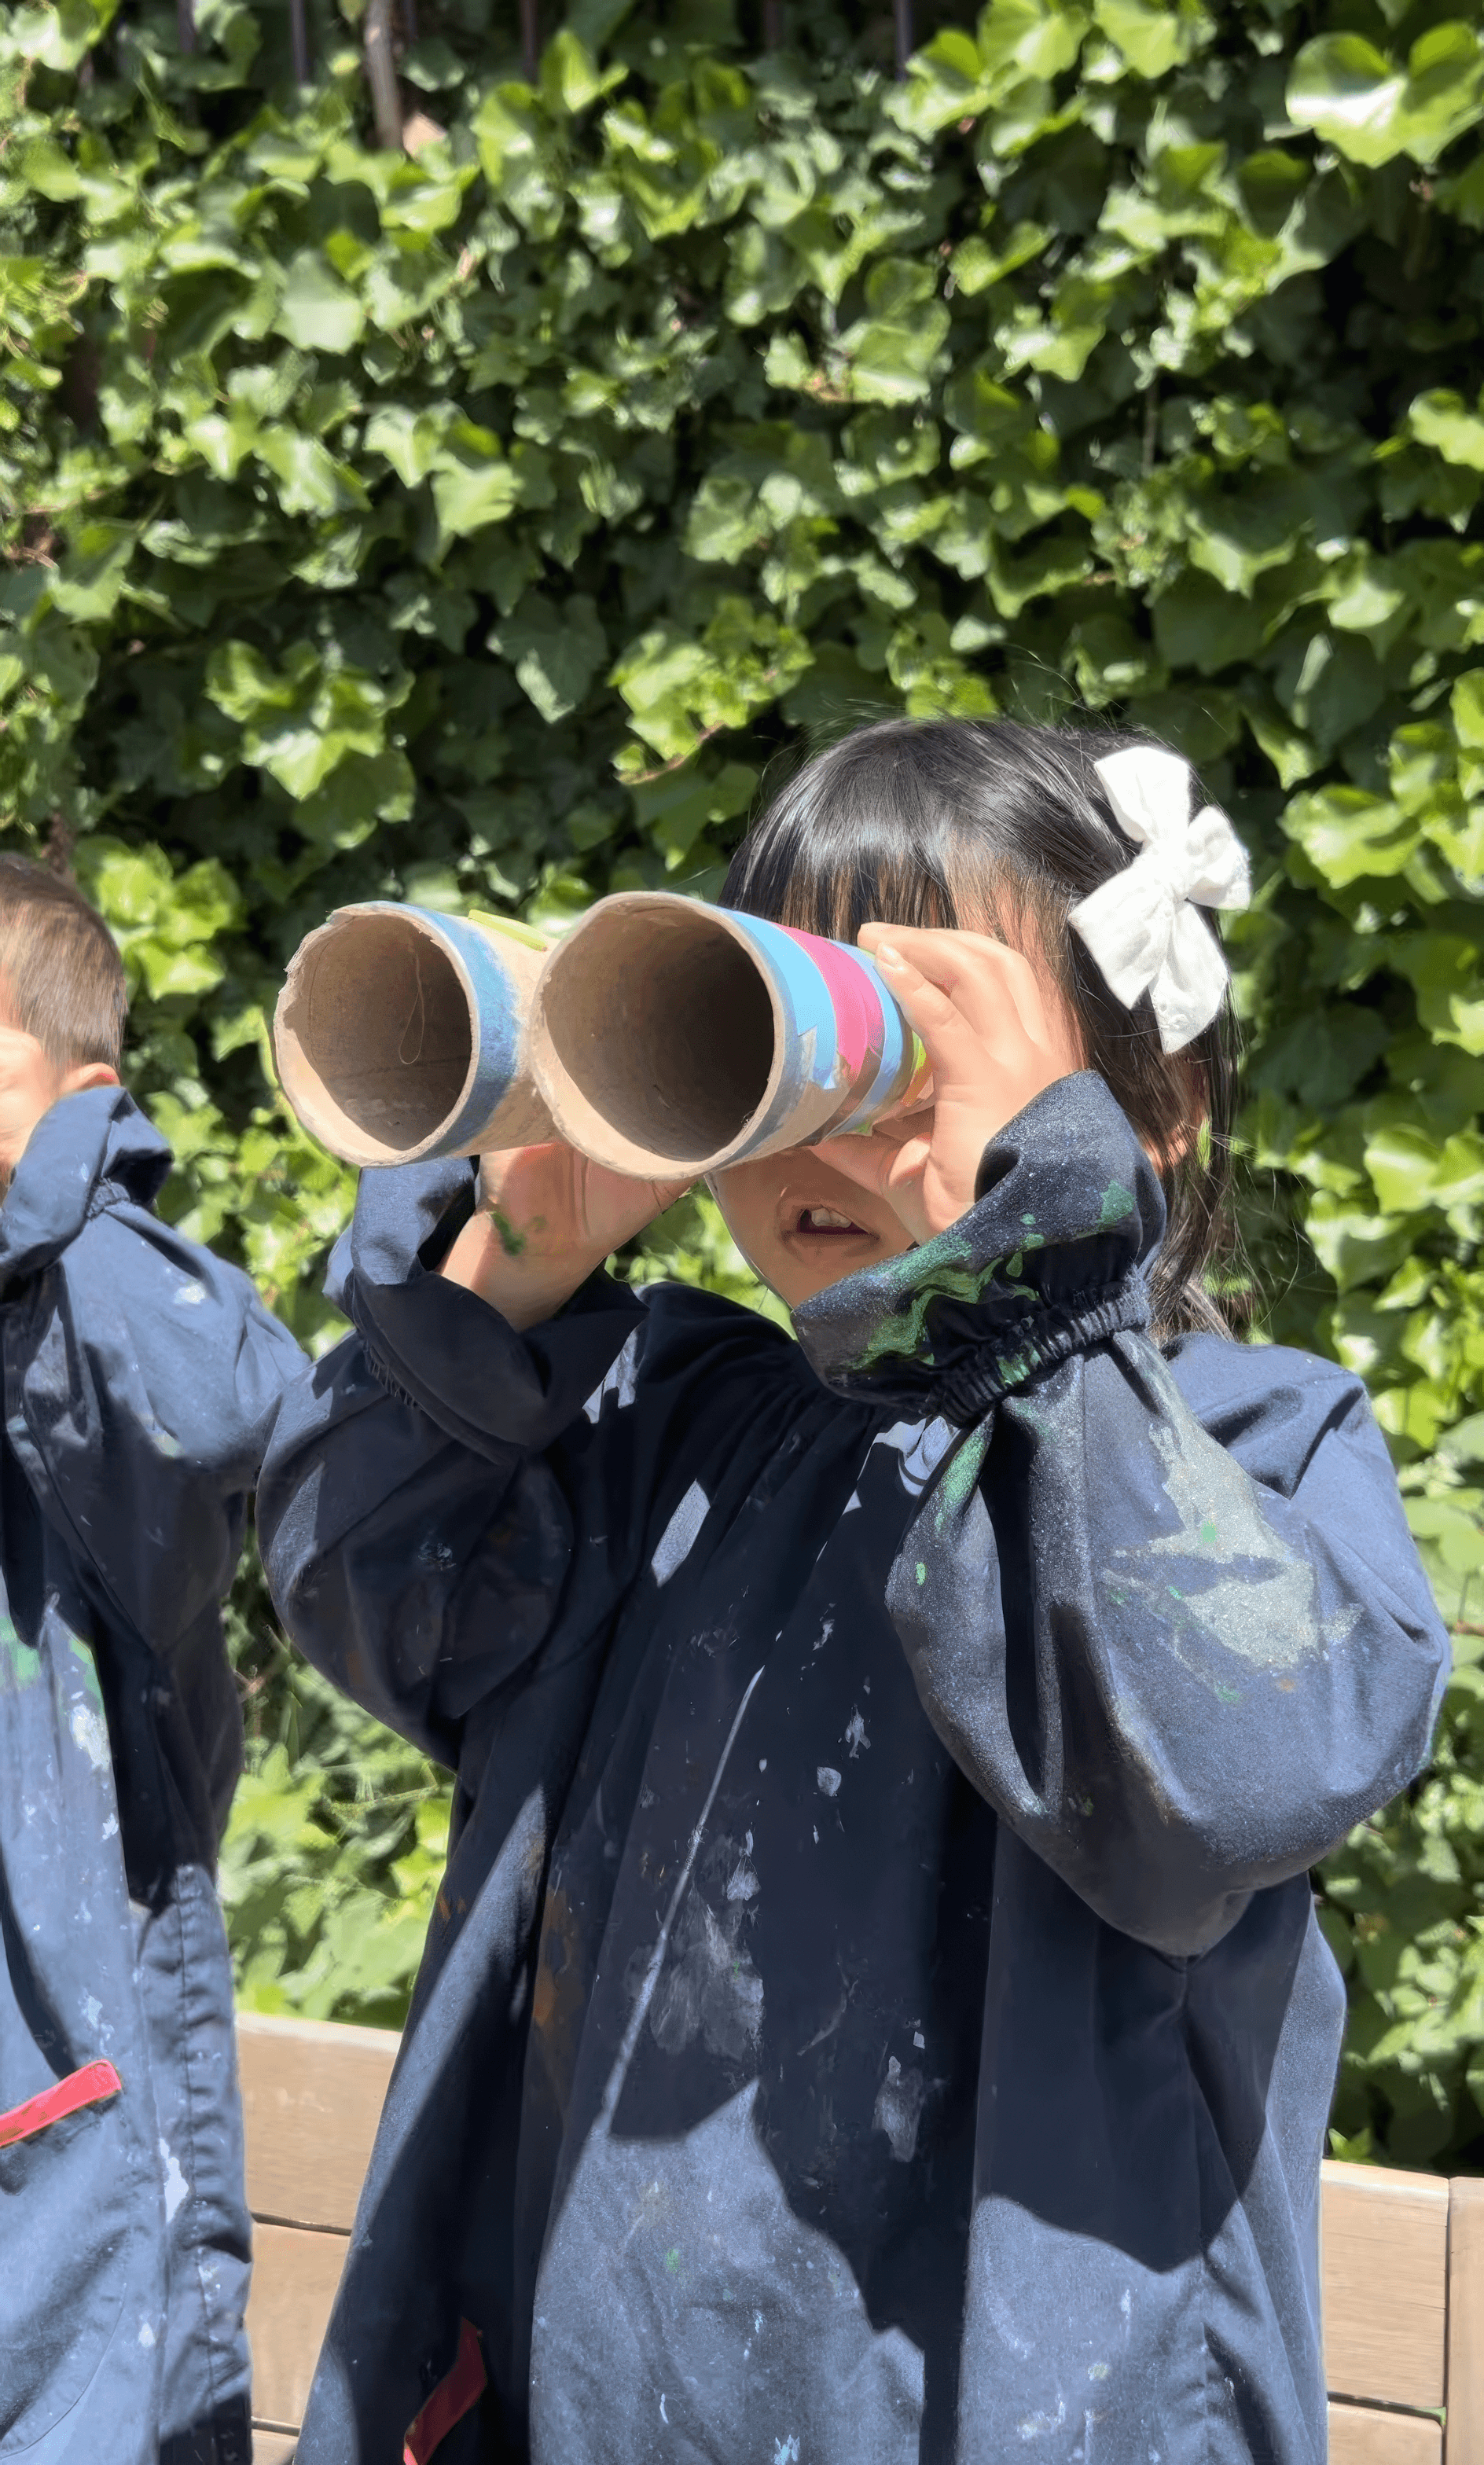
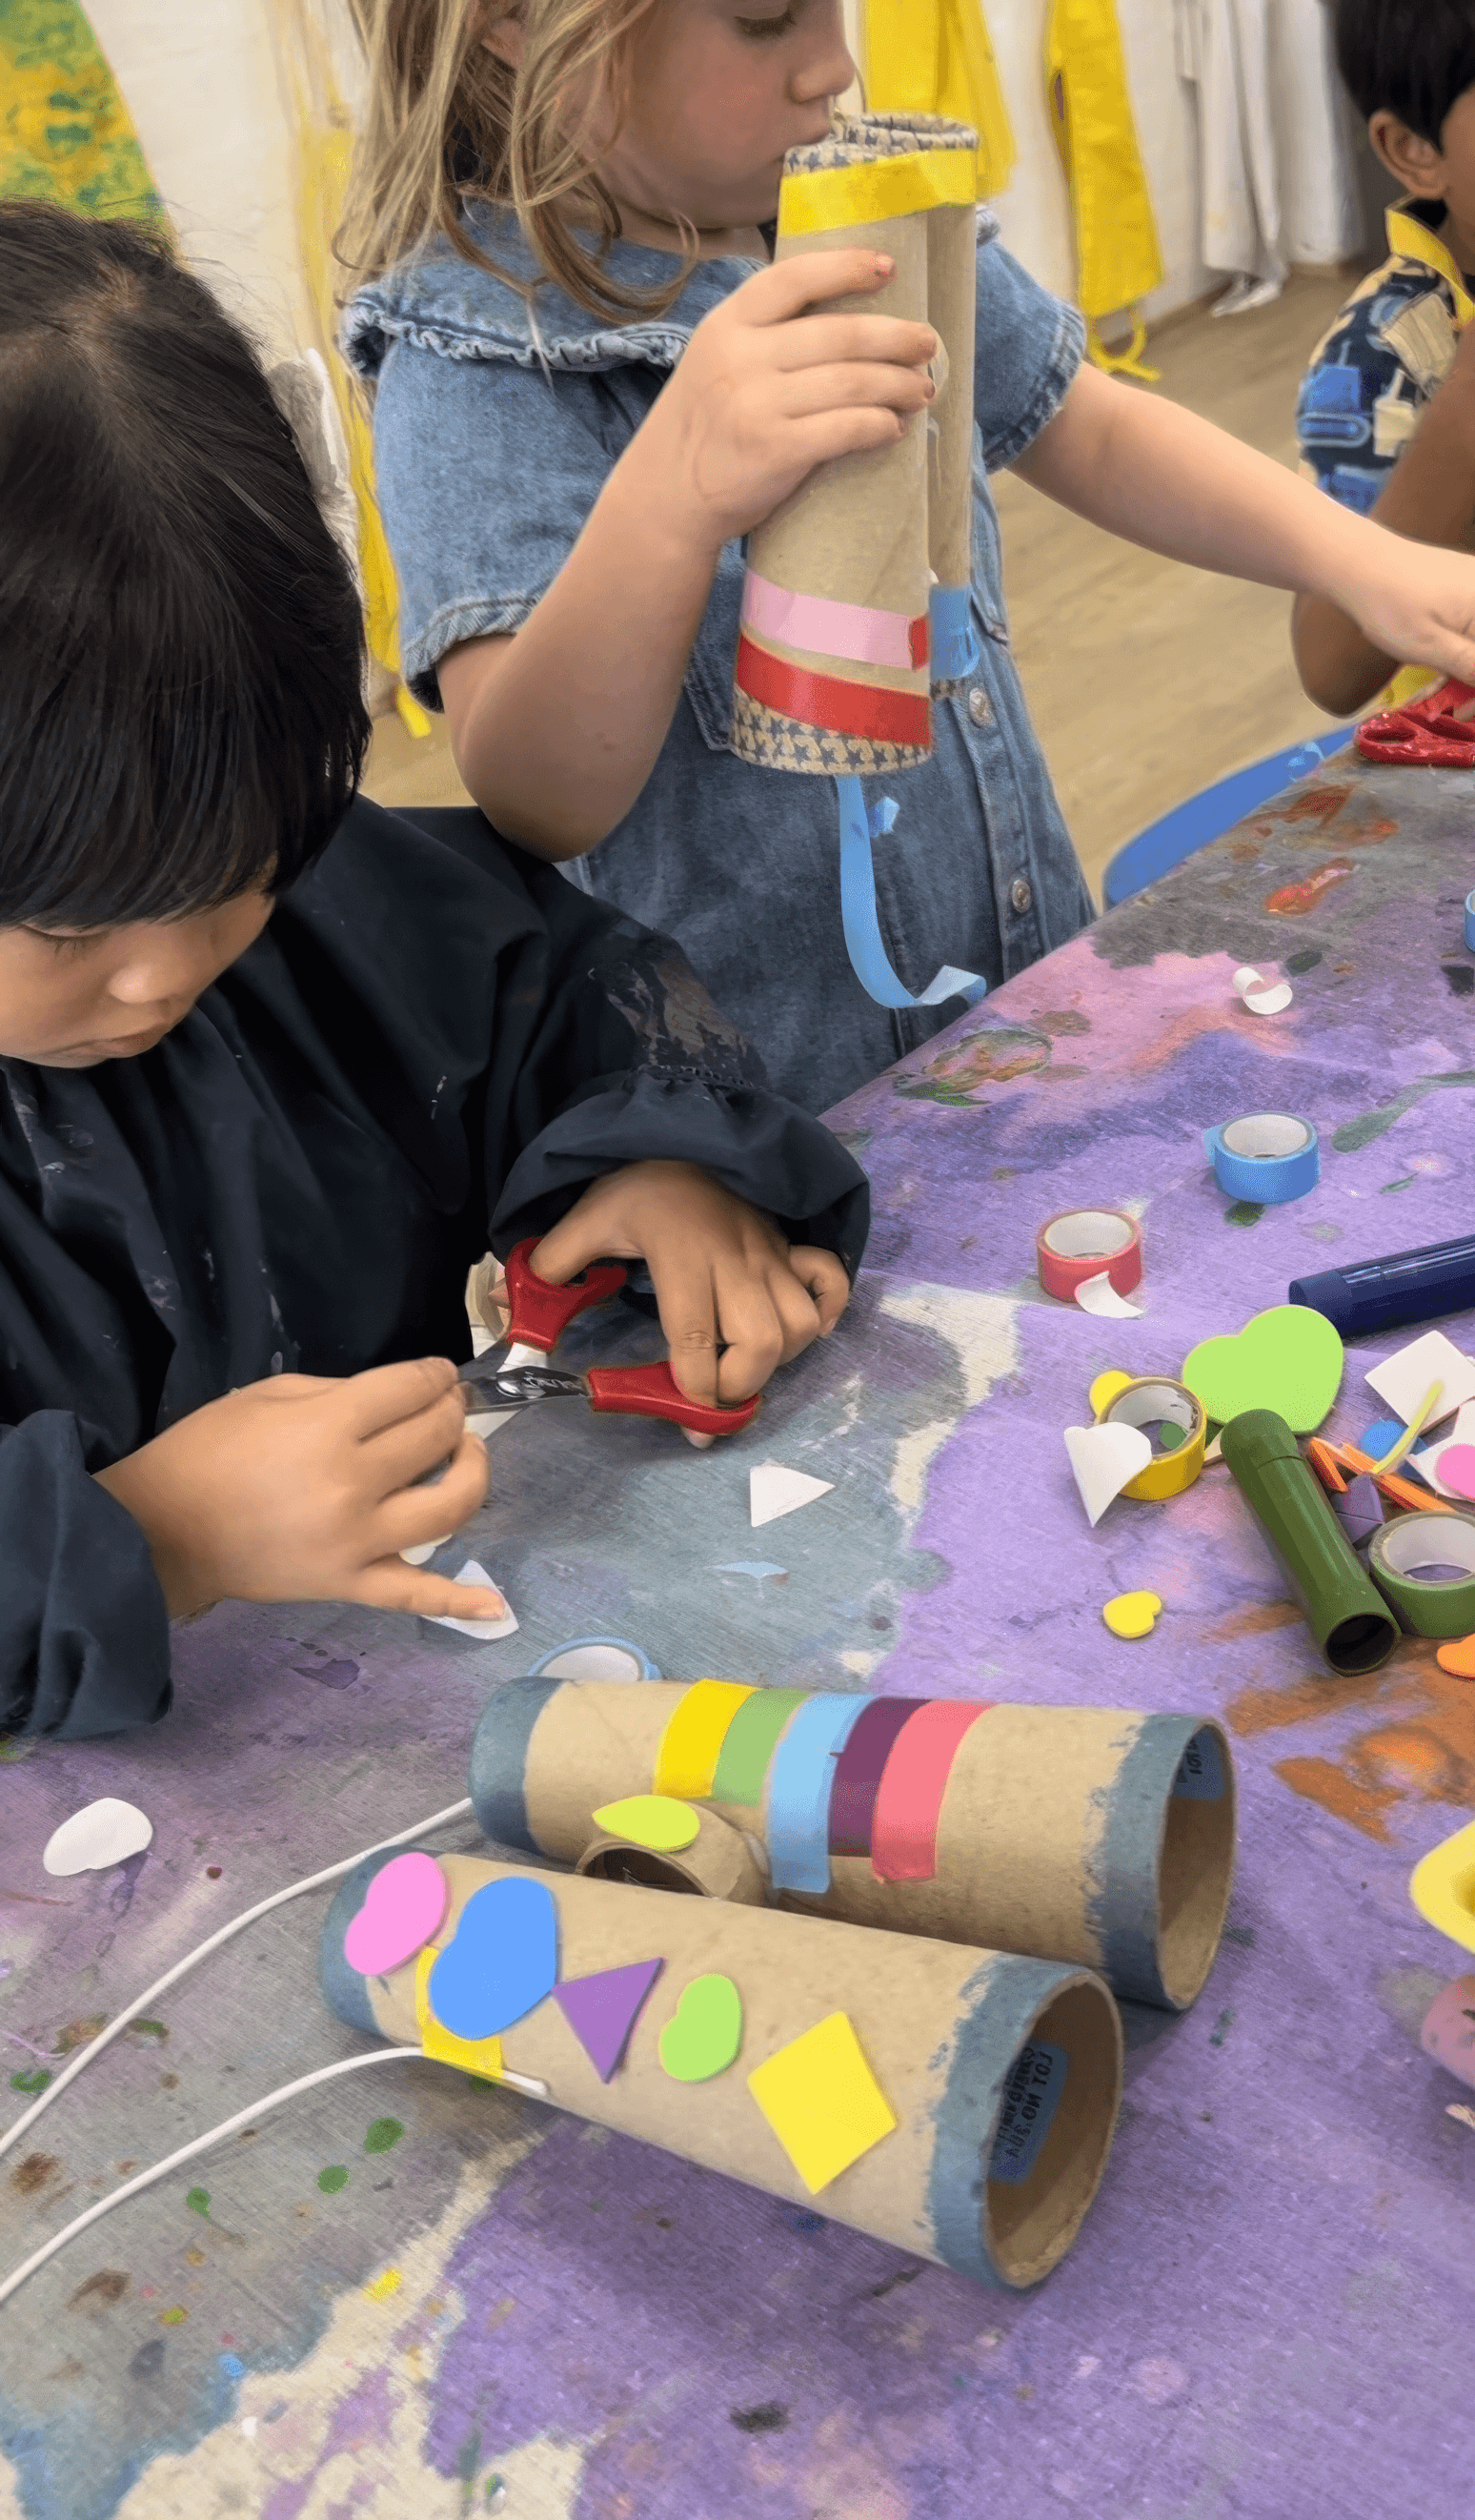
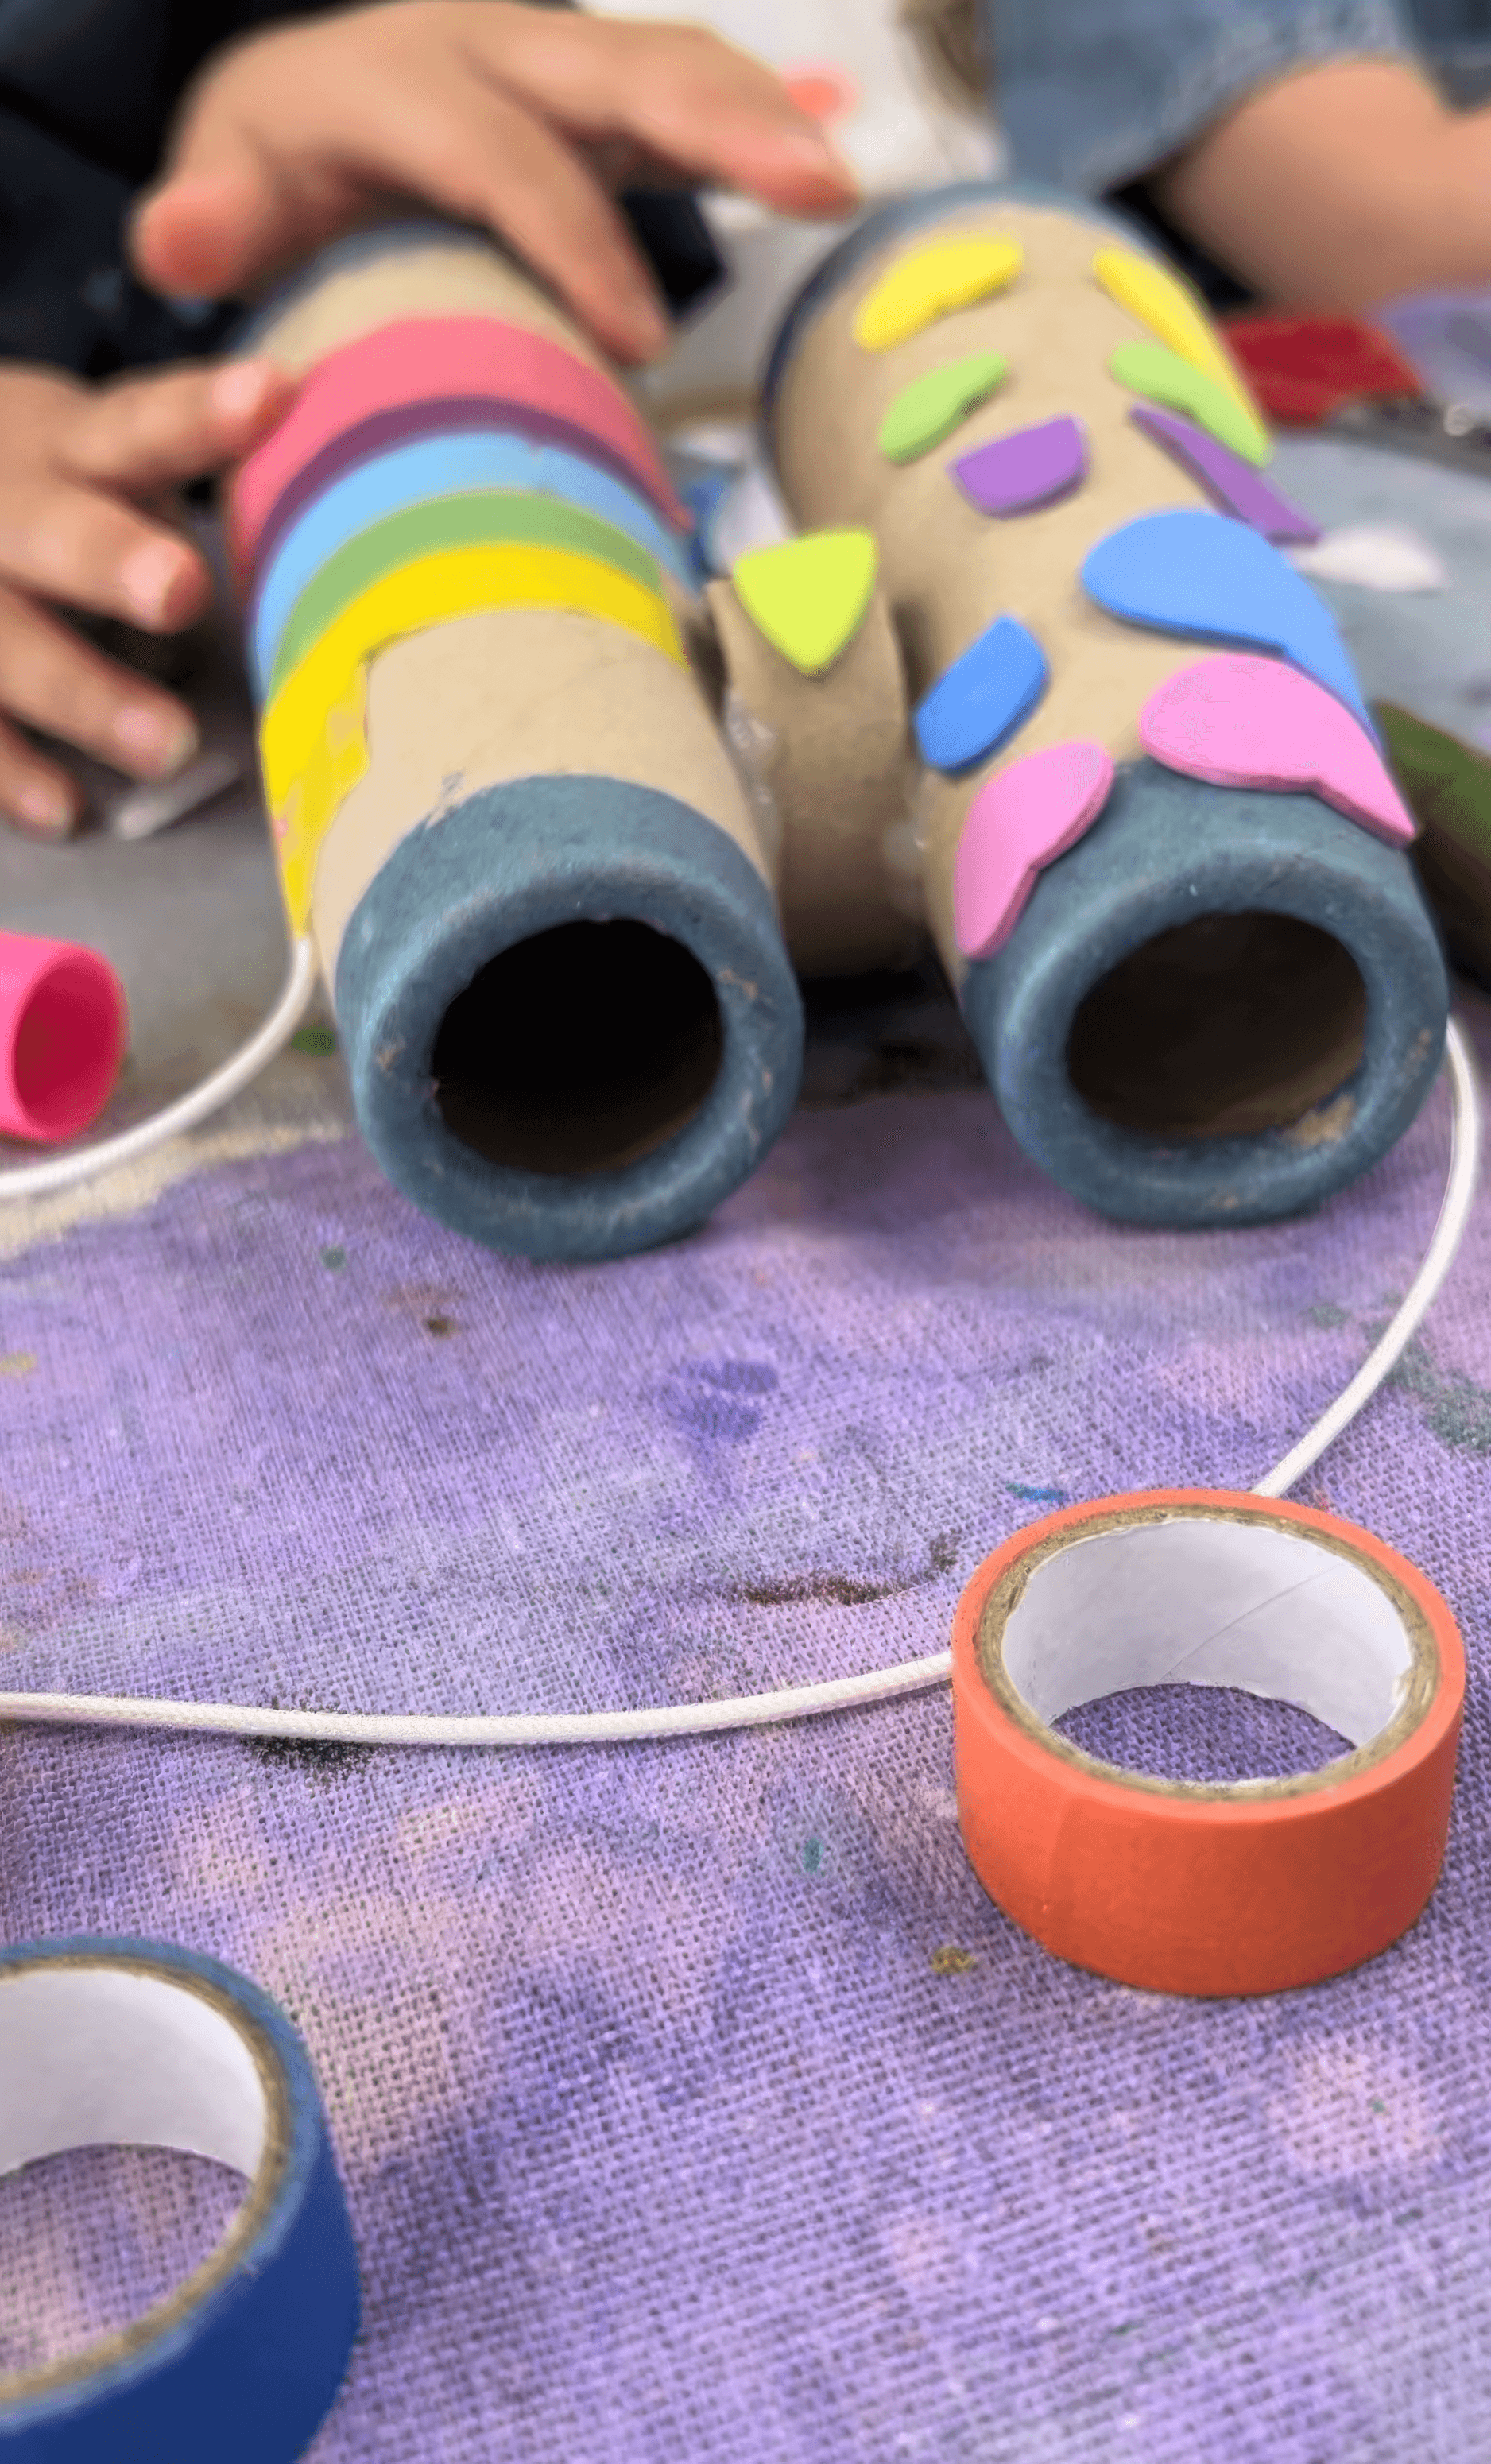
Gather cardboard tubes. I love using yarn cones from Reverse Art Truck style reuse places because they are sturdy and tapered, but regular paper towel rolls cut in half work well too. Hold two tubes side by side and have a look. Sometimes they sit a little too close together for comfortable eyes. A small spacer in the middle helps. You can hot glue a short strip of scrap wood or thick cardboard between them so they angle just right and feel like real binoculars in little hands. Hot glue is adult work only.
Lay out fast colour. Paint sticks are perfect here because they glide on smoothly, they are vivid, and they dry almost instantly, which means kids can decorate and then play right away without waiting. Add oil pastels, foam stickers, sequins, cord, yarn, string for straps, anything that sparks a story. Set scissors and tape or more hot glue within adult reach if you are adding a strap so the binoculars can hang around a neck.
The Making
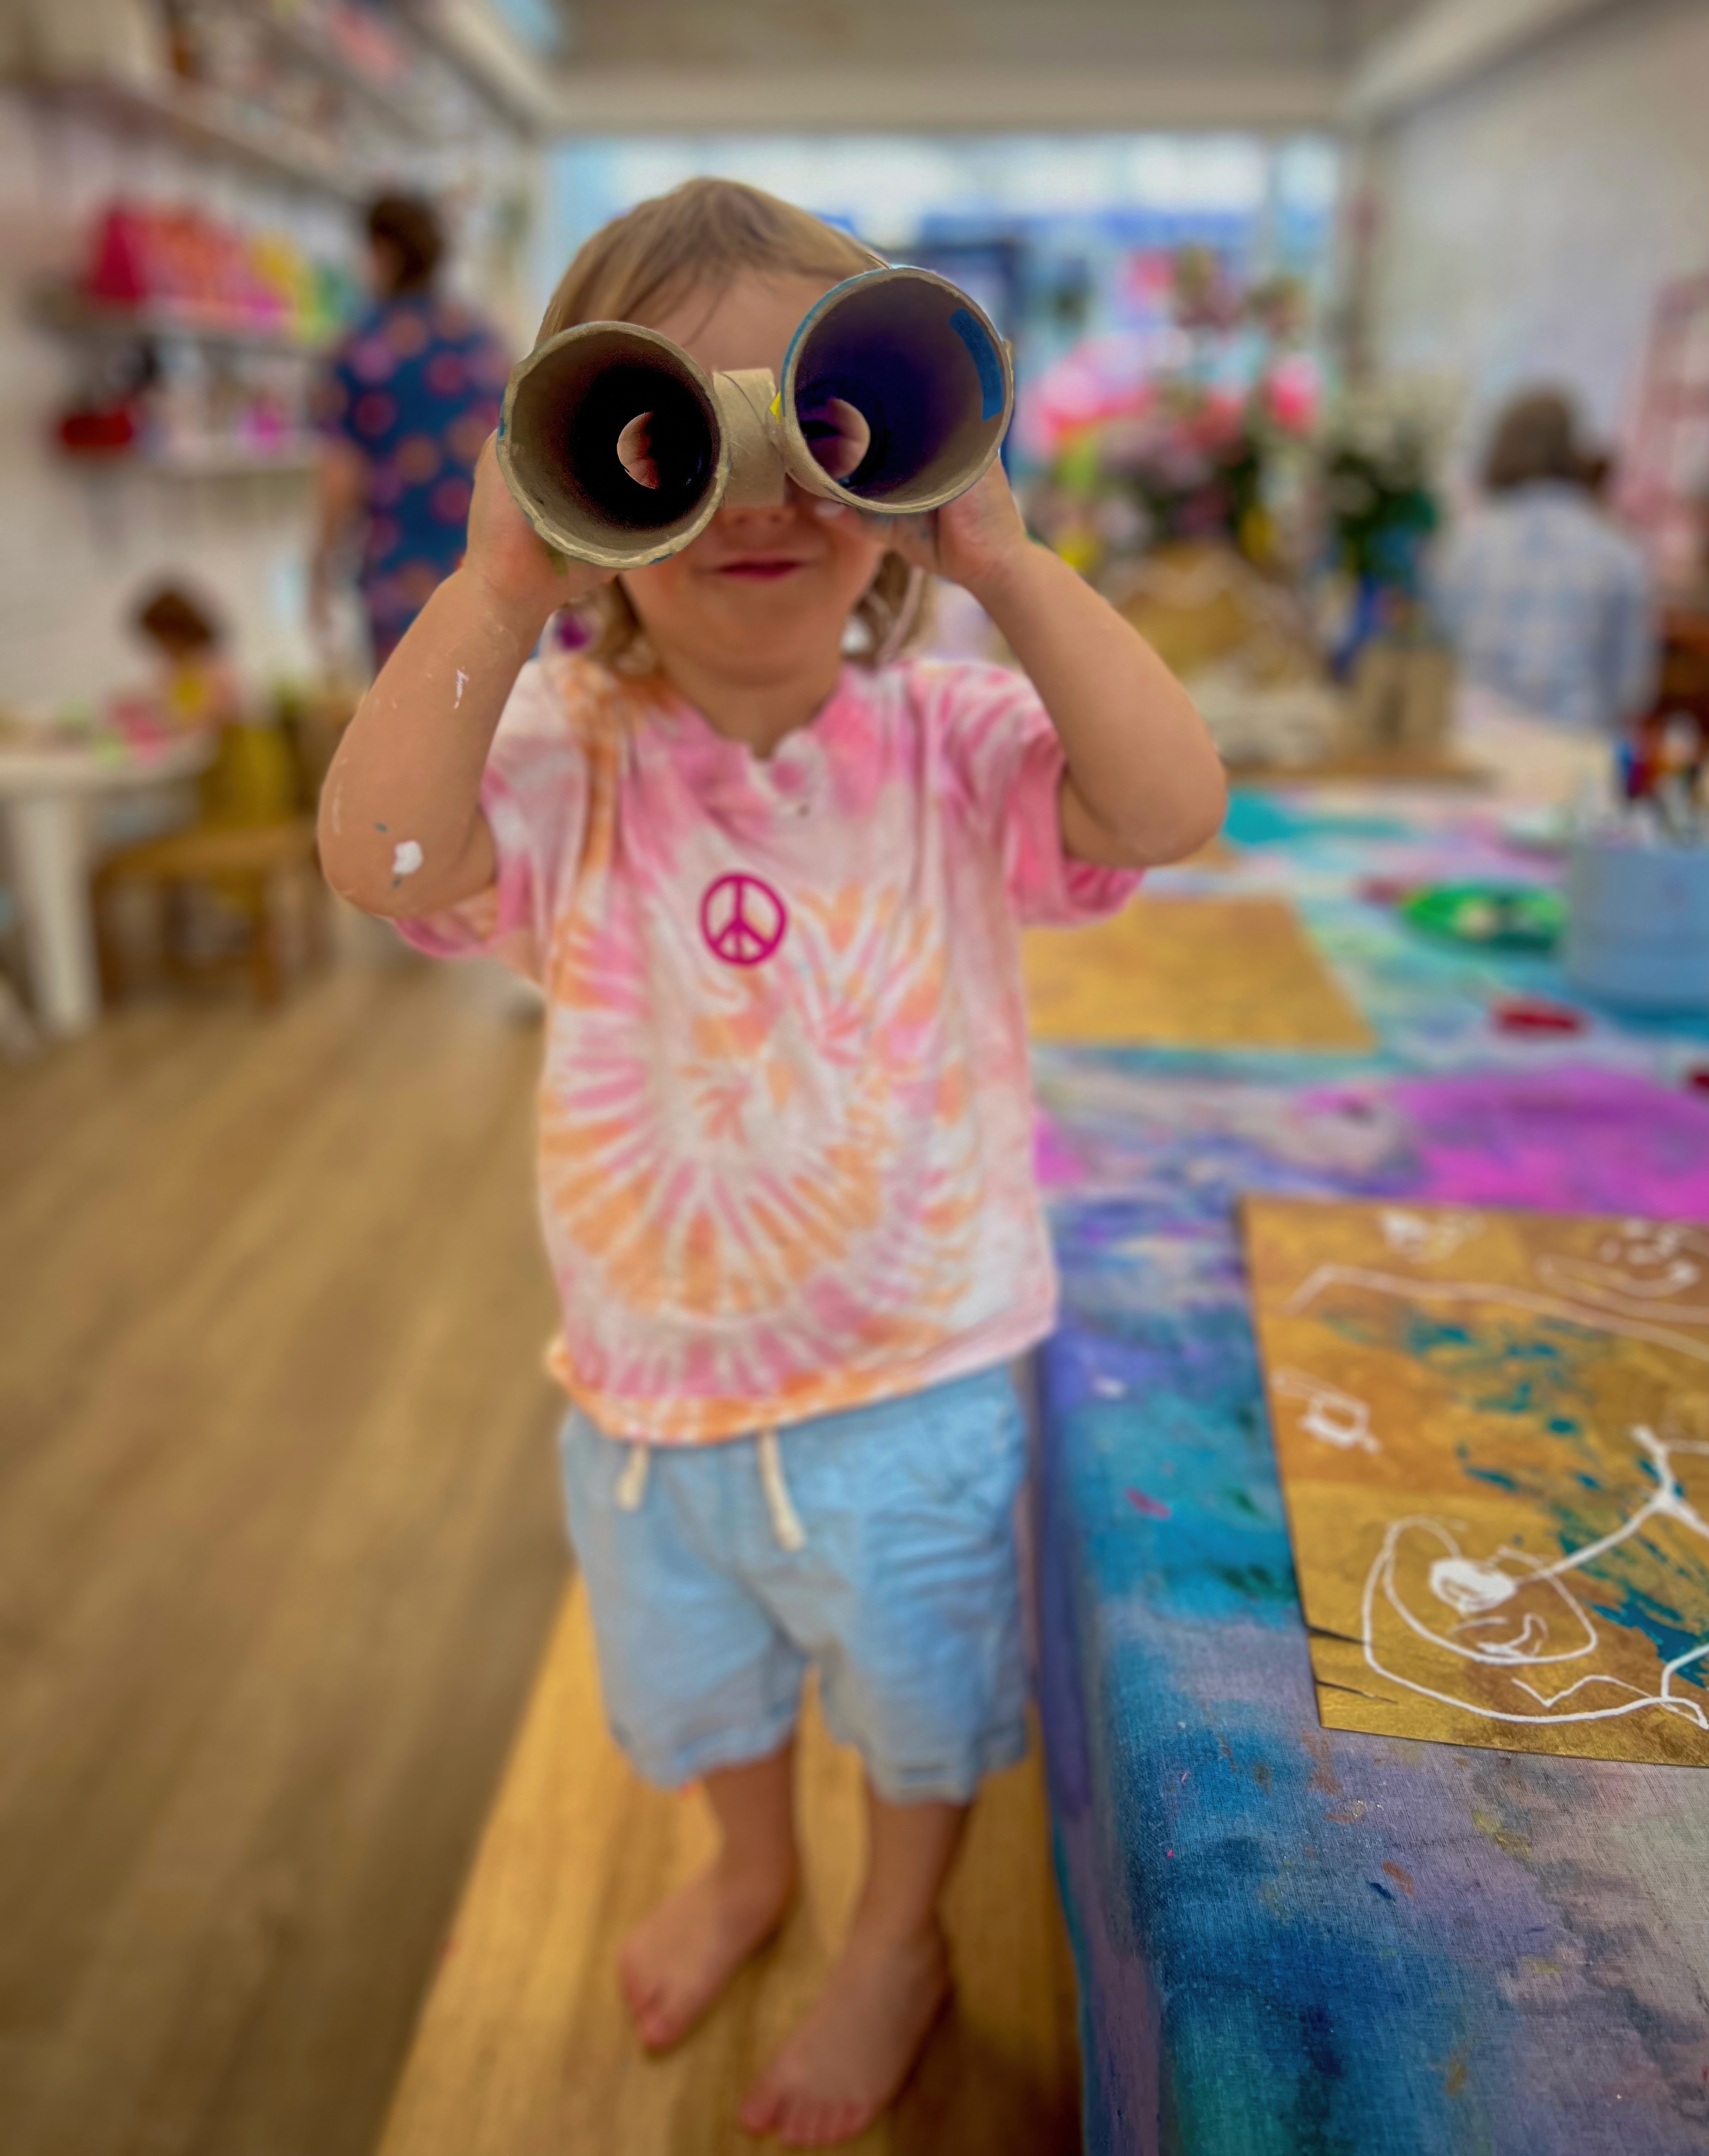
Invite each artist to design their own field kit, and they'll instinctively cover, wrap, stick, draw, and build in layers. We’ve learned that if you offer the strap too early, adults tend to try to engineer while kids are still imagining. Plus if you wait until the decoration feels finished (according to the artist!), kids are clearer about where they want the strap to sit and why.
As soon as a pair is wearable, give them room to use them. Movement and role play are not an add on here, they're definitely part of the making. Watching through self made binoculars changes how kids move through the rest of the space!
Variations
Tape a layer of coloured cellophane over one end for a tinted world view
Make a shared set of binoculars for a classroom explorer station
Add a small notebook and pencil to create a field journal kit

Materials
Cardboard yarn cones or paper towel tubes
Short scrap of wood or thick cardboard as a spacer
Paint sticks
Oil pastels and foam stickers
Cord, yarn, string for straps
Scissors
Tape or hot glue for adult assembly
Optional cellophane squares and rubber bands
Back to Top
Explorer Binoculars
Make it, wear it, start exploring!
Bookmark
Sculpture
The Set Up
Gather cardboard tubes. I love using yarn cones from Reverse Art Truck style reuse places because they are sturdy and tapered, but regular paper towel rolls cut in half work well too. Hold two tubes side by side and have a look. Sometimes they sit a little too close together for comfortable eyes. A small spacer in the middle helps. You can hot glue a short strip of scrap wood or thick cardboard between them so they angle just right and feel like real binoculars in little hands. Hot glue is adult work only.
Lay out fast colour. Paint sticks are perfect here because they glide on smoothly, they are vivid, and they dry almost instantly, which means kids can decorate and then play right away without waiting. Add oil pastels, foam stickers, sequins, cord, yarn, string for straps, anything that sparks a story. Set scissors and tape or more hot glue within adult reach if you are adding a strap so the binoculars can hang around a neck.
The Making
Invite each artist to design their own field kit, and they'll instinctively cover, wrap, stick, draw, and build in layers. We’ve learned that if you offer the strap too early, adults tend to try to engineer while kids are still imagining. Plus if you wait until the decoration feels finished (according to the artist!), kids are clearer about where they want the strap to sit and why.
As soon as a pair is wearable, give them room to use them. Movement and role play are not an add on here, they're definitely part of the making. Watching through self made binoculars changes how kids move through the rest of the space!
Variations
Tape a layer of coloured cellophane over one end for a tinted world view
Make a shared set of binoculars for a classroom explorer station
Add a small notebook and pencil to create a field journal kit
Materials
Cardboard yarn cones or paper towel tubes
Short scrap of wood or thick cardboard as a spacer
Paint sticks
Oil pastels and foam stickers
Cord, yarn, string for straps
Scissors
Tape or hot glue for adult assembly
Optional cellophane squares and rubber bands
Back to Top
Adventure Lab
Stones and scoops and hidden treasure
Bookmark
Sensory Play
The Set Up
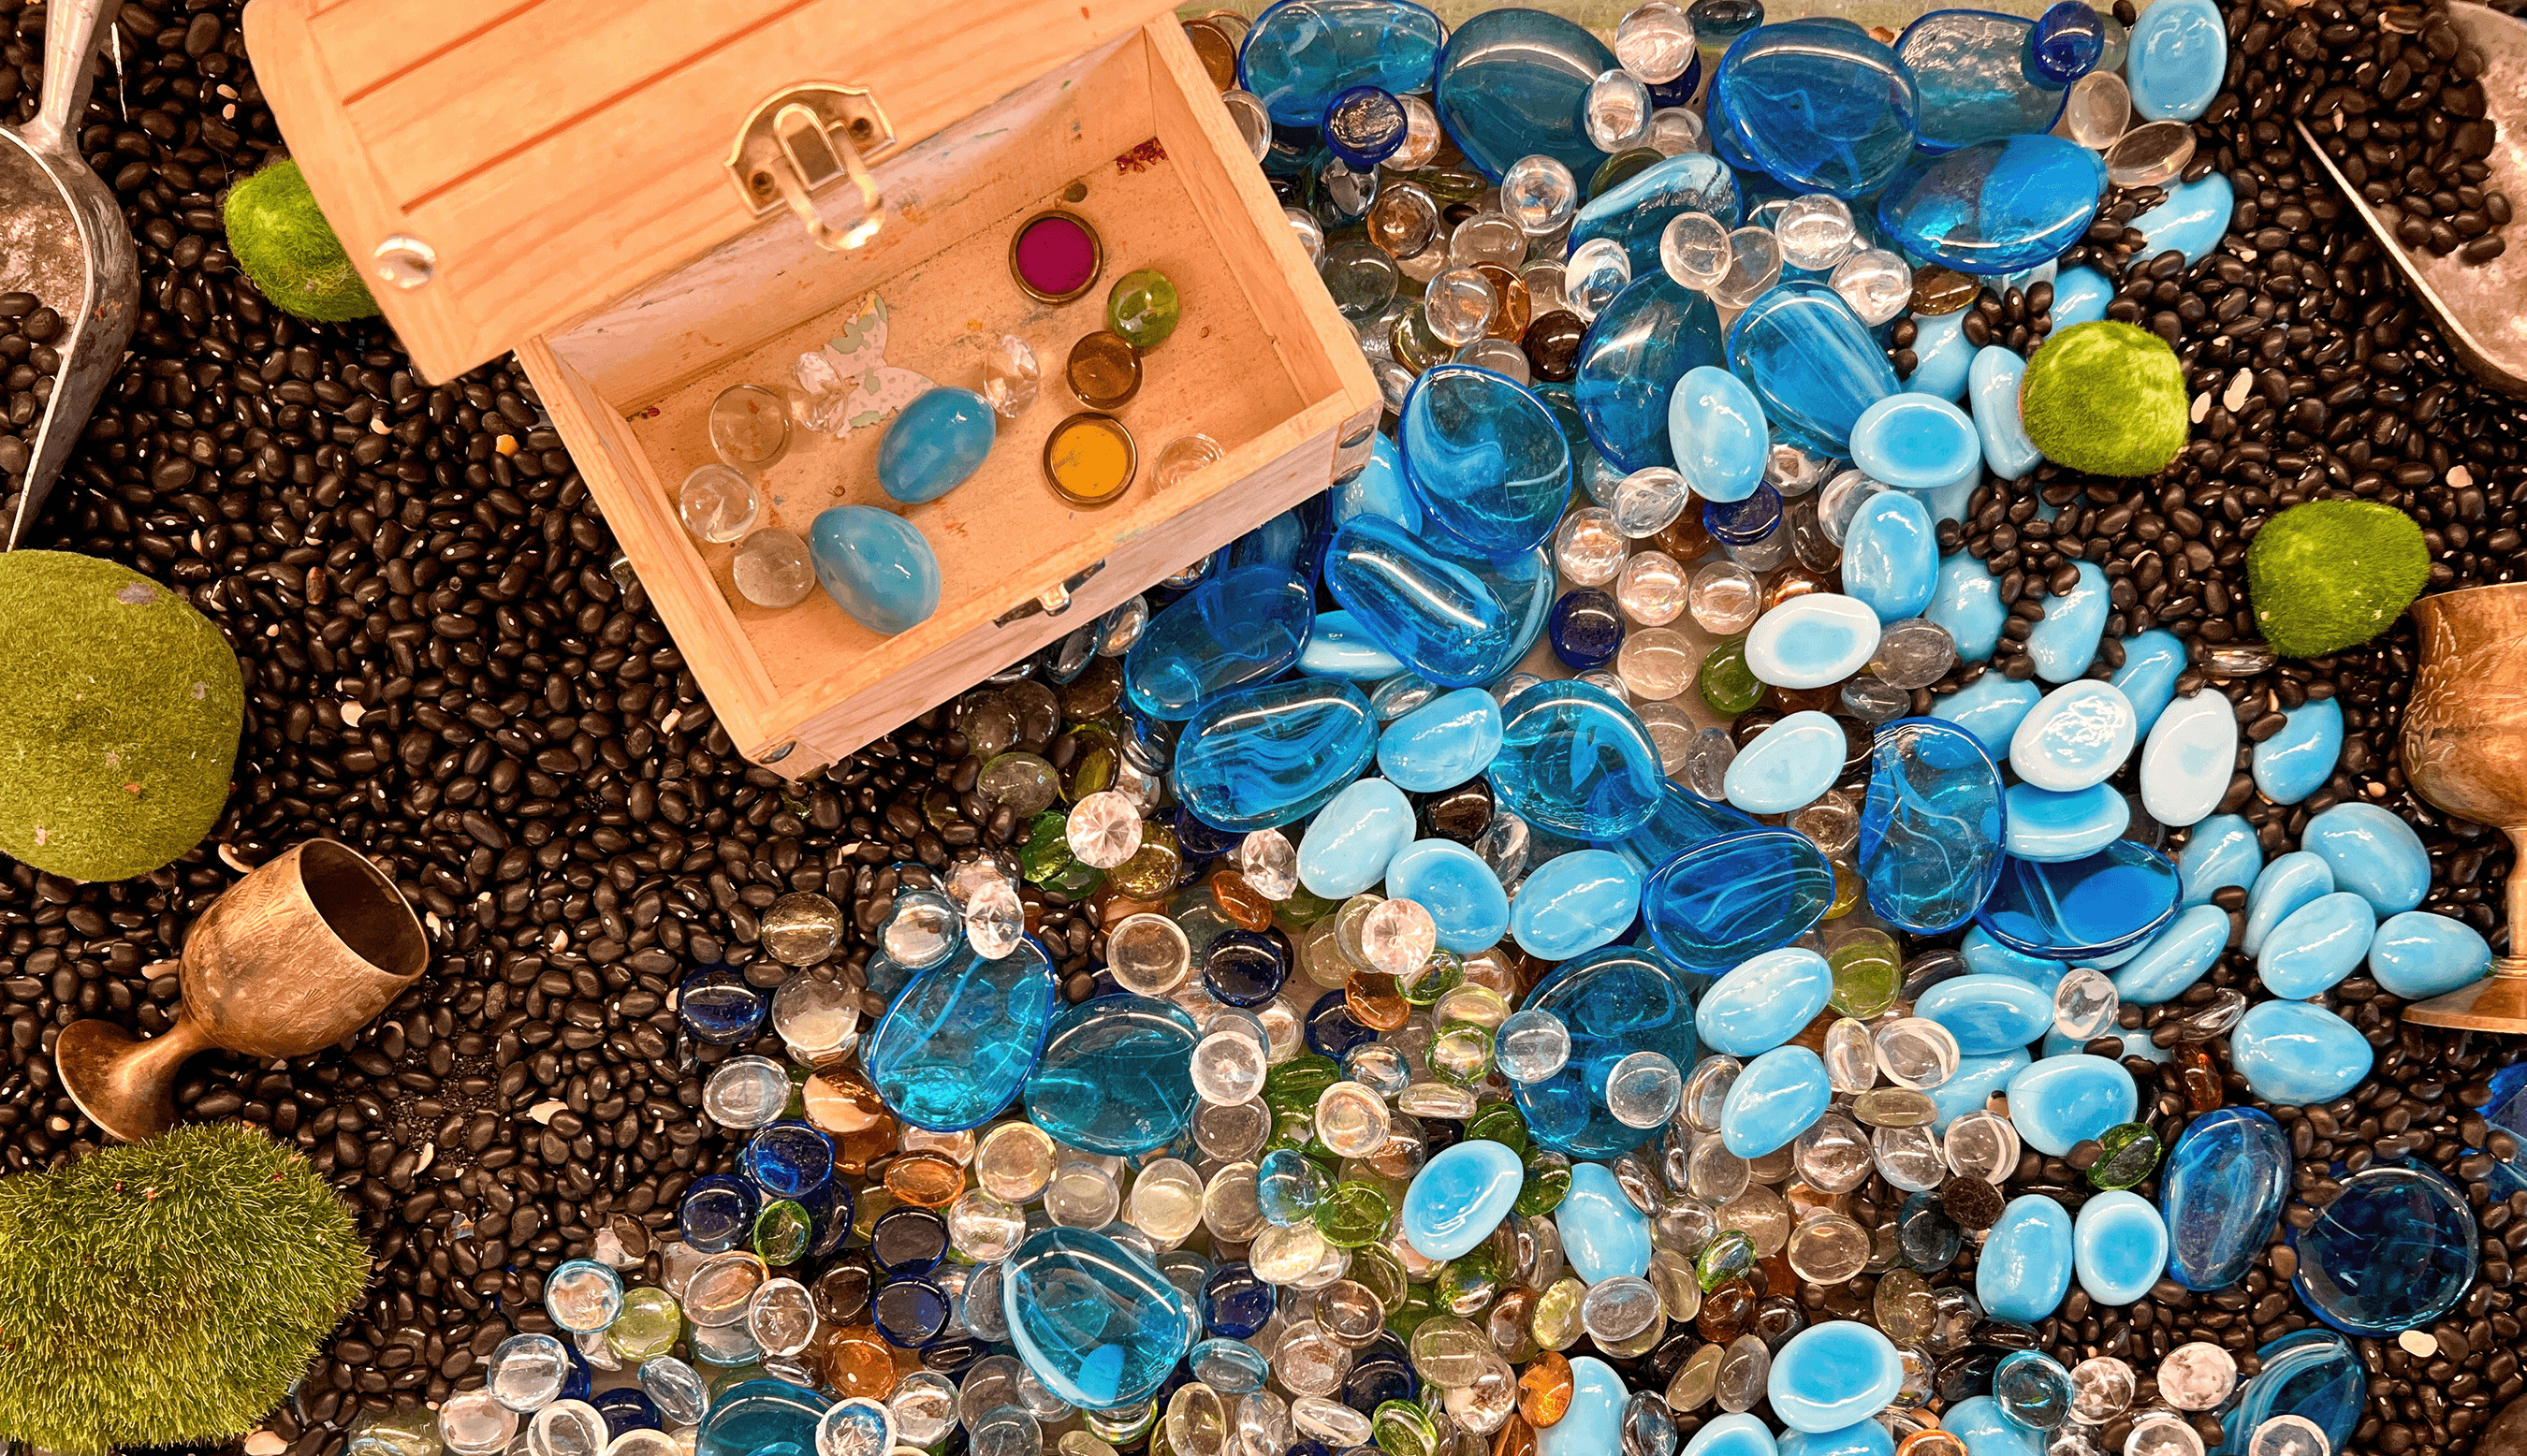
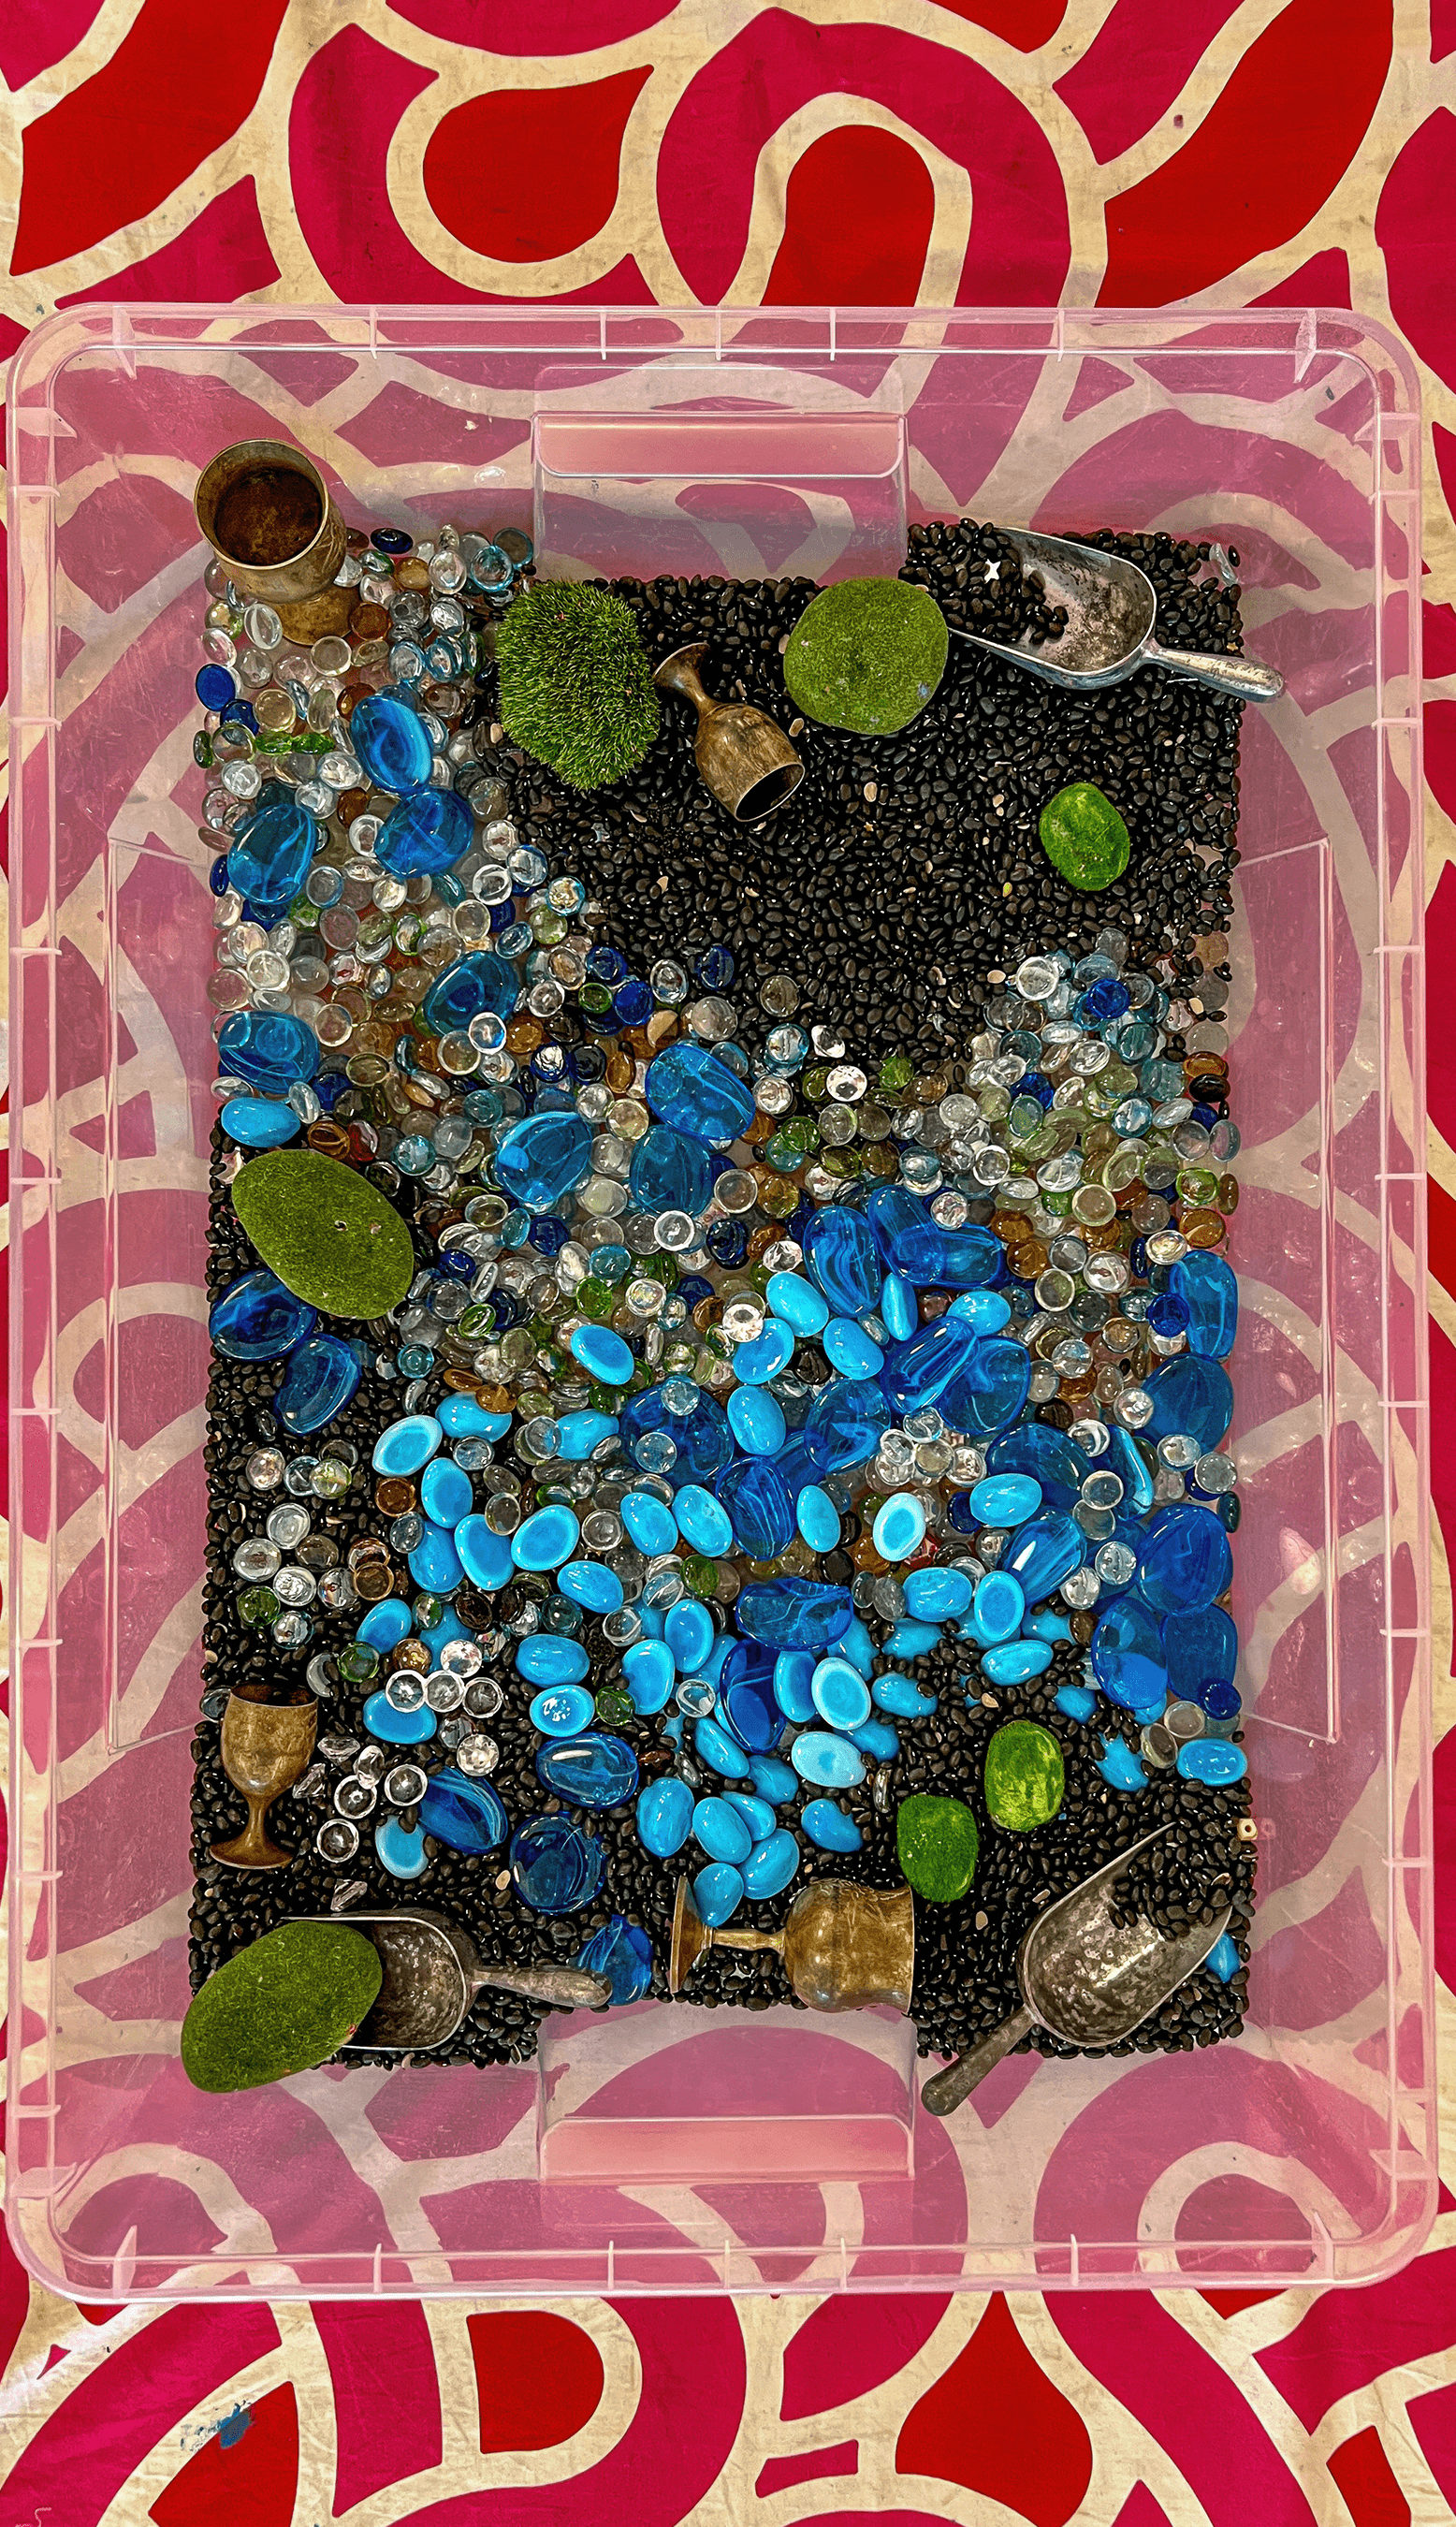
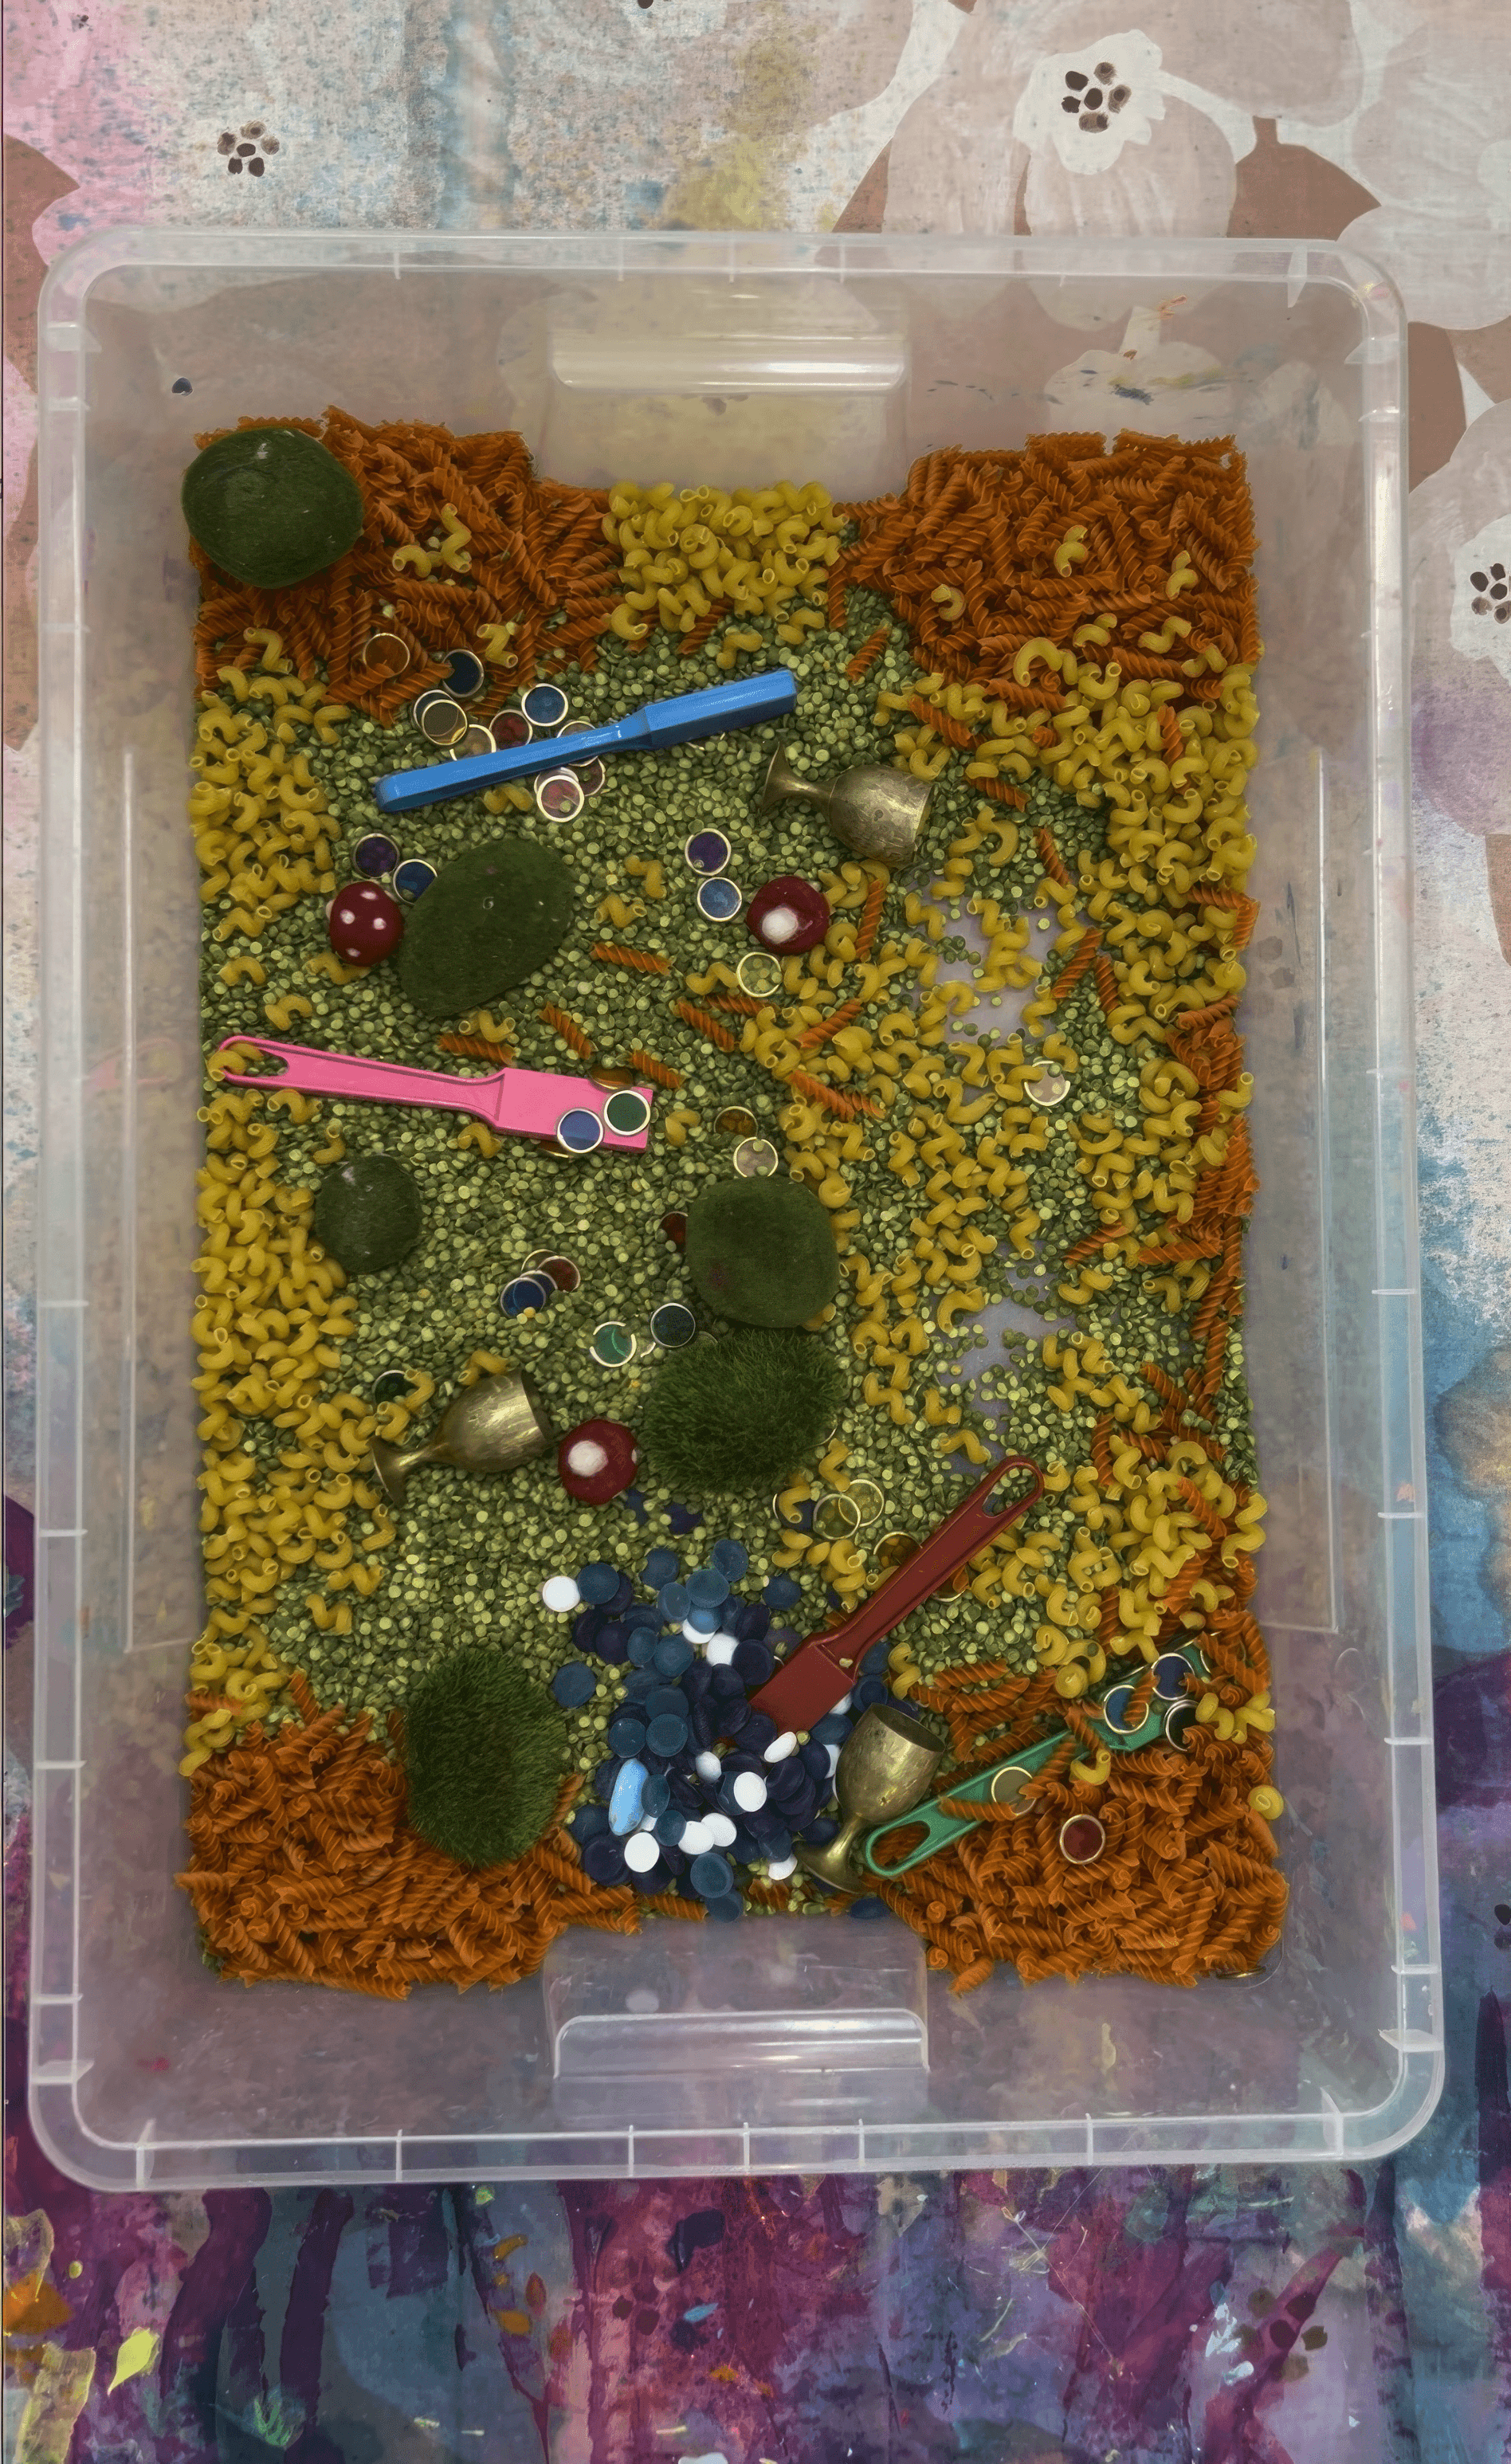
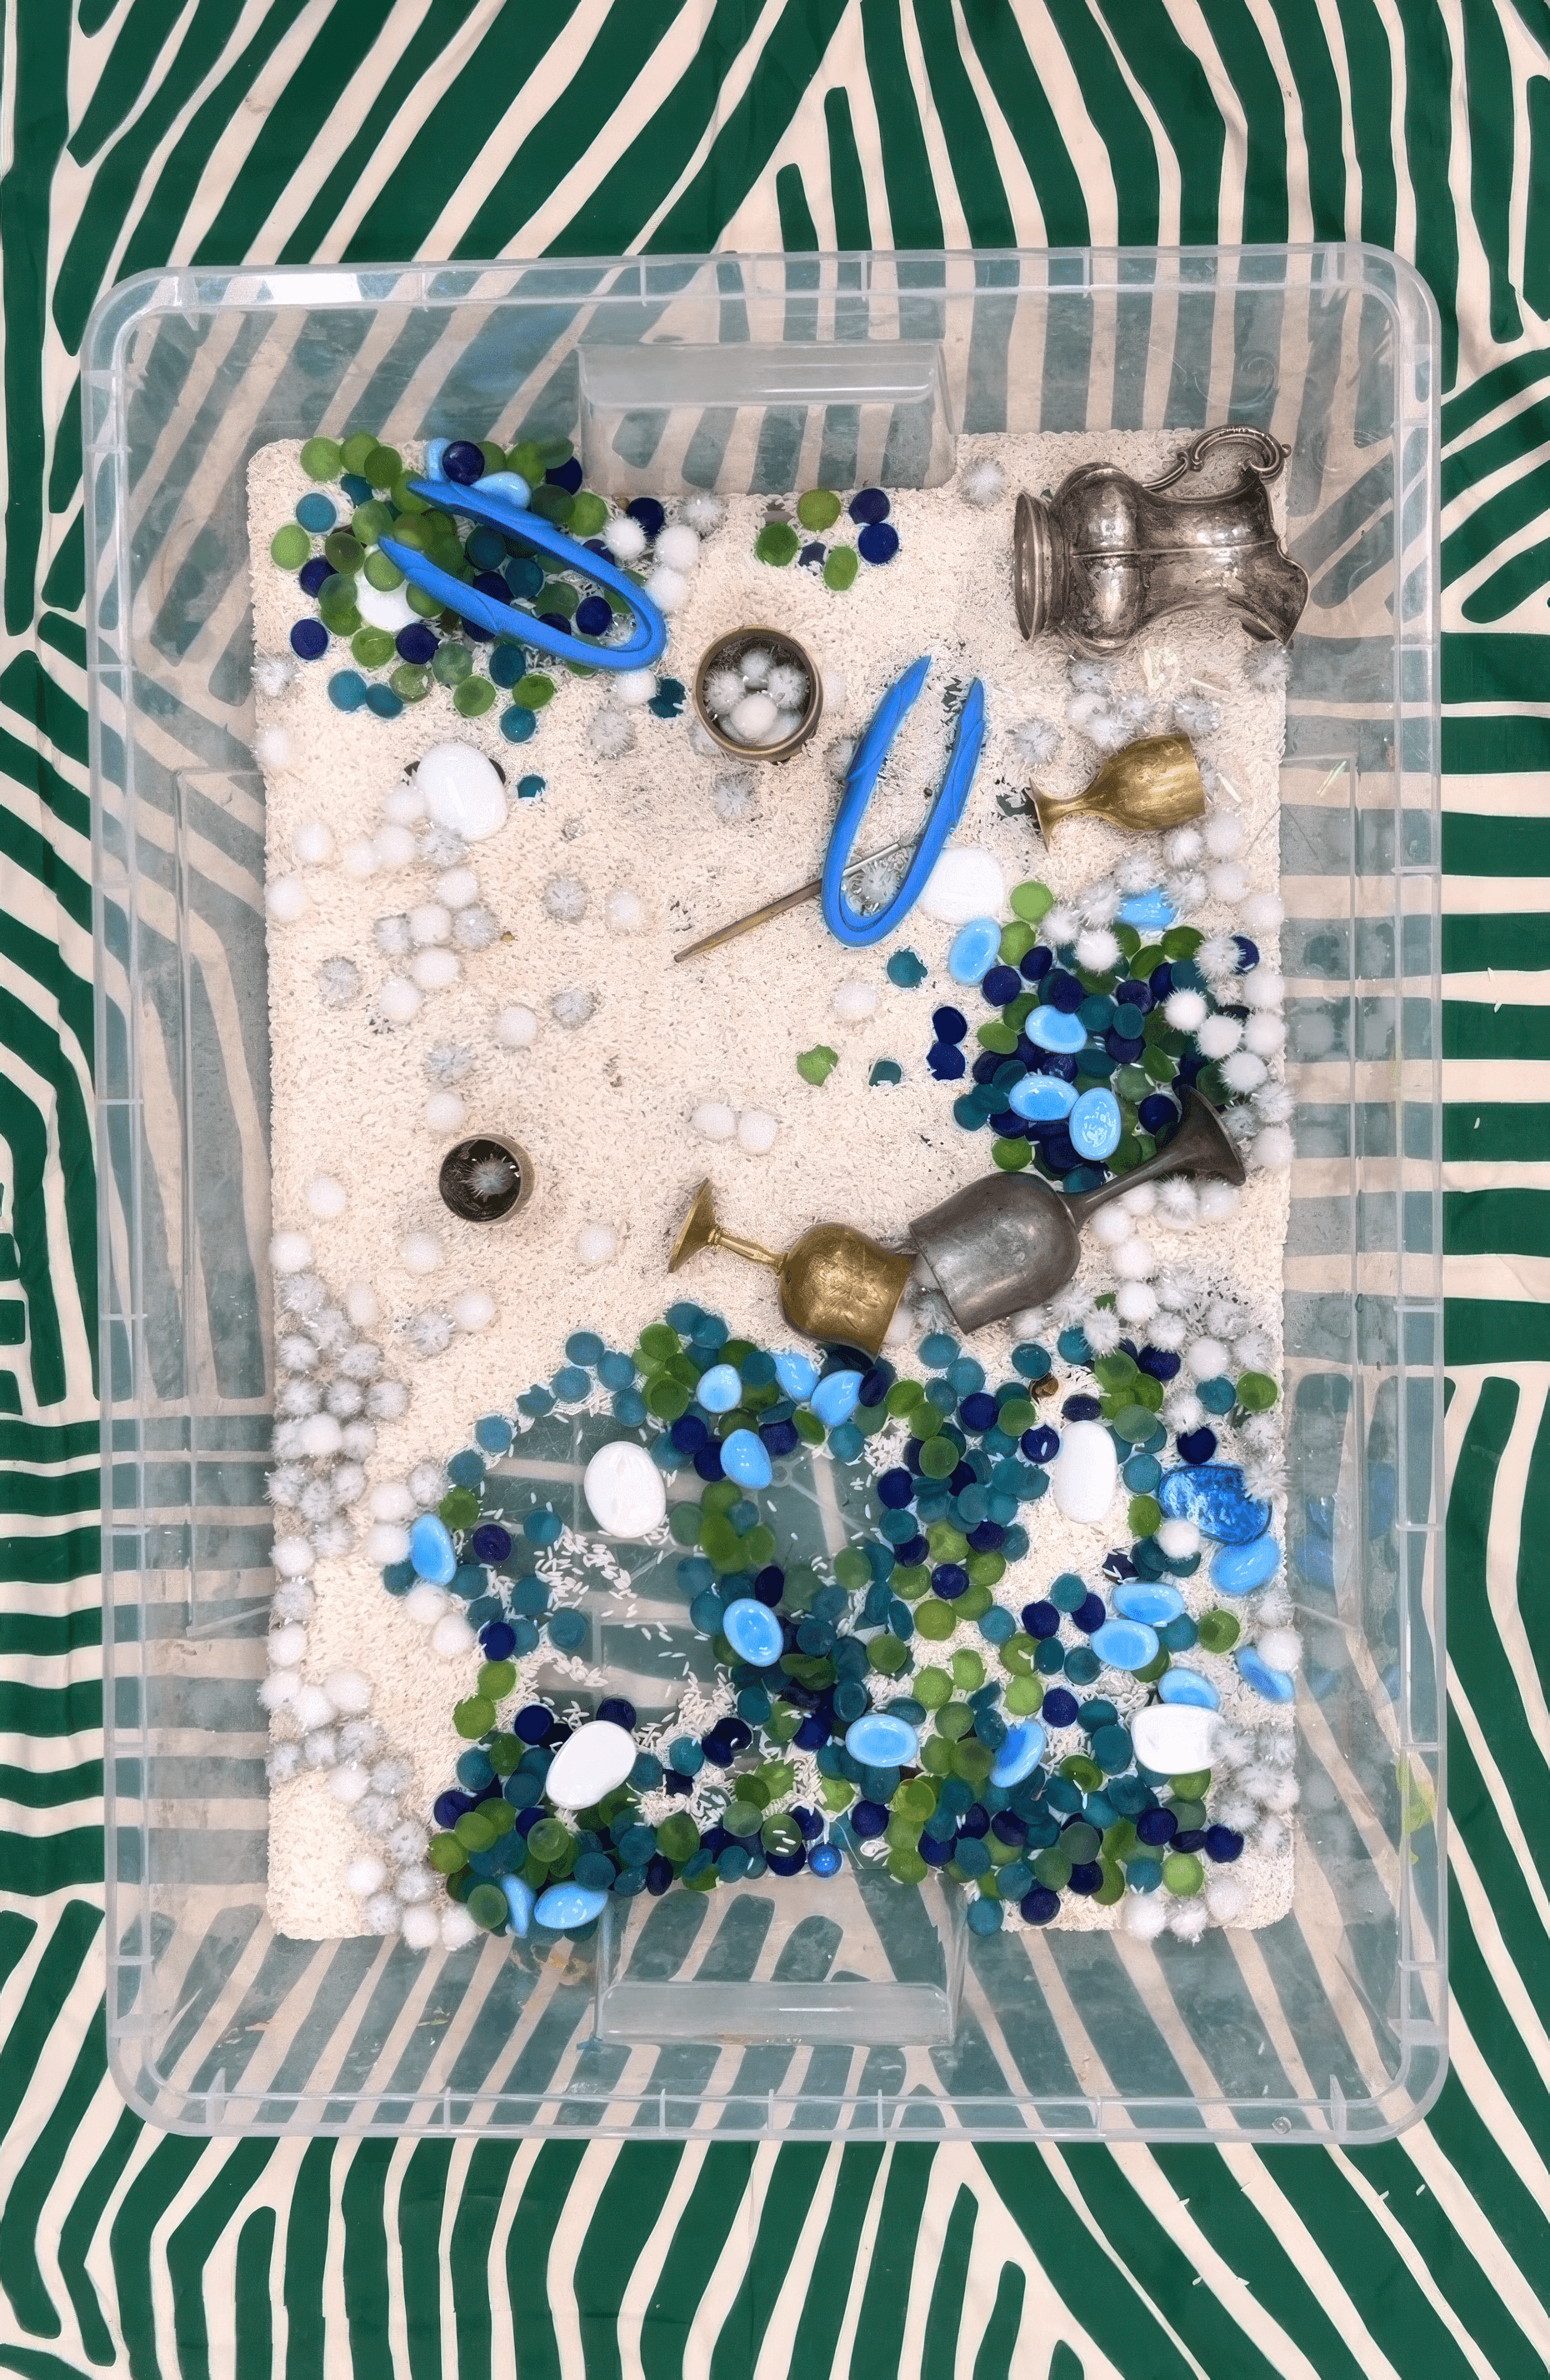
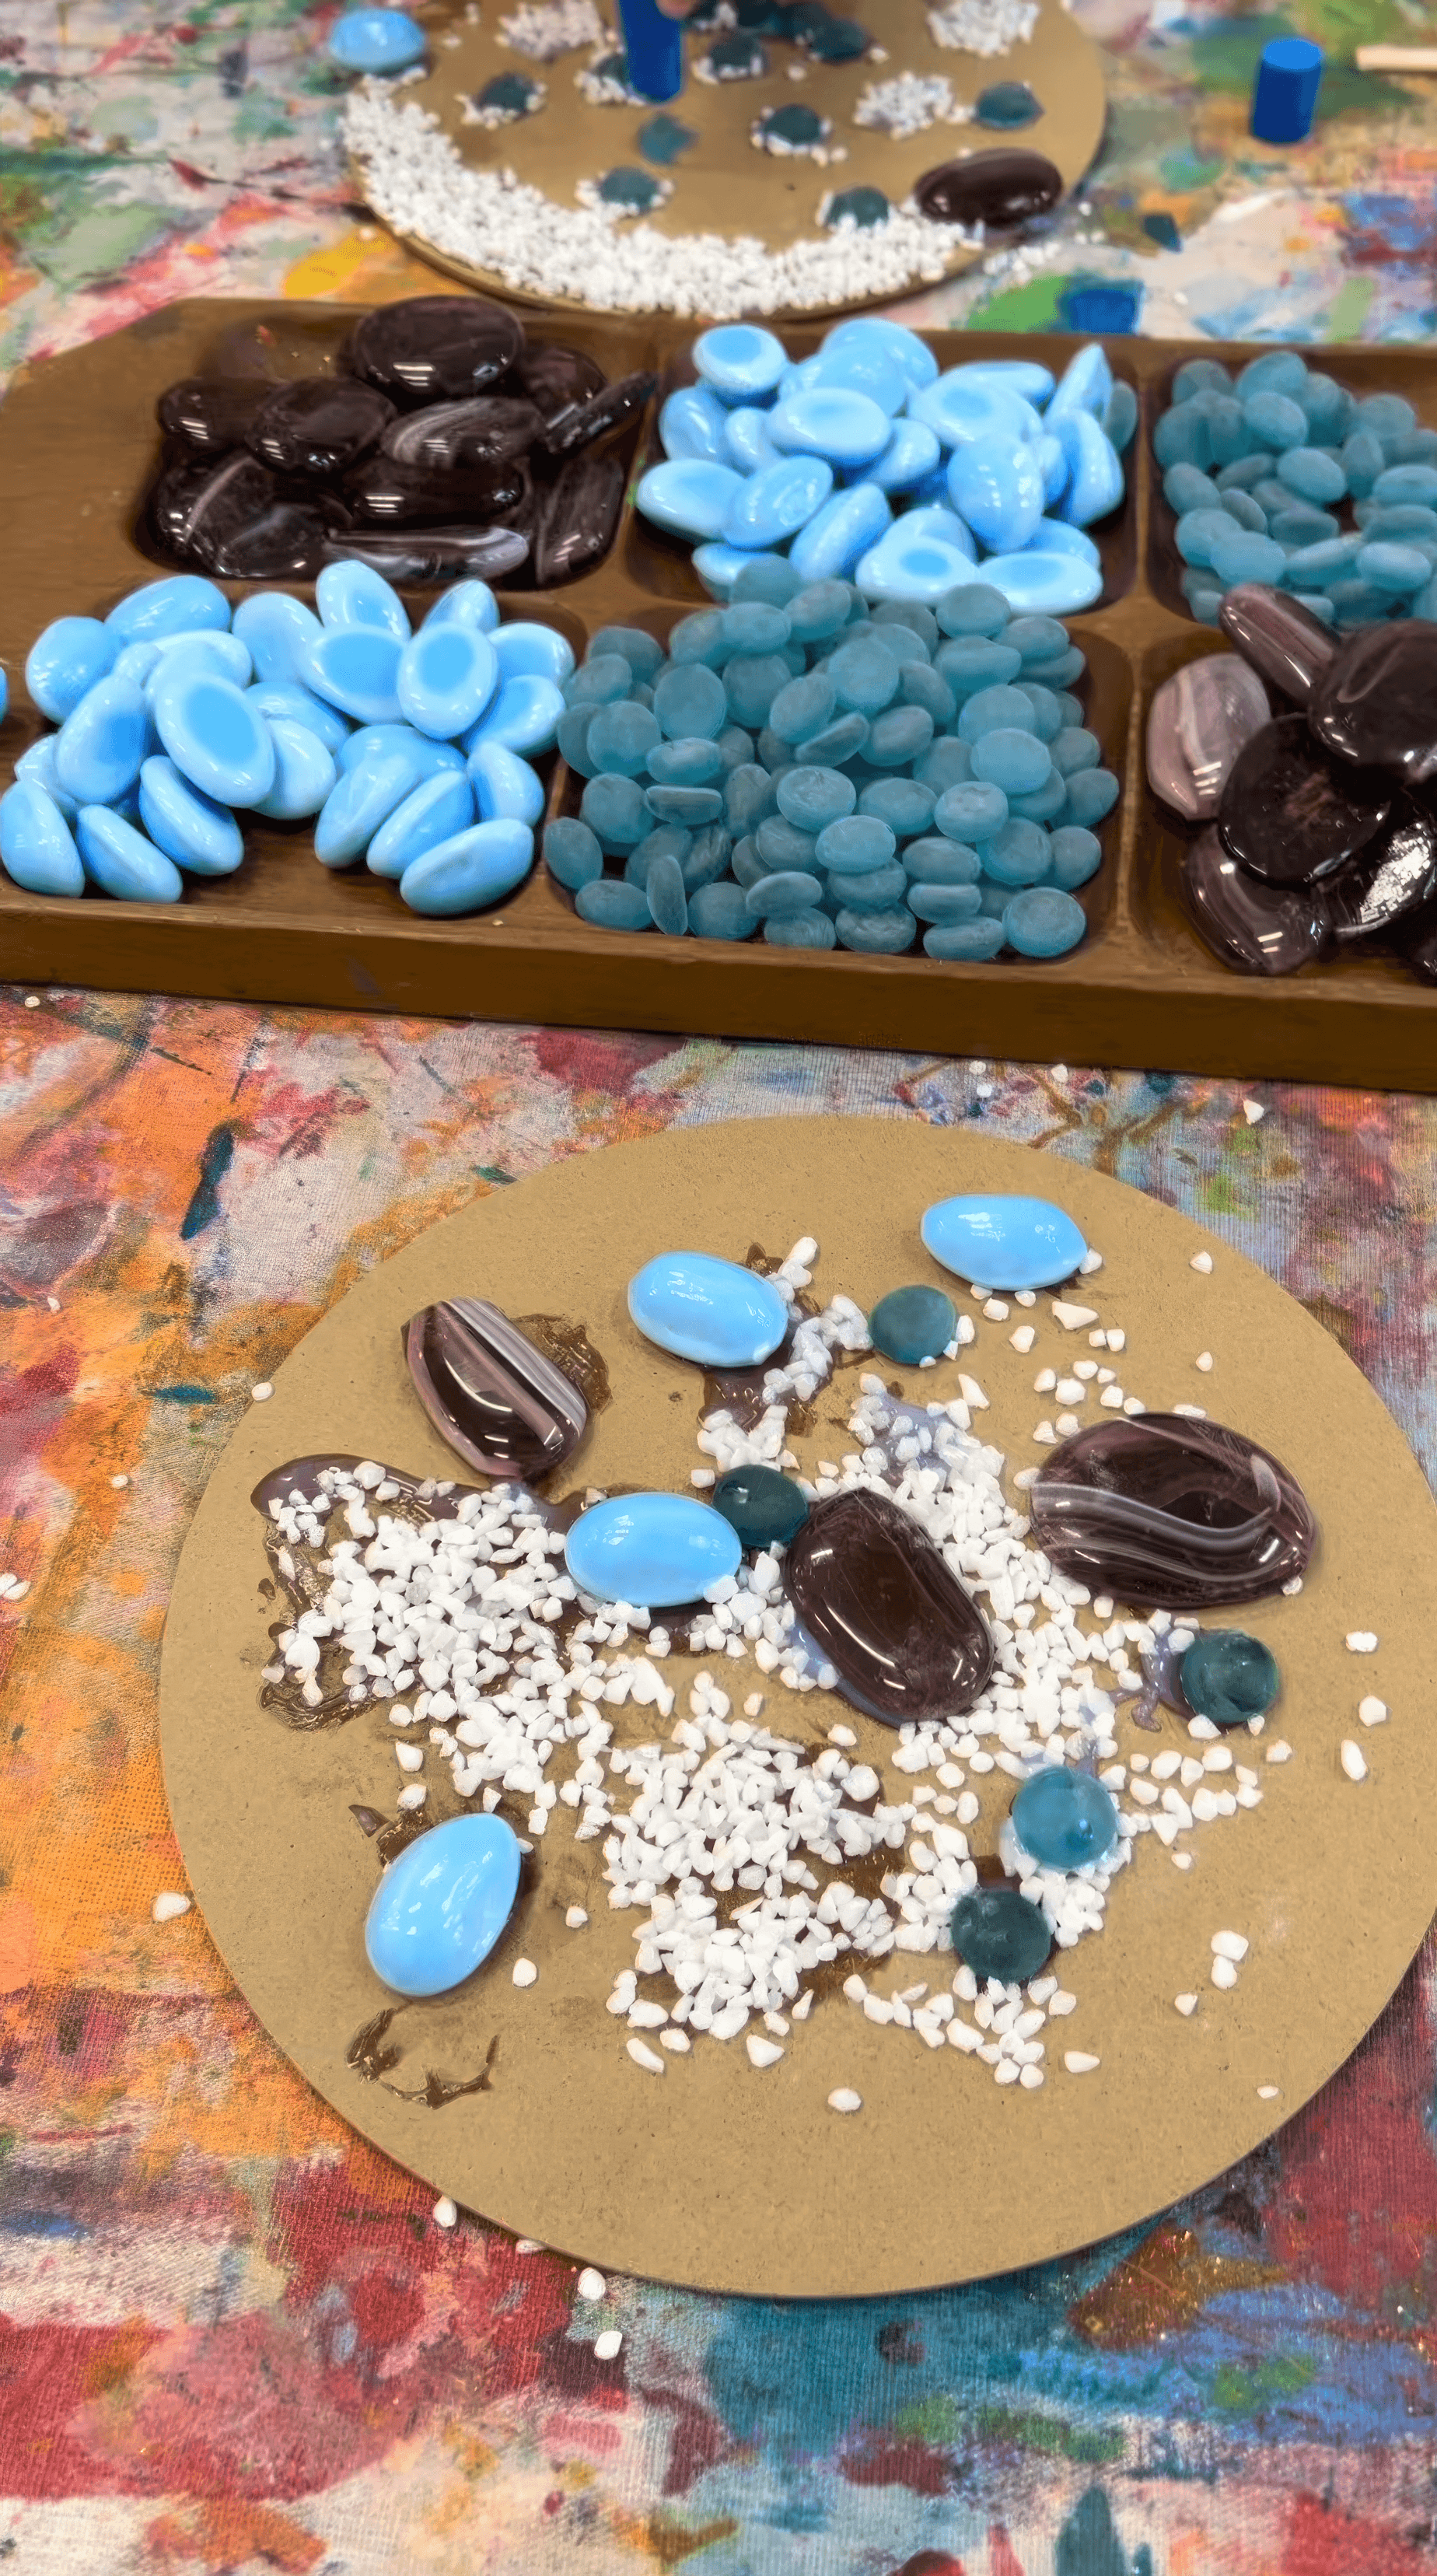
Tip a base layer into a low tub or tray. River pebbles from the garden centre or hardware store work beautifully. They are usually sold cheaply for paving and drainage and they have that cool smooth weight in the hand. Just the best! You can add a second base like white rice or yellow split peas or black beans if you want contrast under the stones. The sounds are glorious and matter here as much as the look.
Drop in a wooden treasure box. Scatter a few jewels, old keys, crystals, coins, magnetic chips with a wand, anything that reads treasure. Add scoops, small containers, funnels, ladles. The more it feels like real adventure gear, the deeper they go!
For toddlers or any group where mouthing is likely, swap tiny loose parts for safer larger pieces. Dried citrus slices, large shells, big wooden discs. You still get the ritual of finding and collecting without the choke risk.
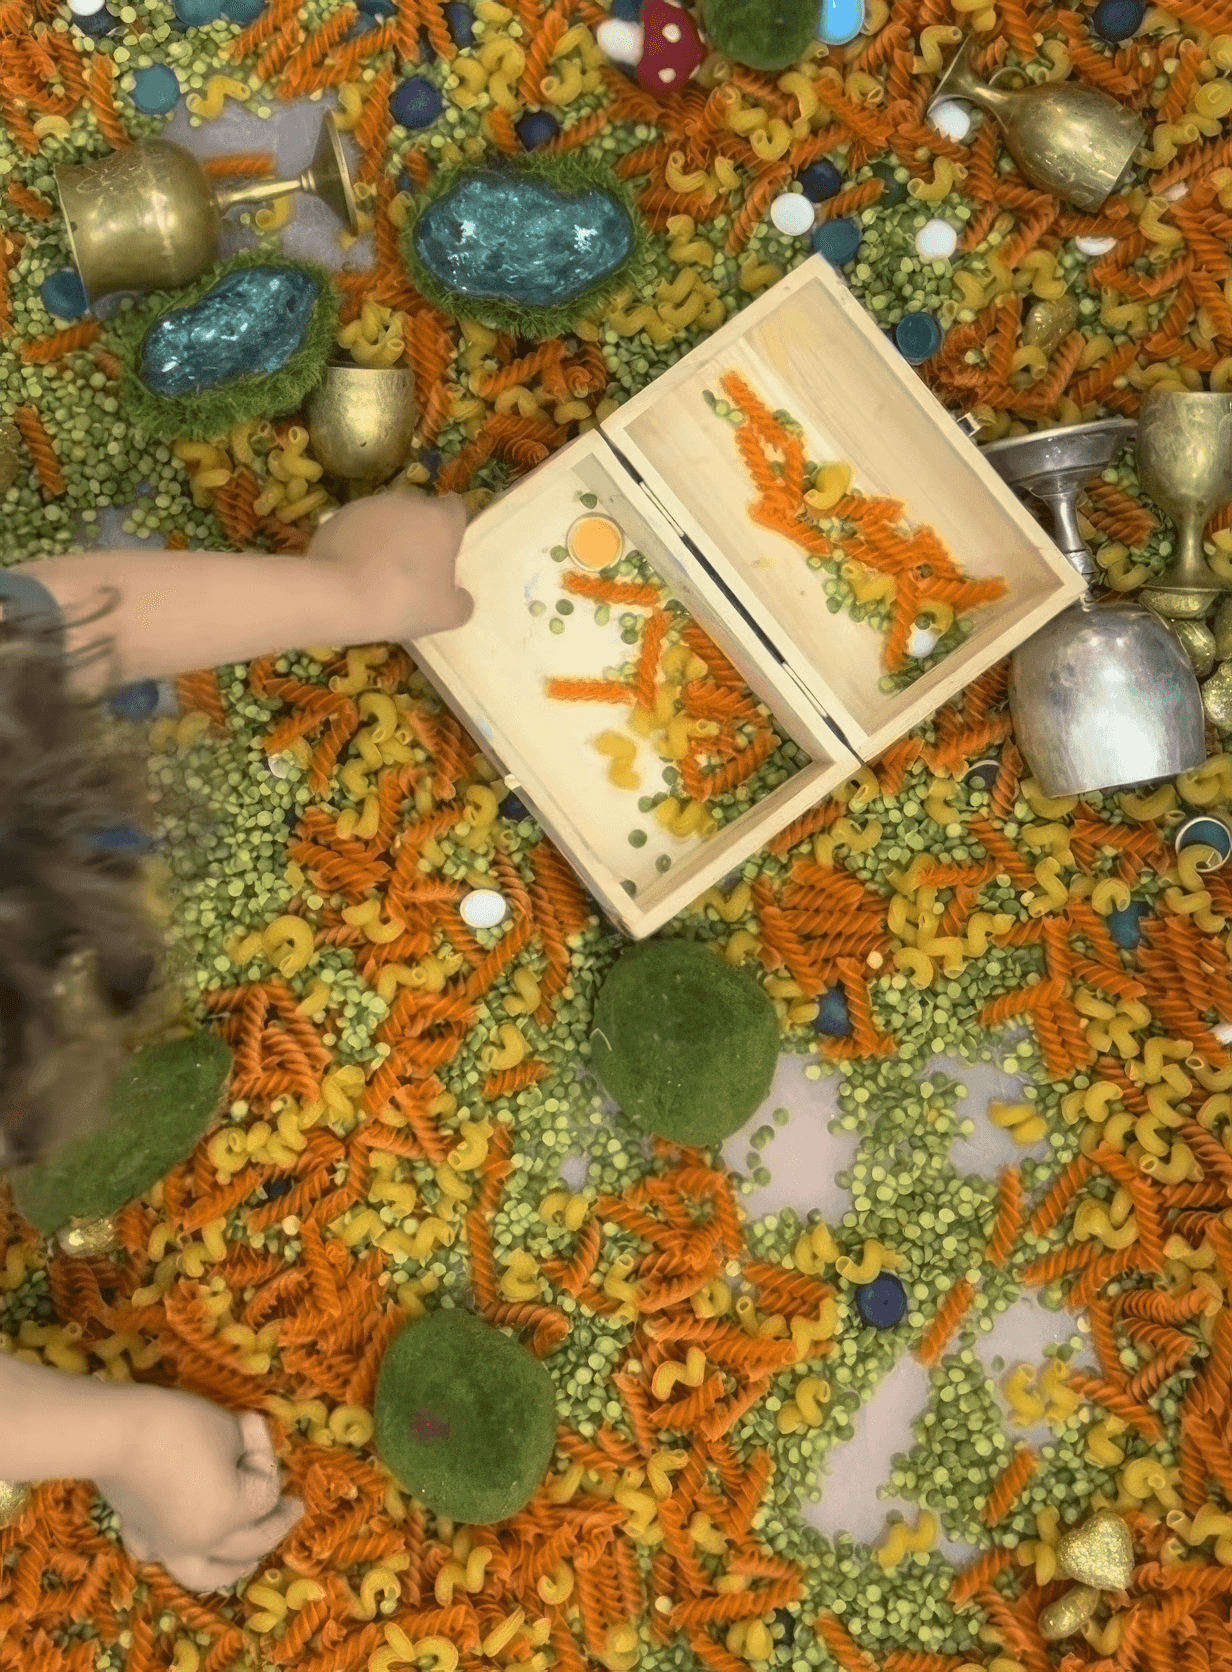
The Making
As always with sensory play, stand back and watch the first choice they make. Do they go straight for the scoop and listen to the pour? Do they hunt for the most shiny object? Do they start arranging stones into lines like roads or river edges? That first instinct tells you what to lean into. If they choose sound, talk about sound. If they choose collecting, talk about what belongs in the treasure box today and why.
This is a great one to have a display tray nearby, like a shallow board or lid where found objects can be placed and admired! The adventure lab might shift from 'grab and dump' to 'curate and explain', so language, turn taking and memory work can start to build naturally.
Variations
Add a mirror or metallic tray under part of the base so everything reflects and shimmers
Use natural finds like pinecones, bark, seed pods for an outdoor campsite version
Materials
Low tub or tray
River stones or pebbles from a garden supplier
Optional split peas, rice, or beans as a base
Treasure box, jewels, crystals, keys, coins, magnetic chips
Scoops, funnels, spoons, jars
A shallow tray or board for displaying finds
Note on safety: Keep loose parts large for toddlers so nothing disappears into a mouth
Back to Top
Adventure Lab
Stones and scoops and hidden treasure
Bookmark
Sensory Play
The Set Up
Tip a base layer into a low tub or tray. River pebbles from the garden centre or hardware store work beautifully. They are usually sold cheaply for paving and drainage and they have that cool smooth weight in the hand. Just the best! You can add a second base like white rice or yellow split peas or black beans if you want contrast under the stones. The sounds are glorious and matter here as much as the look.
Drop in a wooden treasure box. Scatter a few jewels, old keys, crystals, coins, magnetic chips with a wand, anything that reads treasure. Add scoops, small containers, funnels, ladles. The more it feels like real adventure gear, the deeper they go!
For toddlers or any group where mouthing is likely, swap tiny loose parts for safer larger pieces. Dried citrus slices, large shells, big wooden discs. You still get the ritual of finding and collecting without the choke risk.
The Making
As always with sensory play, stand back and watch the first choice they make. Do they go straight for the scoop and listen to the pour? Do they hunt for the most shiny object? Do they start arranging stones into lines like roads or river edges? That first instinct tells you what to lean into. If they choose sound, talk about sound. If they choose collecting, talk about what belongs in the treasure box today and why.
This is a great one to have a display tray nearby, like a shallow board or lid where found objects can be placed and admired! The adventure lab might shift from 'grab and dump' to 'curate and explain', so language, turn taking and memory work can start to build naturally.
Variations
Add a mirror or metallic tray under part of the base so everything reflects and shimmers
Use natural finds like pinecones, bark, seed pods for an outdoor campsite version
Materials
Low tub or tray
River stones or pebbles from a garden supplier
Optional split peas, rice, or beans as a base
Treasure box, jewels, crystals, keys, coins, magnetic chips
Scoops, funnels, spoons, jars
A shallow tray or board for displaying finds
Note on safety: Keep loose parts large for toddlers so nothing disappears into a mouth
Back to Top
Tent Weaving
Wrap, weave, and build a place to sit together
Bookmark
Installations
The Set Up
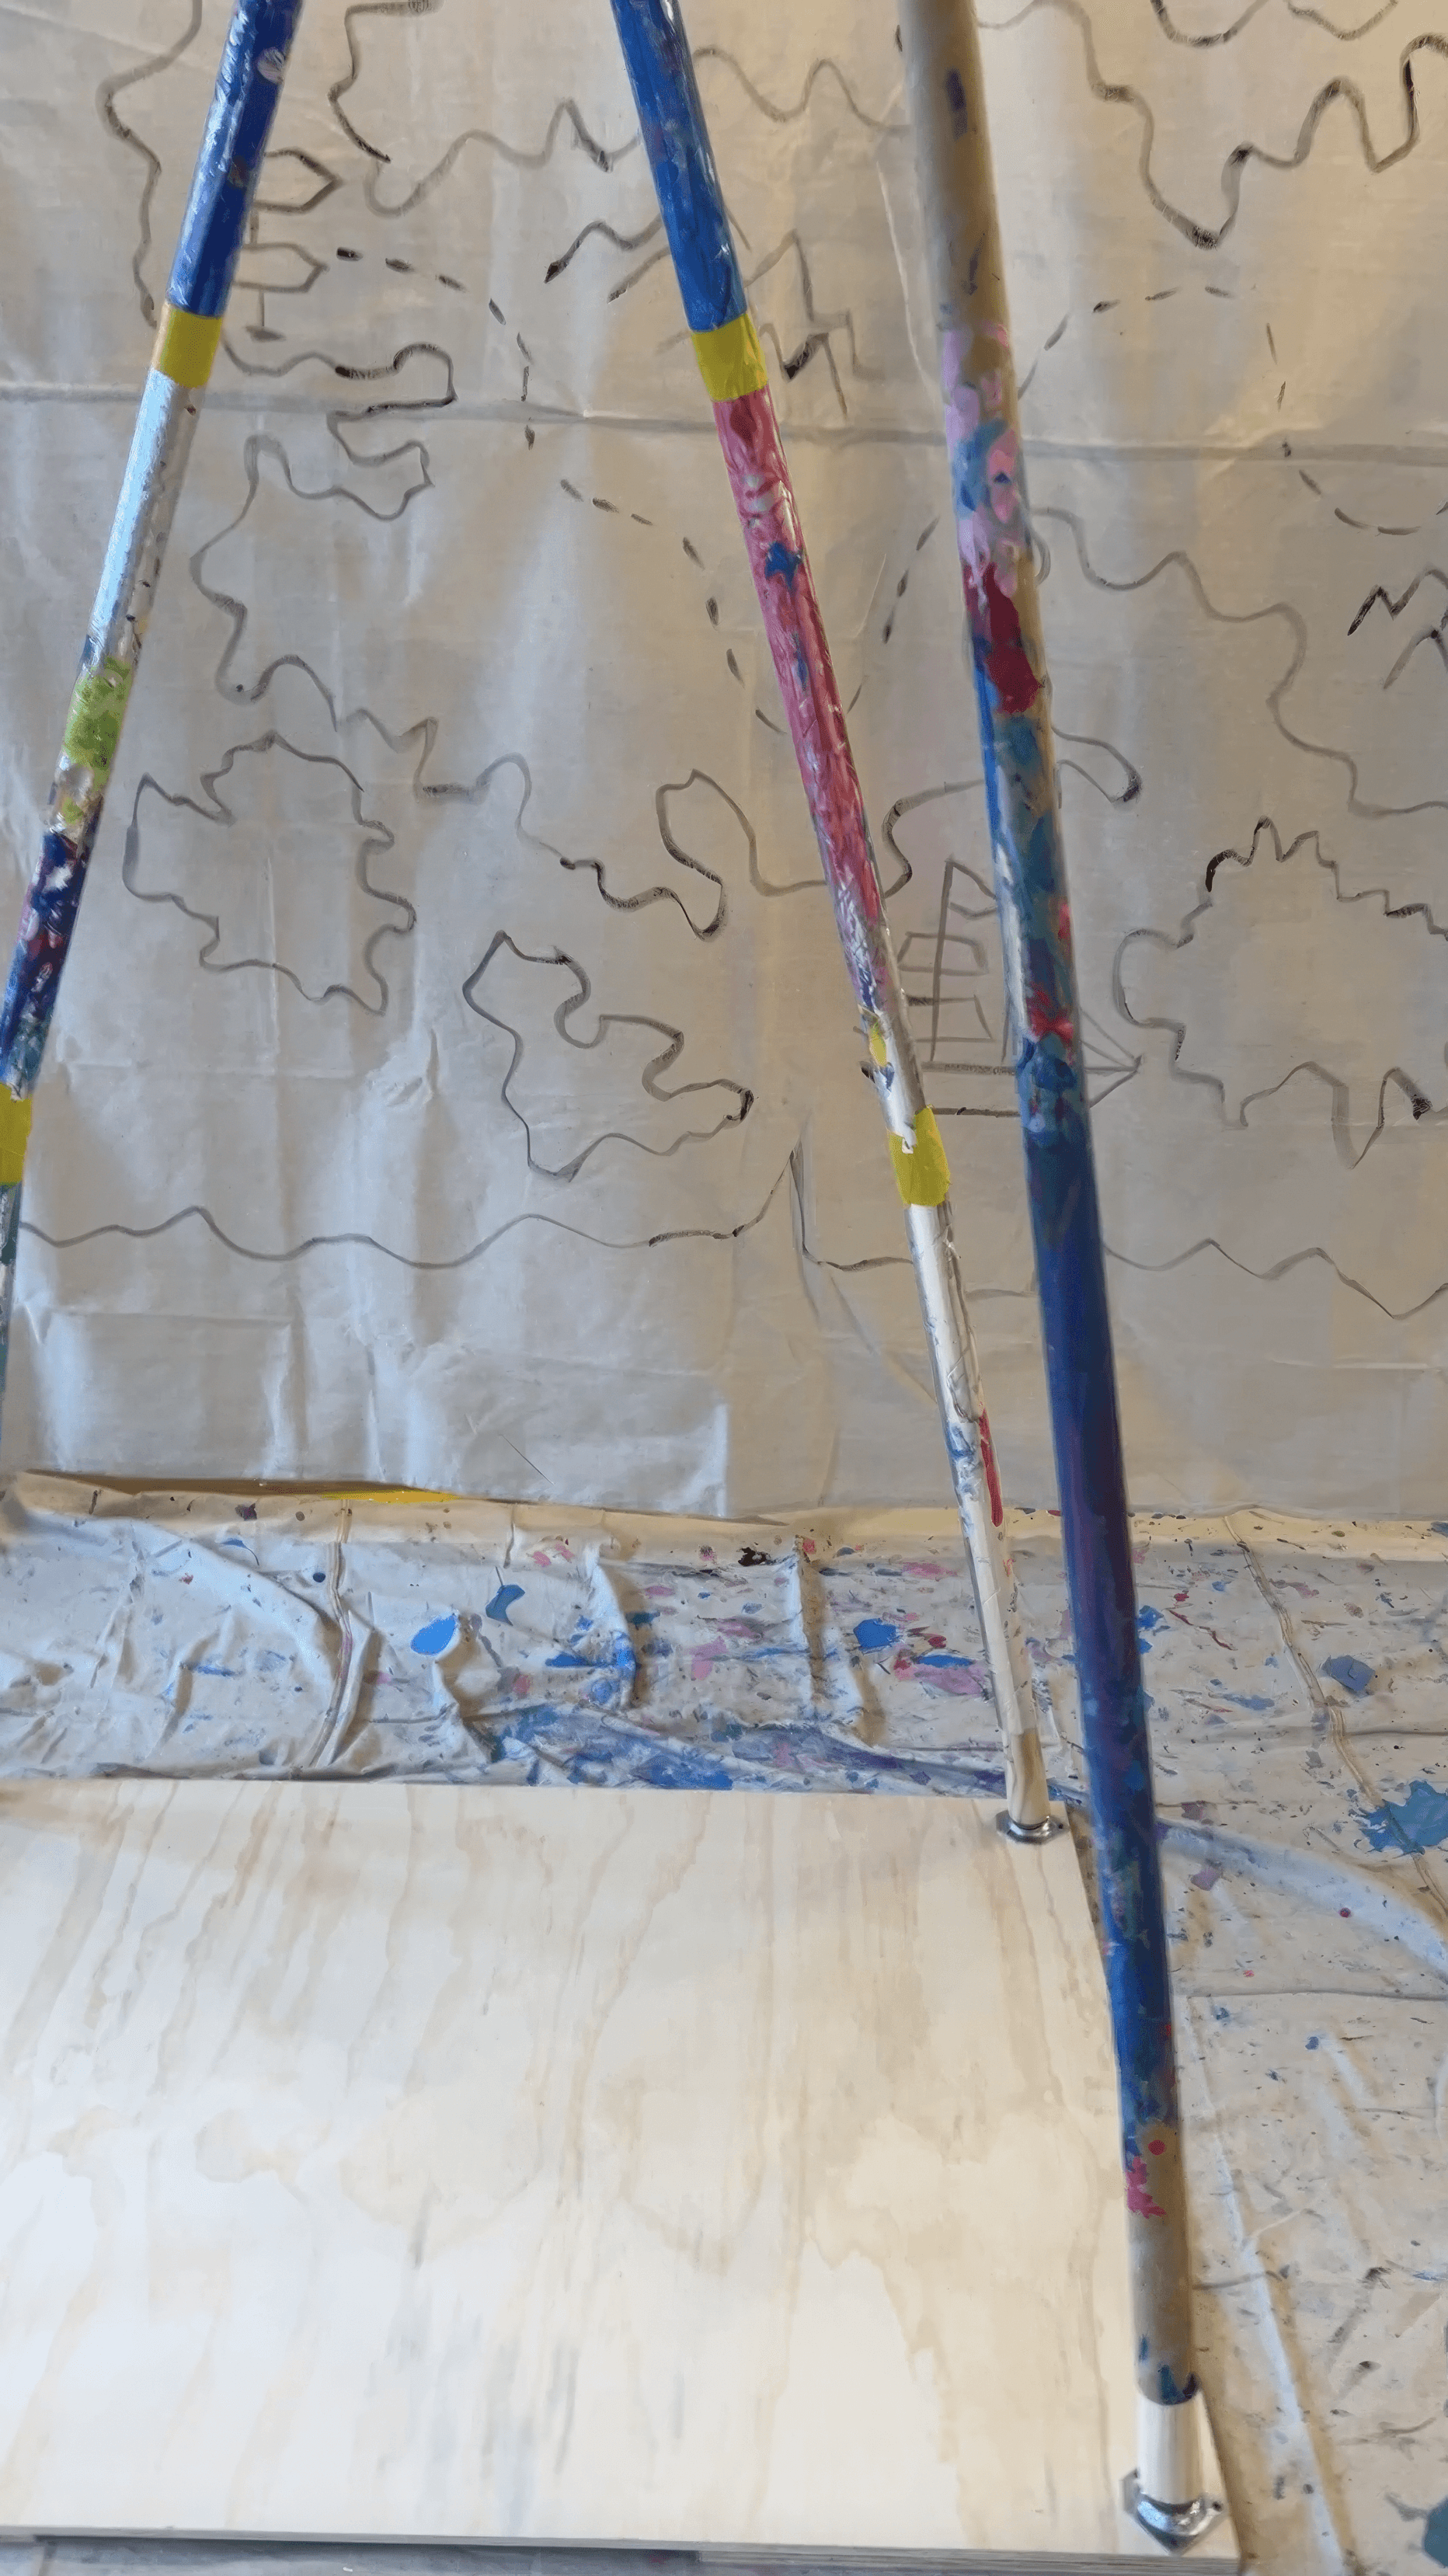
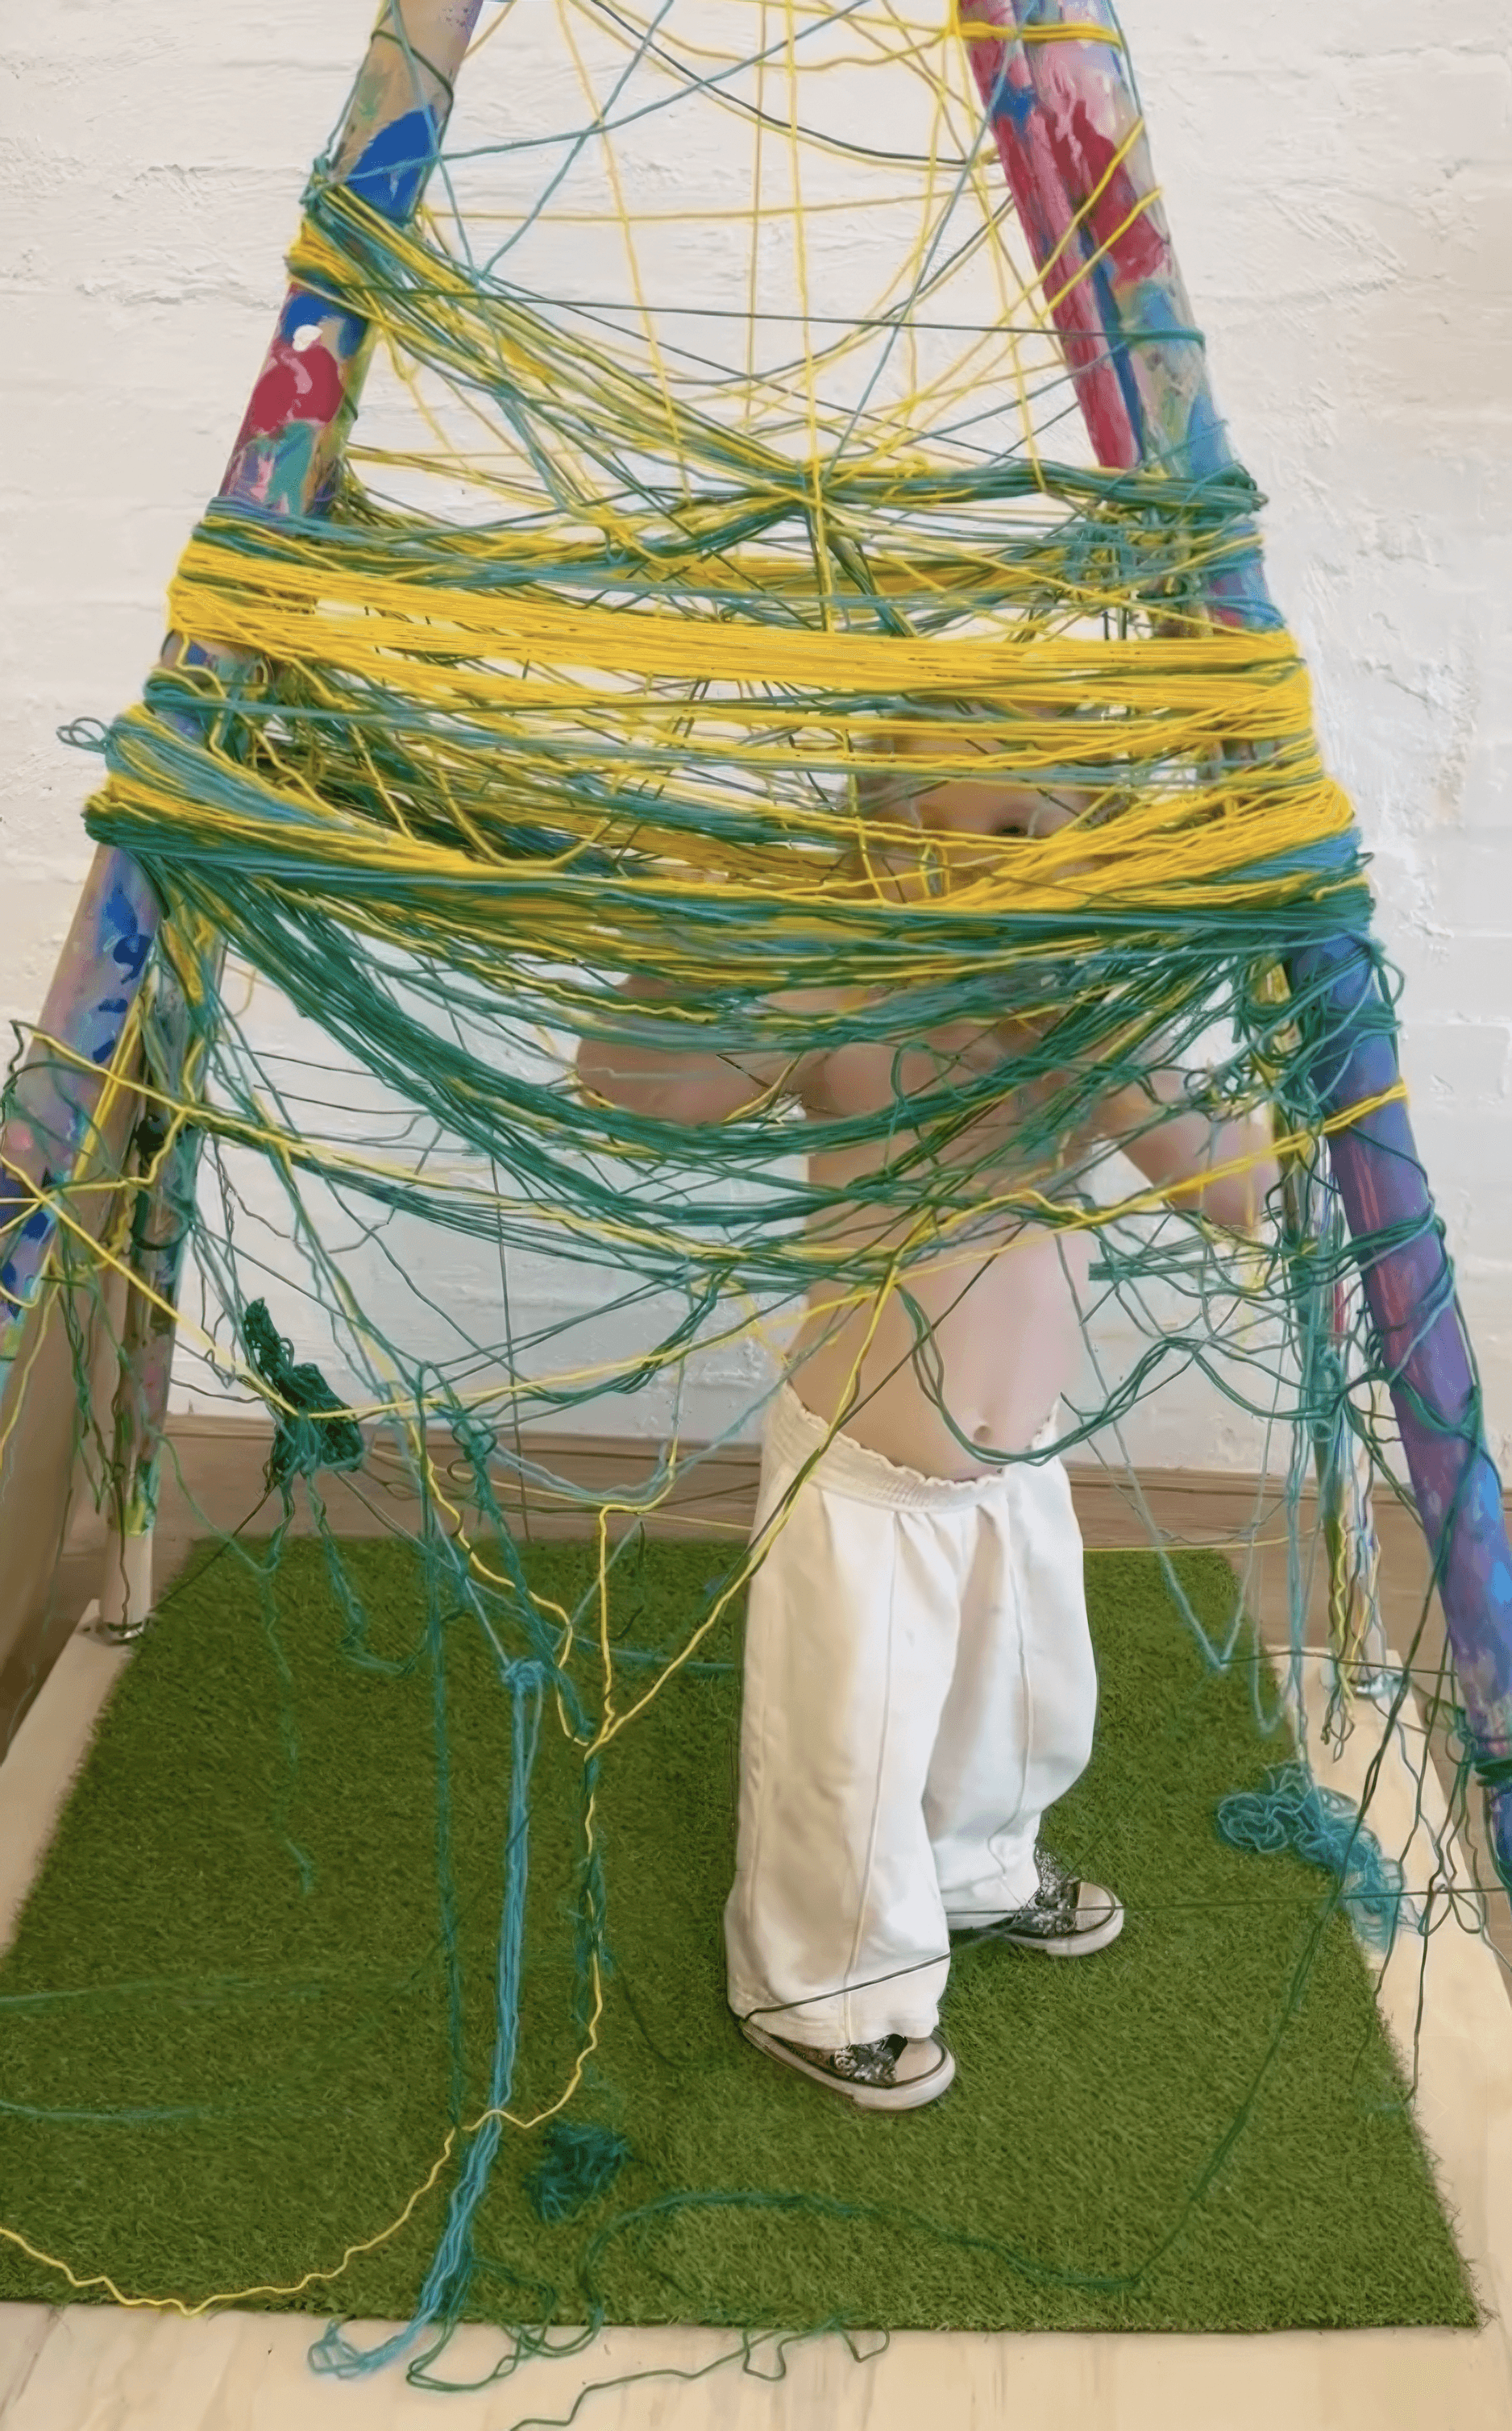
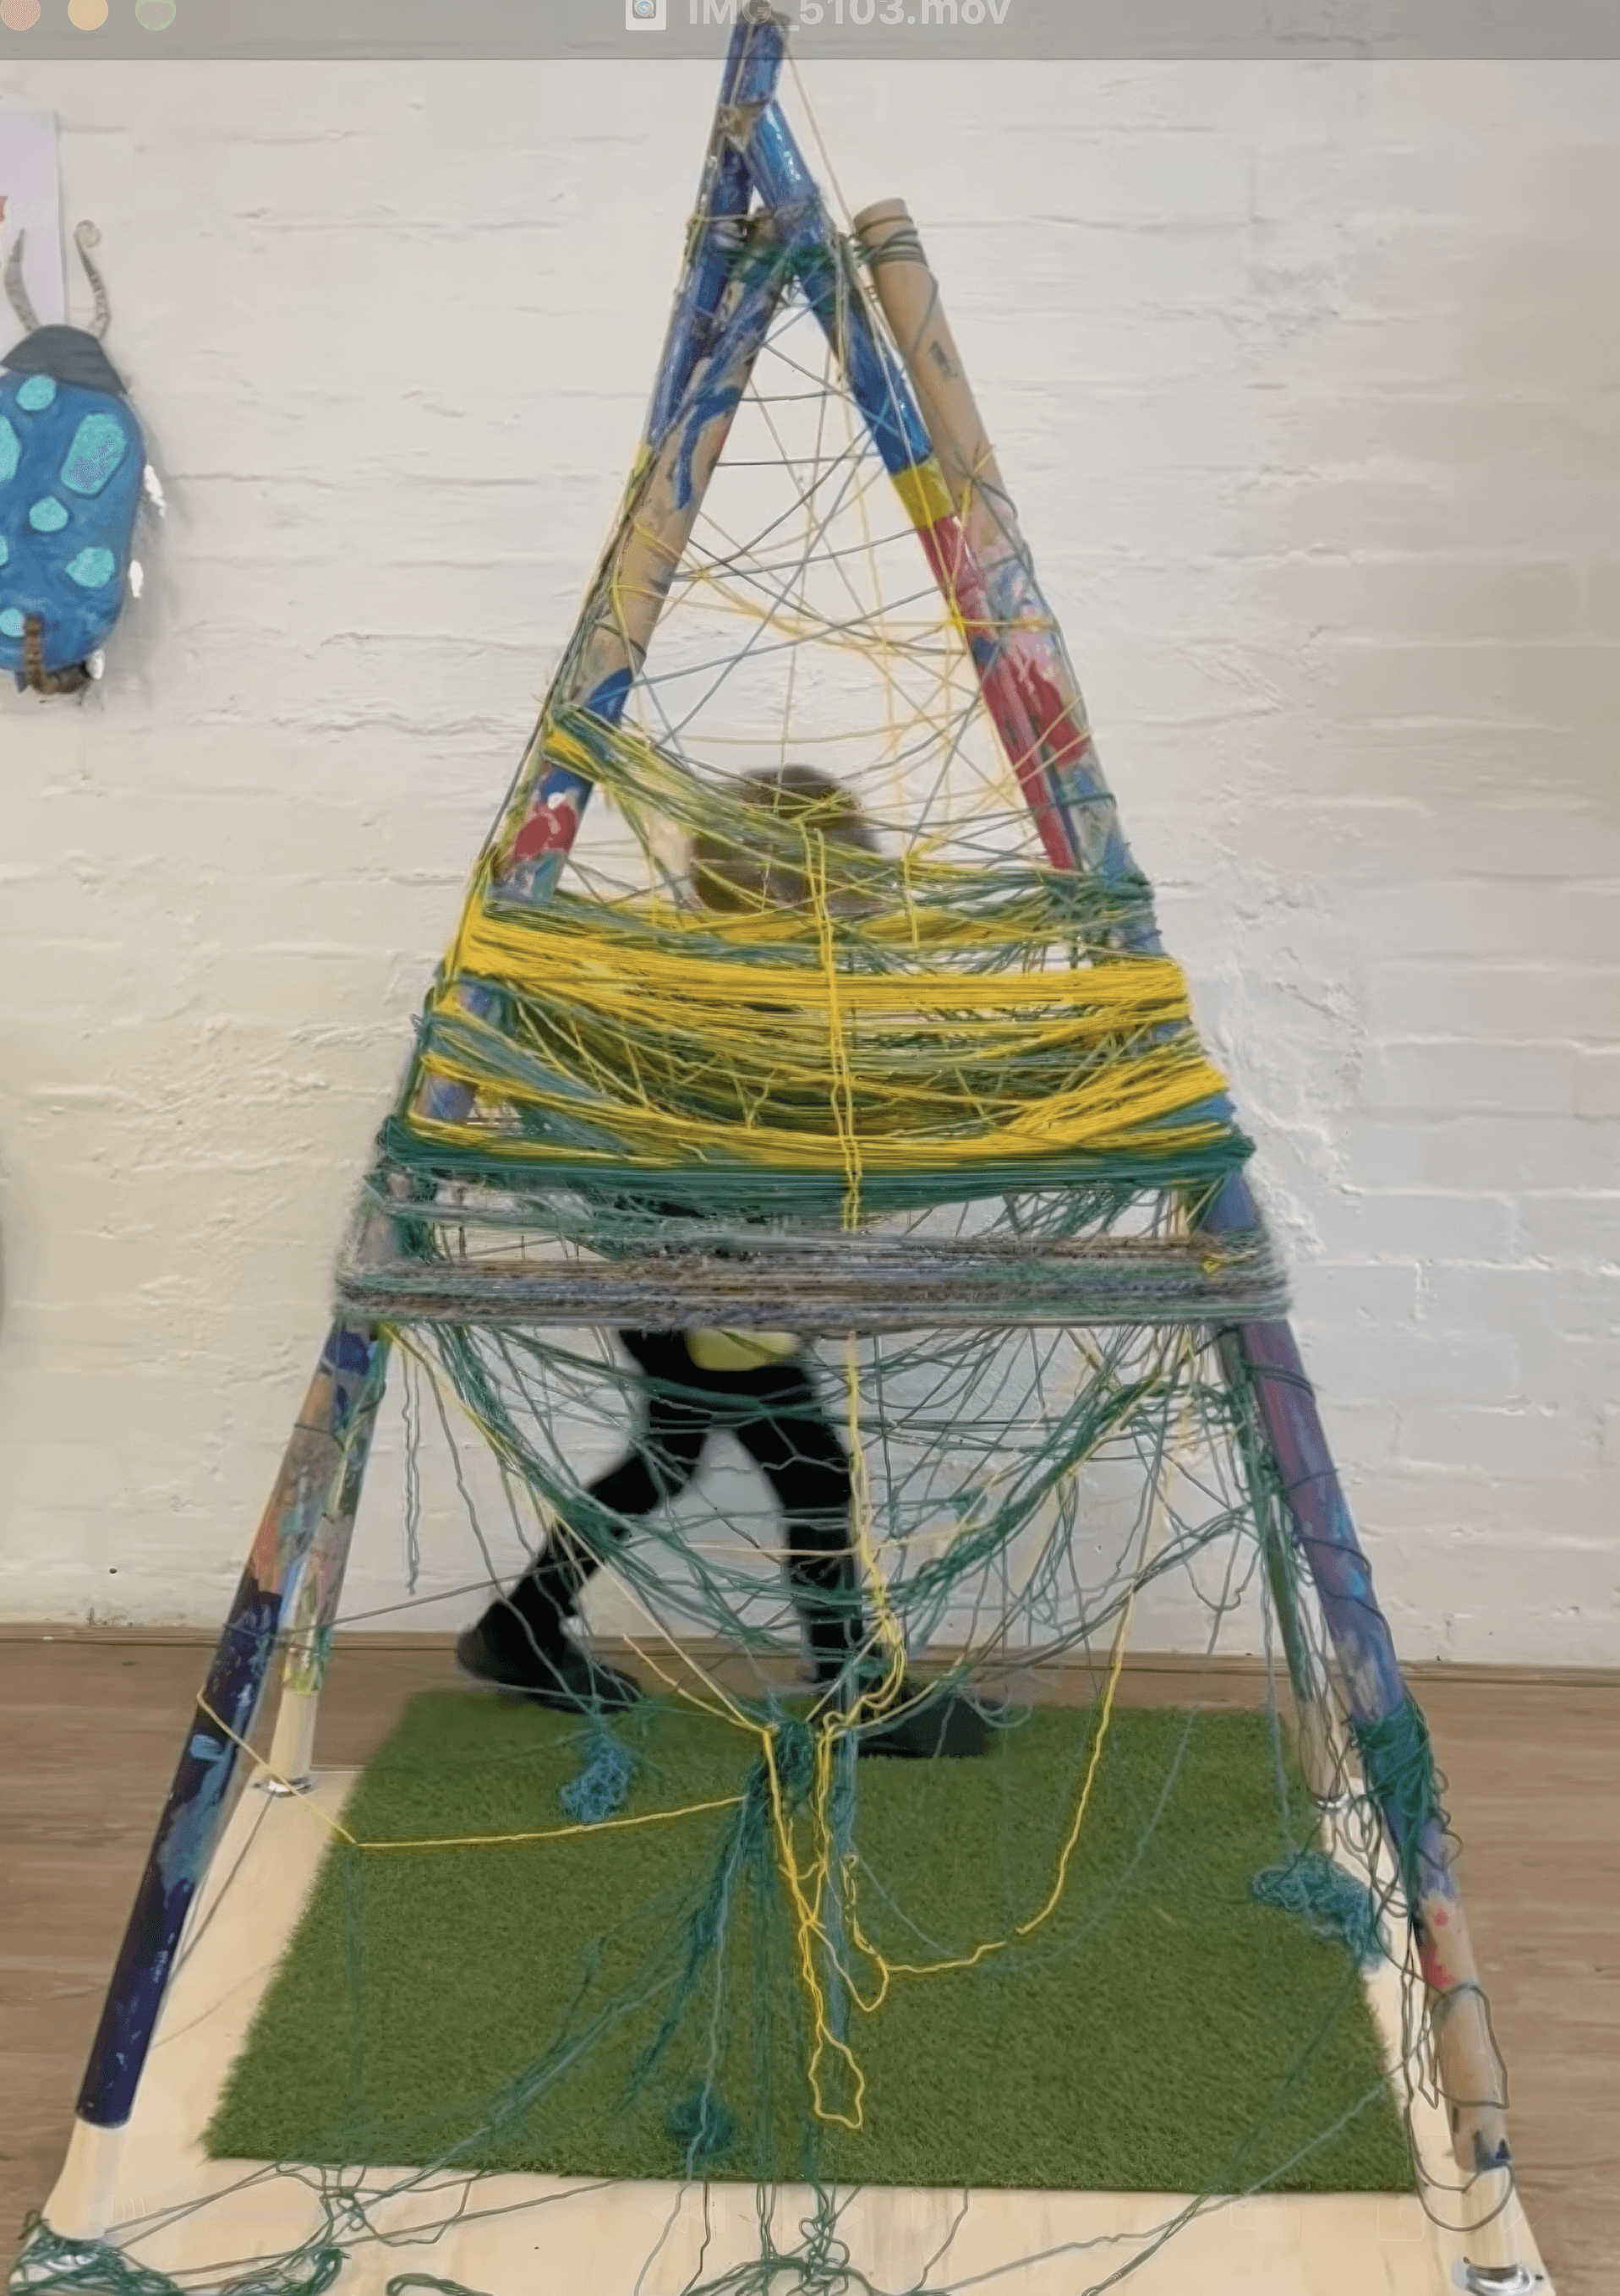
Think simple structure first. You are building a frame that invites wrapping and weaving and gathering underneath. We use extra large cardboard tubes from fabric rolls. You can arrange three as a tripod, or four in a pyramid, or five in more of a circle. The only real requirement is that it feels steady and leaves enough space inside to sit!
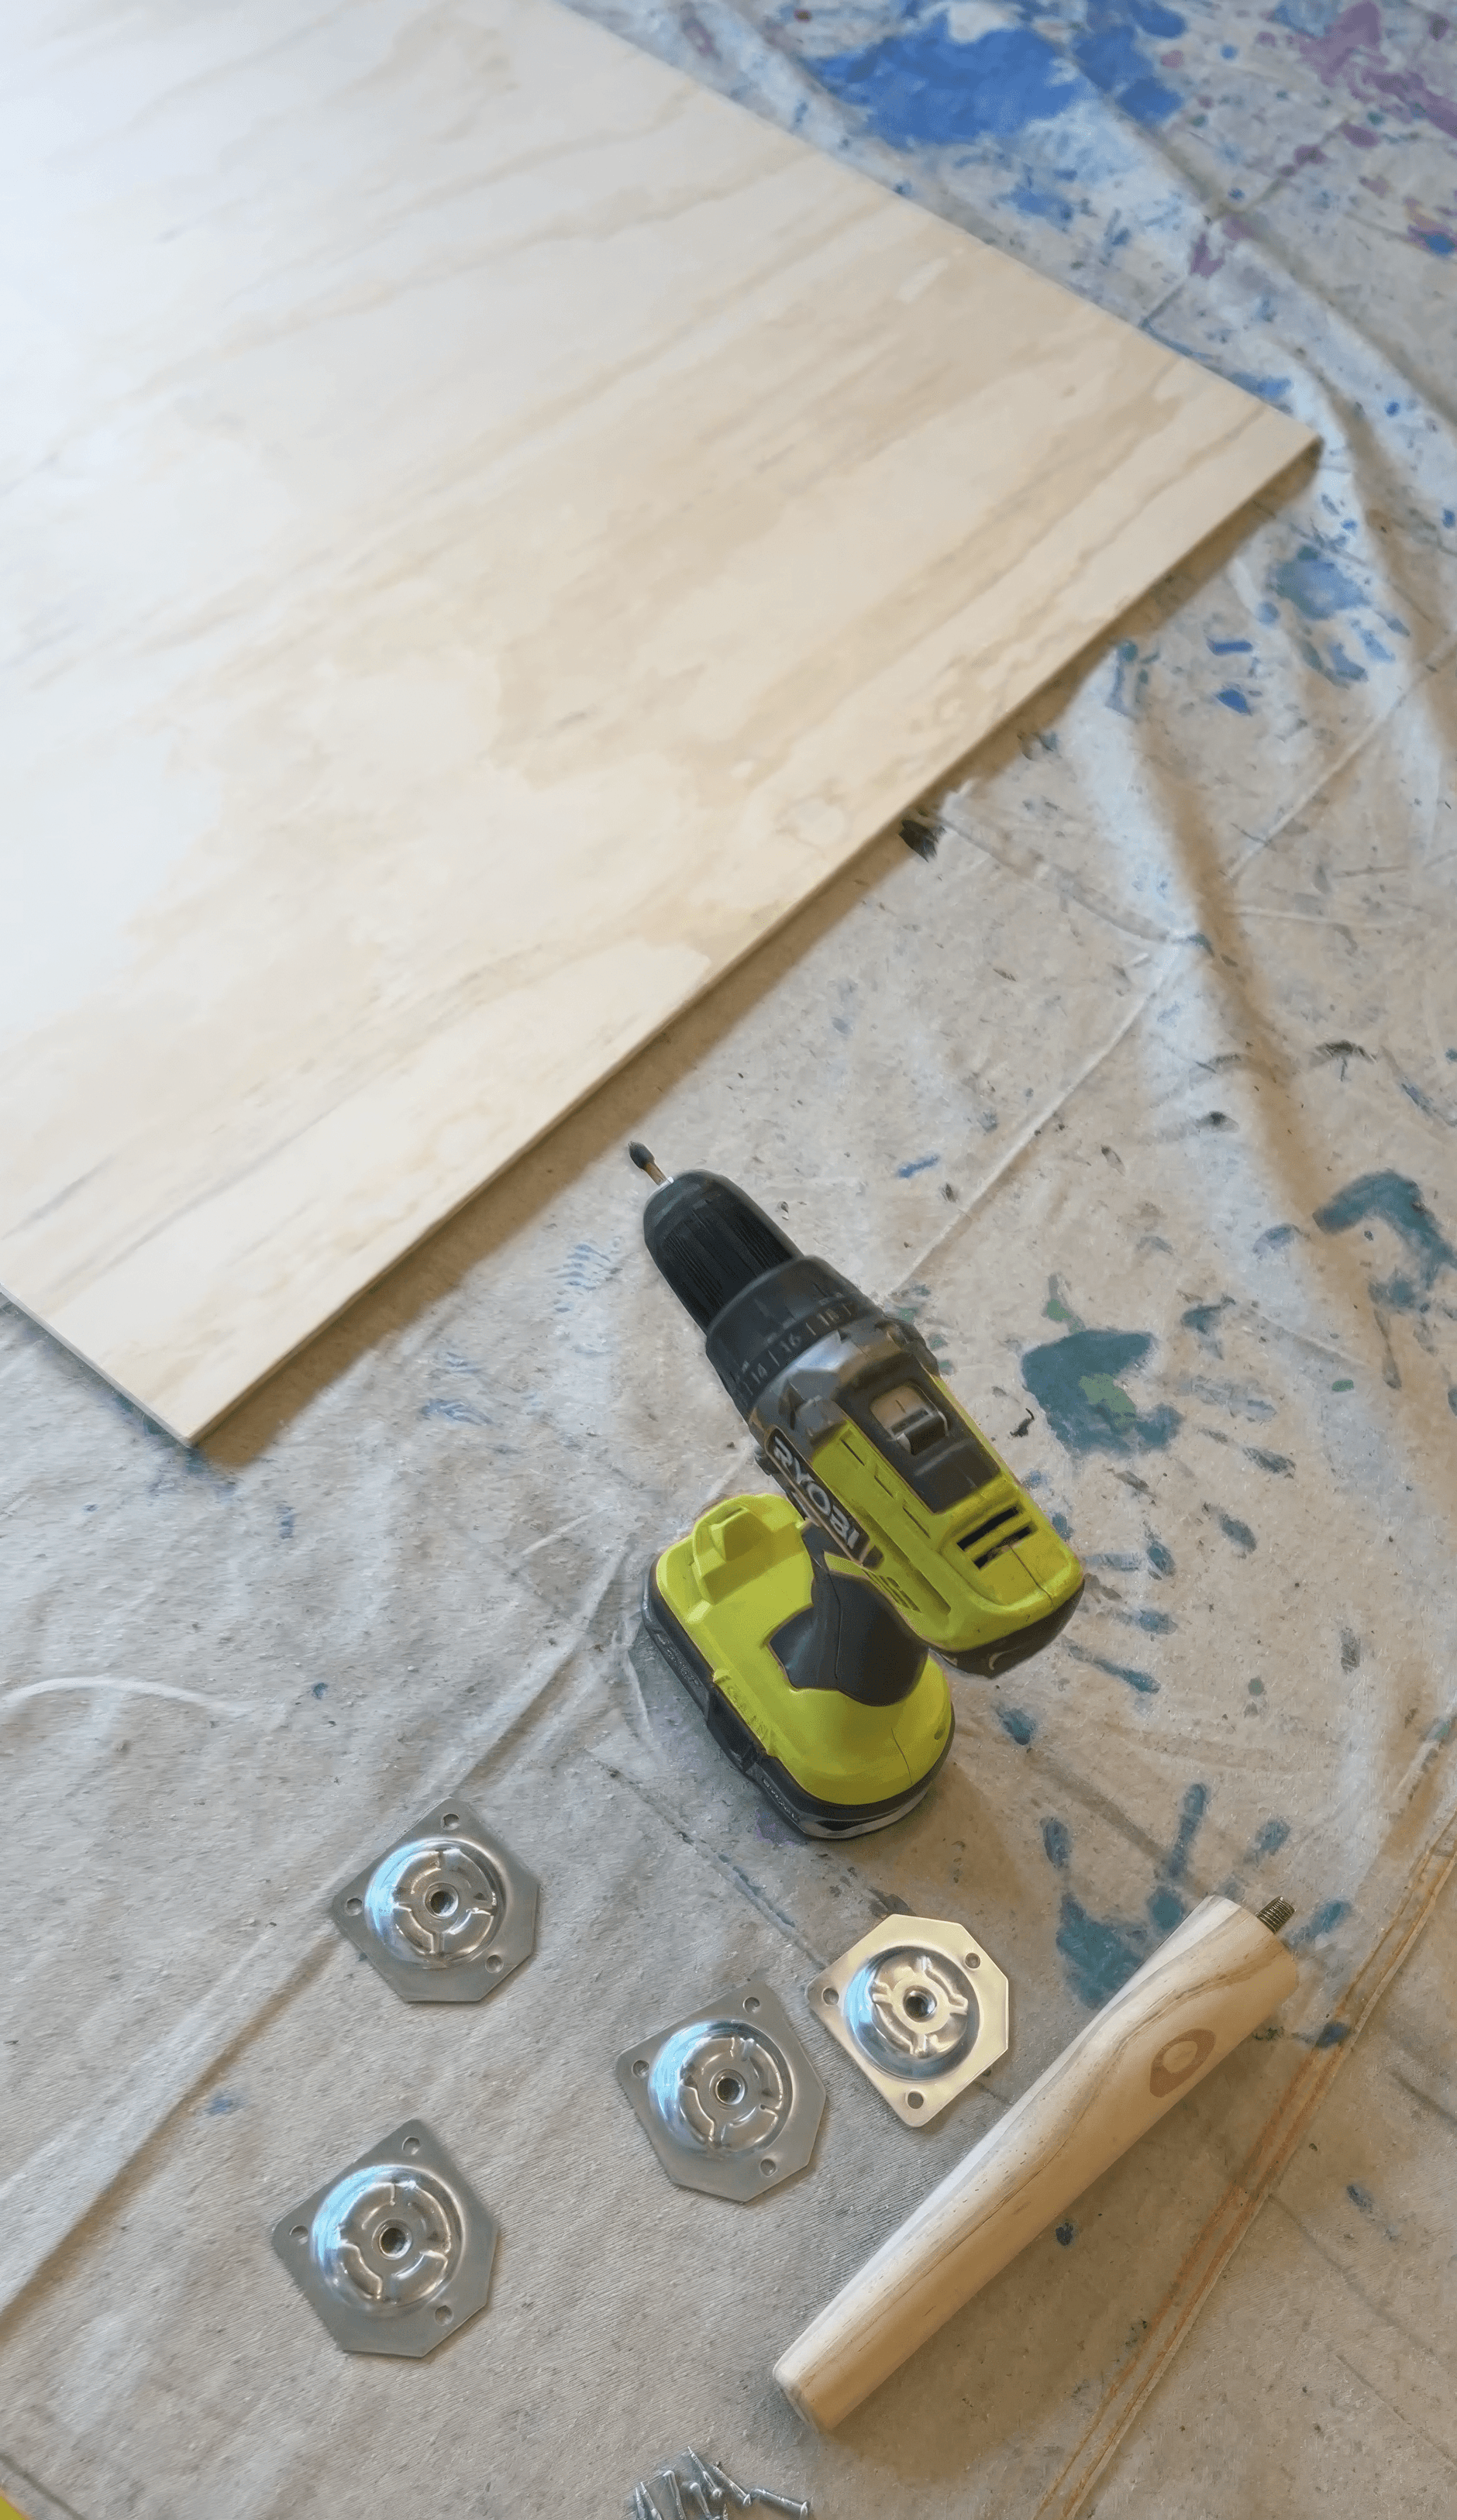
Here is what we learned. As kids wrap wool around and around, tension pulls the tubes inward. The frame can start to get a little bit too small. To solve that we anchored each tube onto short wooden legs and fixed those legs into a sturdy plank base using angled (furniture) brackets. Then we slid the cardboard tubes down over the legs so each tube stayed upright and didn't drift. If you don't have brackets or timber you can still build a temporary lean to style hideout by wedging the tubes into heavy buckets or large plant pots filled with sand or stones. Or just keep things a-la-natural and let the tubes move and shift as the artists weave.
Set out baskets of wool, string, ribbon, fabric strips, beads, feathers.
And all that's left is to invite them in!
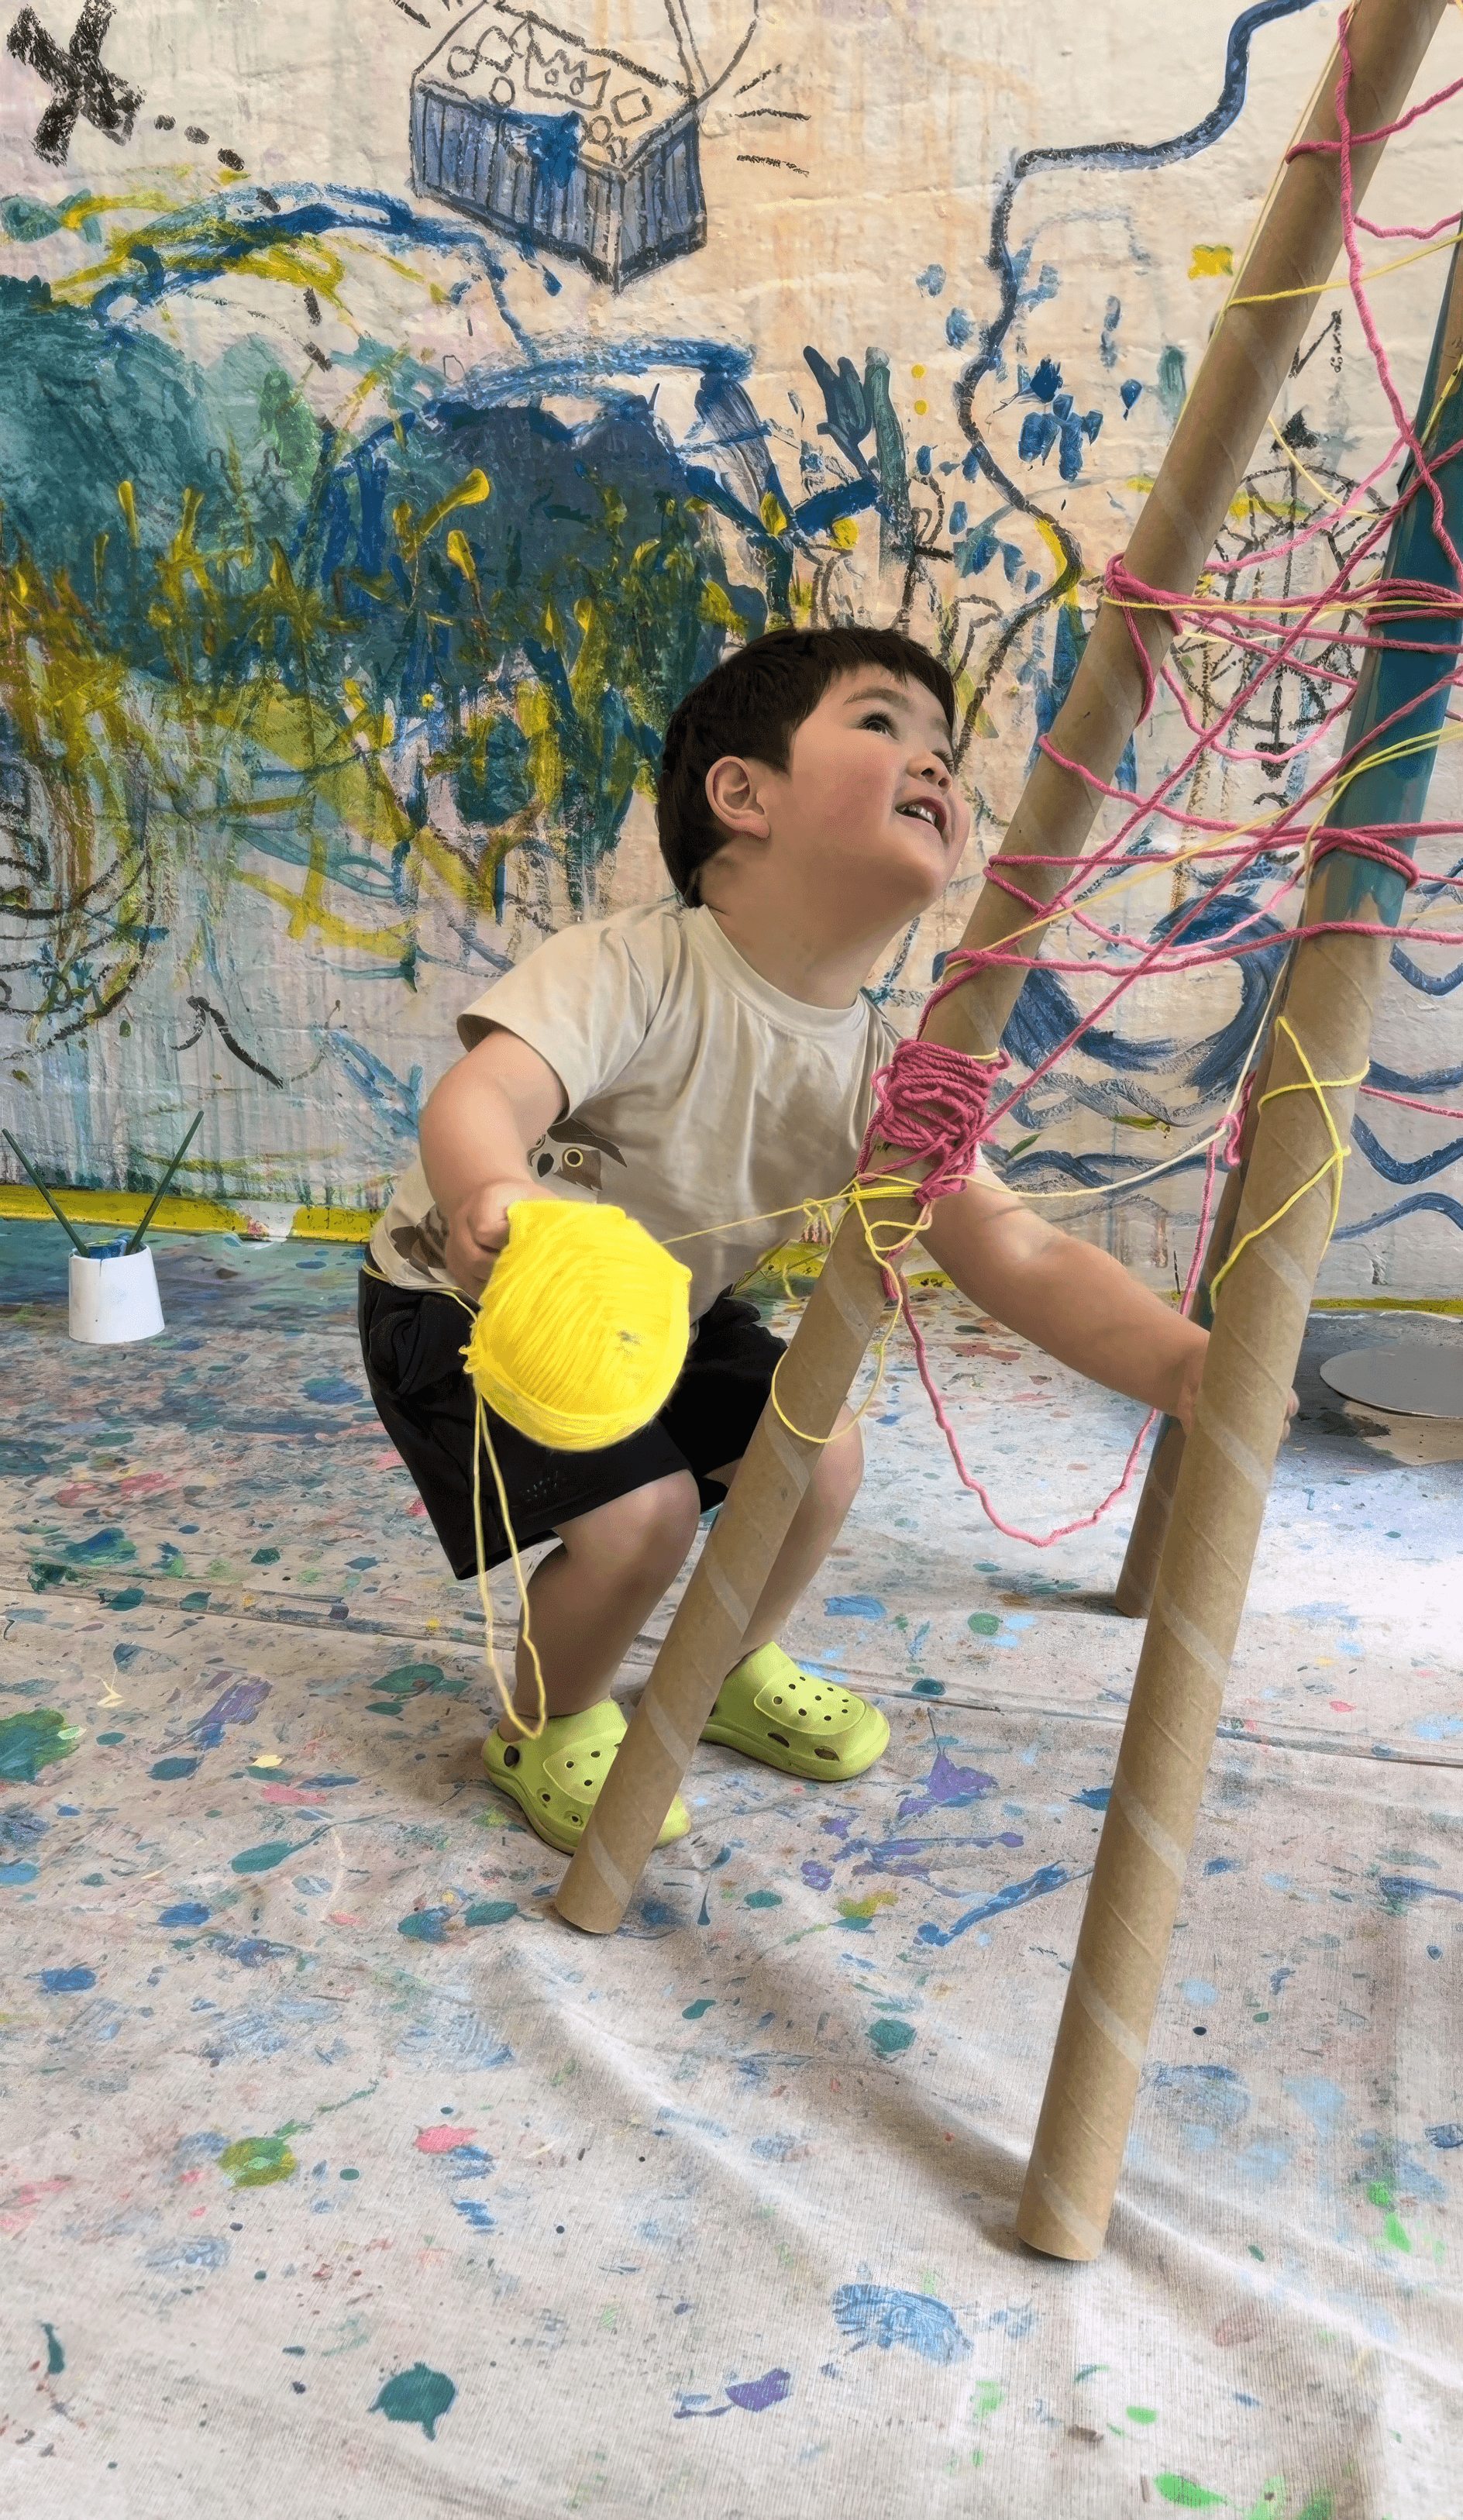
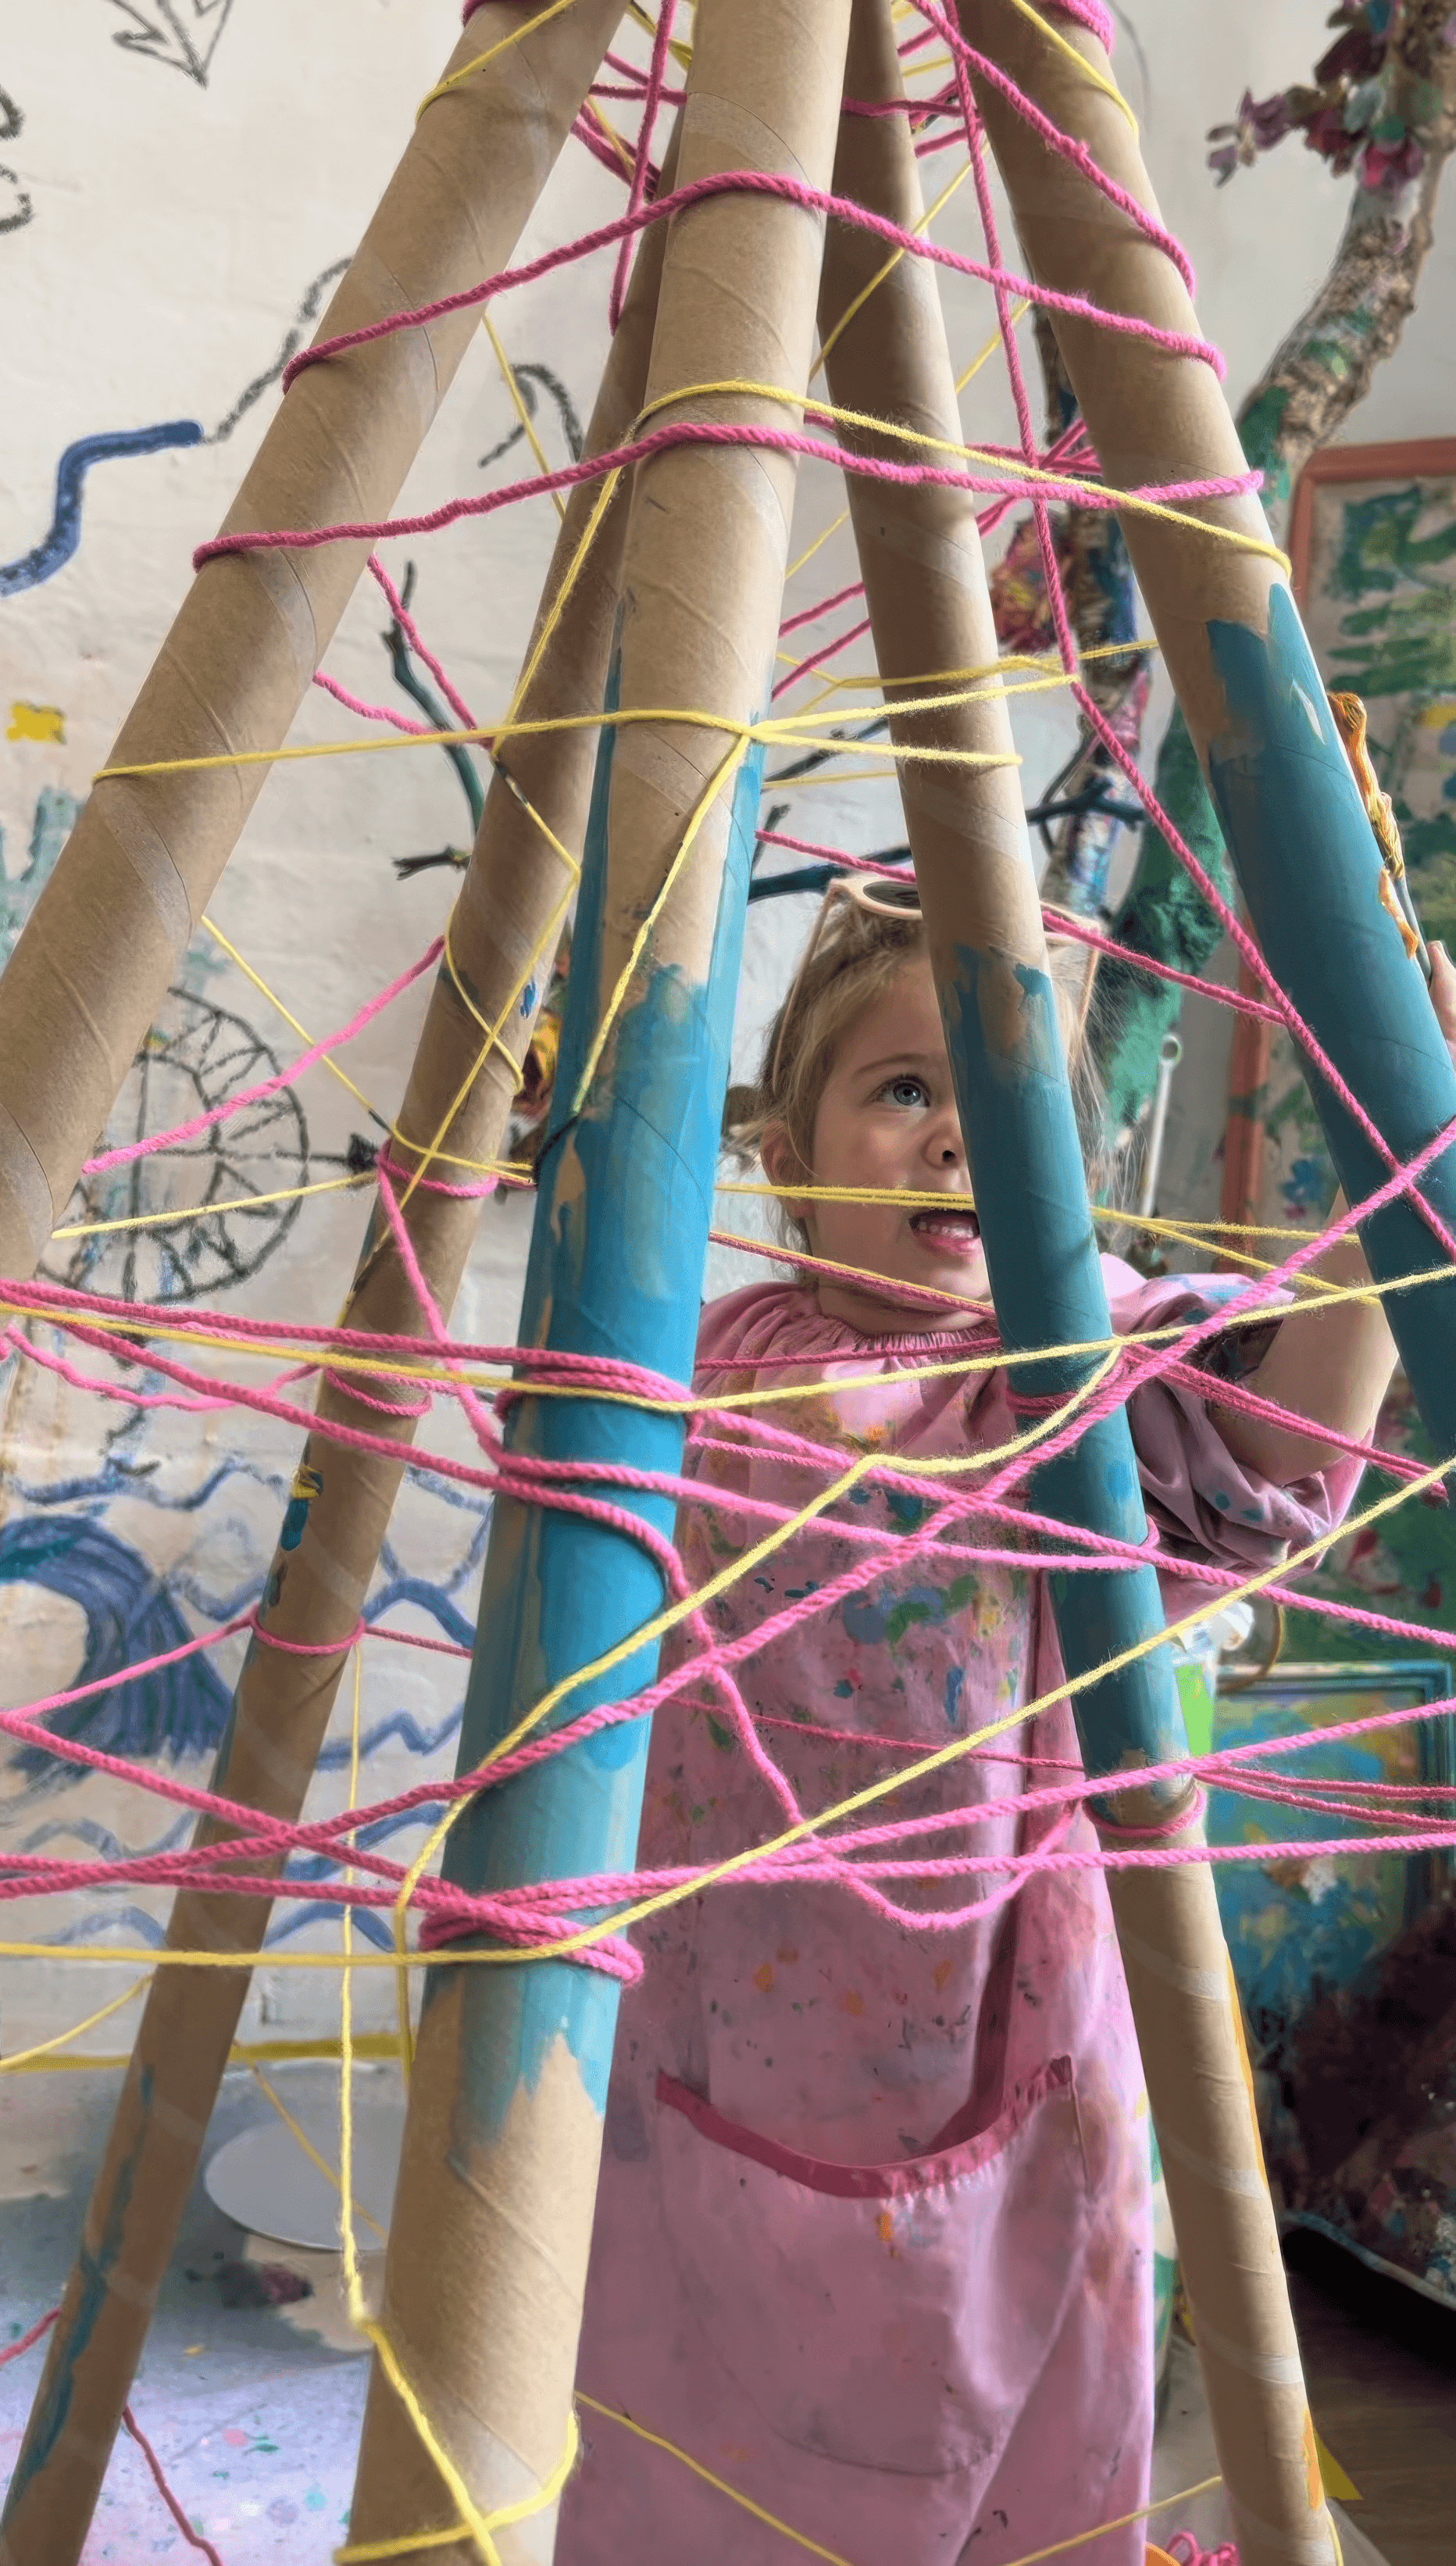
The Making
As kids wrap and weave and pull, gaps close, colours build, and it turns from loose poles into a real hideout in minutes. The collaboration is just pure magic.
Variations
Hang a small light or torch inside and turn it into a night camp
Weave in found natural materials like leaves and long grasses for an outdoor version
Keep adding across a full week so it evolves with the group
Materials
Extra large cardboard tubes from fabric rolls
Sturdy base solution such as a plank with brackets and short wooden legs, or heavy buckets filled with sand or stones
Thick wool, string, ribbon, fabric strips
Beads and feathers
Scissors
Flashlight or torch for inside play
Back to Top
Tent Weaving
Wrap, weave, and build a place to sit together
Bookmark
Installations
The Set Up
Think simple structure first. You are building a frame that invites wrapping and weaving and gathering underneath. We use extra large cardboard tubes from fabric rolls. You can arrange three as a tripod, or four in a pyramid, or five in more of a circle. The only real requirement is that it feels steady and leaves enough space inside to sit!
Here is what we learned. As kids wrap wool around and around, tension pulls the tubes inward. The frame can start to get a little bit too small. To solve that we anchored each tube onto short wooden legs and fixed those legs into a sturdy plank base using angled (furniture) brackets. Then we slid the cardboard tubes down over the legs so each tube stayed upright and didn't drift. If you don't have brackets or timber you can still build a temporary lean to style hideout by wedging the tubes into heavy buckets or large plant pots filled with sand or stones. Or just keep things a-la-natural and let the tubes move and shift as the artists weave.
Set out baskets of wool, string, ribbon, fabric strips, beads, feathers.
And all that's left is to invite them in!
The Making
As kids wrap and weave and pull, gaps close, colours build, and it turns from loose poles into a real hideout in minutes. The collaboration is just pure magic.
Variations
Hang a small light or torch inside and turn it into a night camp
Weave in found natural materials like leaves and long grasses for an outdoor version
Keep adding across a full week so it evolves with the group
Materials
Extra large cardboard tubes from fabric rolls
Sturdy base solution such as a plank with brackets and short wooden legs, or heavy buckets filled with sand or stones
Thick wool, string, ribbon, fabric strips
Beads and feathers
Scissors
Flashlight or torch for inside play
Back to Top
Travel Collage
Cut and stick the story of your own journey
Bookmark
Collage
The Set Up
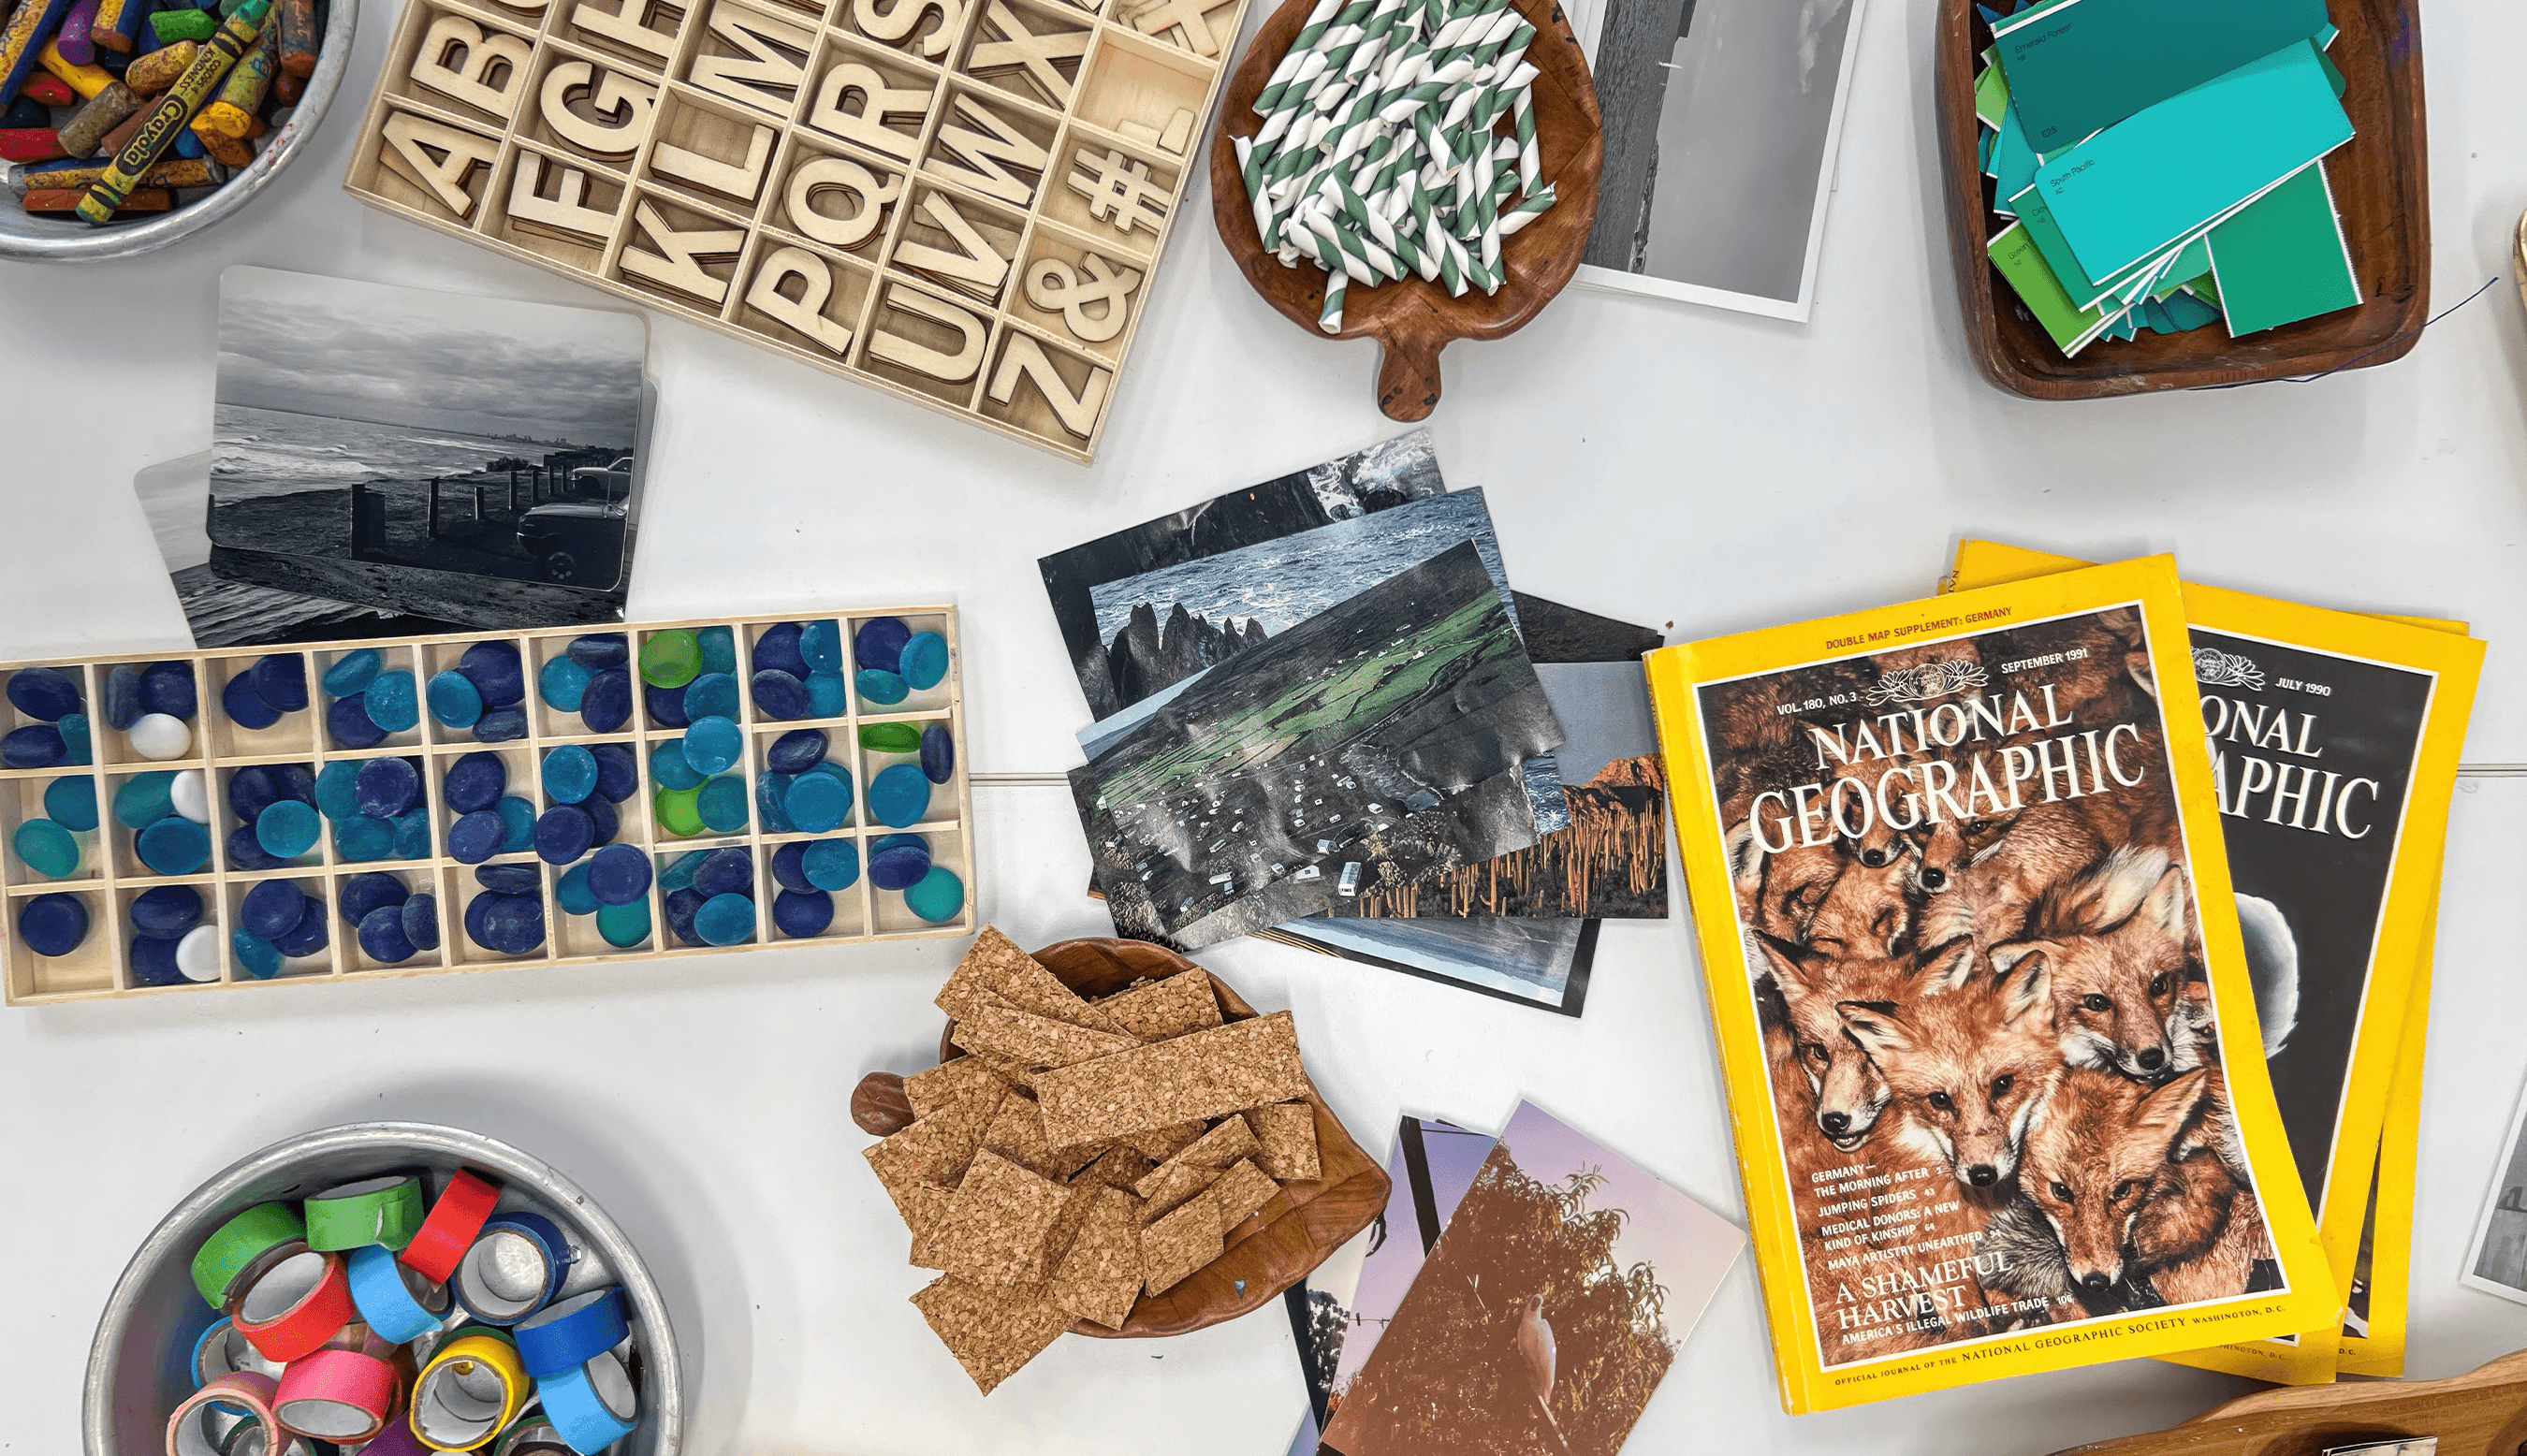
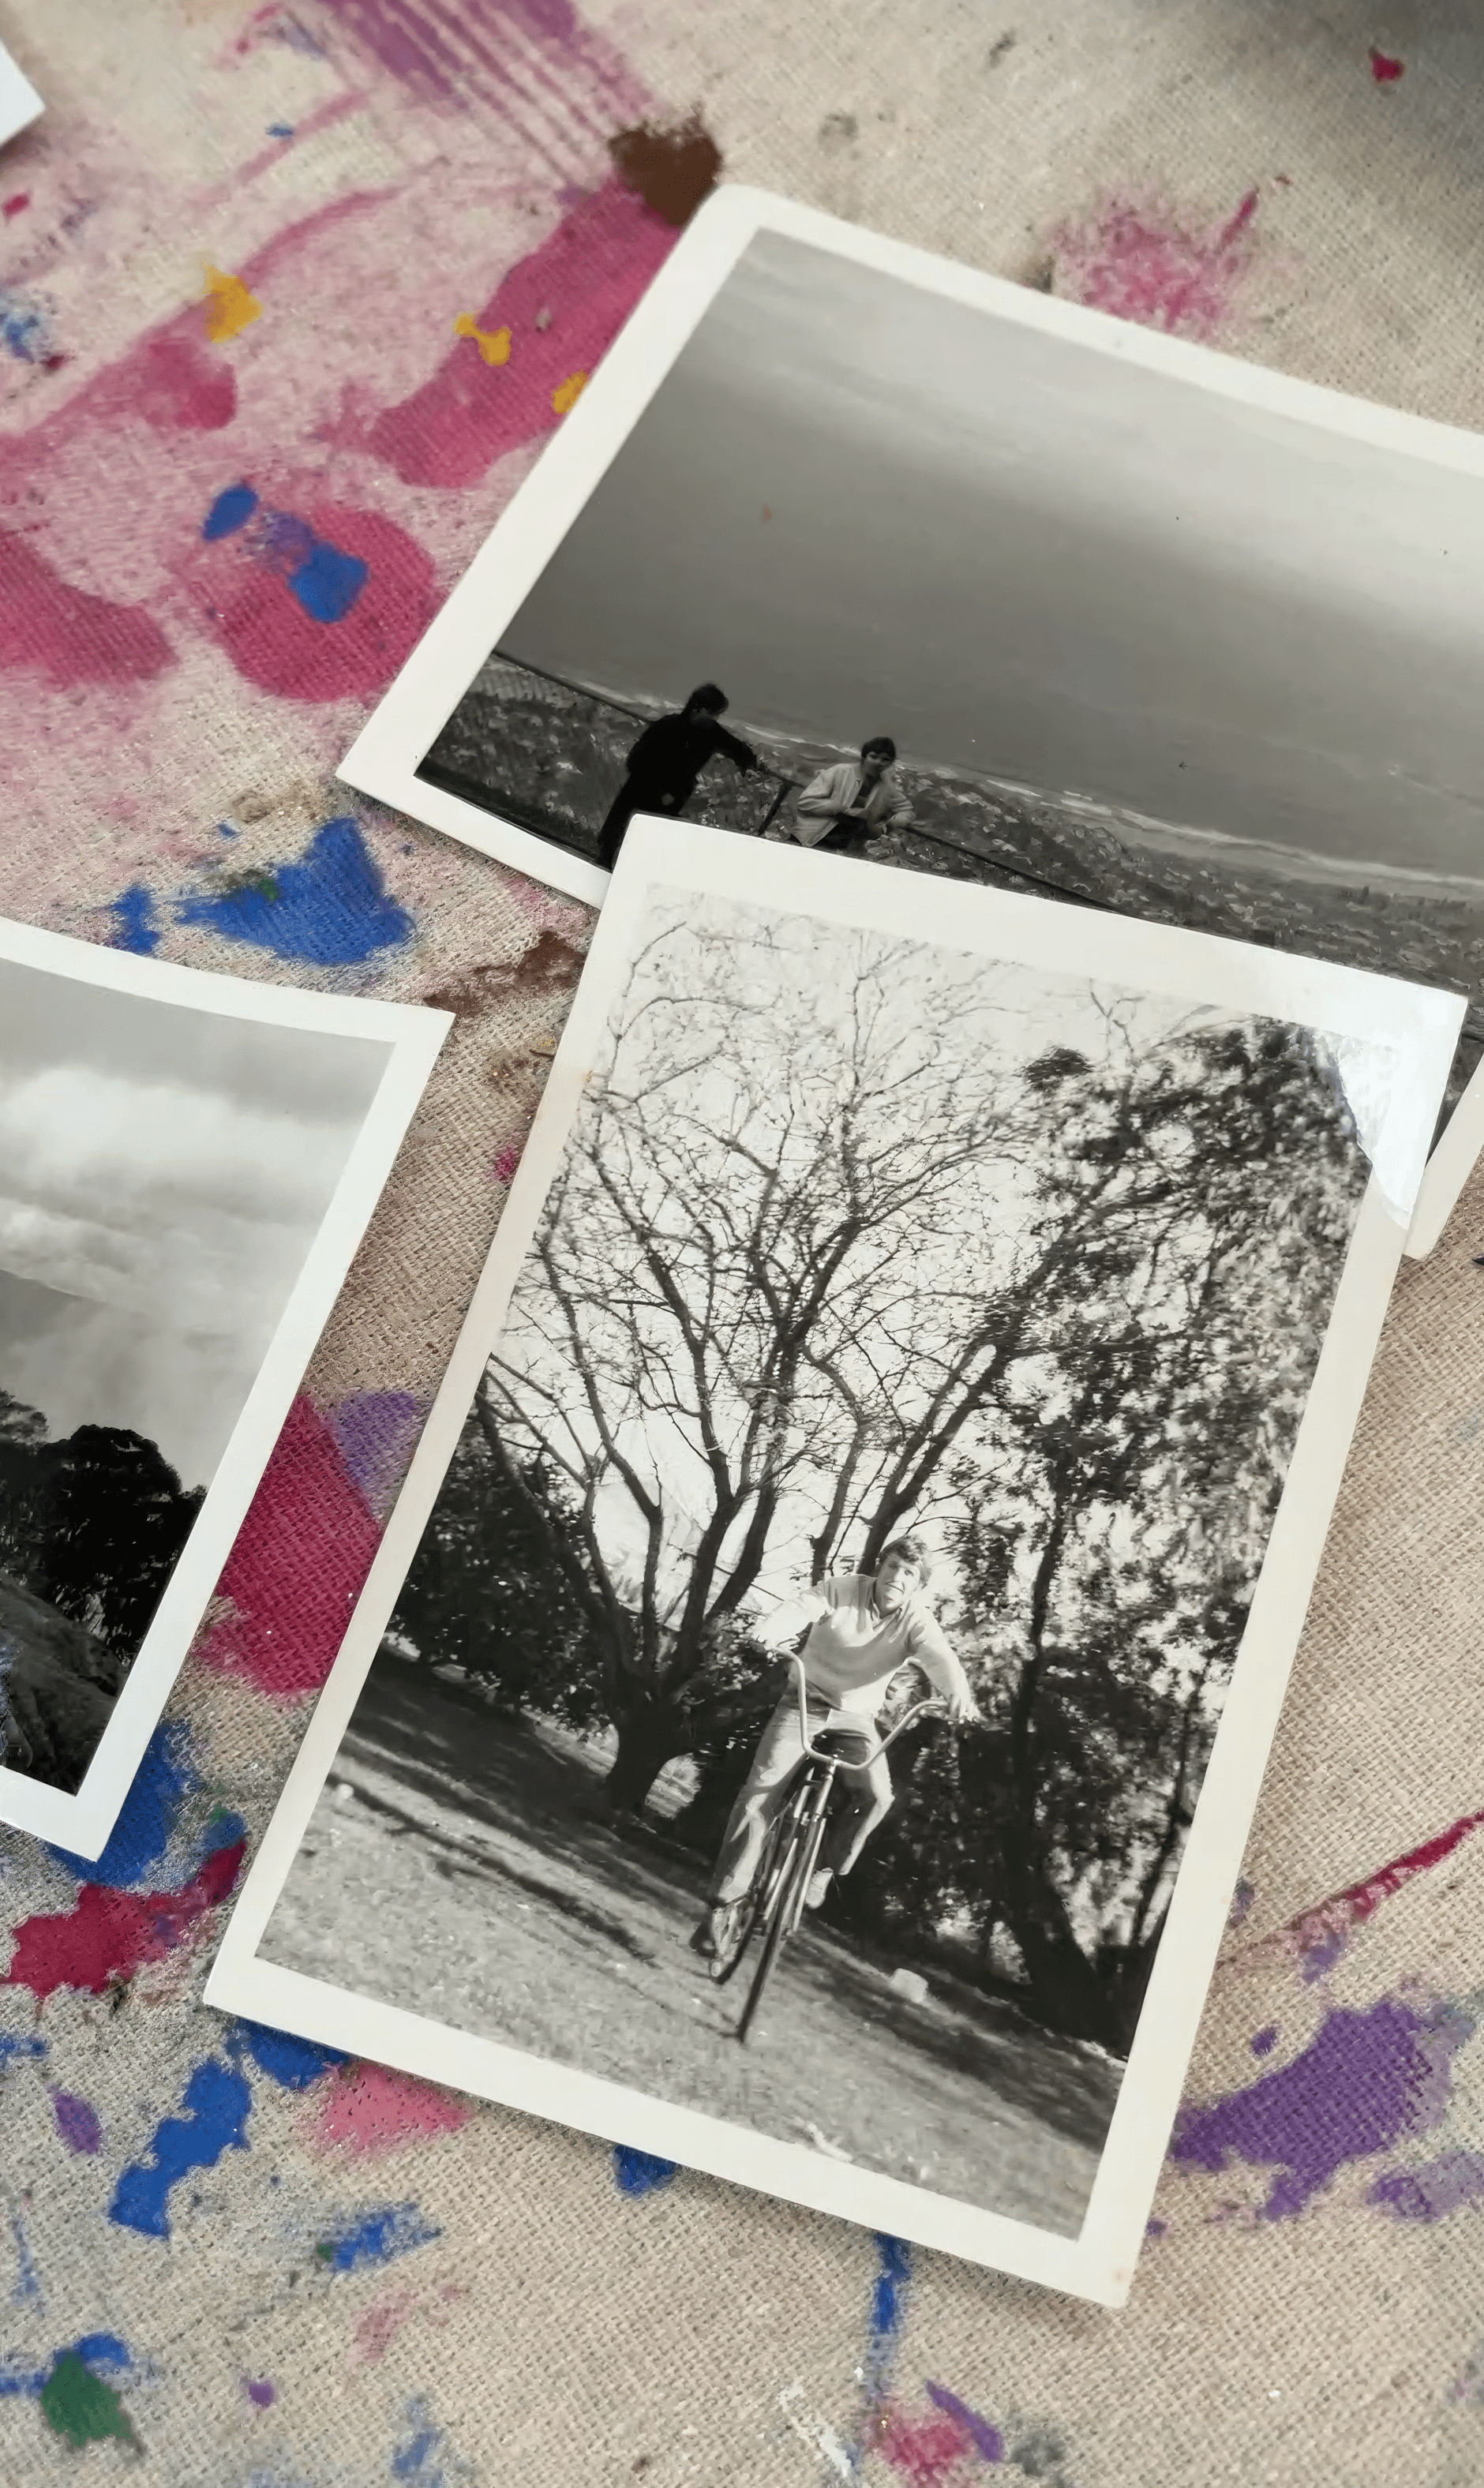
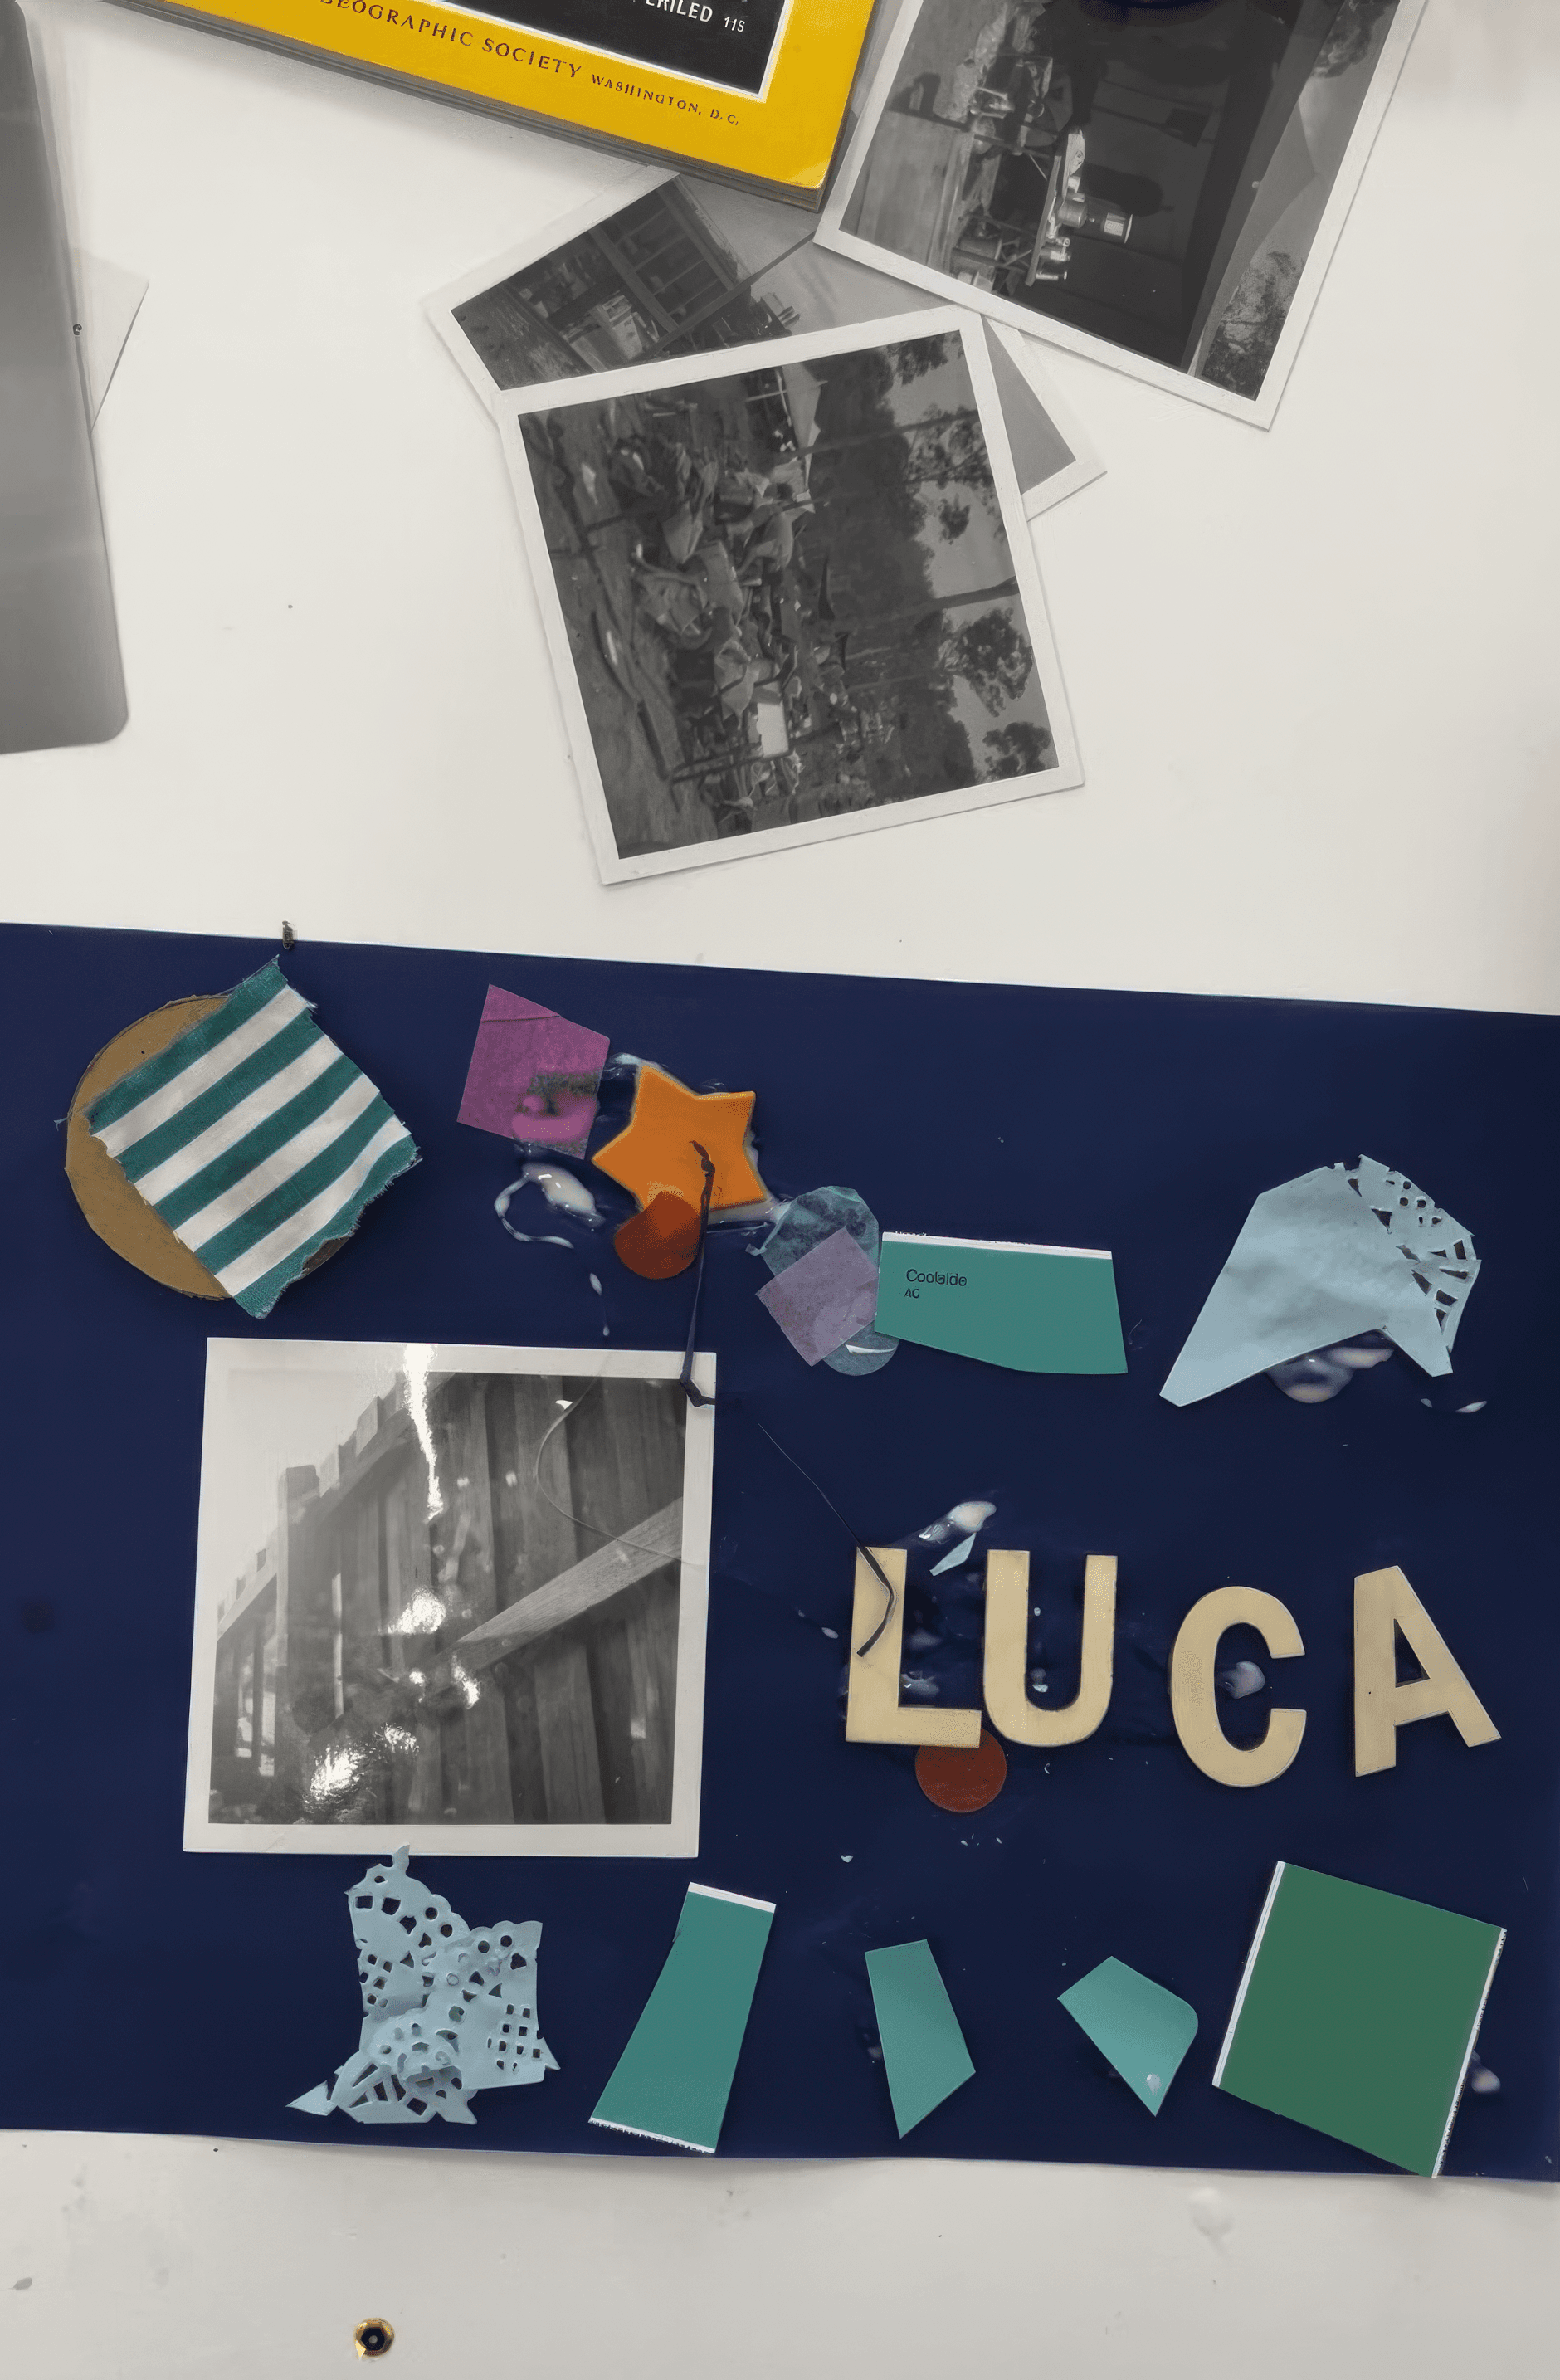
Lay out a generous collage table. Old travel magazines. National Geographic style nature spreads. Monochrome photos. Photocopies of old family holiday snapshots. Fold out road maps, torn Melways pages if you are in Melbourne. Tickets, boarding passes, brochures, tiny printed symbols from favourite places. Ripped painted paper in bold colour. Paint swatches. Alphabet letters. Cut up straws for little line markers. Thicker card or sturdy paper is wonderful for the base.
Place glue sticks and PVA in shallow trays with broad brushes. Add scissors.
The Making
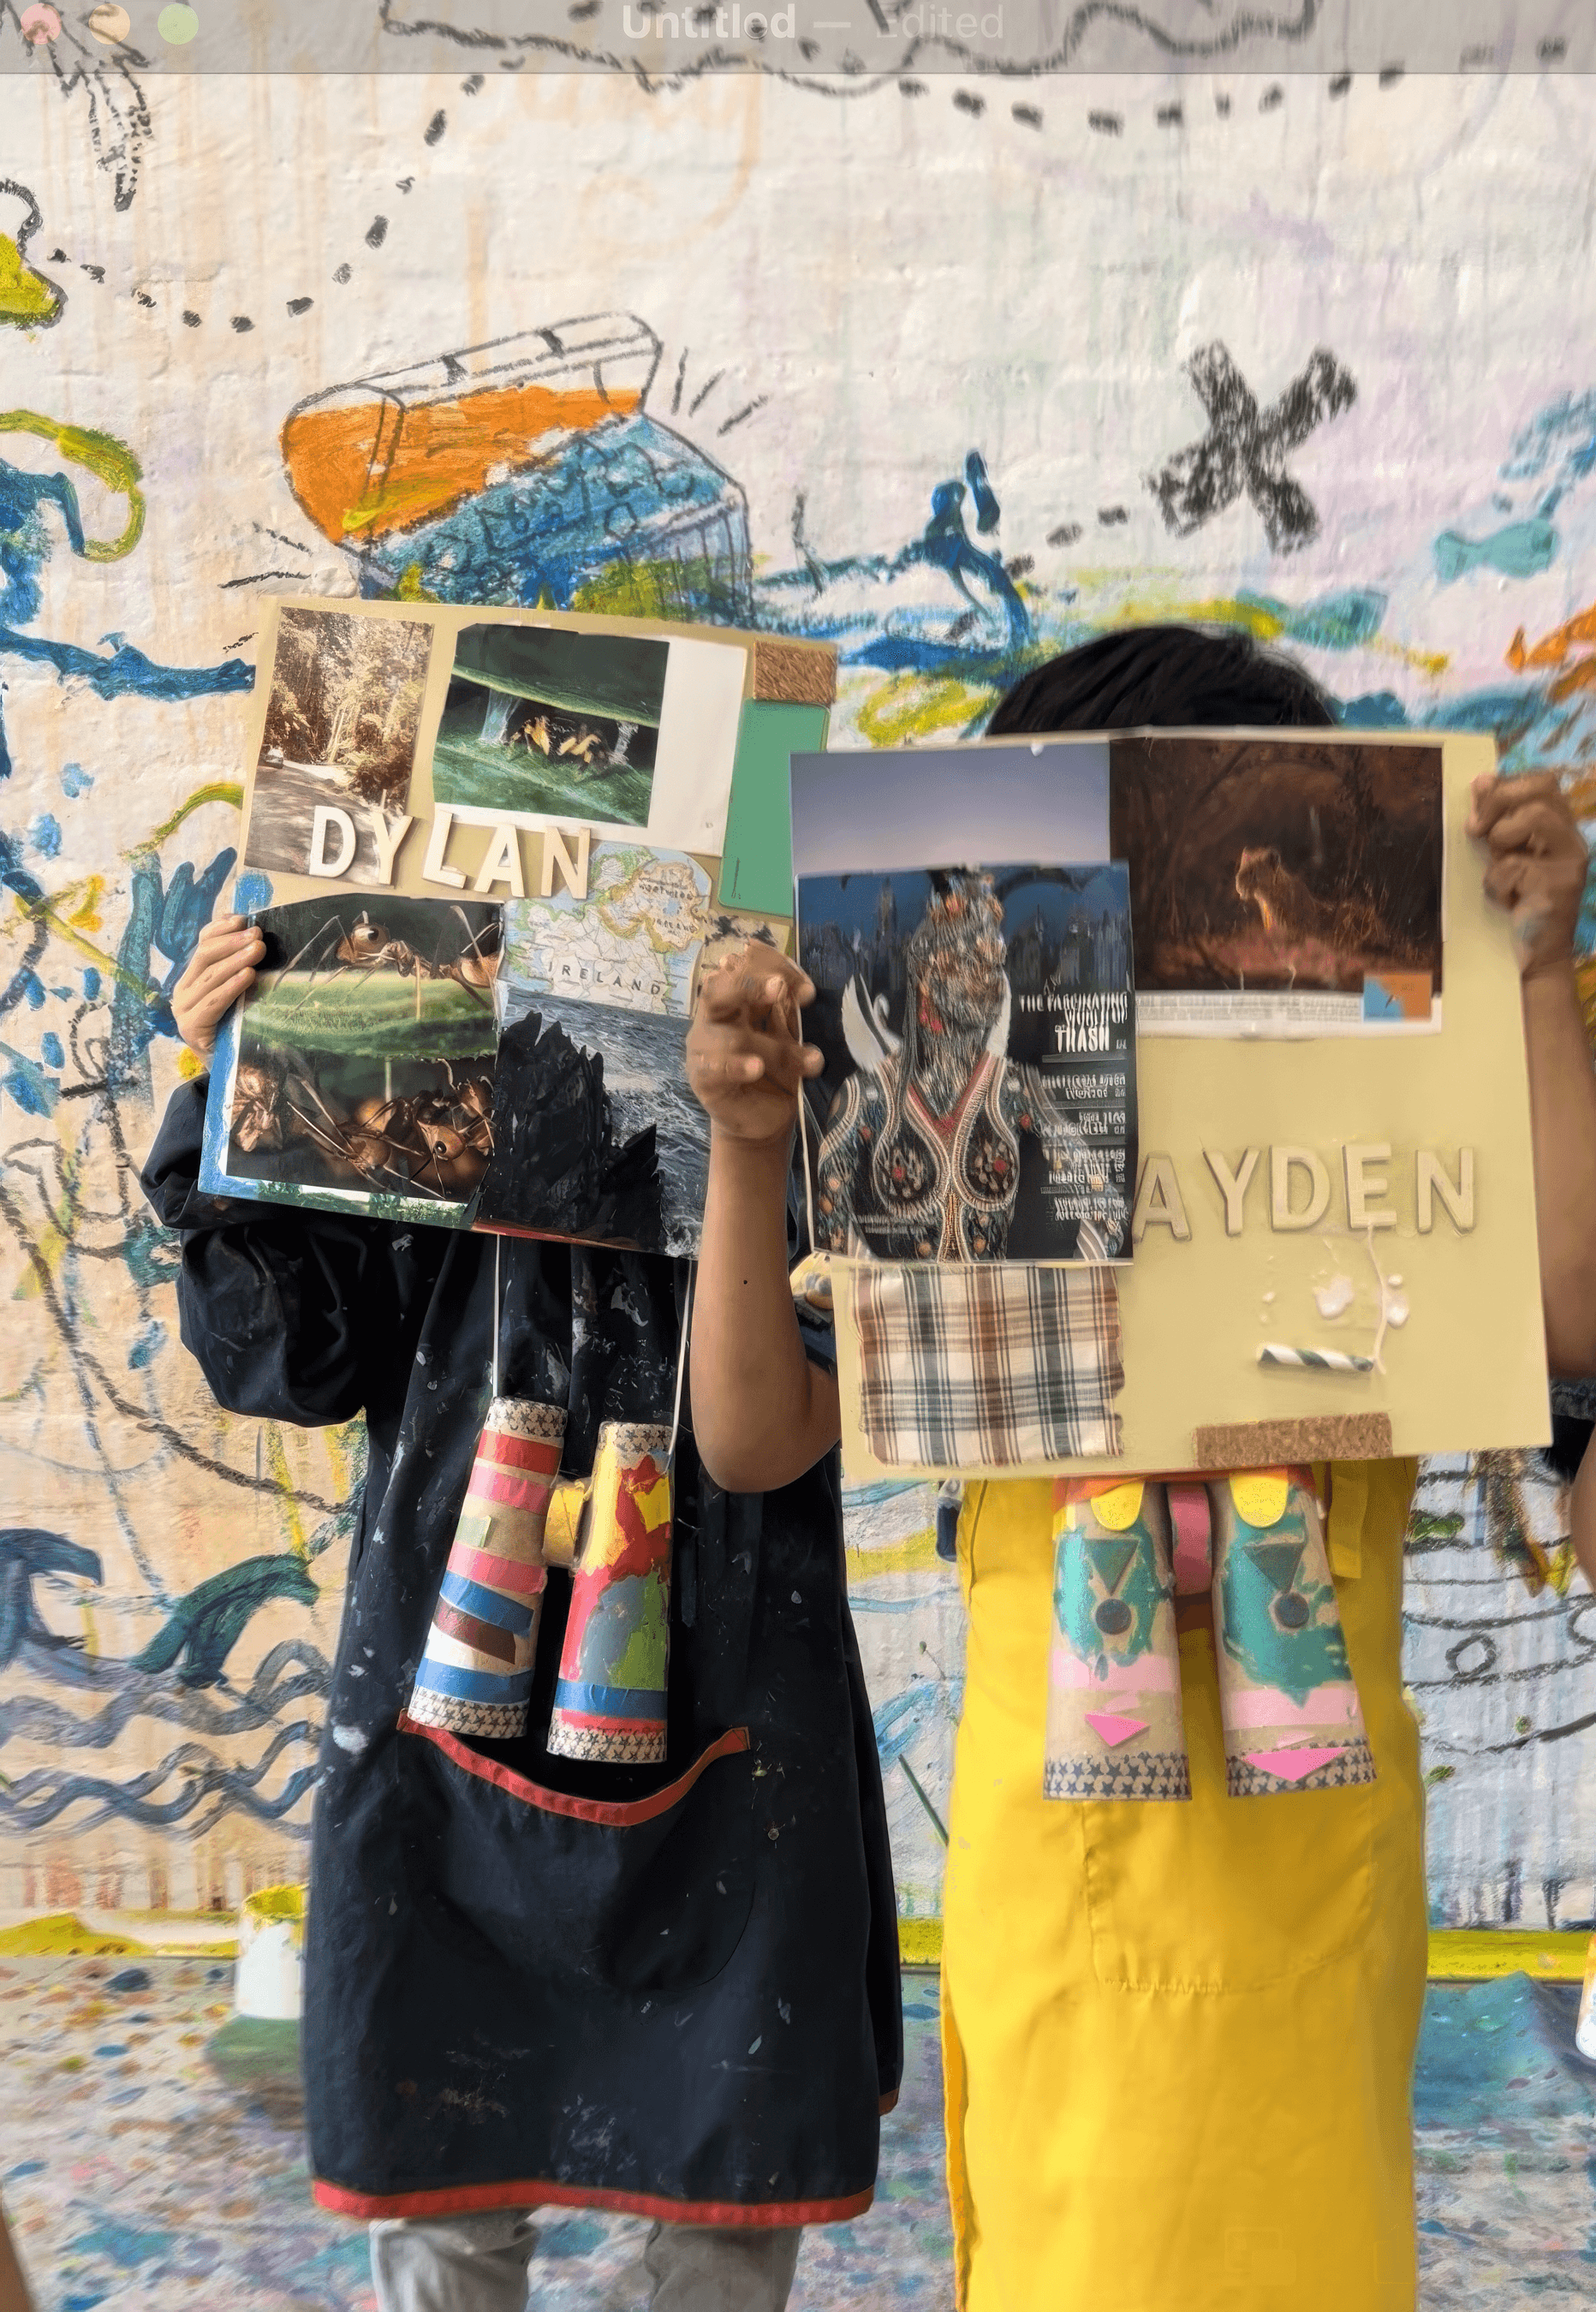
Invite each artist to build their own journey map. It can be a real trip or a dream place.
Artist Study: David Hockney
David Hockney paints places he loves. He’s known for bright, flat blocks of colour, bold outlines, and almost impossible blues and greens. A swimming pool might be pure turquoise with a single white ripple. A hillside might be orange and pink and violet instead of “grass green.” He isn’t trying to copy what a place looks like. He’s trying to show how it feels to stand there and look.
Later in his career he spent a lot of time painting the English countryside. Hedgerows, roads curving through fields, rows of trees on rolling hills. Instead of painting them in dull browns and greys, he pushed the colours loud and clear. Purples in the shadows and neon greens in new growth and hot reds in the dirt. It all feels so alive and personal!
You can share this idea with your artists. Colour doesn’t have to be realistic to be true. What colours belong to your place. What shapes tell the story of where you’ve been or where you want to go. Could your street be orange. Could your favourite swimming spot be magenta around the edges. That is very Hockney.
If you can, print or show a couple of David Hockney’s landscape works. As with all art experieneces that are inspired by the works of others, the idea is not to copy his style. The idea is to ask what colours belong to your place.
Variations
Turn finished collages into postcards. Fold, write a message, deliver!
Materials
Materials
Old maps, brochures, photocopied photos, tickets
Magazines and painted paper scraps
Paint swatches, alphabet letters, cut straws or yarn
Thick card or sturdy paper as the base
Glue sticks and shallow trays of PVA with brushes
Scissors
Optional reference images of David Hockney landscapes for colour conversation
Gallery
Back to Top
Travel Collage
Cut and stick the story of your own journey
Bookmark
Collage
The Set Up
Lay out a generous collage table. Old travel magazines. National Geographic style nature spreads. Monochrome photos. Photocopies of old family holiday snapshots. Fold out road maps, torn Melways pages if you are in Melbourne. Tickets, boarding passes, brochures, tiny printed symbols from favourite places. Ripped painted paper in bold colour. Paint swatches. Alphabet letters. Cut up straws for little line markers. Thicker card or sturdy paper is wonderful for the base.
Place glue sticks and PVA in shallow trays with broad brushes. Add scissors.
The Making
Invite each artist to build their own journey map. It can be a real trip or a dream place.
Artist Study: David Hockney
David Hockney paints places he loves. He’s known for bright, flat blocks of colour, bold outlines, and almost impossible blues and greens. A swimming pool might be pure turquoise with a single white ripple. A hillside might be orange and pink and violet instead of “grass green.” He isn’t trying to copy what a place looks like. He’s trying to show how it feels to stand there and look.
Later in his career he spent a lot of time painting the English countryside. Hedgerows, roads curving through fields, rows of trees on rolling hills. Instead of painting them in dull browns and greys, he pushed the colours loud and clear. Purples in the shadows and neon greens in new growth and hot reds in the dirt. It all feels so alive and personal!
You can share this idea with your artists. Colour doesn’t have to be realistic to be true. What colours belong to your place. What shapes tell the story of where you’ve been or where you want to go. Could your street be orange. Could your favourite swimming spot be magenta around the edges. That is very Hockney.
If you can, print or show a couple of David Hockney’s landscape works. As with all art experieneces that are inspired by the works of others, the idea is not to copy his style. The idea is to ask what colours belong to your place.
Variations
Turn finished collages into postcards. Fold, write a message, deliver!
Materials
Materials
Old maps, brochures, photocopied photos, tickets
Magazines and painted paper scraps
Paint swatches, alphabet letters, cut straws or yarn
Thick card or sturdy paper as the base
Glue sticks and shallow trays of PVA with brushes
Scissors
Optional reference images of David Hockney landscapes for colour conversation
Gallery
Back to Top
Scraped Mountains
Pull colour across a rocky horizon
Bookmark
Painting & Drawing
The Set Up
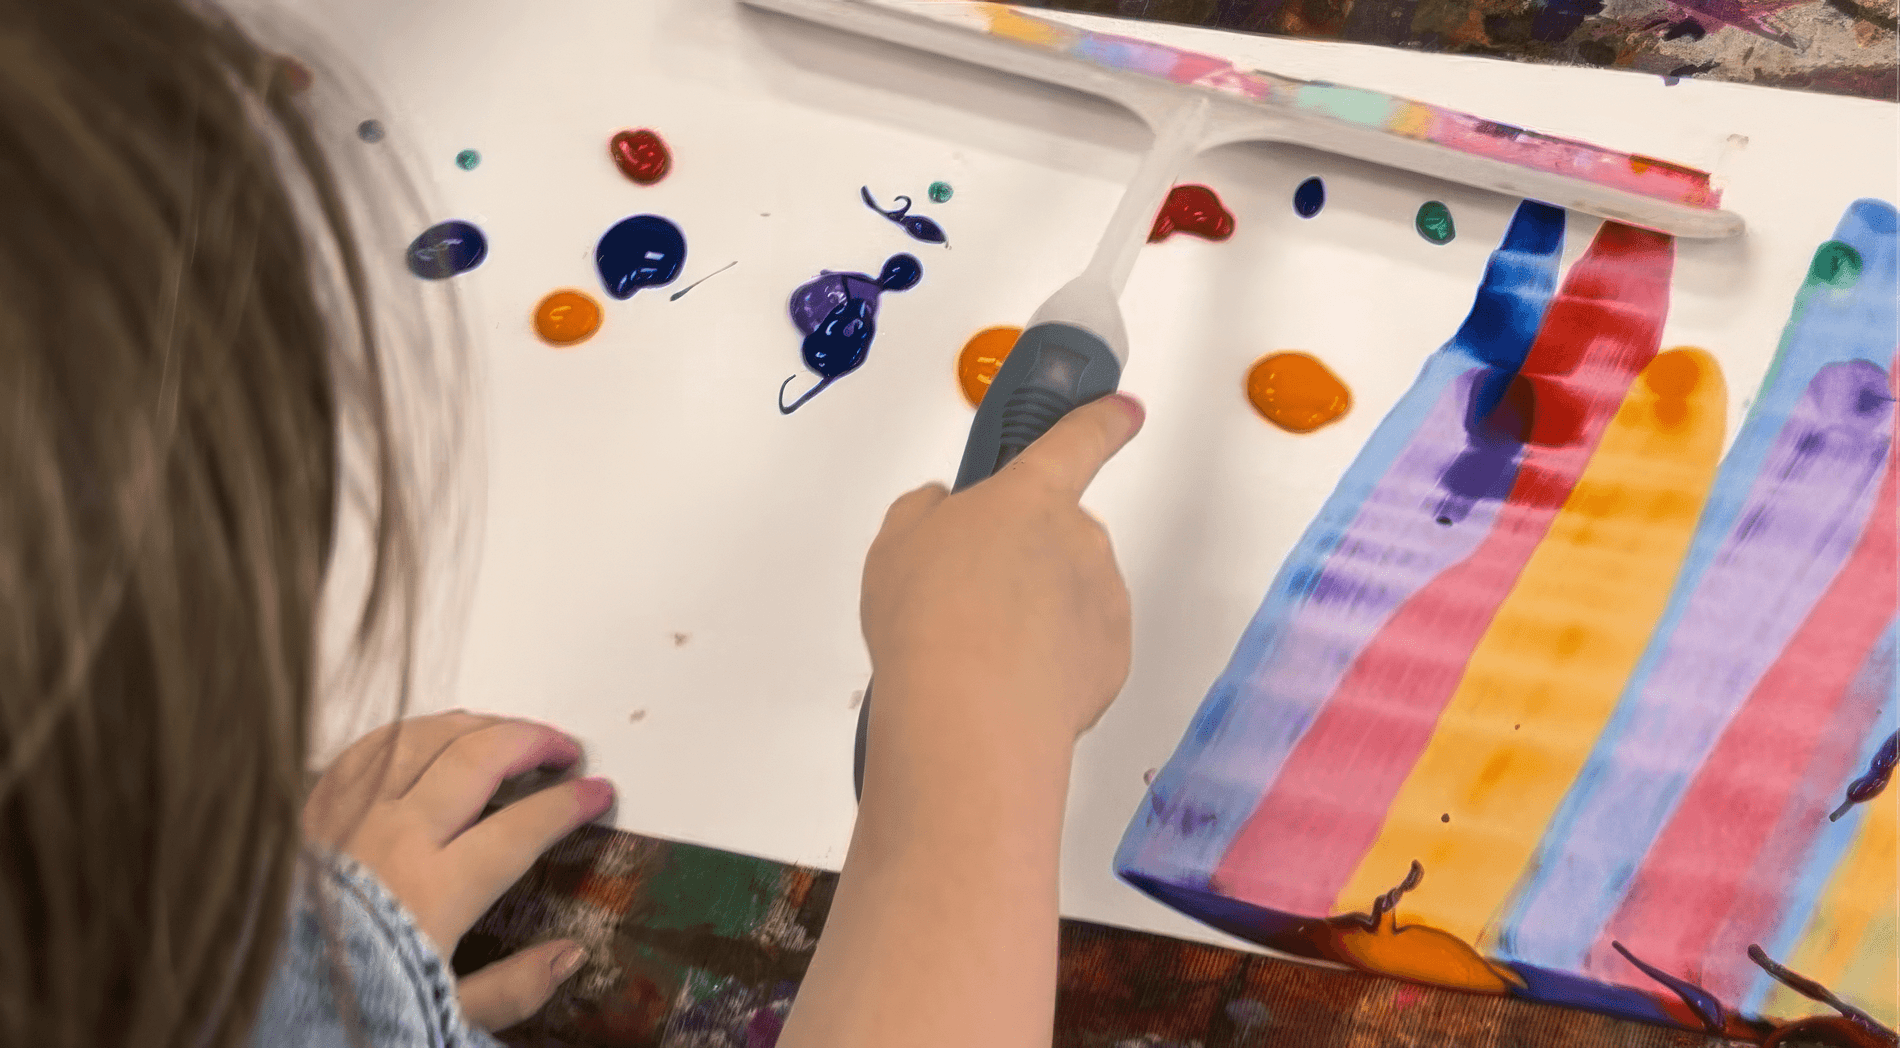
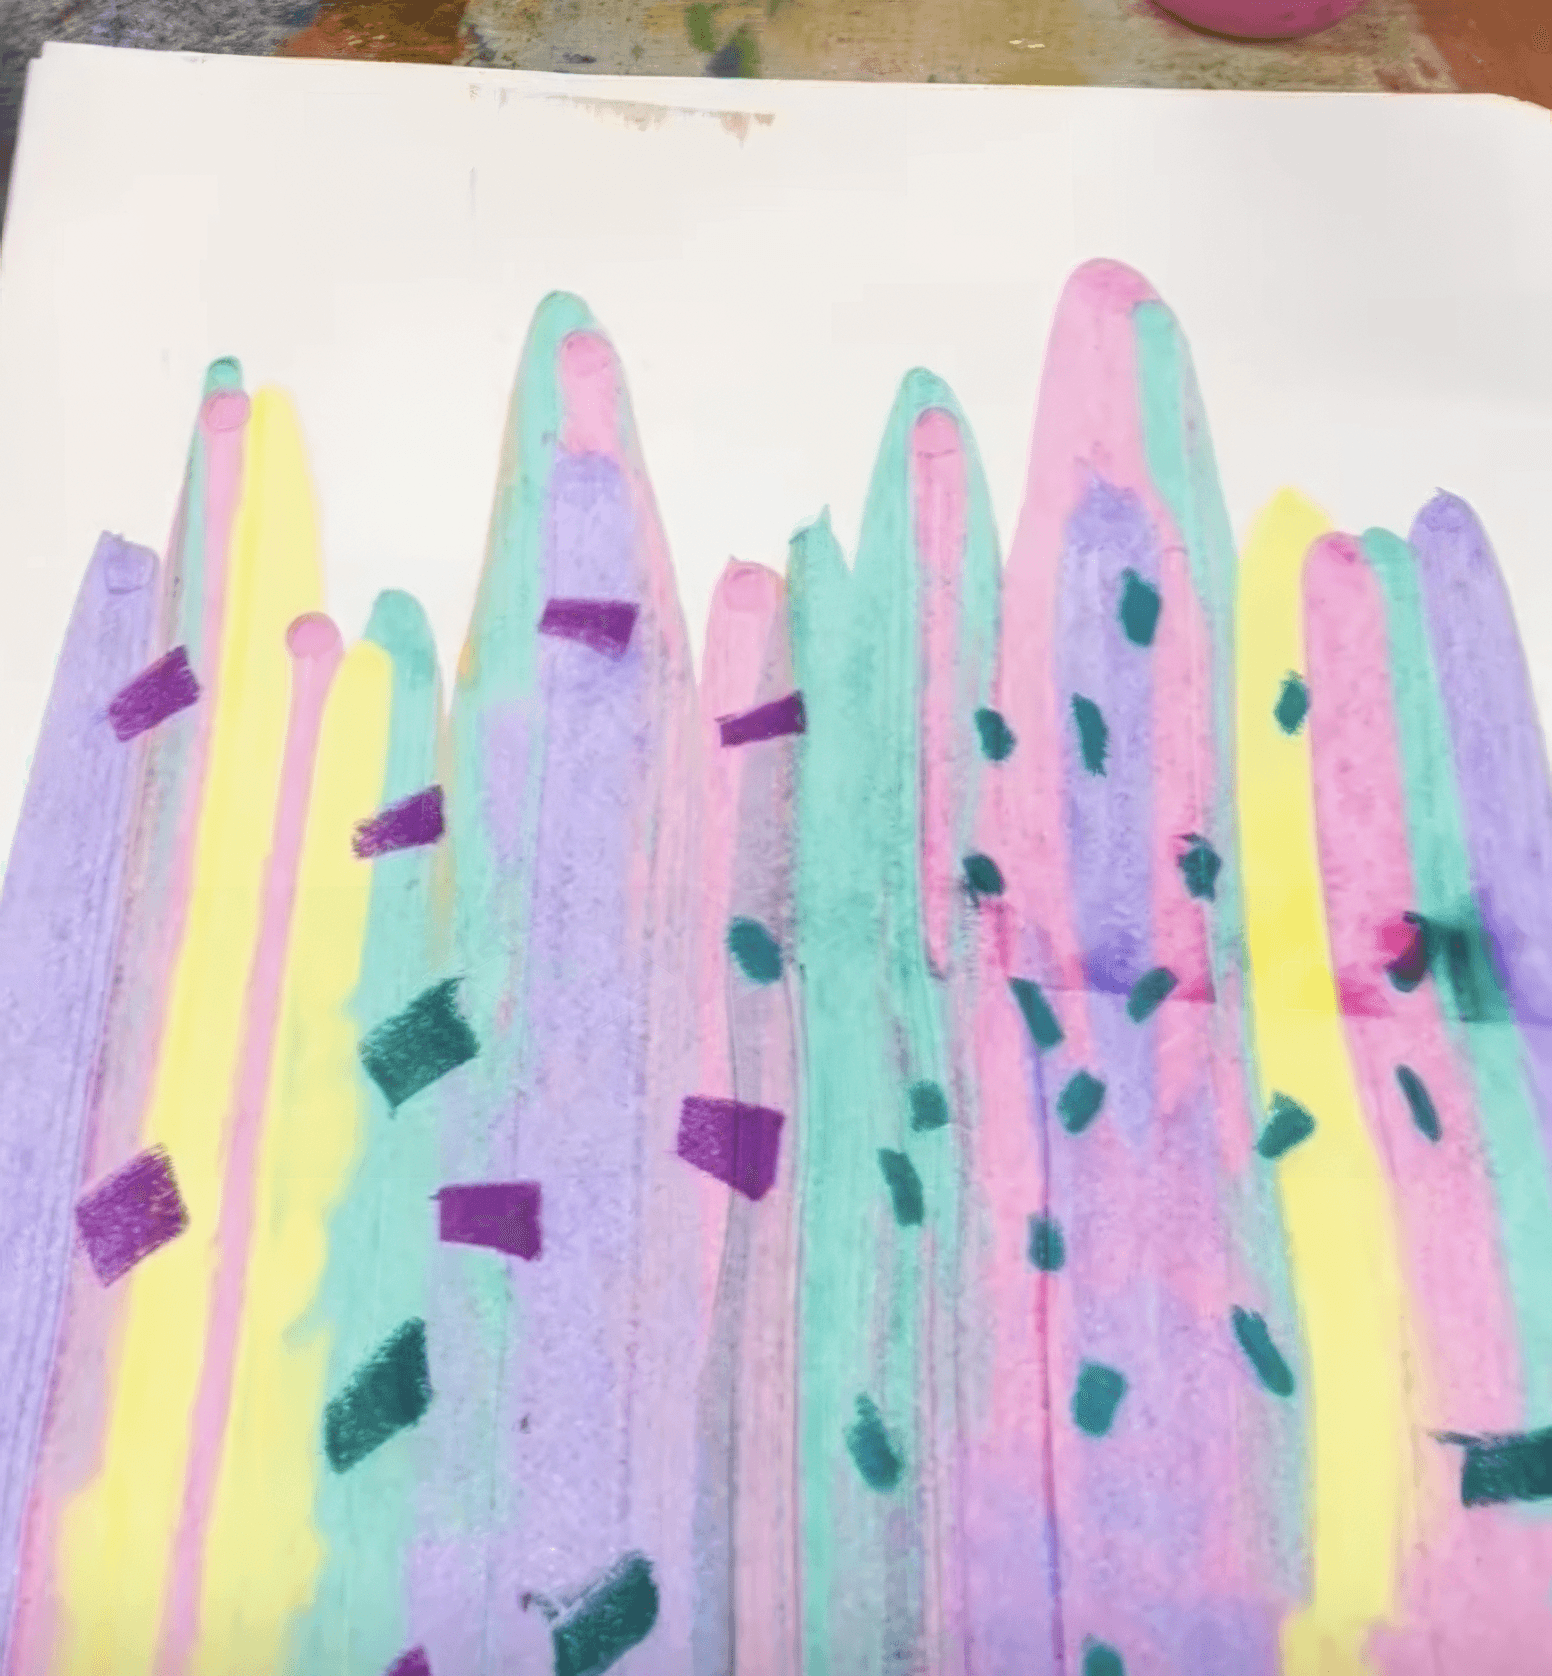
Lay out thick cardstock or lightweight board that can handle wet paint. Set out a small selection of opaque poster paints and a couple of pearlescent or metallic paints. The contrast between flat colour and shimmer reads beautifully. Have squeegee style window washers, wide paint scrapers, and old loyalty cards or cut plastic cards in different widths. The variety of edges creates different ridgelines.
You can lay out reference photos of mountain ranges if that sparks interest, or you can stay abstract and let the act of scraping discover the shape. Both are true to the theme because this is about landscape and memory and arrival and experimentation!
The Making
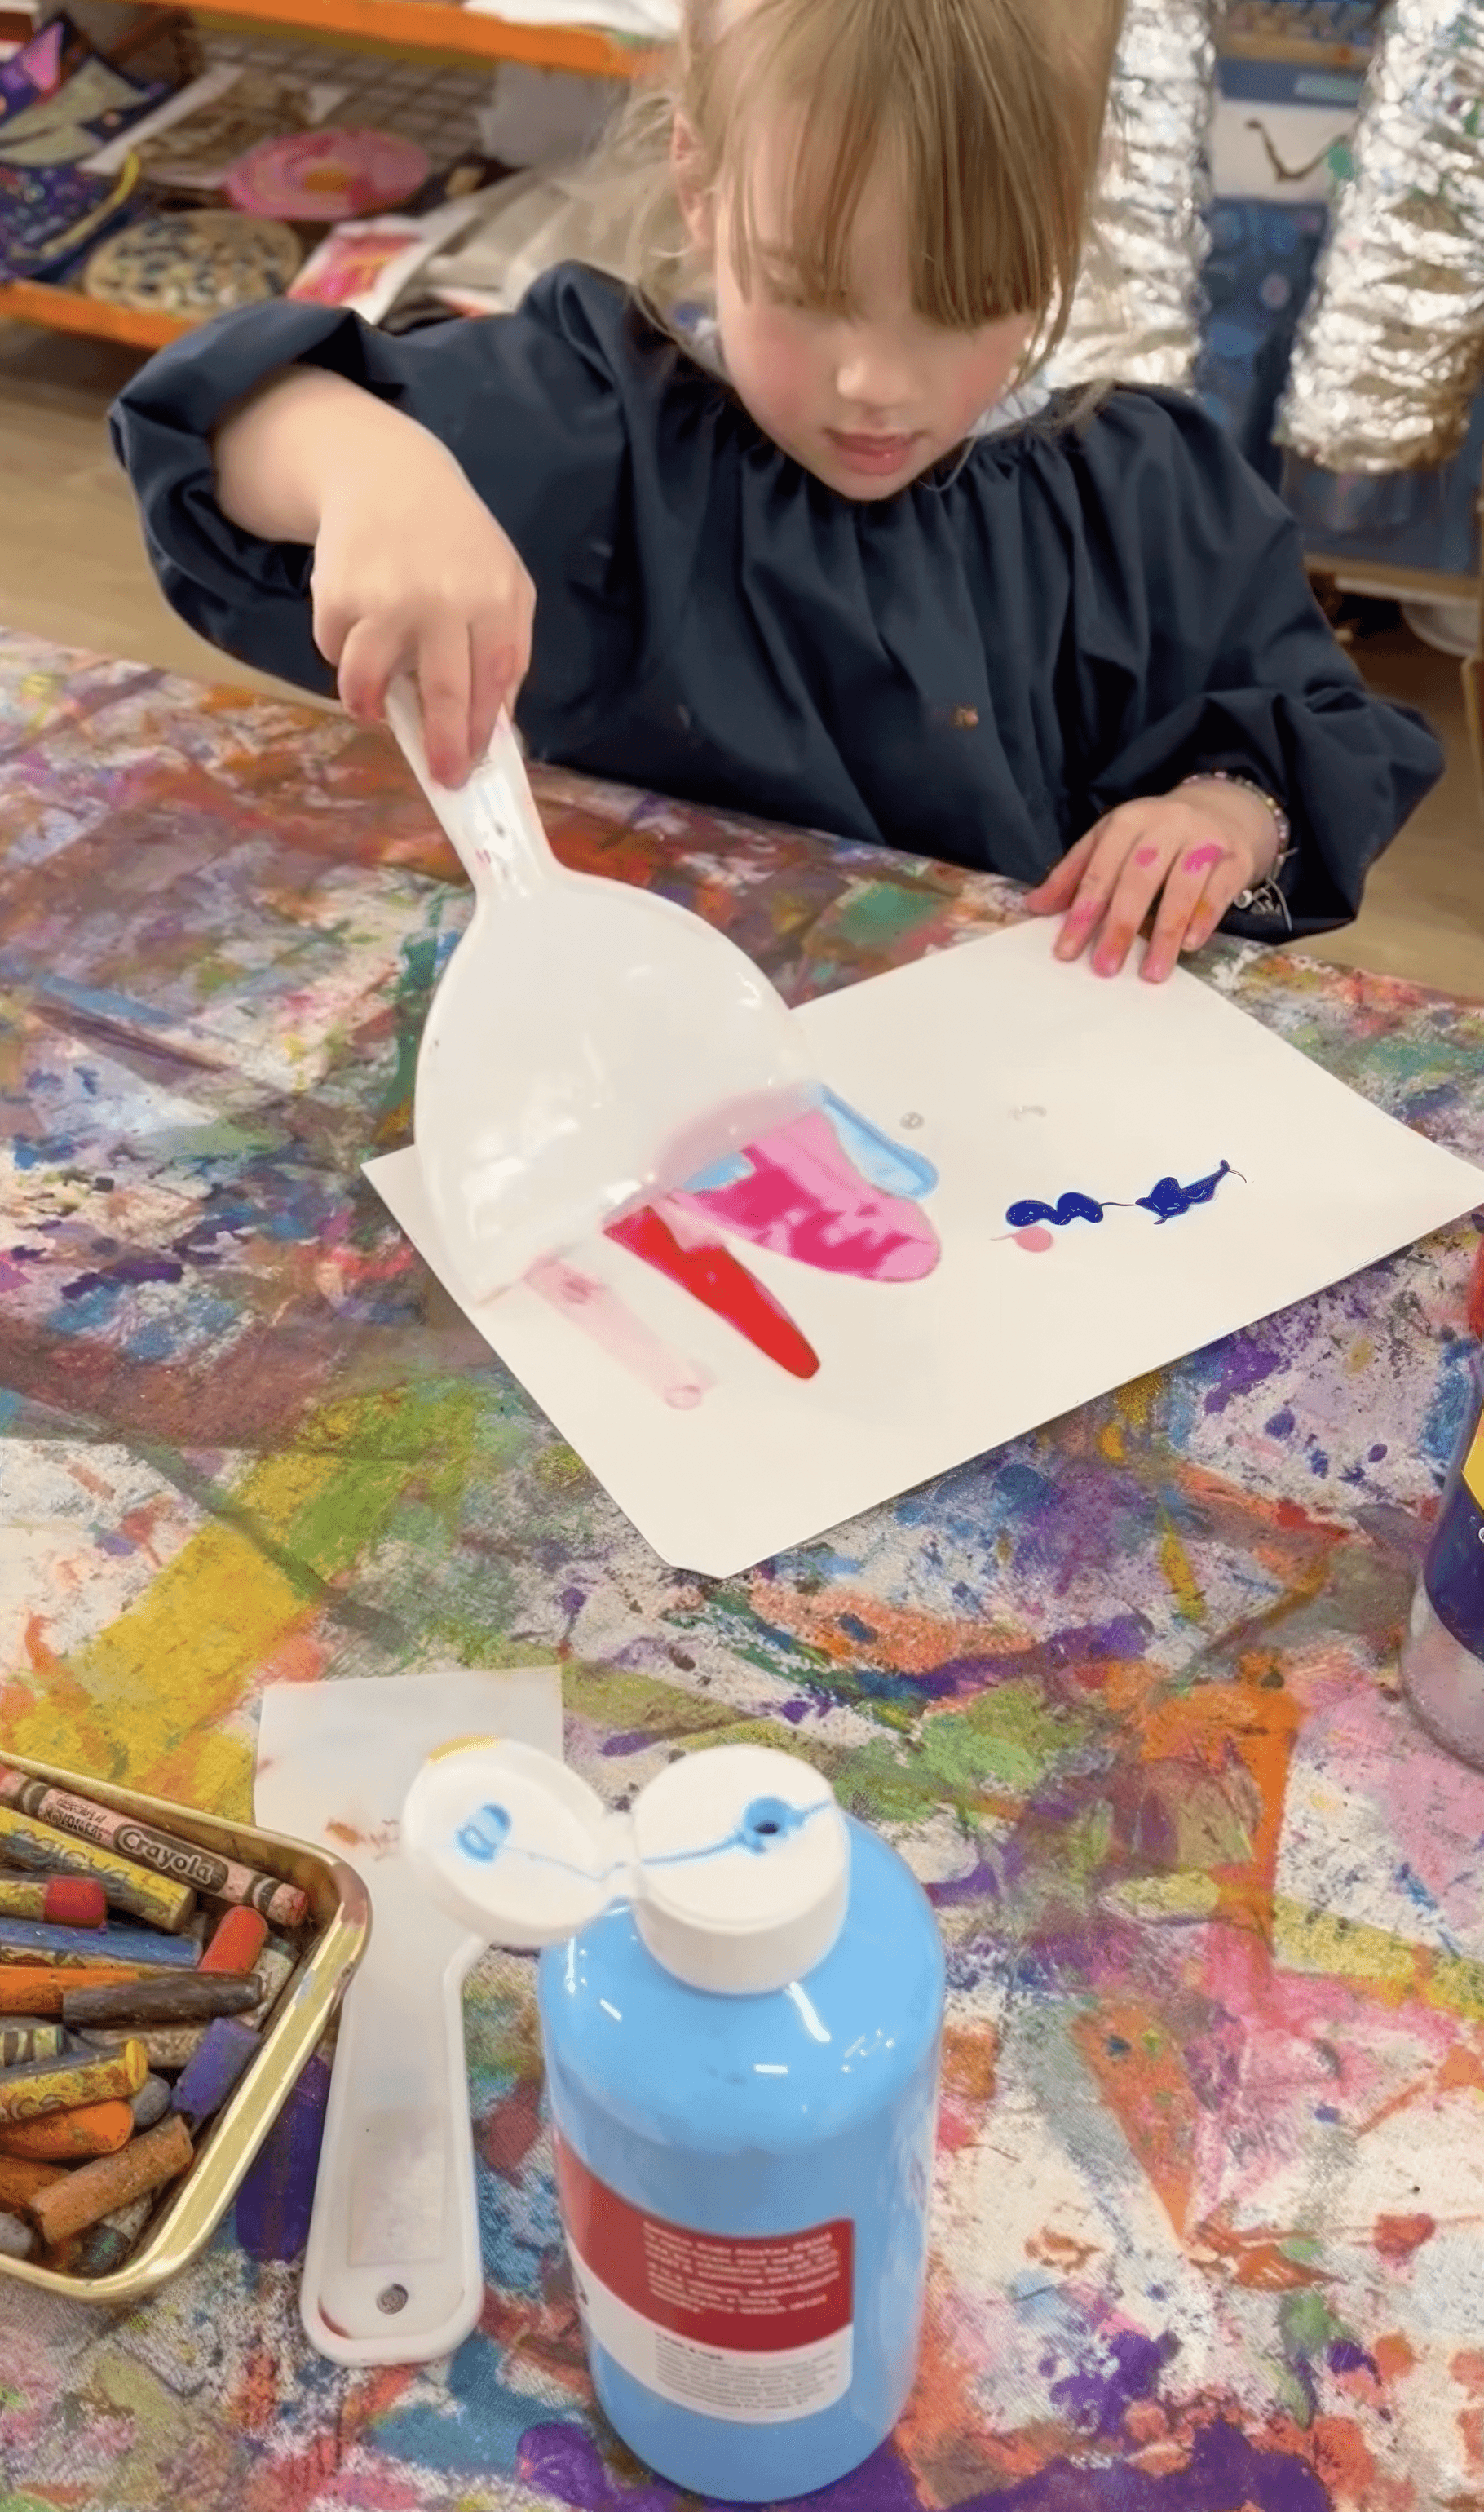
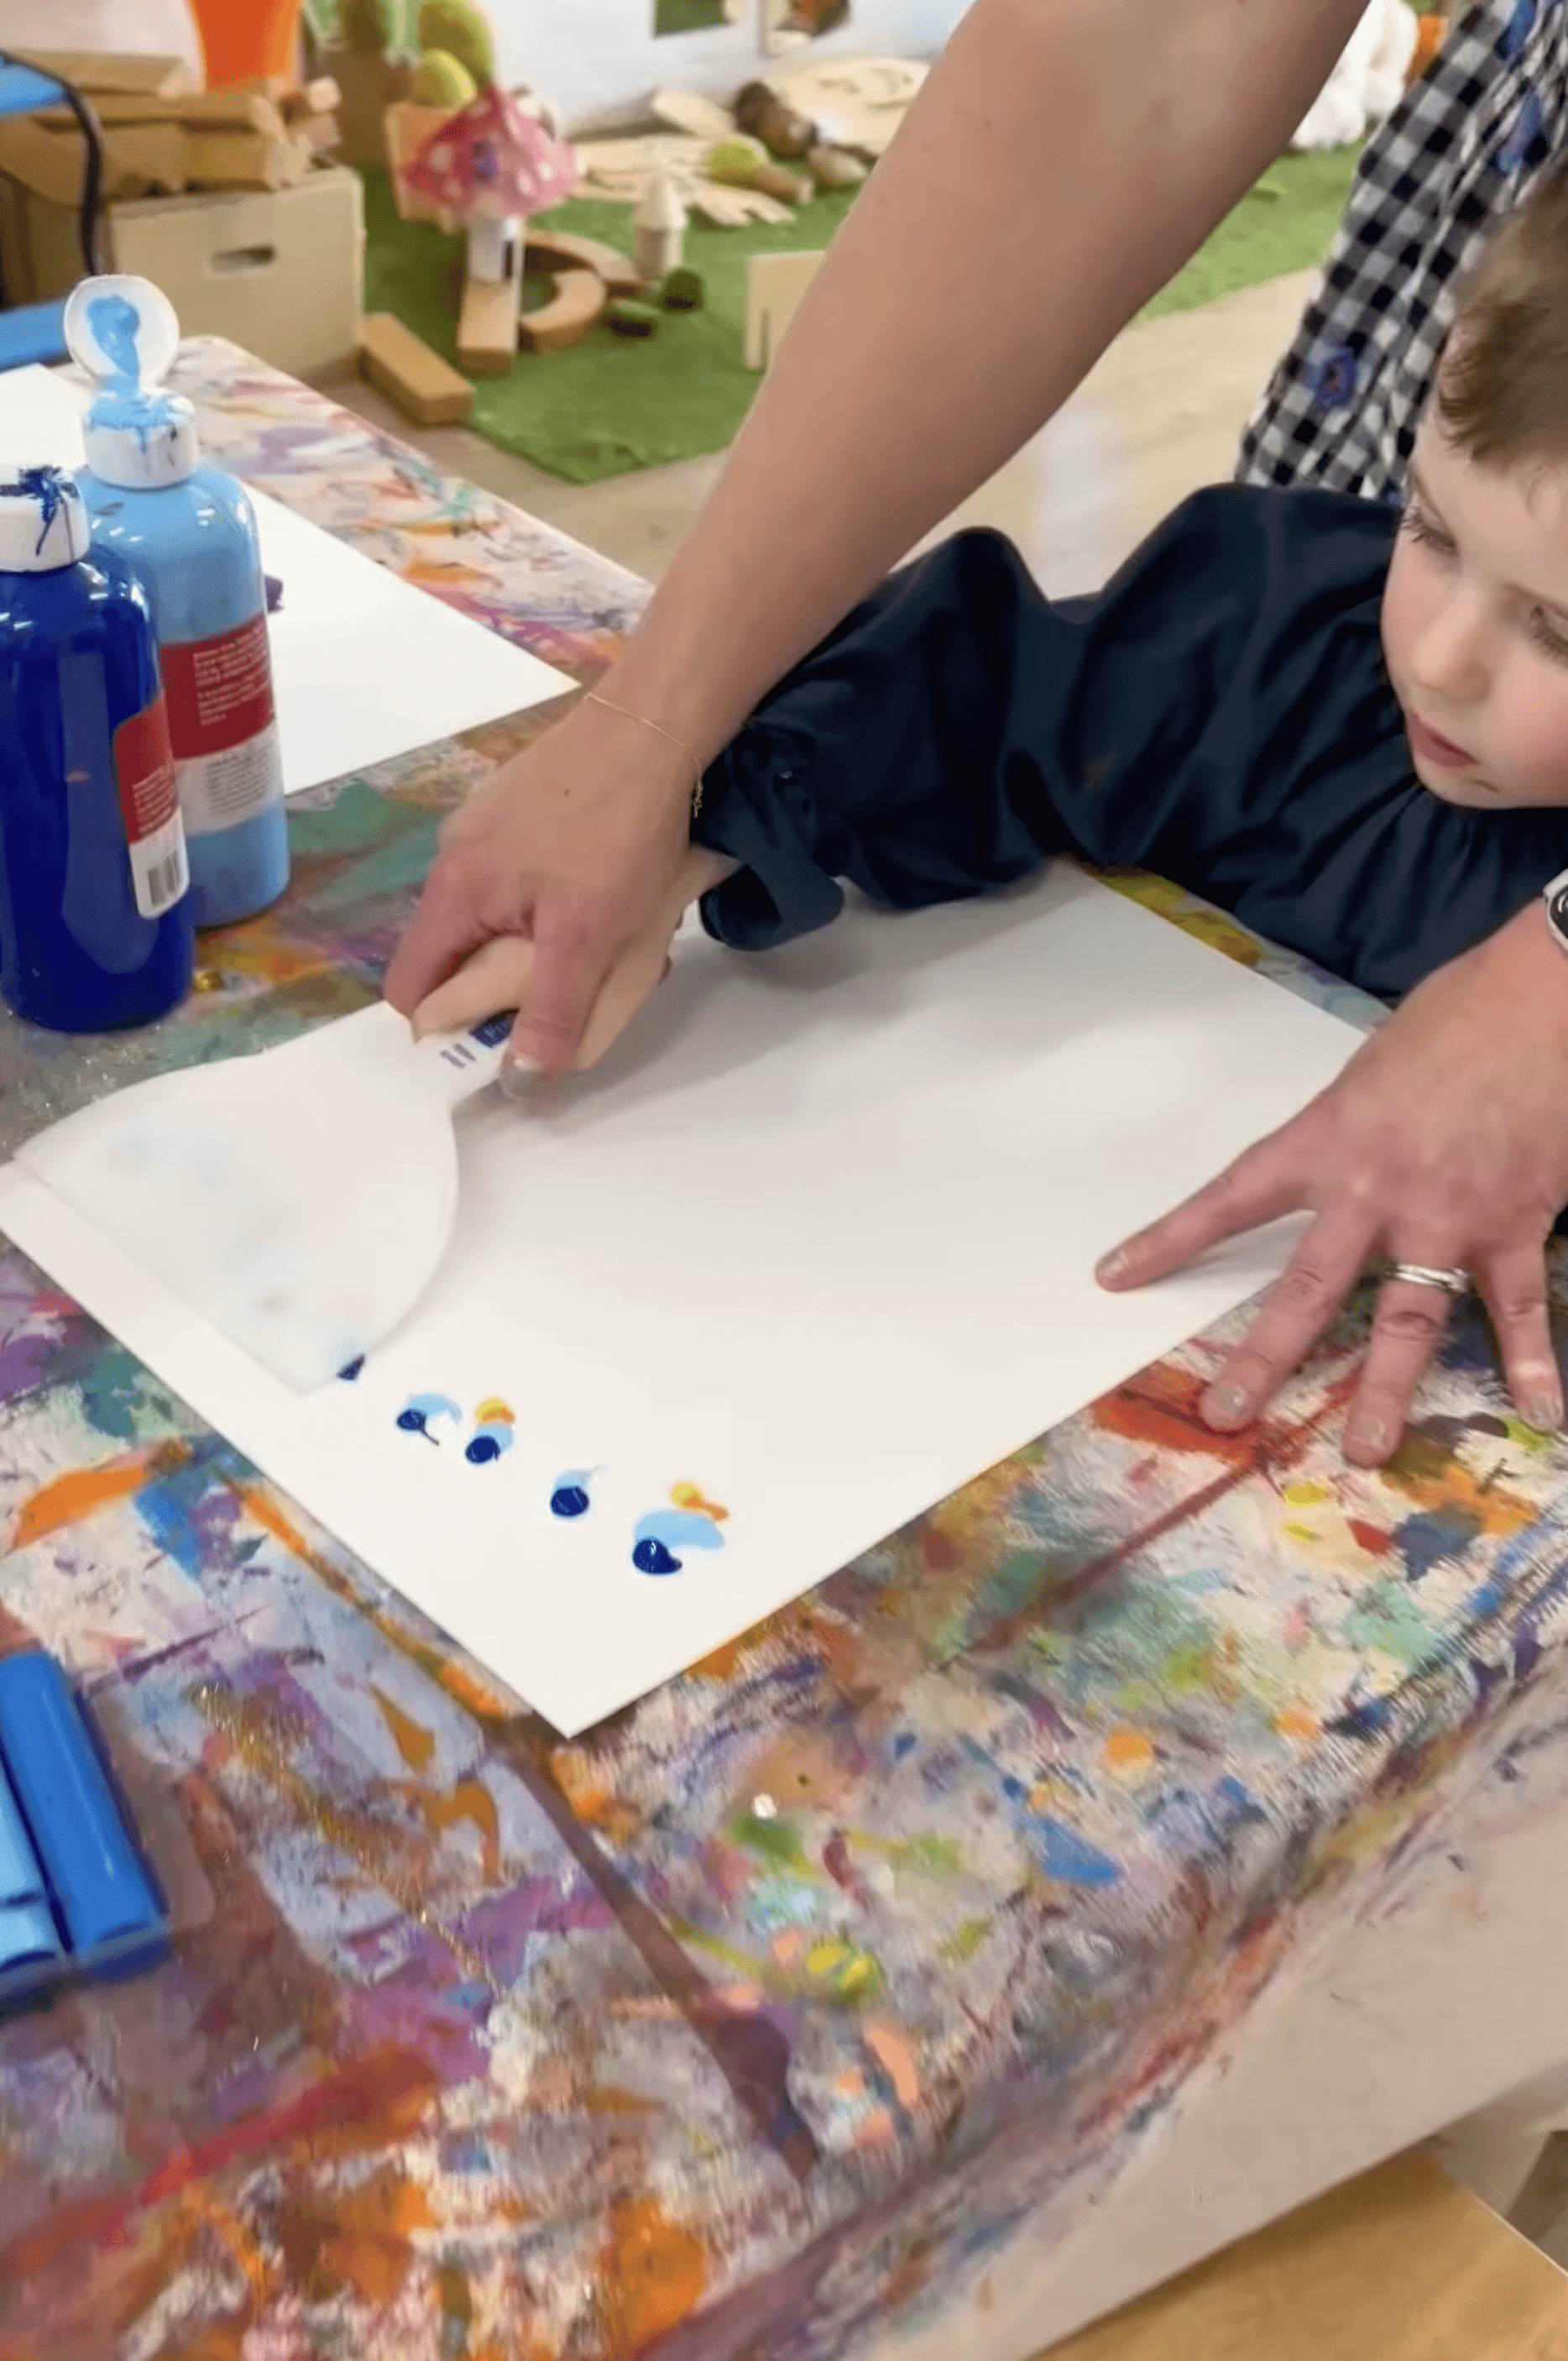
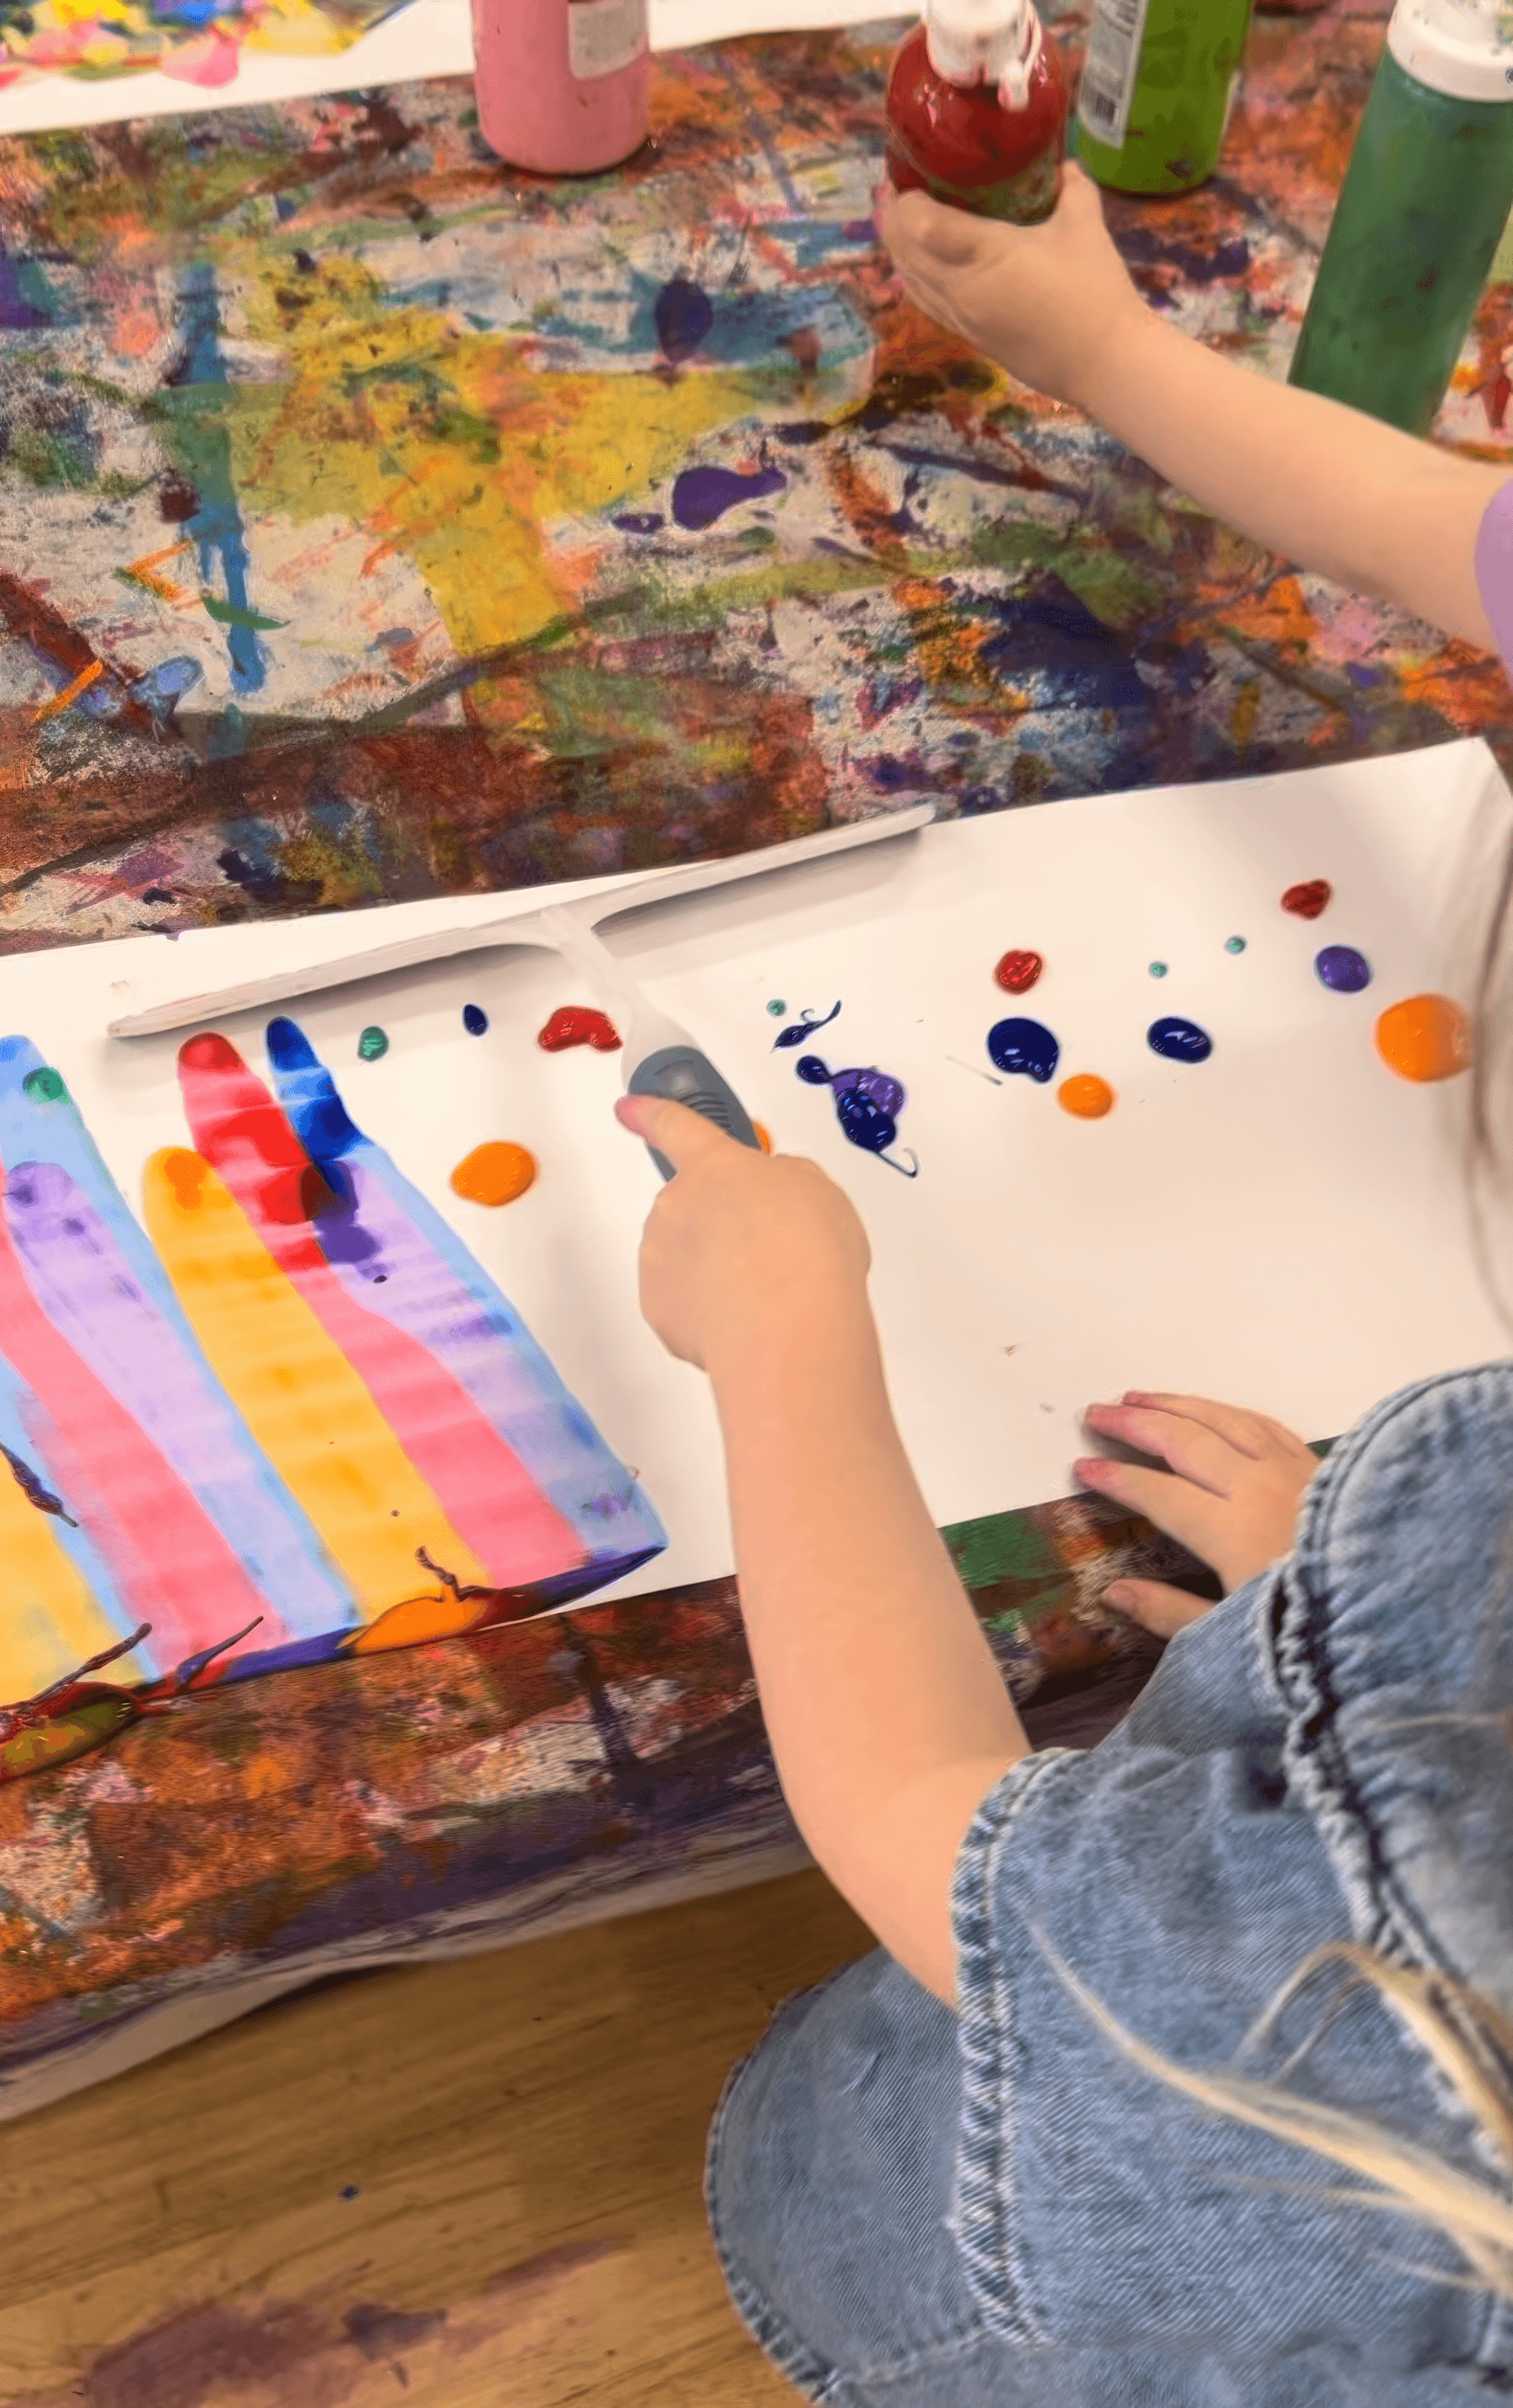
Squeeze tiny blobs of paint along the top third of the paper. Too much paint turns muddy. Less paint lets you pull clean layers and keep the shape of the movement. Keep cloths nearby for wiping tools between pulls.
Invite the artist to choose which edge they want to try first. A wide scraper makes a long smooth slope. A narrow card makes sharper dramatic lines. Press the edge into the paint blobs and pull downward in one steady motion, letting the colours drag and mix. You will see instant ridgelines and valleys appear.
Ask Where could this be. A snowy ridge. A lava range. A planet no one has seen yet. That open question turns technique into story.
Once the first layer dries a little, you can add new small blobs above or below and scrape again. Layers build depth. Pearlescent paint over flat colour can read like mist or early sun. If scraping feels too fast for some kids, let them press and slide with both hands, slow and steady, so they can feel the movement of the paint rather than rushing the pull.
Notes from our Artspace: MÅLA style squeezy paints (from Ikea) are great here because the paint flows slowly enough that kids stay in control instead of dumping a huge puddle by accident.
Variations
Cut the dried mountains into strips and collage them into a travel journal scene
Make one huge shared horizon by lining pages side by side and scraping across them all in one pull
Materials
Thick cardstock or light board
Opaque poster or tempera paints plus a pearlescent or metallic option
Window squeegees, paint scrapers, old plastic cards
Optional printed mountain or landscape references
Optional glue and extra paper if you want to collage after
Gallery
Back to Top
Scraped Mountains
Pull colour across a rocky horizon
Bookmark
Painting & Drawing
The Set Up
Lay out thick cardstock or lightweight board that can handle wet paint. Set out a small selection of opaque poster paints and a couple of pearlescent or metallic paints. The contrast between flat colour and shimmer reads beautifully. Have squeegee style window washers, wide paint scrapers, and old loyalty cards or cut plastic cards in different widths. The variety of edges creates different ridgelines.
You can lay out reference photos of mountain ranges if that sparks interest, or you can stay abstract and let the act of scraping discover the shape. Both are true to the theme because this is about landscape and memory and arrival and experimentation!
The Making
Squeeze tiny blobs of paint along the top third of the paper. Too much paint turns muddy. Less paint lets you pull clean layers and keep the shape of the movement. Keep cloths nearby for wiping tools between pulls.
Invite the artist to choose which edge they want to try first. A wide scraper makes a long smooth slope. A narrow card makes sharper dramatic lines. Press the edge into the paint blobs and pull downward in one steady motion, letting the colours drag and mix. You will see instant ridgelines and valleys appear.
Ask Where could this be. A snowy ridge. A lava range. A planet no one has seen yet. That open question turns technique into story.
Once the first layer dries a little, you can add new small blobs above or below and scrape again. Layers build depth. Pearlescent paint over flat colour can read like mist or early sun. If scraping feels too fast for some kids, let them press and slide with both hands, slow and steady, so they can feel the movement of the paint rather than rushing the pull.
Notes from our Artspace: MÅLA style squeezy paints (from Ikea) are great here because the paint flows slowly enough that kids stay in control instead of dumping a huge puddle by accident.
Variations
Cut the dried mountains into strips and collage them into a travel journal scene
Make one huge shared horizon by lining pages side by side and scraping across them all in one pull
Materials
Thick cardstock or light board
Opaque poster or tempera paints plus a pearlescent or metallic option
Window squeegees, paint scrapers, old plastic cards
Optional printed mountain or landscape references
Optional glue and extra paper if you want to collage after
Gallery
Back to Top
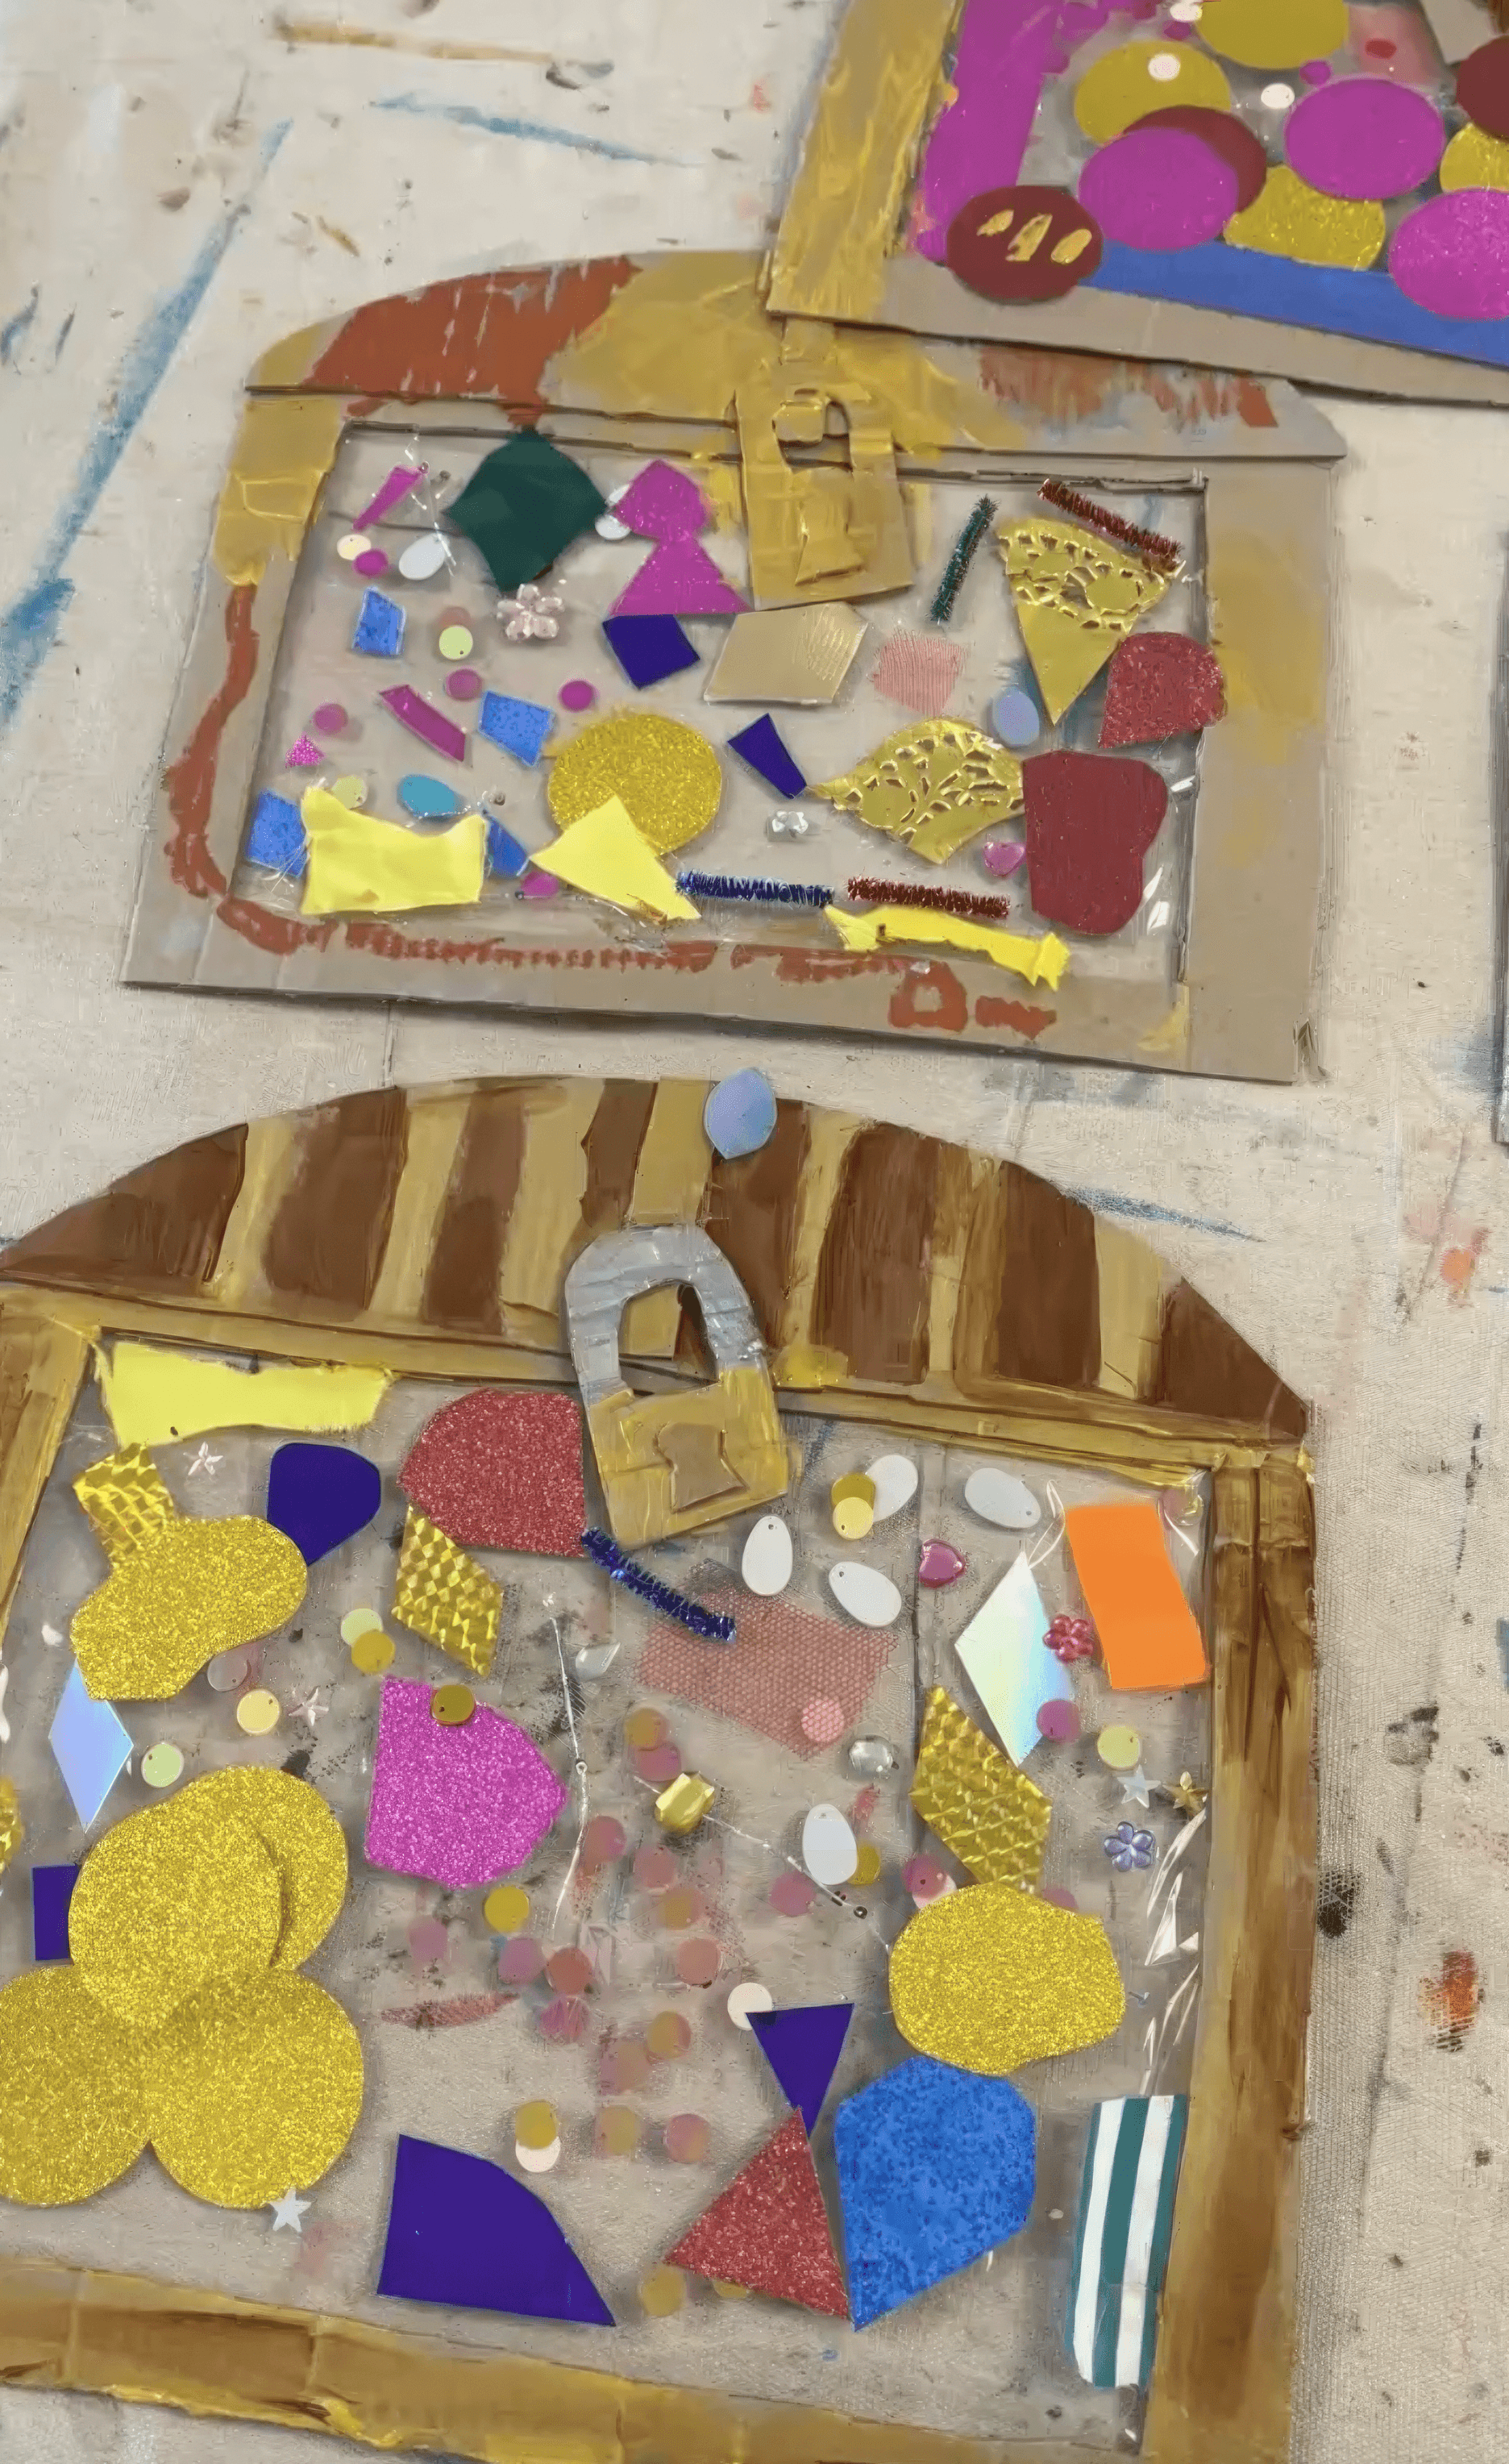
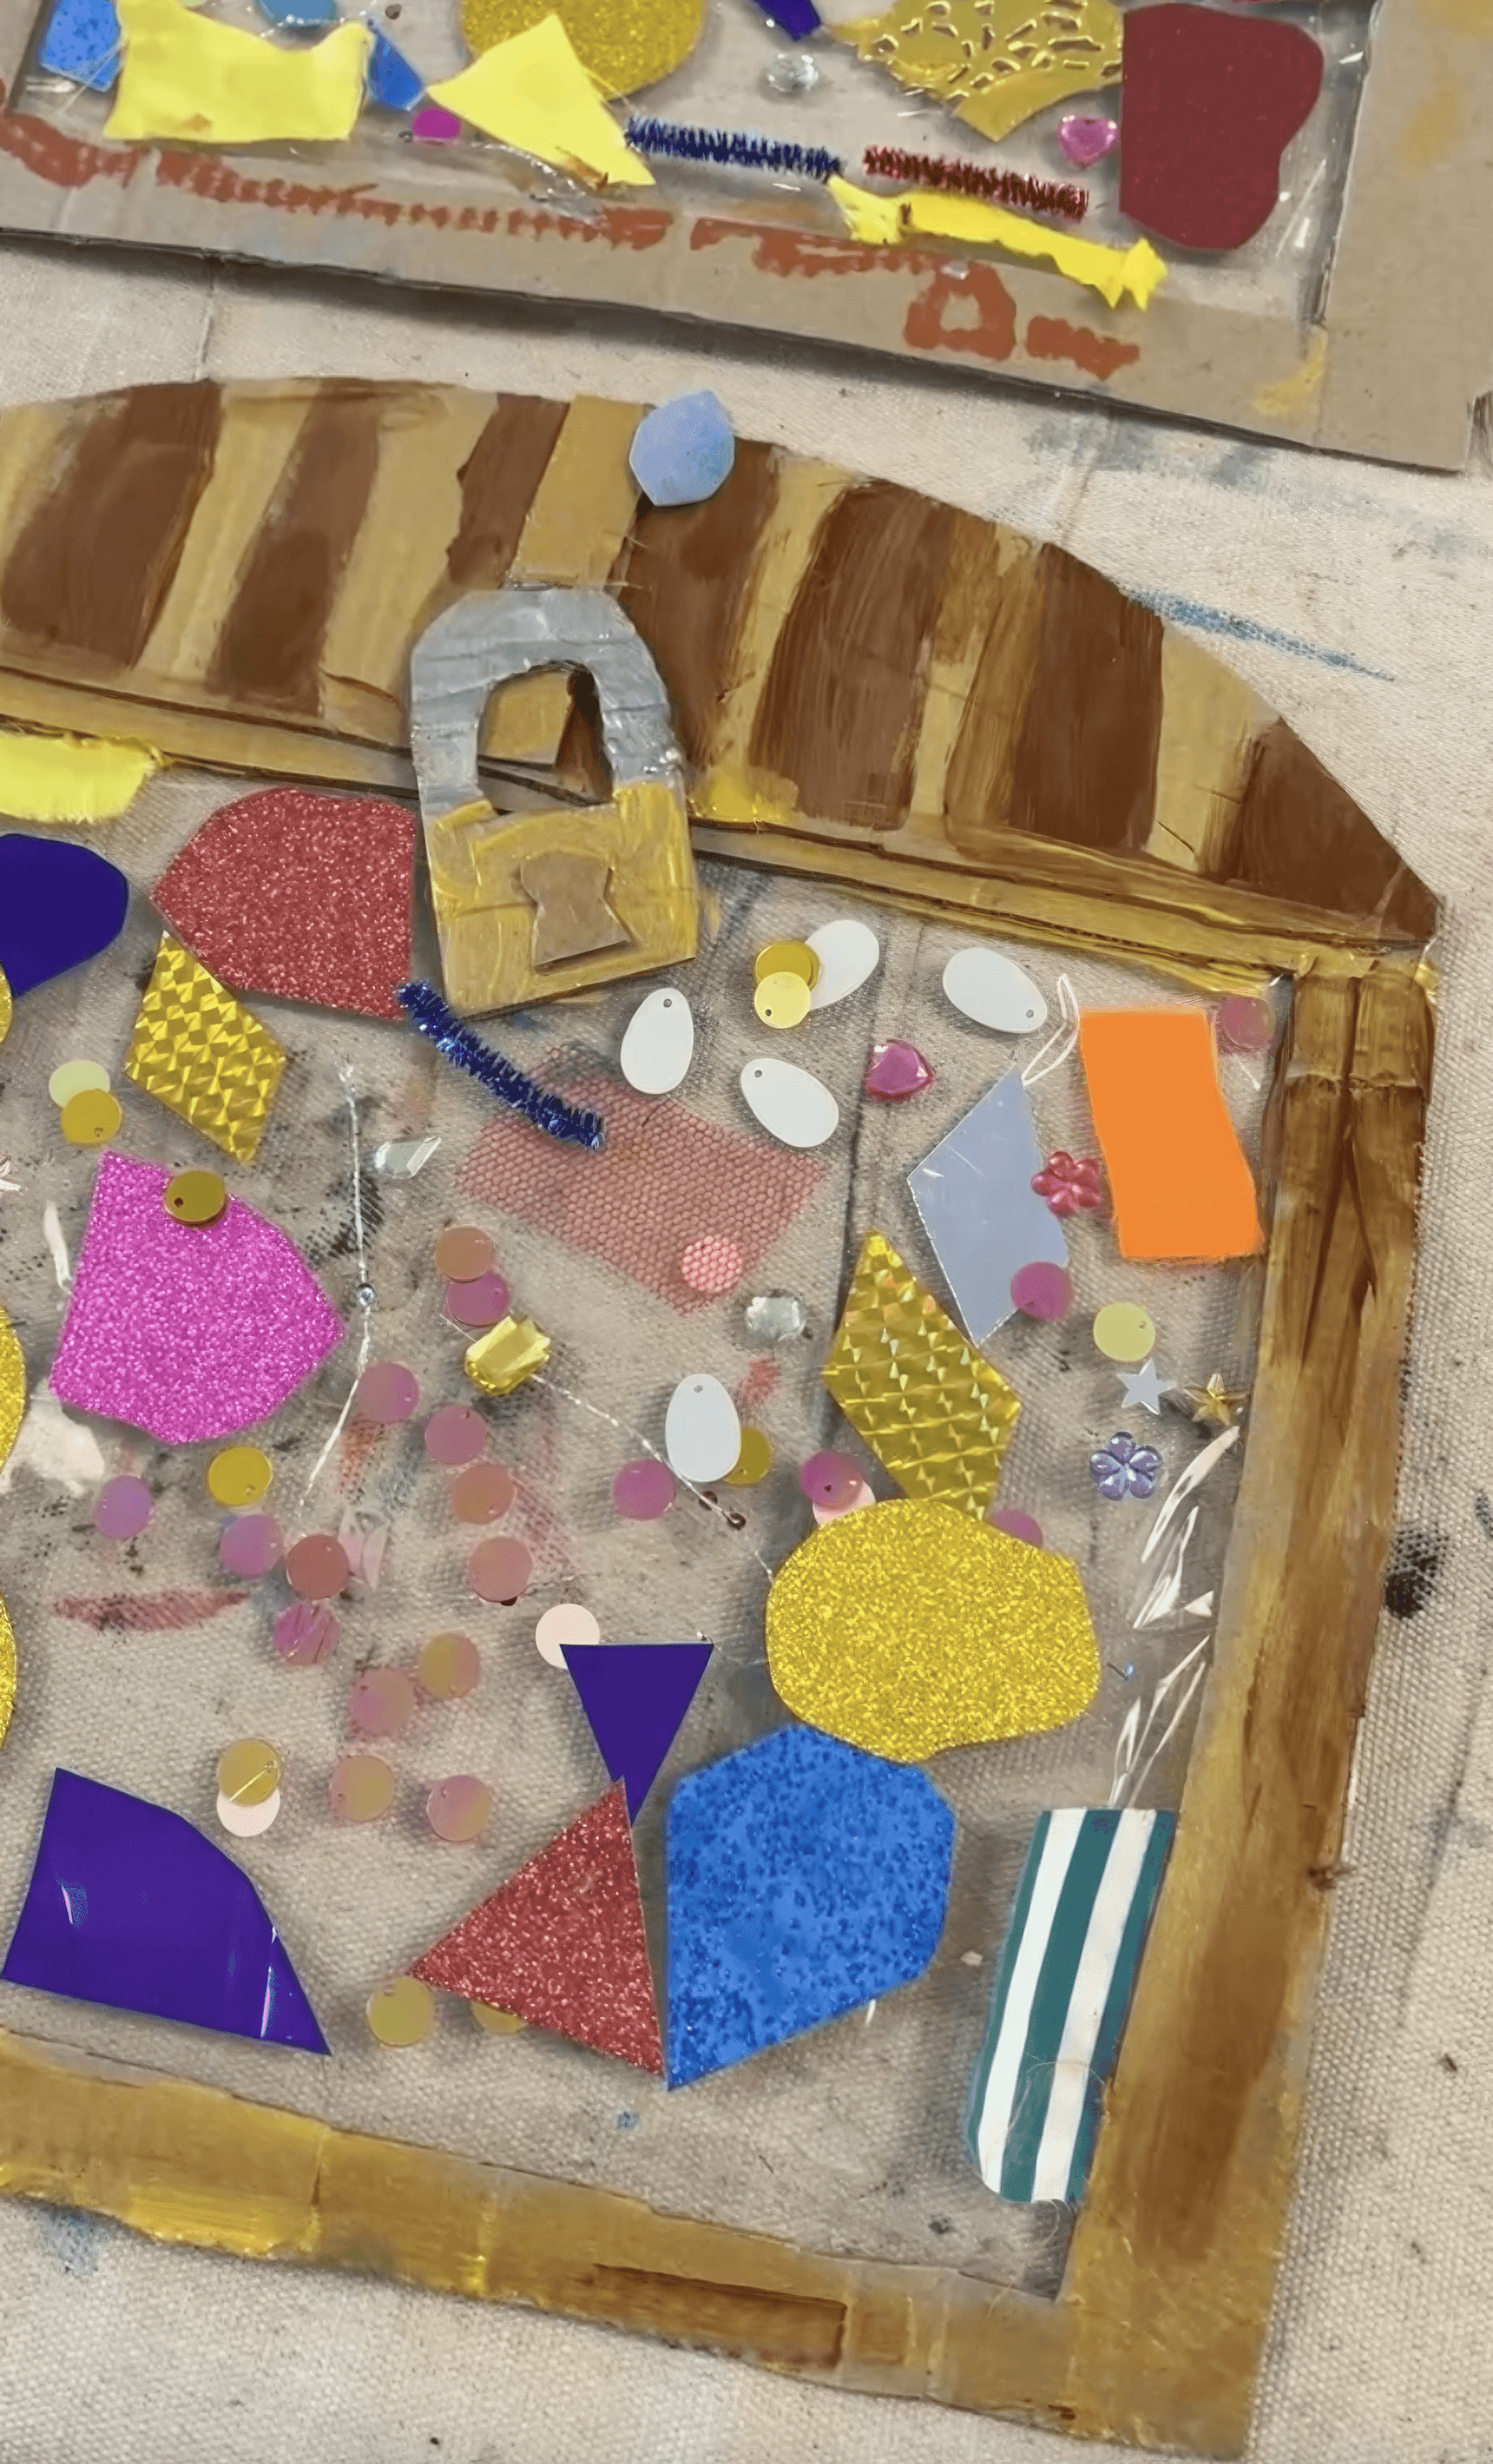
Treasure Boxes
Create your own pirate chest and fill it with all the treasures!
Bookmark
Collage
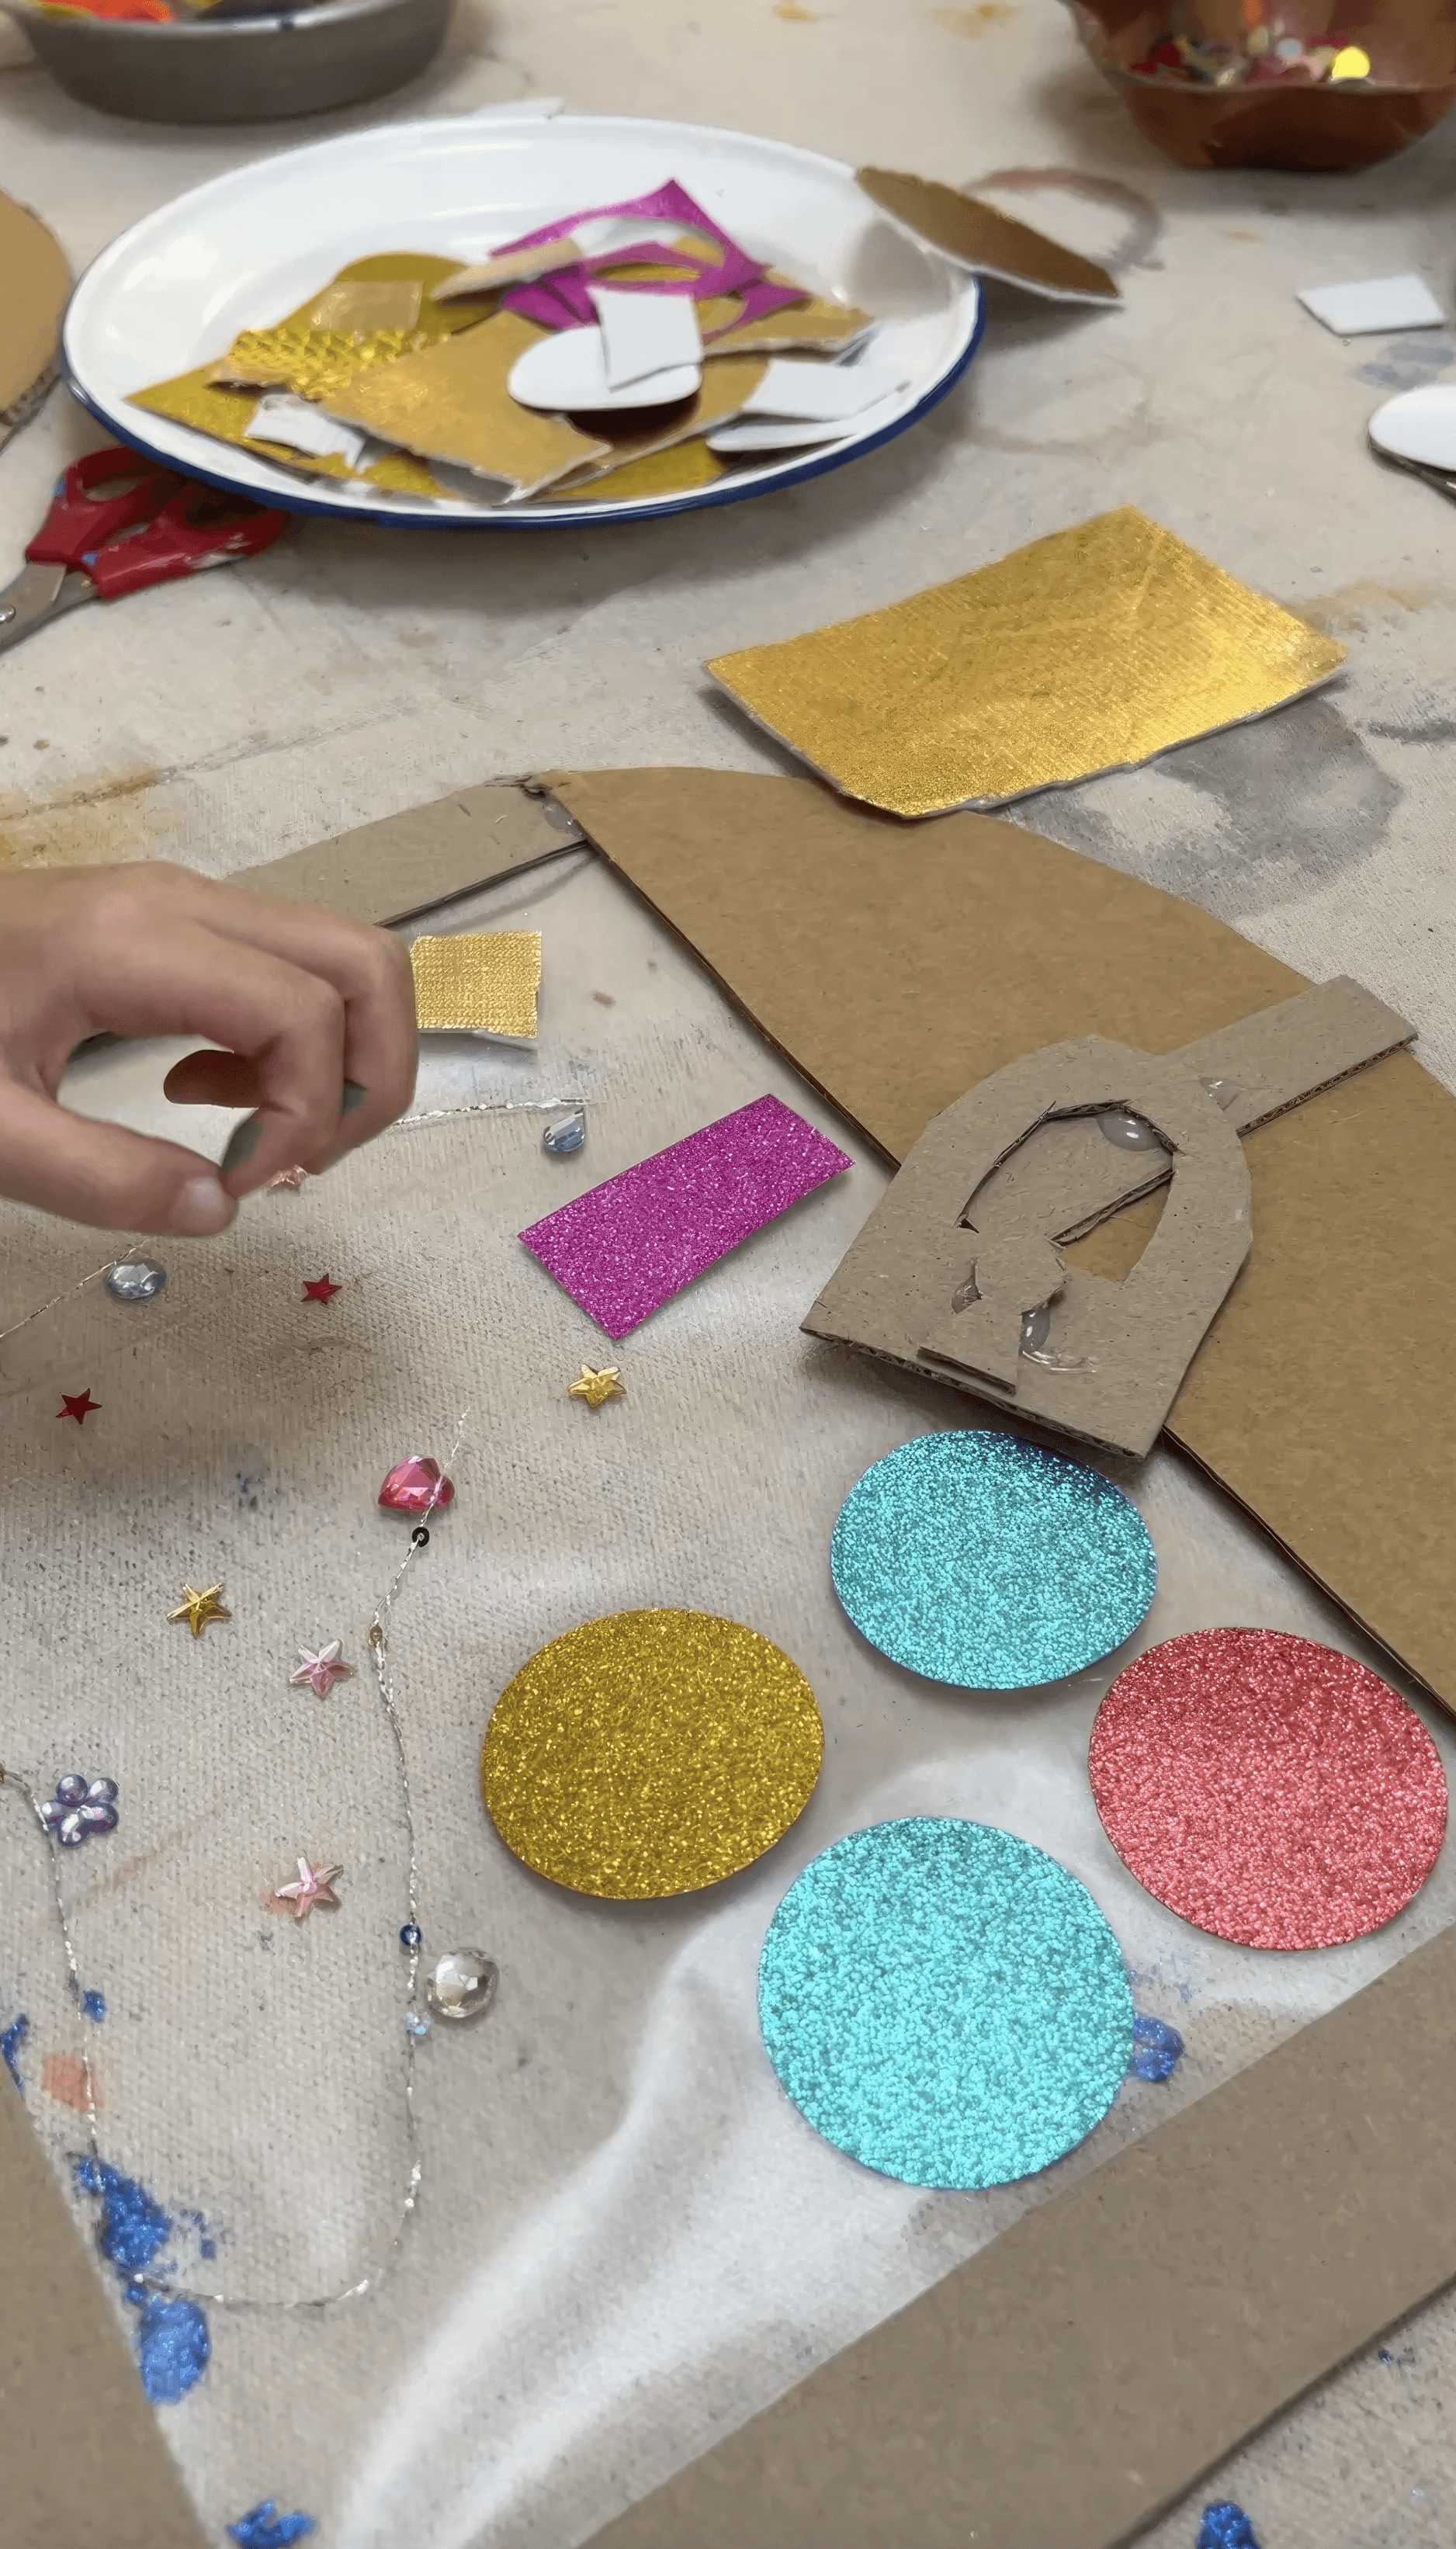
The Set Up
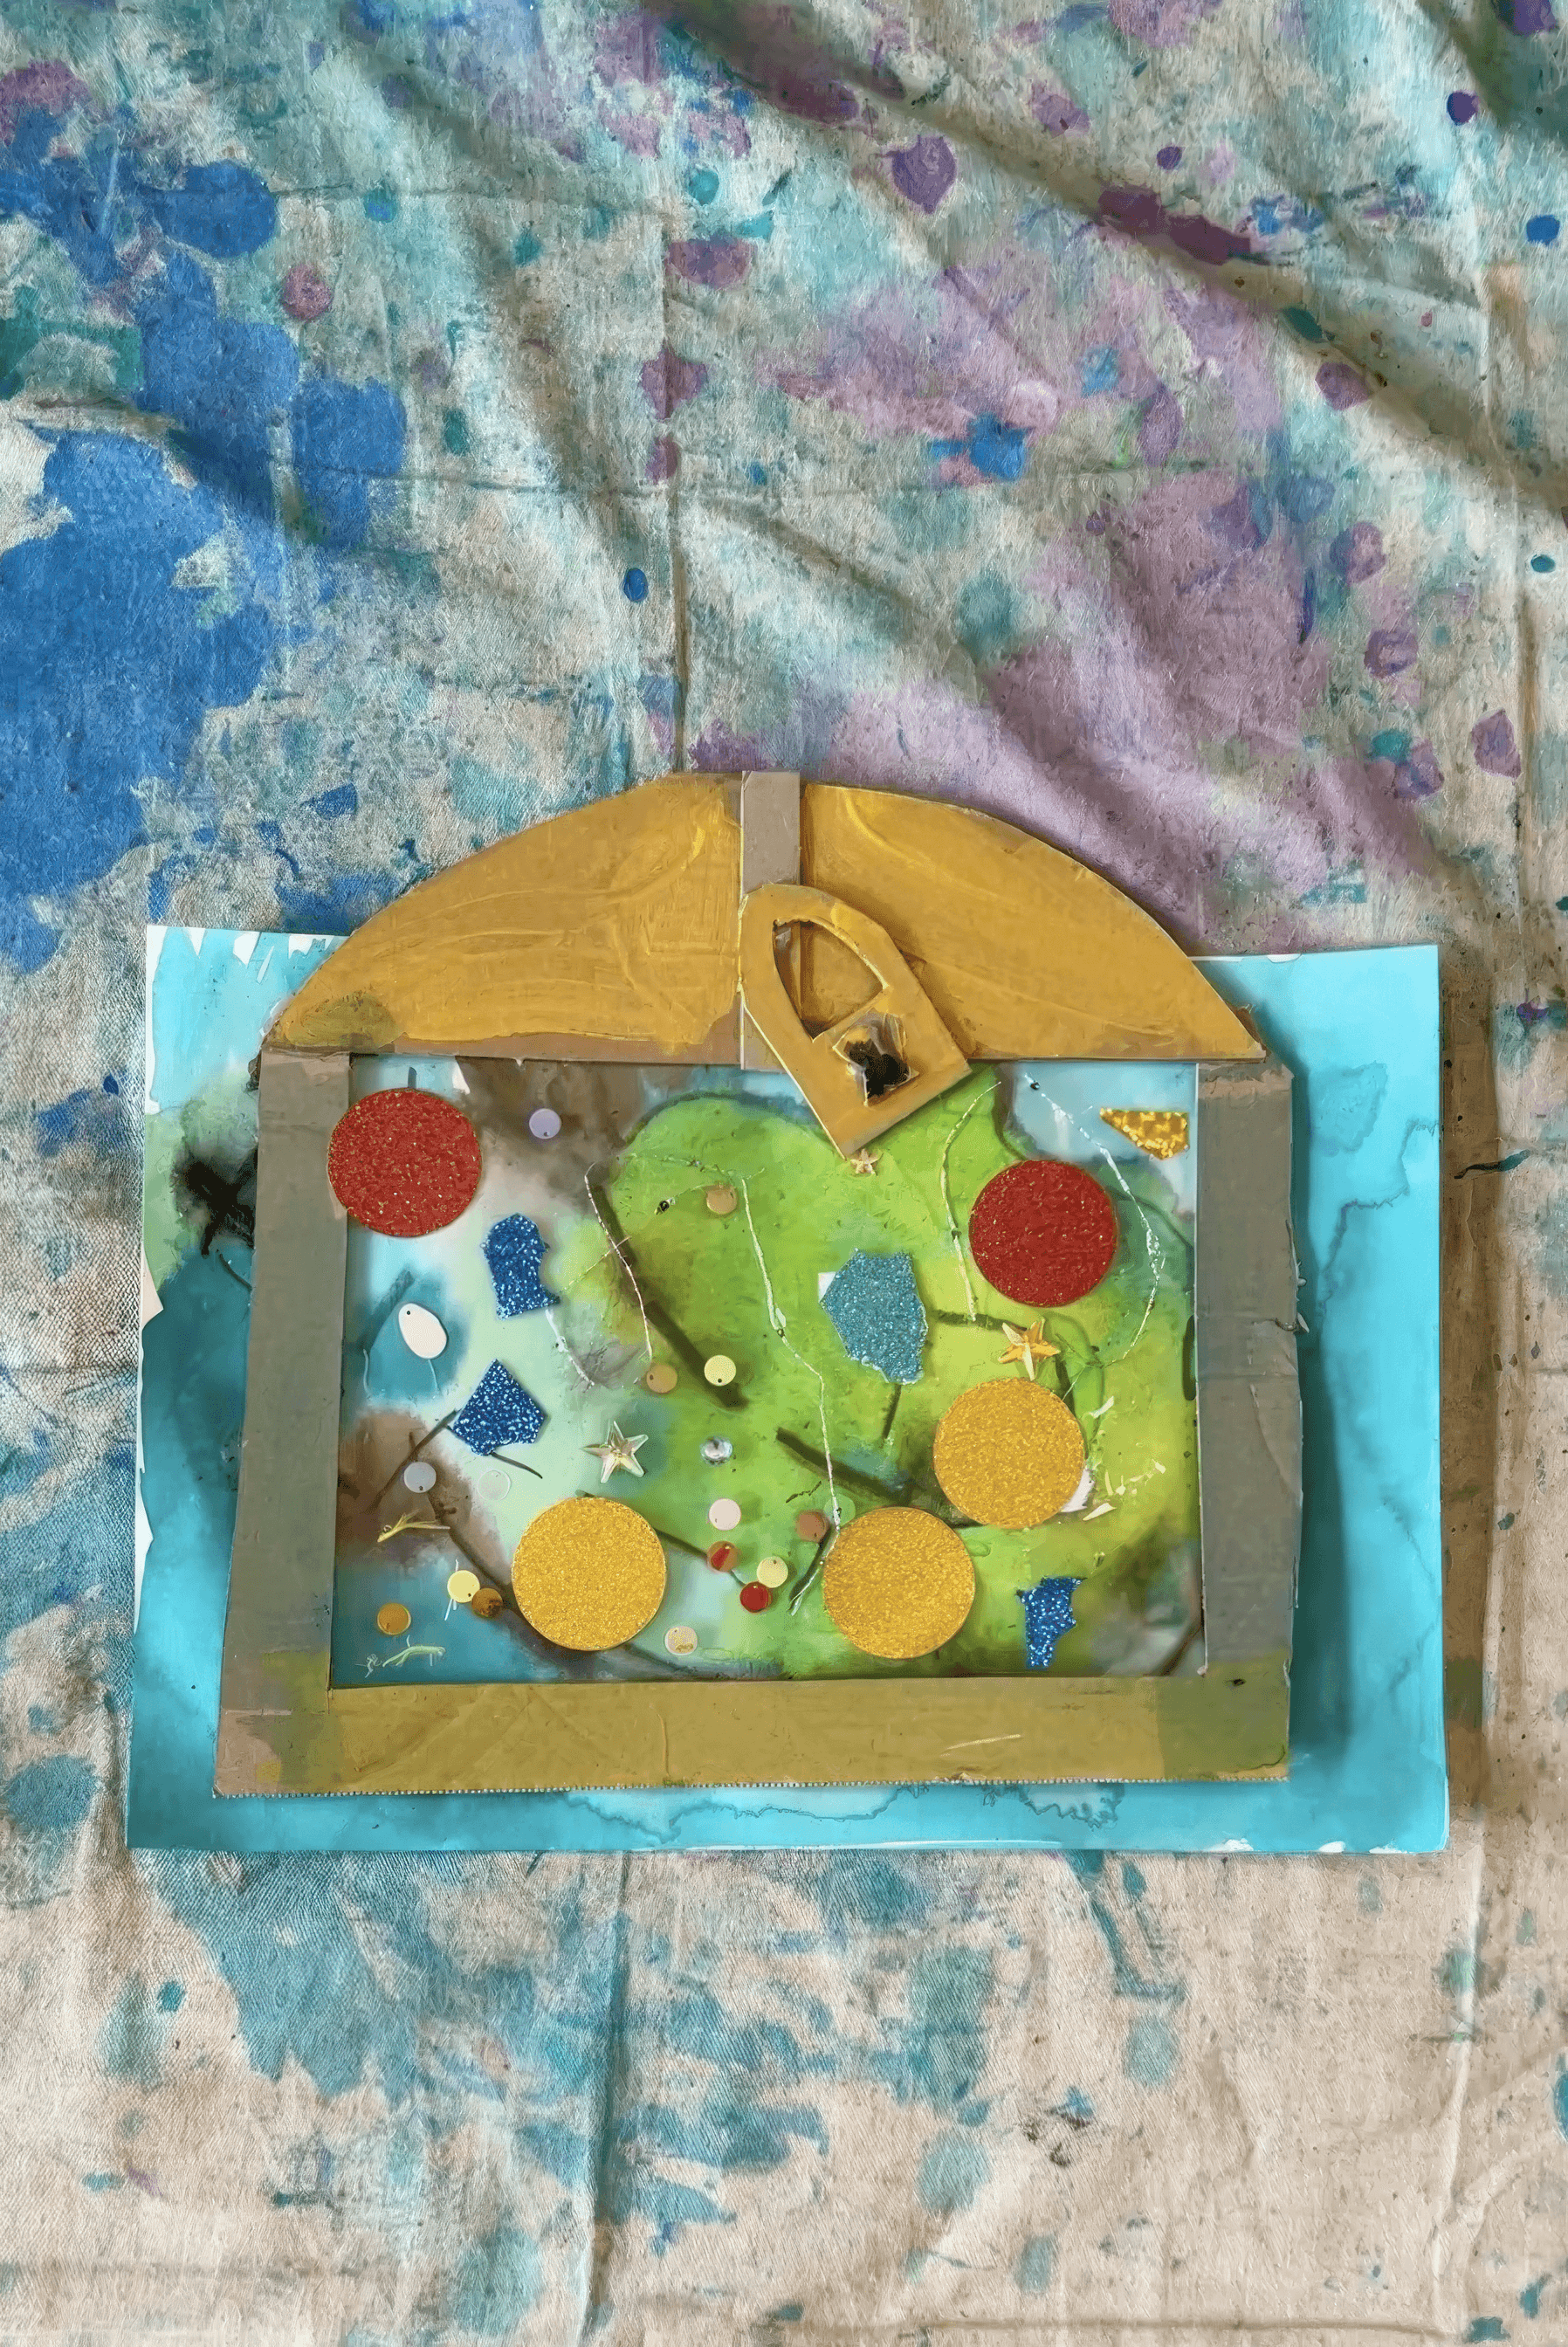
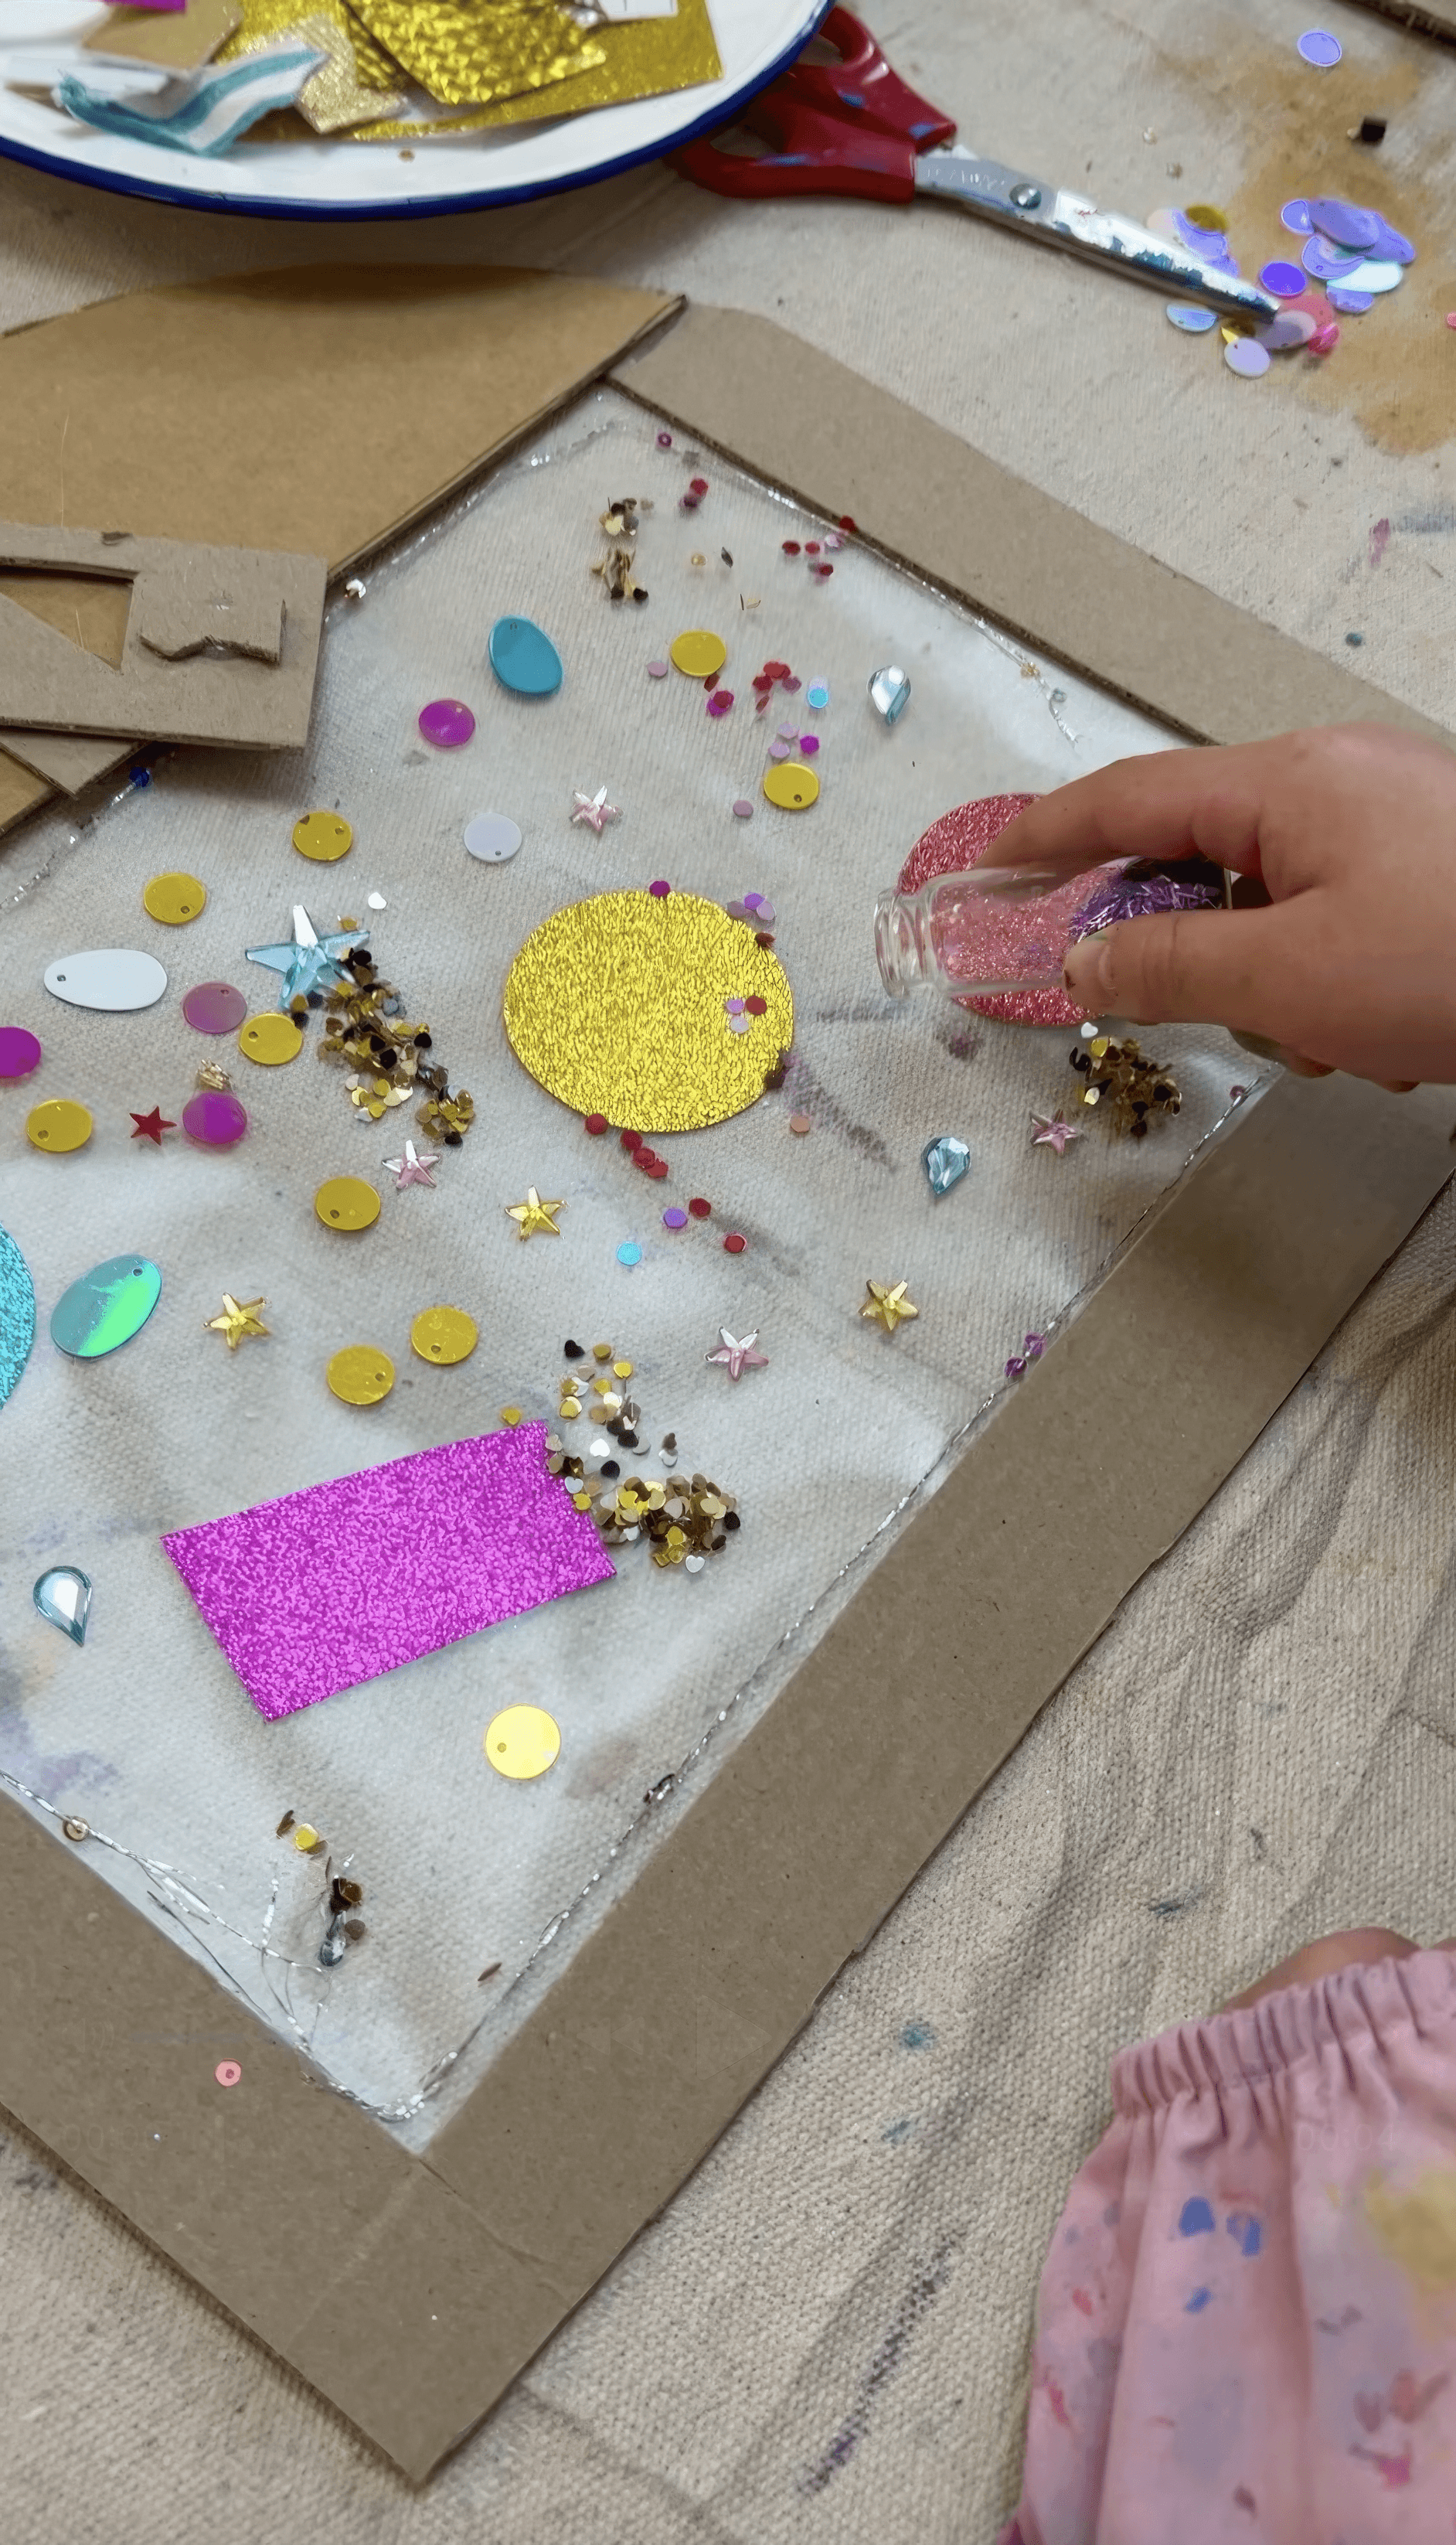
Cut treasure chest shapes from thick cardboard. Leave a wide frame and cut out a big window in the centre. Cover that window on the back with a sheet of clear contact paper so the sticky side faces forward. Peel the top layer so the sticky is exposed. Now you have an instant place where jewels and finds can live without dripping glue. If you do not have contact paper you can absolutely do this on regular card with PVA or glue sticks. The experience still sings!
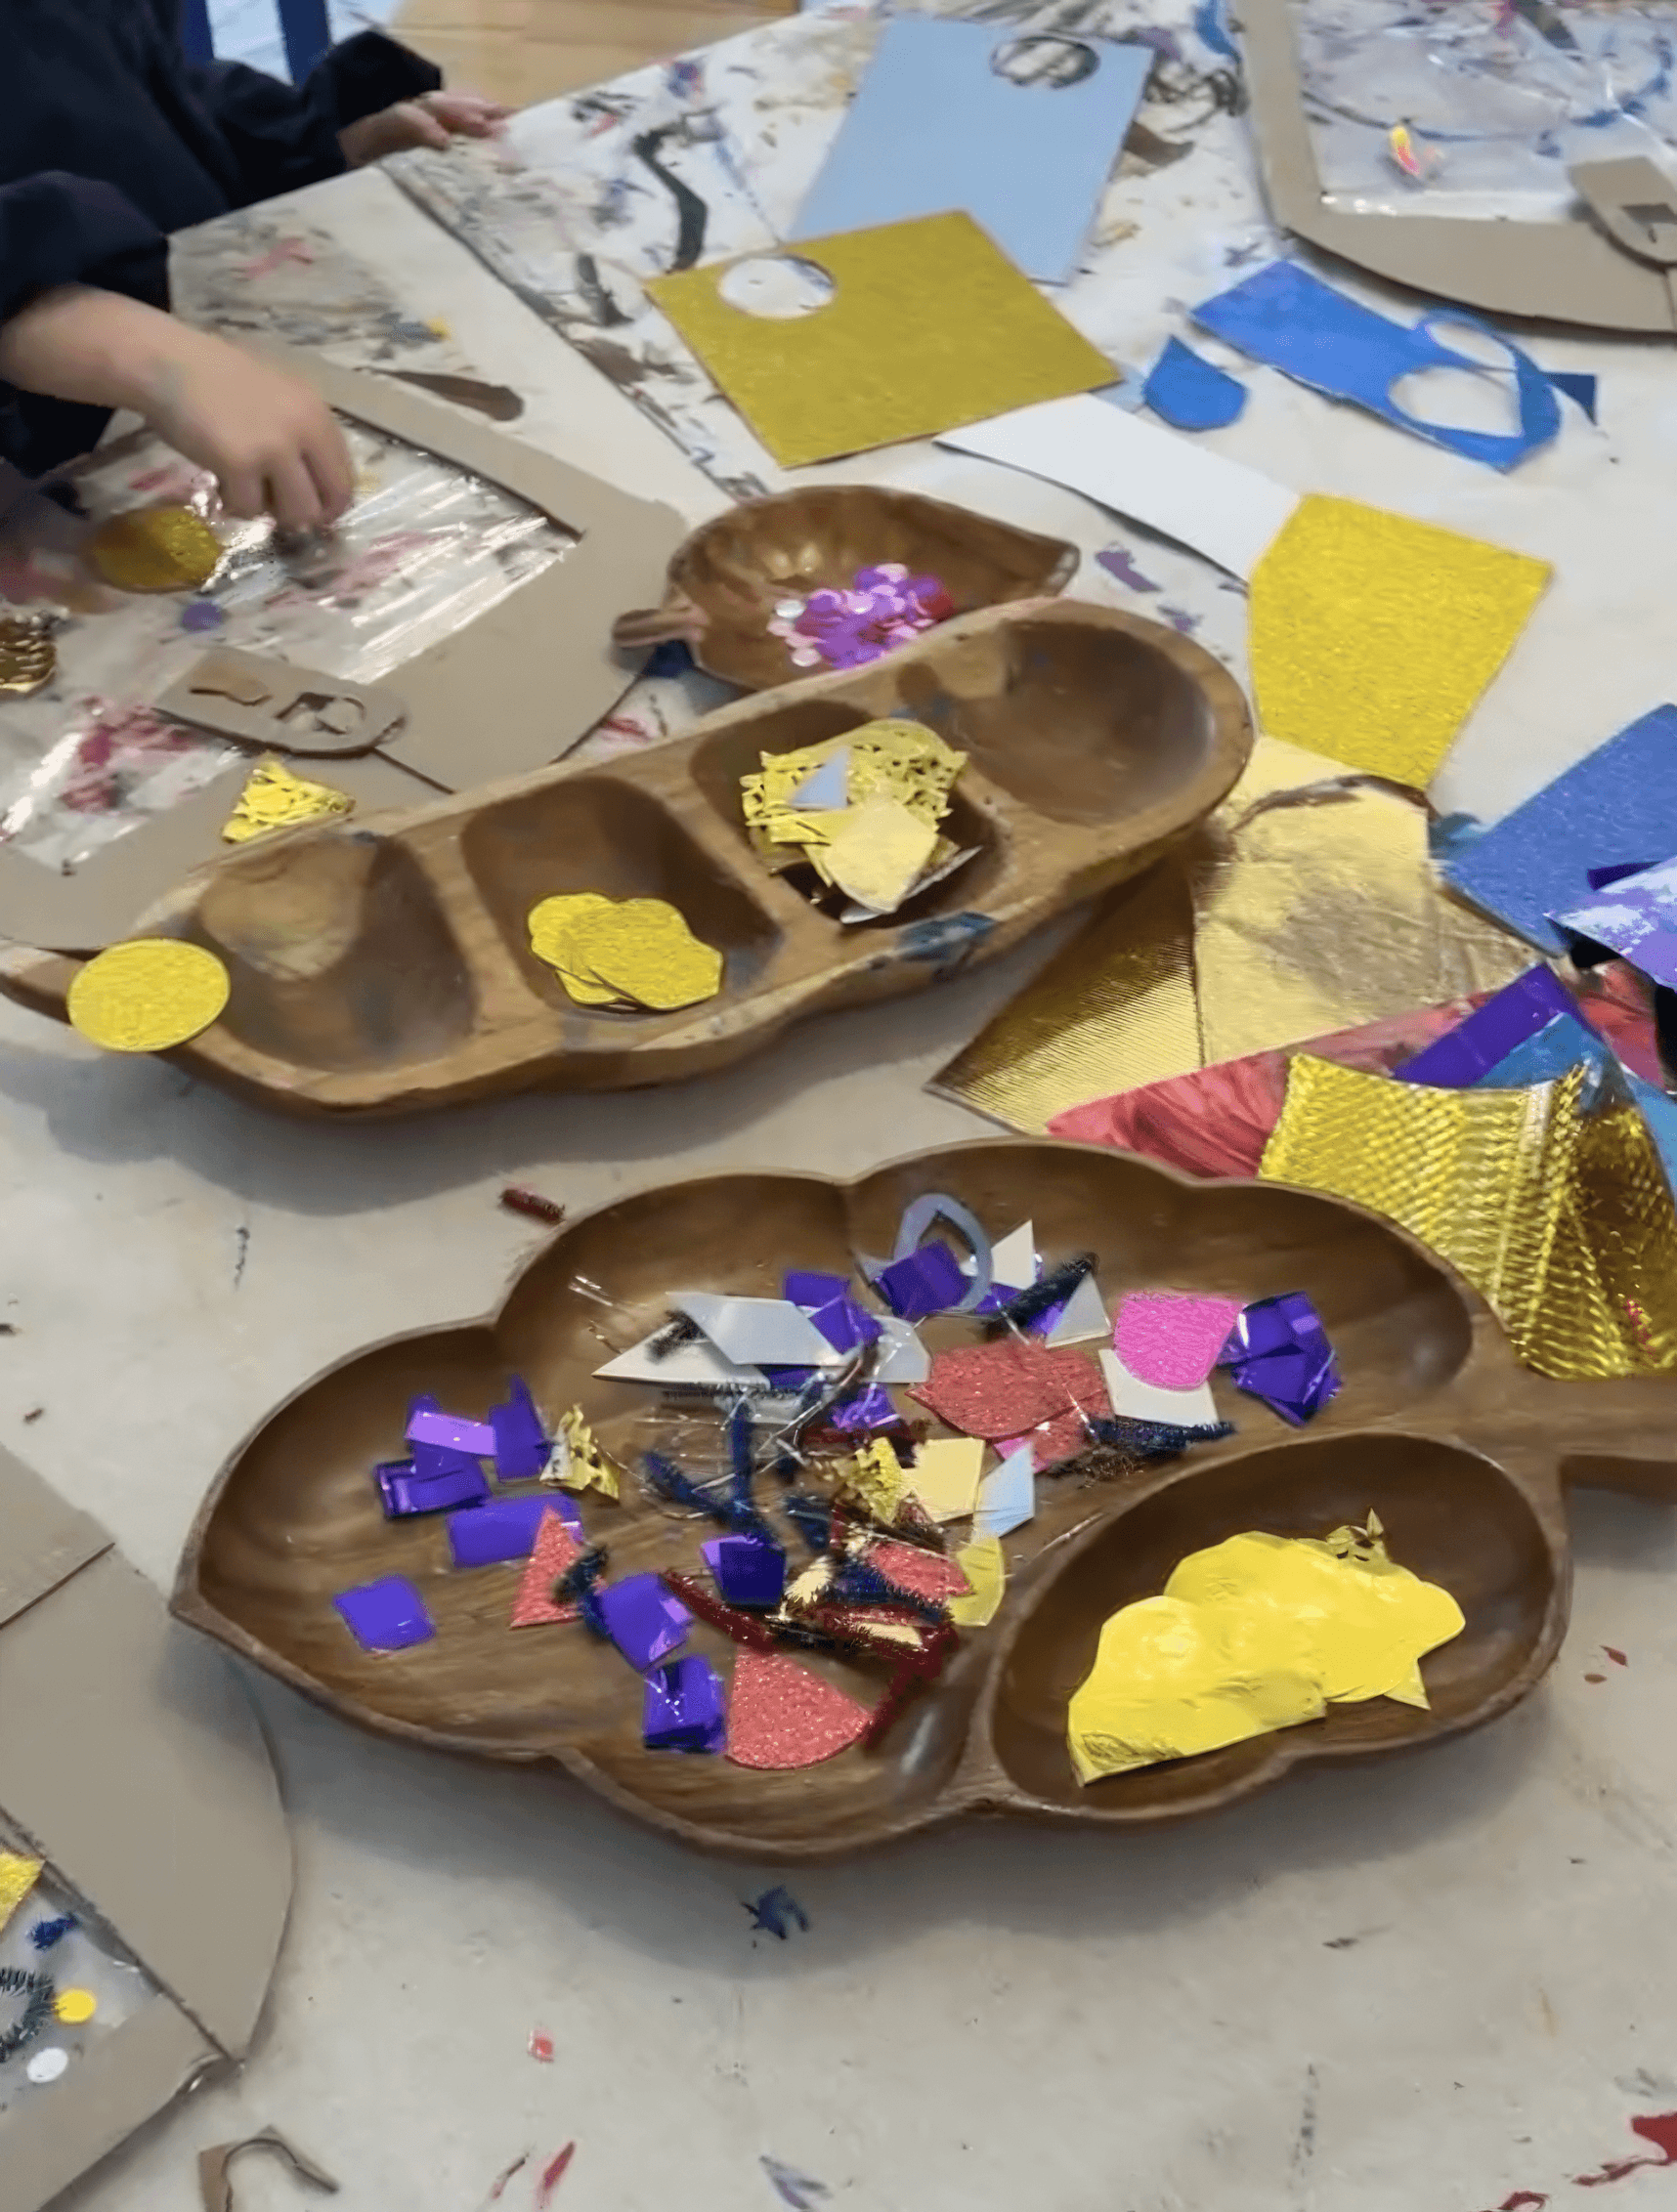
Fill small trays with sequins, metallic paper, foil, ribbon, beads, tiny keys, pretend coins, plastic gems, painted paper scraps, anything that reads treasure. Add scissors and hole punches if you have them. A Fiskars style hand punch is great for making perfect little circles that feel like coins.
Metallic paint or paint sticks is fabulous to have on hand too.
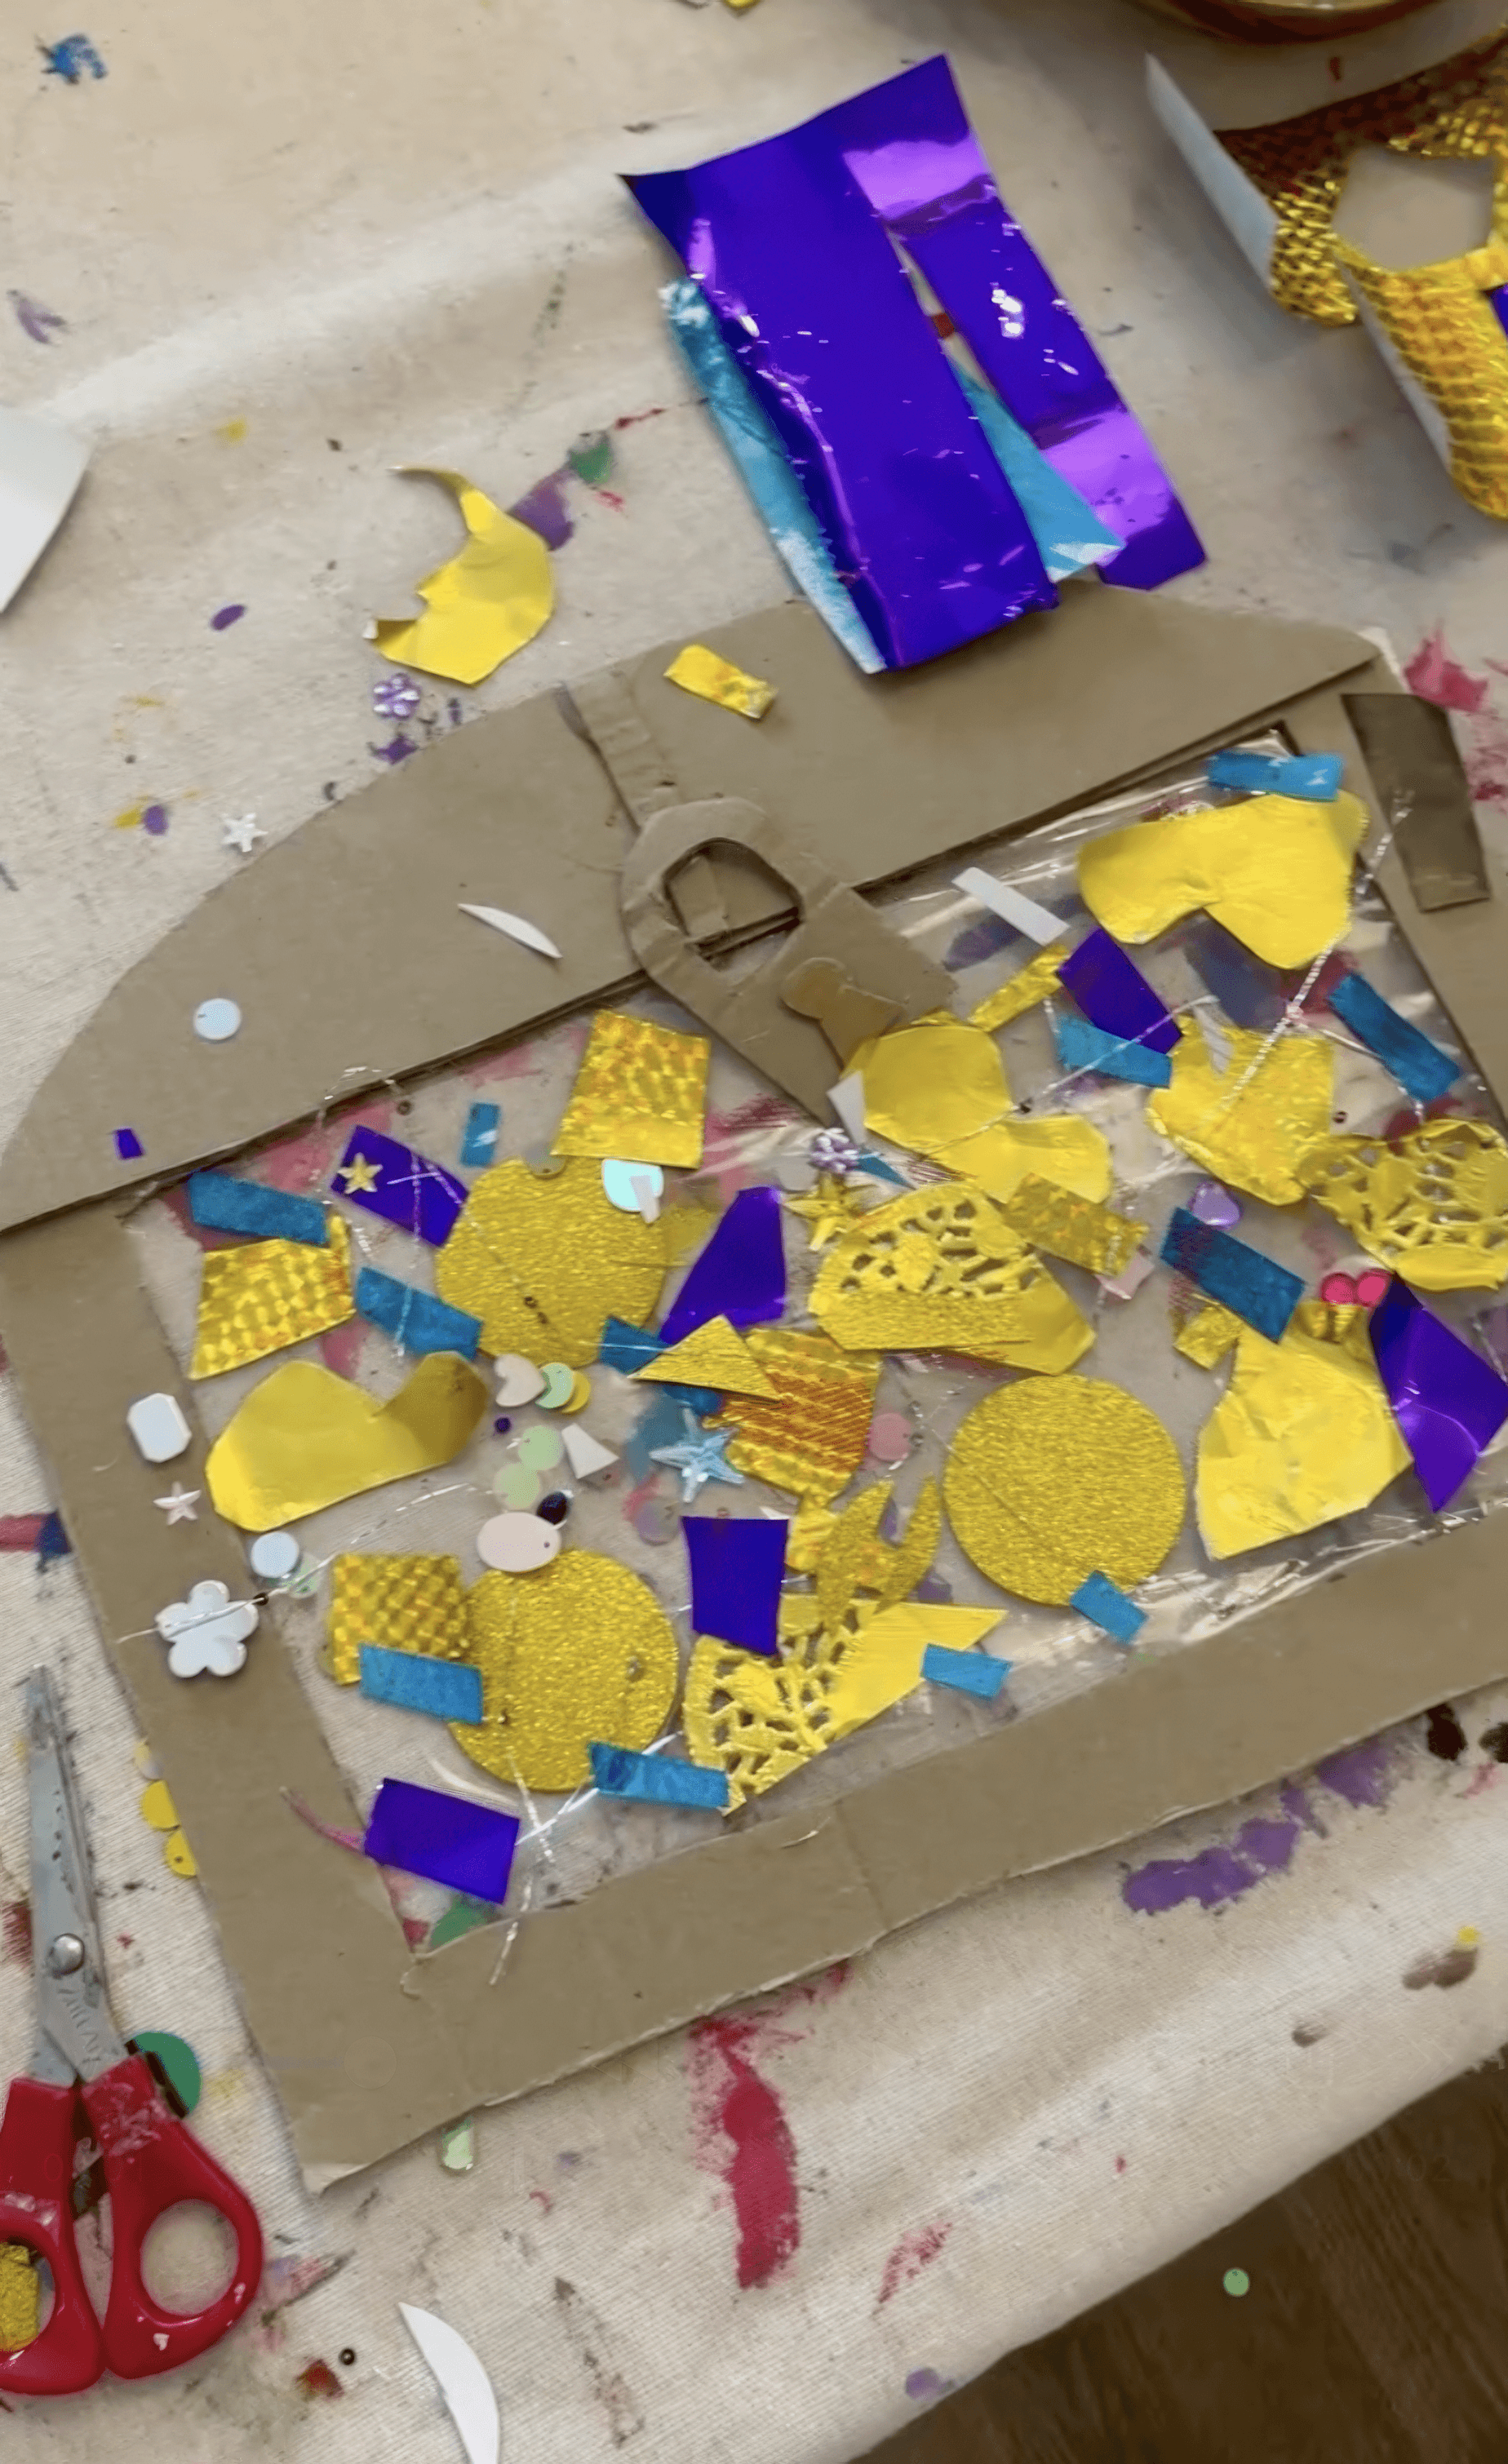
The Making
Invite each artist to curate their own treasure box.
The contact paper method is beautiful for very young artists because sticking is immediate and oh so satisfying! Older kids often like using glue on card instead so they can build height and overlap.
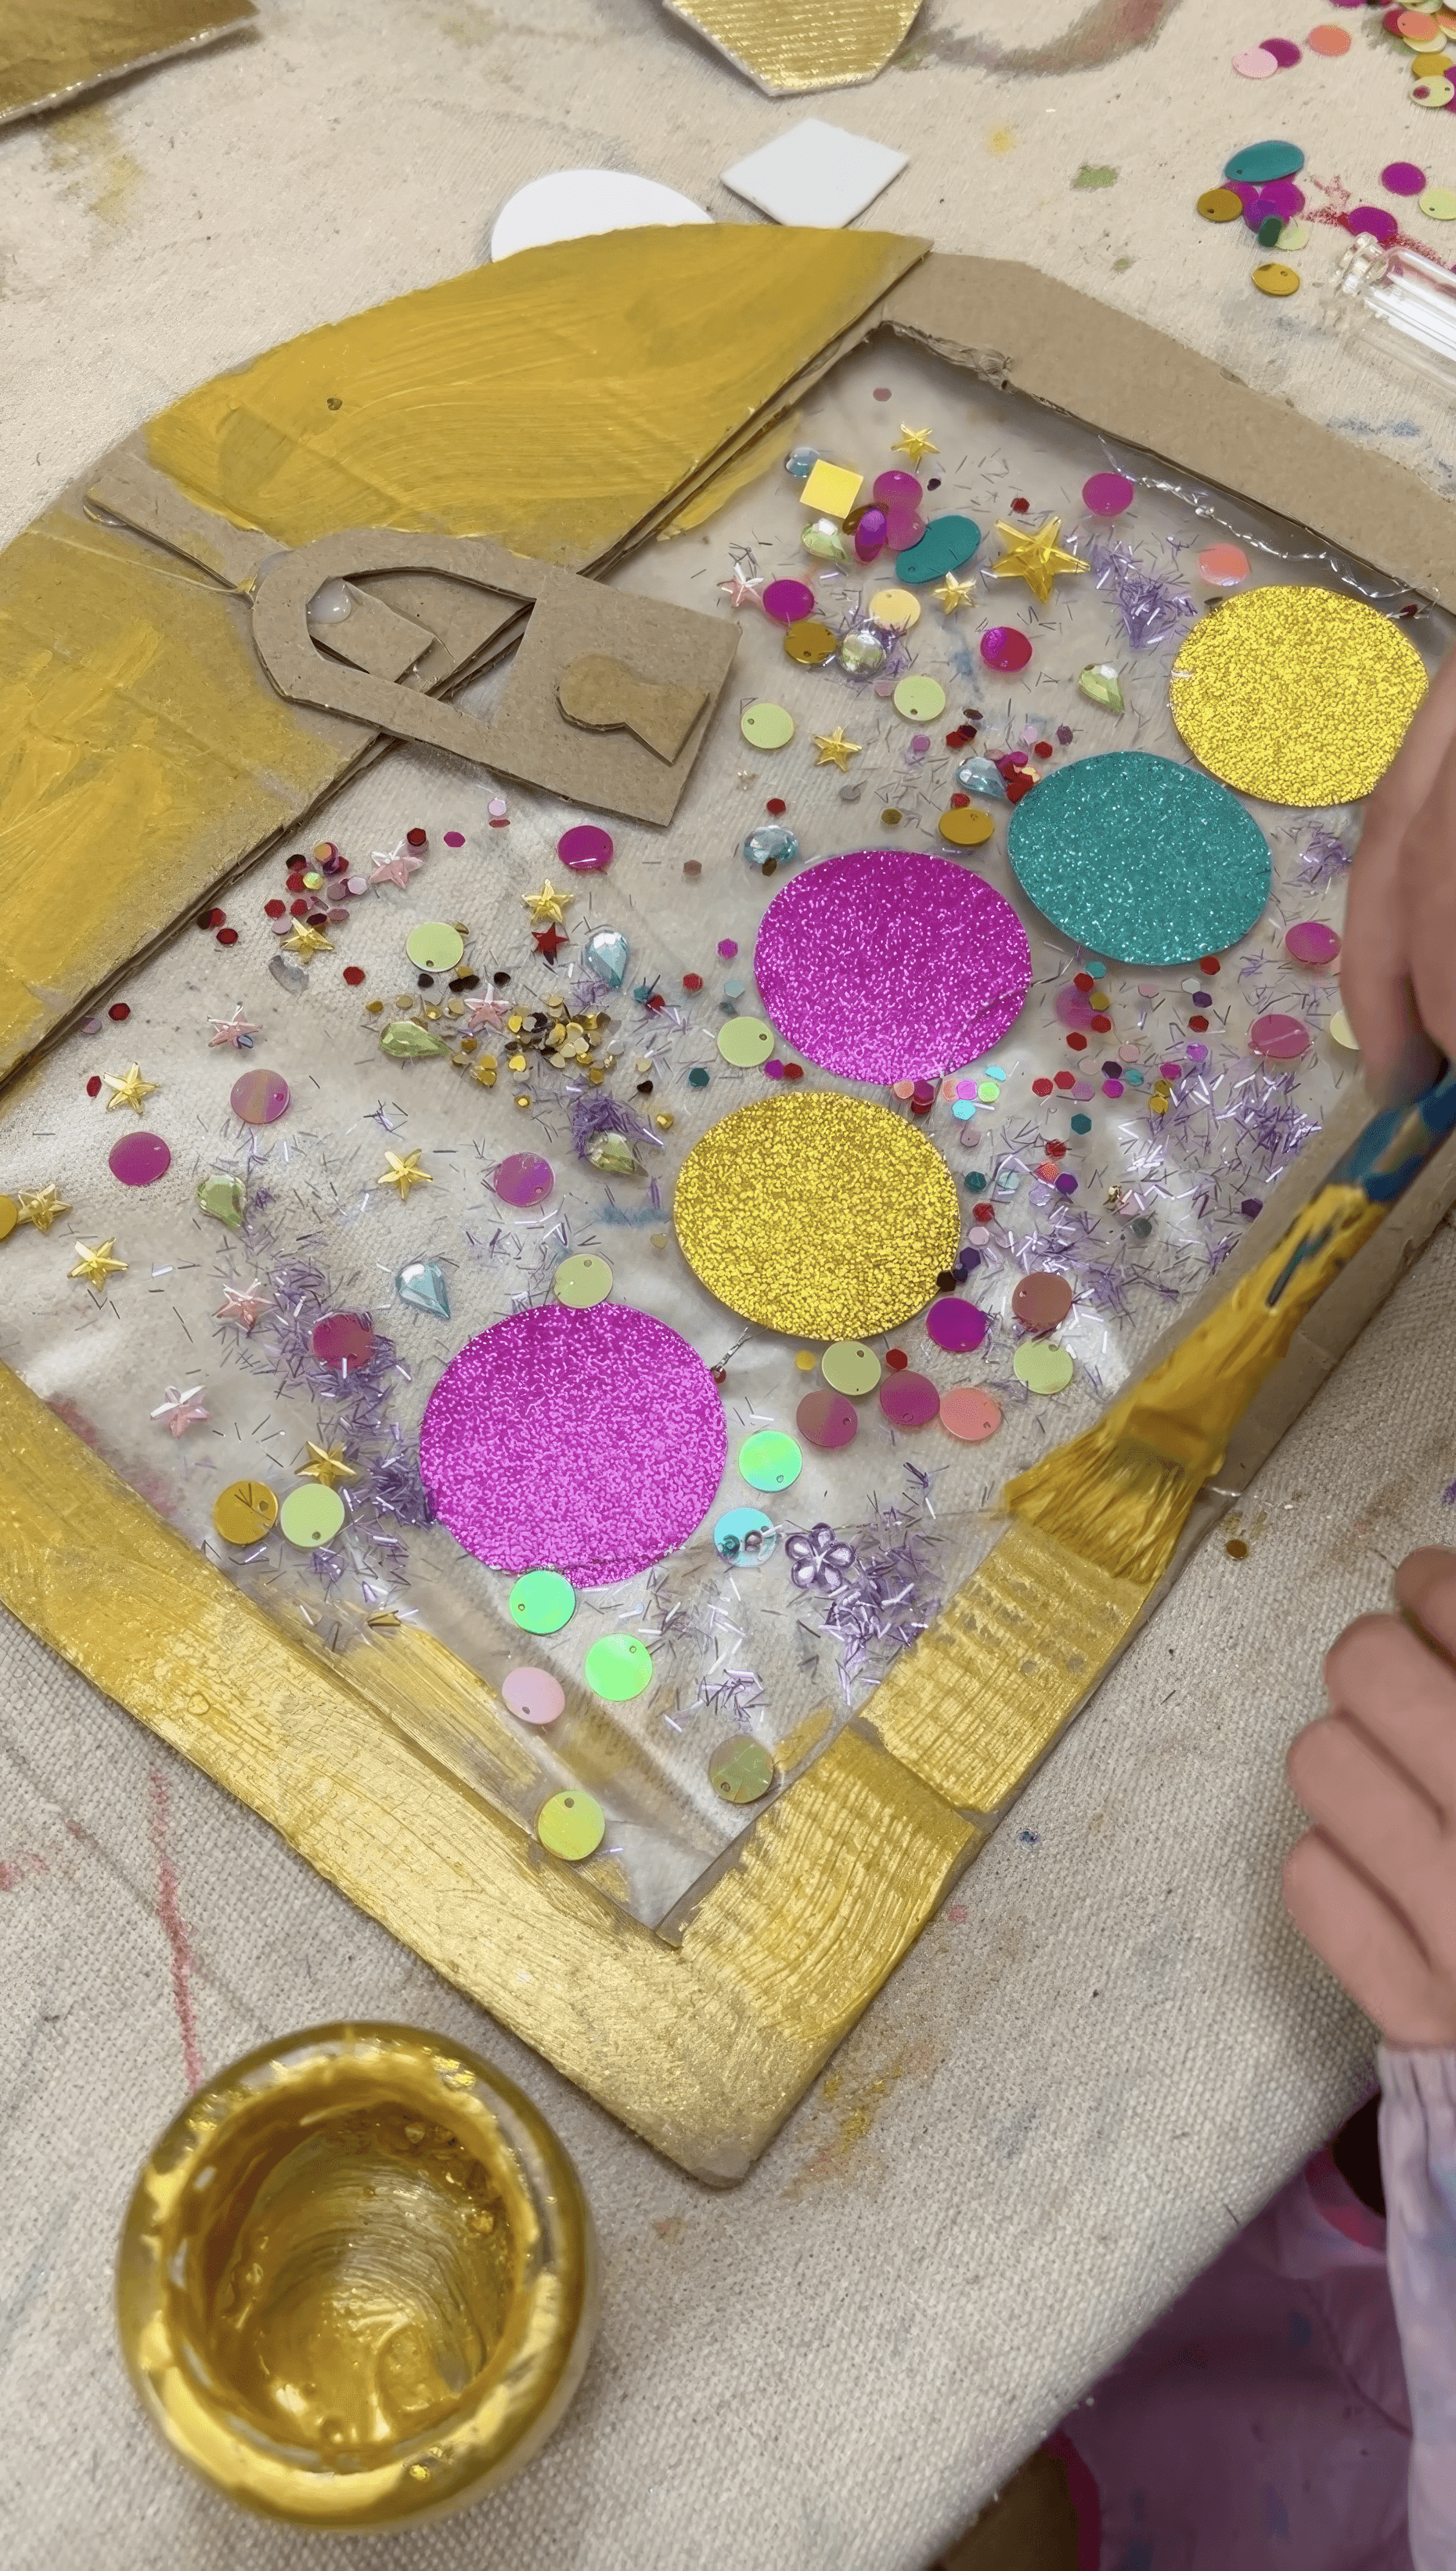
Once all the treasures are safely inside the box, it's time to bring out the metallic paint (and glitter if you're brave!).
Materials
Thick cardboard cut into treasure chest shapes
Clear contact paper for sticky windows
Sequins, foil, metallic paper, pretend coins, beads, ribbon
Scissors and a hole punch
Glue sticks or PVA in shallow trays with brushes if not using contact paper
Back to Top
Treasure Boxes
Create your own pirate chest and fill it with all the treasures!
Bookmark
Collage
The Set Up
Cut treasure chest shapes from thick cardboard. Leave a wide frame and cut out a big window in the centre. Cover that window on the back with a sheet of clear contact paper so the sticky side faces forward. Peel the top layer so the sticky is exposed. Now you have an instant place where jewels and finds can live without dripping glue. If you do not have contact paper you can absolutely do this on regular card with PVA or glue sticks. The experience still sings!
Fill small trays with sequins, metallic paper, foil, ribbon, beads, tiny keys, pretend coins, plastic gems, painted paper scraps, anything that reads treasure. Add scissors and hole punches if you have them. A Fiskars style hand punch is great for making perfect little circles that feel like coins.
Metallic paint or paint sticks is fabulous to have on hand too.
The Making
Invite each artist to curate their own treasure box.
The contact paper method is beautiful for very young artists because sticking is immediate and oh so satisfying! Older kids often like using glue on card instead so they can build height and overlap.
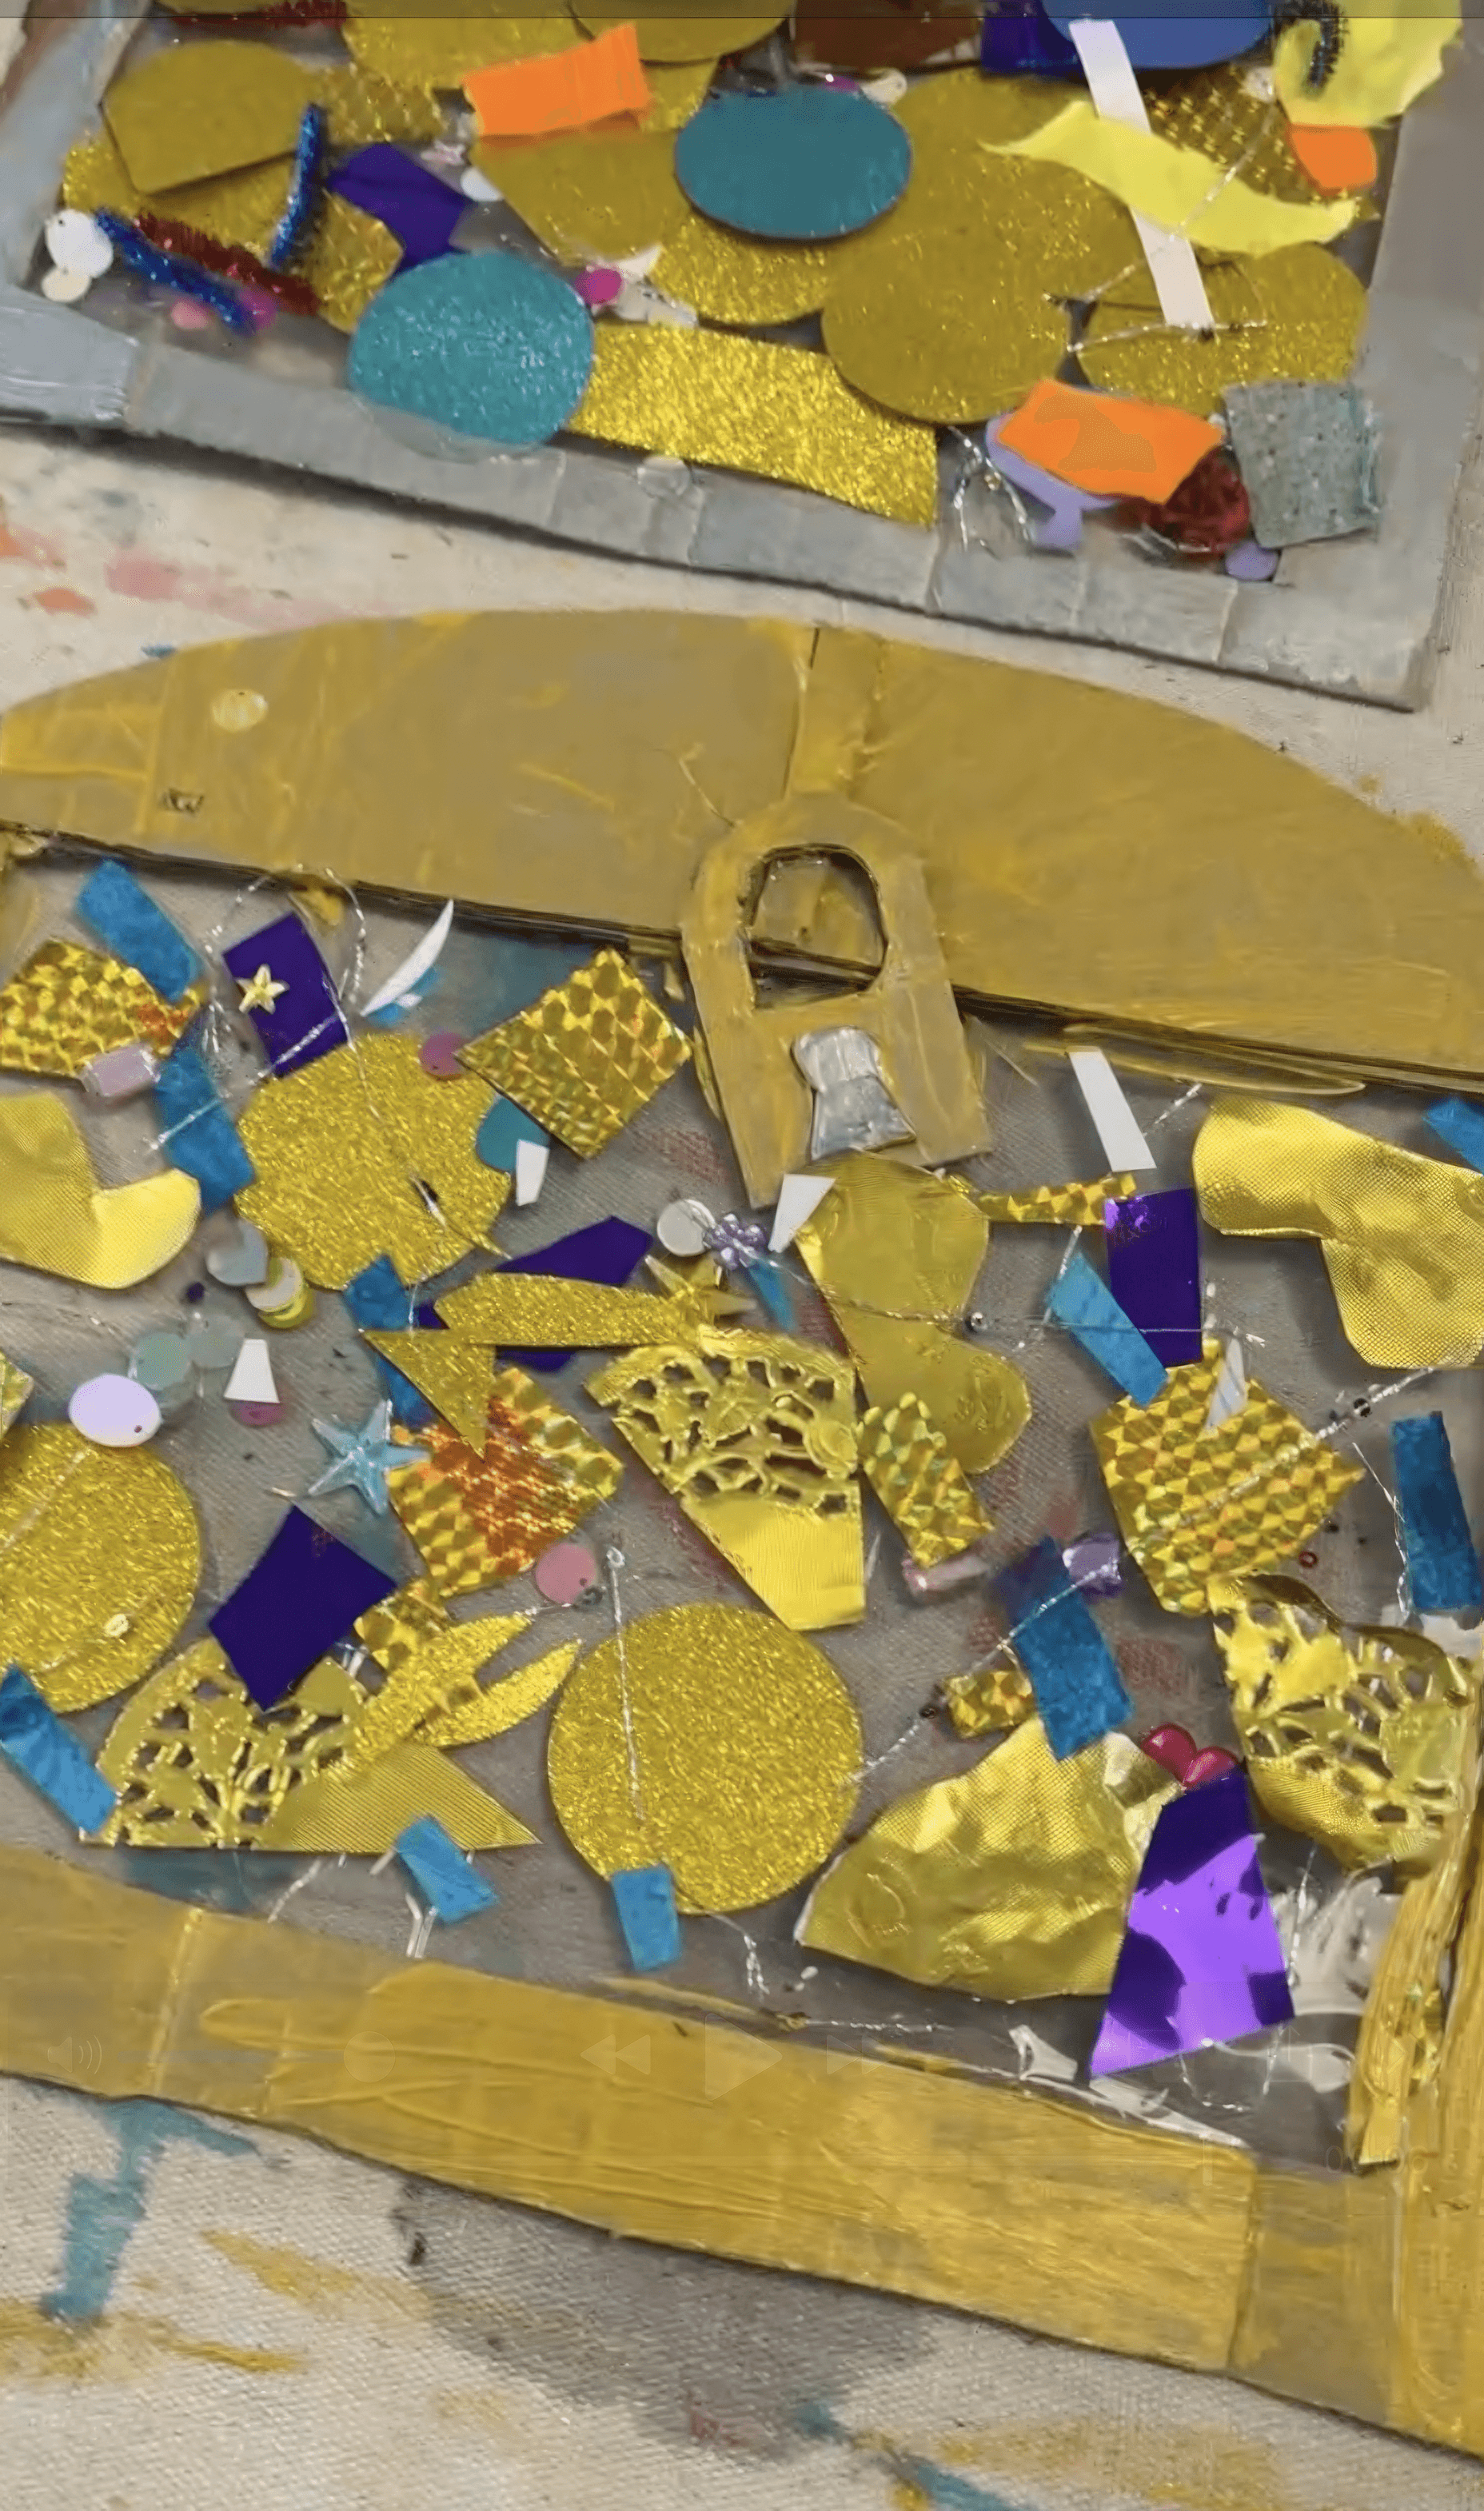
Once all the treasures are safely inside the box, it's time to bring out the metallic paint (and glitter if you're brave!).
Materials
Thick cardboard cut into treasure chest shapes
Clear contact paper for sticky windows
Sequins, foil, metallic paper, pretend coins, beads, ribbon
Scissors and a hole punch
Glue sticks or PVA in shallow trays with brushes if not using contact paper
Back to Top
Treasure Boxes
Create your own pirate chest and fill it with all the treasures!
Bookmark
Collage
The Set Up
Cut treasure chest shapes from thick cardboard. Leave a wide frame and cut out a big window in the centre. Cover that window on the back with a sheet of clear contact paper so the sticky side faces forward. Peel the top layer so the sticky is exposed. Now you have an instant place where jewels and finds can live without dripping glue. If you do not have contact paper you can absolutely do this on regular card with PVA or glue sticks. The experience still sings!
Fill small trays with sequins, metallic paper, foil, ribbon, beads, tiny keys, pretend coins, plastic gems, painted paper scraps, anything that reads treasure. Add scissors and hole punches if you have them. A Fiskars style hand punch is great for making perfect little circles that feel like coins.
Metallic paint or paint sticks is fabulous to have on hand too.
The Making
Invite each artist to curate their own treasure box.
The contact paper method is beautiful for very young artists because sticking is immediate and oh so satisfying! Older kids often like using glue on card instead so they can build height and overlap.
Once all the treasures are safely inside the box, it's time to bring out the metallic paint (and glitter if you're brave!).
Materials
Thick cardboard cut into treasure chest shapes
Clear contact paper for sticky windows
Sequins, foil, metallic paper, pretend coins, beads, ribbon
Scissors and a hole punch
Glue sticks or PVA in shallow trays with brushes if not using contact paper
Back to Top
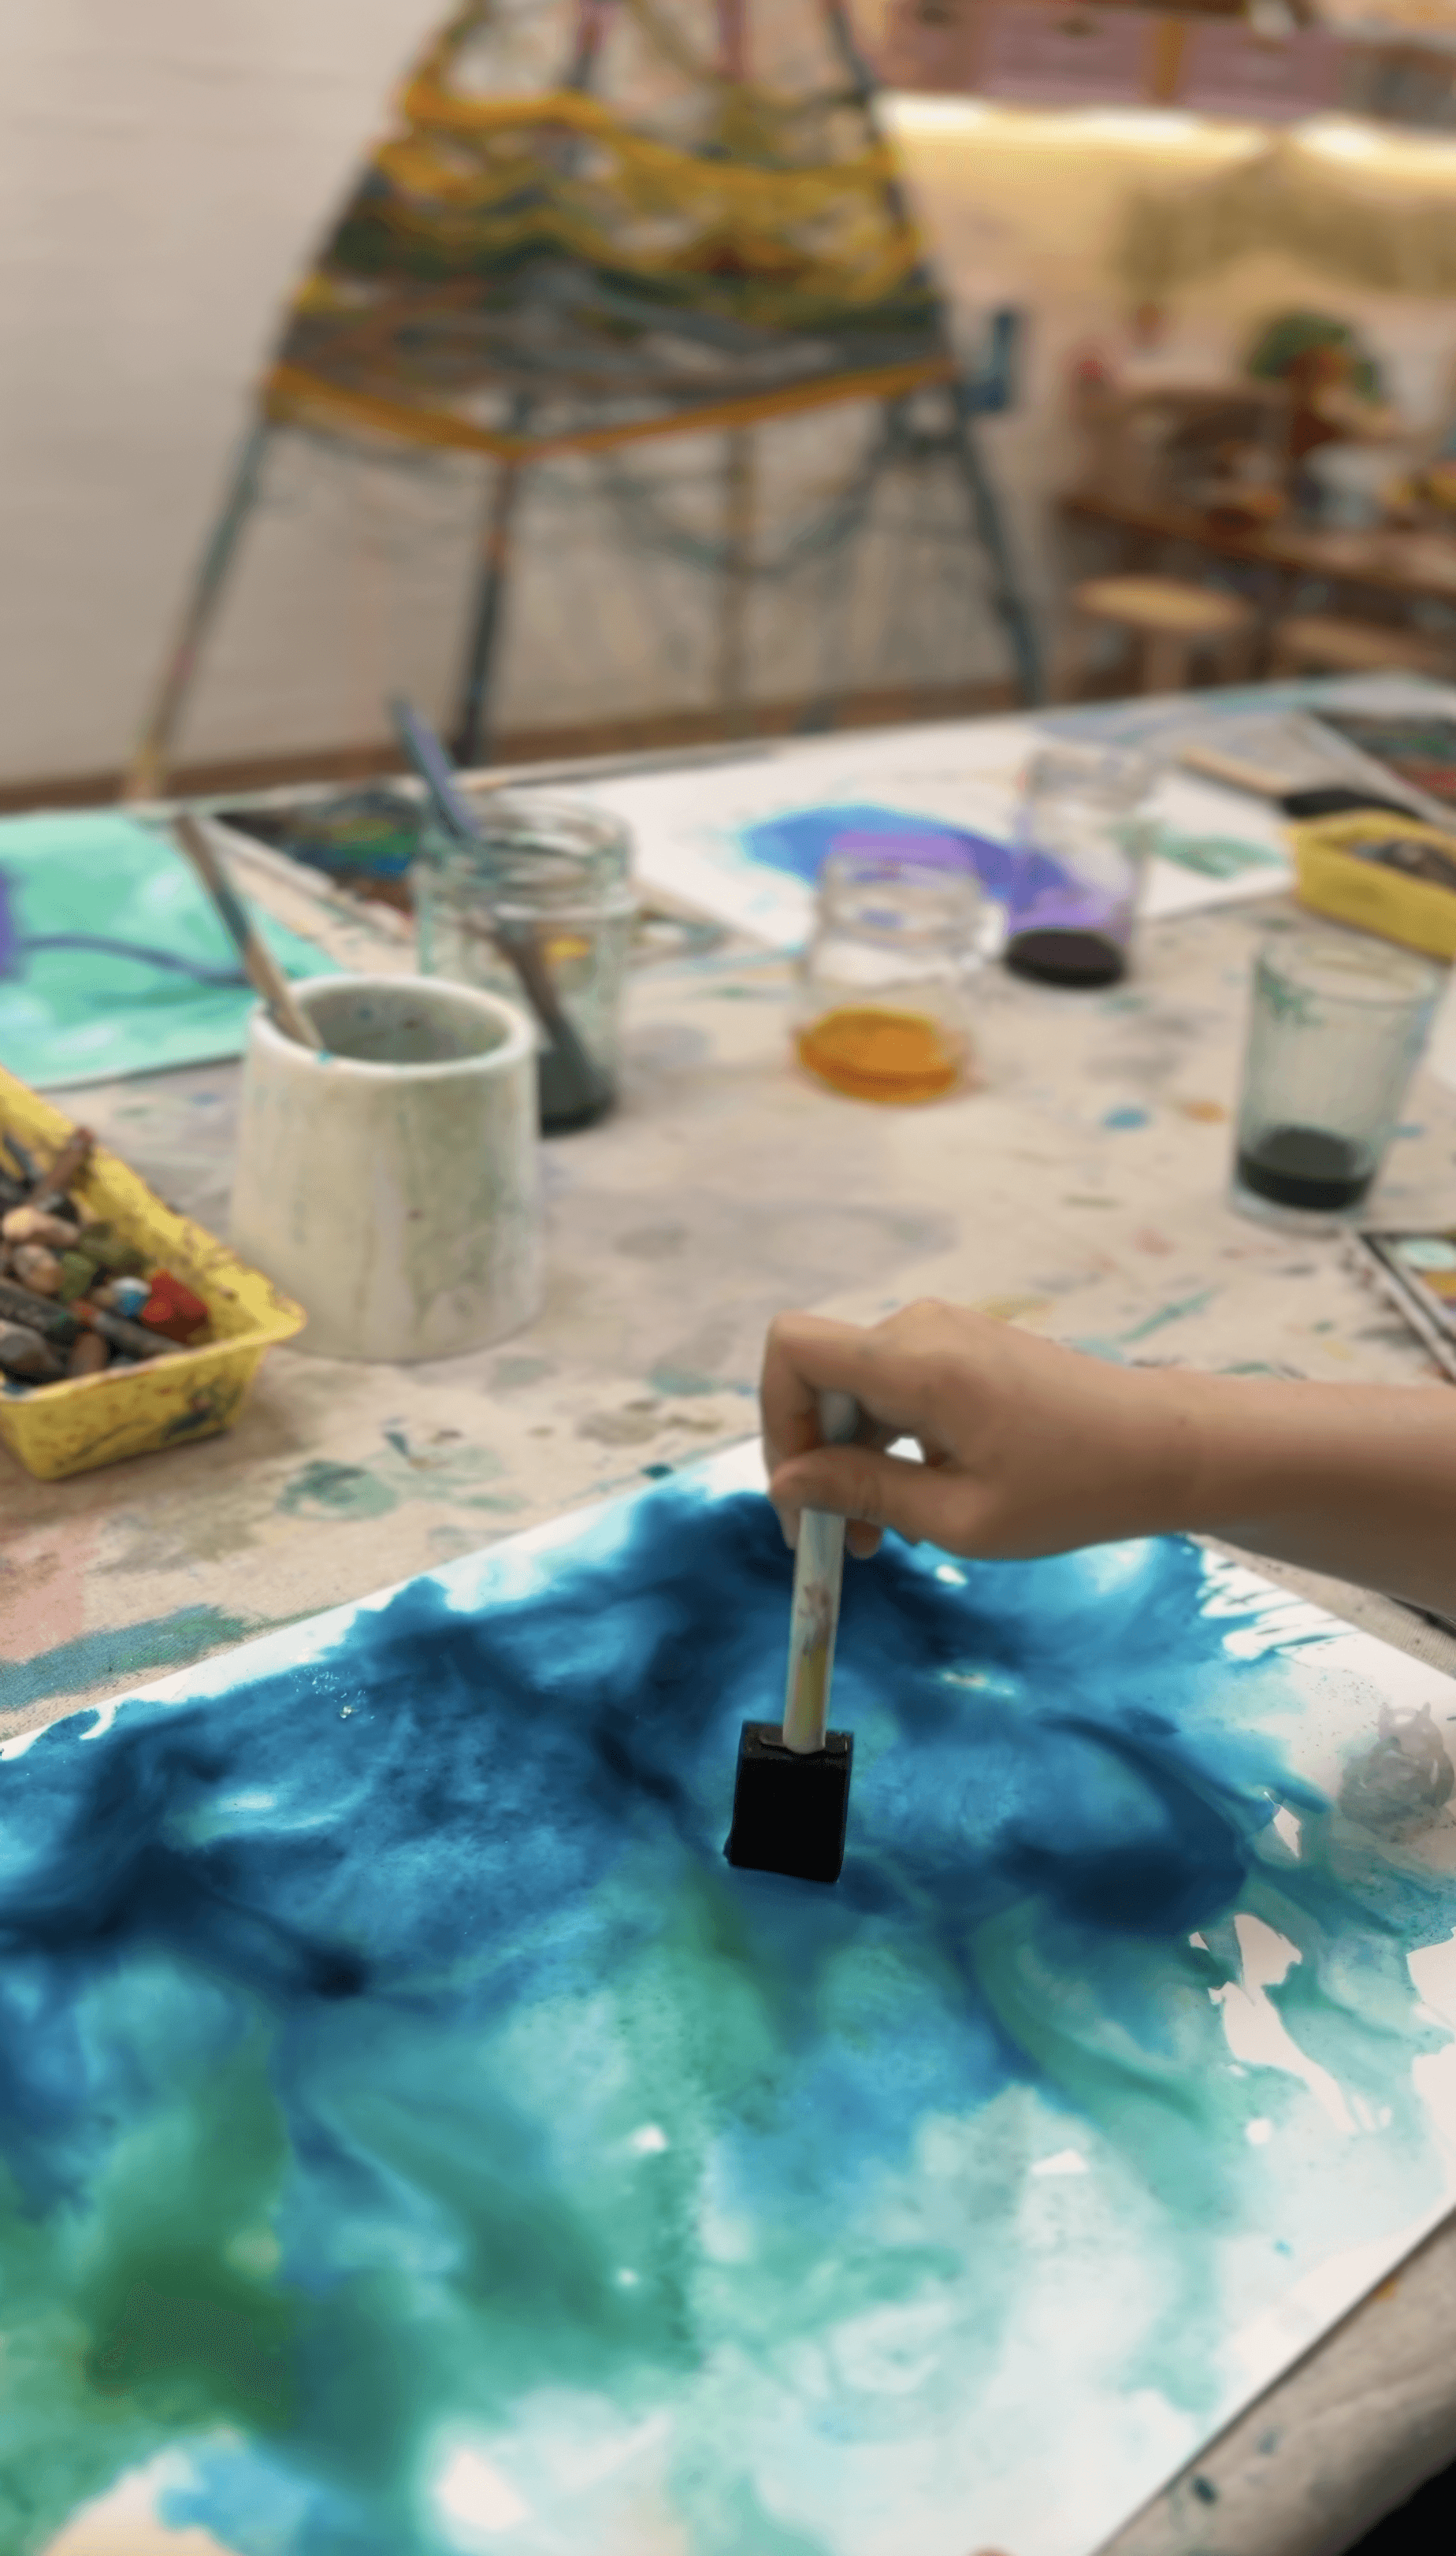
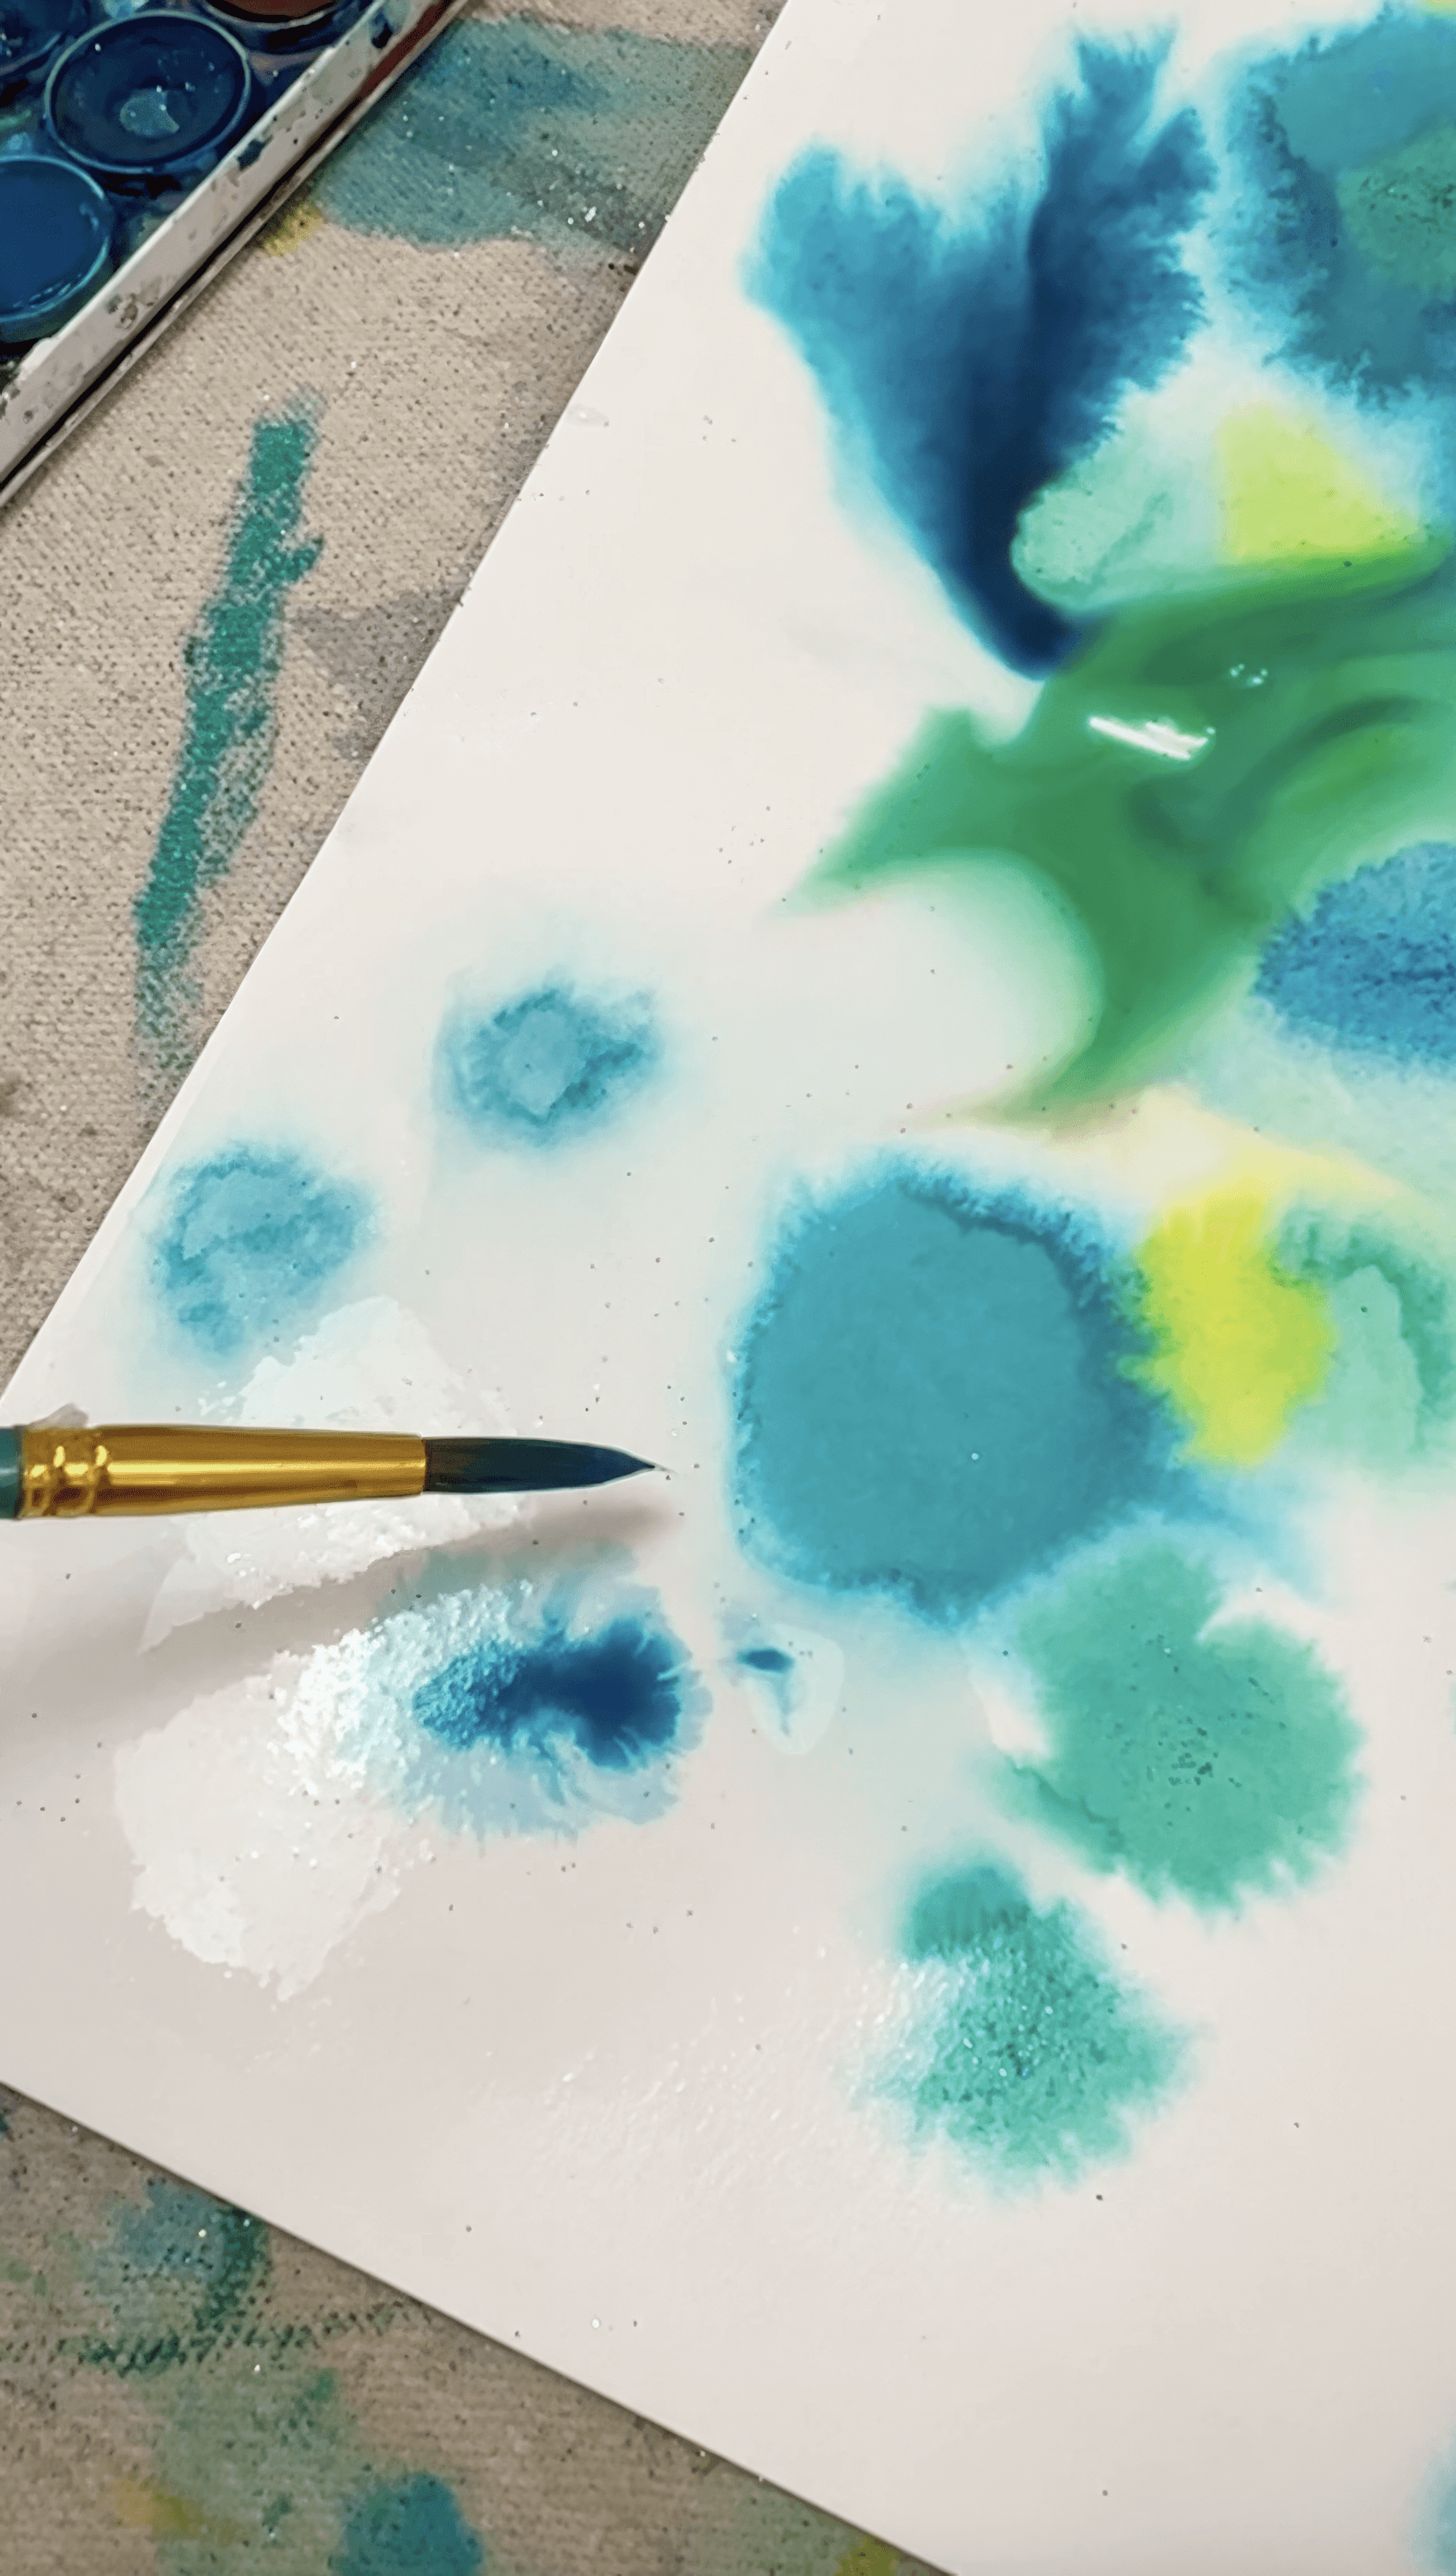
Painted Maps
Build your own road map of where you’ve been (or want to go next)!
Bookmark
Painting & Drawing
The Set Up
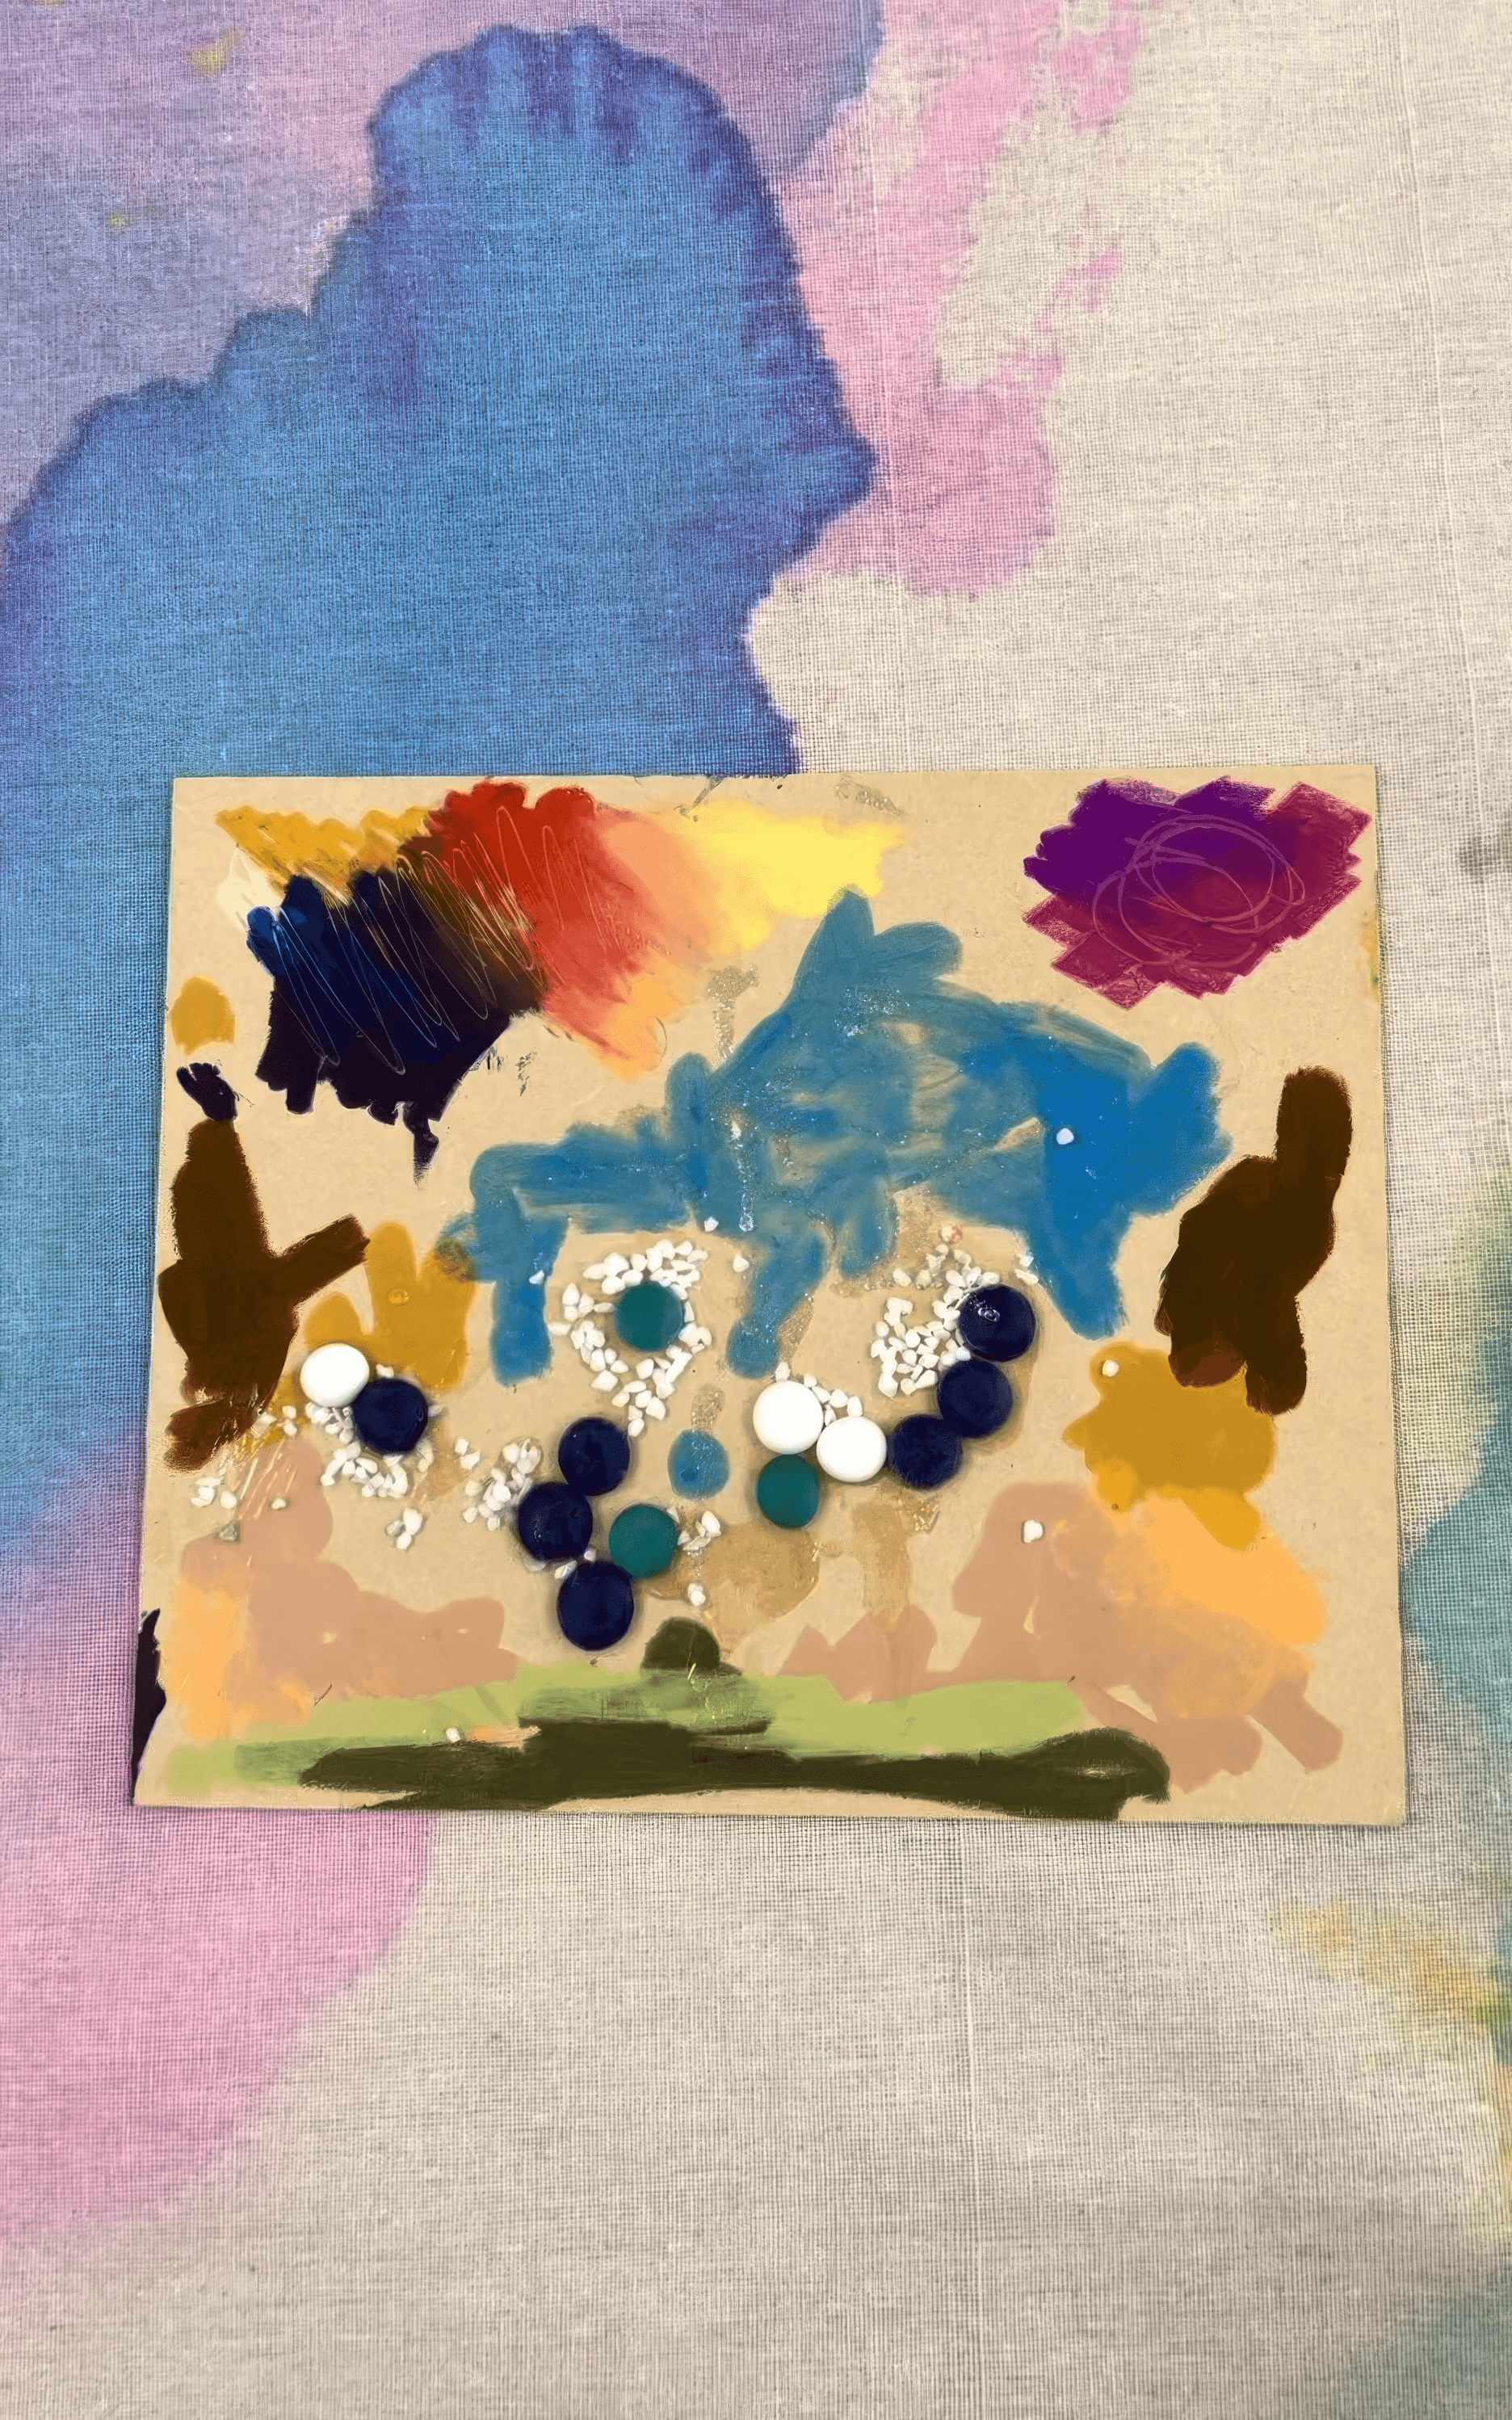
Lay out heavy paper or card. Liquid watercolours in blues, greens, purples, turquoise. Poster or tempera paint in earthy browns and sandy yellows. Always include white so kids can mix tints that feel sunlit or shallow or misty. Put the colours in low trays or jars with brushes. Keep black Posca or other paint pens nearby for lines and maps and outlines.
You can lightly sketch a coastline or island shape in pencil first if that helps younger artists enter. Or my preference is always to leave the page blank and let the first wash of colour help the artist decide where land appears!
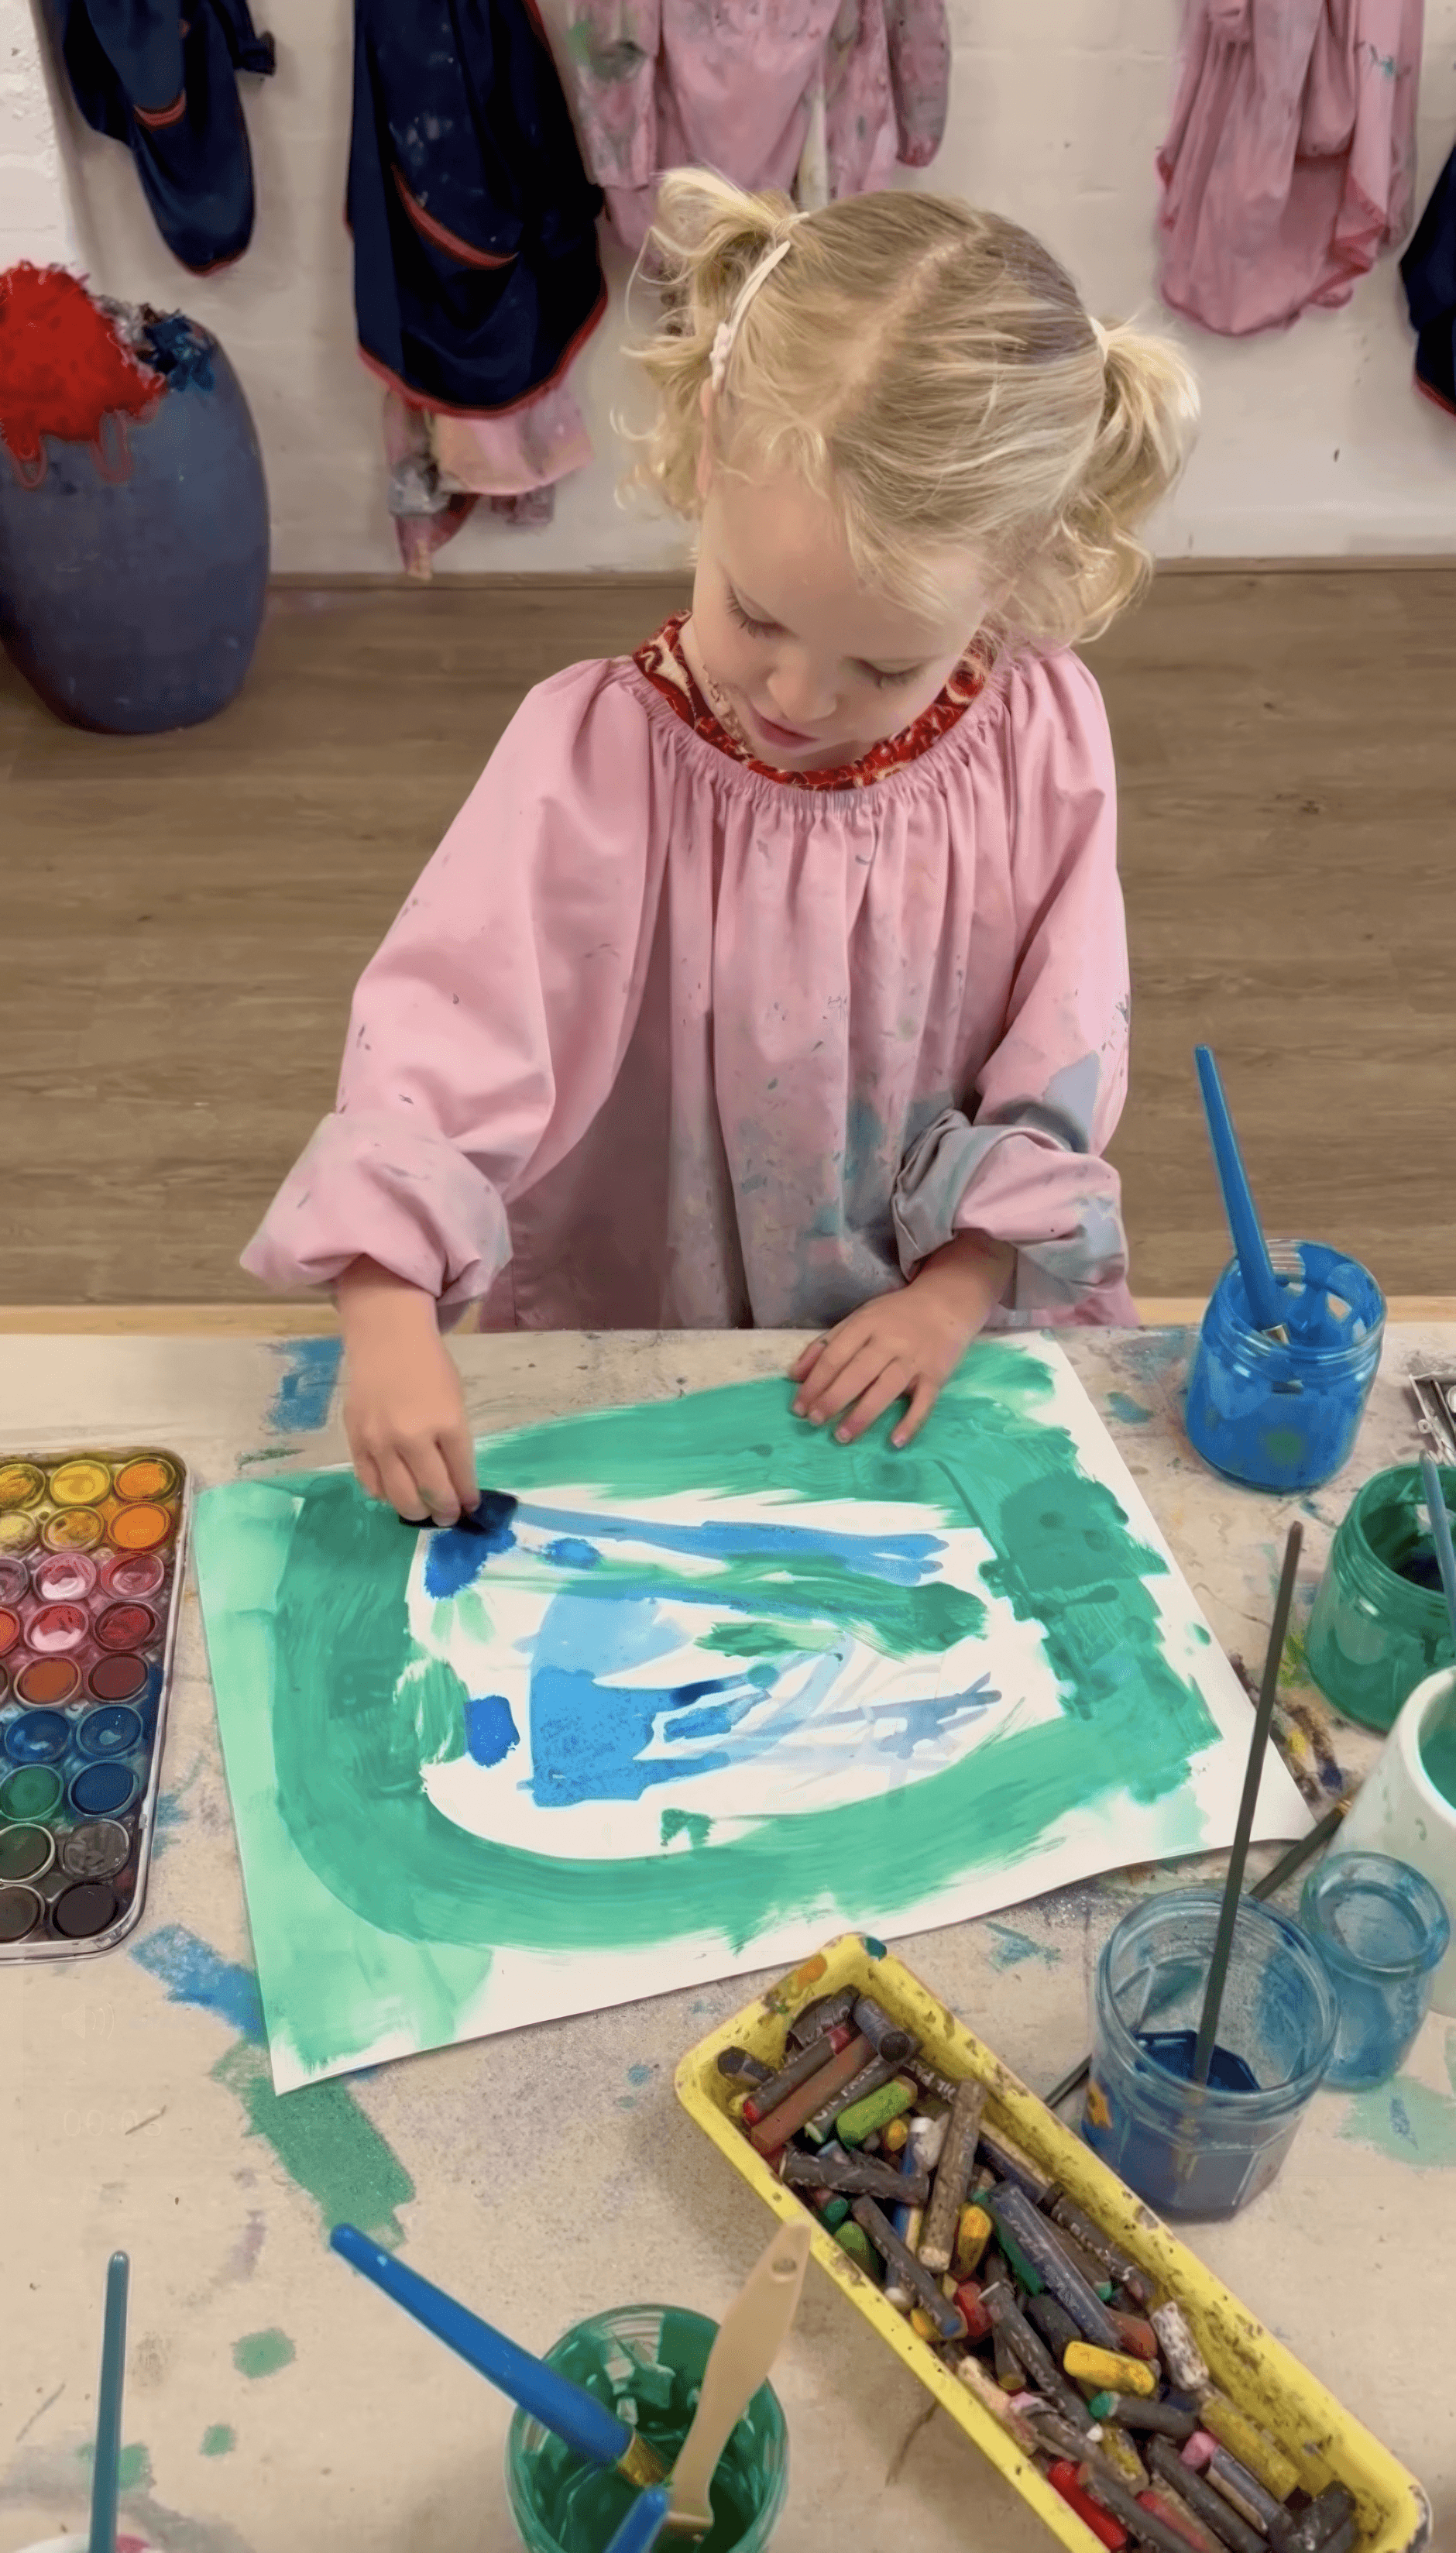
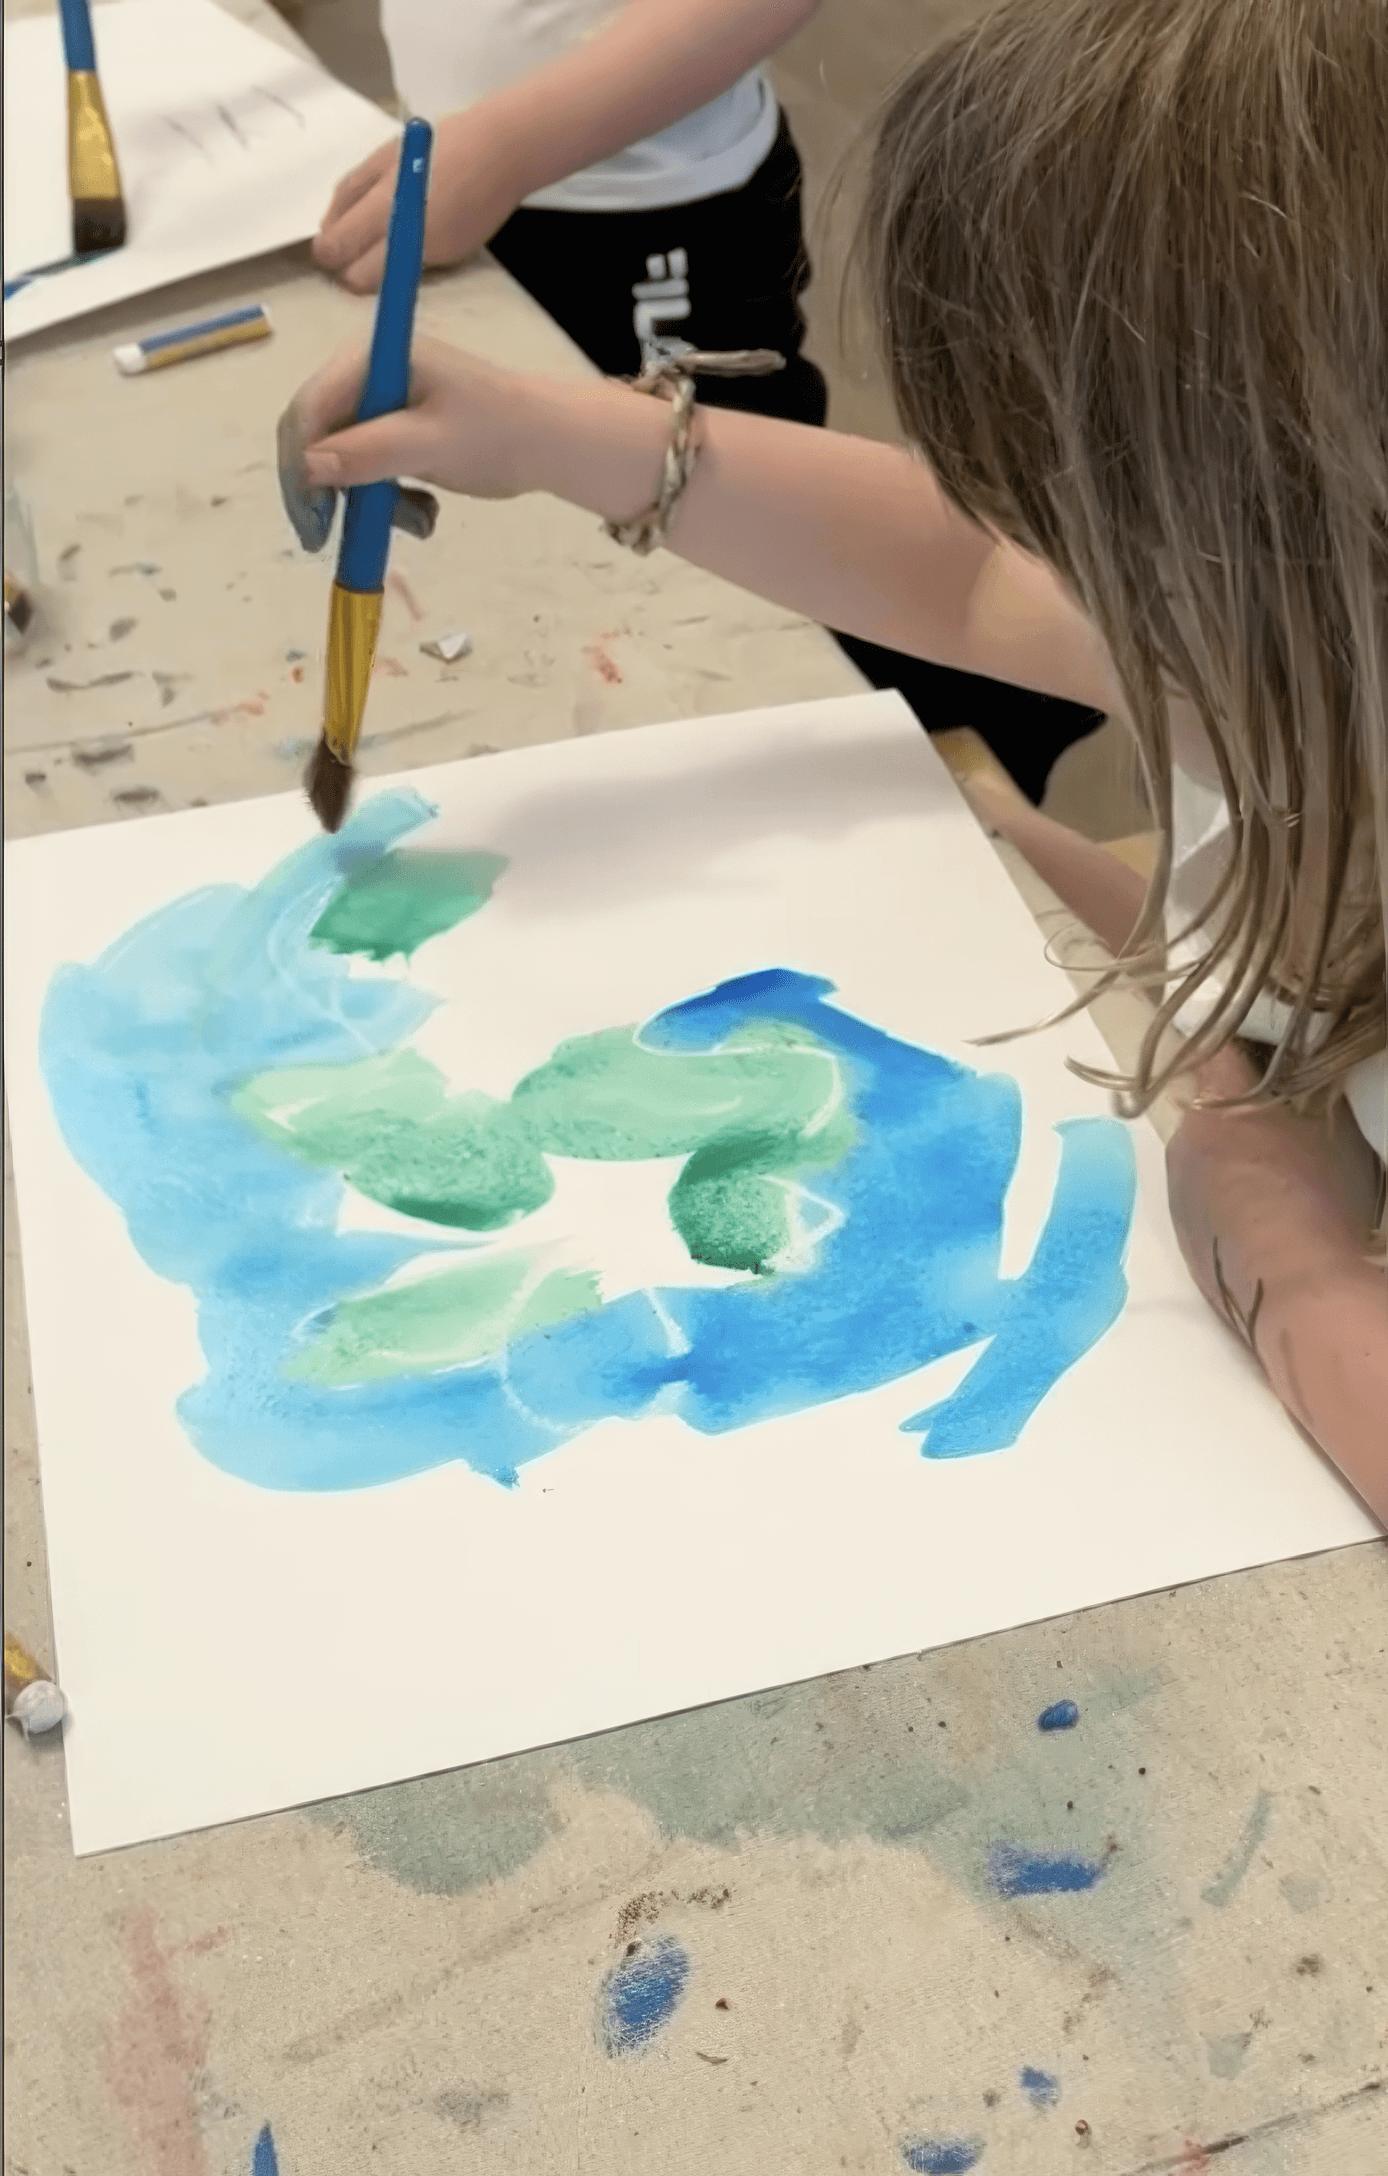
The Making
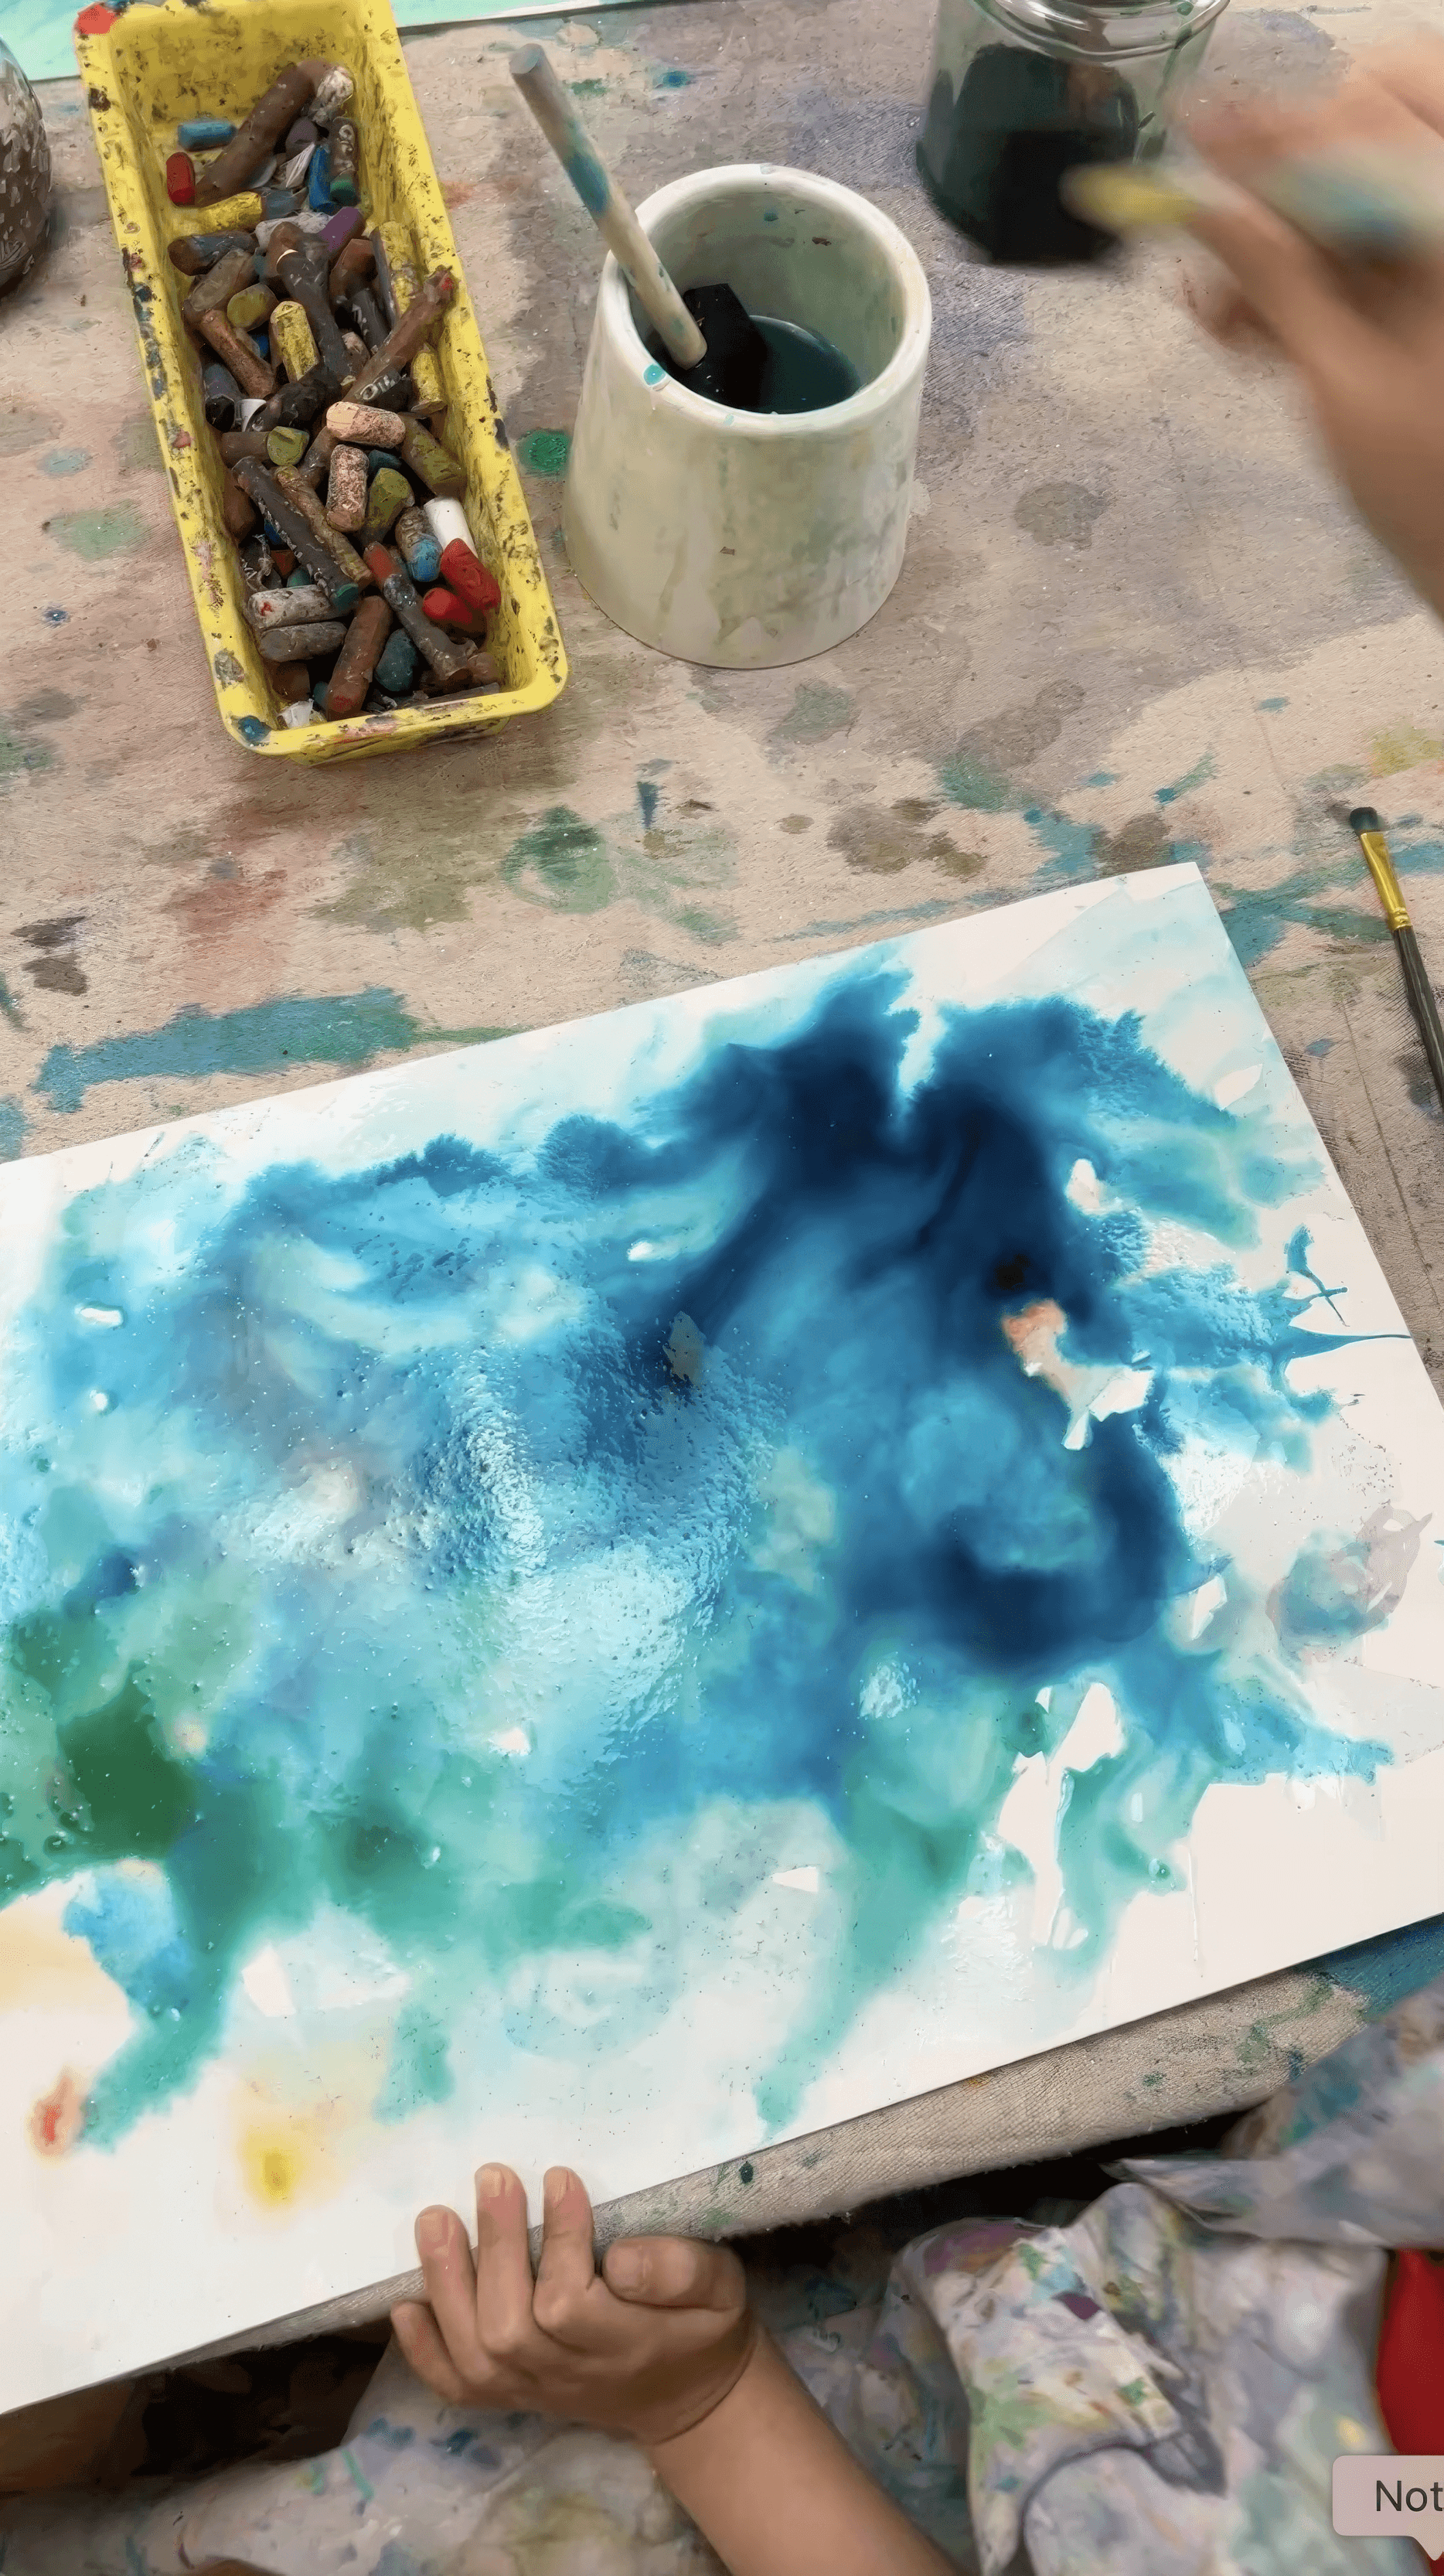
There’s no one right way to build a map! Some artists flood whole areas with watery colour and call it an island or a deep ocean trench. Others work small, dropping pockets of colour and letting them bleed into each other until a coastline appears on its own. Let both happen.
Keep the materials open. Thin washes. Thicker paint on top. Little scraps of paper or pen lines added later if they want paths or markers or creatures. Your job is mostly to offer and hold space and ask quiet questions invite story and thinking.
When they start naming places and tracing routes with a fingertip, that’s the moment the page stops being paint and becomes a world to explore!

Variations
Turn the finished map into a field guide by adding tiny drawings of creatures or plants that live there
Fold the map into a secret note and hide it in the Giant Treasure Map installation for someone else to discover
Materials
Heavy paper or card
Liquid watercolours and washable poster or tempera paint
White paint for mixing tints
Brushes and trays or small jars
Black paint pens or Posca style markers for outlining and naming
Back to Top
Painted Maps
Build your own road map of where you’ve been (or want to go next)!
Bookmark
Painting & Drawing
The Set Up
Lay out heavy paper or card. Liquid watercolours in blues, greens, purples, turquoise. Poster or tempera paint in earthy browns and sandy yellows. Always include white so kids can mix tints that feel sunlit or shallow or misty. Put the colours in low trays or jars with brushes. Keep black Posca or other paint pens nearby for lines and maps and outlines.
You can lightly sketch a coastline or island shape in pencil first if that helps younger artists enter. Or my preference is always to leave the page blank and let the first wash of colour help the artist decide where land appears!
The Making
There’s no one right way to build a map! Some artists flood whole areas with watery colour and call it an island or a deep ocean trench. Others work small, dropping pockets of colour and letting them bleed into each other until a coastline appears on its own. Let both happen.
Keep the materials open. Thin washes. Thicker paint on top. Little scraps of paper or pen lines added later if they want paths or markers or creatures. Your job is mostly to offer and hold space and ask quiet questions invite story and thinking.
When they start naming places and tracing routes with a fingertip, that’s the moment the page stops being paint and becomes a world to explore!
Variations
Turn the finished map into a field guide by adding tiny drawings of creatures or plants that live there
Fold the map into a secret note and hide it in the Giant Treasure Map installation for someone else to discover
Materials
Heavy paper or card
Liquid watercolours and washable poster or tempera paint
White paint for mixing tints
Brushes and trays or small jars
Black paint pens or Posca style markers for outlining and naming
Back to Top
