
ARTFUL EXPERIENCES
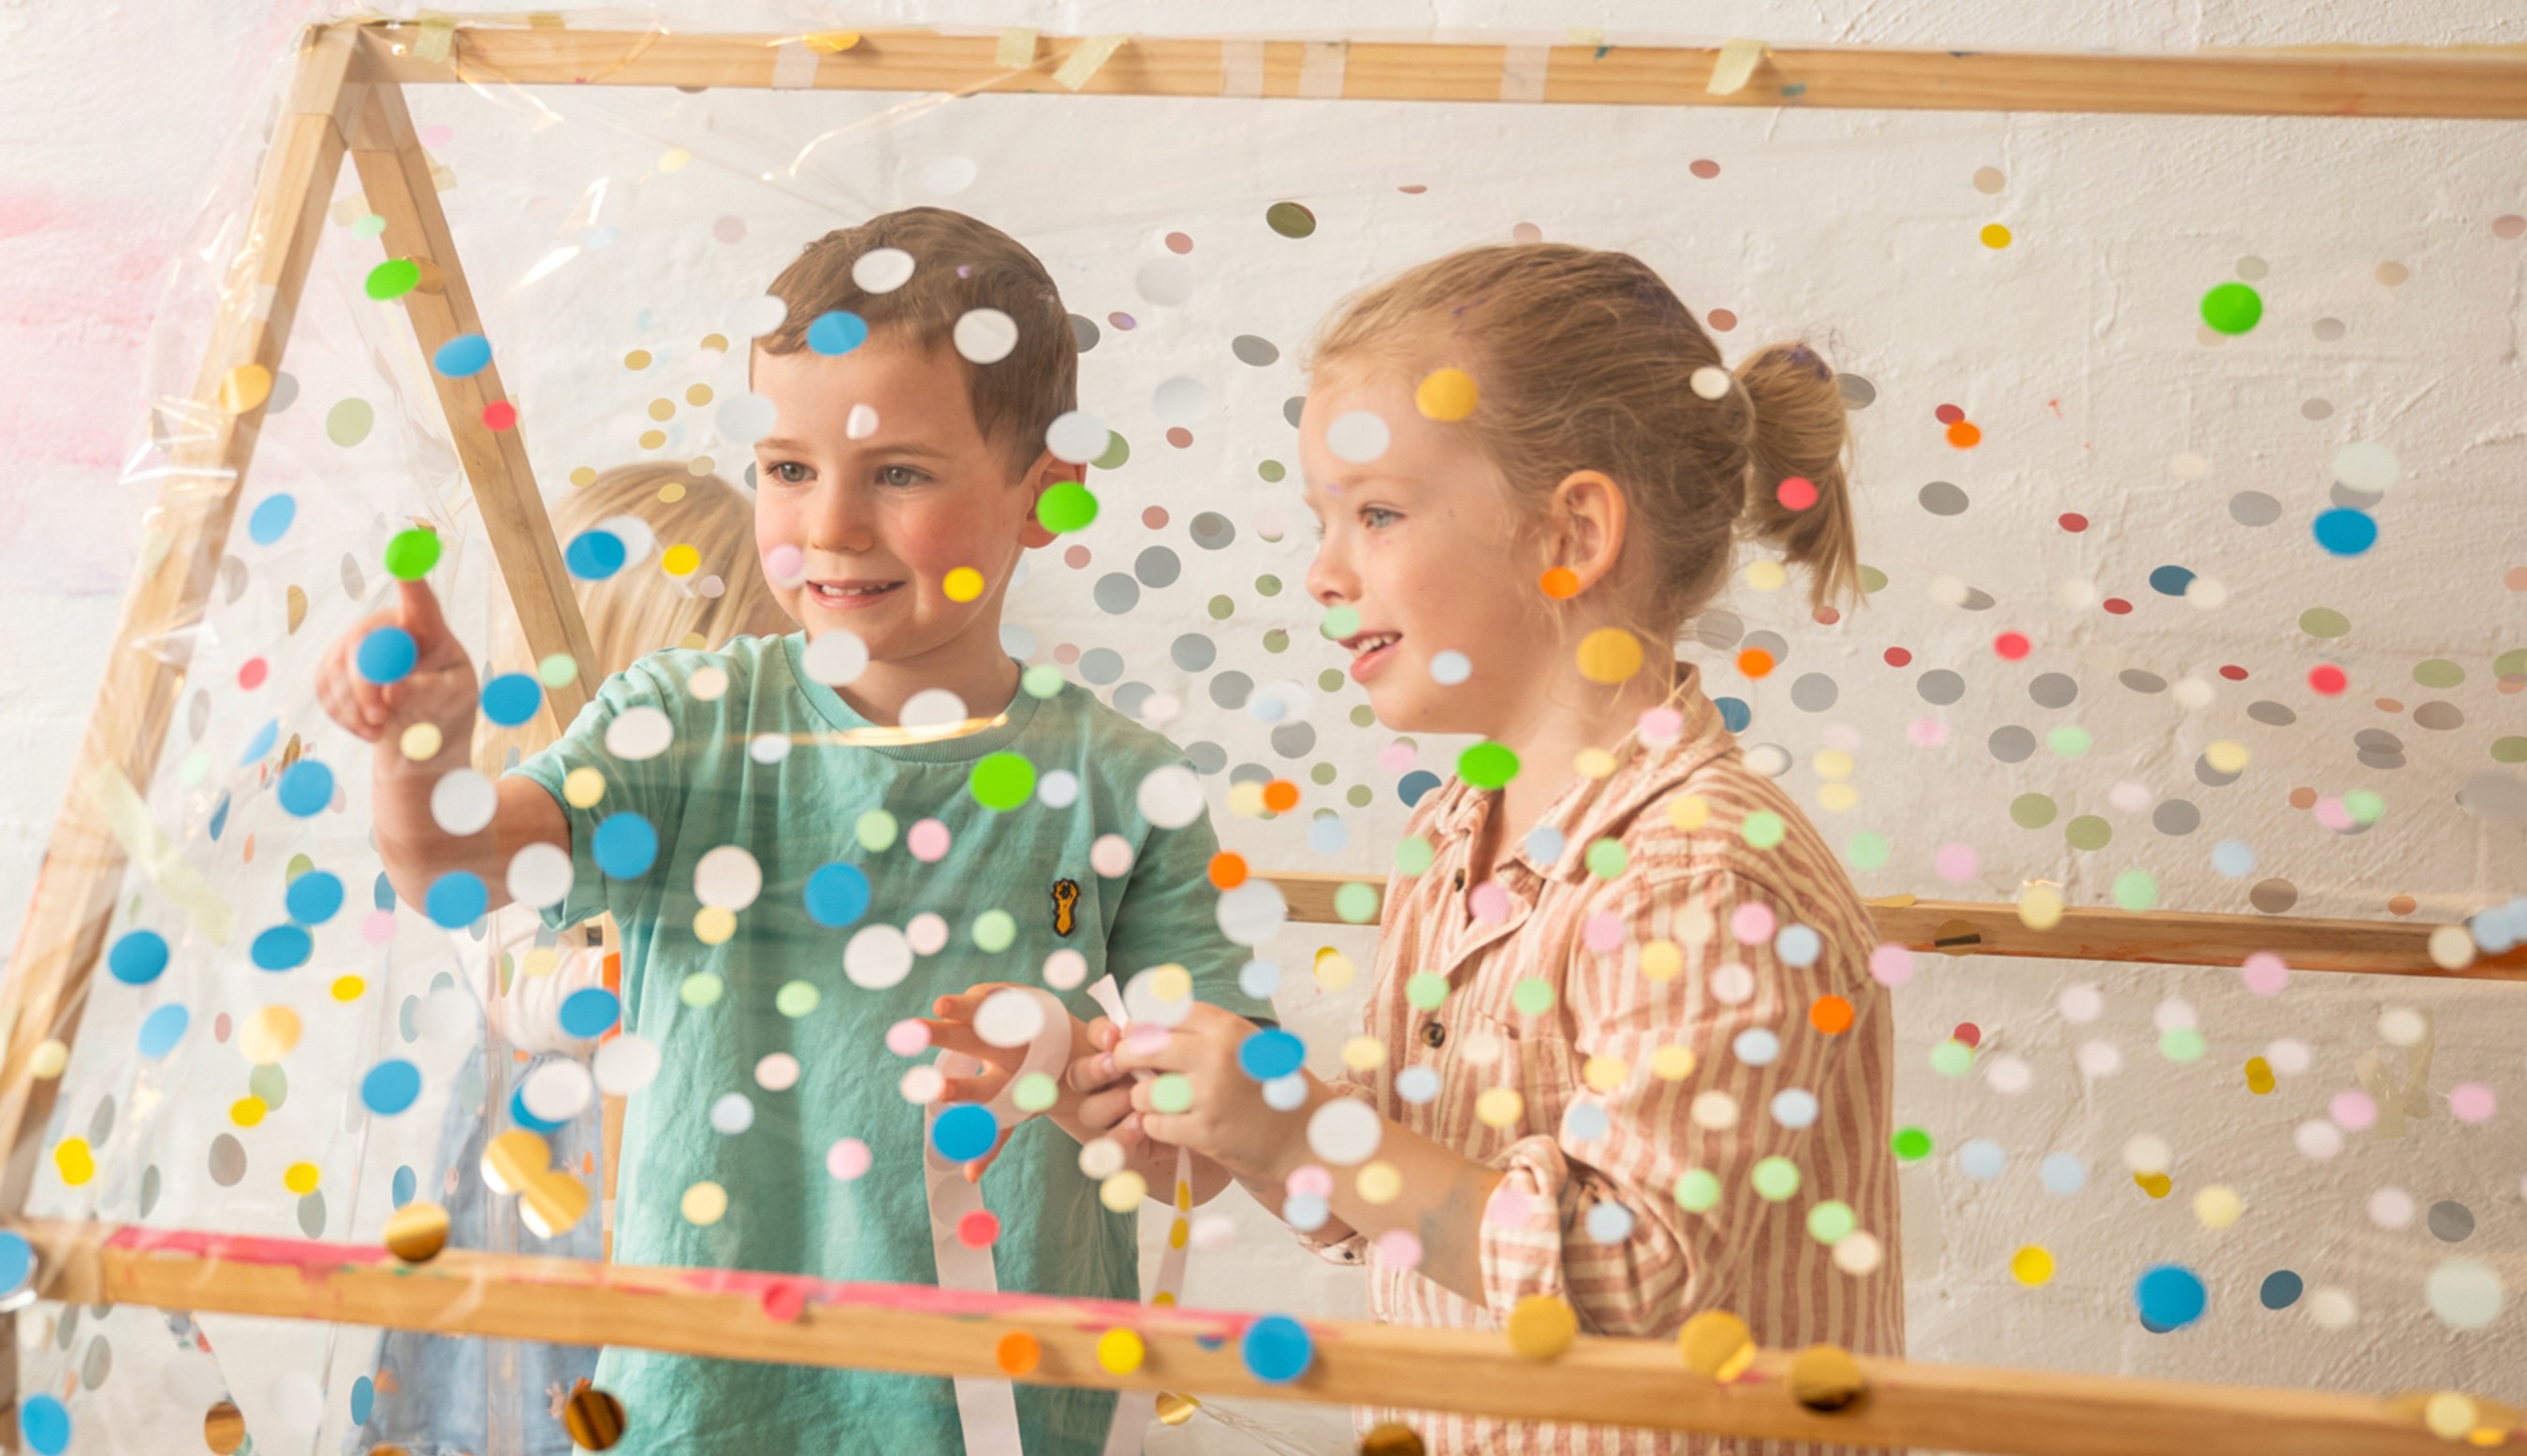
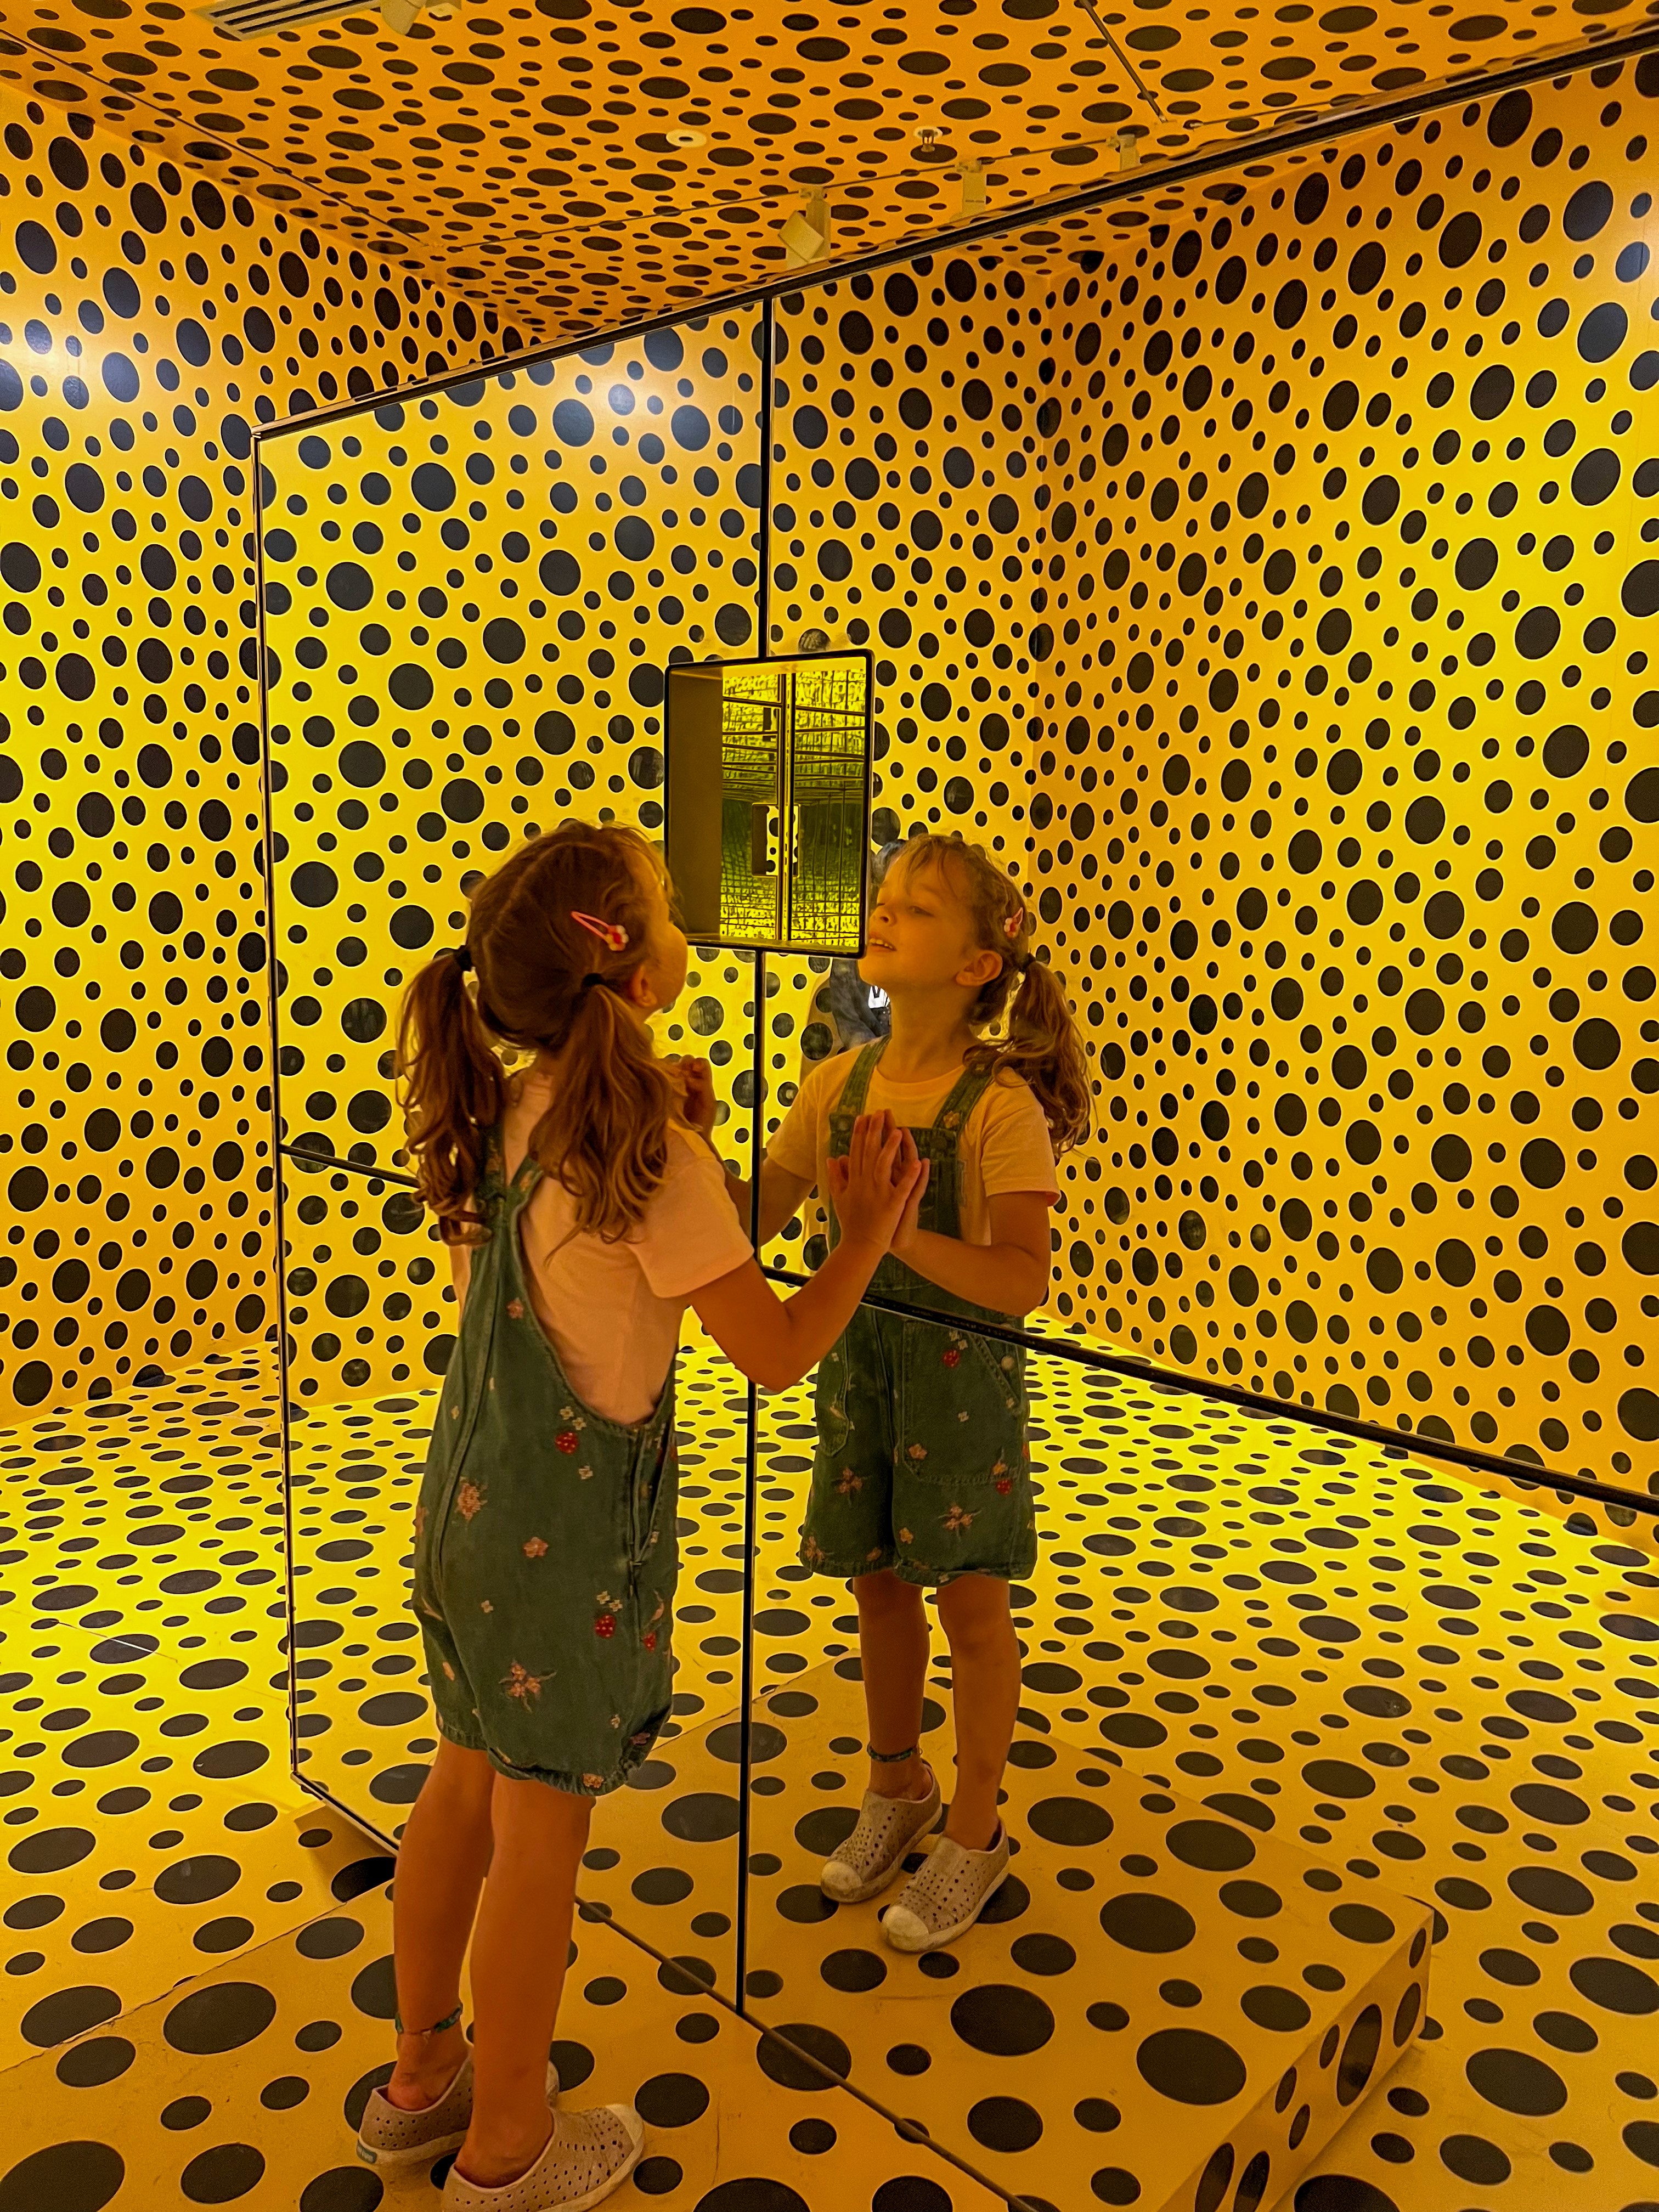
Smudge Obliteration Room
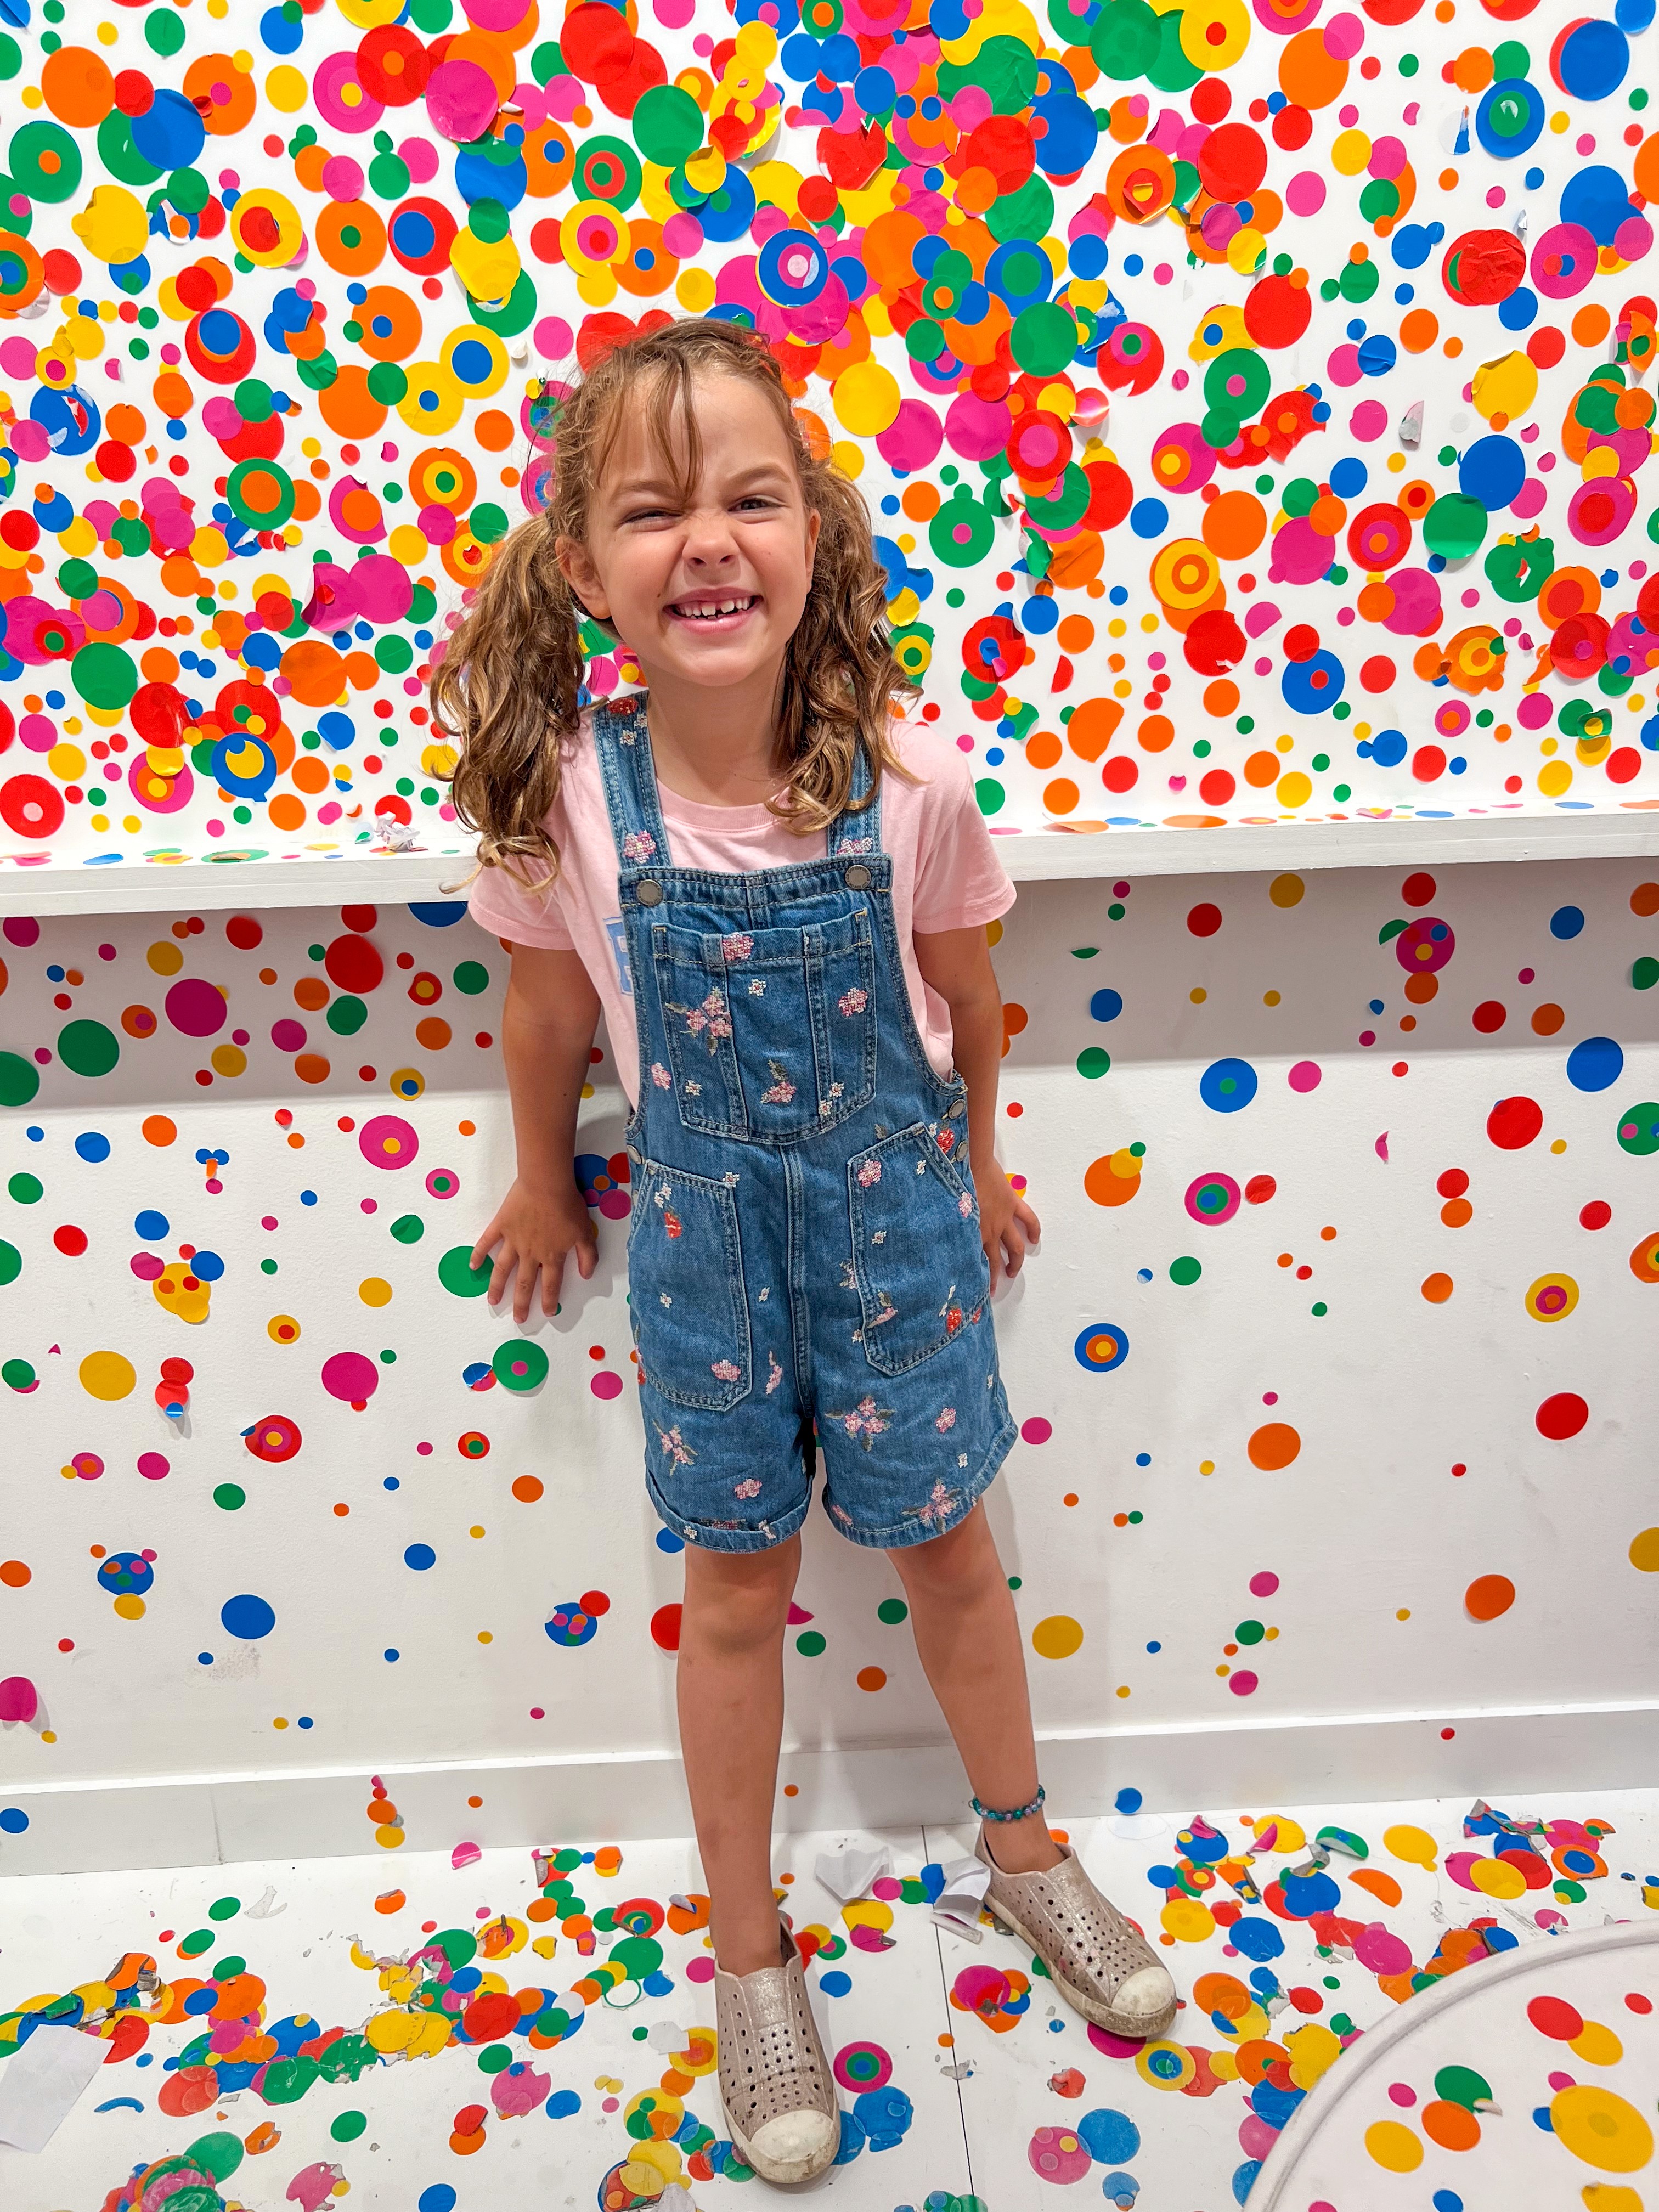
Start with a blank white space and let dot stickers slowly take it over!
Bookmark
Installations

The Set Up
Begin with everything painted white. Old furniture, frames, even pumpkins if you have them. The plainer the better, because it means every dot added will shine.
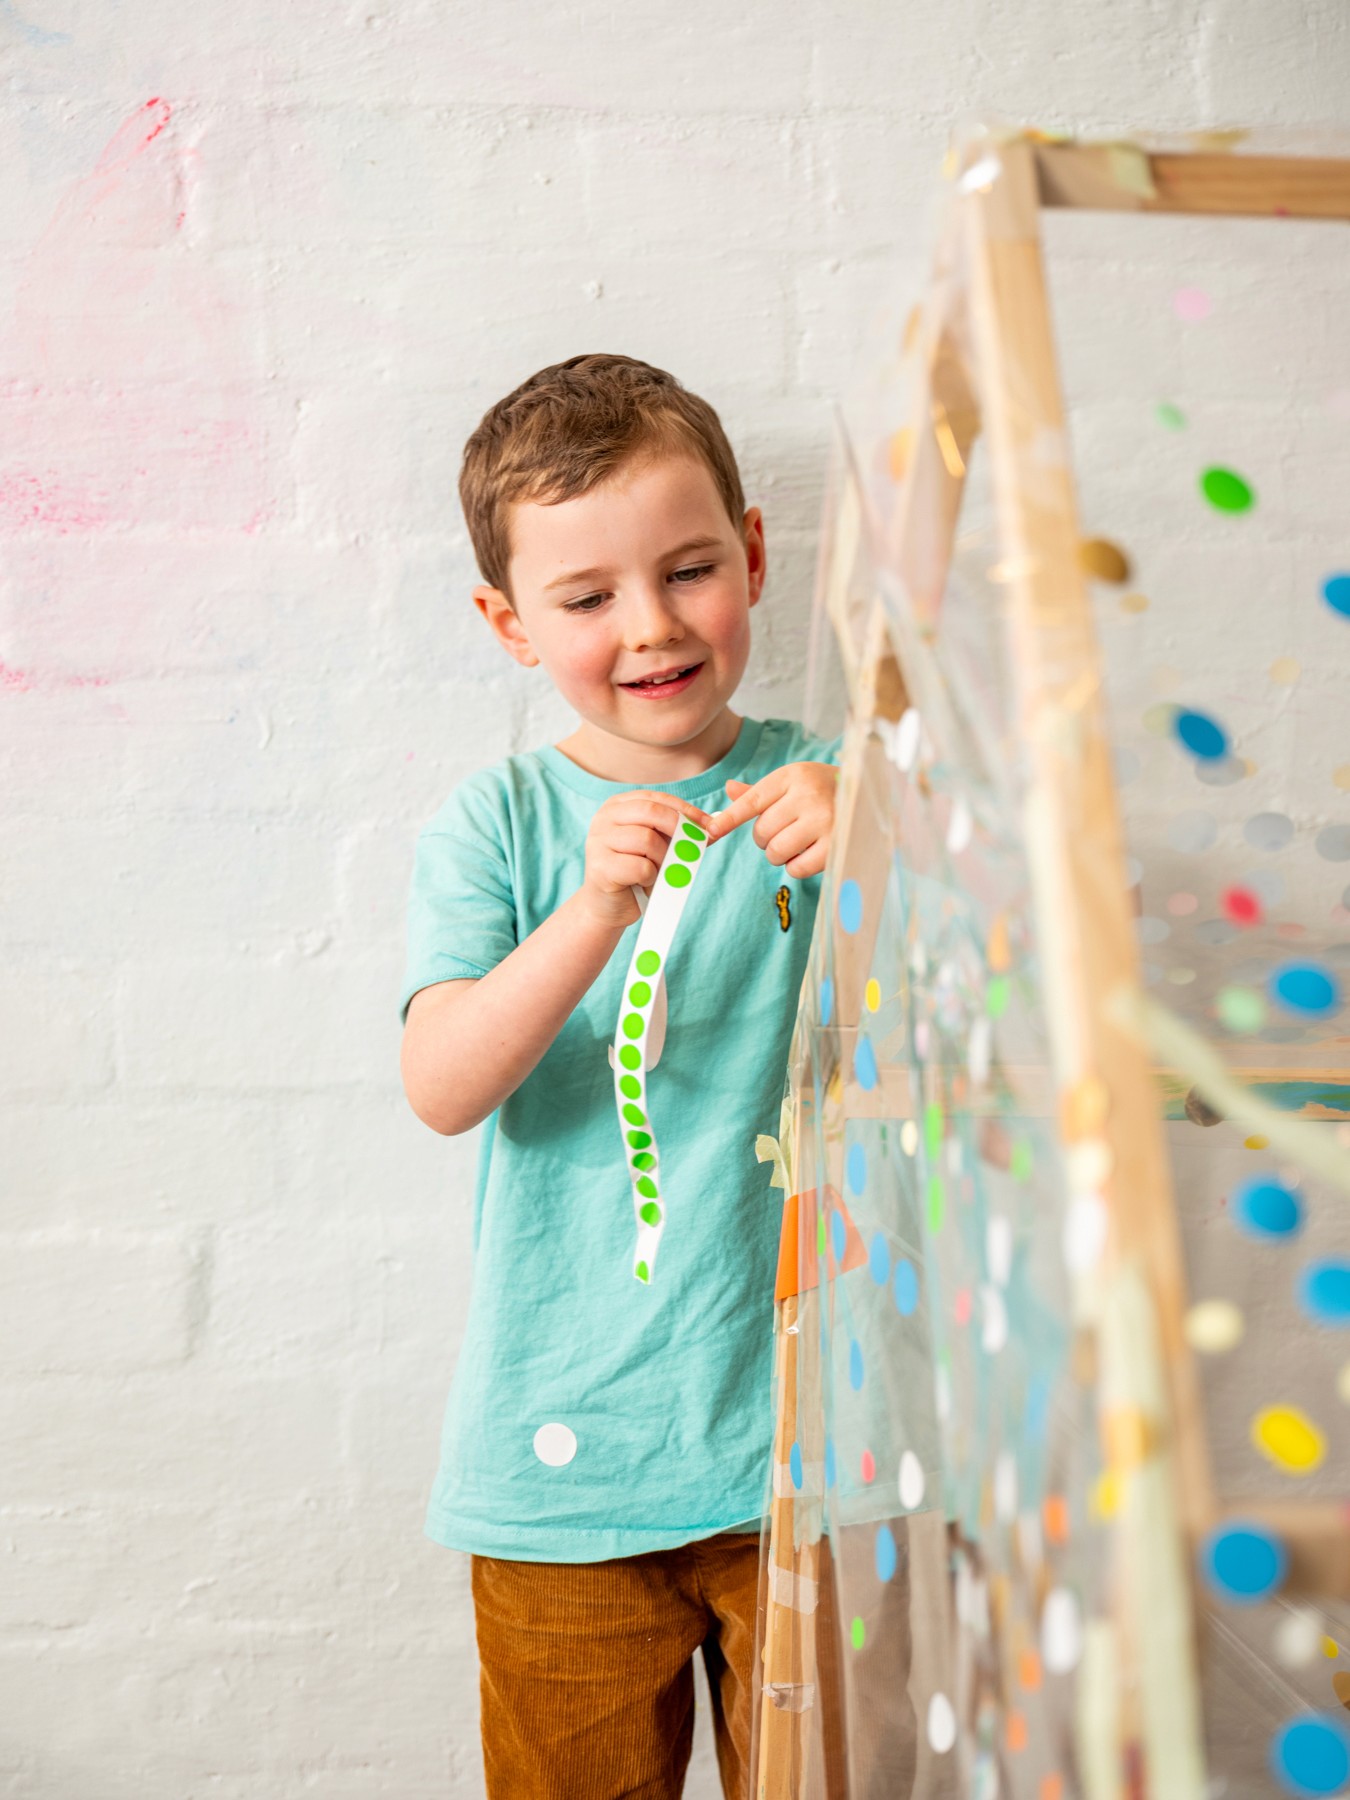
One of my favourite versions was when we used the wooden frame of a cubby house and wrapped it in clear cellophane. It became a glowing little structure that was covered inside and out with dots. Kids loved crawling in, sticking from the inside, then stepping out and seeing how the colours layered through the clear walls.


The Making
Hand out sheets of colourful dot stickers and let people loose. The stickers can go on walls, across chairs, onto frames, over tables. At first the room looks sparse, but before long the dots begin to take over. The white fades into the background and what you are left with is a buzzing, joyful explosion of colour created by everyone who stepped inside.
Art History Moment
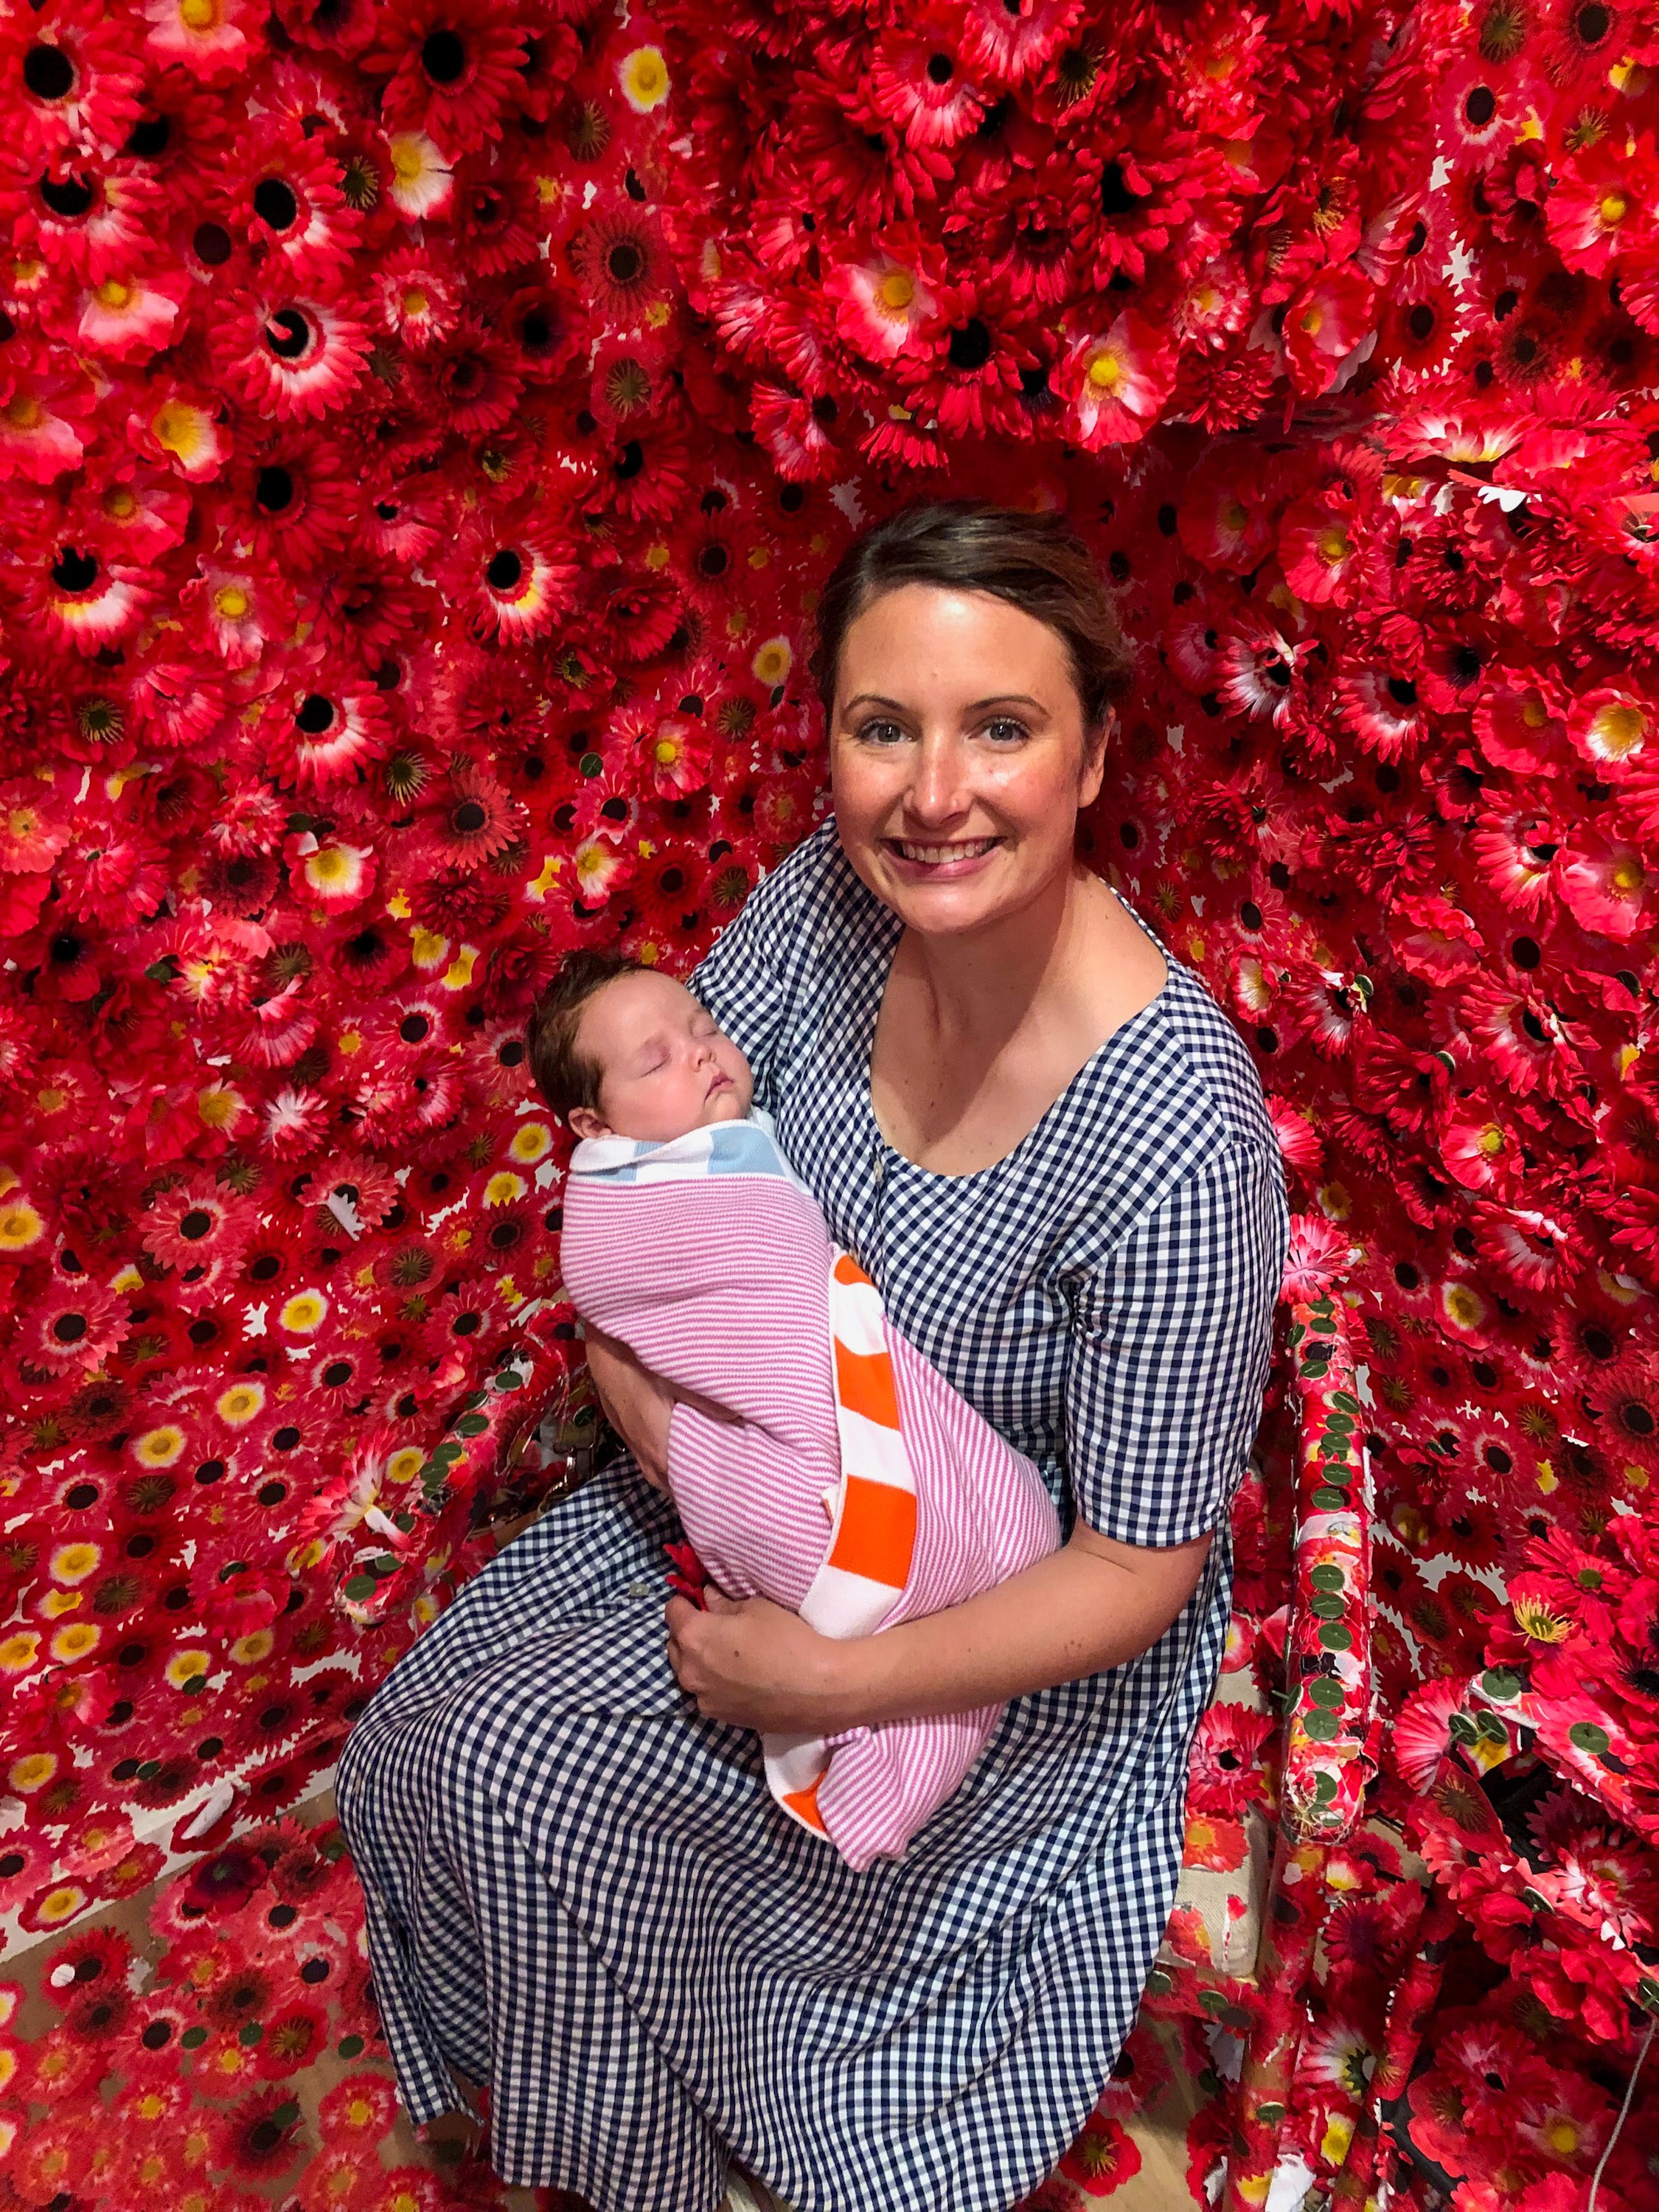
Kusama’s Flower Obsession began as a simple apartment space. By the end of the NGV Triennial, visitors had placed more than half a million stickers. The sofa, the walls, the windows, even the bathroom were transformed. It is a reminder that art doesn’t need to be kept at arm’s length. It becomes so much more powerful when we are invited in.


Variations
Offer dots in a single colour to see how intensity builds through repetition.
Try changing the shapes (maybe hearts, stars, or flowers) to create your own twist on Kusama’s idea.
Photograph the room each day to capture its transformation over time.
Materials
White-painted furniture or props (frames, stools, pumpkins, boxes)
Sheets of dot stickers in various colours and sizes
Drop cloths if you are painting items white beforehand
Optional: blank frames or canvases for a more gallery-like effect
Back to Top
Smudge Obliteration Room
Start with a blank white space and let dot stickers slowly take it over!
Bookmark
Installations
The Set Up
Begin with everything painted white. Old furniture, frames, even pumpkins if you have them. The plainer the better, because it means every dot added will shine.
One of my favourite versions was when we used the wooden frame of a cubby house and wrapped it in clear cellophane. It became a glowing little structure that was covered inside and out with dots. Kids loved crawling in, sticking from the inside, then stepping out and seeing how the colours layered through the clear walls.
The Making
Hand out sheets of colourful dot stickers and let people loose. The stickers can go on walls, across chairs, onto frames, over tables. At first the room looks sparse, but before long the dots begin to take over. The white fades into the background and what you are left with is a buzzing, joyful explosion of colour created by everyone who stepped inside.
Art History Moment
Kusama’s Flower Obsession began as a simple apartment space. By the end of the NGV Triennial, visitors had placed more than half a million stickers. The sofa, the walls, the windows, even the bathroom were transformed. It is a reminder that art doesn’t need to be kept at arm’s length. It becomes so much more powerful when we are invited in.
Variations
Offer dots in a single colour to see how intensity builds through repetition.
Try changing the shapes (maybe hearts, stars, or flowers) to create your own twist on Kusama’s idea.
Photograph the room each day to capture its transformation over time.
Materials
White-painted furniture or props (frames, stools, pumpkins, boxes)
Sheets of dot stickers in various colours and sizes
Drop cloths if you are painting items white beforehand
Optional: blank frames or canvases for a more gallery-like effect
Back to Top
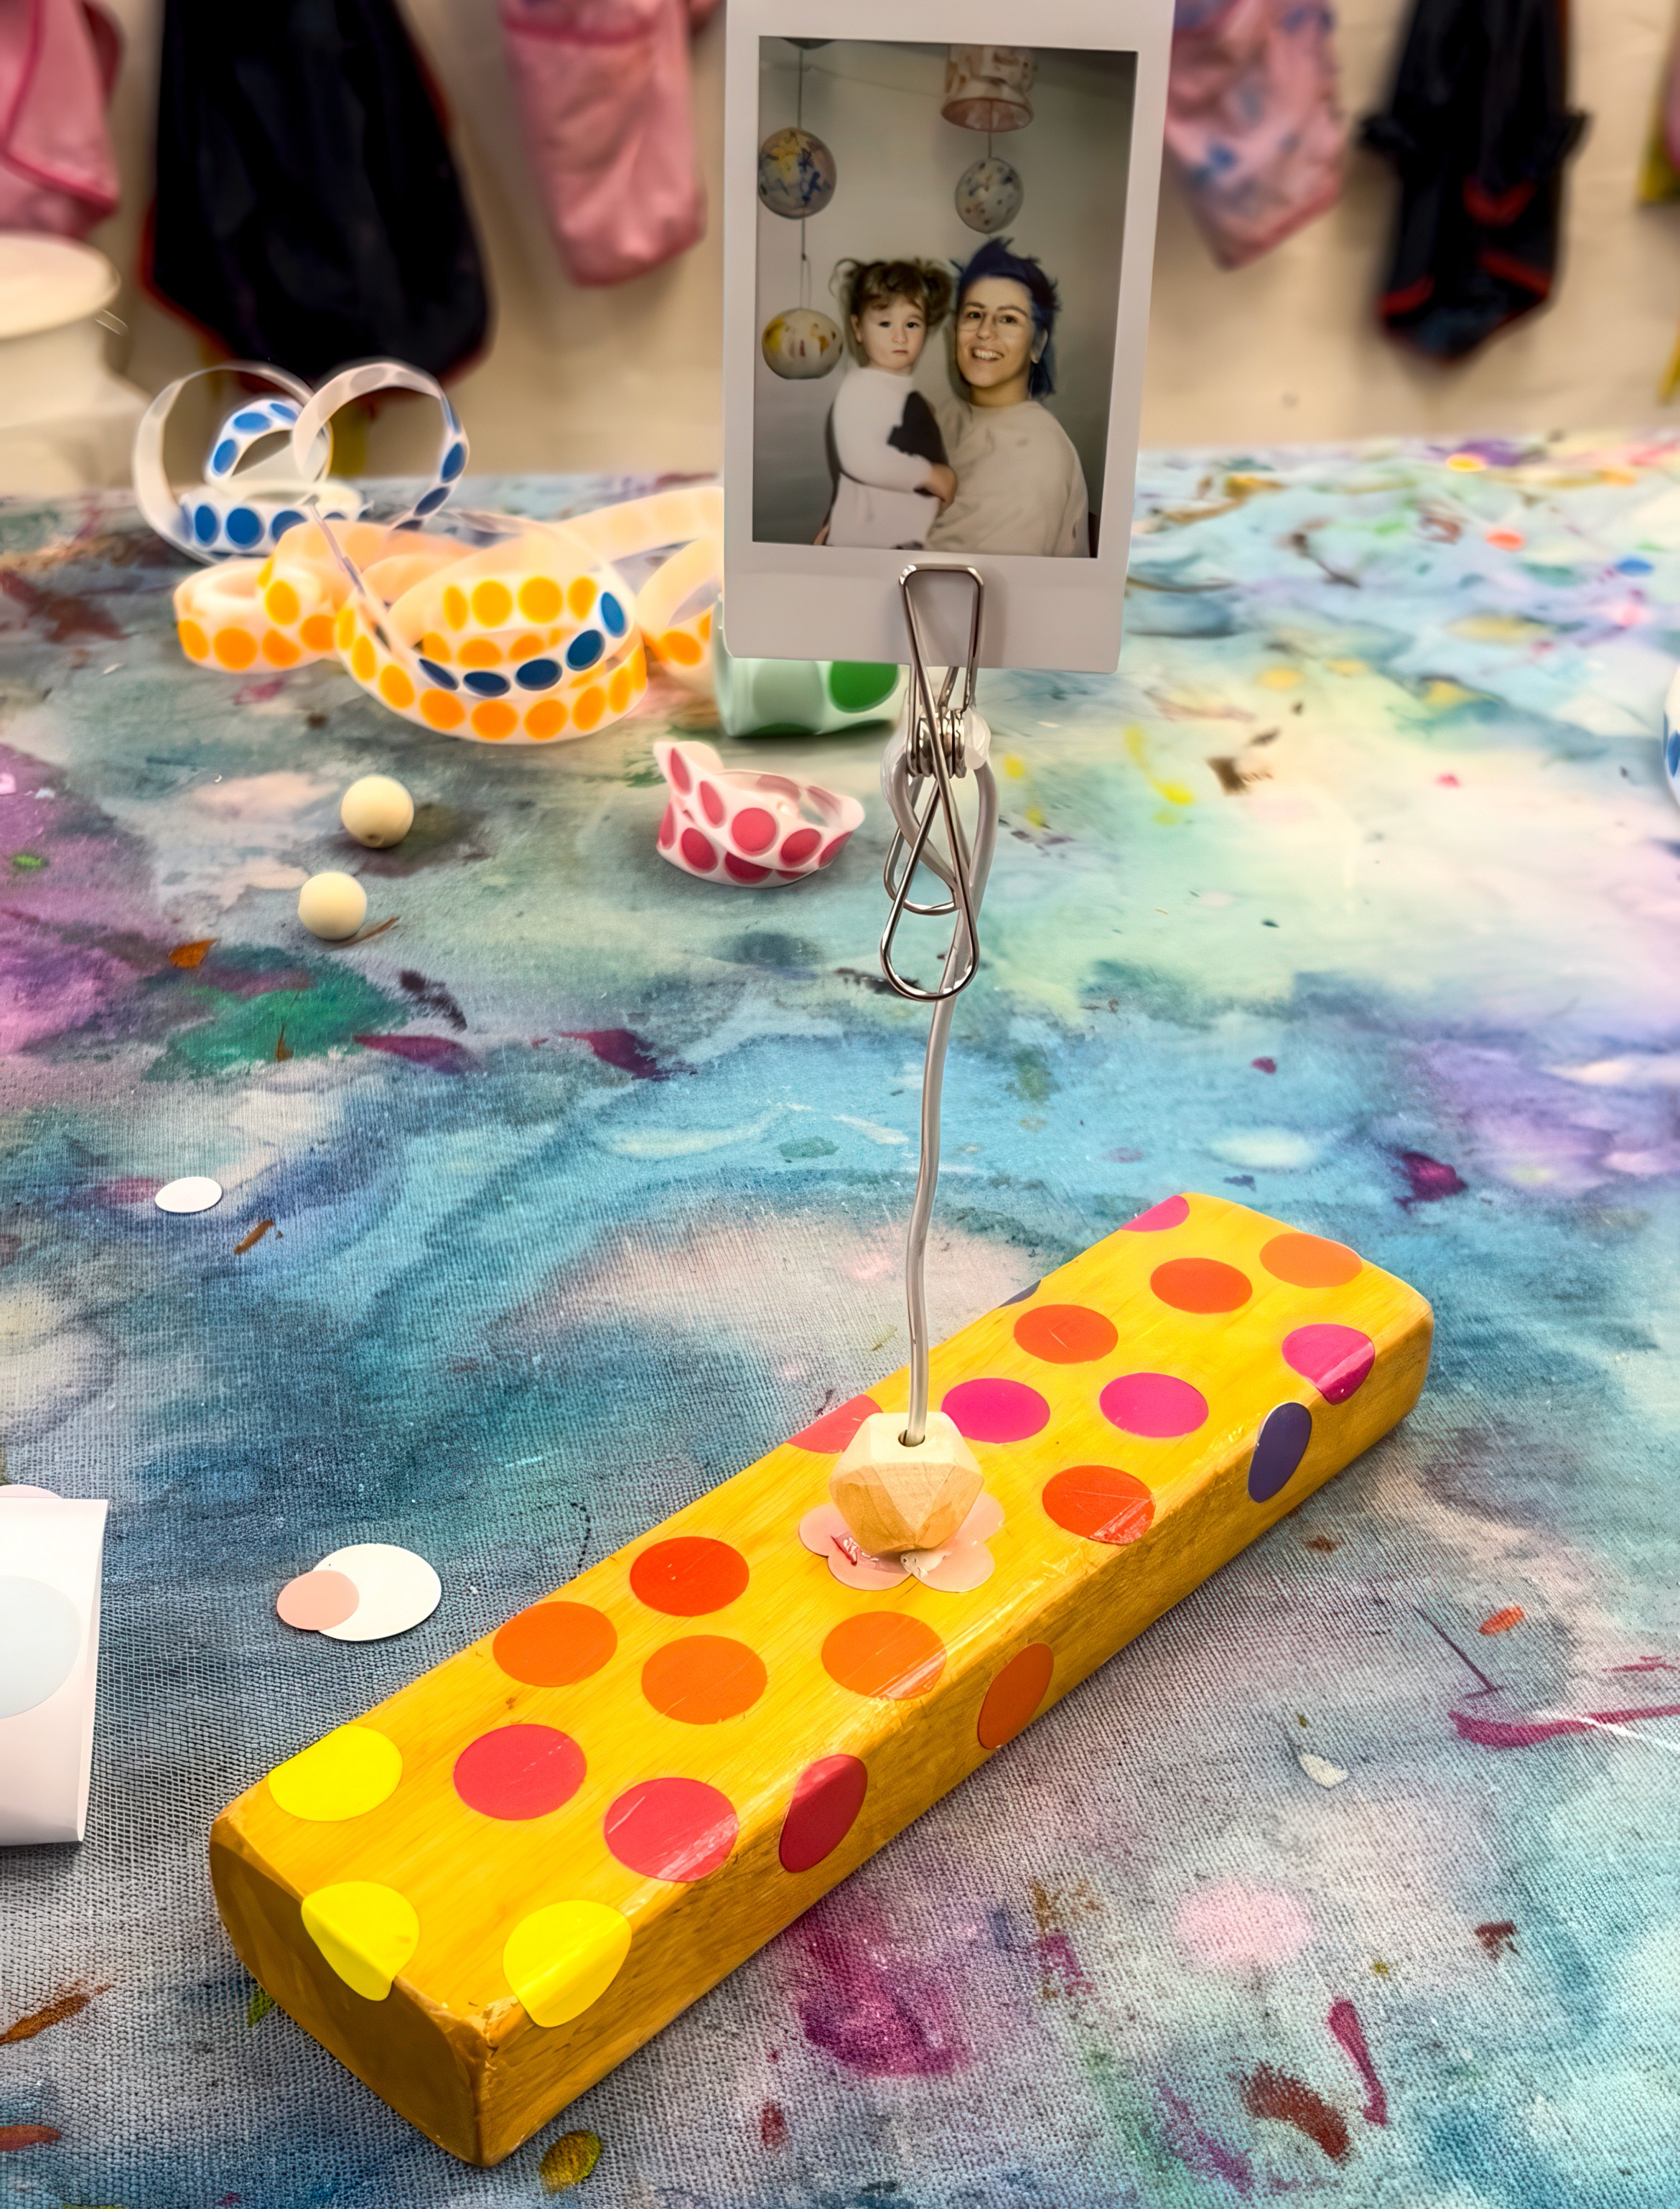
Spotty Photo Blocks
Put your Yayoi-inspired portraits on show!
Bookmark
Sculpture

The Set Up
Start with a plain wooden block. Lay out trays of dot stickers and labels in every size and colour you can find.
The Making
Cover every side with dots until the block feels alive. Seal with Modge Podge so the stickers stay put and shine.
Drill a hole in the top, add a dab of hot glue, and slide in a piece of wire with a bead at the base to hold it steady. Twist the wire into a loop or spiral at the top so that it becomes the holder for a portrait or photo. Snap an instant photo, print one in black and white, or slip in a drawing.
Kusama loved self portraits and fashion as part of her art, so this step feels especially connected to her world.


Variations
Use mini metal photo pegs instead of wire if you want a simpler build.
Line up a collection of blocks to create a dot-filled gallery.
Let each artist choose their own sticker palette so every block has a distinct personality.


Materials
Wooden blocks
Dot stickers or coloured labels
Mod Podge and brushes
Wire and beads (or photo pegs)
Hot glue gun
Photos, Polaroids, or portraits
Gallery


Back to Top
Spotty Photo Blocks
Put your Yayoi-inspired portraits on show!
Bookmark
Sculpture
The Set Up
Start with a plain wooden block. Lay out trays of dot stickers and labels in every size and colour you can find.
The Making
Cover every side with dots until the block feels alive. Seal with Modge Podge so the stickers stay put and shine.
Drill a hole in the top, add a dab of hot glue, and slide in a piece of wire with a bead at the base to hold it steady. Twist the wire into a loop or spiral at the top so that it becomes the holder for a portrait or photo. Snap an instant photo, print one in black and white, or slip in a drawing.
Kusama loved self portraits and fashion as part of her art, so this step feels especially connected to her world.
Variations
Use mini metal photo pegs instead of wire if you want a simpler build.
Line up a collection of blocks to create a dot-filled gallery.
Let each artist choose their own sticker palette so every block has a distinct personality.
Materials
Wooden blocks
Dot stickers or coloured labels
Mod Podge and brushes
Wire and beads (or photo pegs)
Hot glue gun
Photos, Polaroids, or portraits
Gallery
Back to Top
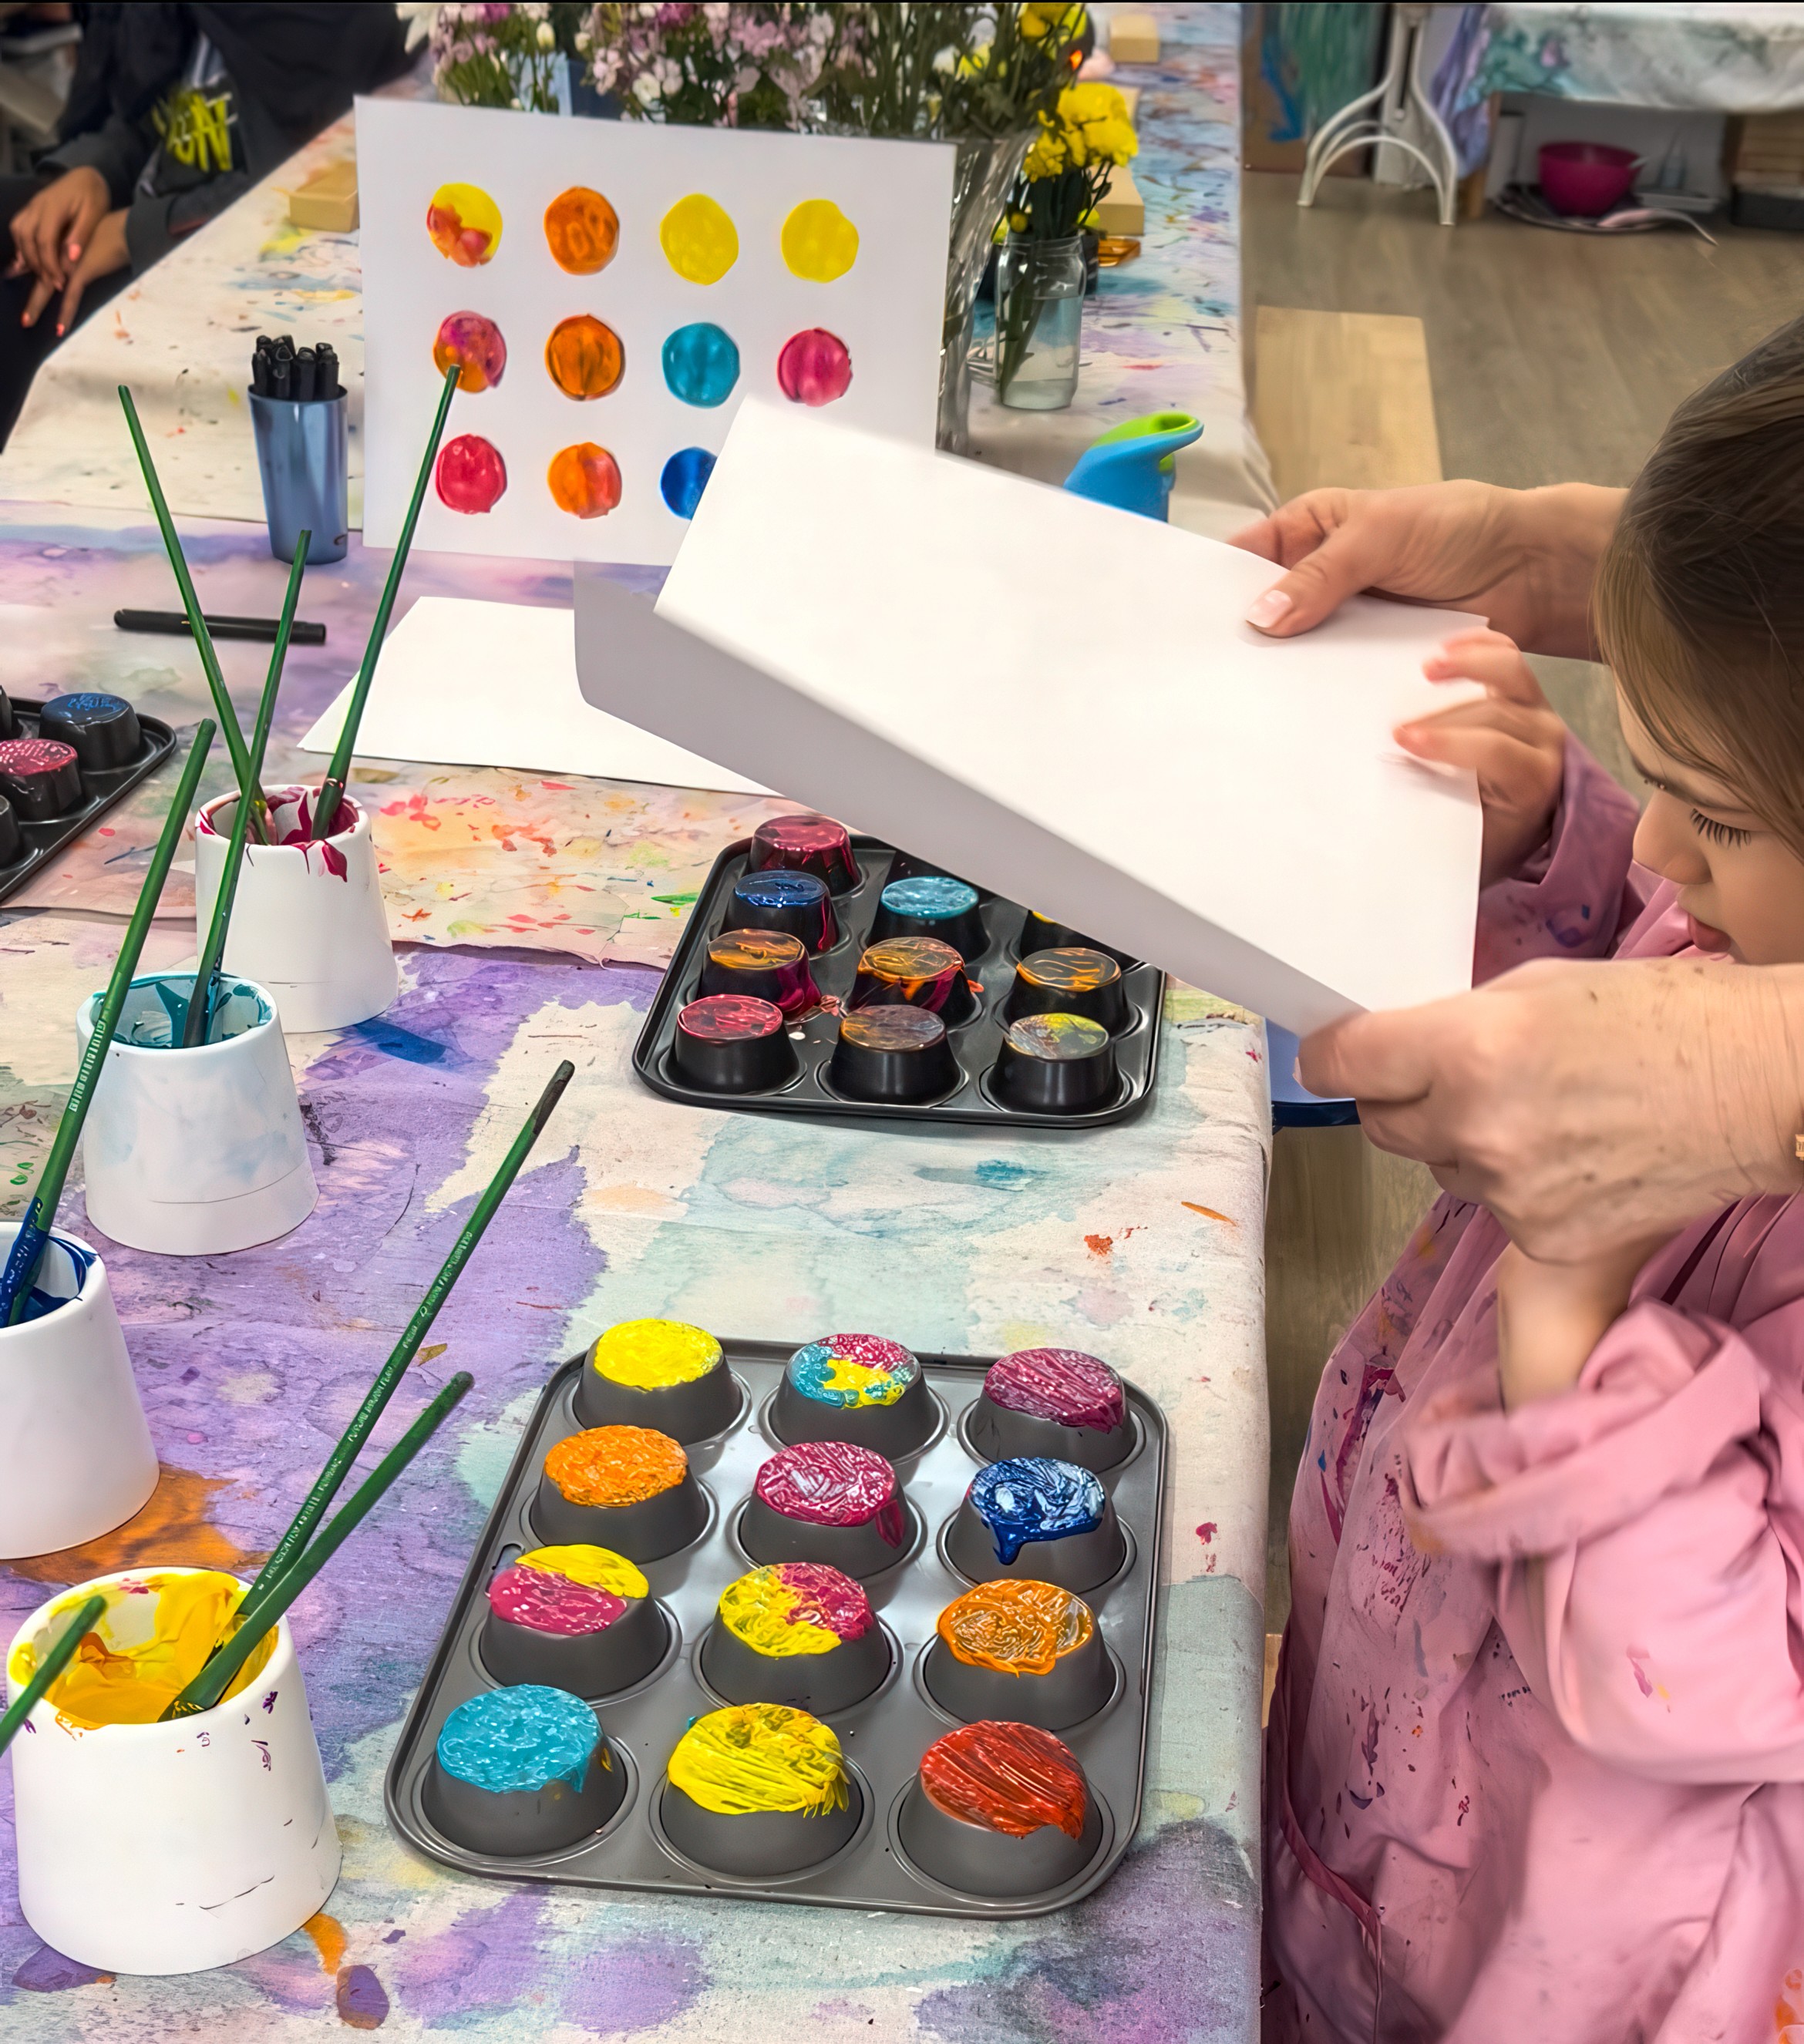
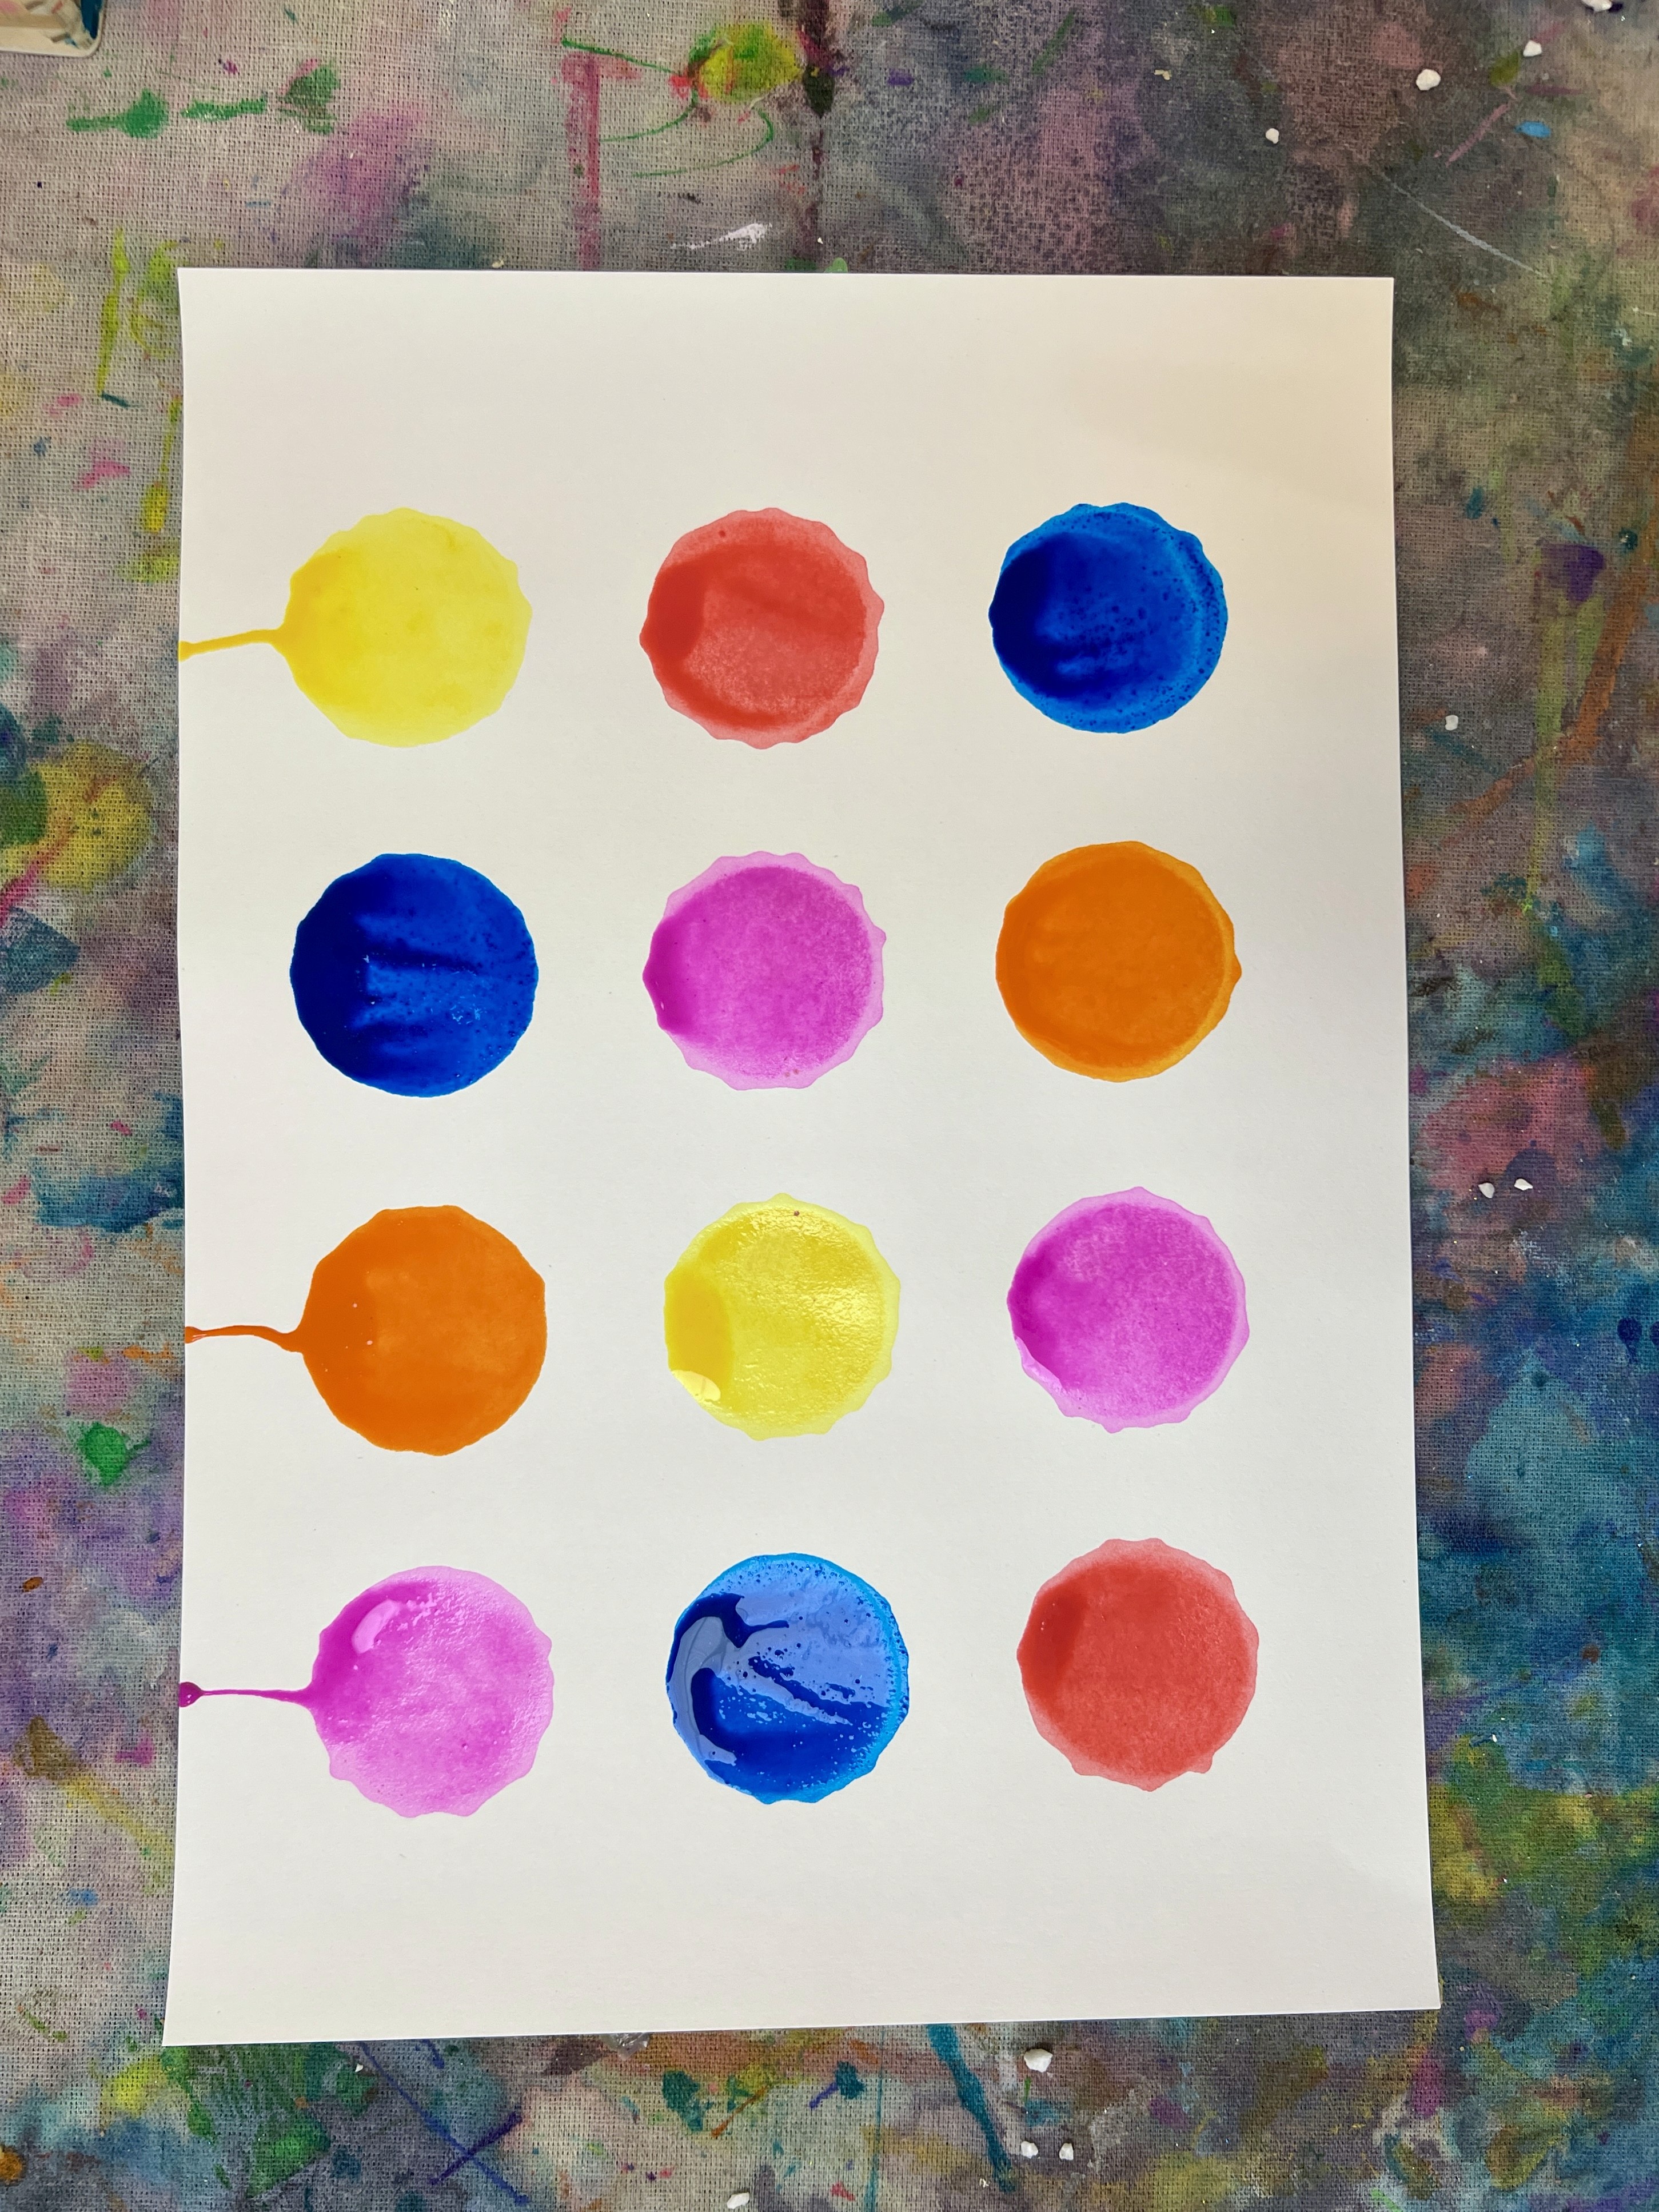
Muffin Tray Monoprinting
A colourful field of circles!
Bookmark
Print Making

The Set Up
Yayoi Kusama has spent her life chasing dots. She calls them her infinity nets — a way of dissolving the edges of things so that everything becomes part of a larger universe. Simple, repetitive, and endlessly joyful.
I first saw this idea on Bar Rucci’s blog Art Bar. Bar is my ultimate inspiration for process art, and she has been incredibly influential in shaping Smudge's philosophy. Her words, “set it up and see what happens,” gives everyone permission to let go and always trust the process. This activity feels like the perfect meeting point between Kusama’s obsession with repetition and Bar’s spirit of play!
Flip muffin trays upside down so the circles are raised. Pour poster paint into jars and always add a little white (it makes the colours sing).


The Making
Load up the circles with brushes, sponges, or even fingertips. Keep it simple with one colour per jar or mix directly on the tray and watch marbling magic appear. Lay a sheet of A3 paper over the top and press down with your palms, or flip the tray dramatically onto the paper. Peel it back and it feels like magic; a whole field of circles appearing in one go!


Variations
Use liquid watercolours for a different print texture.
Mix colours directly in the jars for swirled, unpredictable prints.
Rotate the paper and print multiple layers so the circles overlap into infinity patterns.
Materials
Muffin trays (any size)
Poster paint mixed with white for vibrancy
Jars for paints
Brushes, sponges, or rollers
A3 paper or larger
Back to Top
Muffin Tray Monoprinting
A colourful field of circles!
Bookmark
Print Making
The Set Up
Yayoi Kusama has spent her life chasing dots. She calls them her infinity nets — a way of dissolving the edges of things so that everything becomes part of a larger universe. Simple, repetitive, and endlessly joyful.
I first saw this idea on Bar Rucci’s blog Art Bar. Bar is my ultimate inspiration for process art, and she has been incredibly influential in shaping Smudge's philosophy. Her words, “set it up and see what happens,” gives everyone permission to let go and always trust the process. This activity feels like the perfect meeting point between Kusama’s obsession with repetition and Bar’s spirit of play!
Flip muffin trays upside down so the circles are raised. Pour poster paint into jars and always add a little white (it makes the colours sing).
The Making
Load up the circles with brushes, sponges, or even fingertips. Keep it simple with one colour per jar or mix directly on the tray and watch marbling magic appear. Lay a sheet of A3 paper over the top and press down with your palms, or flip the tray dramatically onto the paper. Peel it back and it feels like magic; a whole field of circles appearing in one go!
Variations
Use liquid watercolours for a different print texture.
Mix colours directly in the jars for swirled, unpredictable prints.
Rotate the paper and print multiple layers so the circles overlap into infinity patterns.
Materials
Muffin trays (any size)
Poster paint mixed with white for vibrancy
Jars for paints
Brushes, sponges, or rollers
A3 paper or larger
Back to Top
Mixed Media Mushrooms
Circles and circles and circles and more.
Bookmark
Painting & Drawing

The Set Up
Clear a space and lay out sheets of A3 paper (the thicker the better). Put out watercolour palettes, jars of liquid watercolour diluted a little, and plenty of brushes. Keep coffee filters close by, because they are magic with colour. Add droppers or pipettes for those, then line up scissors, glue, and dot stickers for when the cutting and assembling begins.


The Making
Begin by flooding the page with colour. You could wash watery blues across the paper, drop in yellows that bloom into greens, or layer soft patches of pink and orange until the whole background hums with energy. The joy is in letting the paints meet and wander!
Meanwhile, coffee filters soak up liquid watercolour like sponges. How incredible is it watching the colour spead! Snip them into shapes once they are dry enough, or dive straight in and cut while wet if you love the unpredictability. Pair each cap with a simple stalk cut from painted paper or card, then glue them down. Kusama’s mushrooms have always hovered between reality and imagination, and these carry the same spirit.
Finish by pressing on bright dot stickers. Their flat boldness against the watery filters is striking, a simple act that transforms the piece into something I think she would really adore.


Variations
Swap coffee filters for paper plates or fabric scraps and see how each material holds colour differently.
Add metallic pens or paint over the caps once dry to bring shimmer and light.
Try oversized mushrooms on big sheets of paper and let them tower like something out of Kusama’s world.

Materials
Large paper sheets for backgrounds
Watercolour palettes and liquid watercolours (diluted a little)
Coffee filters
Droppers or pipettes
Card or painted paper for stalks
Dot stickers or coloured labels
Scissors and glue
Back to Top
Mixed Media Mushrooms
Circles and circles and circles and more.
Bookmark
Painting & Drawing
The Set Up
Clear a space and lay out sheets of A3 paper (the thicker the better). Put out watercolour palettes, jars of liquid watercolour diluted a little, and plenty of brushes. Keep coffee filters close by, because they are magic with colour. Add droppers or pipettes for those, then line up scissors, glue, and dot stickers for when the cutting and assembling begins.
The Making
Begin by flooding the page with colour. You could wash watery blues across the paper, drop in yellows that bloom into greens, or layer soft patches of pink and orange until the whole background hums with energy. The joy is in letting the paints meet and wander!
Meanwhile, coffee filters soak up liquid watercolour like sponges. How incredible is it watching the colour spead! Snip them into shapes once they are dry enough, or dive straight in and cut while wet if you love the unpredictability. Pair each cap with a simple stalk cut from painted paper or card, then glue them down. Kusama’s mushrooms have always hovered between reality and imagination, and these carry the same spirit.
Finish by pressing on bright dot stickers. Their flat boldness against the watery filters is striking, a simple act that transforms the piece into something I think she would really adore.
Variations
Swap coffee filters for paper plates or fabric scraps and see how each material holds colour differently.
Add metallic pens or paint over the caps once dry to bring shimmer and light.
Try oversized mushrooms on big sheets of paper and let them tower like something out of Kusama’s world.
Materials
Large paper sheets for backgrounds
Watercolour palettes and liquid watercolours (diluted a little)
Coffee filters
Droppers or pipettes
Card or painted paper for stalks
Dot stickers or coloured labels
Scissors and glue
Back to Top
Circle Studies
Circles and circles and circles and more.
Bookmark
Painting & Drawing

The Set Up
Gather every circular object you can find! Bottle tops, jar lids, rolls of masking tape, anything that makes a good round edge. The more variety in size, the better. Lay them out with thick paper, oil pastels, and watercolour palettes. A3 paper gives space for big, bold studies, but smaller sizes work just as well.


The Making
Trace around the lids with oil pastels, letting circles overlap, cluster together, or run off the edge. Keep building until the page feels alive with movement. Then bring in the watercolours! Paint inside the circles, watching how the pastel lines resist the pigment and hold the colour in place.
Try wet-on-wet watercolour painting too. This is where you brush water directly onto the page first, then drop in colour and watch it bloom. Some circles stay crisp, others spread into soft, glowing pools.


Variations
Tape a border around the paper before starting. When the tape is peeled off at the end, the clean edge makes the artwork feel polished and gallery ready!
Limit the palette to just warm or cool colours for a striking mood. Or keep it wide open and let every circle tell a different colour story.
Materials
Recycled lids, jar caps, bottle tops, or masking tape rolls in different sizes
Oil pastels
Watercolour palettes or liquid watercolours
A3, A4, or A5 paper
Brushes, water jars, and cloths
Optional: painter’s tape for borders
Back to Top
Circle Studies
Circles and circles and circles and more.
Bookmark
Painting & Drawing
The Set Up
Gather every circular object you can find! Bottle tops, jar lids, rolls of masking tape, anything that makes a good round edge. The more variety in size, the better. Lay them out with thick paper, oil pastels, and watercolour palettes. A3 paper gives space for big, bold studies, but smaller sizes work just as well.
The Making
Trace around the lids with oil pastels, letting circles overlap, cluster together, or run off the edge. Keep building until the page feels alive with movement. Then bring in the watercolours! Paint inside the circles, watching how the pastel lines resist the pigment and hold the colour in place.
Try wet-on-wet watercolour painting too. This is where you brush water directly onto the page first, then drop in colour and watch it bloom. Some circles stay crisp, others spread into soft, glowing pools.
Variations
Tape a border around the paper before starting. When the tape is peeled off at the end, the clean edge makes the artwork feel polished and gallery ready!
Limit the palette to just warm or cool colours for a striking mood. Or keep it wide open and let every circle tell a different colour story.
Materials
Recycled lids, jar caps, bottle tops, or masking tape rolls in different sizes
Oil pastels
Watercolour palettes or liquid watercolours
A3, A4, or A5 paper
Brushes, water jars, and cloths
Optional: painter’s tape for borders
Back to Top
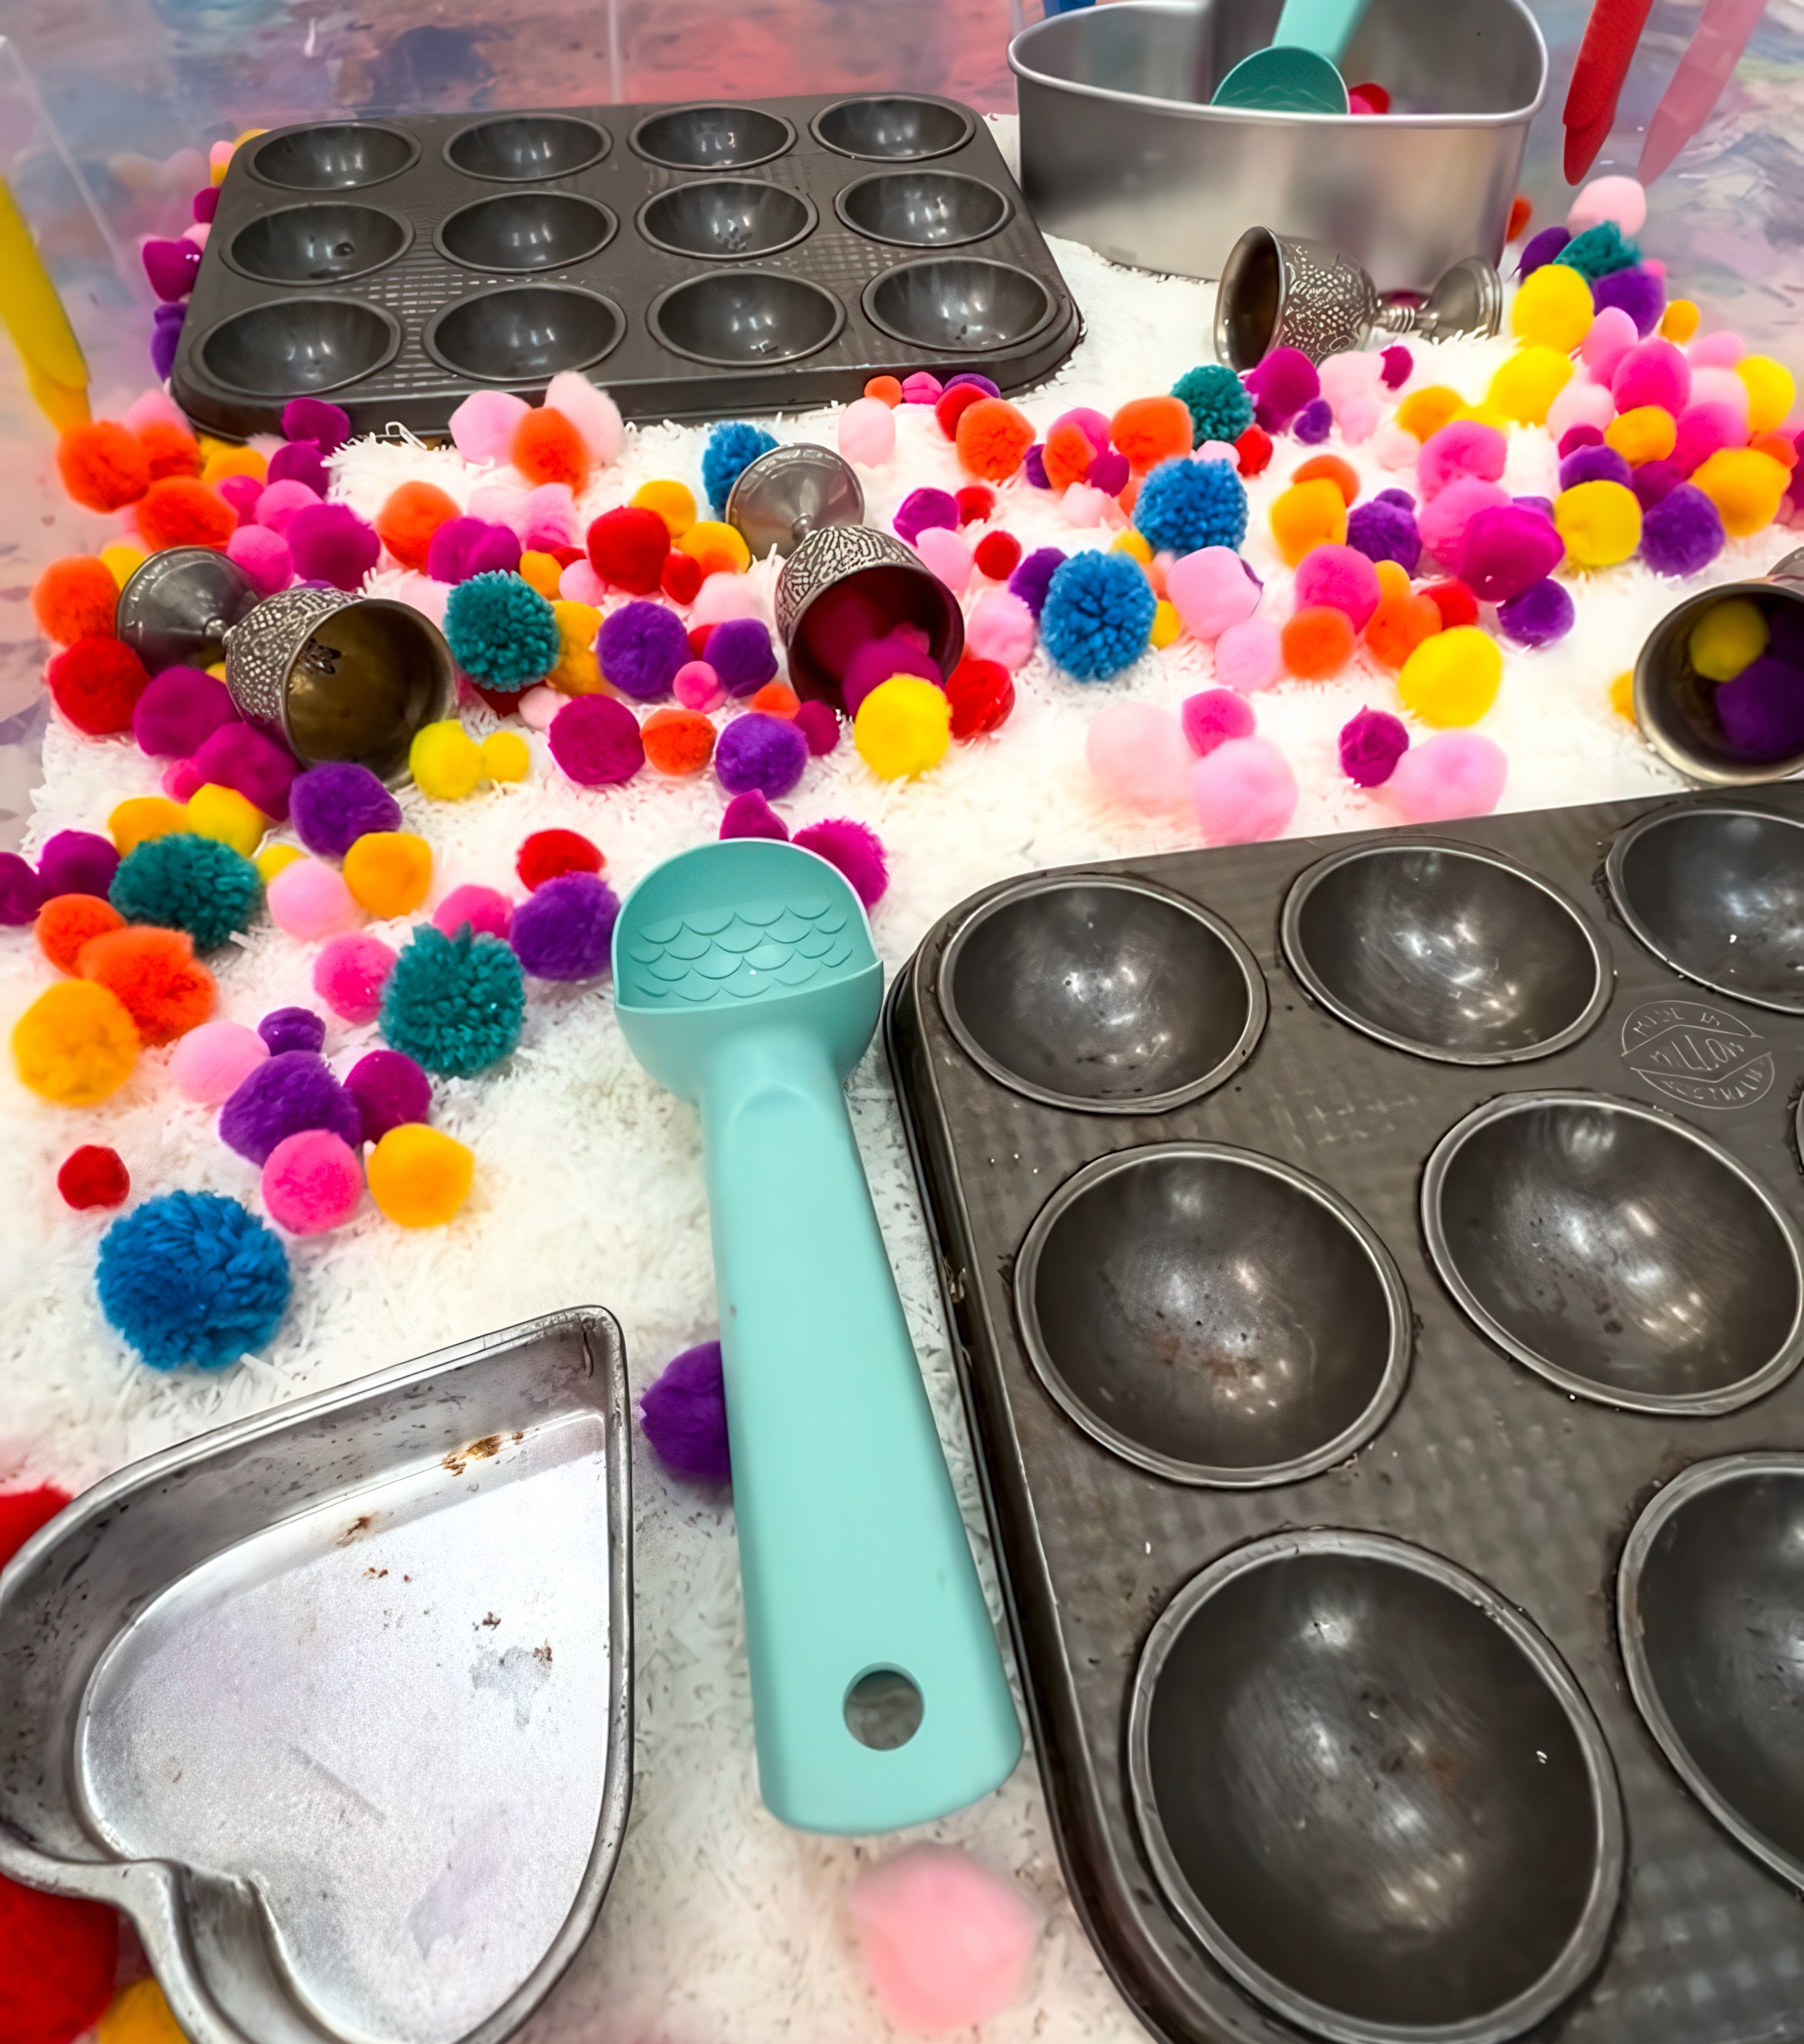
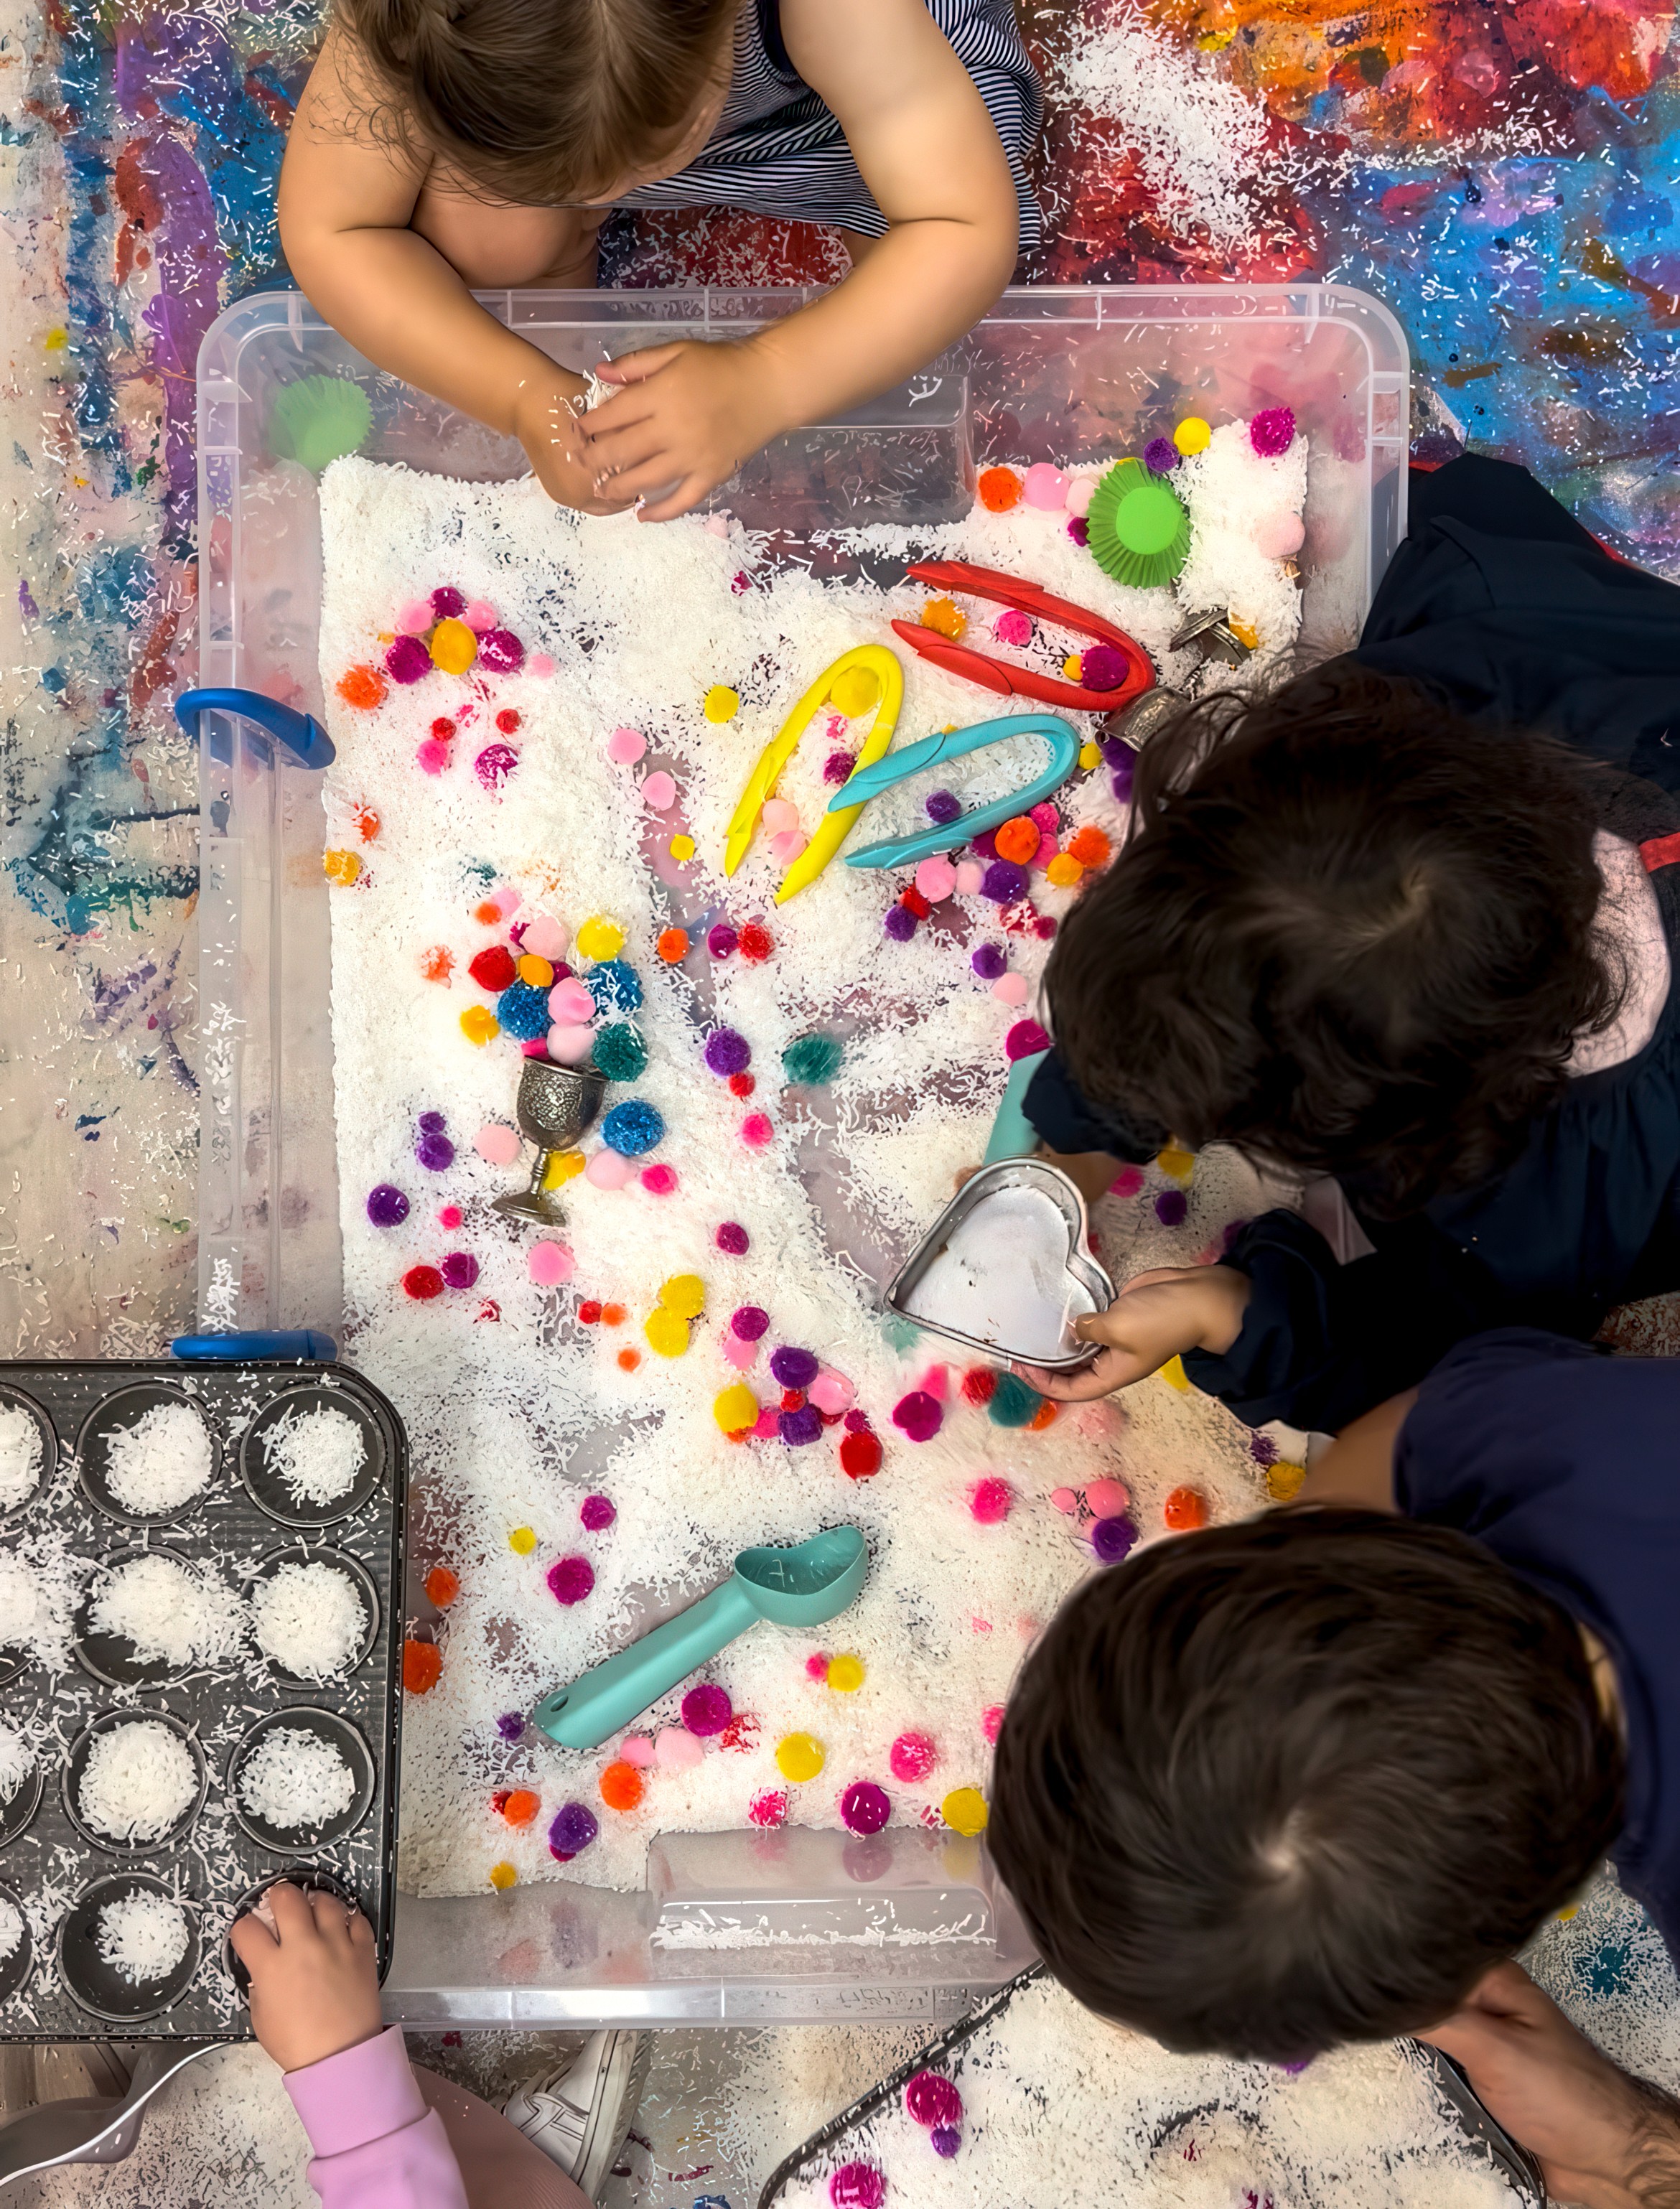
Pom Pom Play
A tiny fibre room you can play in!
Bookmark
Sensory Play

The Set Up
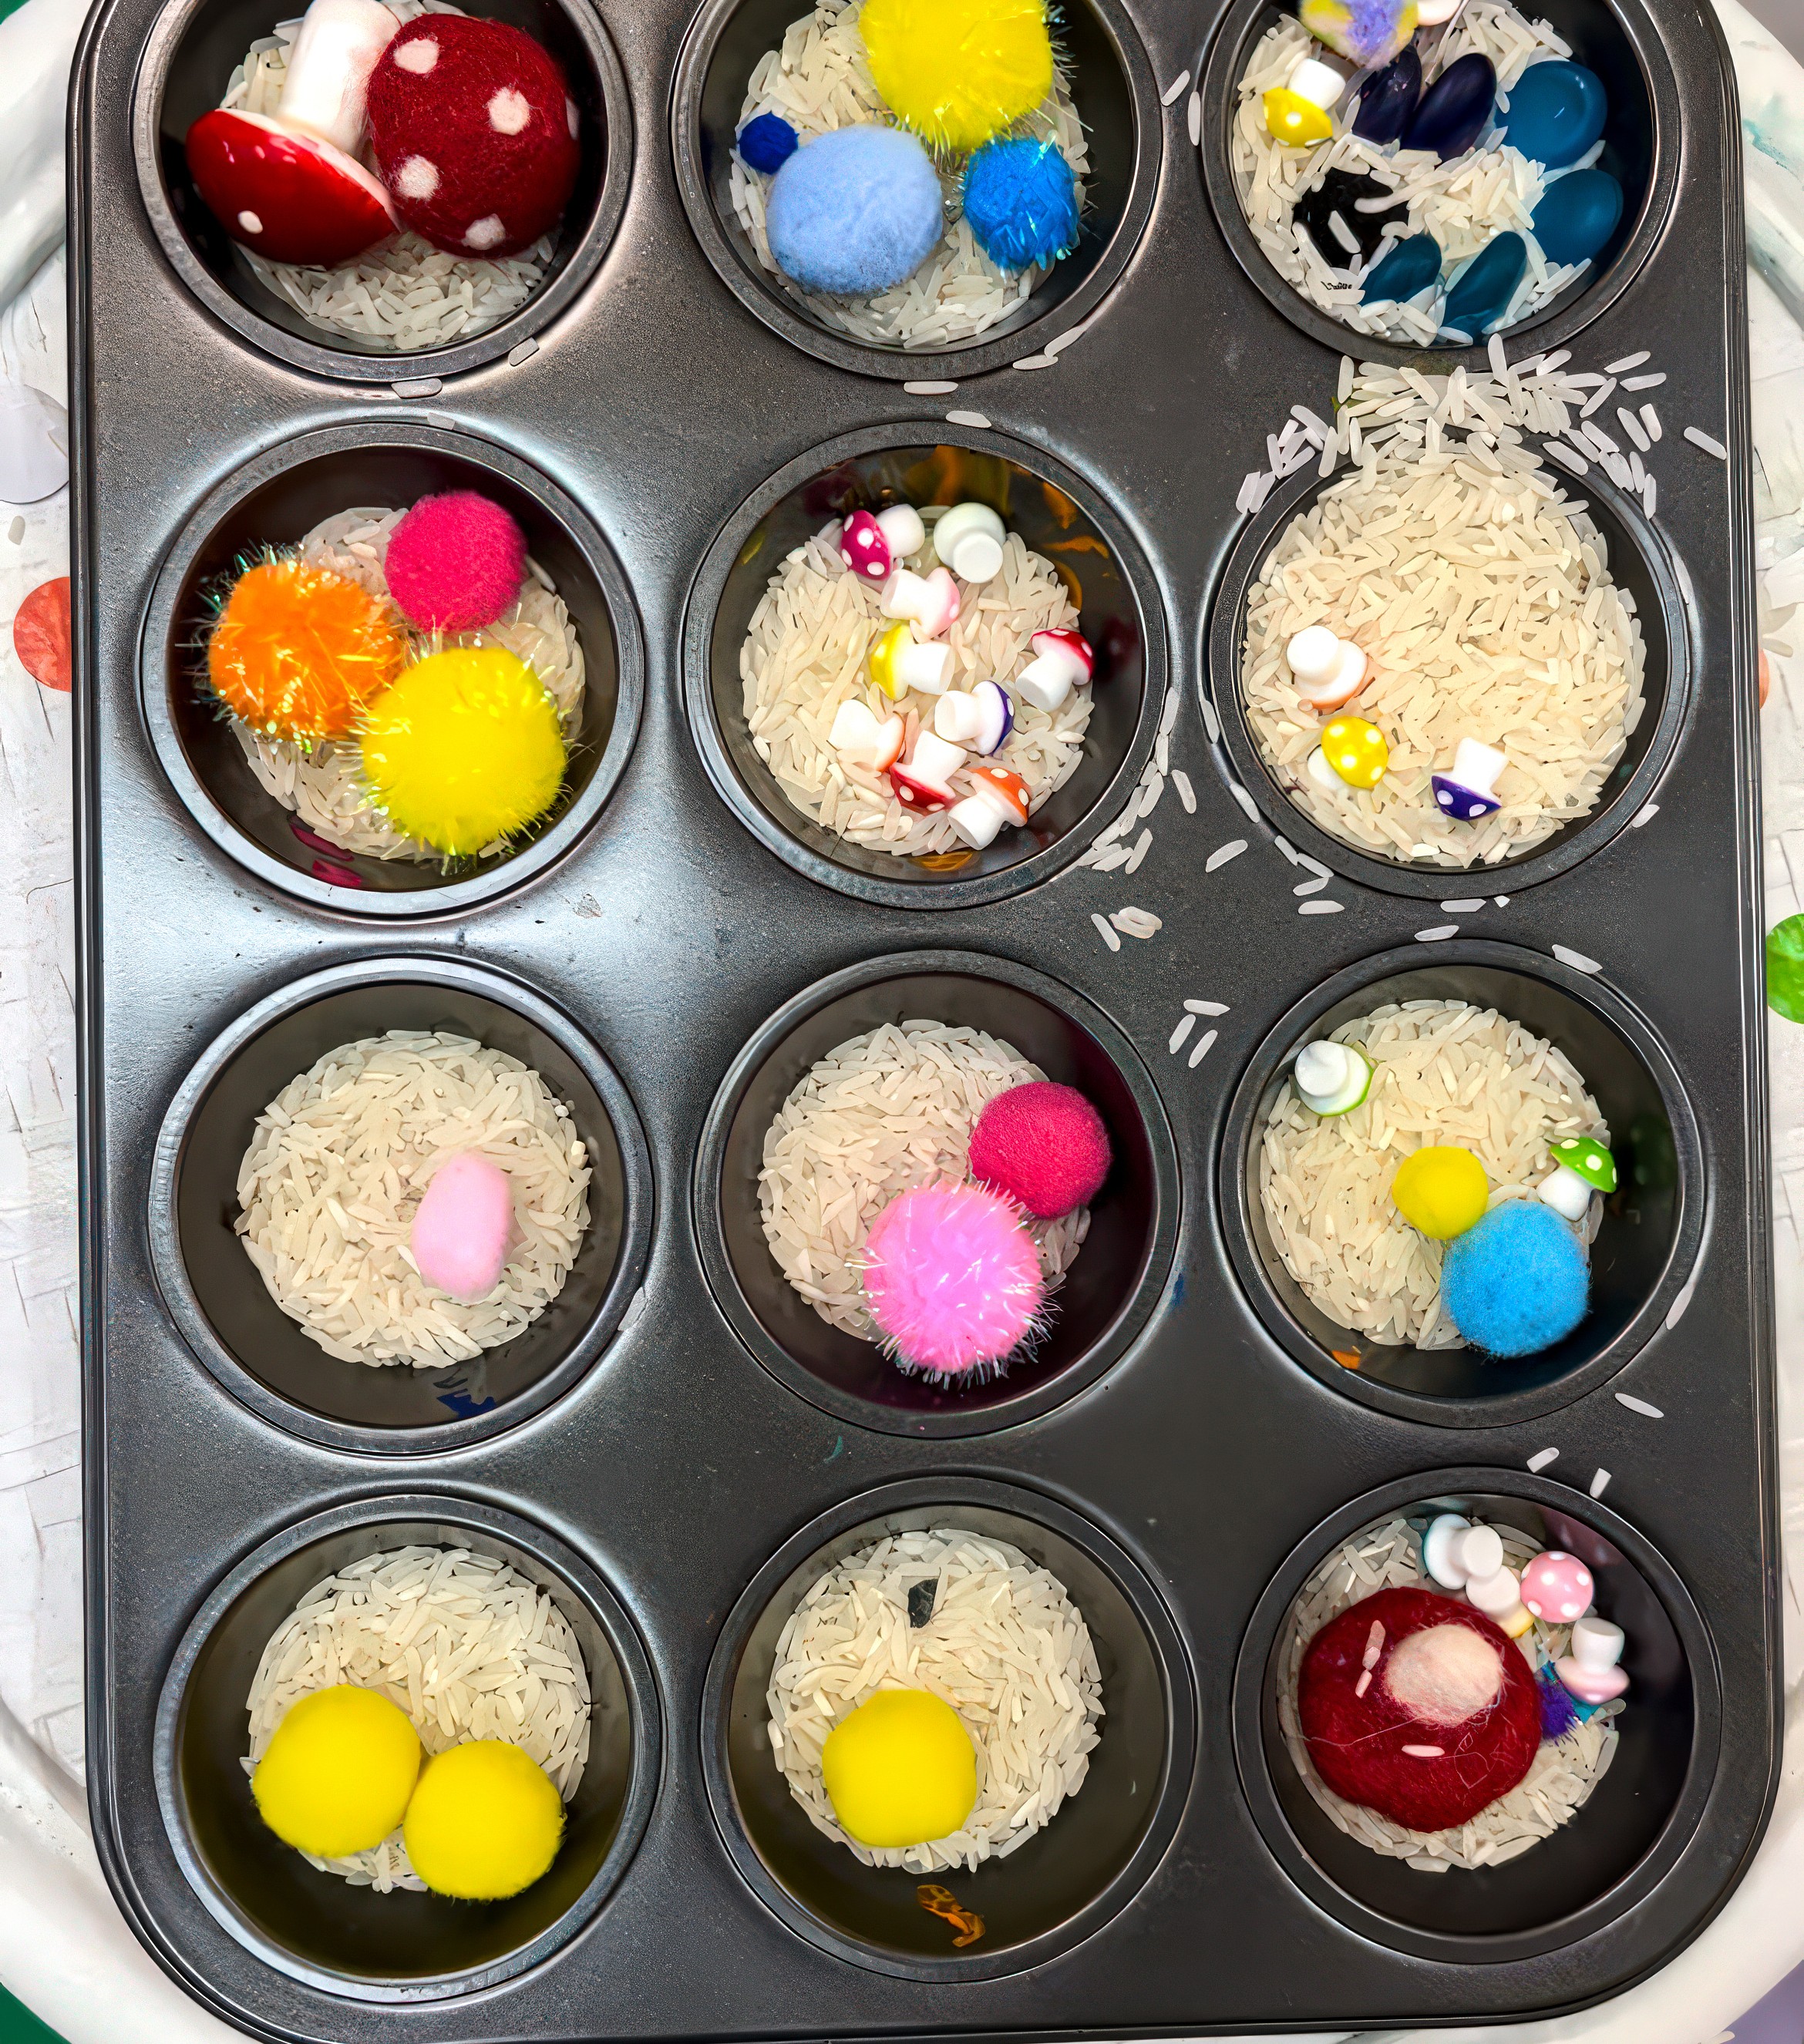
Fill a tub with pom poms in every size and colour! Sometimes we add another sensory tub 'base' to bulk it out a bit. Scatter in cups, bowls, scoops, and tweezers. Line the base with safety mirrors so the colours bounce and multiply.
The Making
Pick up, drop, sort, and pile. Tiny pom poms test fine motor skills with tweezers. Giant fluffy ones are perfect for scooping and pouring. Some artists sort by colour, others build towers or nests. The soft texture and bright palette feel joyful no matter how they are handled.
Variations
Make your own pom poms first and mix them in.
Add dot stickers to cups and bowls for colour-matching games.
Mix in buttons, felt mushrooms, or wooden counters for extra textures.
Materials
Pom poms in a range of colours and sizes
Cups, bowls, scoops, tweezers or tongs
Safety mirrors for the base
Optional: wool and cardboard rings to make pom poms or extra loose parts
Back to Top
Pom Pom Play
A tiny fibre room you can play in!
Bookmark
Sensory Play
The Set Up
Fill a tub with pom poms in every size and colour! Sometimes we add another sensory tub 'base' to bulk it out a bit. Scatter in cups, bowls, scoops, and tweezers. Line the base with safety mirrors so the colours bounce and multiply.
The Making
Pick up, drop, sort, and pile. Tiny pom poms test fine motor skills with tweezers. Giant fluffy ones are perfect for scooping and pouring. Some artists sort by colour, others build towers or nests. The soft texture and bright palette feel joyful no matter how they are handled.
Variations
Make your own pom poms first and mix them in.
Add dot stickers to cups and bowls for colour-matching games.
Mix in buttons, felt mushrooms, or wooden counters for extra textures.
Materials
Pom poms in a range of colours and sizes
Cups, bowls, scoops, tweezers or tongs
Safety mirrors for the base
Optional: wool and cardboard rings to make pom poms or extra loose parts
Back to Top
Oversized Mushrooms
Cut, colour, dot, and stand them tall.
Bookmark
Sculpture

The Set Up
Yayoi’s mushrooms feel almost psychedelic to me. It must be their bold colour and playful dots and forms that hover somewhere between real life and an imagined world! I always think of the red and black beauty at Pt Leo, which feels both whimsical and commanding at once.
For your Smudge mushroom garden, cardboard is the star. Cut out caps and stems, or let artists design their own. There are over 10,000 known mushroom species in the world, which makes it easy to know there is no “right” shape! Add a base so each one stands tall and soon a whole forest begins to appear.
The Making
Now for the fun part! Mushrooms are the perfect excuse to go bold with colour. Pick the loudest combinations you can think of! Orange beside blue, pink and black battling it out, red covered in snowy white spots. Dip the end of a pencil, a bottle top, even your finger, and start dotting. Big or small, scattered or bunched, each dot shifts the personality of the mushroom. Watch how quickly the plain cardboard turns into something wild and wonderful.


Variations
One mushroom feels playful but a cluster becomes hypnotic! If you and other artists gather enough together then suddenly the whole corner feels alive.

Materials
Sturdy cardboard sheets
Scissors or craft knives (adult use for the thicker pieces)
Stands or bases (wooden blocks, recycled stands, or cardboard slots)
Poster or tempera paints (mix with white for vibrancy)
Paintbrushes in different sizes
Foam circle brushes, bottle lids, or pencil ends for dots
Palettes, jars, or trays for mixing contrasting colours
Back to Top
Oversized Mushrooms
Cut, colour, dot, and stand them tall.
Bookmark
Sculpture
The Set Up
Yayoi’s mushrooms feel almost psychedelic to me. It must be their bold colour and playful dots and forms that hover somewhere between real life and an imagined world! I always think of the red and black beauty at Pt Leo, which feels both whimsical and commanding at once.
For your Smudge mushroom garden, cardboard is the star. Cut out caps and stems, or let artists design their own. There are over 10,000 known mushroom species in the world, which makes it easy to know there is no “right” shape! Add a base so each one stands tall and soon a whole forest begins to appear.
The Making
Now for the fun part! Mushrooms are the perfect excuse to go bold with colour. Pick the loudest combinations you can think of! Orange beside blue, pink and black battling it out, red covered in snowy white spots. Dip the end of a pencil, a bottle top, even your finger, and start dotting. Big or small, scattered or bunched, each dot shifts the personality of the mushroom. Watch how quickly the plain cardboard turns into something wild and wonderful.
Variations
One mushroom feels playful but a cluster becomes hypnotic! If you and other artists gather enough together then suddenly the whole corner feels alive.
Materials
Sturdy cardboard sheets
Scissors or craft knives (adult use for the thicker pieces)
Stands or bases (wooden blocks, recycled stands, or cardboard slots)
Poster or tempera paints (mix with white for vibrancy)
Paintbrushes in different sizes
Foam circle brushes, bottle lids, or pencil ends for dots
Palettes, jars, or trays for mixing contrasting colours
Back to Top
Painting Pumpkins
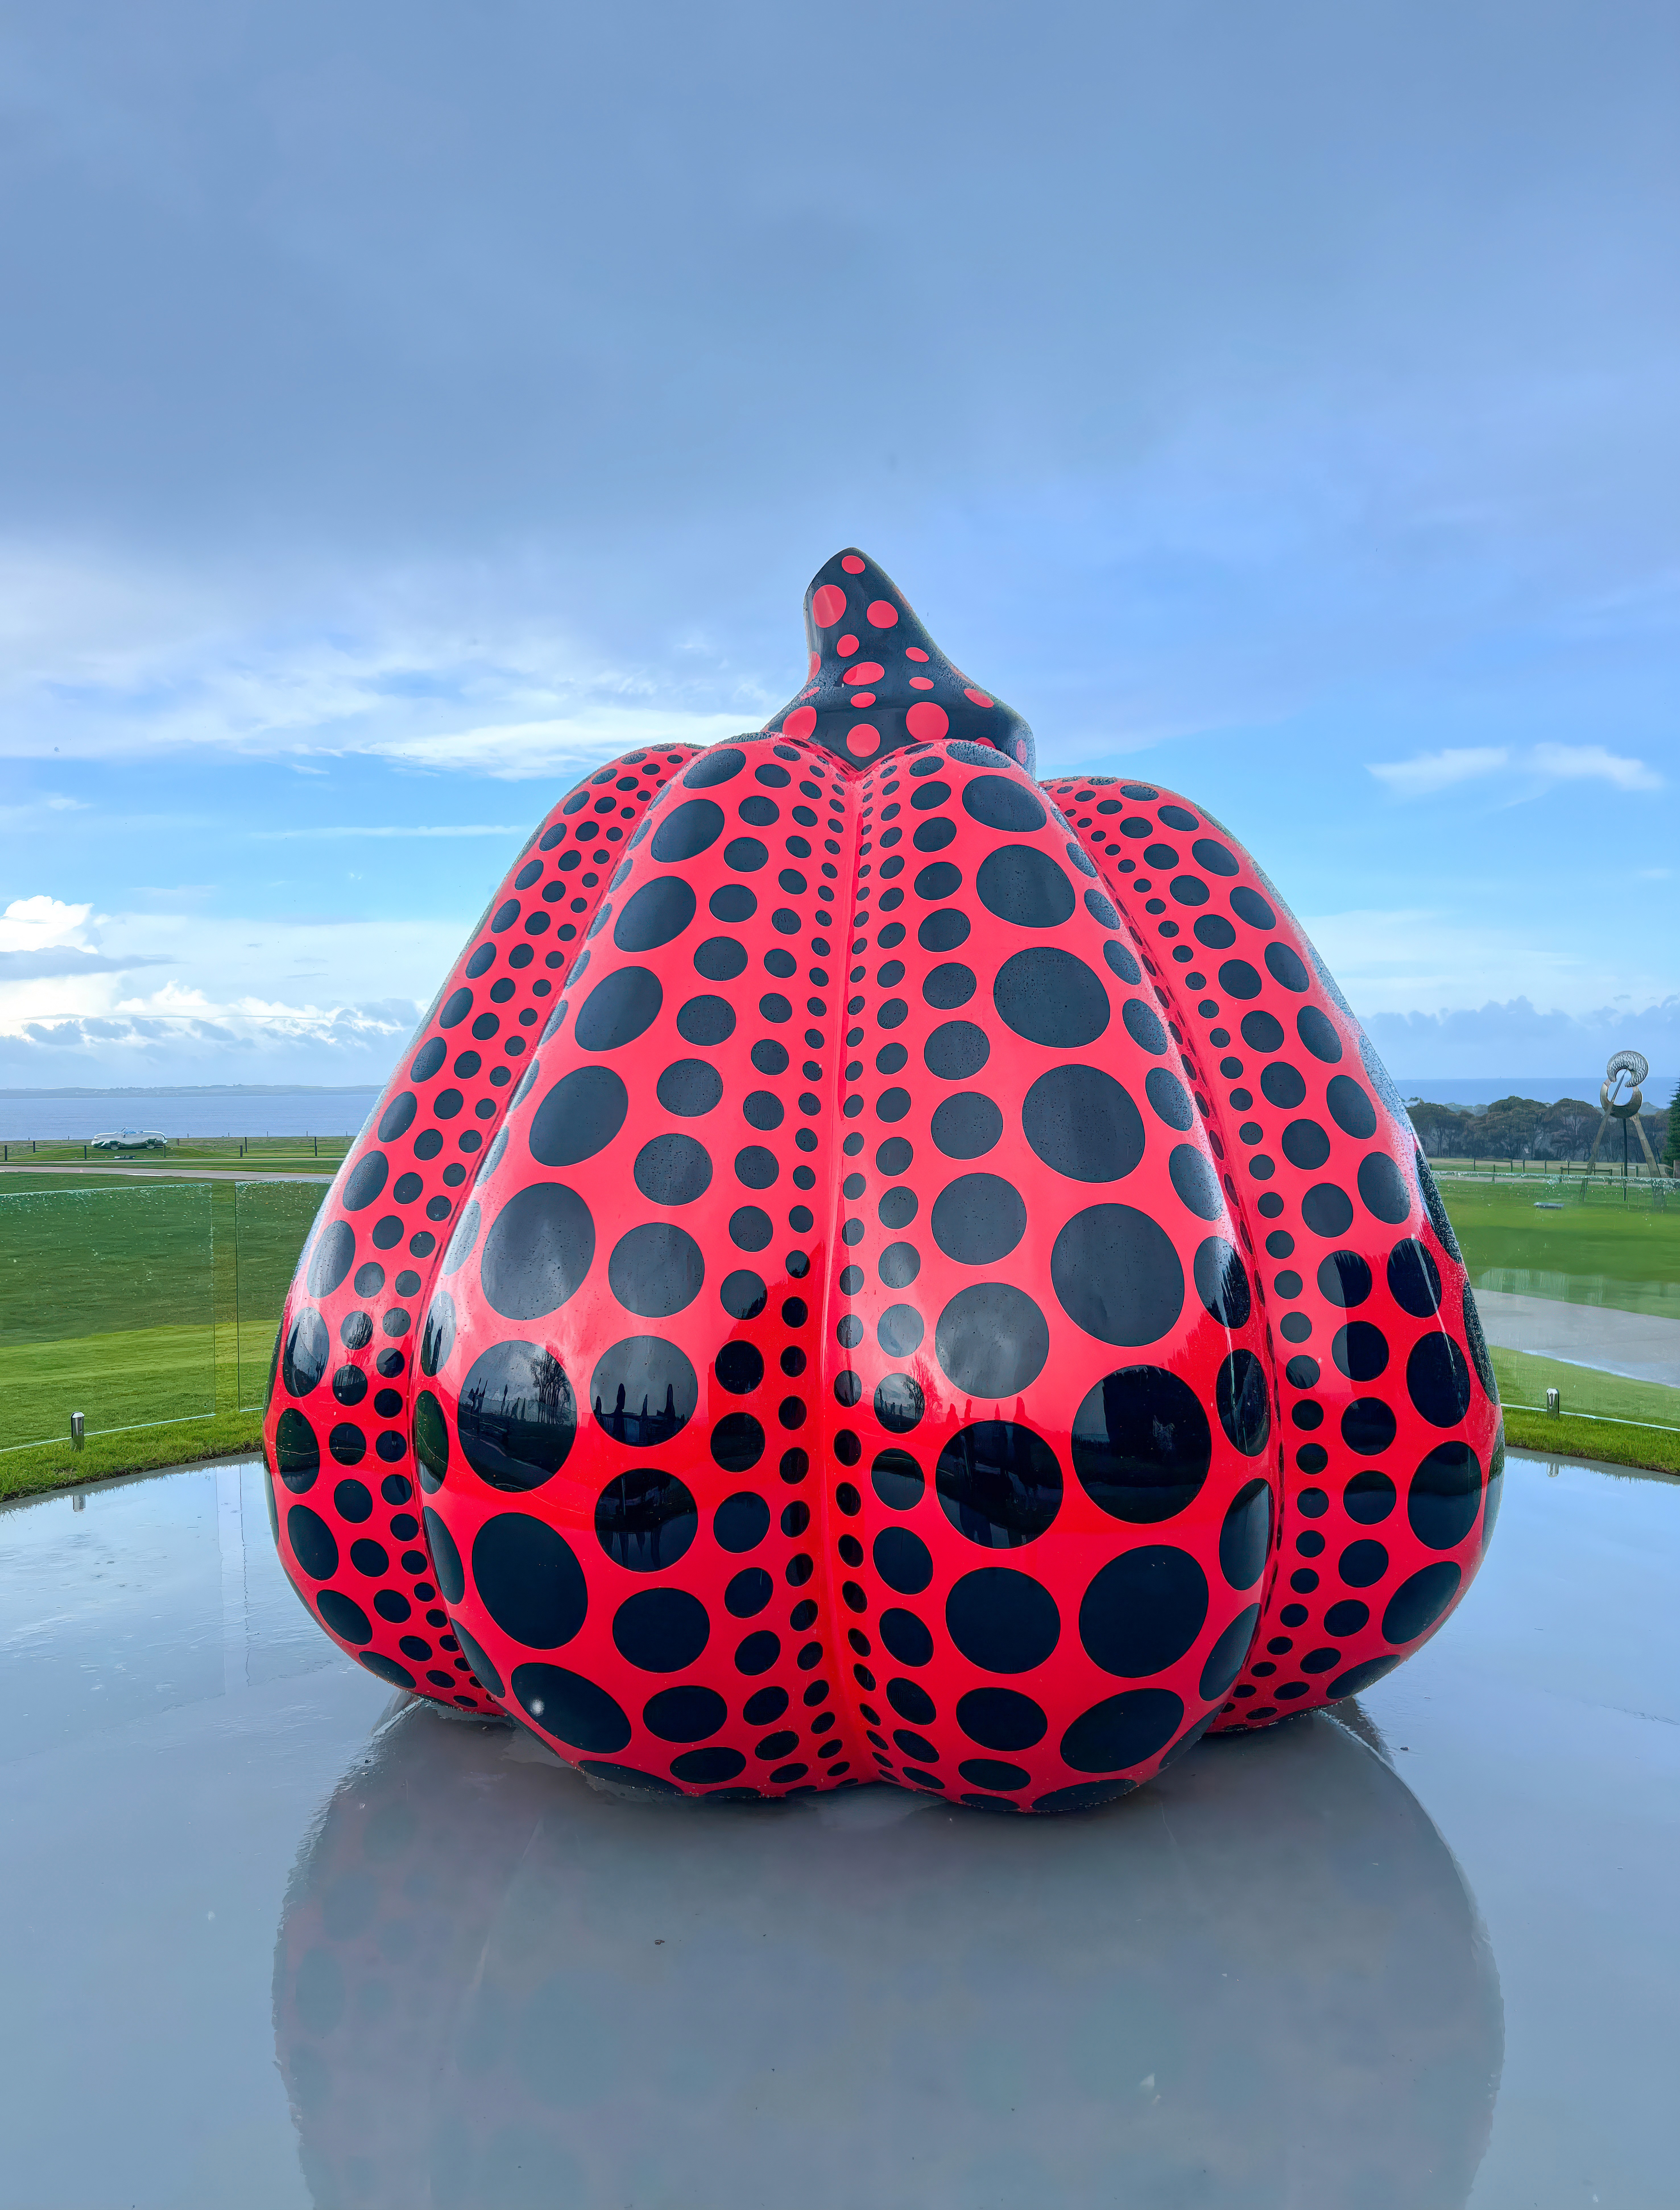
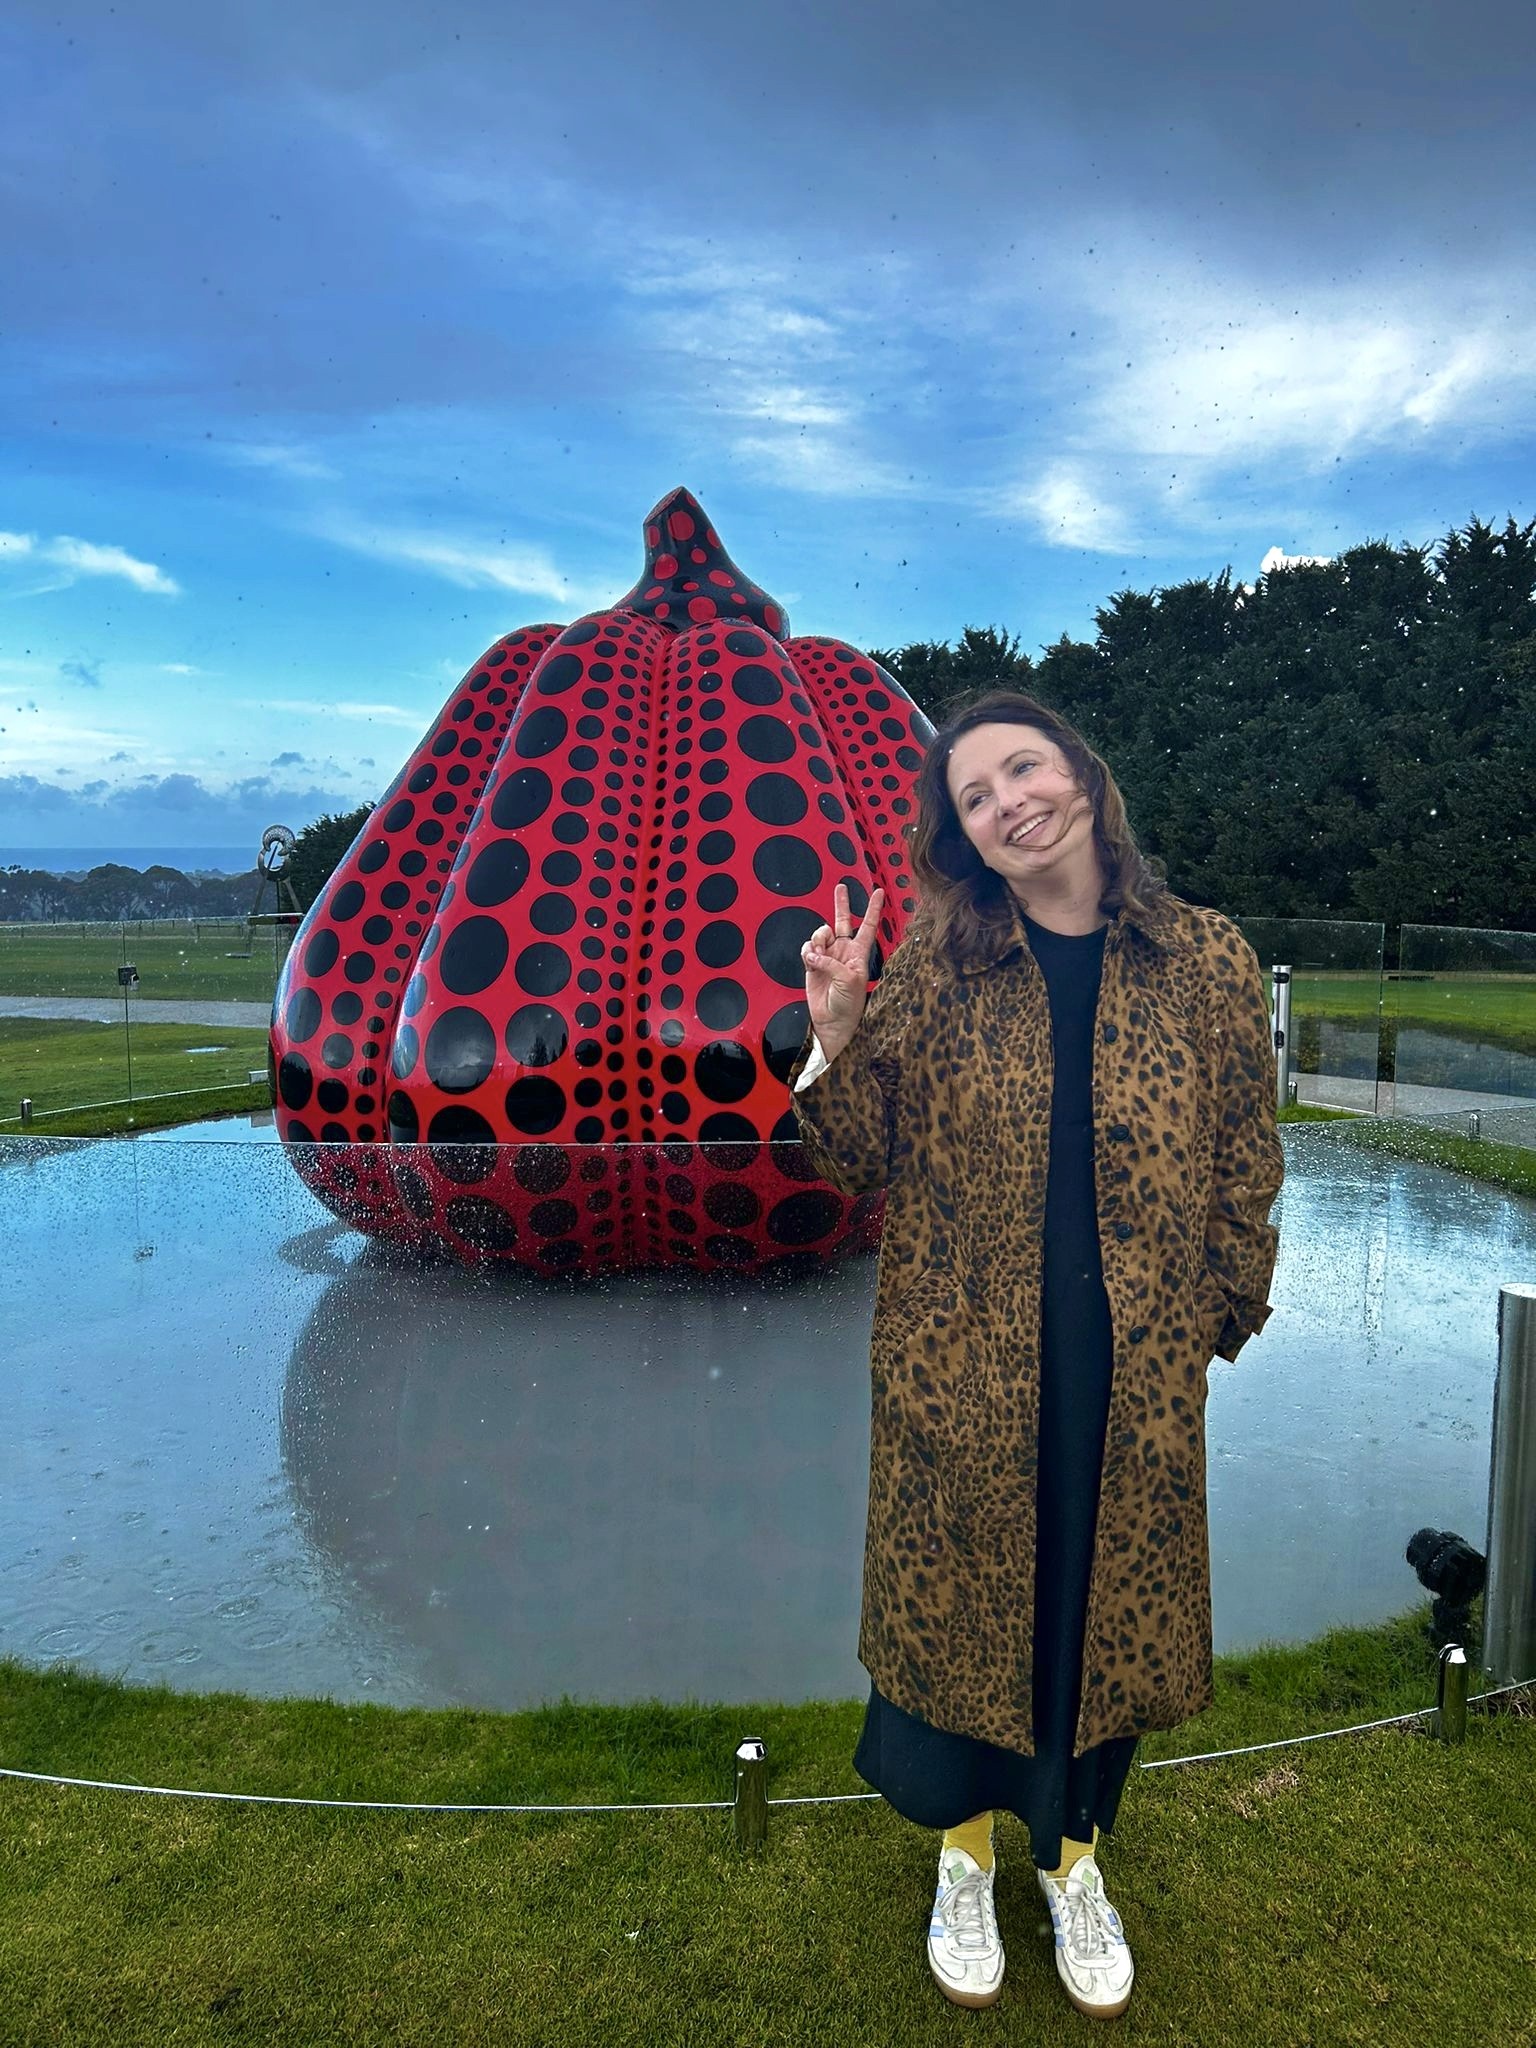
Yayoi and her pumpkins!
Bookmark
Creative Exploration

The Set Up
Kusama and her pumpkins; they pop up everywhere! The yellow one perched on a pier in Naoshima, the red and black beauty at Pt Leo Sculpture Park just outside Melbourne. The first time I saw it, I could not stop circling it. It is enormous and ridiculous and utterly joyful! I think that is what I love about Kusama’s pumpkins: they take something ordinary and make it feel like the most magical object in the world.
Obviously pumpkins are much easier to get hold of in Autumn / Fall, but honestly, any time works! Giant plastic ones from the attic, smaller gourds from the market, even foam or paper-mâché versions are brilliant.
At Smudge, I always go for washable paint so that the play can happen again and again. Line up squeezey bottles, tubs of bright colour, spoons, and brushes. The pumpkin is ready to be transformed!
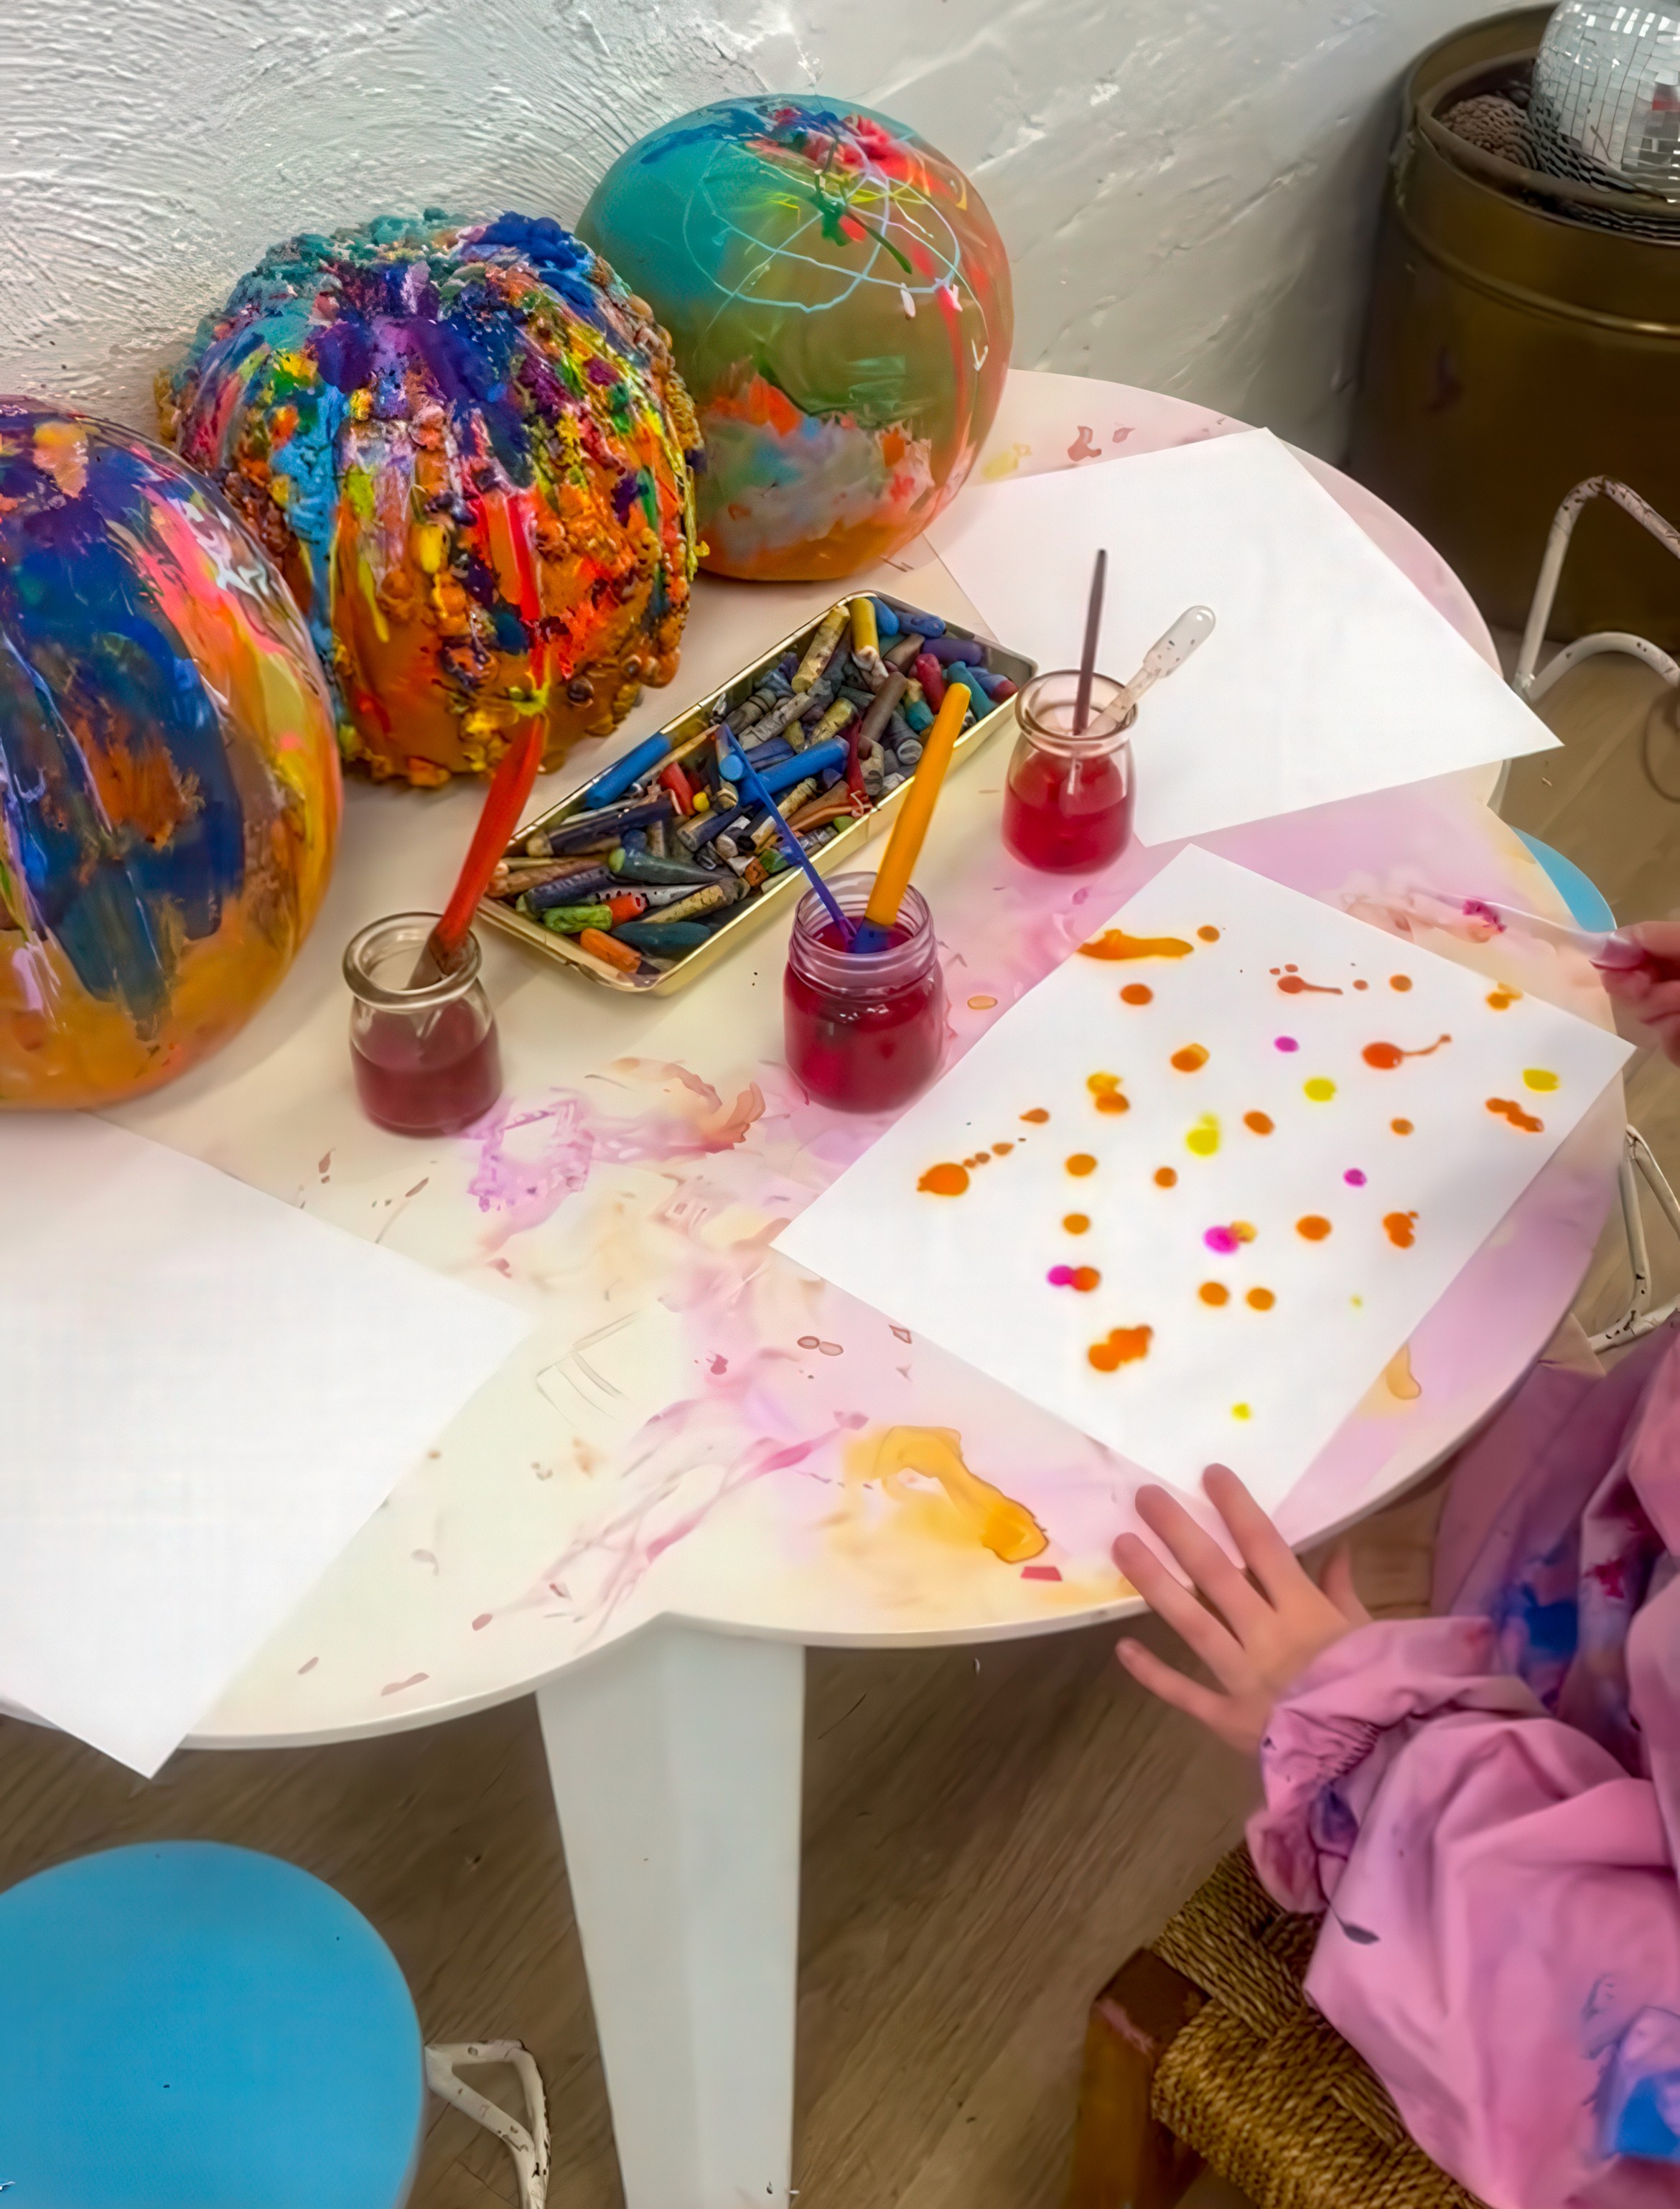
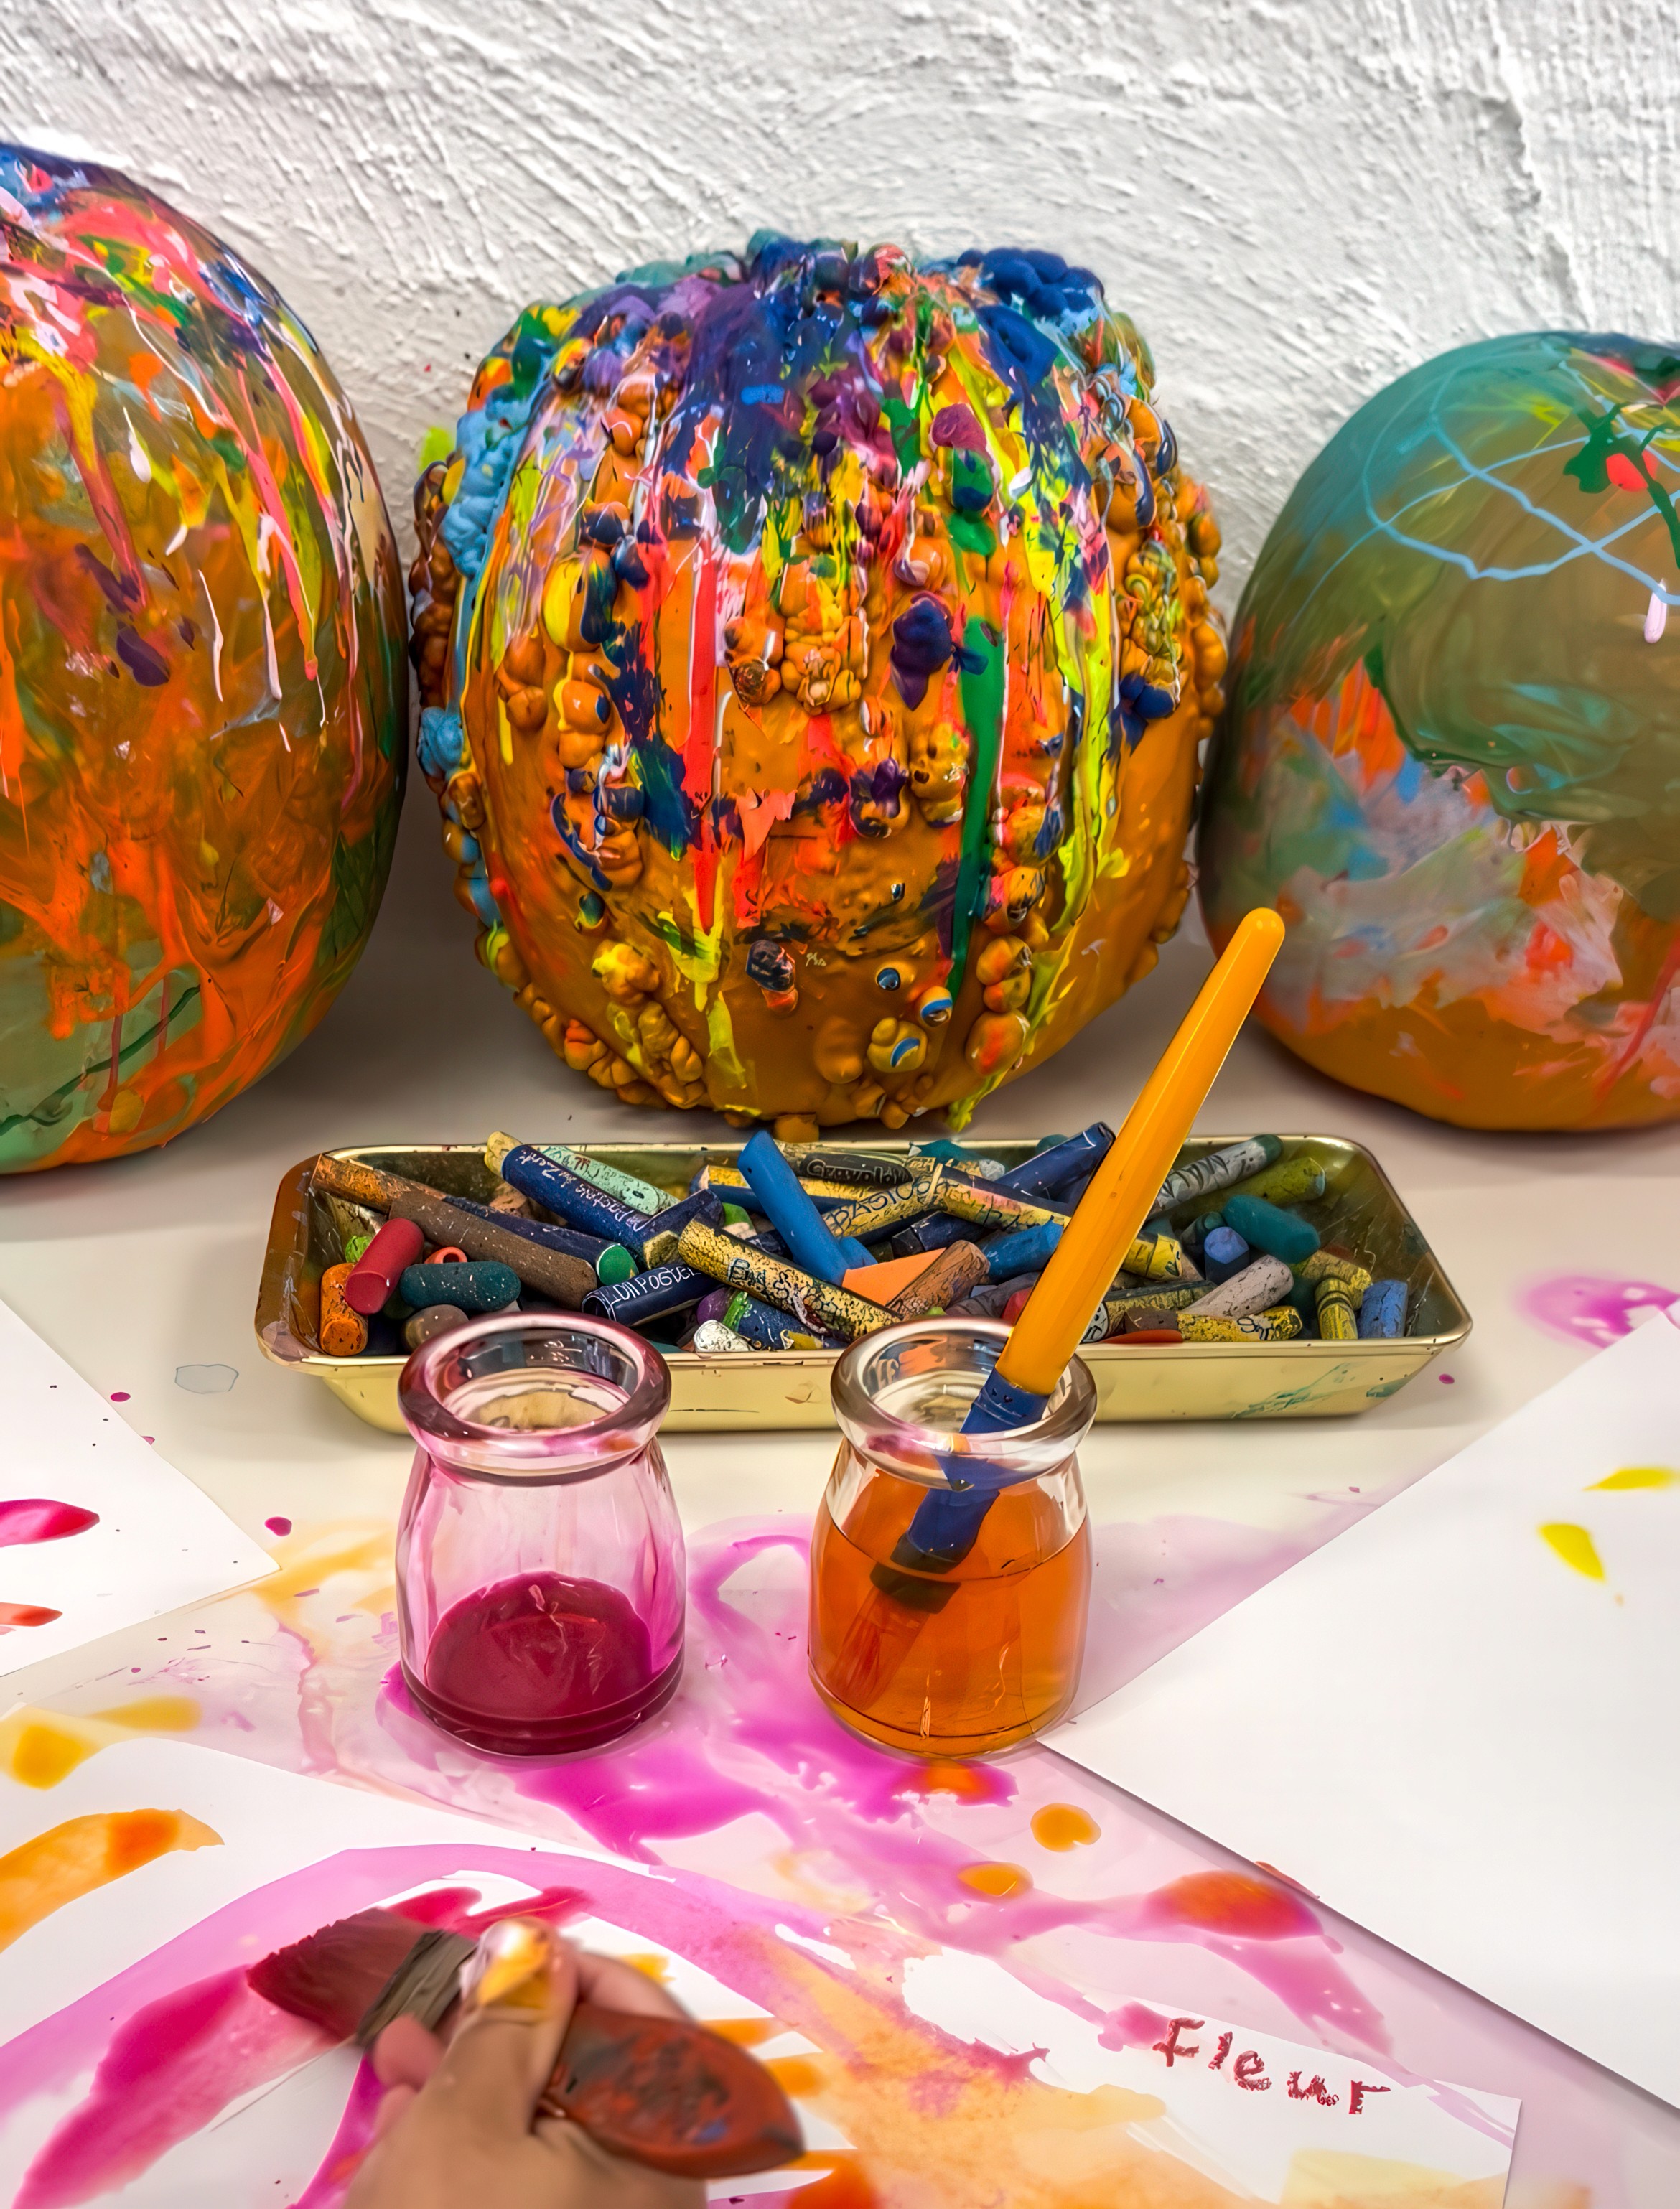
The Making
Pour, squeeze, drip, splash!
Paint runs across the curves in ways you cannot plan, which is exactly the joy of it. Don't worry if kids go wild with the bottles because if the pumpkin sits in a tray, the rainbow puddle left behind can become the material in another artwork later on. However much paint is used, it all belongs to the process.

Variations
Leave the pumpkin as a temporary artwork and wash it clean to begin again.
Keep a plastic one, seal it with Mod Podge once dry, and you have a forever pumpkin full of colour.
Or set the painted pumpkin in the middle of the table as a still life and invite drawings from every angle.

Materials
Real or artificial pumpkins
Washable paints in bold colours
Squeeze bottles, brushes, spoons, or sponges
Drop cloths or trays
Optional: Mod Podge or clear sealer
Back to Top
Painting Pumpkins
Yayoi and her pumpkins!
Bookmark
Creative Exploration
The Set Up
Kusama and her pumpkins; they pop up everywhere! The yellow one perched on a pier in Naoshima, the red and black beauty at Pt Leo Sculpture Park just outside Melbourne. The first time I saw it, I could not stop circling it. It is enormous and ridiculous and utterly joyful! I think that is what I love about Kusama’s pumpkins: they take something ordinary and make it feel like the most magical object in the world.
Obviously pumpkins are much easier to get hold of in Autumn / Fall, but honestly, any time works! Giant plastic ones from the attic, smaller gourds from the market, even foam or paper-mâché versions are brilliant.
At Smudge, I always go for washable paint so that the play can happen again and again. Line up squeezey bottles, tubs of bright colour, spoons, and brushes. The pumpkin is ready to be transformed!
The Making
Pour, squeeze, drip, splash!
Paint runs across the curves in ways you cannot plan, which is exactly the joy of it. Don't worry if kids go wild with the bottles because if the pumpkin sits in a tray, the rainbow puddle left behind can become the material in another artwork later on. However much paint is used, it all belongs to the process.
Variations
Leave the pumpkin as a temporary artwork and wash it clean to begin again.
Keep a plastic one, seal it with Mod Podge once dry, and you have a forever pumpkin full of colour.
Or set the painted pumpkin in the middle of the table as a still life and invite drawings from every angle.
Materials
Real or artificial pumpkins
Washable paints in bold colours
Squeeze bottles, brushes, spoons, or sponges
Drop cloths or trays
Optional: Mod Podge or clear sealer
Back to Top
