Bunny Baskets
The ones they'll be so proud to carry on Easter morning!

The Set Up
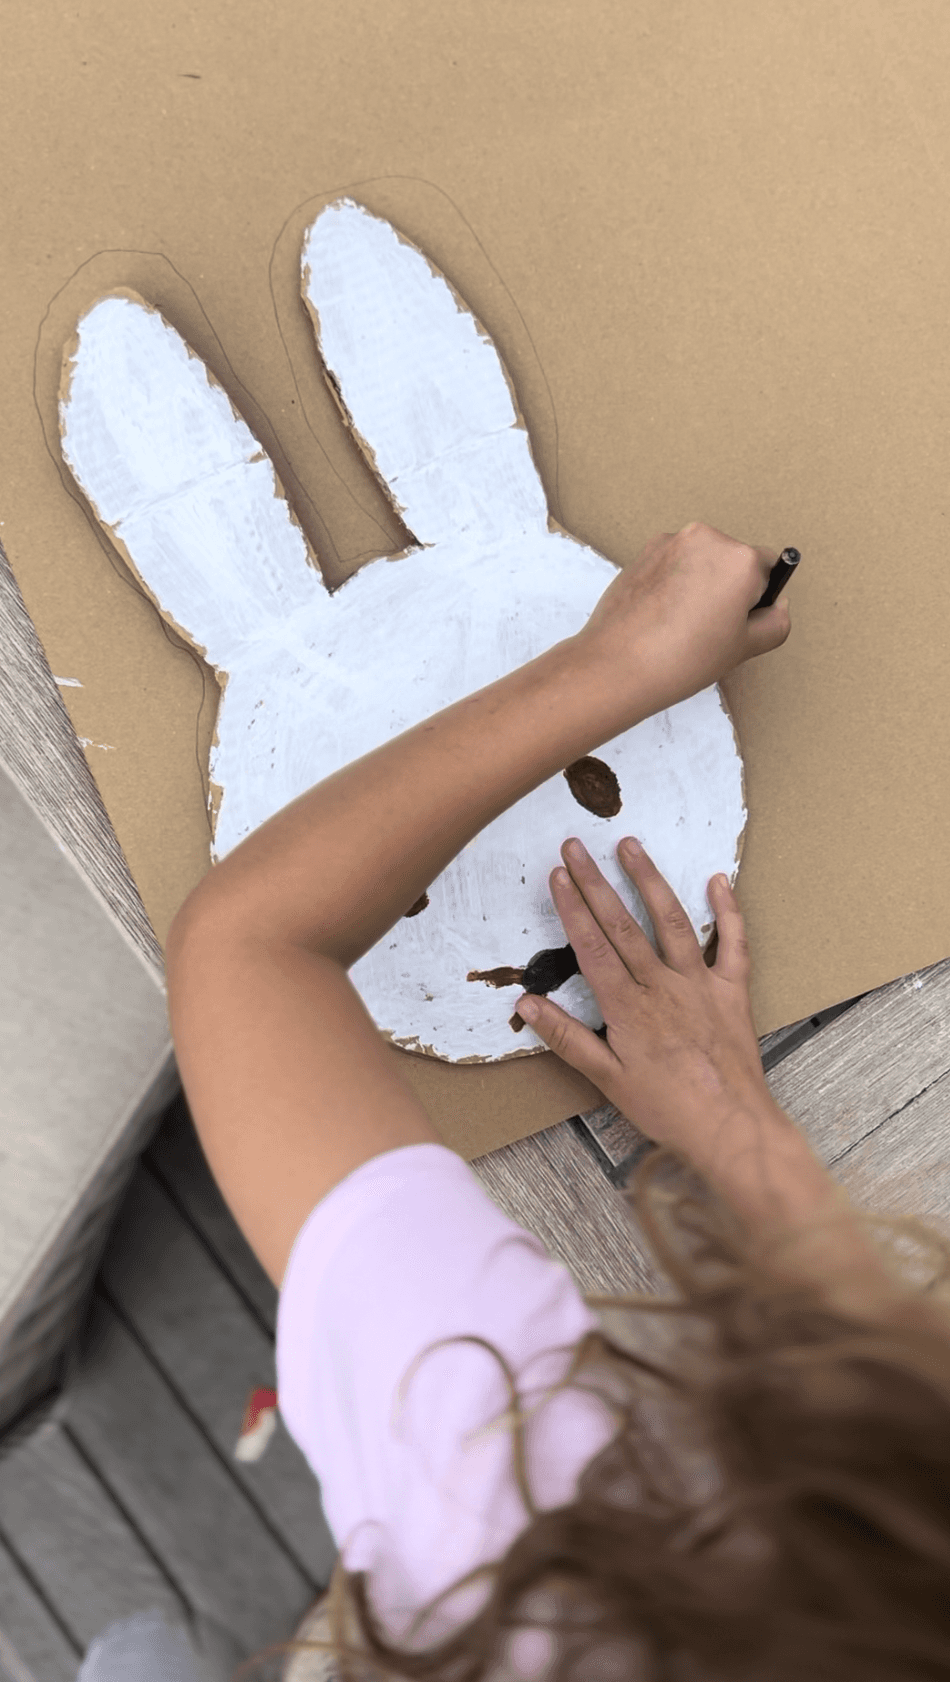
Draw a bunny head shape (or any animal you like!) on cardboard and cut it out. About 25cm tall works well, big enough to hold a decent haul of chocolate but small enough for little arms to carry. Use that as a template to make a second identical one. A curved bottom edge works really well for stability. You'll also need a thick cardboard rectangle to join the two shapes together and form the base of the basket. Double-wall corrugated cardboard is ideal because the basket needs to hold its shape once it's loaded up with eggs. MakeDo tools, cardboard scissors, or a Chompshop Chompsaw all work for cutting.
The trickiest bit is attaching the rectangle base between the two bunny shapes. Hot glue gives the strongest join (adults do this part if you're supporting younger kids), but MakeDo screws work realy well too and let kids do the construction themselves. You'll just need to have extra cardboard rectangles for the joins on the inside of the basket. Tape tends to pull away once there's any weight in the basket, so we avoid it for the structural joins.
Have paint sticks, stickers, collage materials, beads, and ribbon laid out for decorating. We use paint sticks rather than liquid paint for these because cardboard warps when it gets wet, and paint sticks dry instantly so artists can build, decorate, and take it home in one session. A MakeDo hole puncher is brilliant because artists can punch holes around the ears or along the edges and thread ribbon through, or pop in fresh flowers later.


The Making
The building part is so satisfying! Lining up two shapes, figuring out how the rectangle connects them, working out how to make it stand. There's real problem-solving in this. For the very youngest artists, pre-assemble the basket shape and let them focus on decorating.
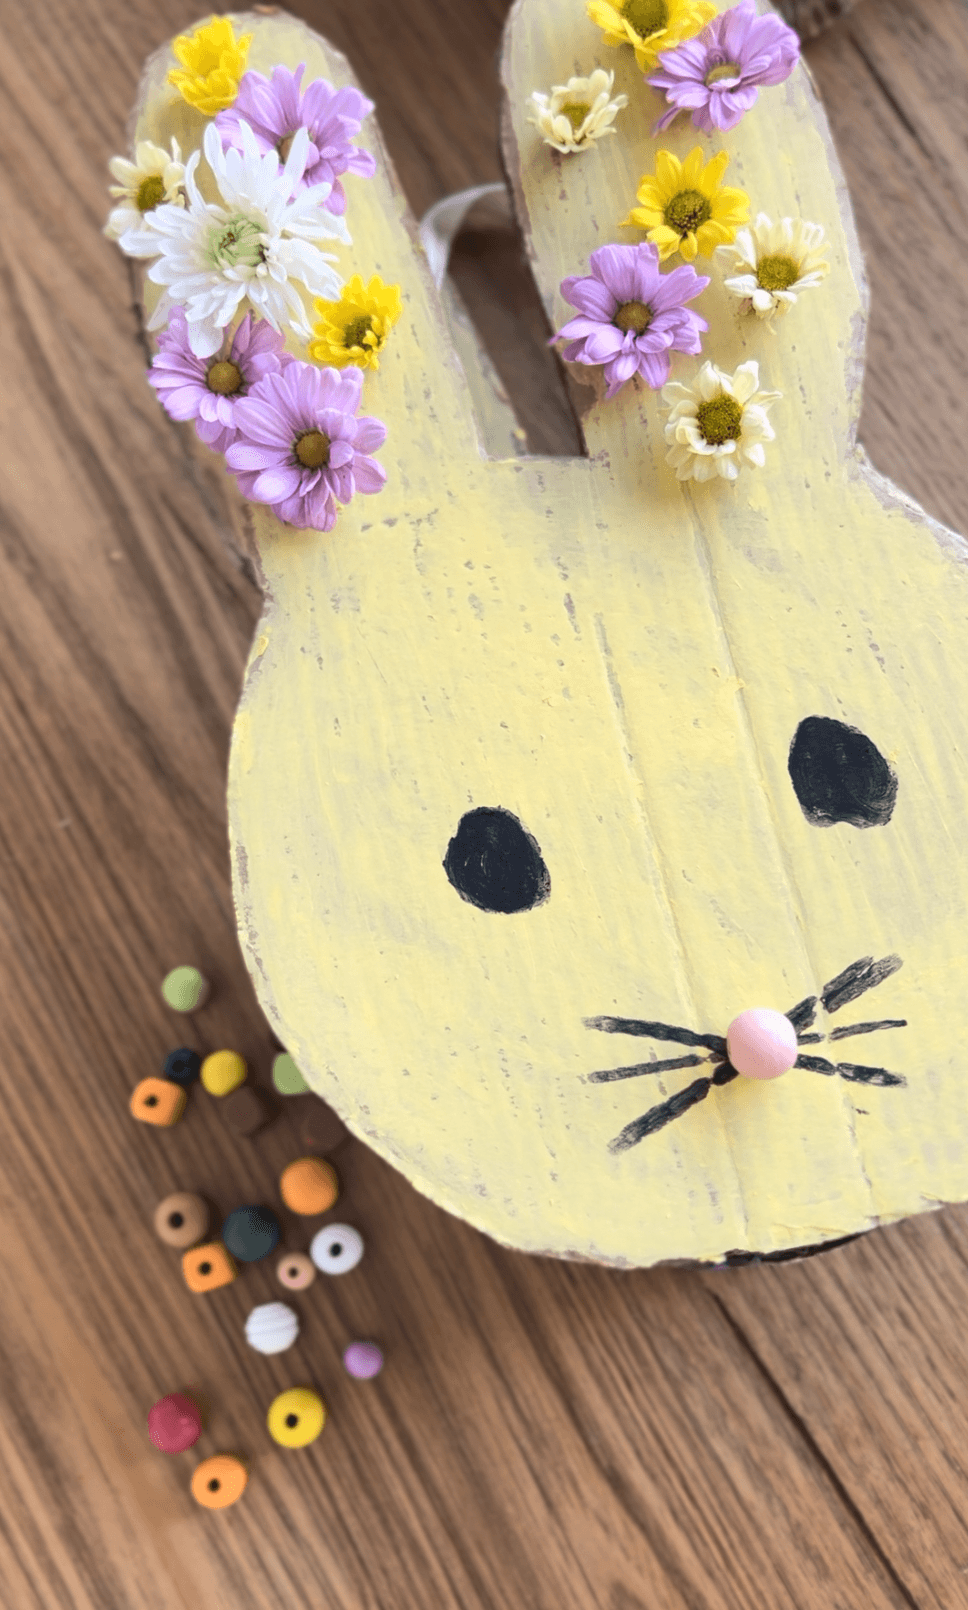
Every basket ends up wildly different. Stripes, polka dots, rainbow ears, flowers tucked into the holes. We always attach a ribbon handle at the end so they can carry them around, and the look on a kid's face when they realise they just built something they'll actually use on Easter Sunday... just the best. Ours survived a backyard hunt with a very enthusiastic four-year-old, chocolates and all.


Variations
Make them in different sizes! A tiny one for a chocolate egg or two, a big one for the full Easter hunt haul. You could also skip the bunny shape entirely and do chicks, or eggs, or a carrot basket.

Materials
Double-wall corrugated cardboard (thick enough to hold its shape when loaded with chocolate)
Cardboard scissors, MakeDo saw, or Chompsaw
MakeDo hole puncher Mini-tool
Paint sticks
Hot glue gun, low-temp (for adult use on structural joins) or PVA
Ribbon for handles
Collage materials: stickers, beads, sequins, pom poms
Fresh flowers or greenery (optional, for finishing)
Back to Top
Bunny Baskets
The ones they'll be so proud to carry on Easter morning!
Bookmark
Sculpture
The Set Up
Draw a bunny head shape (or any animal you like!) on cardboard and cut it out. About 25cm tall works well, big enough to hold a decent haul of chocolate but small enough for little arms to carry. Use that as a template to make a second identical one. A curved bottom edge works really well for stability. You'll also need a thick cardboard rectangle to join the two shapes together and form the base of the basket. Double-wall corrugated cardboard is ideal because the basket needs to hold its shape once it's loaded up with eggs. MakeDo tools, cardboard scissors, or a Chompshop Chompsaw all work for cutting.
The trickiest bit is attaching the rectangle base between the two bunny shapes. Hot glue gives the strongest join (adults do this part if you're supporting younger kids), but MakeDo screws work realy well too and let kids do the construction themselves. You'll just need to have extra cardboard rectangles for the joins on the inside of the basket. Tape tends to pull away once there's any weight in the basket, so we avoid it for the structural joins.
Have paint sticks, stickers, collage materials, beads, and ribbon laid out for decorating. We use paint sticks rather than liquid paint for these because cardboard warps when it gets wet, and paint sticks dry instantly so artists can build, decorate, and take it home in one session. A MakeDo hole puncher is brilliant because artists can punch holes around the ears or along the edges and thread ribbon through, or pop in fresh flowers later.
The Making
The building part is so satisfying! Lining up two shapes, figuring out how the rectangle connects them, working out how to make it stand. There's real problem-solving in this. For the very youngest artists, pre-assemble the basket shape and let them focus on decorating.
Every basket ends up wildly different. Stripes, polka dots, rainbow ears, flowers tucked into the holes. We always attach a ribbon handle at the end so they can carry them around, and the look on a kid's face when they realise they just built something they'll actually use on Easter Sunday... just the best. Ours survived a backyard hunt with a very enthusiastic four-year-old, chocolates and all.
Variations
Make them in different sizes! A tiny one for a chocolate egg or two, a big one for the full Easter hunt haul. You could also skip the bunny shape entirely and do chicks, or eggs, or a carrot basket.
Materials
Double-wall corrugated cardboard (thick enough to hold its shape when loaded with chocolate)
Cardboard scissors, MakeDo saw, or Chompsaw
MakeDo hole puncher Mini-tool
Paint sticks
Hot glue gun, low-temp (for adult use on structural joins) or PVA
Ribbon for handles
Collage materials: stickers, beads, sequins, pom poms
Fresh flowers or greenery (optional, for finishing)
Back to Top
Add this to your favourites
Add this to your favourites
Thoughts?
Would love to hear if youv'e tried this or have any ideas on how to make it even better!
