Custom Tote Printing
Fashion you can carry home.
The Set Up
Fabric printing is one of those activities that looks complicated and is secretly so easy and satisfying. I love using plain white cotton tote bags or calico bags because the colour pops instantly. T-shirts work beautifully too.
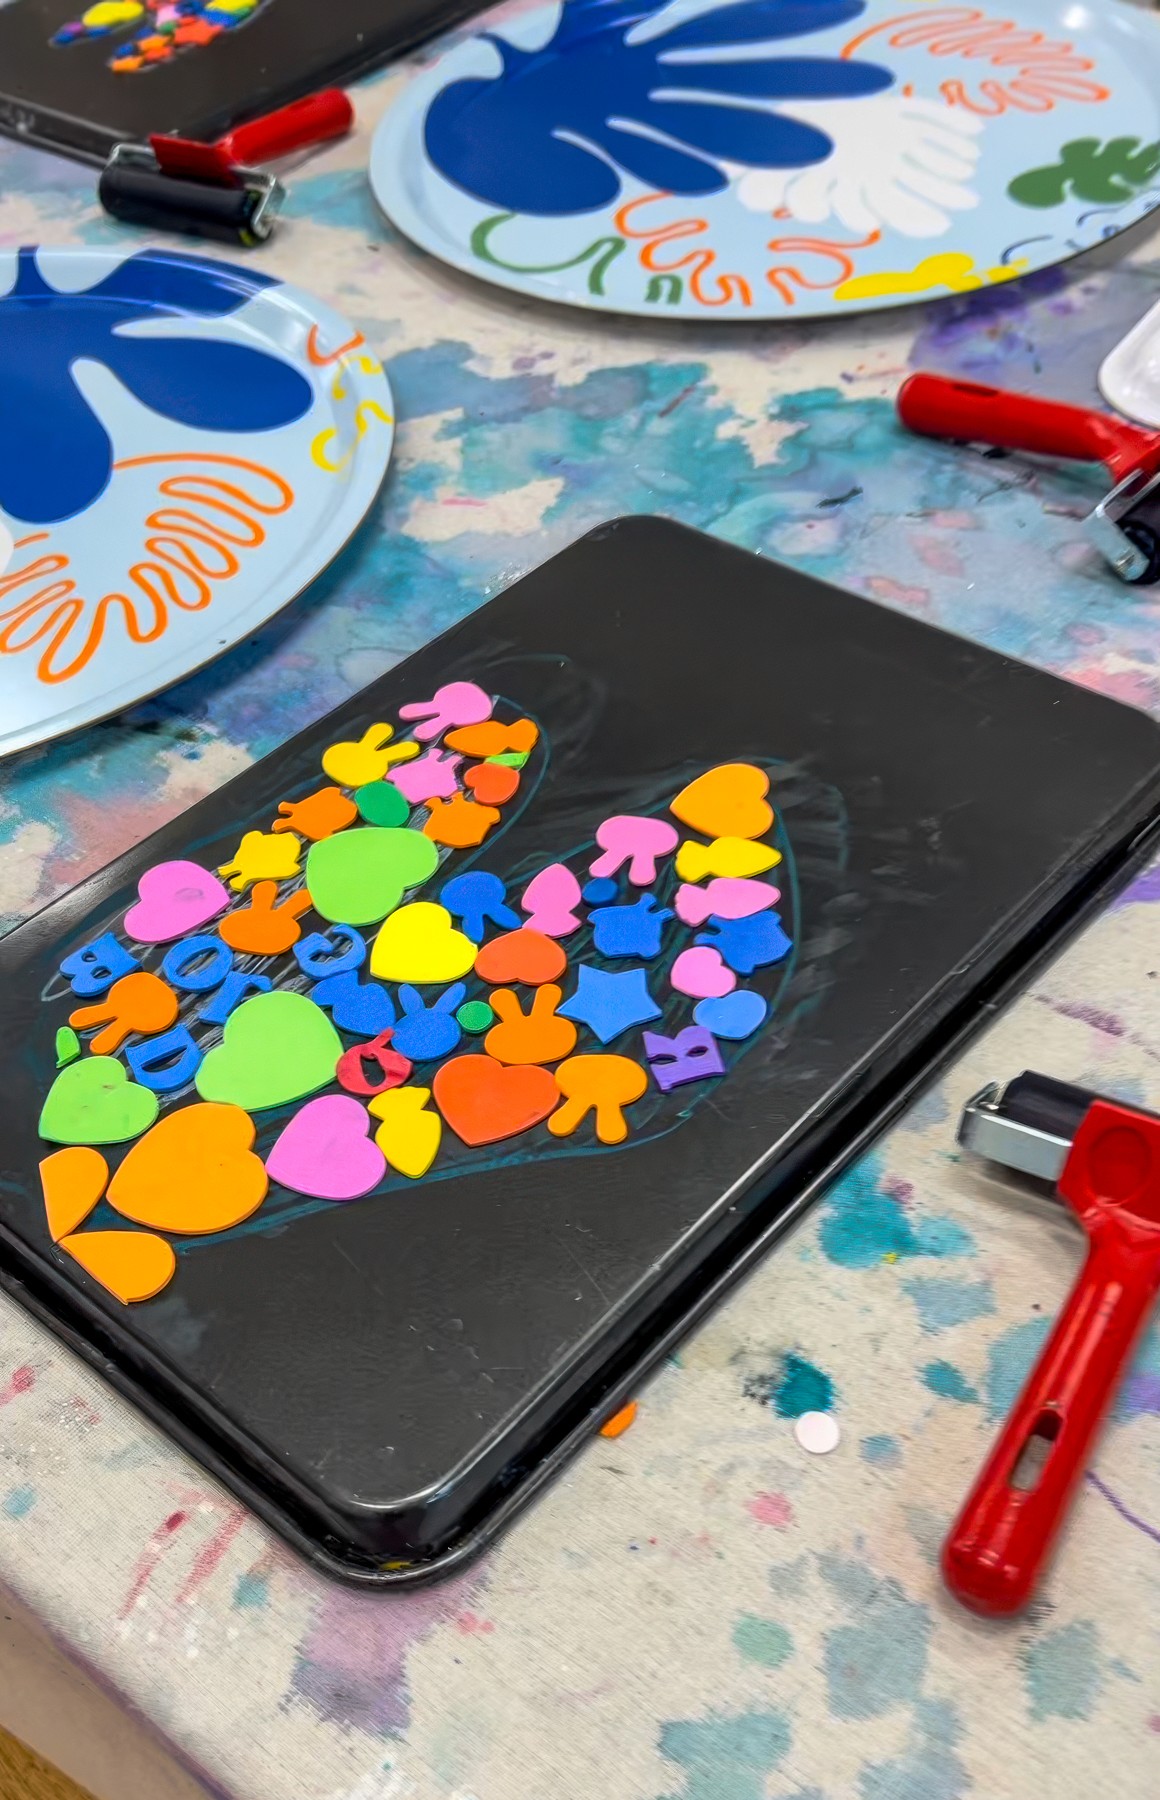
For the stamps, you’ve got options. Baking trays are incredible because they’re sturdy and won’t buckle under pressure. Thick cardboard works too and is great for sending the stamps home so kids can keep printing at the kitchen table later.
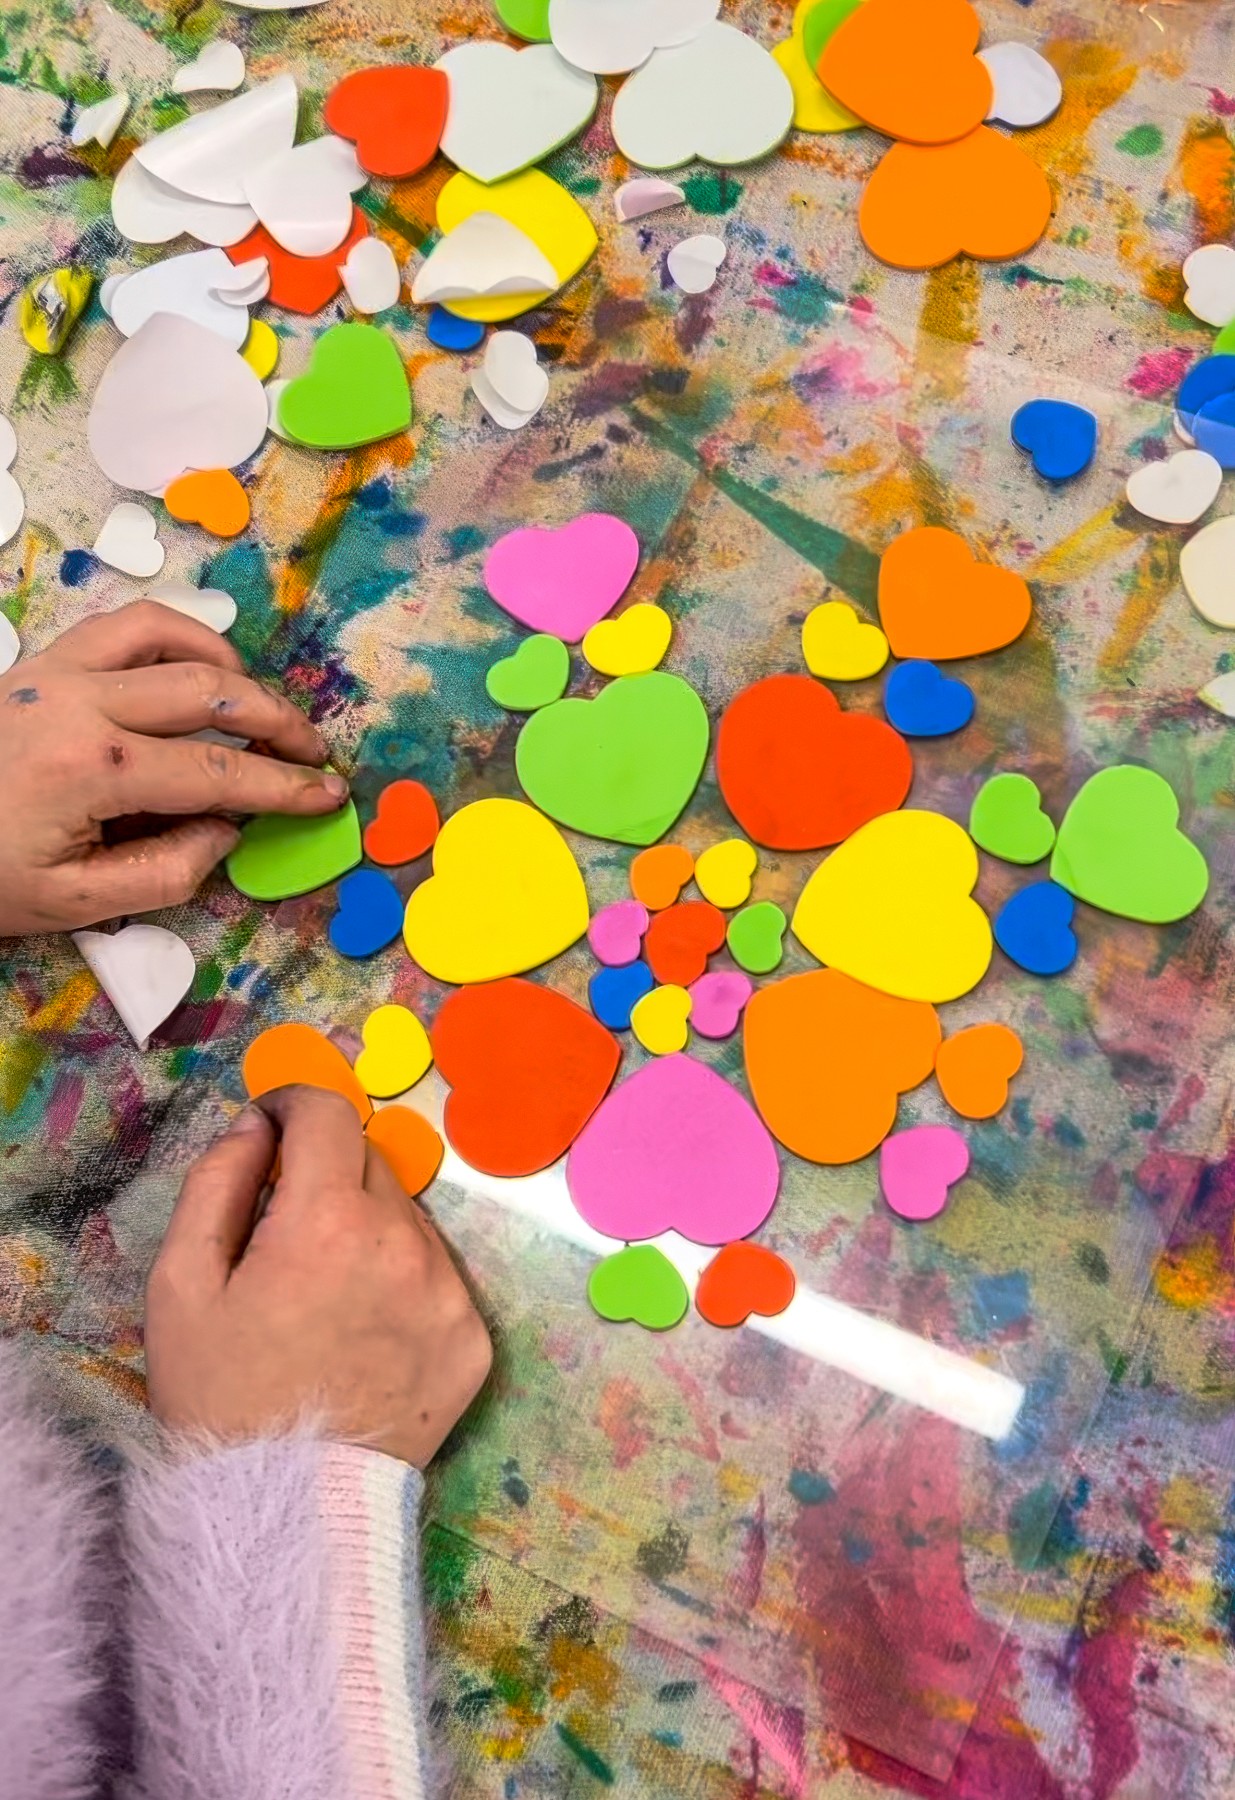
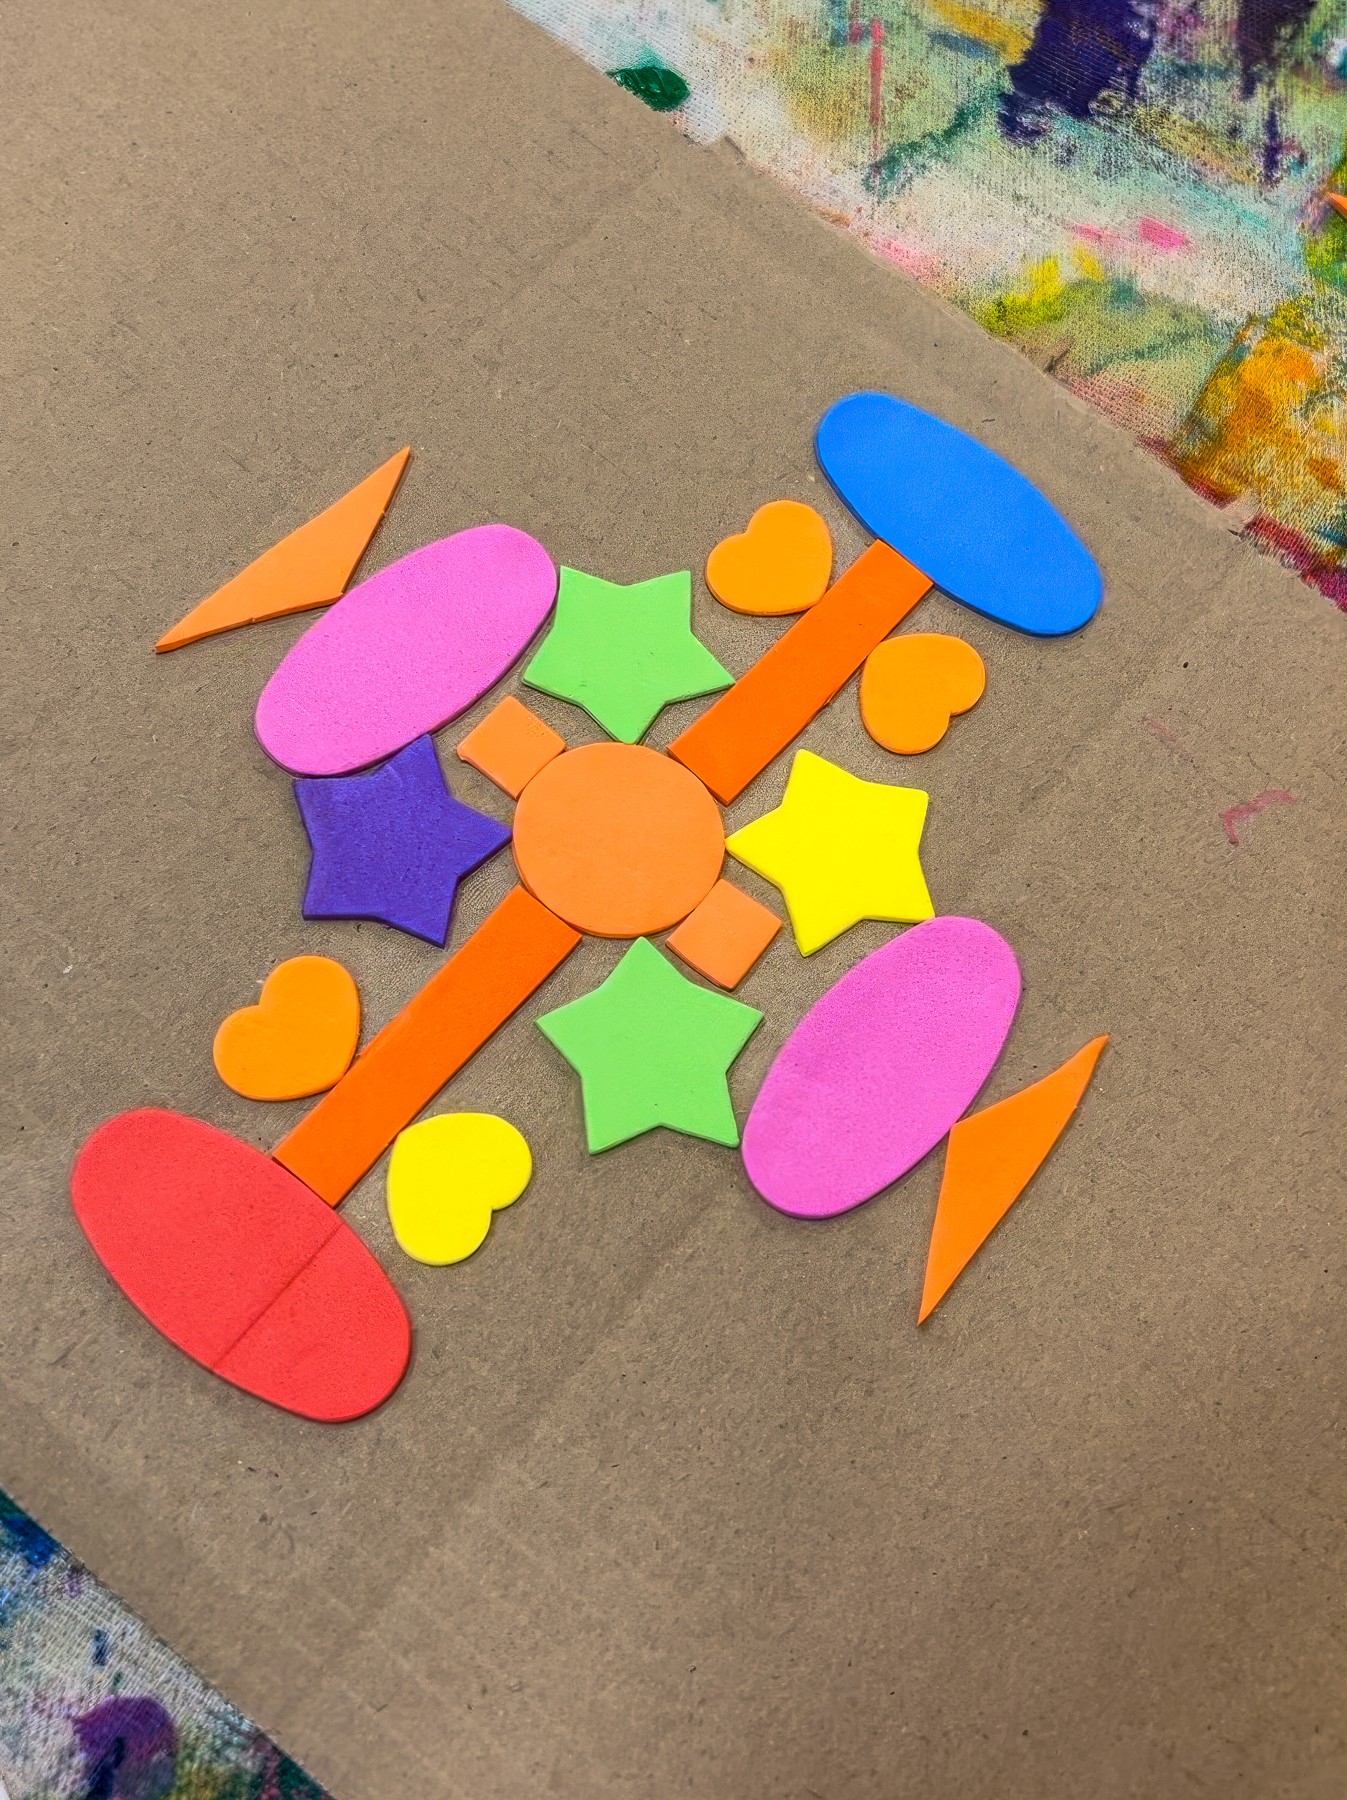
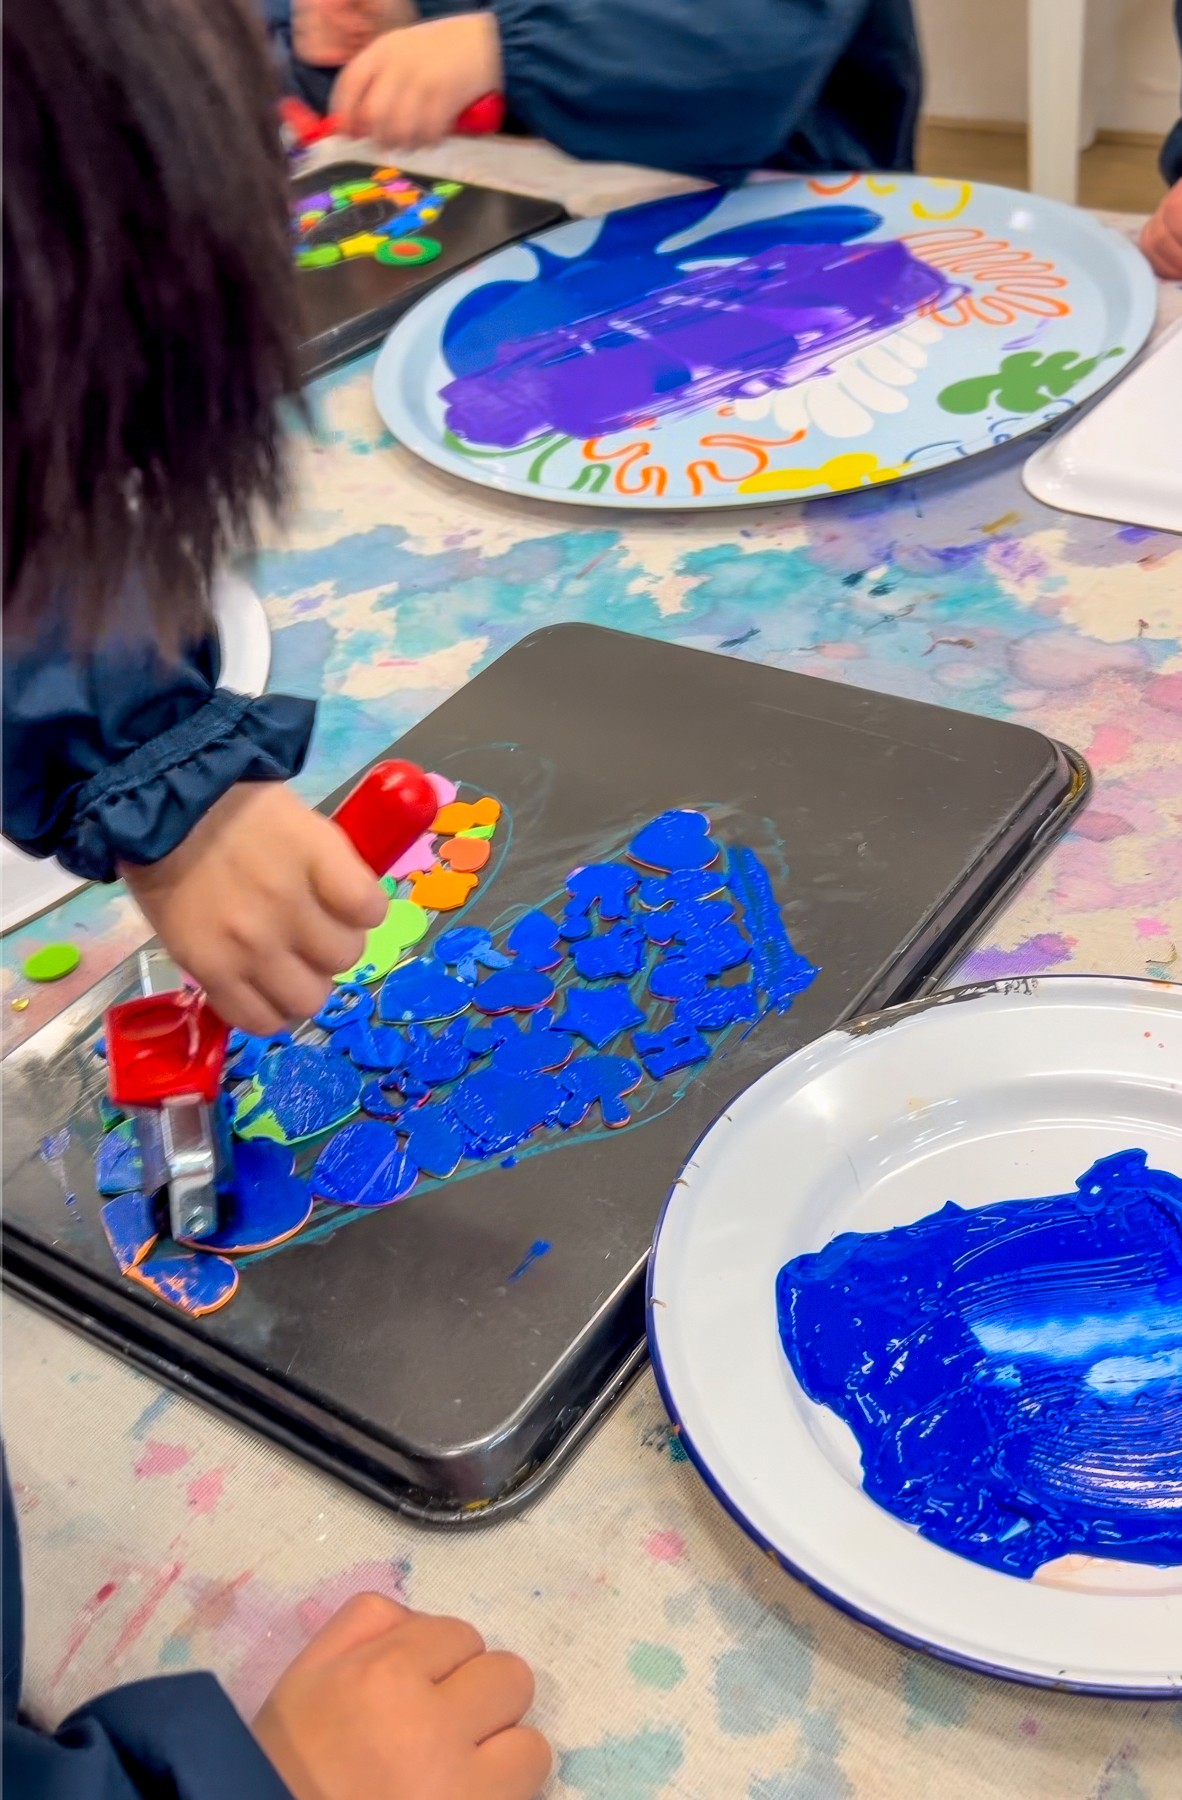
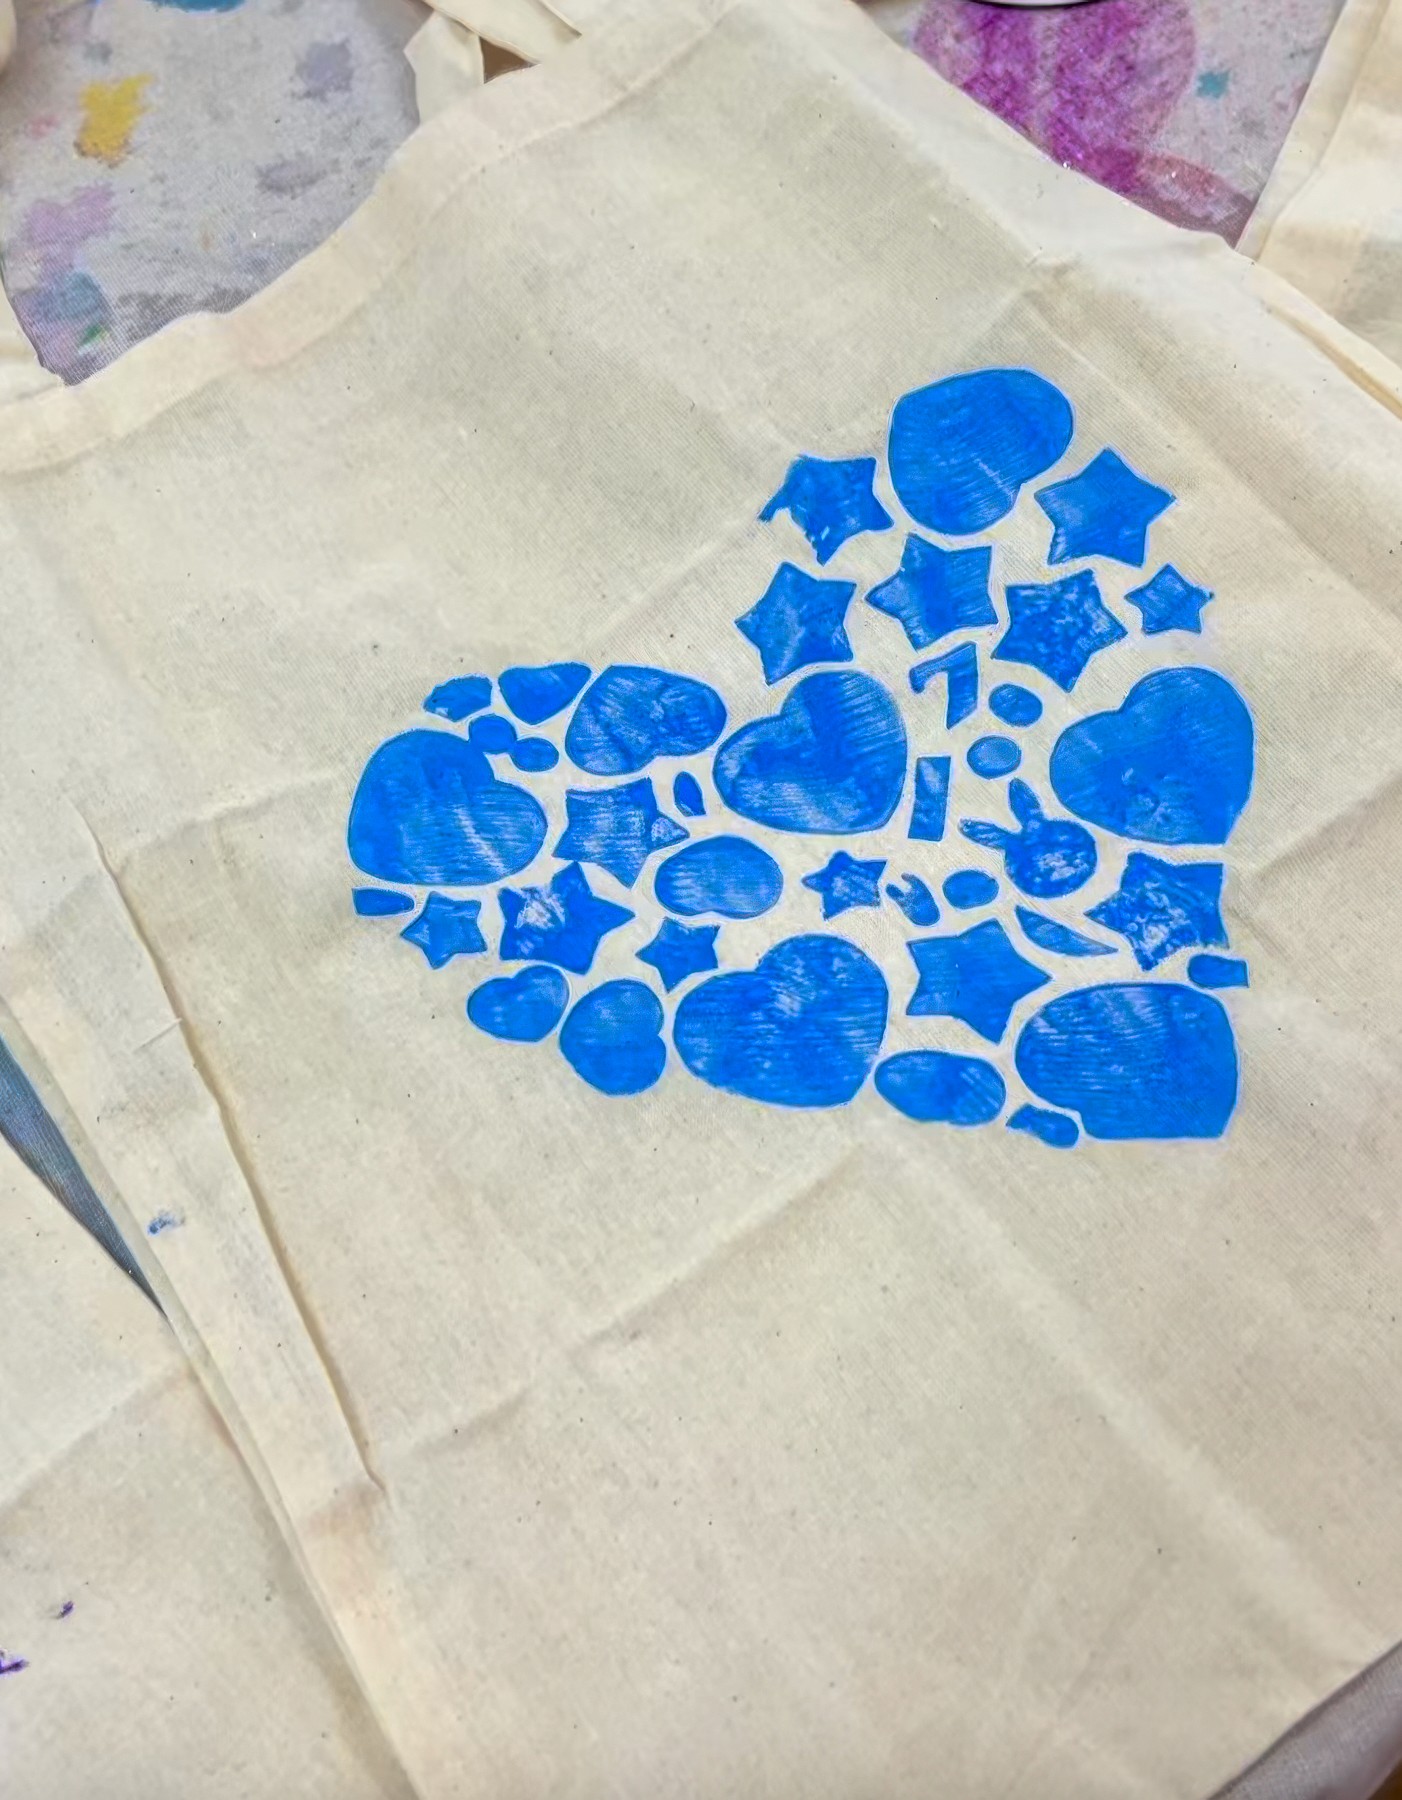
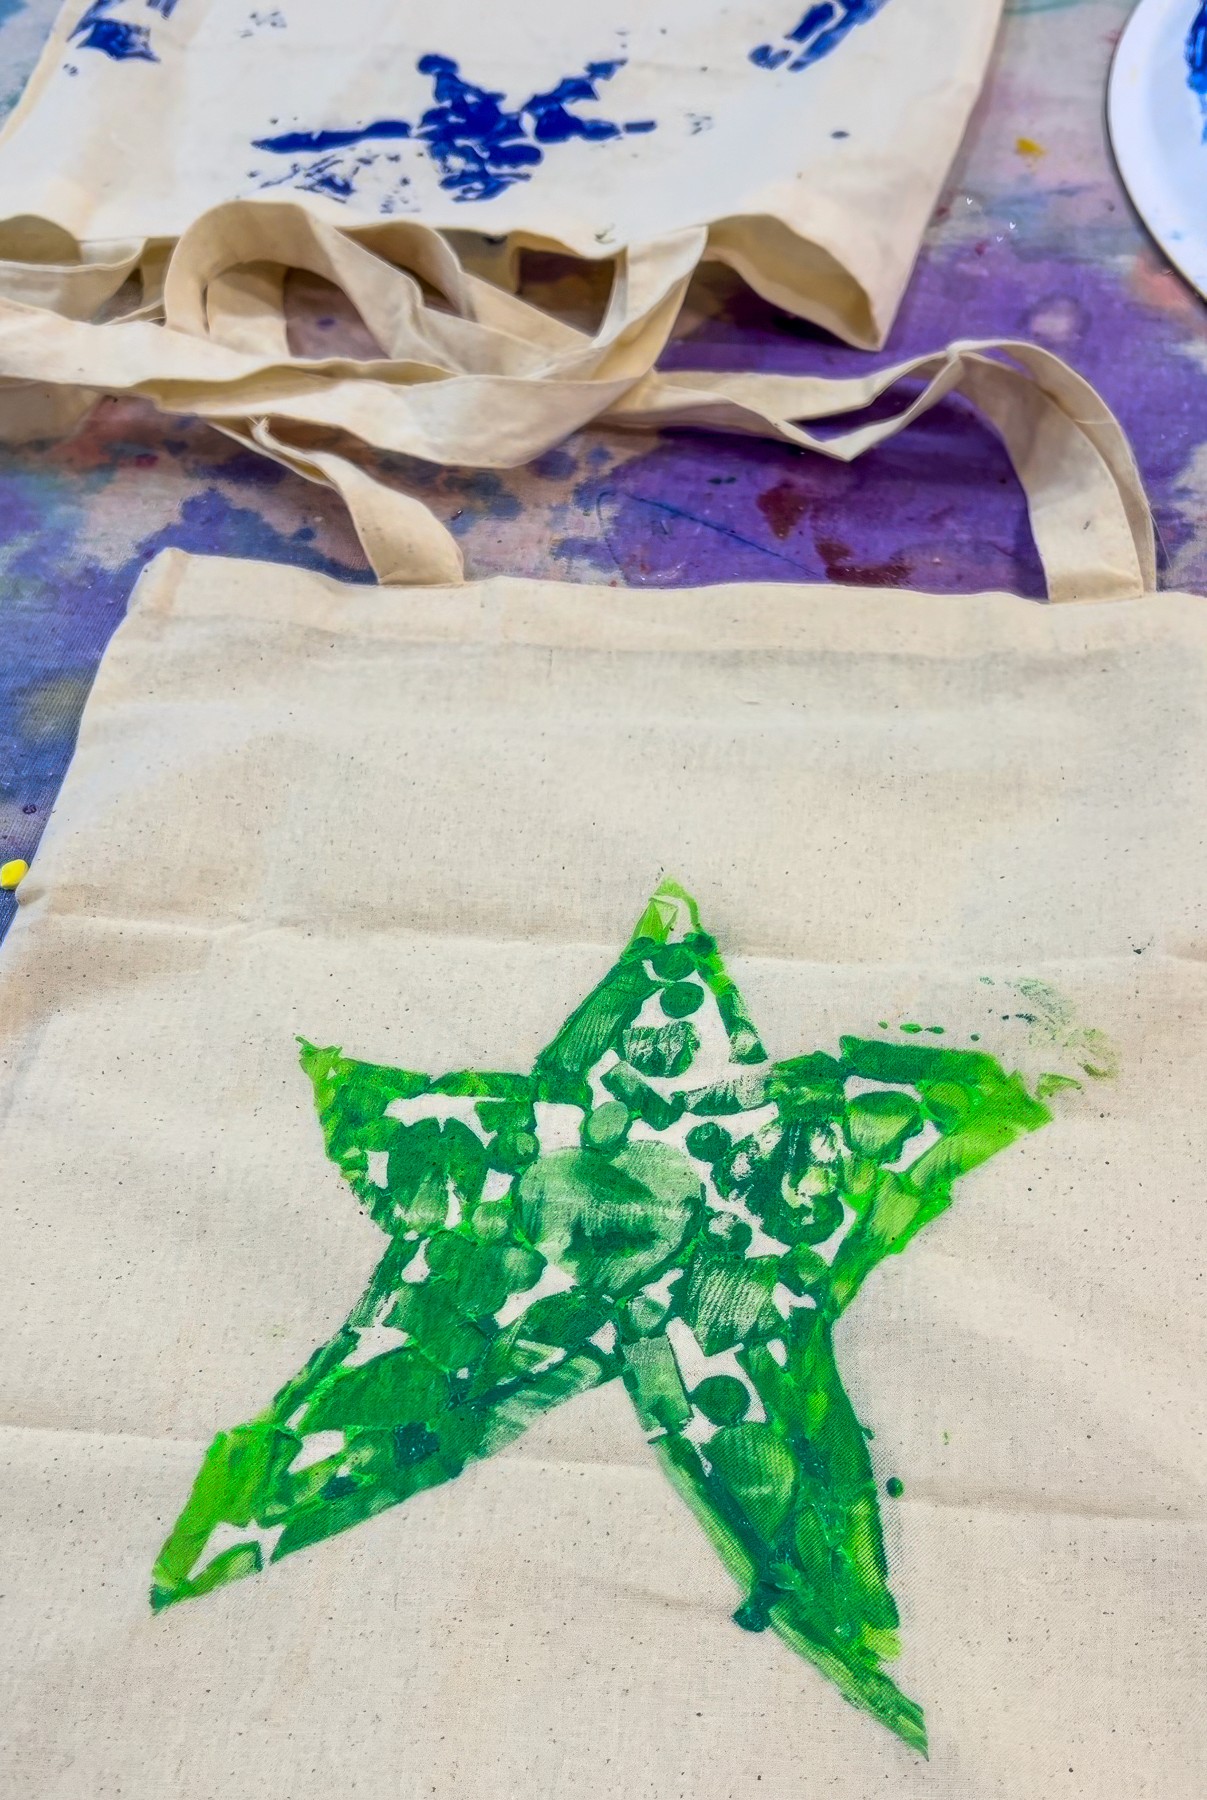
Ask each artist to draw one bold, simple shape (lightning bolt, giant flower, star, heart, sunglasses, a sneaker…). Inside that shape, they fill the space with foam stickers. Little ones, big ones, odd ones. It becomes this gorgeous jigsaw of raised edges and tiny gaps. The spacing is totally up to them. I usually go for “around a couple of centimetres apart”, but honestly, anything goes.
Set out fabric paint in a few strong colours. Poster paint works fine if you mix in a good squeeze of white so it covers the fabric nicely. And always slip a piece of cardboard inside the tote or tee first so the paint doesn’t bleed through.
The Making
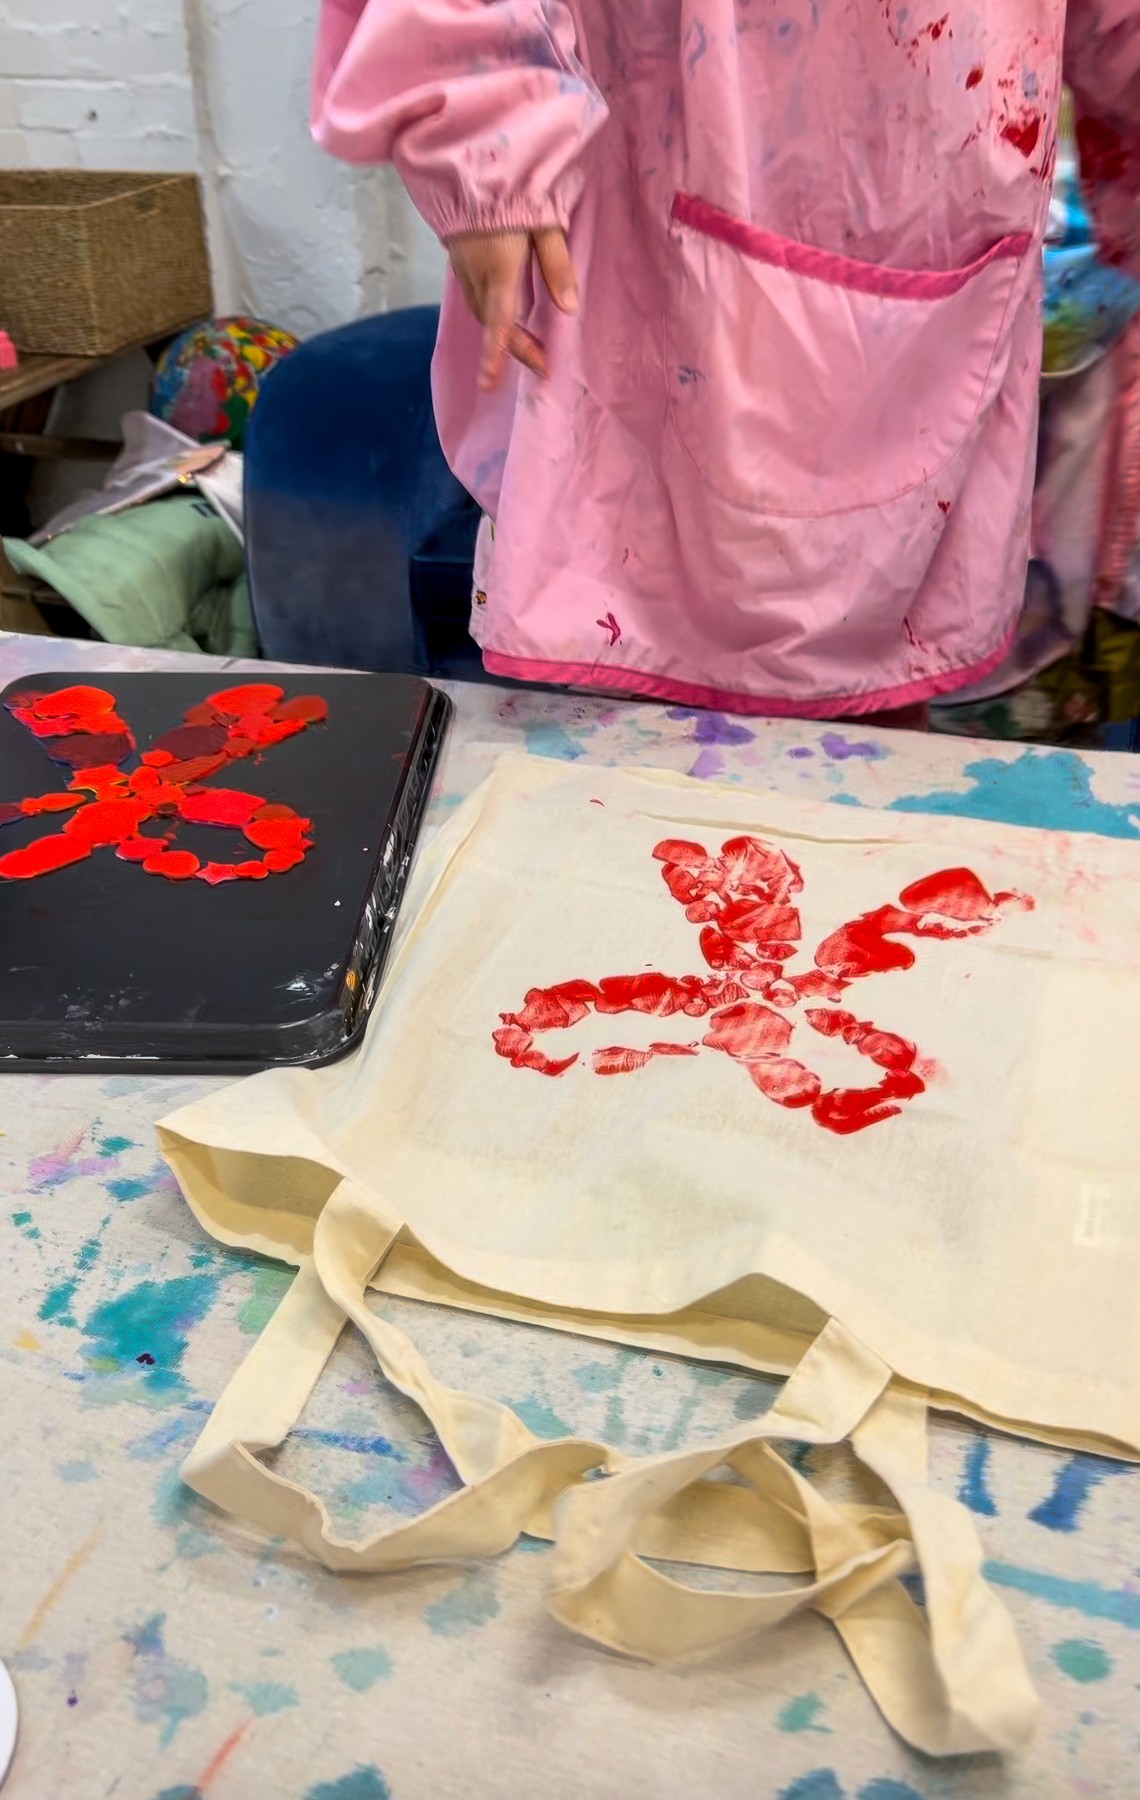
Load the stamp however you like. Roll the paint on with a brayer for super-even coverage or brush it on with a sponge if you want more texture. You don’t need perfect precision here. Uneven edges make beautiful prints!
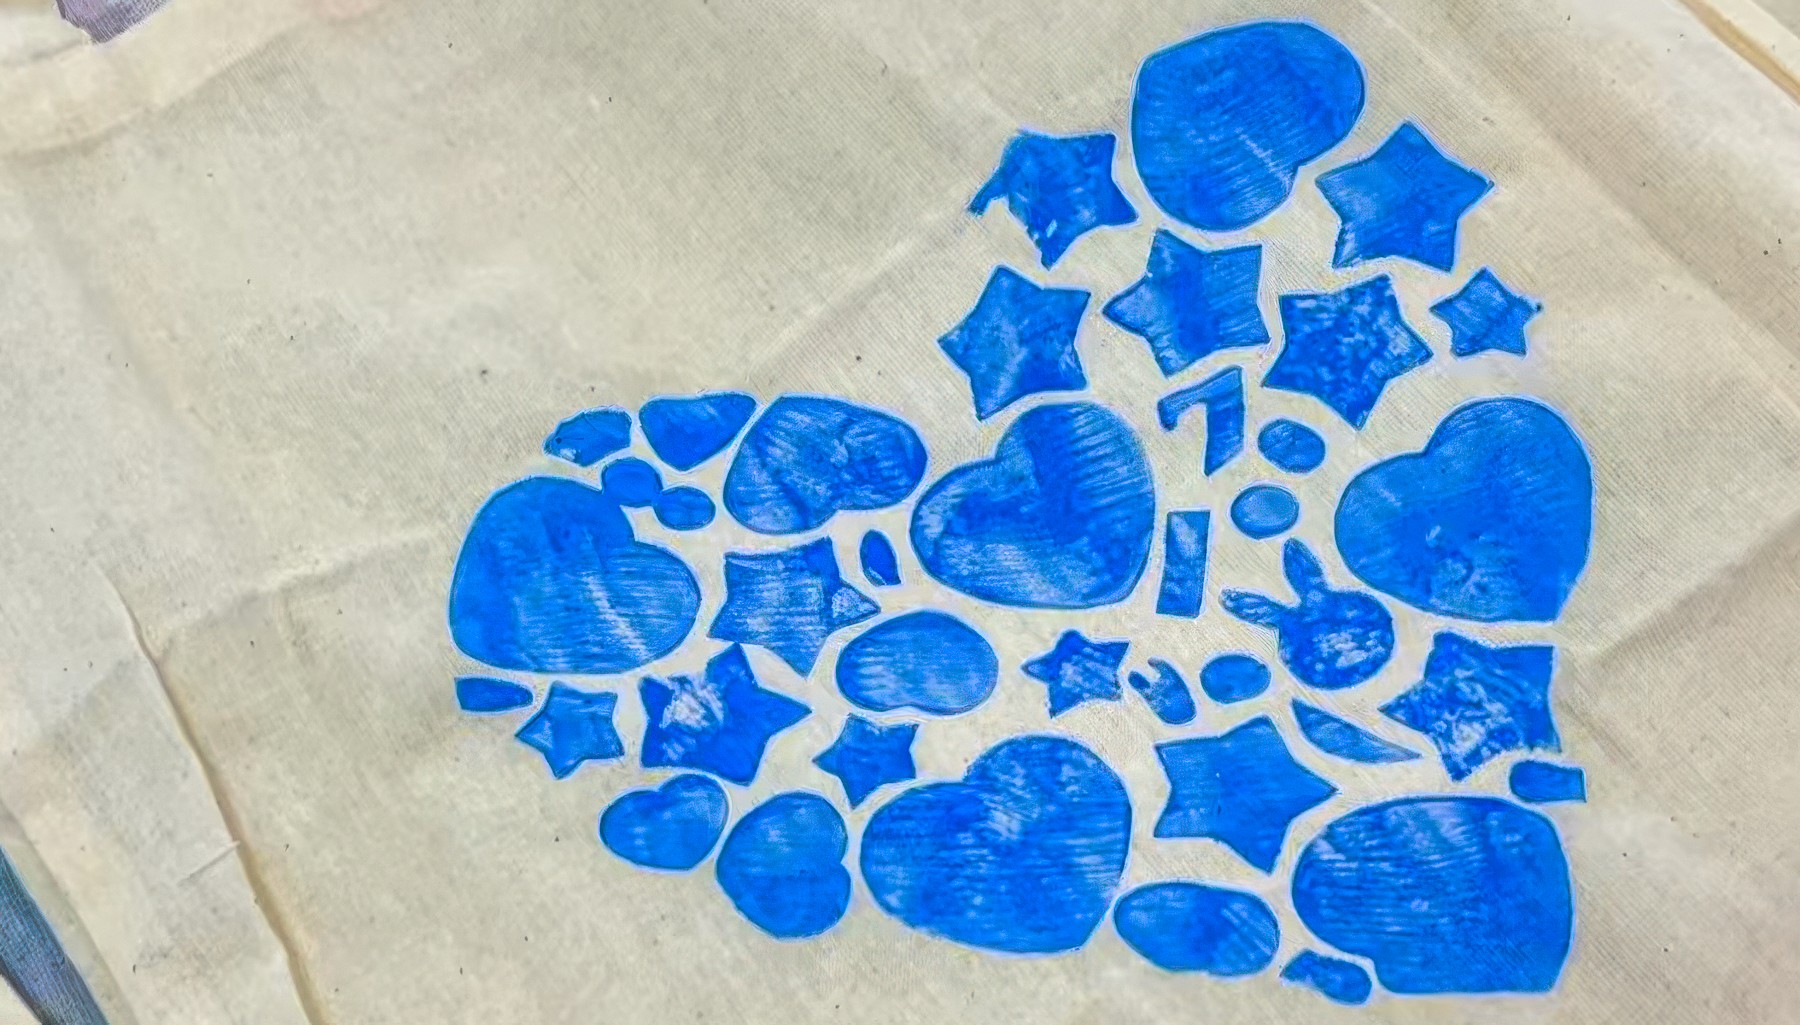
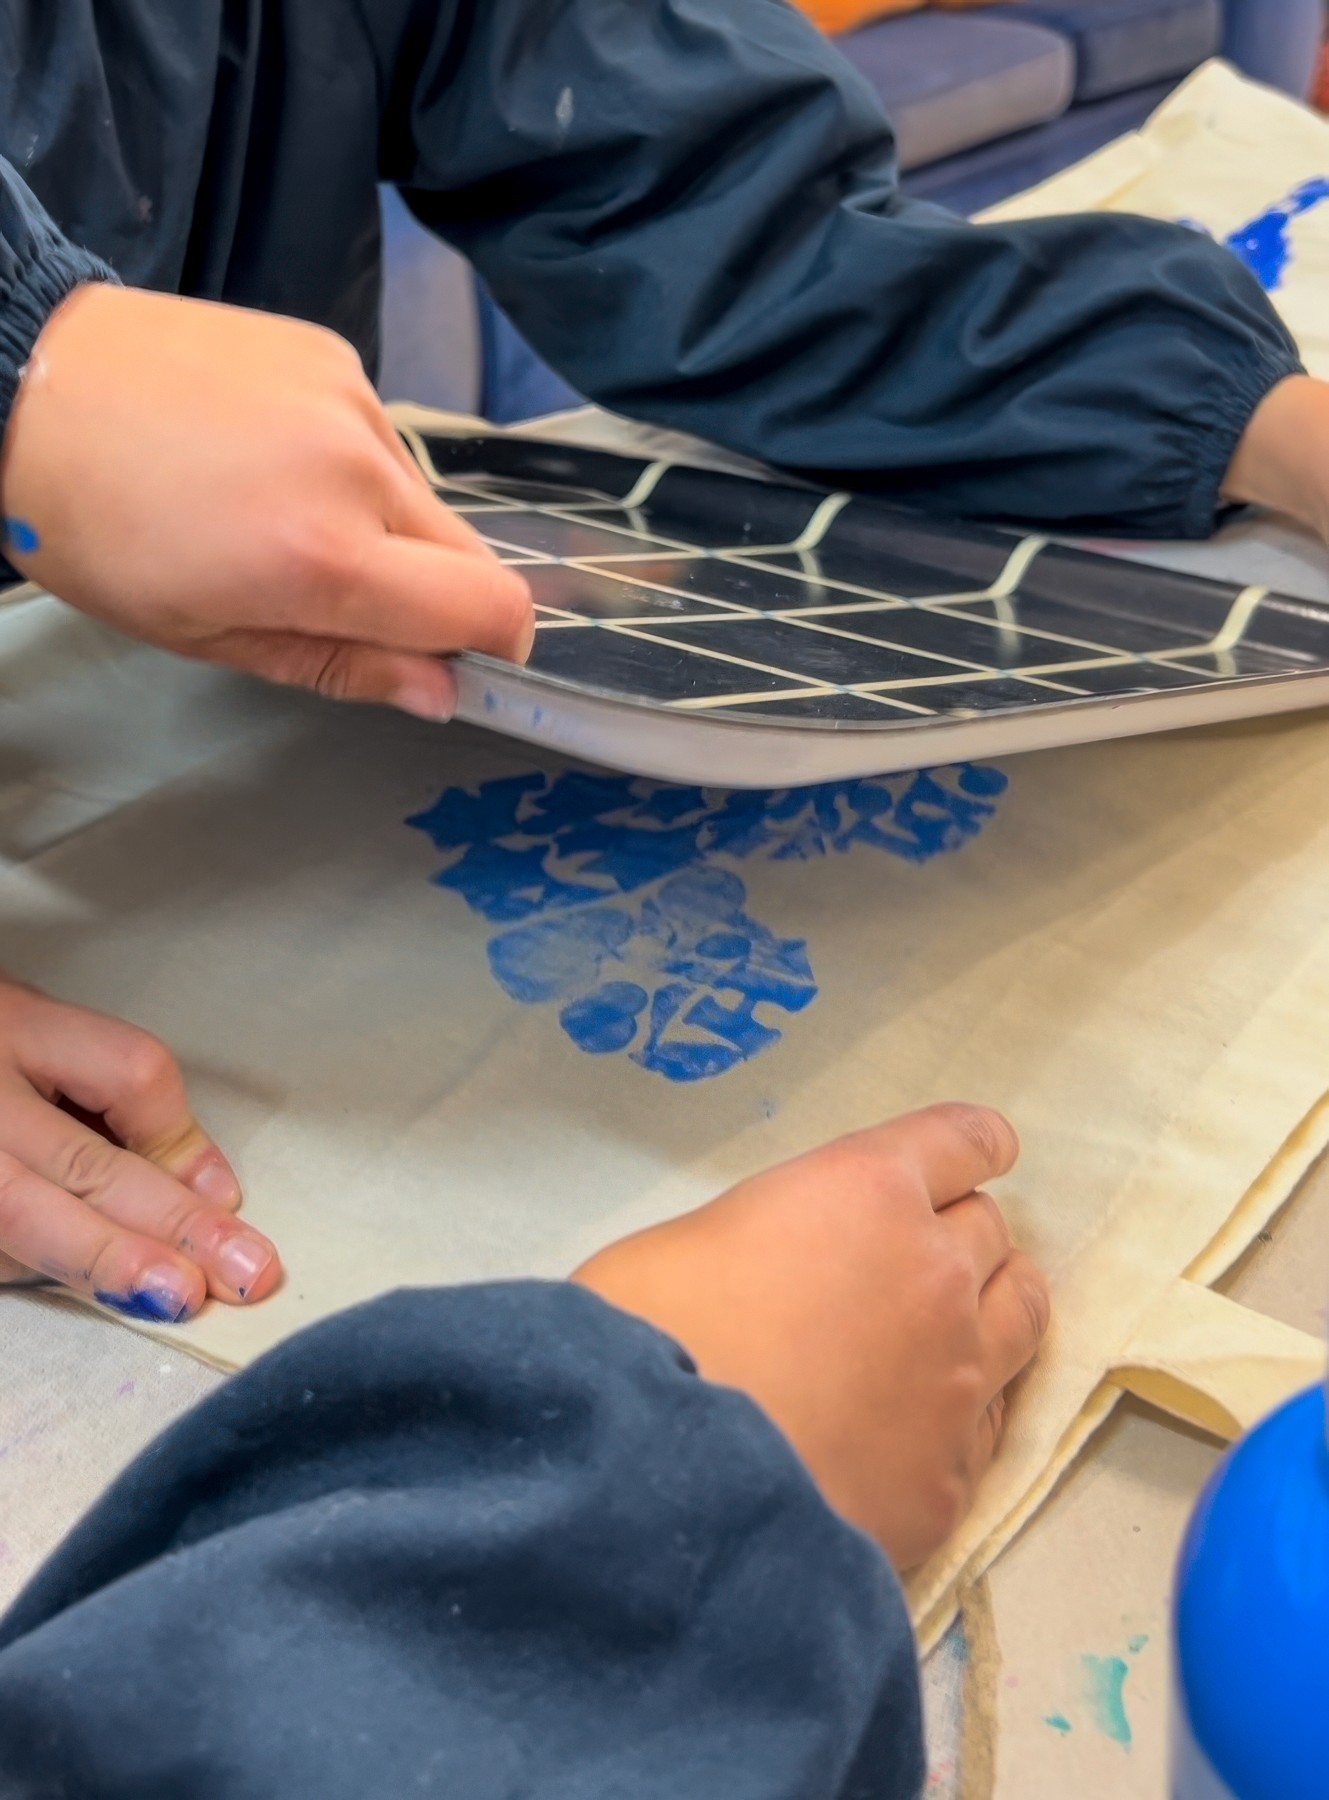
For printing, I find it easiest to place the stamp face-down on the fabric so the kids can position it exactly where they want it. Press firmly. If you’re using baking trays, you can do a gentle “step and press” for a full-body transfer. Kids love this! And it gives a beautifully crisp print.
Lift the stamp slowly to reveal the shape..
If you’re using fabric paint, let the design dry fully then iron with baking paper on top to heat-set it. Poster paint dries matte and soft and is perfect for bags that won’t be washed.
Variations
Build a whole pattern by repeating the same stamp at different angles.
Offer metallic or neon paint for a runway moment.
Use alphabet foam stickers to write names, slogans or tiny “fashion labels.” But remember that these will be printed as a mirror image, so you’ll need to reverse them.
Materials
• Cotton tote bags or t-shirts
• Baking trays or thick cardboard
• Foam stickers
• Fabric paint or poster paint + white
• Brayers, sponge brushes, wide brushes
• Scrap cardboard for inside the bag
• Pencils for sketching outlines
• Baking paper and iron for heat setting (optional)
Back to Top
Custom Tote Printing
Fashion you can carry home.
Bookmark
Print Making
The Set Up
Fabric printing is one of those activities that looks complicated and is secretly so easy and satisfying. I love using plain white cotton tote bags or calico bags because the colour pops instantly. T-shirts work beautifully too.
For the stamps, you’ve got options. Baking trays are incredible because they’re sturdy and won’t buckle under pressure. Thick cardboard works too and is great for sending the stamps home so kids can keep printing at the kitchen table later.
Ask each artist to draw one bold, simple shape (lightning bolt, giant flower, star, heart, sunglasses, a sneaker…). Inside that shape, they fill the space with foam stickers. Little ones, big ones, odd ones. It becomes this gorgeous jigsaw of raised edges and tiny gaps. The spacing is totally up to them. I usually go for “around a couple of centimetres apart”, but honestly, anything goes.
Set out fabric paint in a few strong colours. Poster paint works fine if you mix in a good squeeze of white so it covers the fabric nicely. And always slip a piece of cardboard inside the tote or tee first so the paint doesn’t bleed through.
The Making
Load the stamp however you like. Roll the paint on with a brayer for super-even coverage or brush it on with a sponge if you want more texture. You don’t need perfect precision here. Uneven edges make beautiful prints!
For printing, I find it easiest to place the stamp face-down on the fabric so the kids can position it exactly where they want it. Press firmly. If you’re using baking trays, you can do a gentle “step and press” for a full-body transfer. Kids love this! And it gives a beautifully crisp print.
Lift the stamp slowly to reveal the shape..
If you’re using fabric paint, let the design dry fully then iron with baking paper on top to heat-set it. Poster paint dries matte and soft and is perfect for bags that won’t be washed.
Variations
Build a whole pattern by repeating the same stamp at different angles.
Offer metallic or neon paint for a runway moment.
Use alphabet foam stickers to write names, slogans or tiny “fashion labels.” But remember that these will be printed as a mirror image, so you’ll need to reverse them.
Materials
• Cotton tote bags or t-shirts
• Baking trays or thick cardboard
• Foam stickers
• Fabric paint or poster paint + white
• Brayers, sponge brushes, wide brushes
• Scrap cardboard for inside the bag
• Pencils for sketching outlines
• Baking paper and iron for heat setting (optional)
Back to Top
Add this to your favourites
Add this to your favourites
Thoughts?
Would love to hear if youv'e tried this or have any ideas on how to make it even better!
