Cyanotype Sun Prints
Art Made with the Sun
The Set Up
Cyanotype feels a bit like a magic trick the first time around! It's the most incredible mix of science and art.
We use the Jacquard cyanotype sensitiser kits and I can highly recommend. Once the bottles are prepped, you only ever need small amounts, which makes it easy to bring this process back again and again (one kit has carried us through multiple workshops over months).
You’ll also need thick watercolour paper (200gsm+ works beautifully), a foam brush, a small bowl, and something clear and flat to hold objects in place. Perspex, glass, or a clear clipboard all work well.
If you’re using a sensitiser kit, fill bottles A and B with water and give them a really good shake. Do this at least a day before (24 hours is ideal), then just leave them to settle.
On the day, pour equal amounts from each bottle into a small plastic bowl. You don’t need much. As a rough guide, about 75ml from bottle A and 75ml from bottle B is enough for roughly 20 A3 prints, but this process is very forgiving, so don’t stress if your amounts aren’t exact.
Before you start painting on the mixture, decide on the shape you want to work within. We often make a simple cardboard stencil (ovals look especially gorgeous on A3 sheets) and lightly trace the shape in pencil.
Use a foam brush to paint the mixture onto your paper, staying within your pencilled shape if you’ve drawn one. We usually do this in our storage room at Smudge, but any space away from direct sunlight is fine. Once painted, leave the paper to dry for around an hour.
If you want to try the process in an even simpler way, ready-made sun printing paper is a great option. Lots of gorgeous small businesses make them (like Tribe in Castlemaine, Victoria). Their sun printing paper is beautiful and makes a lovely gift for a young artist too! Or the Jacquard kits are easy to source globally.


The Making
If you have the time, starting with a short nature walk with kids is always special! Leaves and grasses and feathers and fallen petals etc. It's interesting to include a mix of delicate materials where light can sneak through, alongside more solid shapes that block it completely.
Or you can pre-prepare a nature collection and simply invite artists to choose. Feathers are especially effective, and other flat materials work well too. We tend to avoid anything bulky so the clear sheet can press everything down evenly.
Then comes the arranging! Place your design directly on top of the cyanotype mix (as long as the paper stays out of direct sunlight, nothing will start developing).
When everyone’s ready, place the perspex or glass over the top and move into the sunshine. Even cloudy days work! In a hot Melbourne summer, around 12 minutes is usually enough, but timing will vary depending on UV levels.
After exposure, rinse the prints in cold water. Large tubs work beautifully for this and we often use the same IKEA tubs we use for sensory play. Try a gentle spray from a hose (with a shower-style attachment).
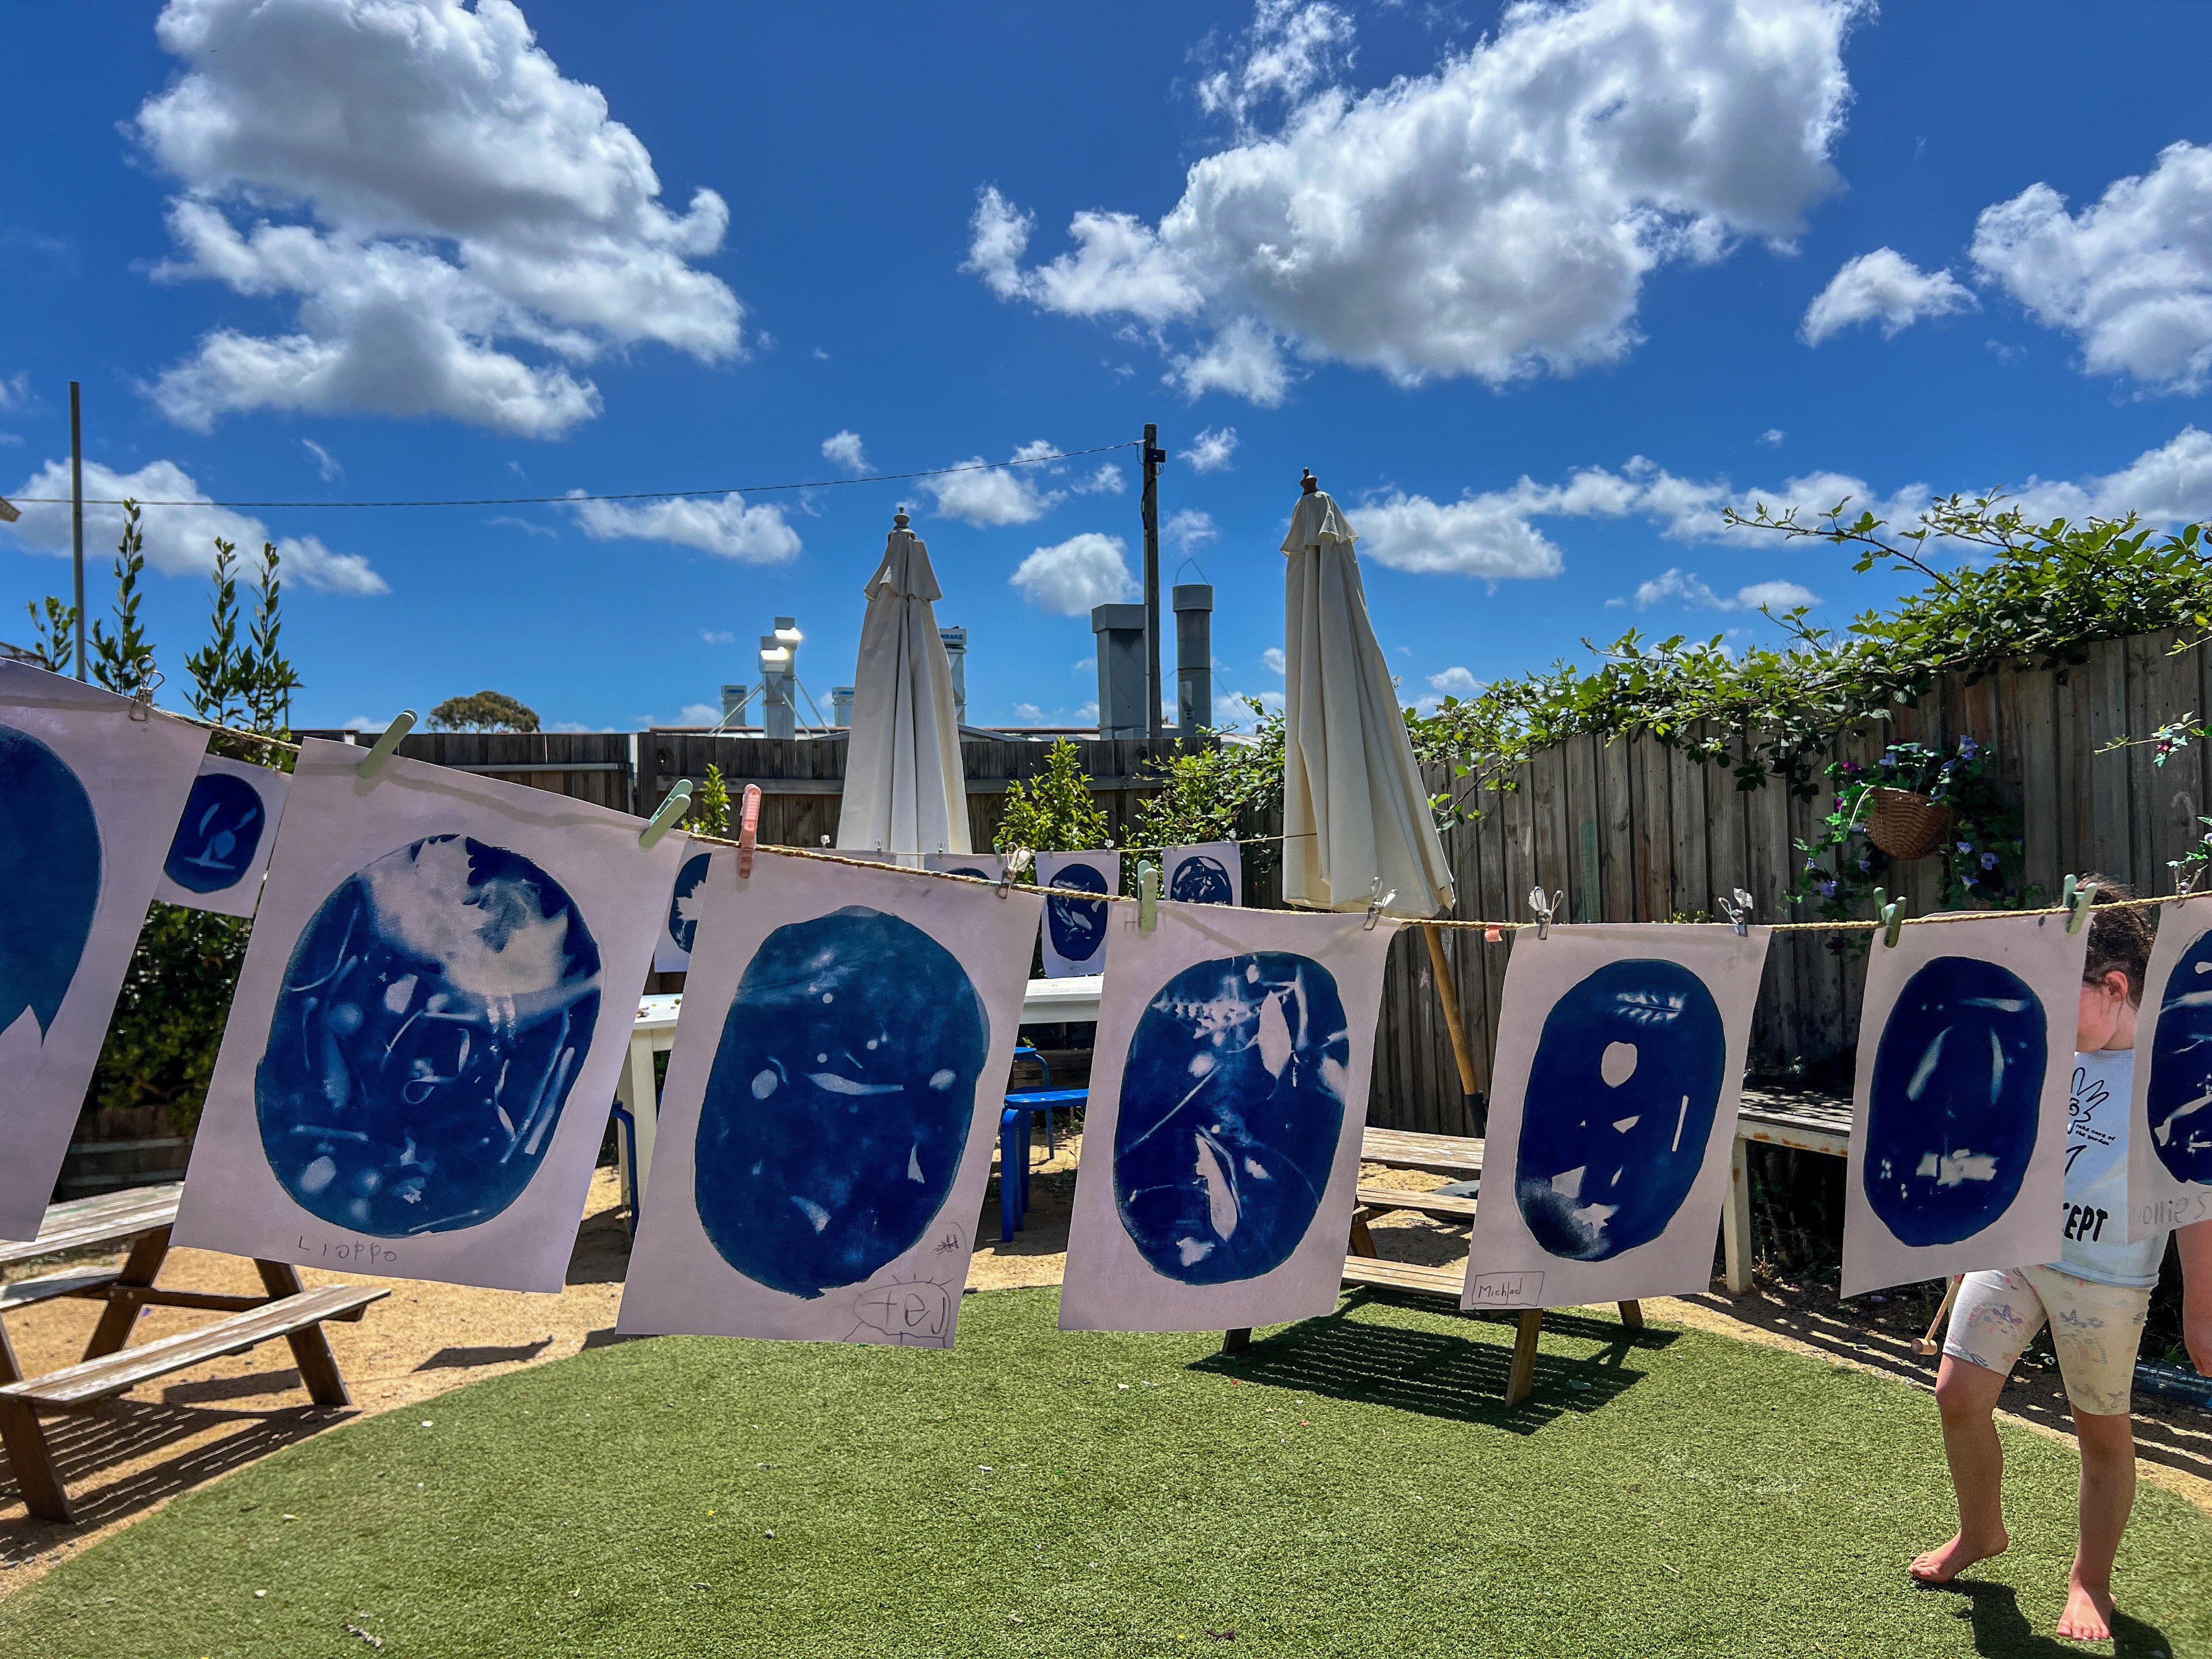
Hang the prints to dry and watch the blue deepen as the paper dries.


Materials
Cyanotype sensitiser kit or ready-made sun printing paper
Thick watercolour paper (200gsm or heavier)
Foam brushes
Small plastic bowls
Water (for bottles A and B)
Cardboard stencils (optional)
Natural materials (leaves, grasses, feathers, petals etc)
Perspex, glass, or clear clipboard
Large tubs of cold water
Drying rack or washing line


Back to Top
Cyanotype Sun Prints
Art Made with the Sun
Bookmark
Print Making
The Set Up
Cyanotype feels a bit like a magic trick the first time around! It's the most incredible mix of science and art.
We use the Jacquard cyanotype sensitiser kits and I can highly recommend. Once the bottles are prepped, you only ever need small amounts, which makes it easy to bring this process back again and again (one kit has carried us through multiple workshops over months).
You’ll also need thick watercolour paper (200gsm+ works beautifully), a foam brush, a small bowl, and something clear and flat to hold objects in place. Perspex, glass, or a clear clipboard all work well.
If you’re using a sensitiser kit, fill bottles A and B with water and give them a really good shake. Do this at least a day before (24 hours is ideal), then just leave them to settle.
On the day, pour equal amounts from each bottle into a small plastic bowl. You don’t need much. As a rough guide, about 75ml from bottle A and 75ml from bottle B is enough for roughly 20 A3 prints, but this process is very forgiving, so don’t stress if your amounts aren’t exact.
Before you start painting on the mixture, decide on the shape you want to work within. We often make a simple cardboard stencil (ovals look especially gorgeous on A3 sheets) and lightly trace the shape in pencil.
Use a foam brush to paint the mixture onto your paper, staying within your pencilled shape if you’ve drawn one. We usually do this in our storage room at Smudge, but any space away from direct sunlight is fine. Once painted, leave the paper to dry for around an hour.
If you want to try the process in an even simpler way, ready-made sun printing paper is a great option. Lots of gorgeous small businesses make them (like Tribe in Castlemaine, Victoria). Their sun printing paper is beautiful and makes a lovely gift for a young artist too! Or the Jacquard kits are easy to source globally.
The Making
If you have the time, starting with a short nature walk with kids is always special! Leaves and grasses and feathers and fallen petals etc. It's interesting to include a mix of delicate materials where light can sneak through, alongside more solid shapes that block it completely.
Or you can pre-prepare a nature collection and simply invite artists to choose. Feathers are especially effective, and other flat materials work well too. We tend to avoid anything bulky so the clear sheet can press everything down evenly.
Then comes the arranging! Place your design directly on top of the cyanotype mix (as long as the paper stays out of direct sunlight, nothing will start developing).
When everyone’s ready, place the perspex or glass over the top and move into the sunshine. Even cloudy days work! In a hot Melbourne summer, around 12 minutes is usually enough, but timing will vary depending on UV levels.
After exposure, rinse the prints in cold water. Large tubs work beautifully for this and we often use the same IKEA tubs we use for sensory play. Try a gentle spray from a hose (with a shower-style attachment).
Hang the prints to dry and watch the blue deepen as the paper dries.
Materials
Cyanotype sensitiser kit or ready-made sun printing paper
Thick watercolour paper (200gsm or heavier)
Foam brushes
Small plastic bowls
Water (for bottles A and B)
Cardboard stencils (optional)
Natural materials (leaves, grasses, feathers, petals etc)
Perspex, glass, or clear clipboard
Large tubs of cold water
Drying rack or washing line
Back to Top
Add this to your favourites
Add this to your favourites
Thoughts?
Would love to hear if youv'e tried this or have any ideas on how to make it even better!
