Painted Eggs
The prettiest dozen you've ever seen
The Set Up
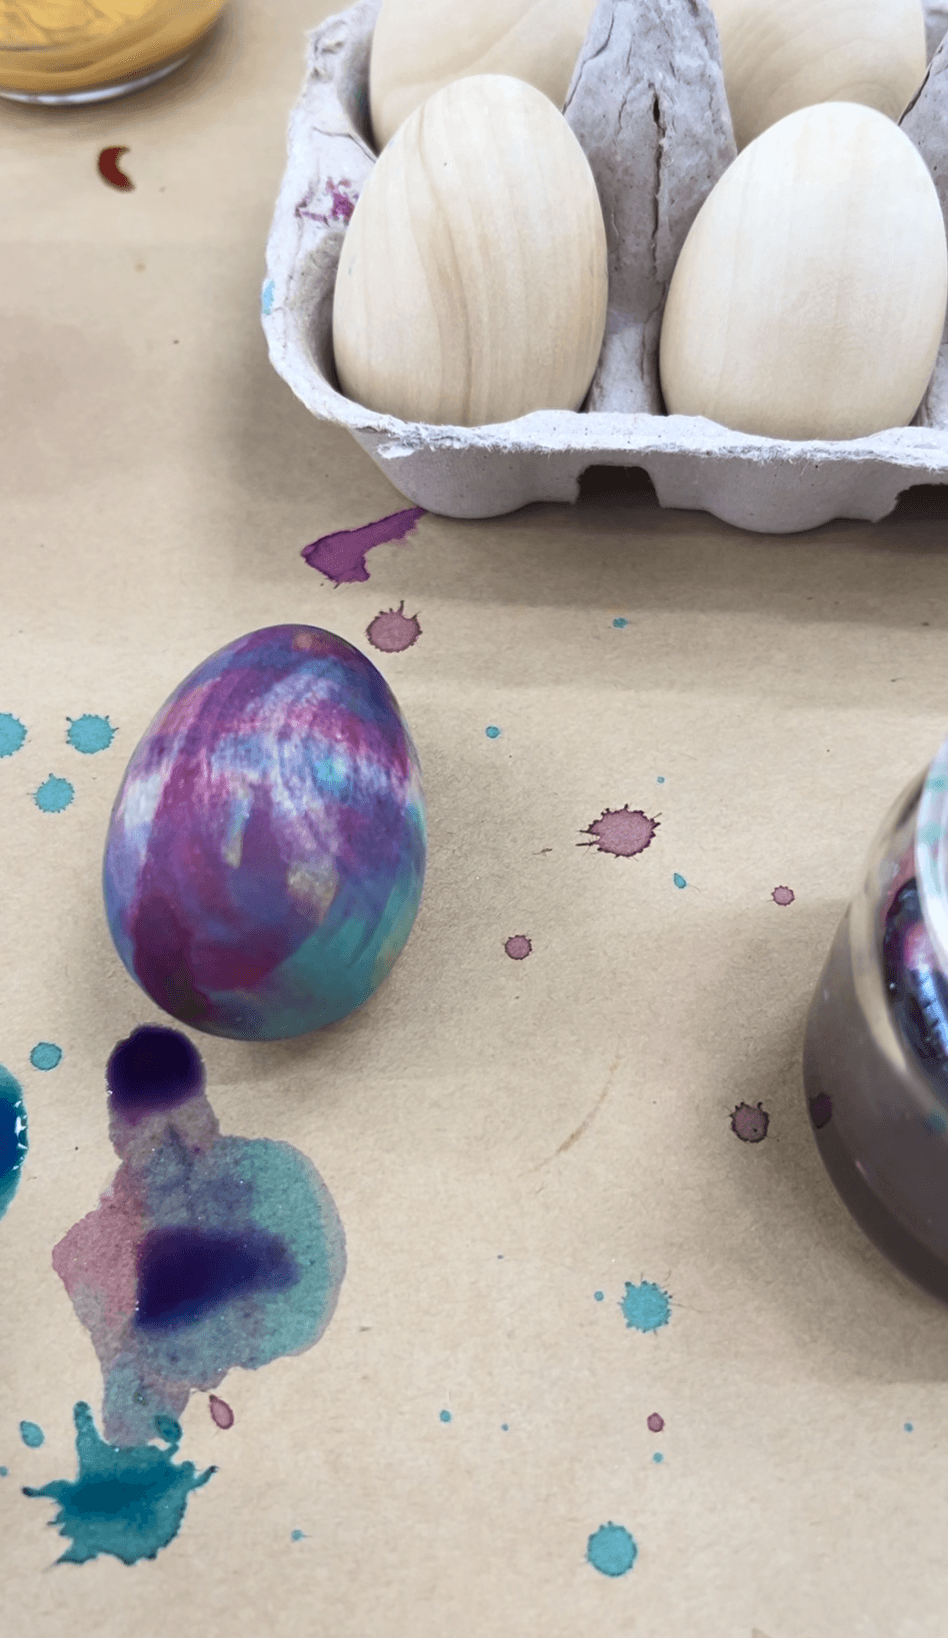
Source wooden eggs from Amazon or a craft supplier. Try to get ones close to the size of real chicken eggs (the tiny ones floating around at the moment are a bit fiddly, especially for smaller hands). You don't need to sand or prime them. Raw wood absorbs the watercolour beautifully and that's such a special part of the process!
Set each egg into an egg carton for painting. The carton keeps them steady and the whole setup looks like the most gorgeous invitation to jump in and create.
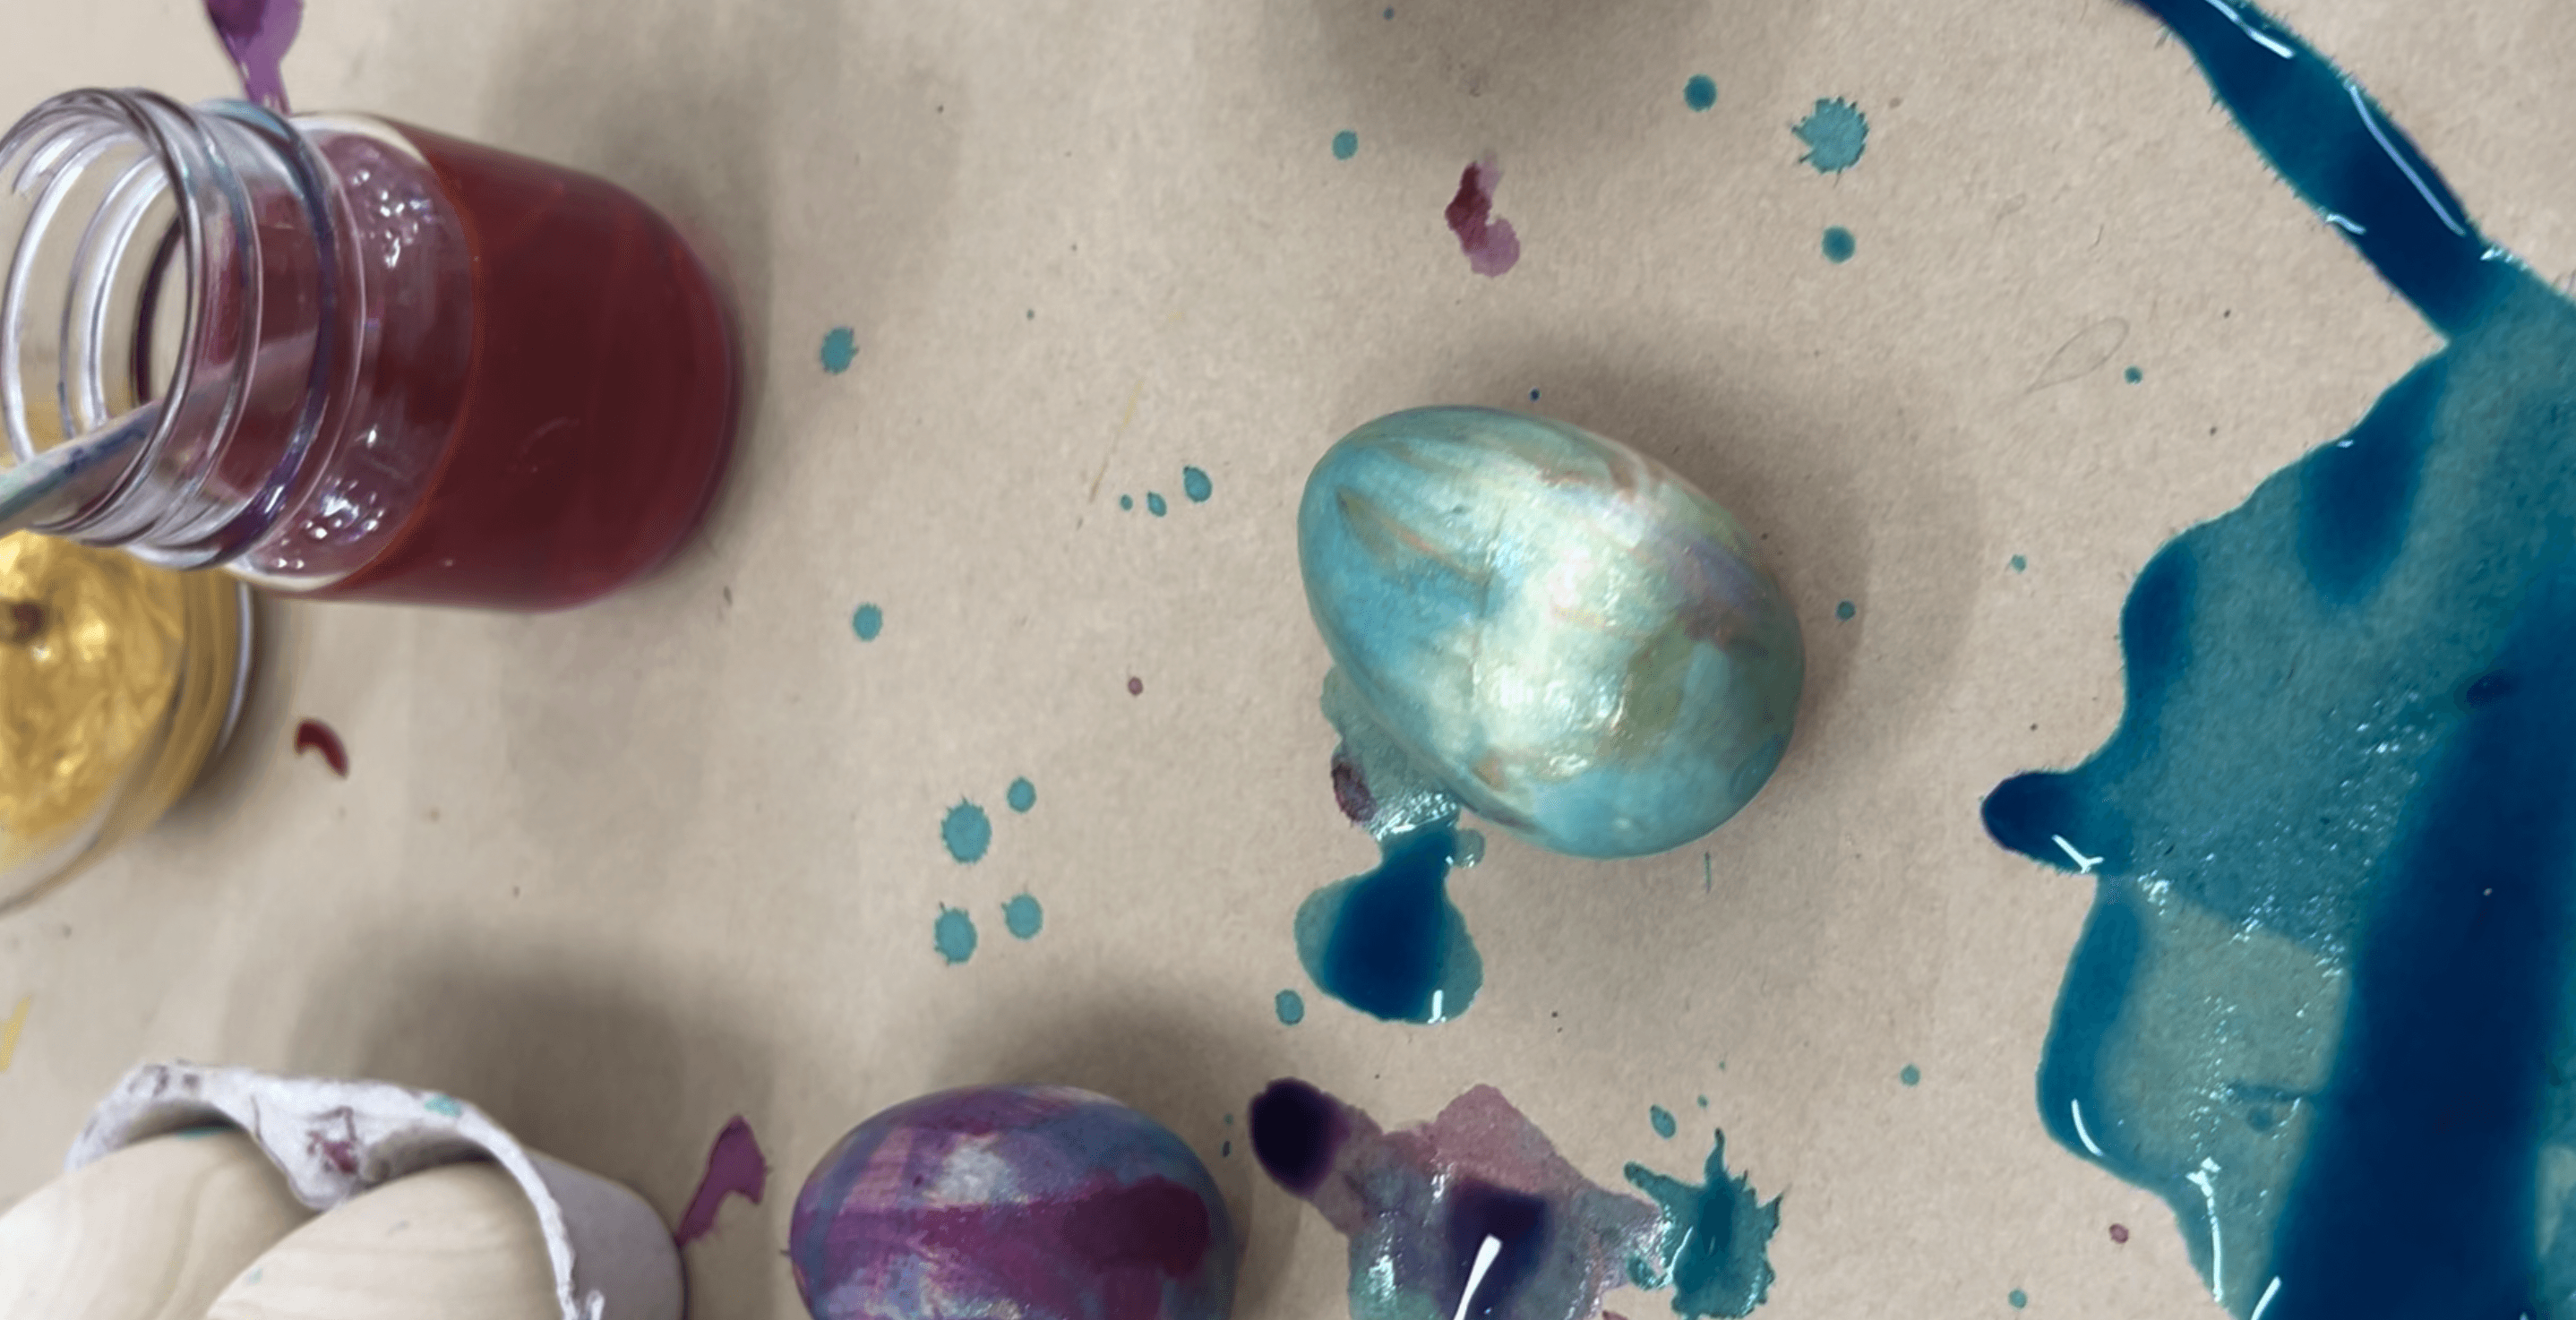
Lay out liquid watercolours in jars with pipettes, cotton tips, and fine brushes. If you haven't used liquid watercolours before, they're concentrated pigment, but not the same as food colouring (which I avoid as it stains everything). You can also use watercolour palettes and water.
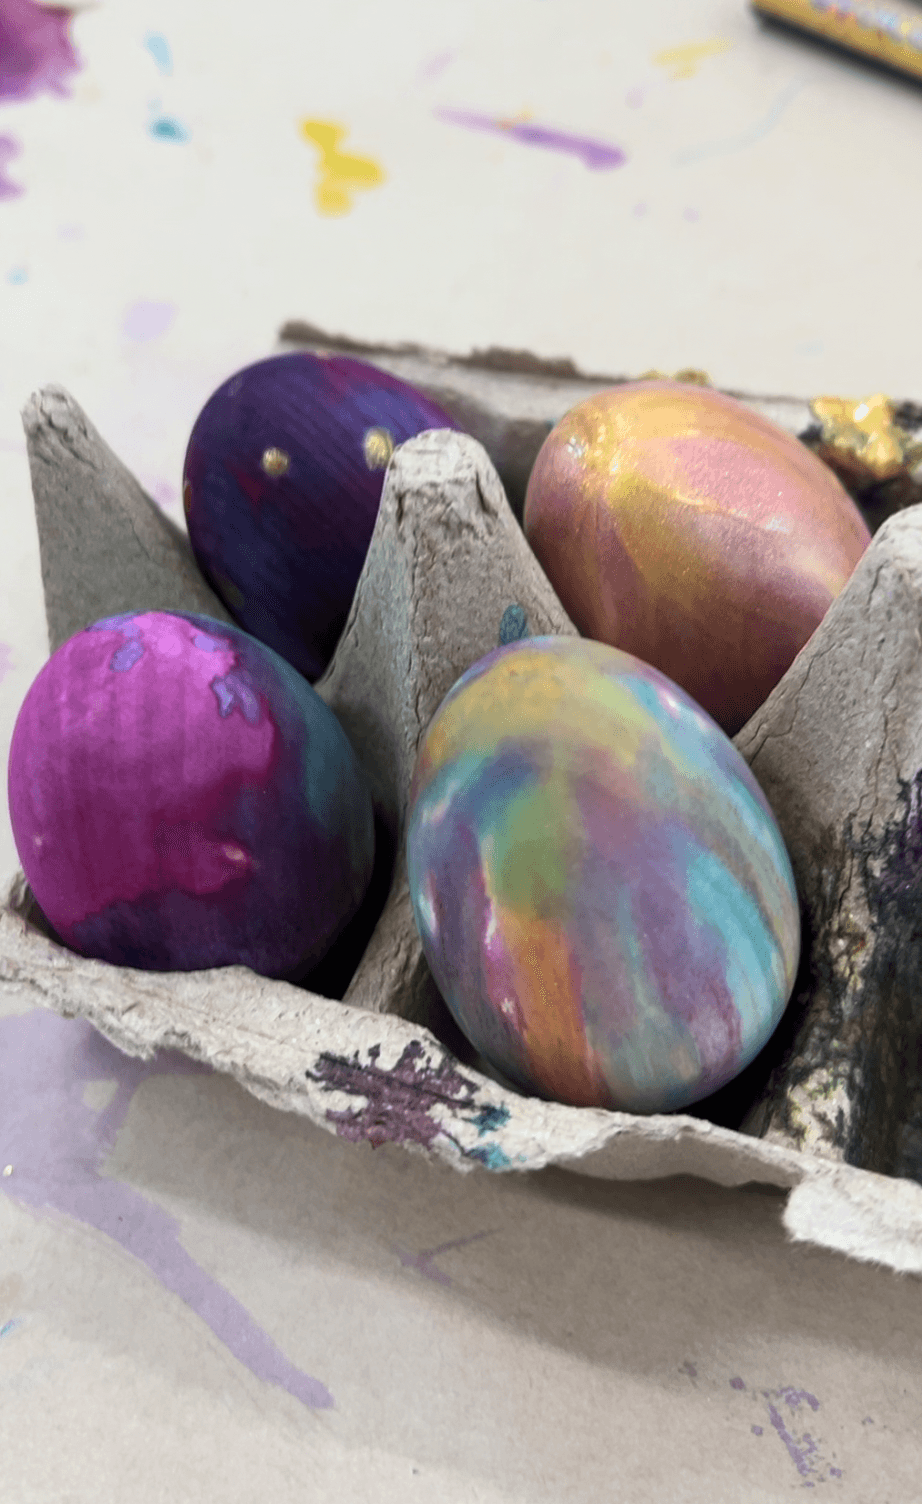
We also offer metallic gold and silver poster paint because the shimmer against the watercolour is stunning. Have a second empty carton ready for drying.


The Making
Liquid watercolour on wood behaves really differently to paper and that's what makes it interesting. The colour pools and bleeds and layers in ways you can't quite predict. It also dries faster than you'd expect, maybe ten minutes, so artists can go back in with a second layer or add metallics on top without a long wait.
Seal with a coat of Mod Podge (or any art sealant) once completely dry if you want them to last.

Variations
Try shaving foam marbling! Spread shaving foam flat on a tray, drop liquid watercolour across the surface, swirl gently with a skewer, then roll the wooden egg through. The marbled effect is gorgeous and completely unique every time. Fair warning: this gets messy quickly. Worth it!
Materials
Wooden eggs, chicken egg sized (no sanding or priming needed)
Egg cartons for holding during painting and drying
Liquid watercolours / watercolour palettes
Pipettes, cotton tips, fine brushes
Metallic gold and silver poster paint
Mod Podge for sealing, matte or gloss (optional)
Shaving foam, flat tray, and skewer (for marbling variation)
Drop cloth (marbling gets messy)
Back to Top
Painted Eggs
The prettiest dozen you've ever seen
Bookmark
Painting & Drawing
The Set Up
Source wooden eggs from Amazon or a craft supplier. Try to get ones close to the size of real chicken eggs (the tiny ones floating around at the moment are a bit fiddly, especially for smaller hands). You don't need to sand or prime them. Raw wood absorbs the watercolour beautifully and that's such a special part of the process!
Set each egg into an egg carton for painting. The carton keeps them steady and the whole setup looks like the most gorgeous invitation to jump in and create.
Lay out liquid watercolours in jars with pipettes, cotton tips, and fine brushes. If you haven't used liquid watercolours before, they're concentrated pigment, but not the same as food colouring (which I avoid as it stains everything). You can also use watercolour palettes and water.
We also offer metallic gold and silver poster paint because the shimmer against the watercolour is stunning. Have a second empty carton ready for drying.
The Making
Liquid watercolour on wood behaves really differently to paper and that's what makes it interesting. The colour pools and bleeds and layers in ways you can't quite predict. It also dries faster than you'd expect, maybe ten minutes, so artists can go back in with a second layer or add metallics on top without a long wait.
Seal with a coat of Mod Podge (or any art sealant) once completely dry if you want them to last.
Variations
Try shaving foam marbling! Spread shaving foam flat on a tray, drop liquid watercolour across the surface, swirl gently with a skewer, then roll the wooden egg through. The marbled effect is gorgeous and completely unique every time. Fair warning: this gets messy quickly. Worth it!
Materials
Wooden eggs, chicken egg sized (no sanding or priming needed)
Egg cartons for holding during painting and drying
Liquid watercolours / watercolour palettes
Pipettes, cotton tips, fine brushes
Metallic gold and silver poster paint
Mod Podge for sealing, matte or gloss (optional)
Shaving foam, flat tray, and skewer (for marbling variation)
Drop cloth (marbling gets messy)
Back to Top
Add this to your favourites
Add this to your favourites
Thoughts?
Would love to hear if youv'e tried this or have any ideas on how to make it even better!
