Painting with Wool
Bold colours and textured strands

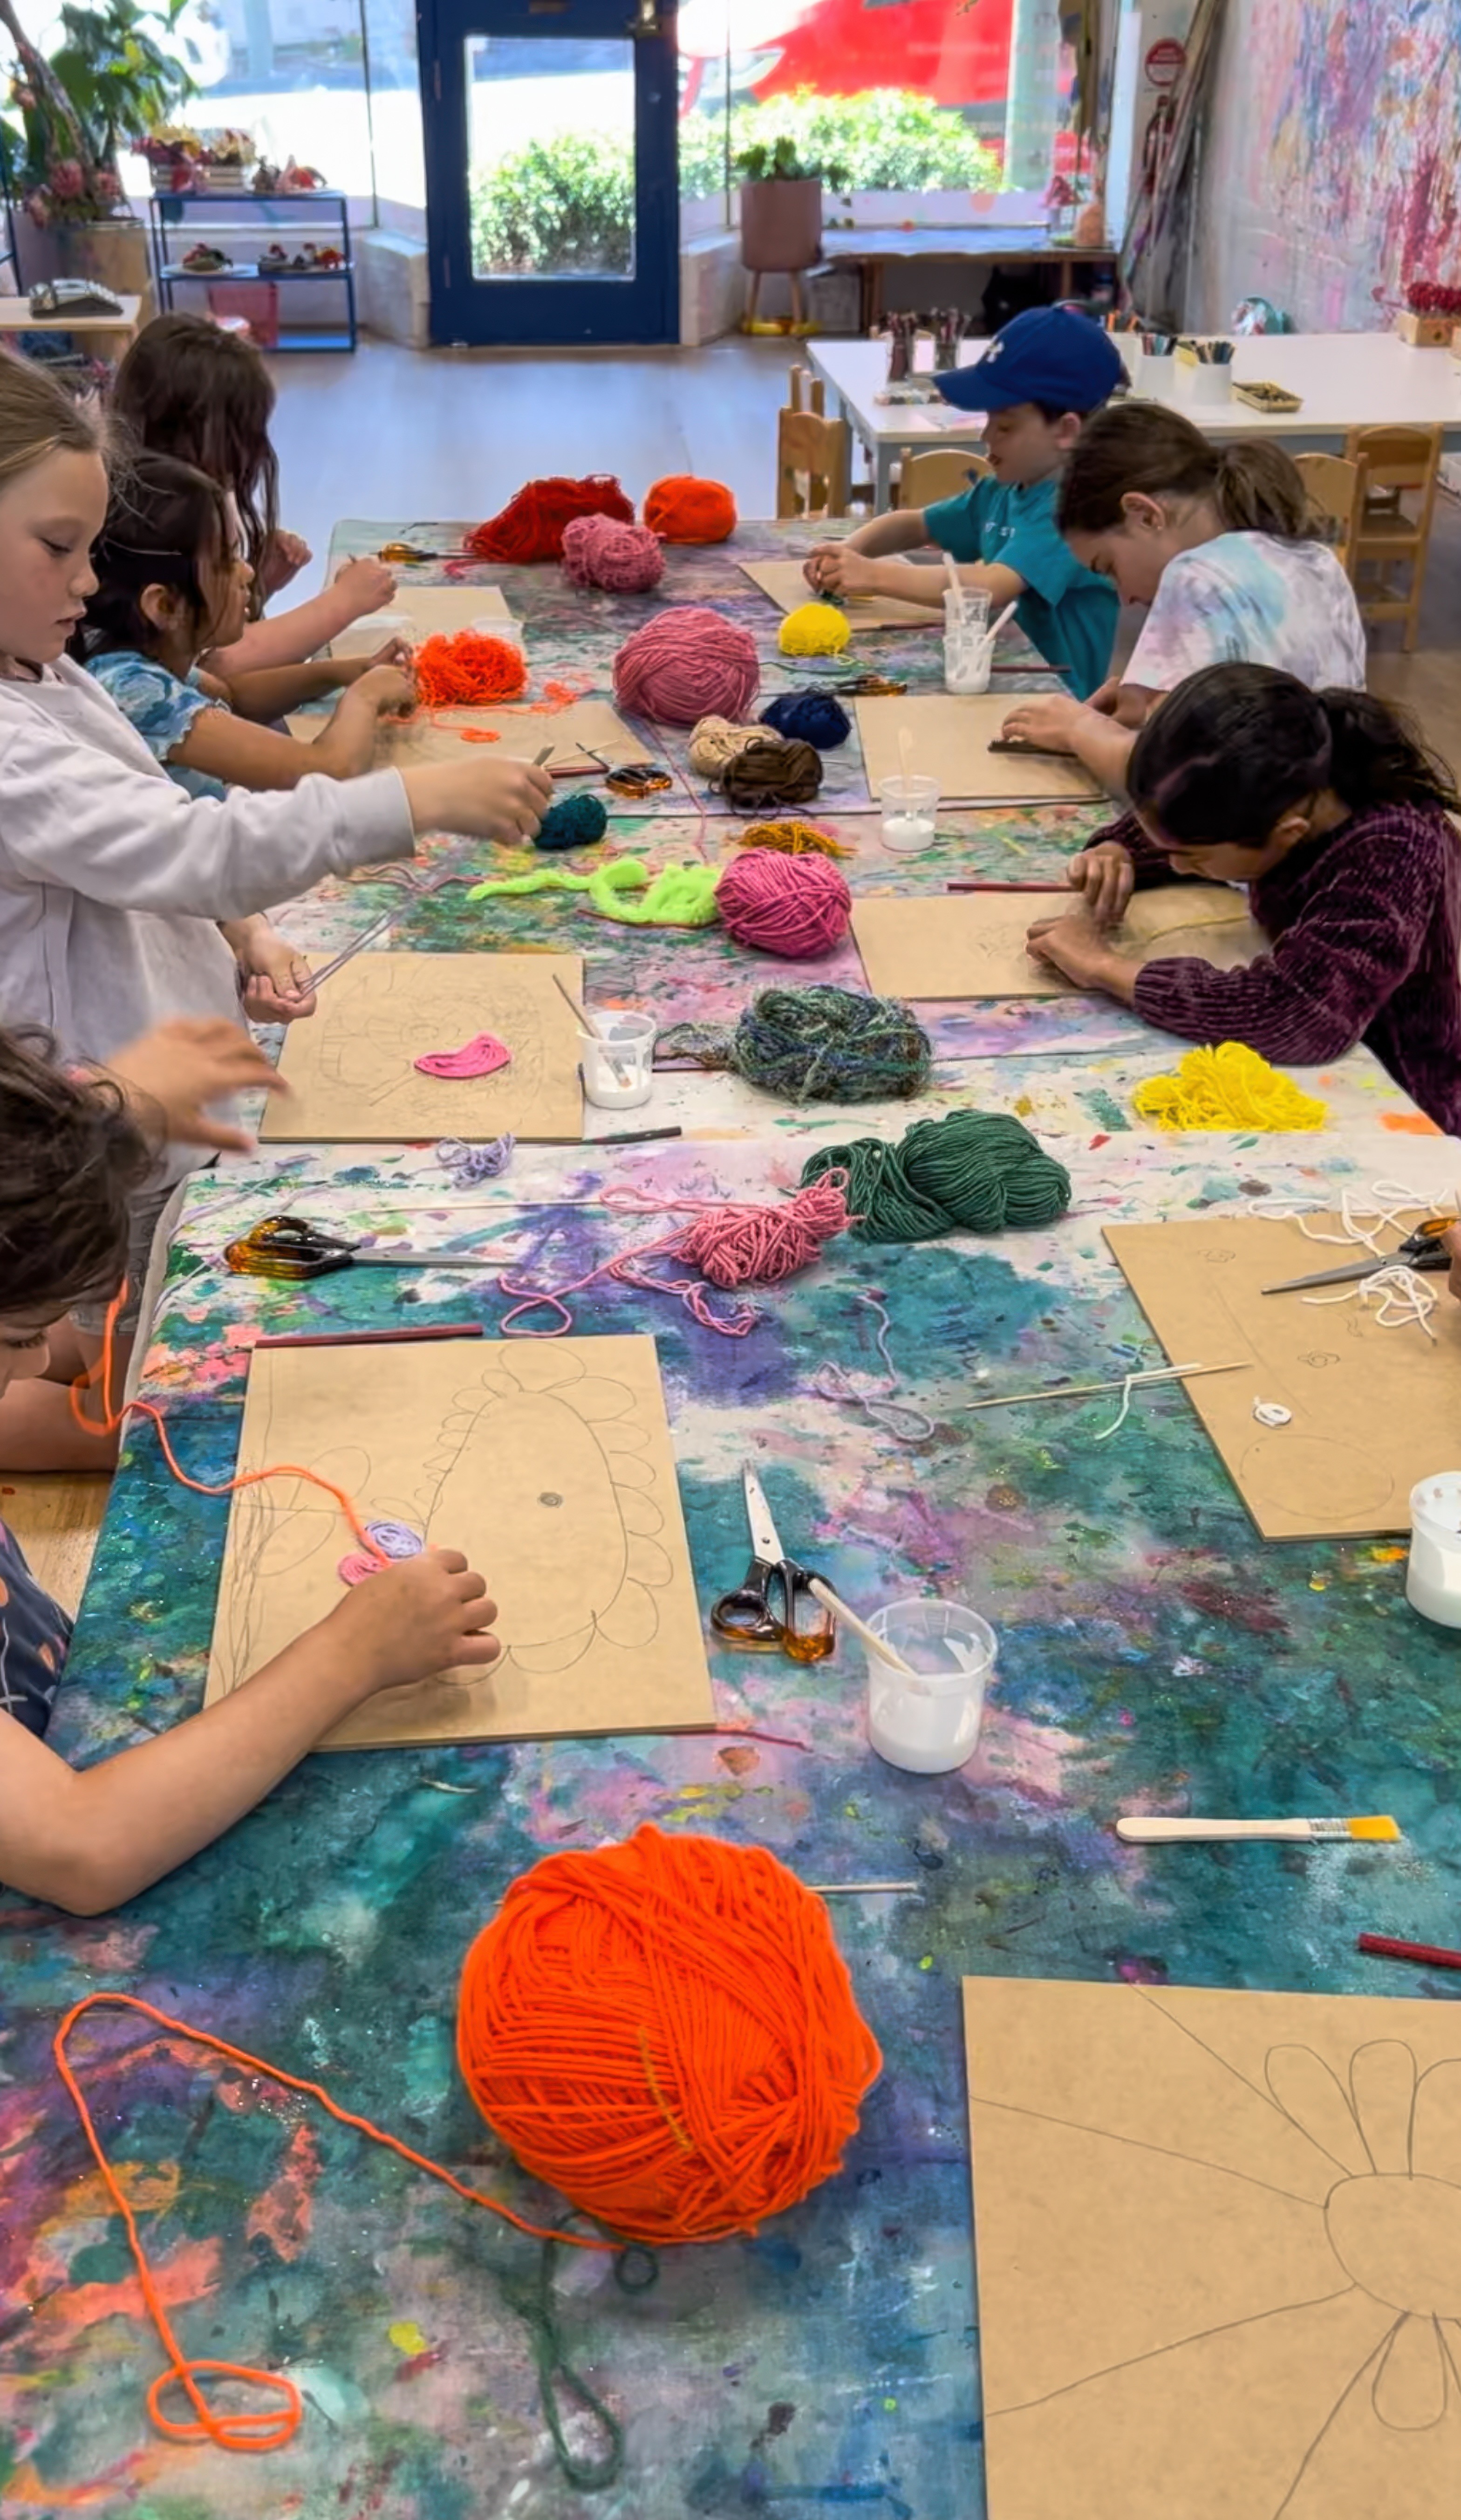
The Set Up
Lay boards on the table first. I love wood for the feel in the hand, though thick card is brilliant when you need lightness! Curate bowls of PVA with fine brushes can sit where hands can easily reach, and trays of cut wool strands in all the colours.
Now's the perfect time to share some images of yarn paintings by Huichol artists in Mexico, also known as Wixárika. You'll see colourful yarn and beads pressed into wood with symbols that hold story and place.
For the artists in your world, invite personal symbols rather than copying sacred designs. Maybe a coastline you know or a plant from your street or a shape that belongs to your family?
Also highly recommend have a damp cloth waiting for the gluey fingers to come.
The Making
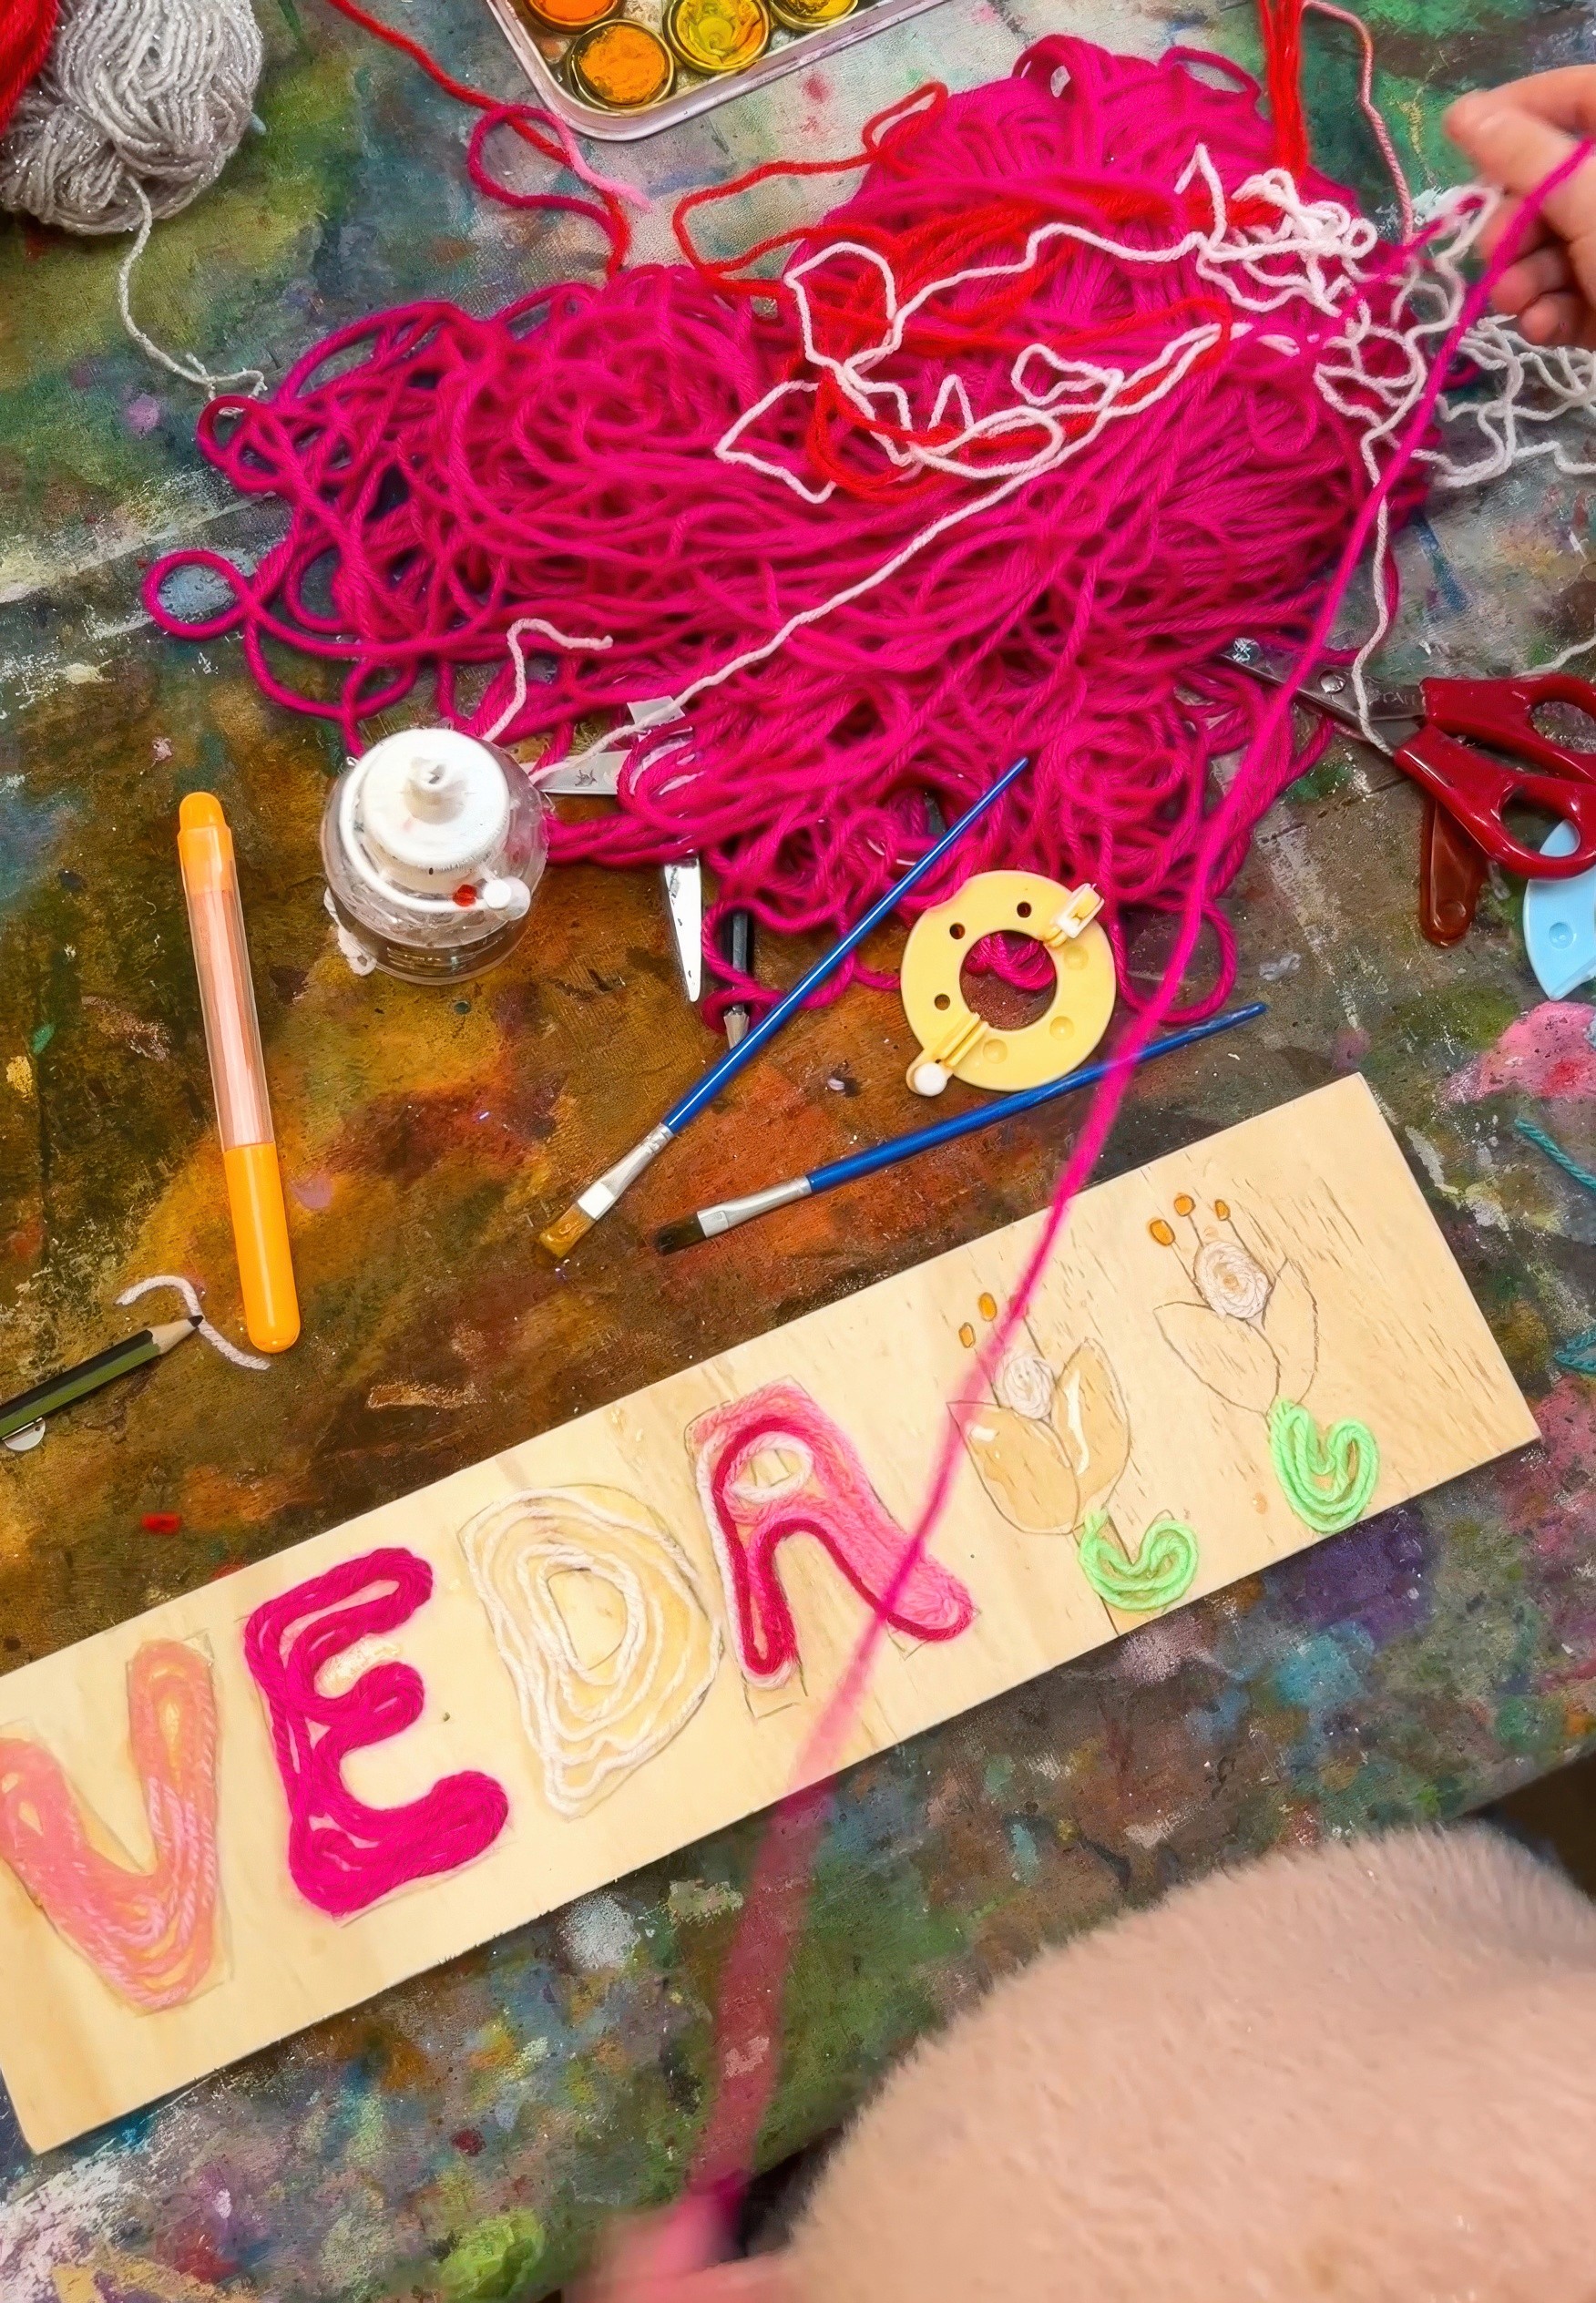
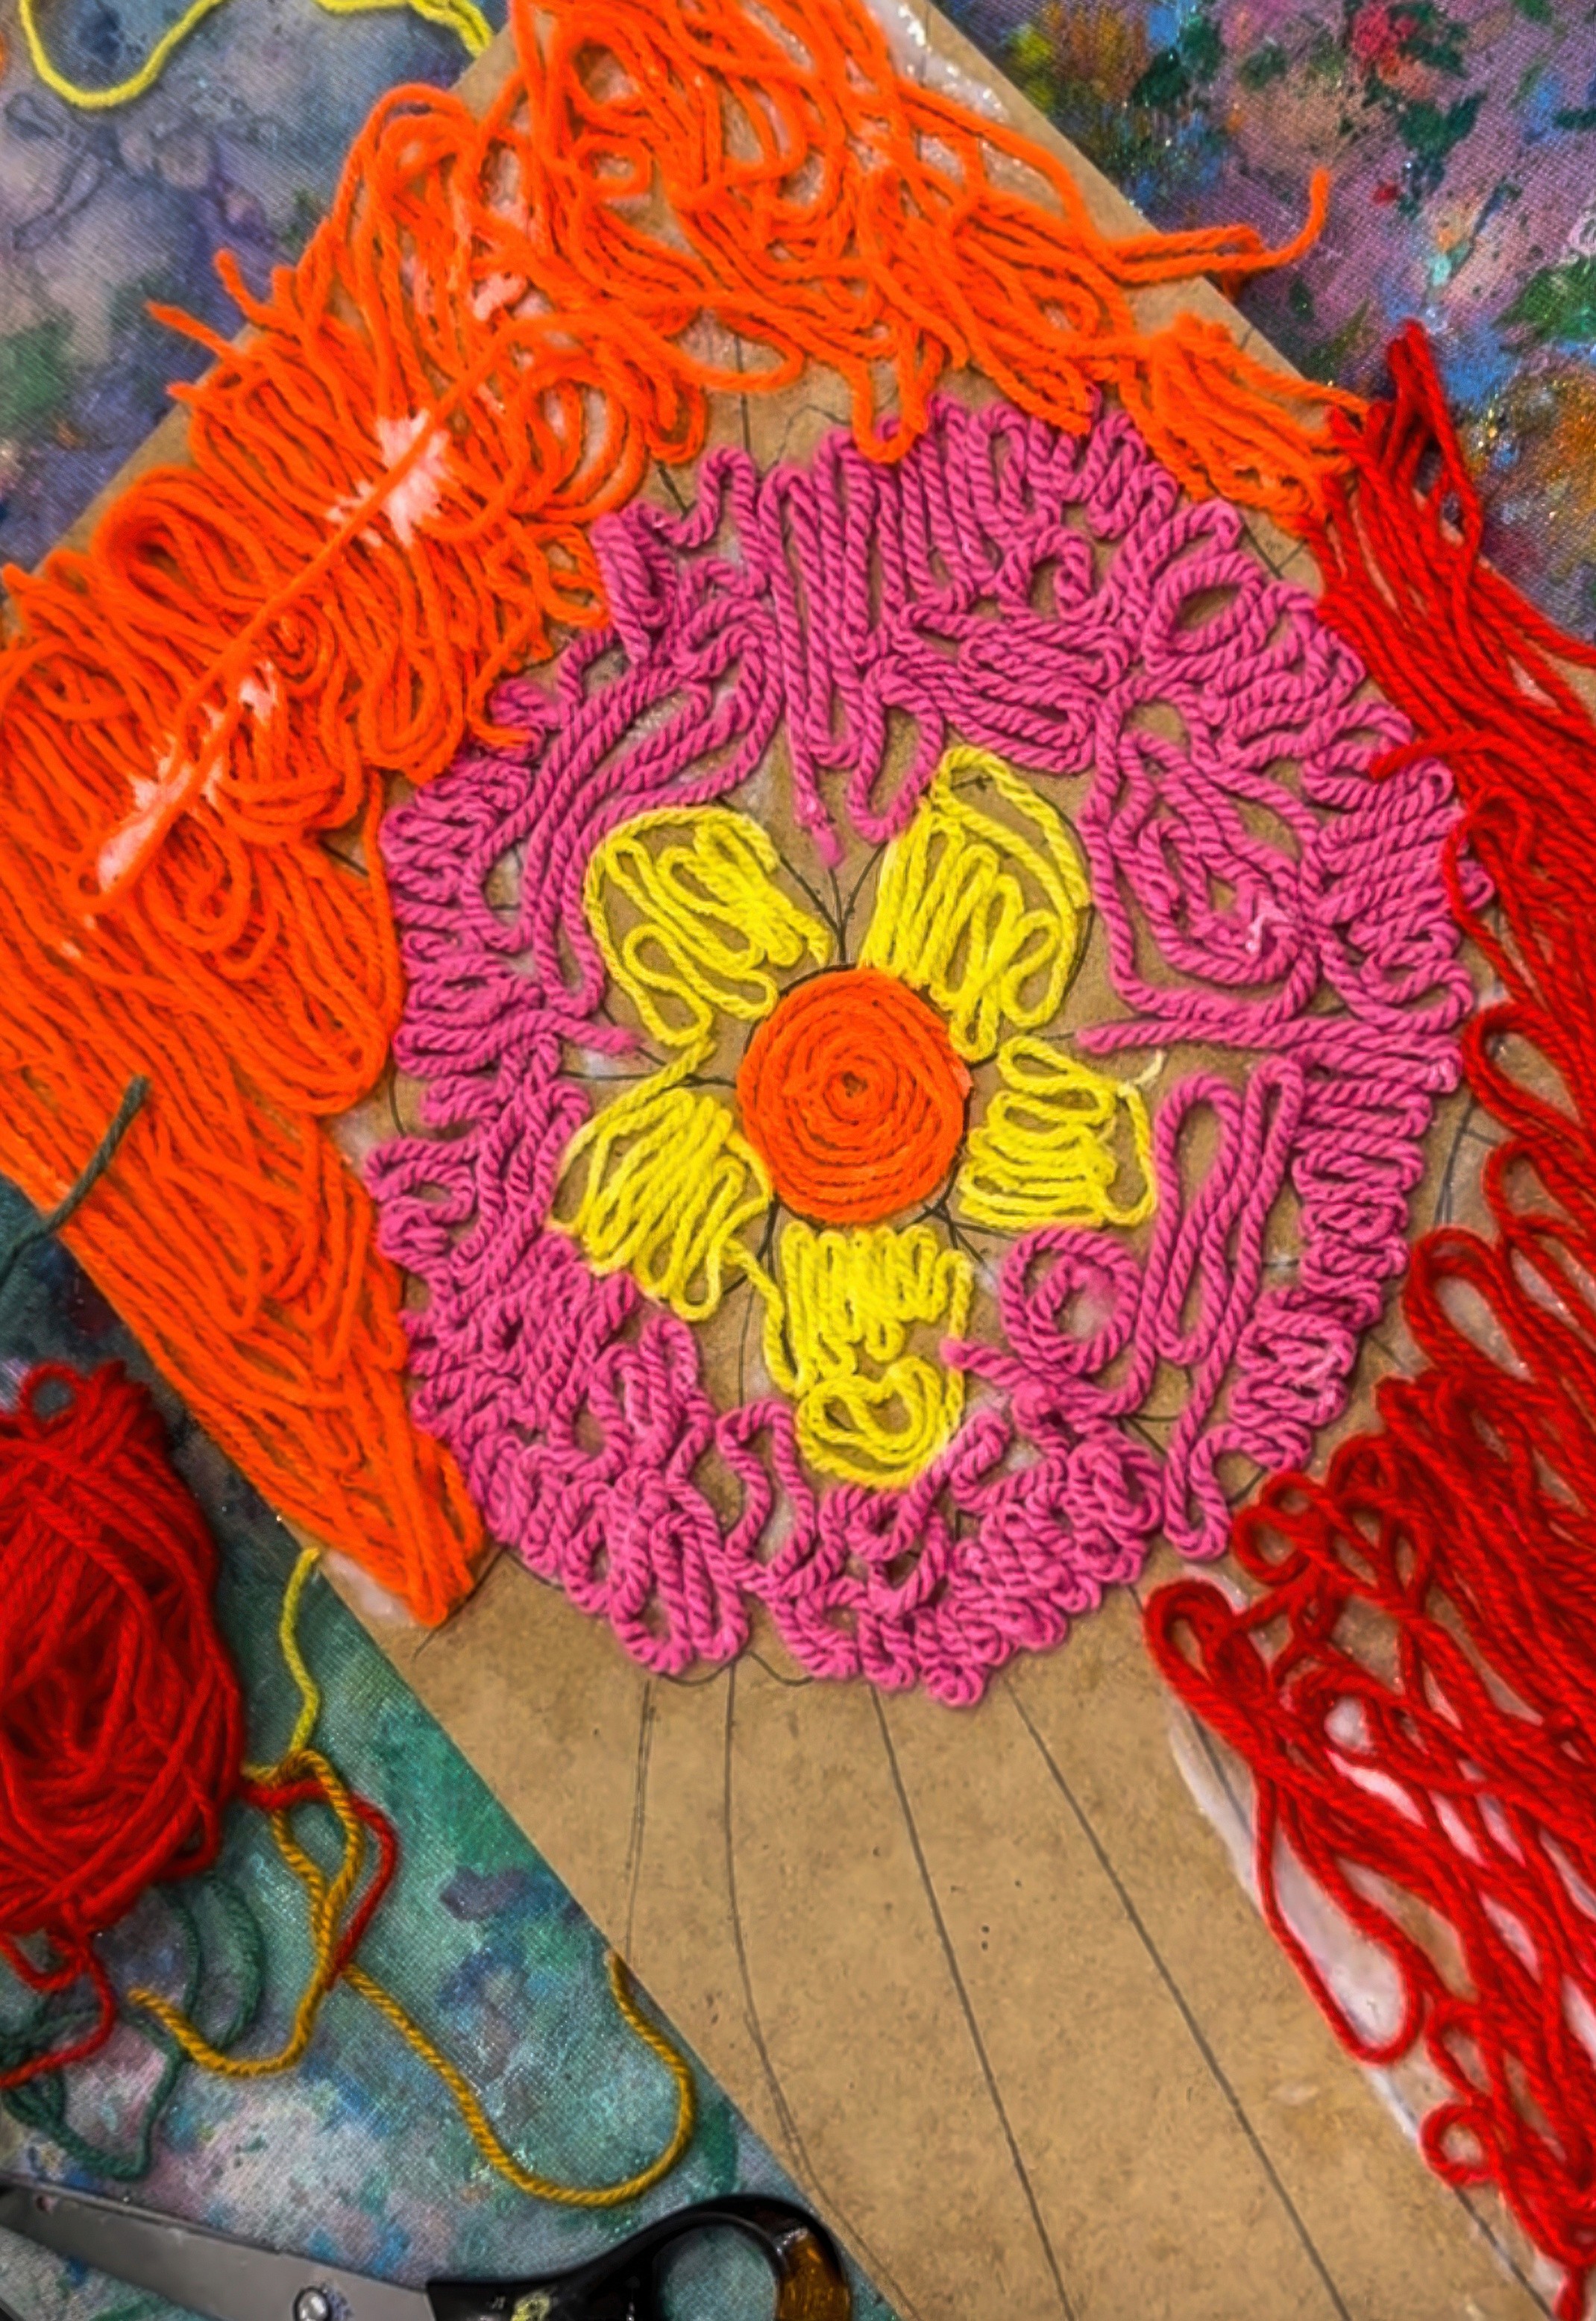
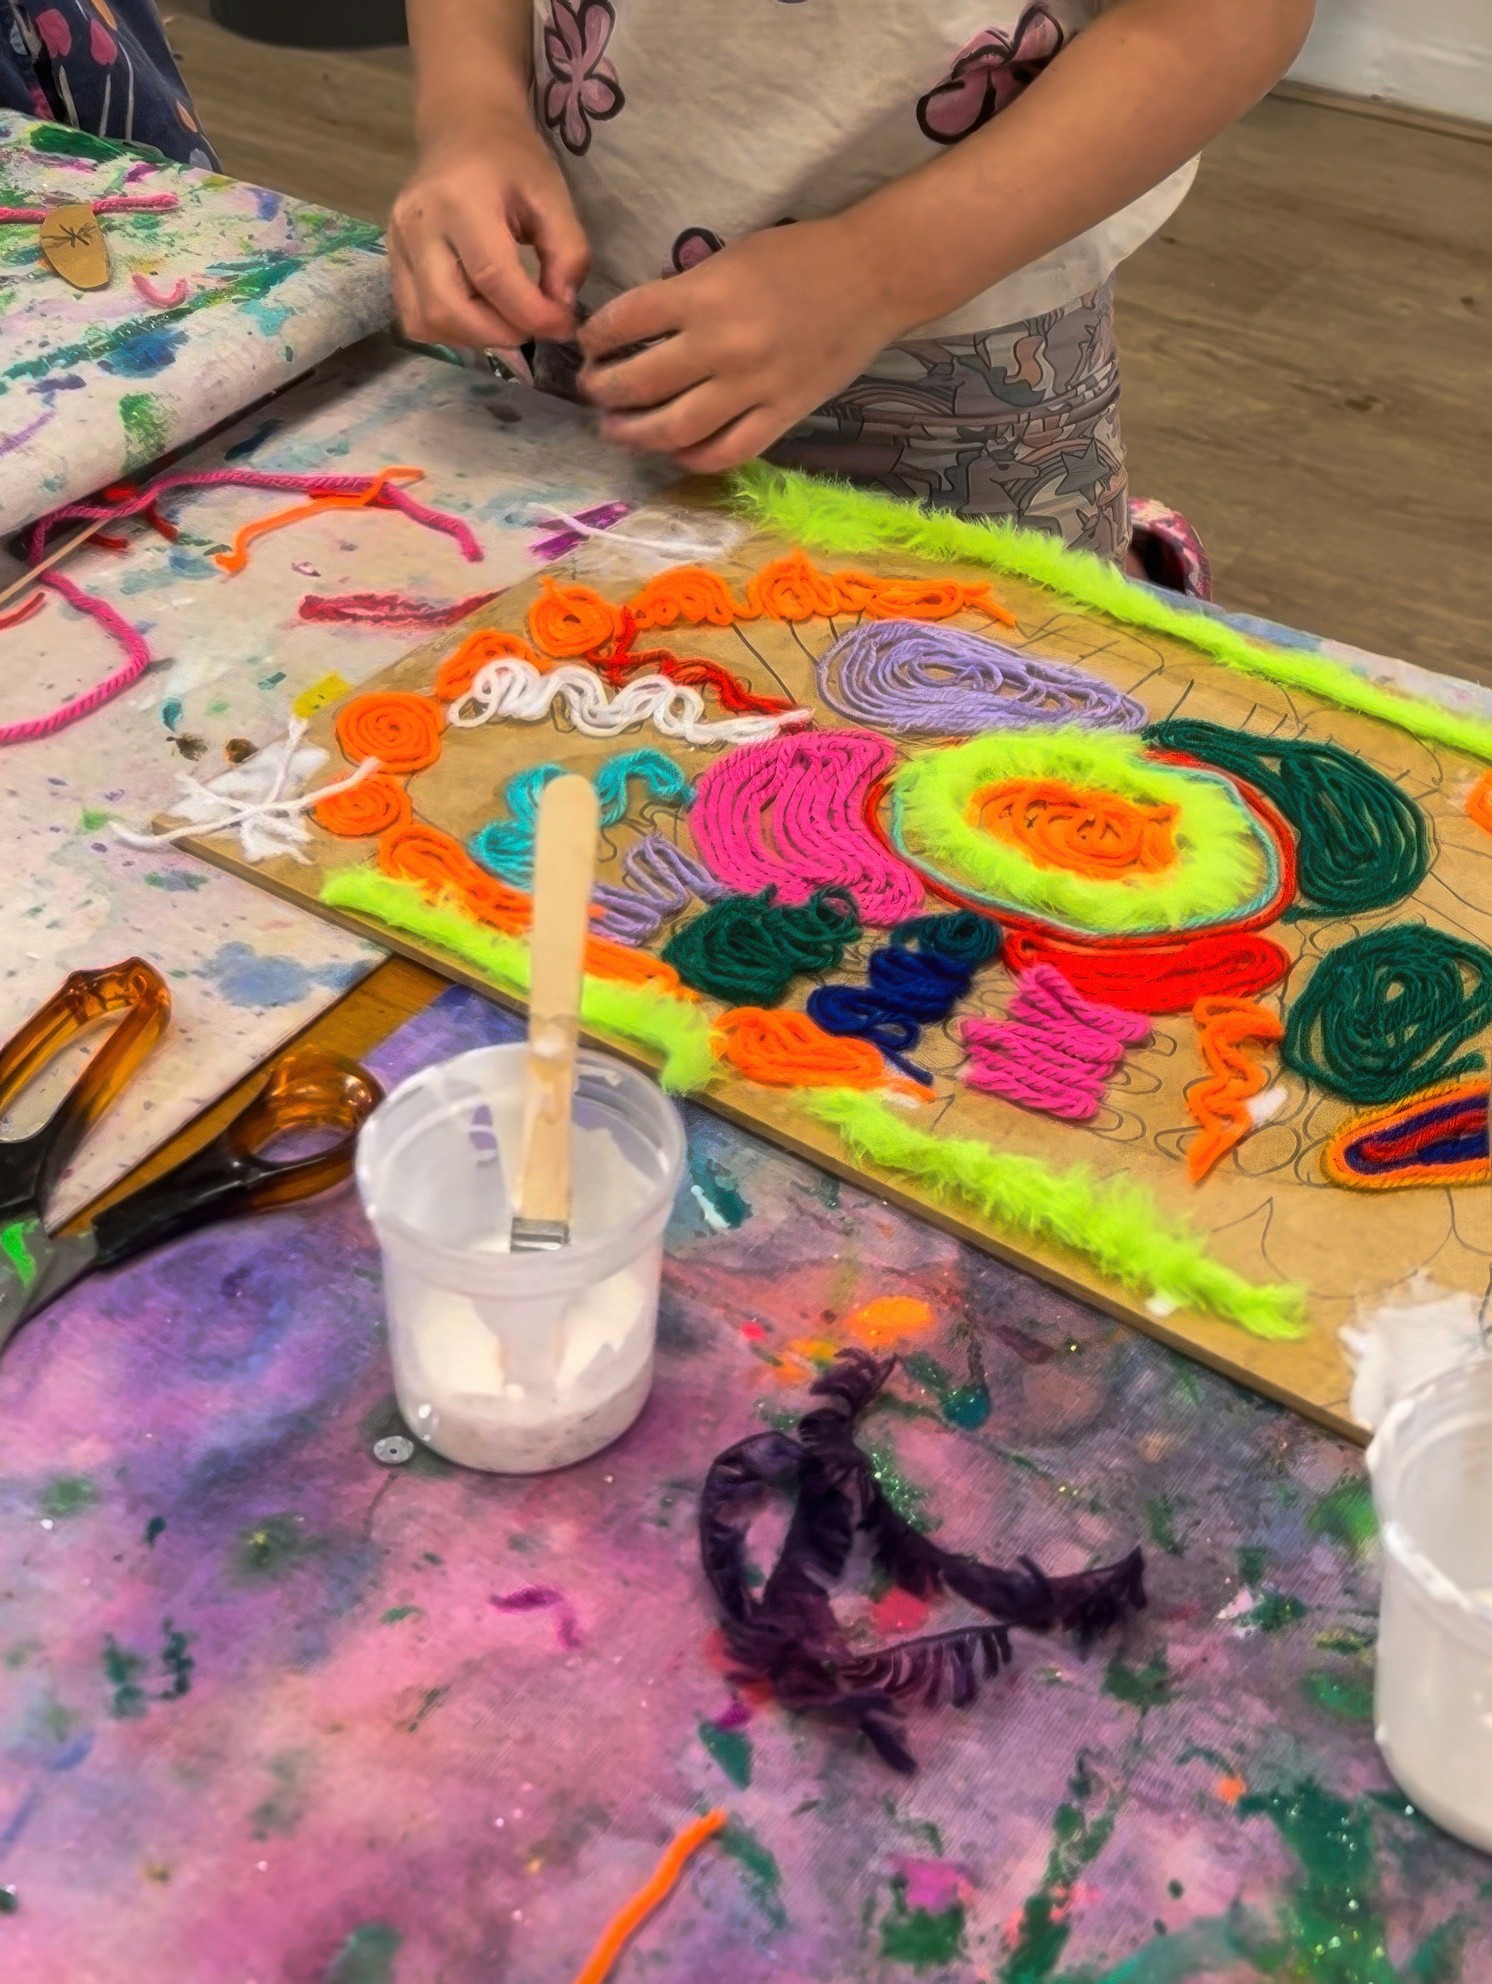
Begin with a quick pencil sketch and keep it bold rather than intricate so the wool can sit cleanly. Sometimes a palette decides the piece before the drawing does, so choose your colours and see what they suggest. Kids can decide whether they want to start right in the middle and let the picture grow outward, or start with the edges and a slow creep in. Both work!
Brush glue a little ahead of the line, then press the strand into place with the tip of a brush or a stick and keep the curve moving (short strands are friendlier for corners and tight turns).
Sticky fingers? Good! That means it’s working!
At Smudge we like to test colour pairings as we go and notice what happens when a calm shade sits beside a loud one. Keep checking the flow by tilting the board and stepping back for a second look.
Variations
One word, big and bold, filled with slow lines (JOY is a great start)
Monochrome day; sticking to one colour family so spacing and rhythm do the talking
Create a tiny series with three small tiles that speak to each other and hang as a set
Materials
Wool
Base board of wood or cardboard
PVA glue
Scissors
Pencil

Back to Top
Painting with Wool
Bold colours and textured strands
Bookmark
Collage
The Set Up
Lay boards on the table first. I love wood for the feel in the hand, though thick card is brilliant when you need lightness! Curate bowls of PVA with fine brushes can sit where hands can easily reach, and trays of cut wool strands in all the colours.
Now's the perfect time to share some images of yarn paintings by Huichol artists in Mexico, also known as Wixárika. You'll see colourful yarn and beads pressed into wood with symbols that hold story and place.
For the artists in your world, invite personal symbols rather than copying sacred designs. Maybe a coastline you know or a plant from your street or a shape that belongs to your family?
Also highly recommend have a damp cloth waiting for the gluey fingers to come.
The Making
Begin with a quick pencil sketch and keep it bold rather than intricate so the wool can sit cleanly. Sometimes a palette decides the piece before the drawing does, so choose your colours and see what they suggest. Kids can decide whether they want to start right in the middle and let the picture grow outward, or start with the edges and a slow creep in. Both work!
Brush glue a little ahead of the line, then press the strand into place with the tip of a brush or a stick and keep the curve moving (short strands are friendlier for corners and tight turns).
Sticky fingers? Good! That means it’s working!
At Smudge we like to test colour pairings as we go and notice what happens when a calm shade sits beside a loud one. Keep checking the flow by tilting the board and stepping back for a second look.
Variations
One word, big and bold, filled with slow lines (JOY is a great start)
Monochrome day; sticking to one colour family so spacing and rhythm do the talking
Create a tiny series with three small tiles that speak to each other and hang as a set
Materials
Wool
Base board of wood or cardboard
PVA glue
Scissors
Pencil
Back to Top
Add this to your favourites
Add this to your favourites
Thoughts?
Would love to hear if youv'e tried this or have any ideas on how to make it even better!
